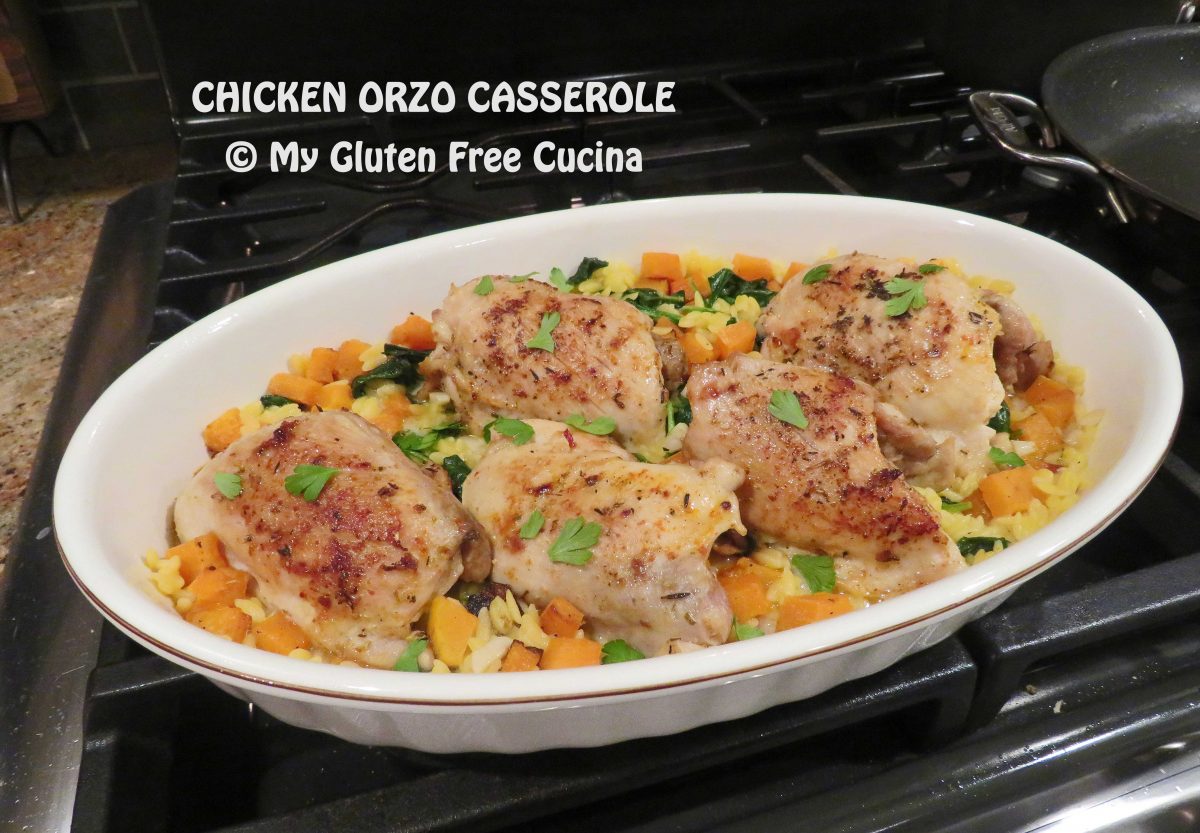
Look at the beautiful colors in this casserole! Would you believe it’s gluten free? It absolutely is! I love that we can enjoy popular orzo dishes like this one, made with gluten free Orzo pasta from DeLallo.
But what I especially love about this recipe is that it uses healthy fresh ingredients, like boneless, skinless chicken thighs, peeled and seeded butternut squash, and bagged baby spinach. The prep work is a snap!
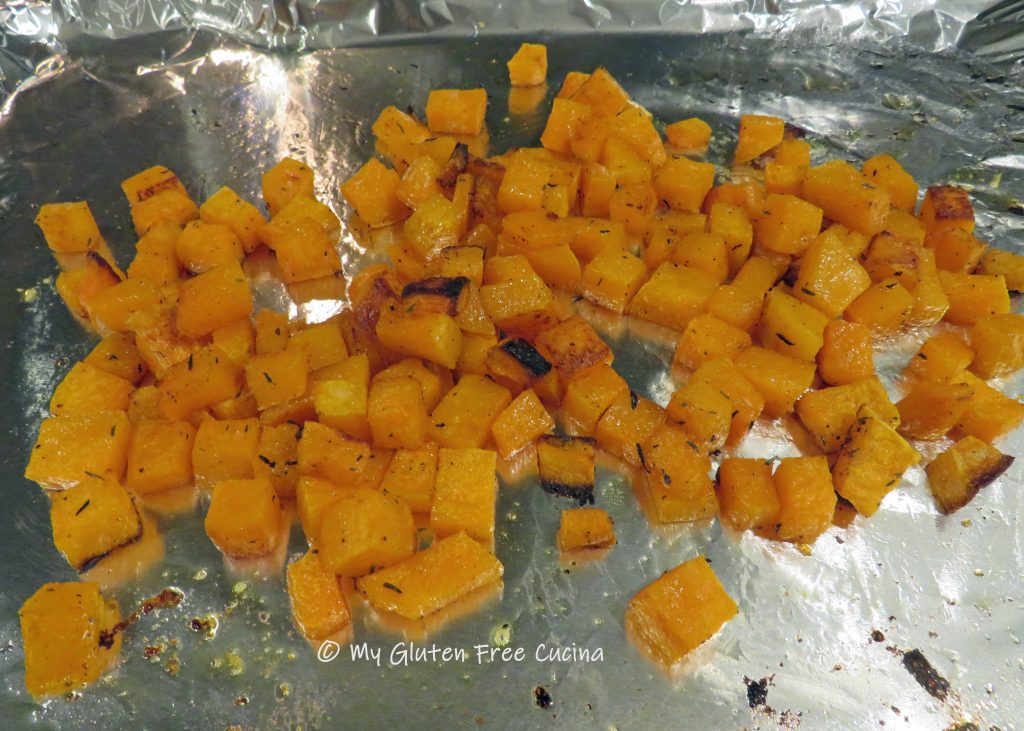
Cut the butternut squash into small cubes. Toss with olive oil, salt, pepper and Italian seasoning. Line a baking sheet with foil and mist with cooking spray. Spread the squash cubes in an even layer, bake at 425º for 20 minutes, then set aside to cool.
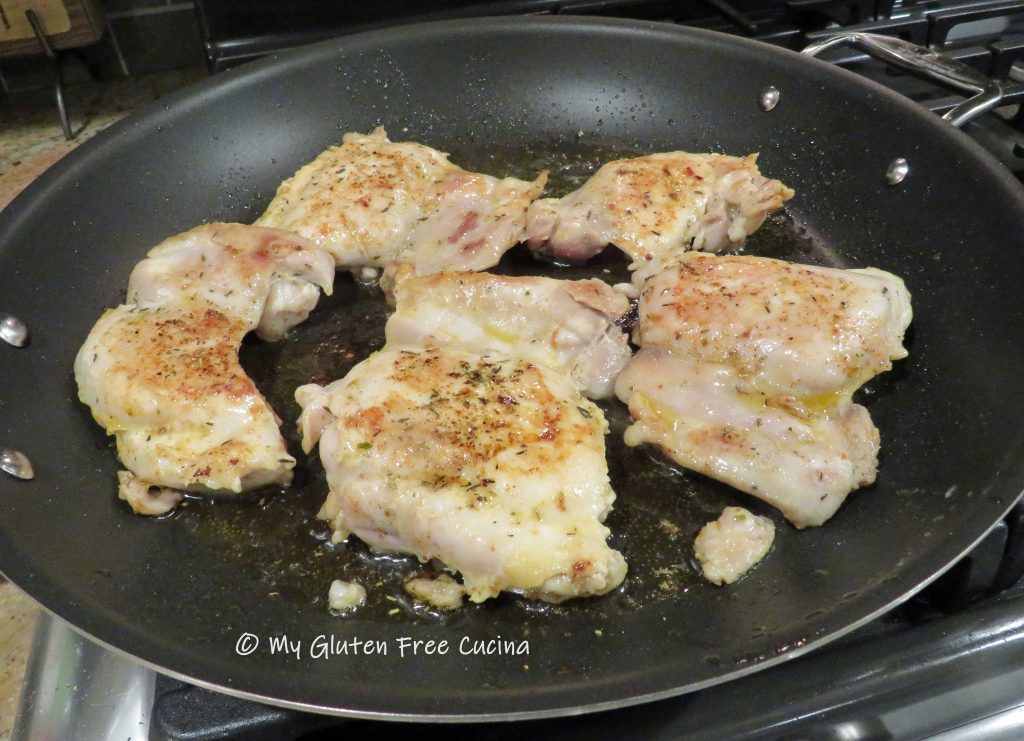
Season the chicken thighs with salt, pepper, Italian seasoning and paprika.
Heat a nonstick skillet with olive oil and add the chicken. Cook 7 minutes per side, turning once. Toward the end of cooking add 1/4 cup white wine to the pan and cook several minutes more until mostly evaporated.
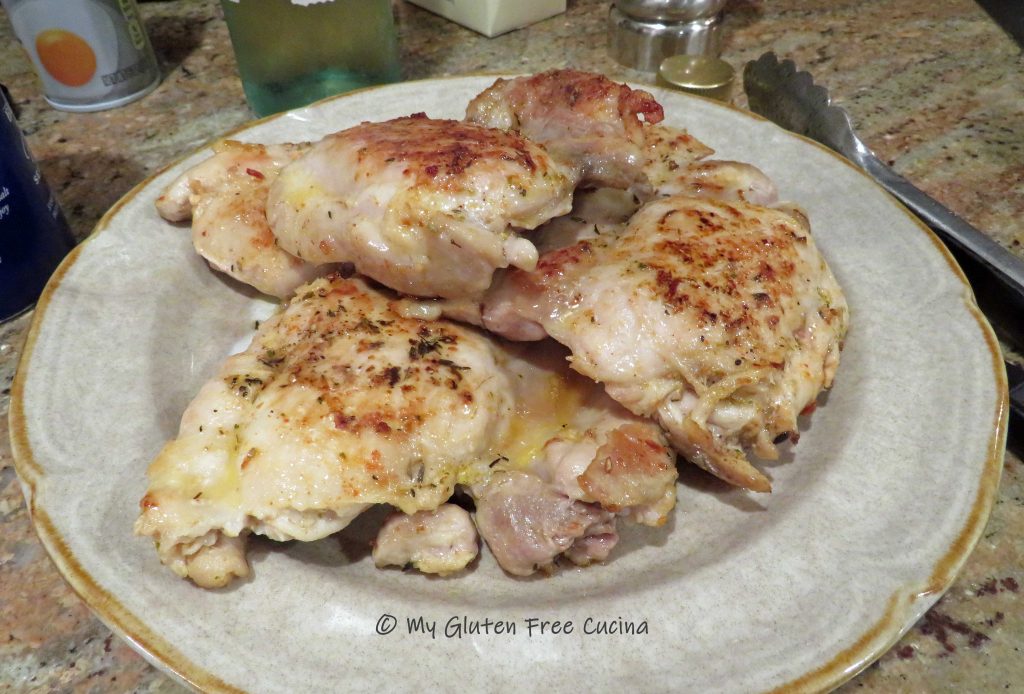
Transfer the chicken to a plate and wipe the skillet clean. Set up a pot of salted water for the gluten free orzo and cook according to package directions.
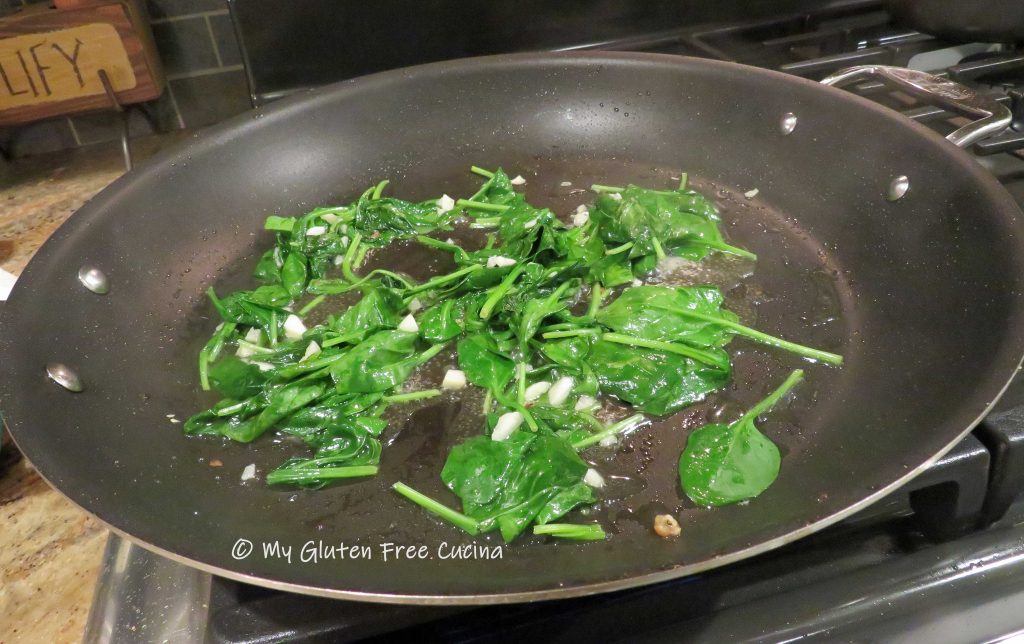
In the skillet, add 1 tbsp. of olive oil, the minced garlic and pinch of red pepper flakes. Cook just until fragrant (30 seconds) then add 1/4 cup of white wine. Add the baby spinach and simmer until wilted. (It looks like a lot of spinach, but don’t be afraid to add it all, it will cook down to nothing!)
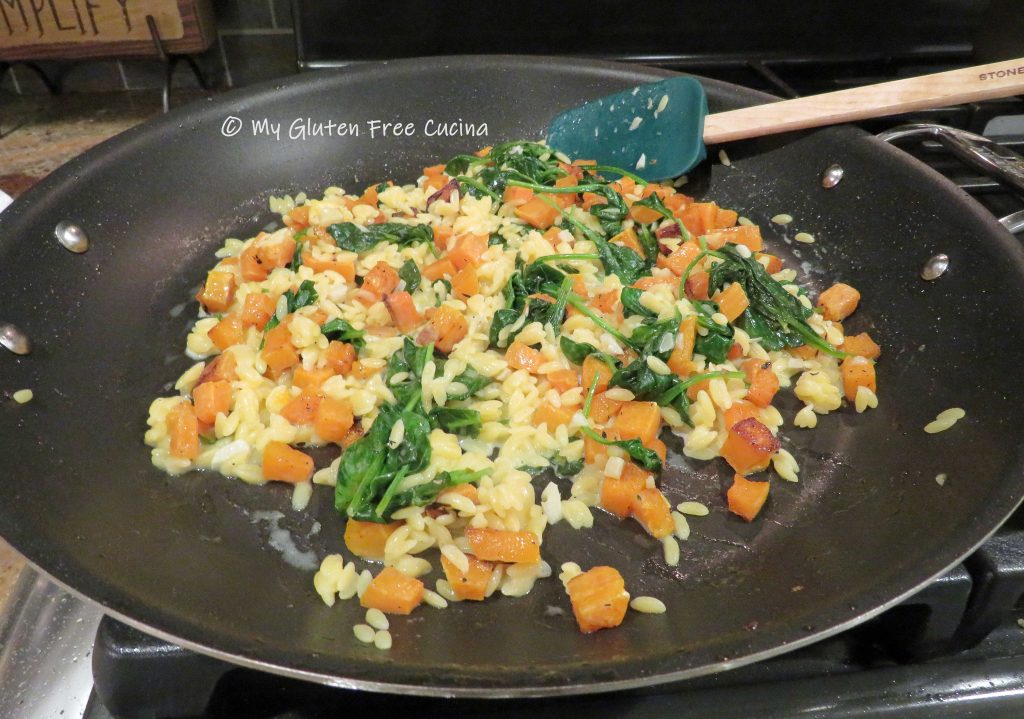
Add the roasted butternut squash back to the pan.
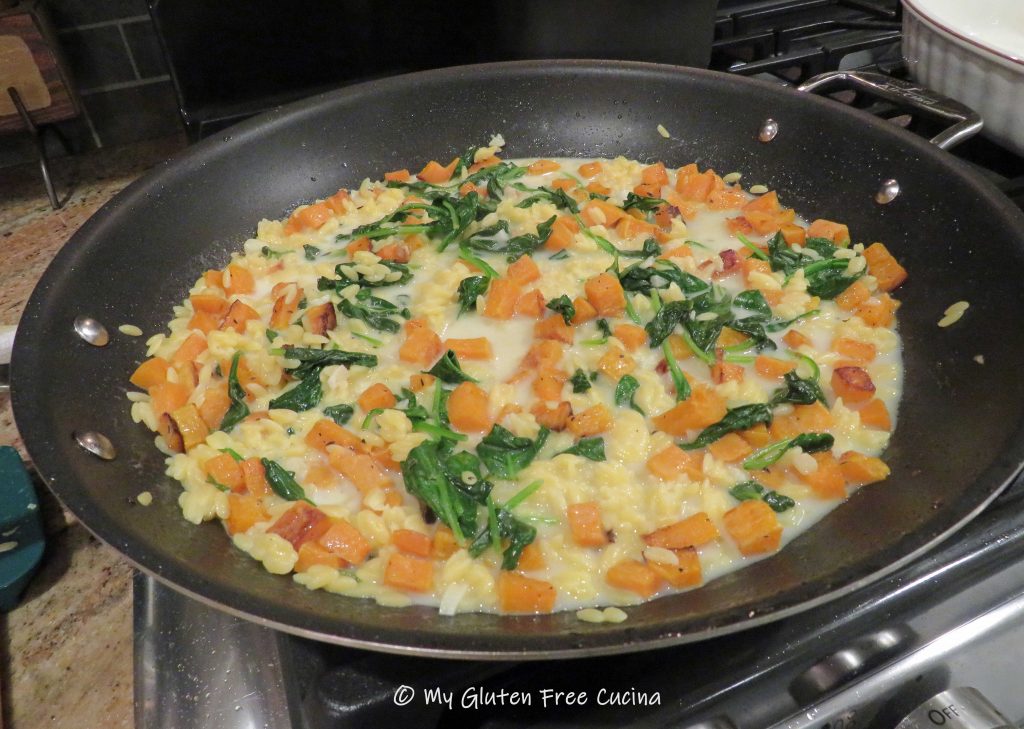
When cooked, drain and rinse the orzo under warm water to remove some of the starch. Use a fork to break up the orzo if it seems to be sticking together. Gradually add it to the skillet with the spinach mixture. Add a pinch of salt, or to taste.
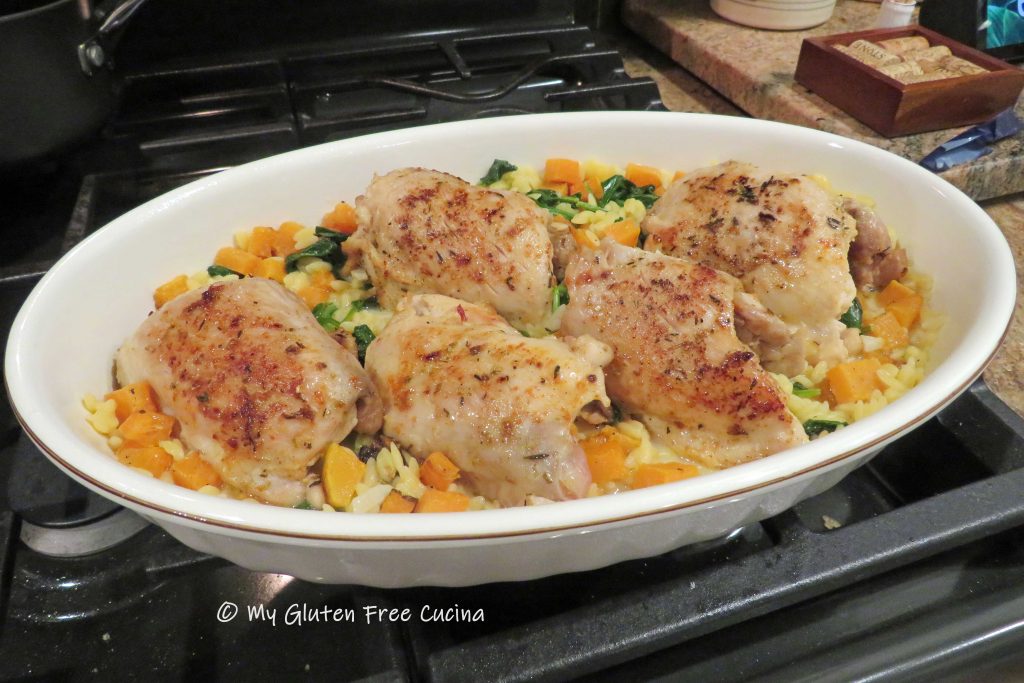
Simmer several minutes to reduce the liquid slightly, then transfer the mixture to a casserole dish that has been coated with cooking spray. Arrange the chicken thighs in the casserole, cover with foil and bake 20 minutes at 350º.
Remove from the oven and garnish with fresh Italian parsley.
Notes ♪♫ Some recipes add the uncooked orzo pasta right into a casserole, but for gluten free pasta I always recommend cooking it separately. Gluten free pasta (especially those made with corn) can be quite gummy, and I prefer to rinse off some of the starch before adding it to the main dish.
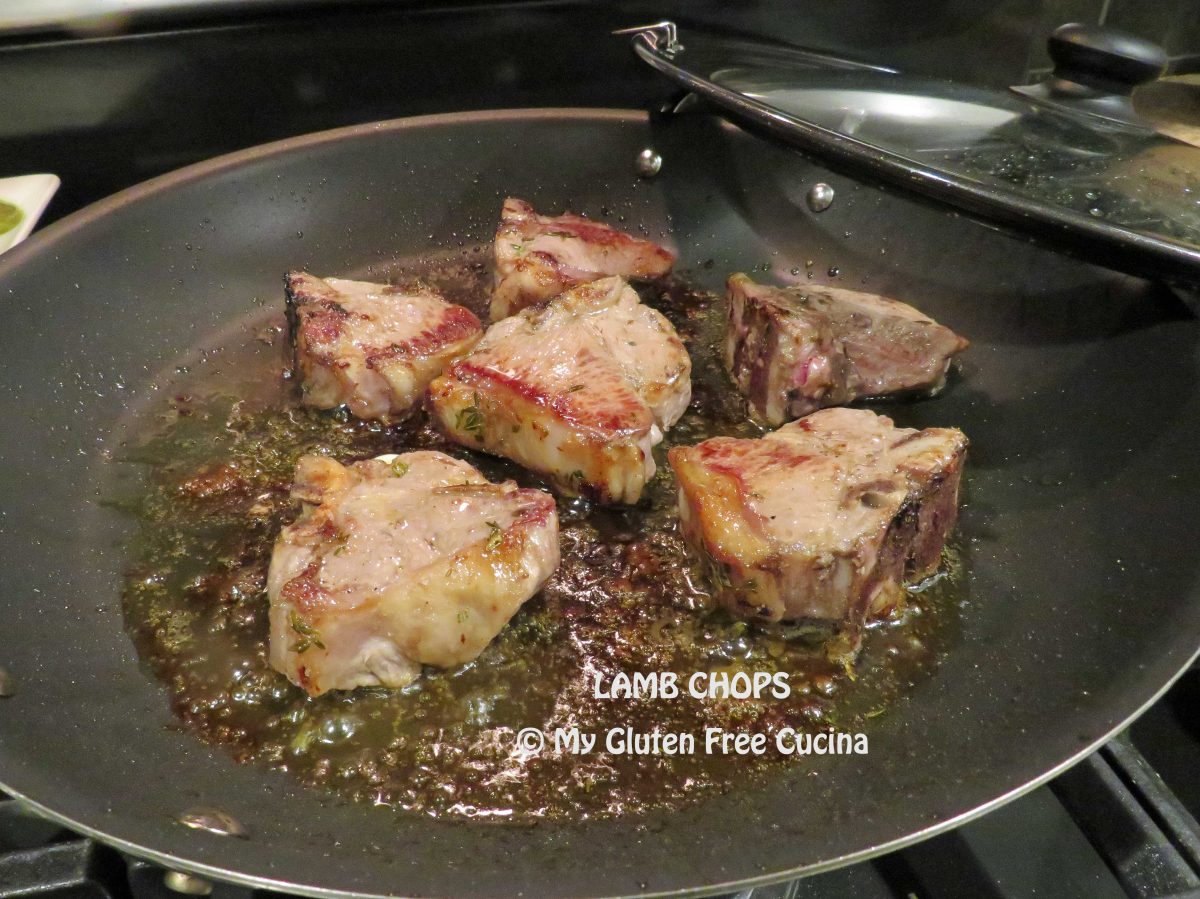
Isn’t it funny how food can bring back a memory? I hadn’t had lamb chops since I was a little girl, 60+ years ago! At a very young age though, I remember my grandmother would often make me a single lamb chop for lunch. It was the perfect size for a picky kid’s appetite!
Today, lamb can be a bit of a splurge, but I will usually buy it when there’s a sale.
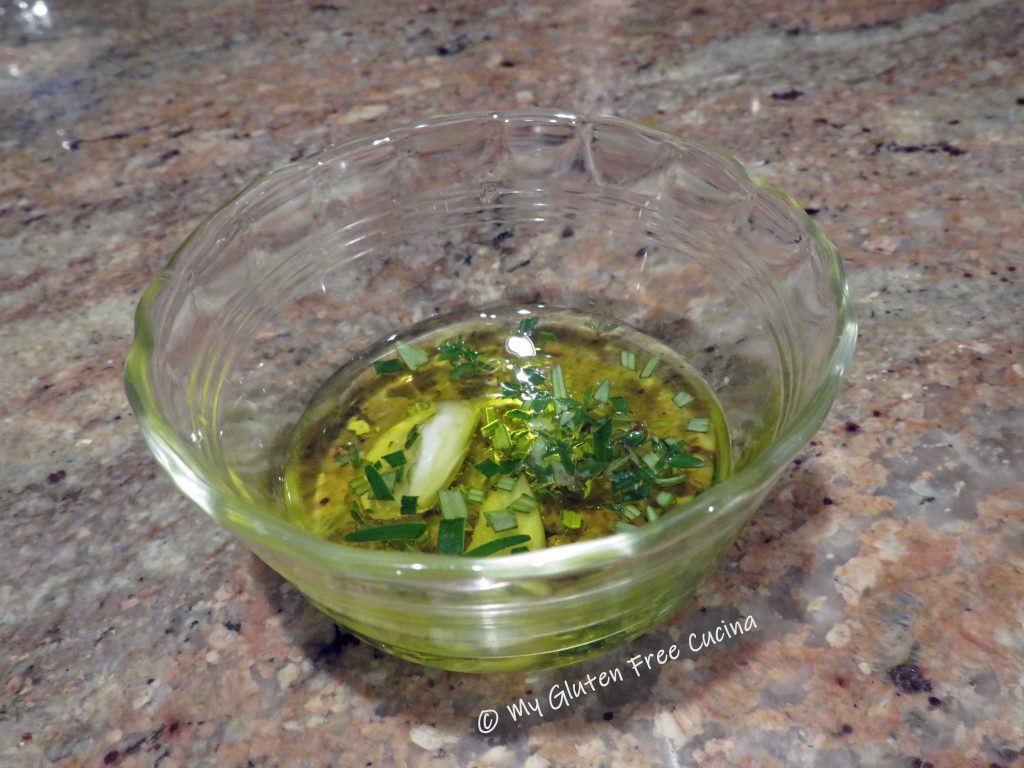
When my herb garden is in season, I use just a bit of fresh herbs and seasonings to bring out the natural flavor of these lamb chops. You can use dried herbs during the winter months.
This post contains affiliate links.
Ingredients:
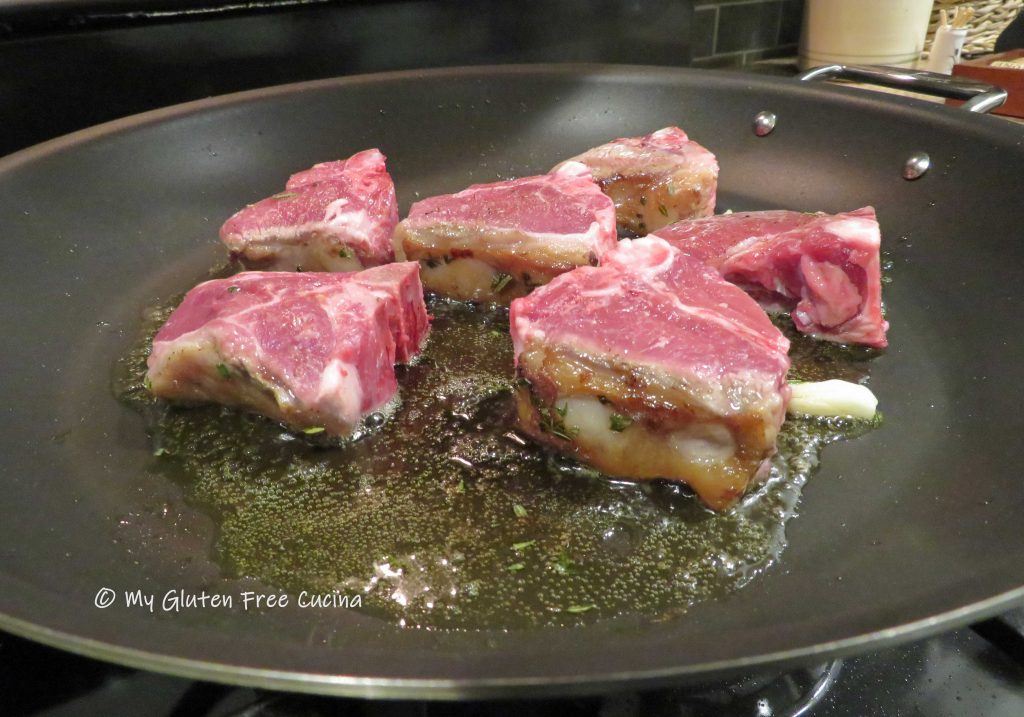
6 Lamb Chops
2 tbsp. olive oil
1 garlic clove, crushed
fresh rosemary
fresh thyme
salt and pepper
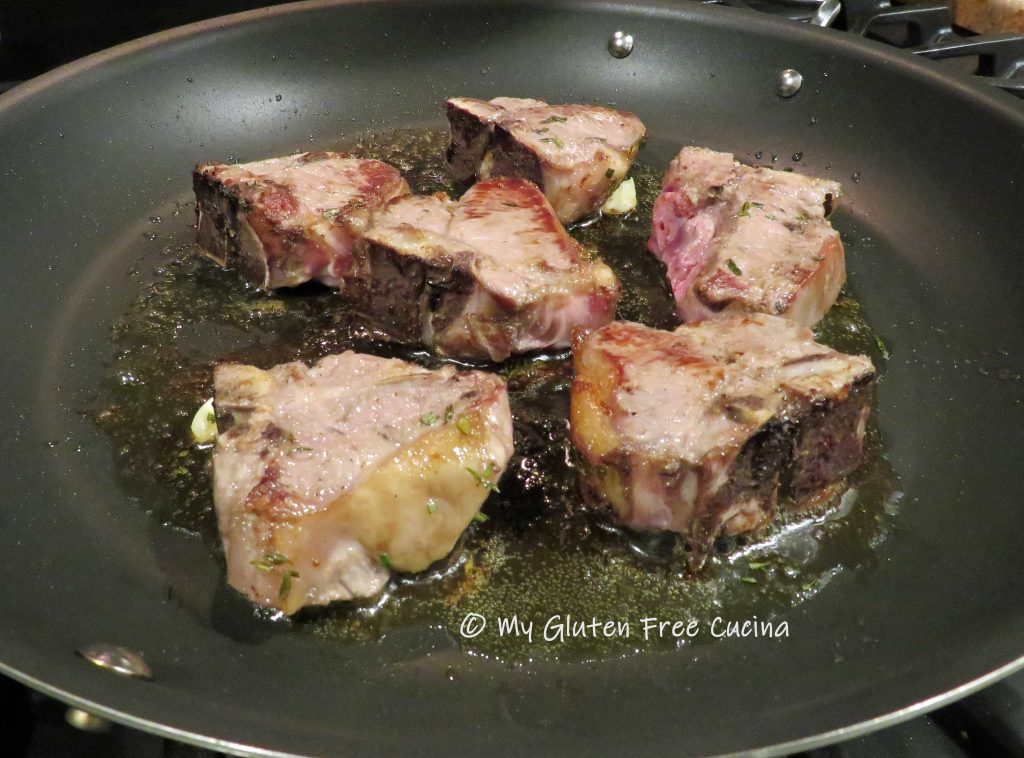
1/4 cup white wine
1 tbsp. butter
fresh parsley, for garnish
Preparation:
Pat the pork chops dry and season with salt and pepper.
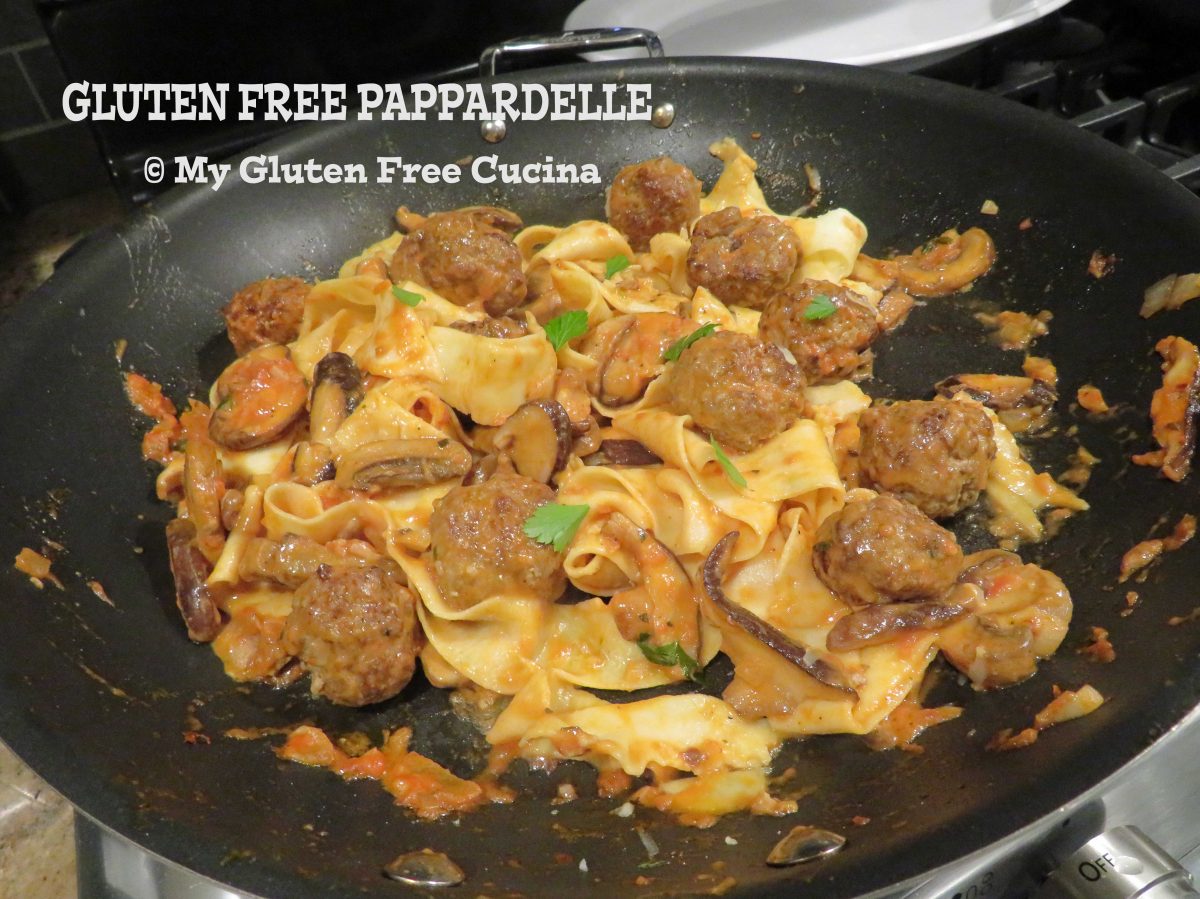
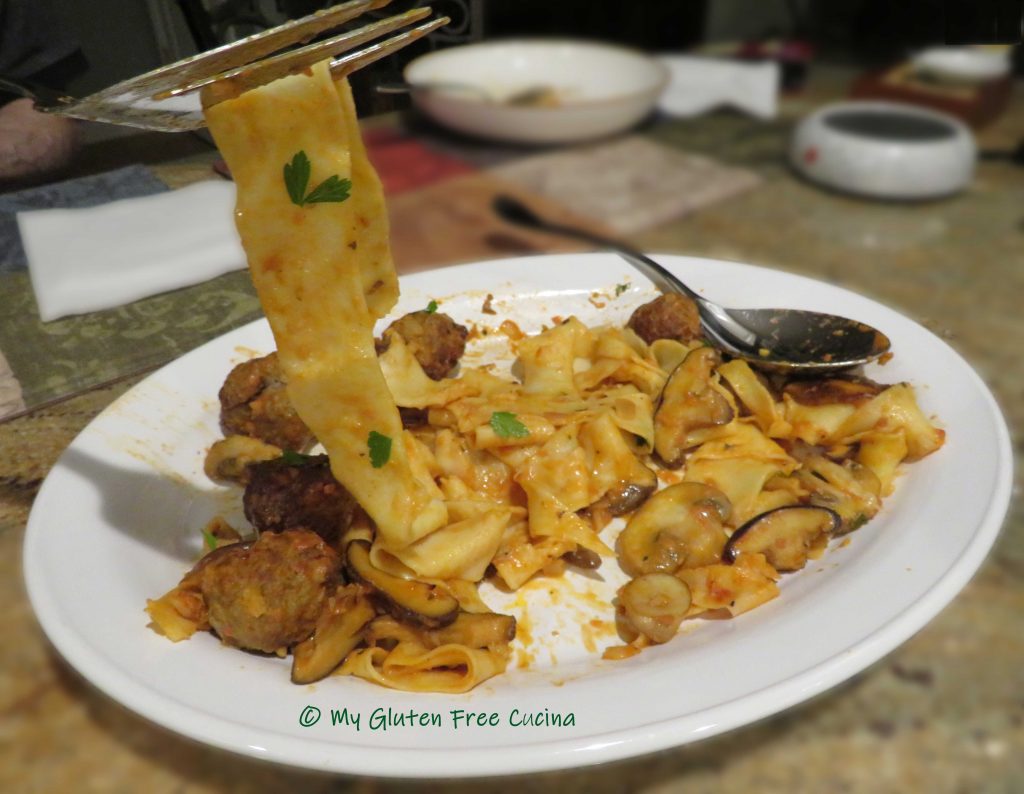
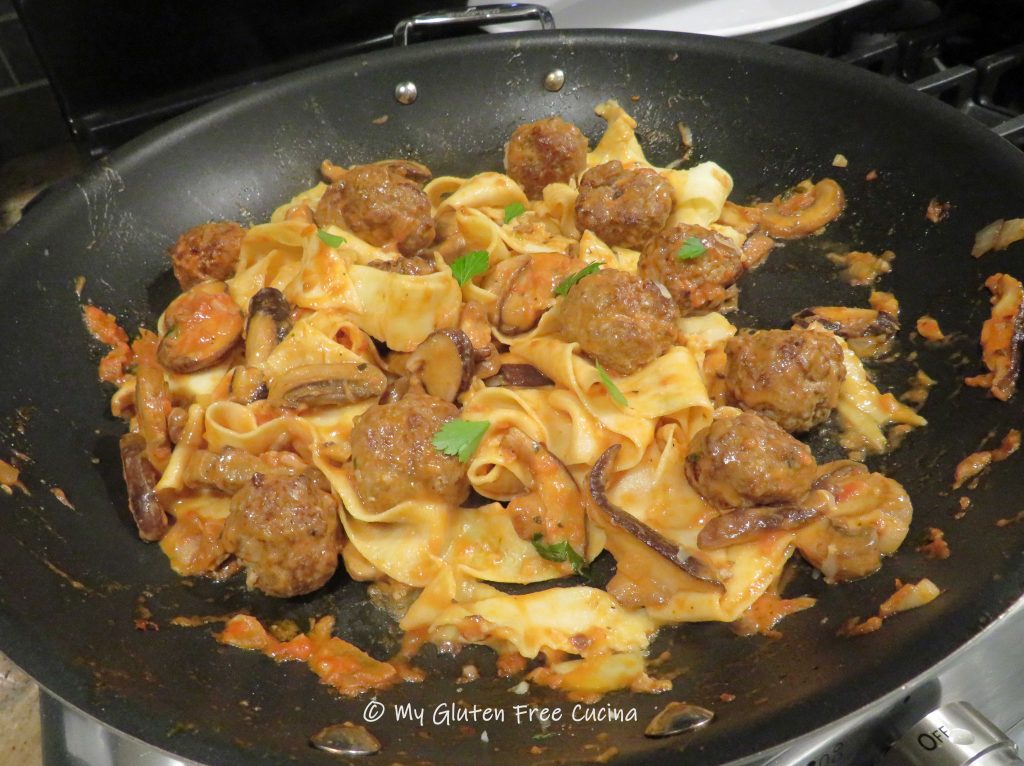
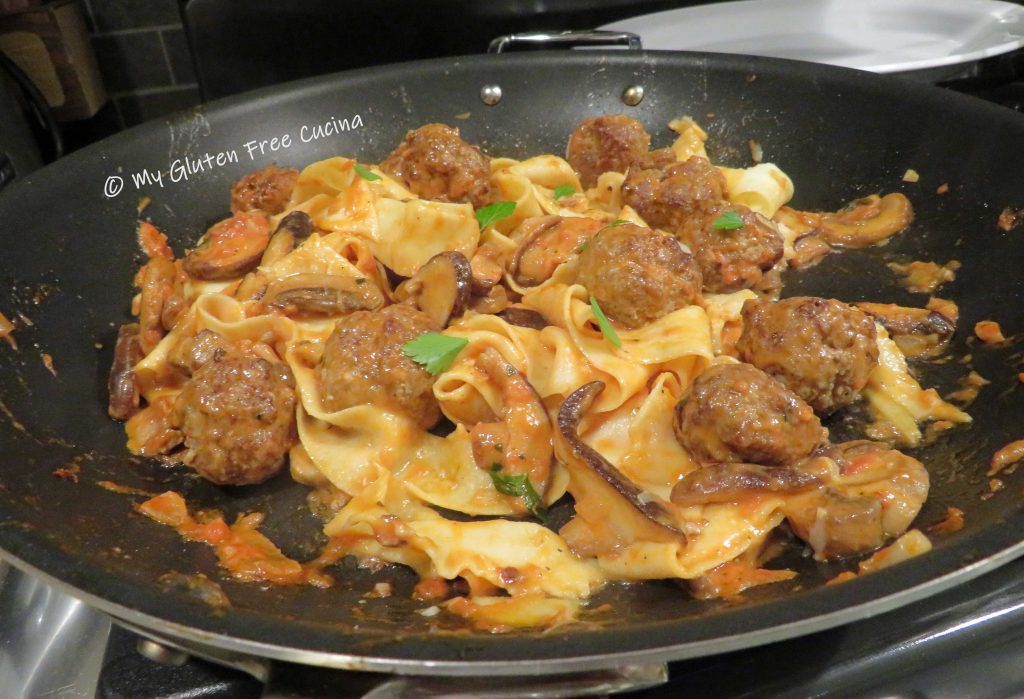
This plate full of happiness features beautiful ribbons of homemade pappardelle pasta prepared with a tomato mushroom cream sauce. Tiny veal meatballs complement the dish.
Completely gluten free, I used my favorite, Better Batter Original All Purpose Flour to make the pasta noodles and they were just perfect! I used my KitchenAid® to roll out the pasta dough and that definitely made the job easier. You can do it with a rolling pin if you have patience!
To make the pappardelle, combine 70g. flour with remaining ingredients in the bowl of a stand mixer and beat with the paddle attachment for 5 minutes to form a soft dough.
Bring the dough together and sprinkle with more flour, then wrap in plastic wrap. Let the dough rest for 15 minutes.
Divide the dough into 4 sections and work with one piece at a time. Begin feeding it through the pasta roller, starting with the thickest setting. Pass it through several times, then begin increasing the roller setting each time until you have a sheet that is thin without tearing the dough. For pappardelle, this would be setting 3 or 4 on a KitchenAid pasta roller attachment. Repeat with each section and lay the sheets on floured wax paper.
Note: For a full tutorial on how to make pappardelle refer to this post!
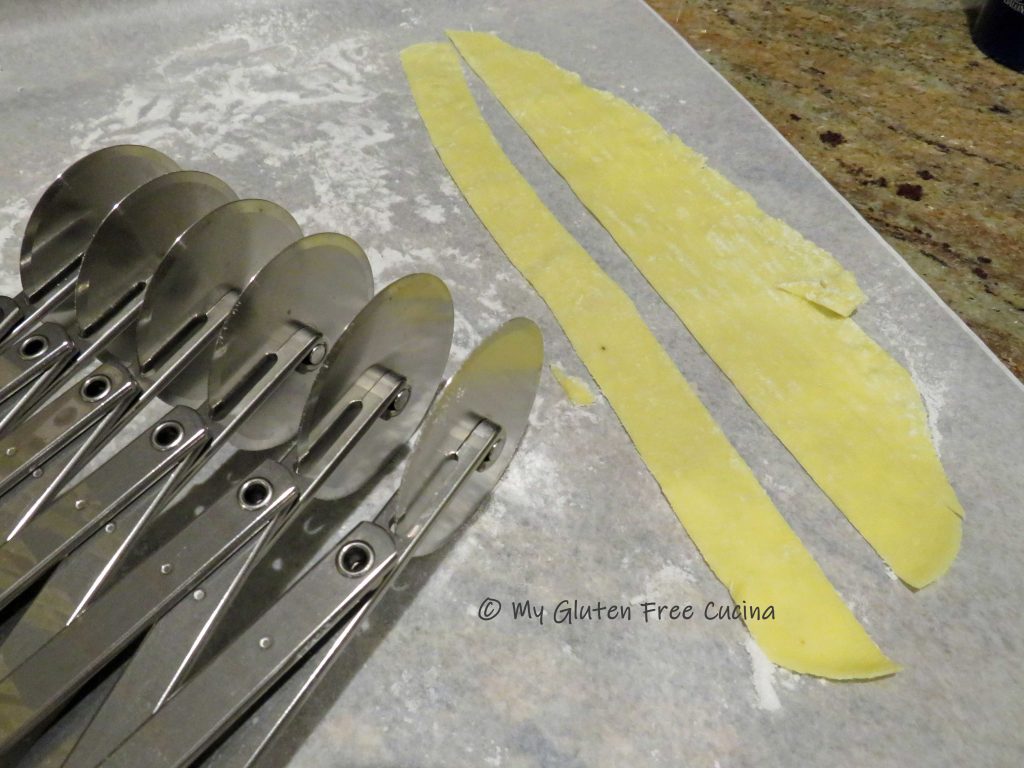
When you have completed rolling the 4 sheets, cut them into 3/4″ ribbons. Hang them up to dry on a pasta drying rack.
To make the meatballs, combine all ingredients in a bowl and mix well with your hands or use a potato masher.
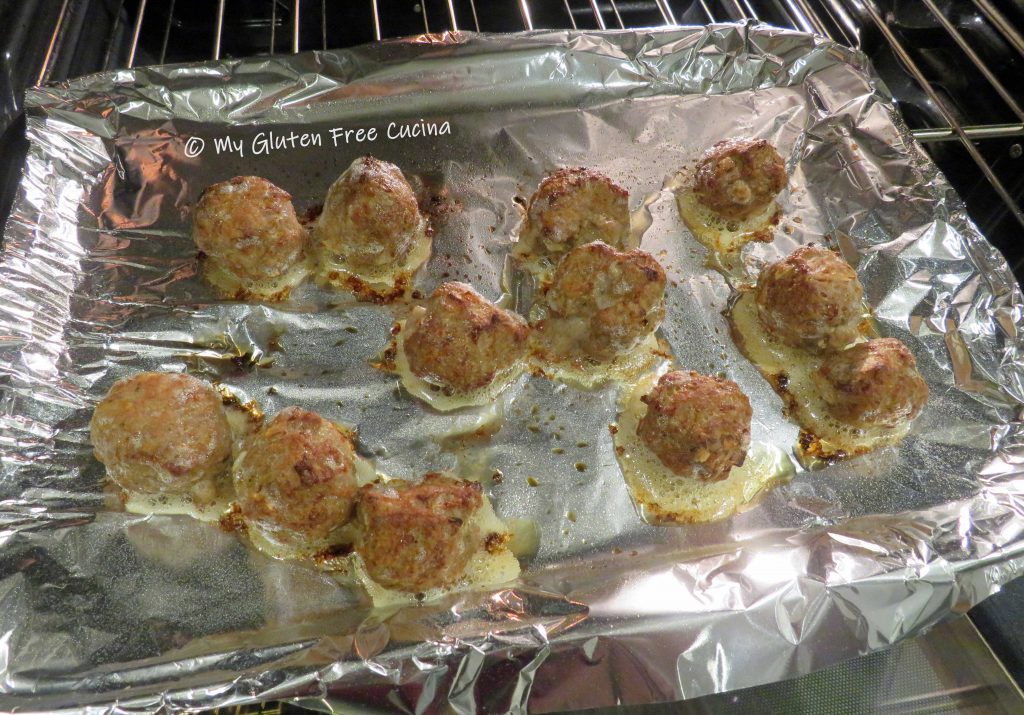
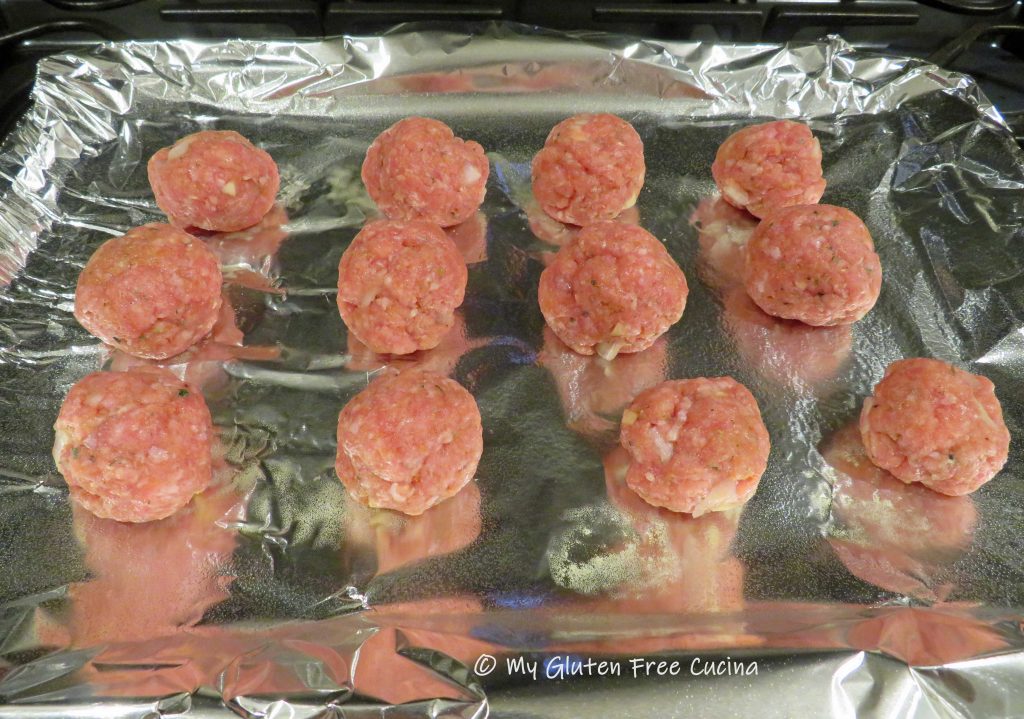
Line a baking sheet with foil and mist with cooking spray. Form 12 small meatballs and arrange on the baking sheet, leaving space in between.
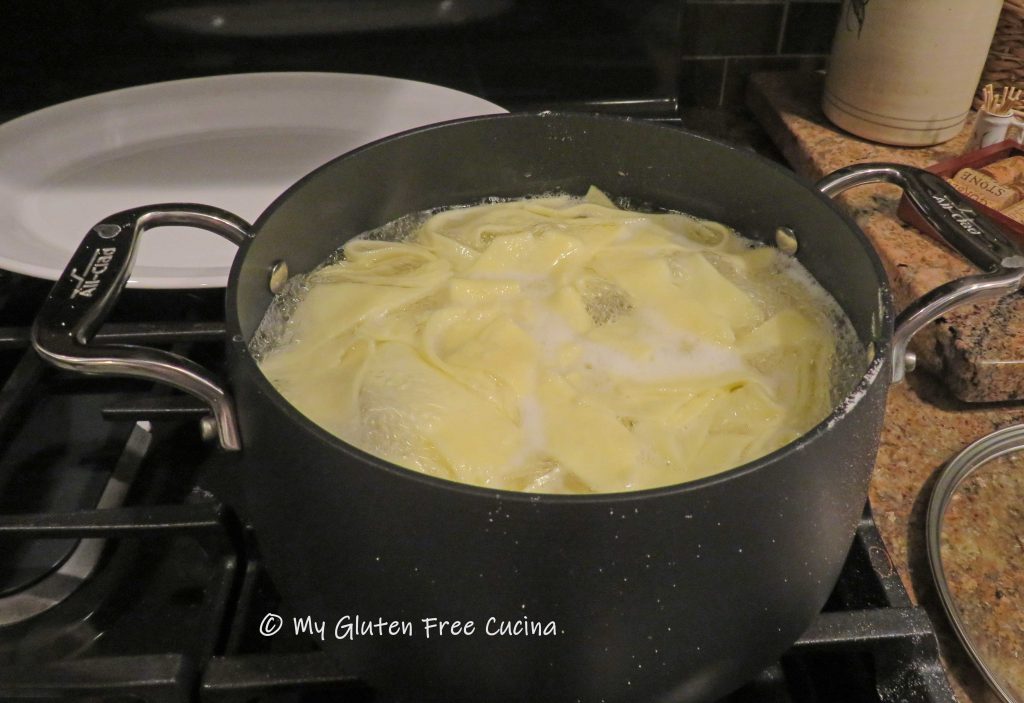
Broil 4 minutes per side, 8 minutes total. Remove from the oven and set aside. Set up a pot of salted water for the pasta and bring to a rolling boil.
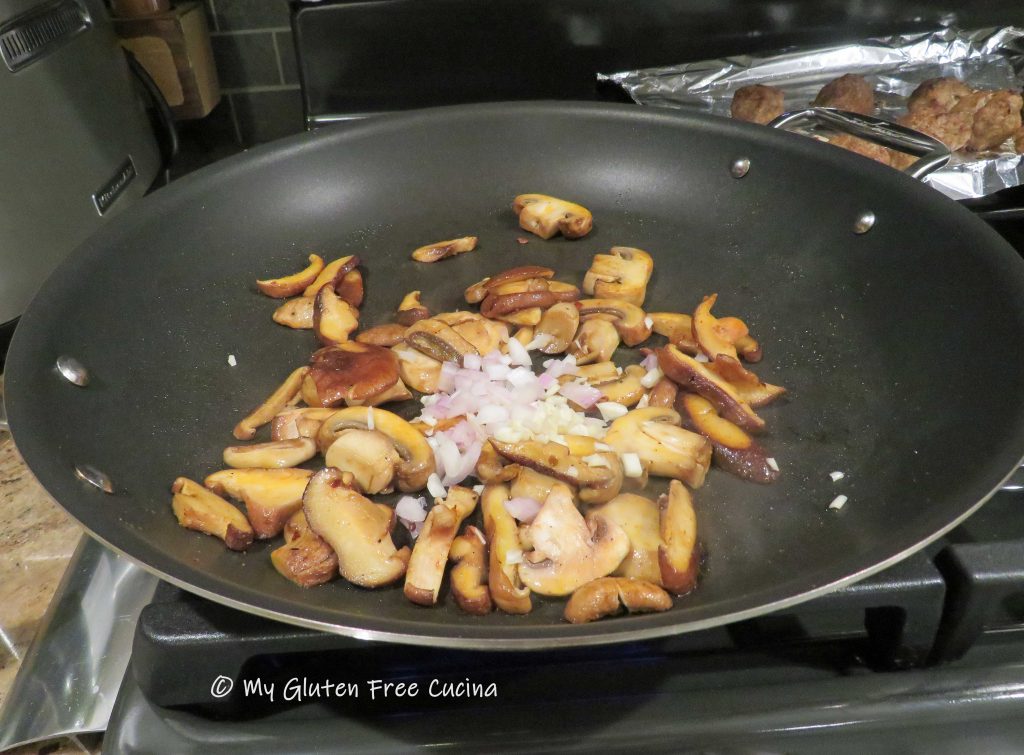
Now, to put it all together make the sauce. In a large nonstick skillet over medium low heat, add the olive oil and red pepper flakes. Add the mushrooms and shallots, season and stir frequently until they begin to release their liquid.
Add the garlic and parsley then add the white wine.
Allow the wine to reduce for 2 minutes then stir in heavy cream.
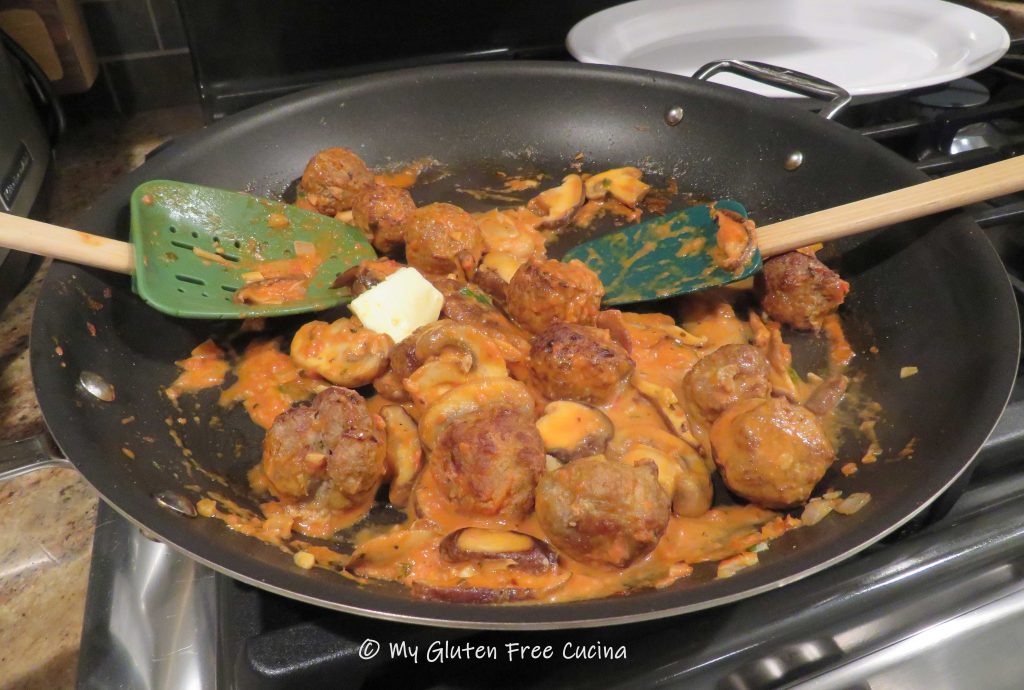
Finally add the tomato sauce and the veal meatballs with 2 tsp. butter.
Add the pasta to the boiling water and cook for 3 minutes. You can add a ladle of the pasta water to the sauce if it appears dry.
Use tongs to carefully remove the pappardelle from the water and add to the sauce. Add another pat of butter and stir in the parmesan cheese.
Carefully fold everything together until cheese is completely melted.
Transfer to a serving platter and garnish with Italian parsley.
Notes ♪♫ Gluten free dough can be so temperamental. It does tend to stick and tear. For best results keep the dough and the roller lightly dusted with flour as you work. I was thrilled to get my pasta sheets to setting #4 on my KitchenAid®, this was an ideal thickness for the pappardelle noodles. Try to get to at least the third setting, and don’t worry if you have a few tears and odd shaped noodles, they will still be delicious!
To make the pappardelle, combine 70g. flour with remaining ingredients in the bowl of a stand mixer and beat with the paddle attachment for 5 minutes to form a soft dough.
Bring the dough together and sprinkle with more flour, then wrap in plastic wrap. Let the dough rest for 15 minutes.
Divide the dough into 4 sections and work with one piece at a time. Begin feeding it through the pasta roller, starting with the thickest setting. Pass it through several times, then begin increasing the roller setting each time until you have a sheet that is thin without tearing the dough. For pappardelle, this would be setting 3 or 4 on a KitchenAid pasta roller attachment. Repeat with each section and lay the sheets on floured wax paper.
When you have completed rolling the 4 sheets, cut them into 3/4″ ribbons. Hang them up to dry on a pasta drying rack.
To make the meatballs, combine all ingredients in a bowl and mix well with your hands or use a potato masher.
Line a baking sheet with foil and mist with cooking spray. Form 12 small meatballs and arrange on the baking sheet, leaving space in between.
Broil 4 minutes per side, 8 minutes total. Remove from the oven and set aside. Set up a pot of salted water for the pasta and bring to a rolling boil.
Now, to put it all together make the sauce. In a large nonstick skillet over medium low heat, add the olive oil and red pepper flakes. Add the mushrooms and shallots, season and stir frequently until they begin to release their liquid.
Add the garlic and parsley then add the white wine.
Allow the wine to reduce for 2 minutes then stir in heavy cream.
Finally add the tomato sauce and the veal meatballs with 2 tsp. butter. Add the pasta to the boiling water and cook for 3 minutes. You can add a ladle of the pasta water to the sauce if it appears dry.
Use tongs to carefully remove the pappardelle from the water and add to the sauce. Add another pat of butter and stir in the parmesan cheese.
Carefully fold everything together until cheese is completely melted.
Transfer to a serving platter and garnish with Italian parsley.
Notes
Gluten free dough can be so temperamental. It does tend to stick and tear. For best results keep the dough and the roller lightly dusted with flour as you work. I was thrilled to get my pasta sheets to setting #4 on my KitchenAid®, this was an ideal thickness for the pappardelle noodles. Try to get to at least the third setting, and don’t worry if you have a few tears and odd shaped noodles, they will still be delicious!
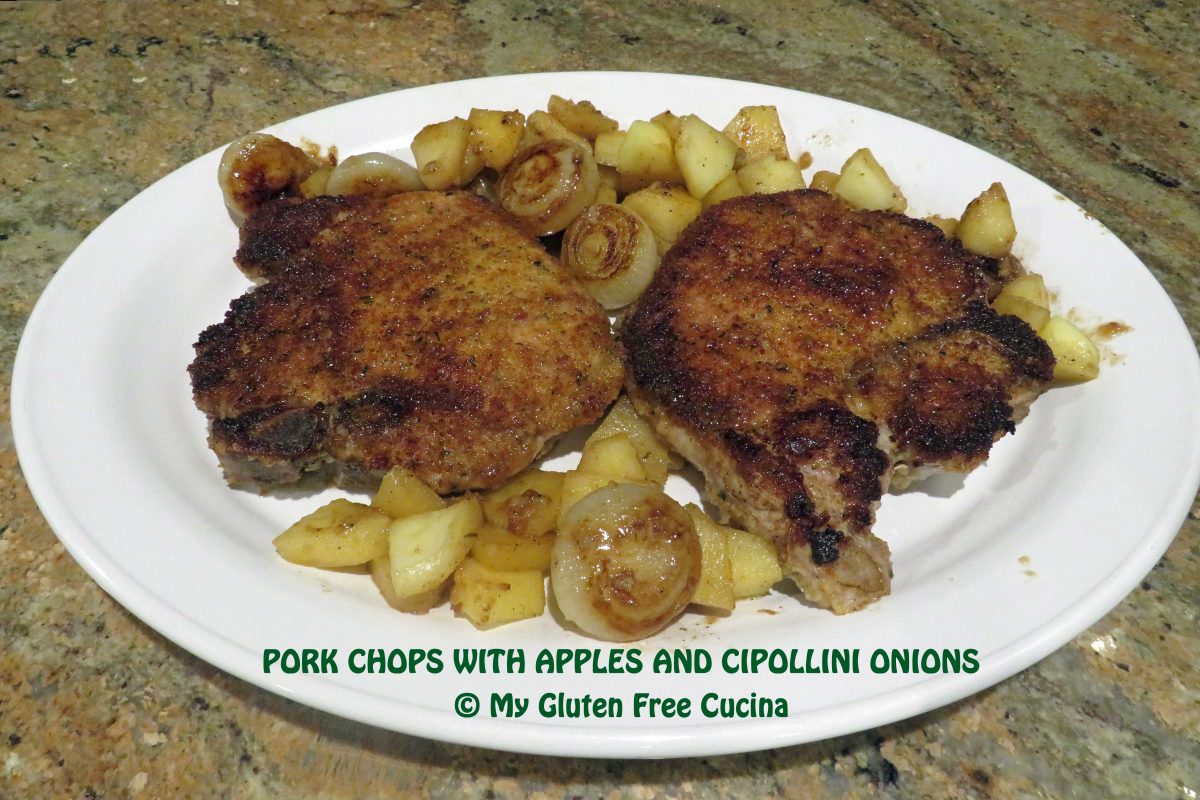
Have you tried Cipollini onions? Cipolla means onion in Italian, and cipollini are “little onions”. Milder and sweeter than regular onions, Cipollini can be a flavorful addition to pork and beef dishes.
You may think these little onions are difficult to peel, but here’s a trick! Simply soak them in water for 30 minutes before you begin prepping the meal. Those skins will pop right off! This is an easy dinner for two, and with only one pan required, cleanup is a breeze!
Soak the Cipollini onions in water for 30 minutes. Be sure they are submerged. At the same time, tenderize the pork chops by placing them in a non-reactive dish with 1/2 cup milk for 30 minutes, turning once. Season with salt and pepper.
After soaking for 30 minutes, peel and trim the onions.
Heat a large nonstick skillet with the olive oil and butter. Season the Cipollini with salt and pepper and cook on medium low heat for 8-10 minutes, turning every few minutes.
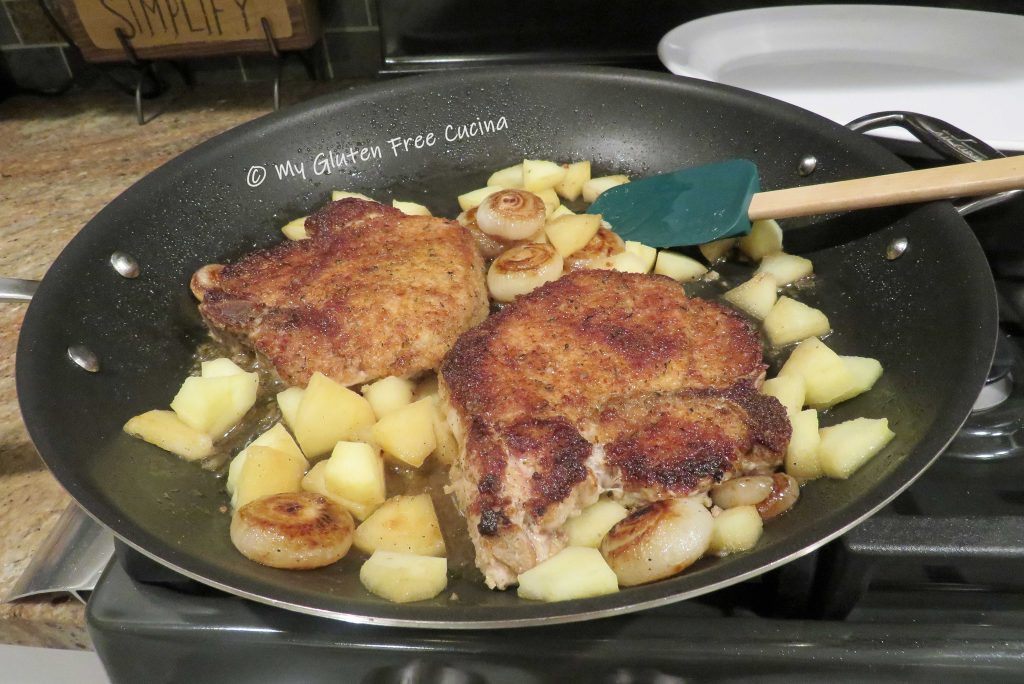
Here you can see the onions are partially cooked and starting to get some color. At this point push them to the side, to make room for the pork chops.
Take each pork chop, shake off the excess milk and dredge in the breadcrumbs. Add the pork chops to the center of the pan, cover and cook 4 minutes.
Turn the pork chops, add the apples to the pan along with the wine, then cover and cook for an additional 4 minutes. Remove the cover and allow any remaining liquid to evaporate, then transfer to a serving platter.
I served them with a side of white rice.
Notes ♪♫ I used Aleia’s gluten free Italian breadcrumbs in this recipe. They are so delicious, the closest I have found in taste and texture to regular Italian breadcrumbs. Everyone in your family will love them, gluten free or not!
Originally published 02/10/2020 Updated 01/02/2023
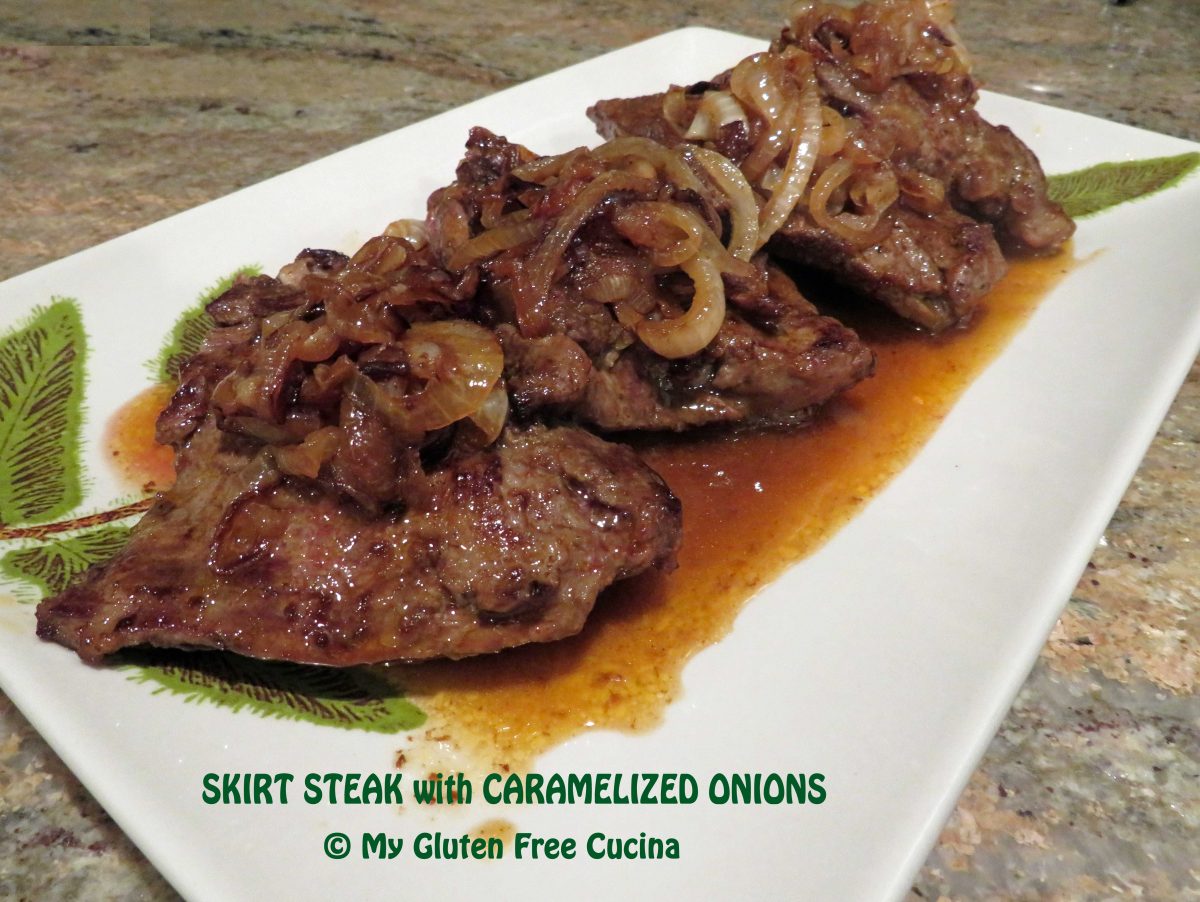
Are you a steak lover? I’ll never say no to a Ribeye or New York Strip. But have you seen the price of beef lately?
When I started looking at more economical cuts one day, I found skirt steak on sale. I remembered making these Italian Skirt Steak Rolls a while back, and they were very good!
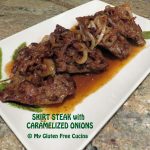
This time though, I decided to pair it with caramelized onions. The beef and onion flavors are amazing together, and it couldn’t have been easier to make. The trick to a tender skirt steak is not to overcook it. Just a quick sear in a hot grill pan is all it needs!
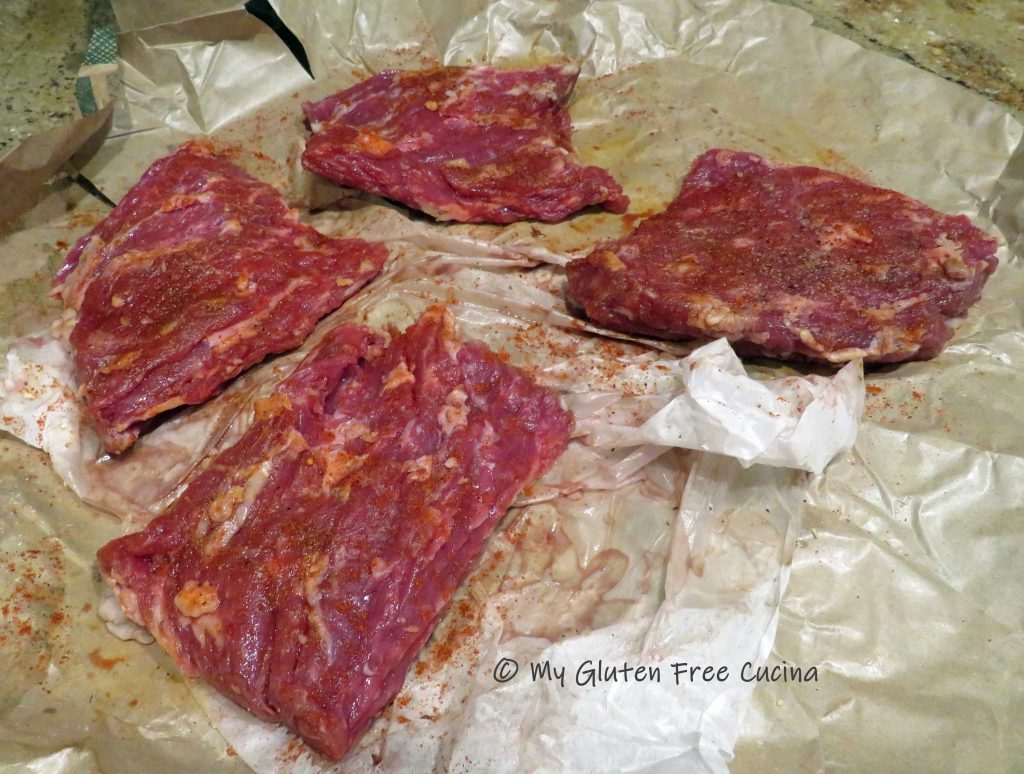
Trim visible fat from the skirt steak and cut into 4 pieces. Sprinkle both sides with salt, pepper, garlic granules, onion granules and paprika. Let it sit at room temperature for 30 minutes.
Slice the onion into thin rings. Heat 1 tbsp. butter and 1 tbsp. olive oil in a nonstick skillet. Add the onions and cook over medium low heat, turning occasionally until brown and caramelized. Remove from heat and set aside.
Whisk together the white wine, red wine vinegar and beef broth.
Heat remaining 1 tbsp. butter and 1 tbsp. olive oil in a grill pan. Add the steak and cook 4 minutes per side over medium heat. Check for doneness with a meat thermometer, the internal temperature should be 140º for medium.
Remove the steak to a serving dish and keep warm. Transfer the cooked onions to the grill pan and deglaze with the wine/broth mixture. Stir gently, until about half of the liquid has evaporated.
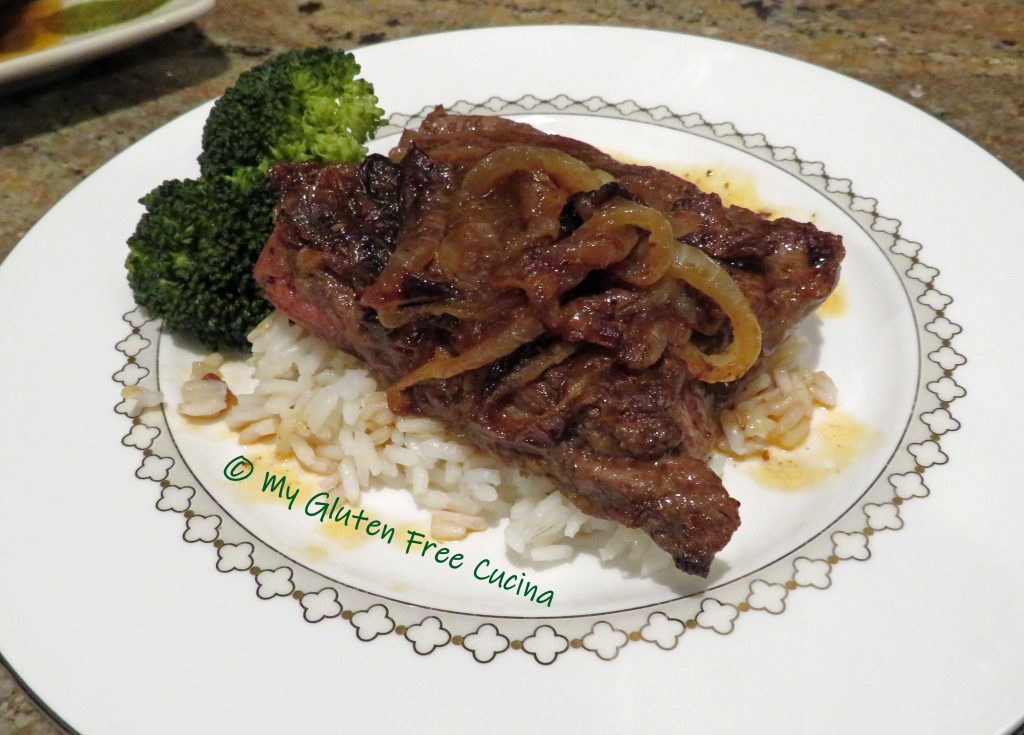
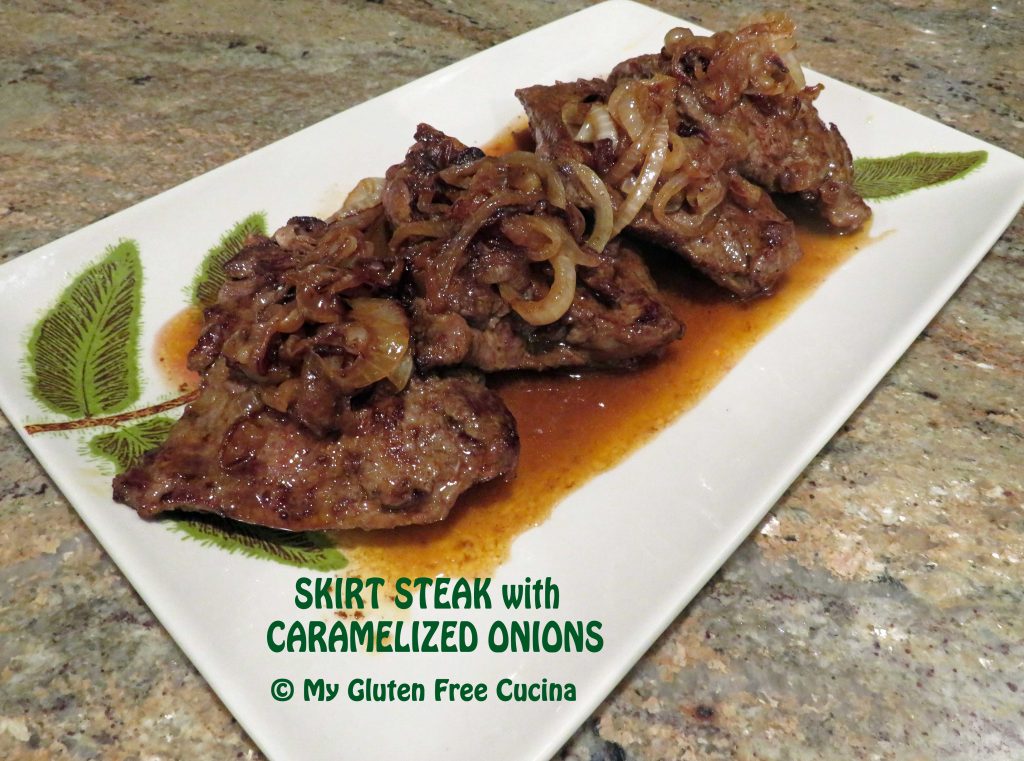
Top the steak with onions and drizzle with any remaining pan juices.
Notes ♪♫ This simple recipe comes together with just a handful of ingredients, proof that gluten free does not have to be complicated. The skirt steak was SO good, I’ll definitely be making it again!
Trim visible fat from the skirt steak and cut into 4 pieces. Sprinkle both sides with salt, pepper, garlic granules, onion granules and paprika. Let it sit at room temperature for 30 minutes.
Slice the onion into thin rings. Heat 1 tbsp. butter and 1 tbsp. olive oil in a nonstick skillet. Add the onions and cook over medium low heat, turning occasionally until brown and caramelized. Remove from heat and set aside.
Whisk together the white wine, red wine vinegar and beef broth.
Heat remaining 1 tbsp. butter and 1 tbsp. olive oil in a grill pan. Add the steak and cook 4 minutes per side over medium heat. Check for doneness with a meat thermometer, the internal temperature should be 140º for medium.
Remove the steak to a serving dish and keep warm. Transfer the cooked onions to the grill pan and deglaze with the wine/broth mixture. Stir gently, until about half of the liquid has evaporated.
Top the steak with onions and drizzle with any remaining pan juices.
Notes
This simple recipe comes together with just a handful of ingredients, proof that gluten free does not have to be complicated.
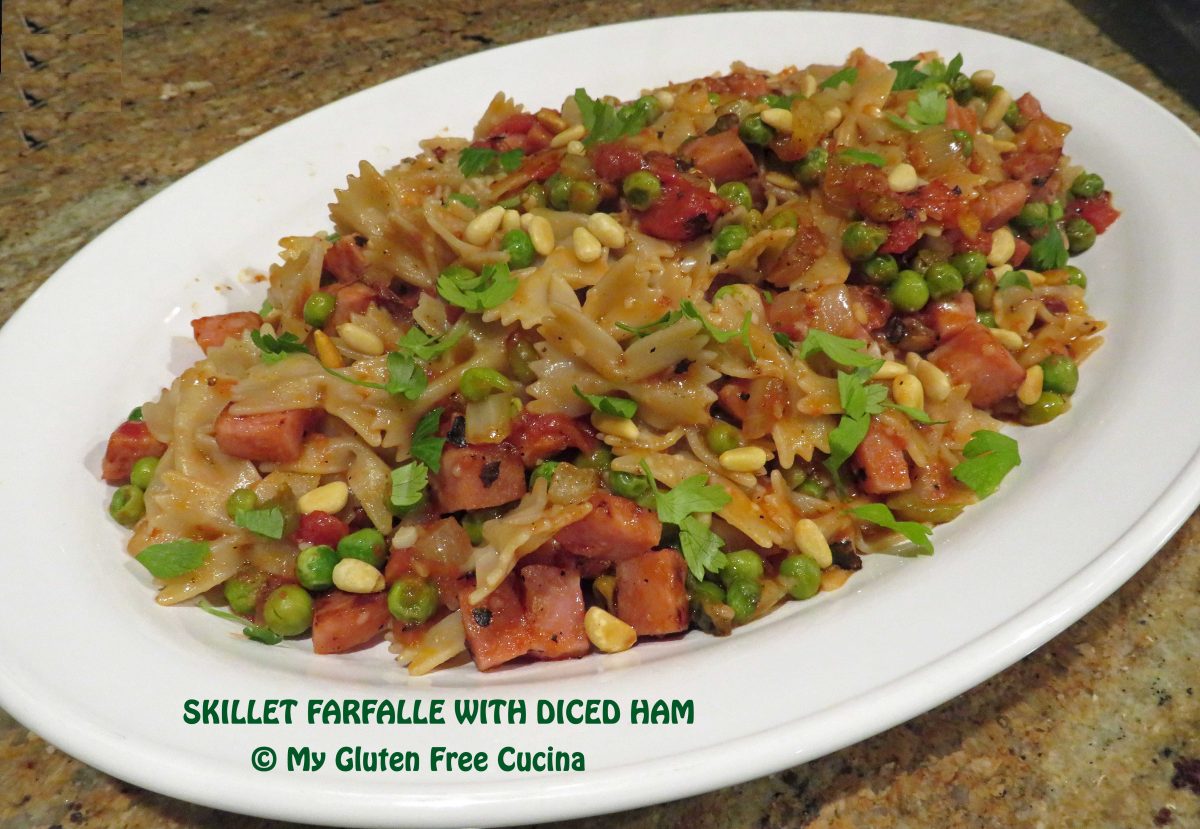
I love easy skillet dinners like this one for busy weeknights! You can make the whole meal beginning to end in about 30 minutes. Honestly, if you prep the veggies the night before it can be ready in less time than that. It’s a great way to use leftover ham, or you can purchase a ham steak which is what I did here. Don’t forget those little finishing touches that can make a meal special, in this case it’s a sprinkle of toasted Pignoli (pine nuts), a favorite of mine!
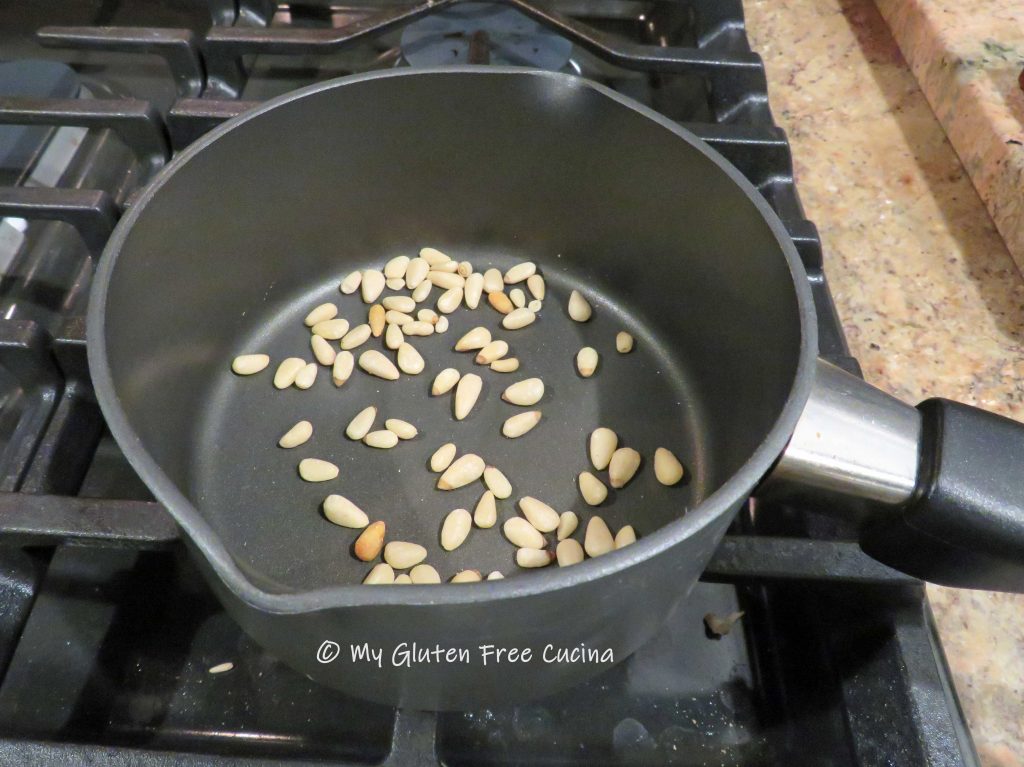
Toast the pignoli until lightly browned and fragrant. I like to use a small saucepan, so they don’t jump all over the place. Set aside for garnish.
Cook the pasta to 1 minute less than package directions, drain and set aside. While the pasta cooks, heat a large, nonstick skillet with 1 tbsp. olive oil and cook the ham 3 minutes. Remove and set aside.
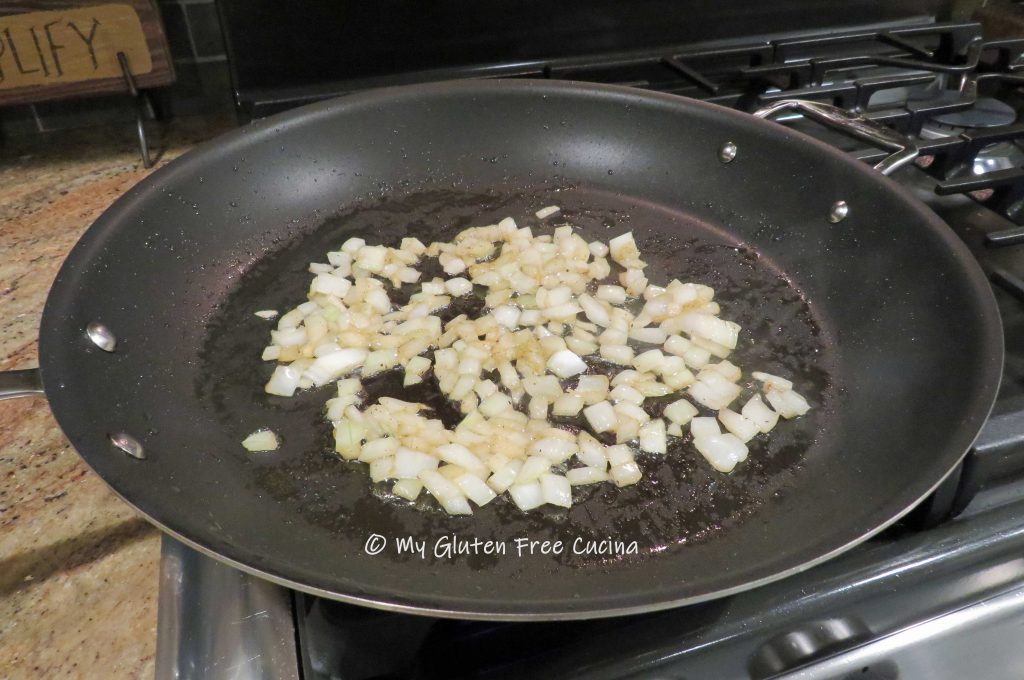
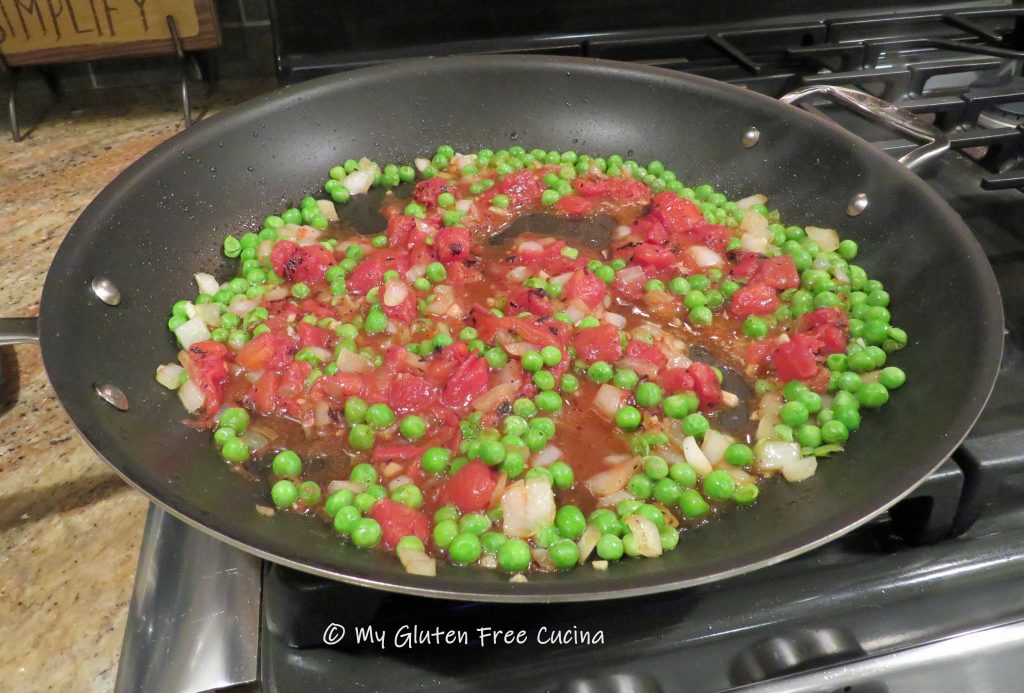
Add a little more olive oil and cook the onions until just beginning to brown, about 3 minutes. Add the garlic and peas, cook 2 minutes more stirring frequently. Season with salt and pepper.
Add the tomatoes with their liquid, toss well to combine and cook until liquid almost evaporates. If the pan is too dry add a ladle of pasta water. Sprinkle with Italian seasoning.
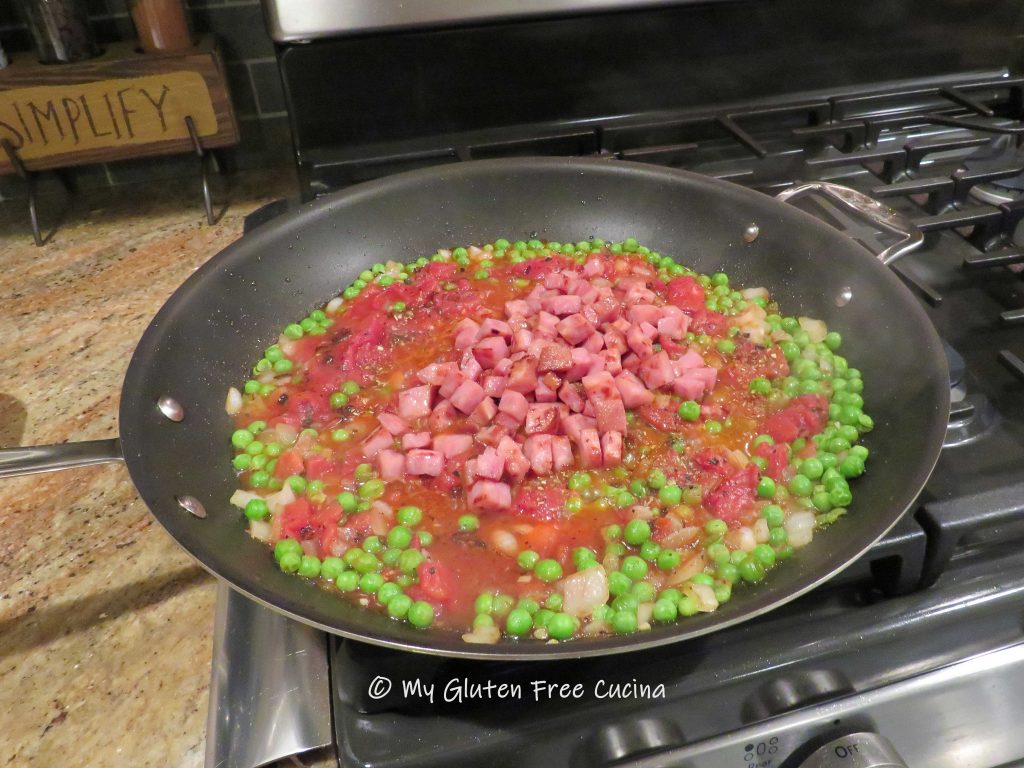
Add back the ham.
Next add back the drained pasta and toss well. Drizzle with olive oil, stir and toss to finish cooking the pasta, 1 minute more. Sprinkle grated cheese.
Transfer to a serving dish, garnish with parsley and toasted pignoli, and serve with grated cheese.
Notes ♪♫ I used Jovial gluten free farfalle (bowtie pasta) in this recipe. One of my favorites, it has great taste and chew. The Smithfield ham steak was labeled gluten free. Always check ingredient labels for hidden gluten, especially in processed foods and seasoning blends.
I love easy skillet dinners like this one for busy weeknights! You can make the whole meal beginning to end in about 30 minutes. Honestly, if you prep the veggies the night before it can be ready in less time than that. It’s a great way to use leftover ham, or you can purchase a ham steak which is what I did here. Don’t forget those little finishing touches that can make a meal special, in this case it’s a sprinkle of toasted Pignoli (pine nuts), a favorite of mine!
Ingredients
UnitsScale
· 8oz. boneless ham steak, cut into small cubes
· 4oz. gluten free pasta
· 1cupsweet onion, diced
· 1 tbsp. garlic, minced
· 1cup frozen peas, thawed
· 1 can (14.5 oz.) diced tomatoes
· 1/2 tsp. gluten free Italian seasoning
· salt and pepper to taste
· Olive oil
· 1 tbsp. pignoli (pine nuts), toasted
· 1/2 tsp. Italian seasoning
· fresh Italian parsley, for garnish
· grated Parmesan, for serving
Instructions
Toast the pignoli until lightly browned and fragrant. I like to use a small saucepan, so they don’t jump all over the place. Set aside for garnish.
Cook the pasta to 1 minute less than package directions, drain and set aside. While the pasta cooks, heat a large, nonstick skillet with 1 tbsp. olive oil and cook the ham 3 minutes. Remove and set aside.
Add a little more olive oil and cook the onions until just beginning to brown, about 3 minutes. Add the garlic and peas, cook 2 minutes more stirring frequently. Season with salt and pepper.
Add the tomatoes with their liquid, toss well to combine and cook until liquid almost evaporates. If the pan is too dry add a ladle of pasta water. Sprinkle with Italian seasoning.
Add back the ham.
Next add back the drained pasta and toss well. Drizzle with olive oil, stir and toss to finish cooking the pasta, 1 minute more. Sprinkle grated cheese.
Transfer to a serving dish, garnish with parsley and toasted pignoli, and serve with grated cheese.
Notes
Notes ♪♫ I used Jovial gluten free farfalle (bowtie pasta) in this recipe. One of my favorites, it has great taste and chew. The Smithfield ham steak was labeled gluten free. Always check ingredient labels for hidden gluten, especially in processed foods and seasoning blends.
Unauthorized use and/or duplication of this material without express and written permission from this blog’s author and/or owner is strictly prohibited.
Pork tenderloin is an easy and delicious main course. Whether you are having a casual family meal, romantic dinner for two or dinner party with guests, pork tenderloin is always a great choice. With a simple, elegant preparation that looks like you fussed, you will have dinner on the table with plenty of time to make your side dishes and socialize!
If roasting more than one tenderloin try to get them about the same size, so that they all finish cooking at the same time. For foolproof results, always use a meat thermometer!
Here’s how to make it.
This post contains affiliate links.
Ingredients:
Pork tenderloin (allow 4-6 oz. per serving)
Olive oil, about 1 tsp. per pound of meat
Salt and pepper to taste
Thinly sliced prosciutto, about 4 slices per tenderloin
Fresh Italian parsley
Preparation:
Preheat the oven to 325°
Remove the tenderloins from the package. Pat dry with paper towels and rub with olive oil. Season all over with salt and pepper, then wrap each tenderloin in prosciutto slices. This keeps the meat very moist. Tie each tenderloin every few inches with cooking twine.
Use a roasting pan with a rack. Mist the rack with cooking spray and set the tenderloins with space between for the air to circulate. Drape fresh parsley over the top and insert an oven safe thermometer in the thickest part of the largest tenderloin.
If you don’t have a probe (oven safe) thermometer, then roast for 20 minutes per pound and check with an instant read.
When the internal temperature reaches 140° (pink in the center) remove from the oven and tent with foil. If you like it more well done, then let it go a little longer, up to 150°. Allow the roast to rest covered for at least 10 minutes to redistribute the juices.
Slice and serve (don’t forget to remove the strings!). Isn’t that beautiful? So easy and always a hit with the family.
Notes ♪♫ A single tenderloin will usually weigh between 1 and 1¼ lbs. If your package weighs more, you will likely find that it actually contains 2 smaller tenderloins. For a small family you can separate the 2 tenderloins, cook one and freeze the other.
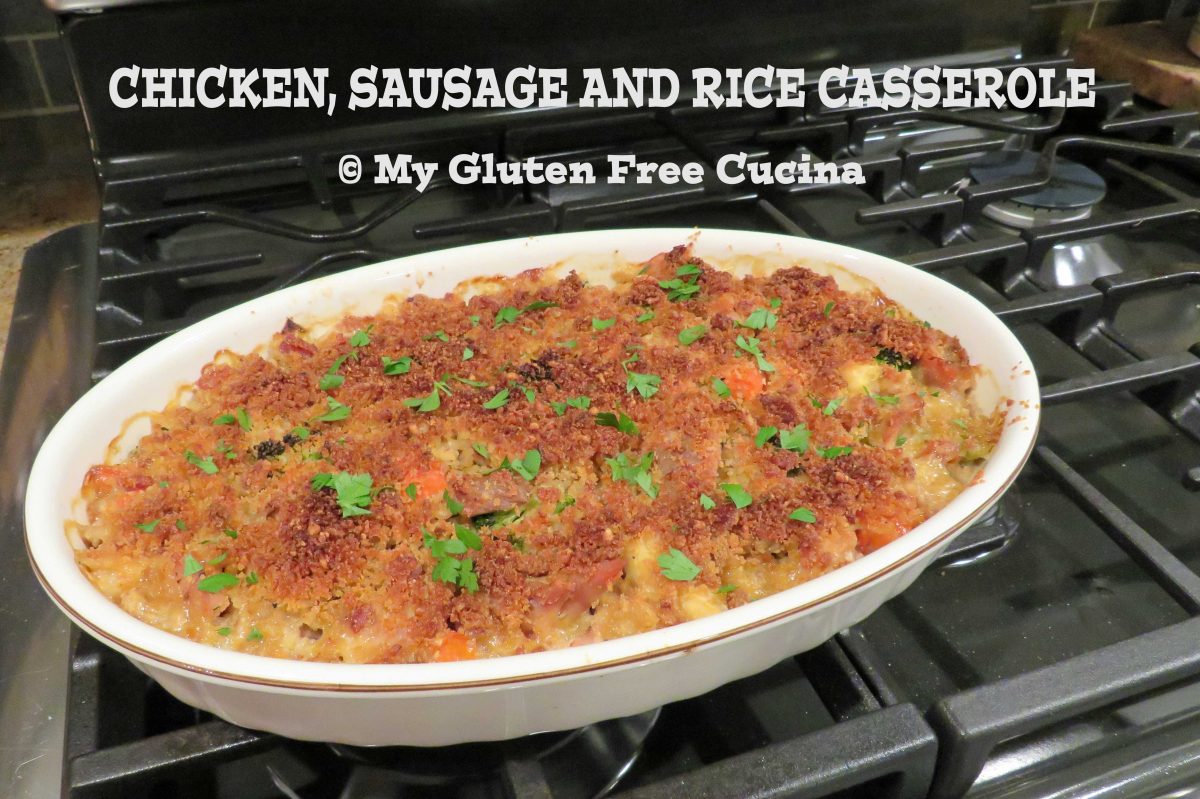
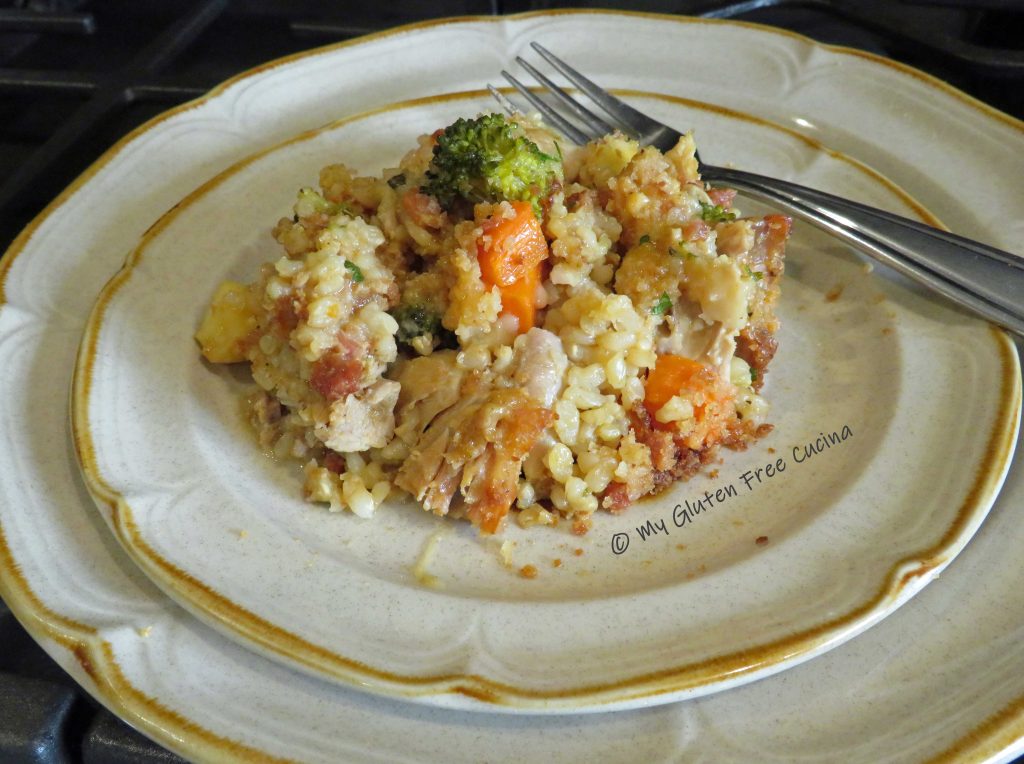
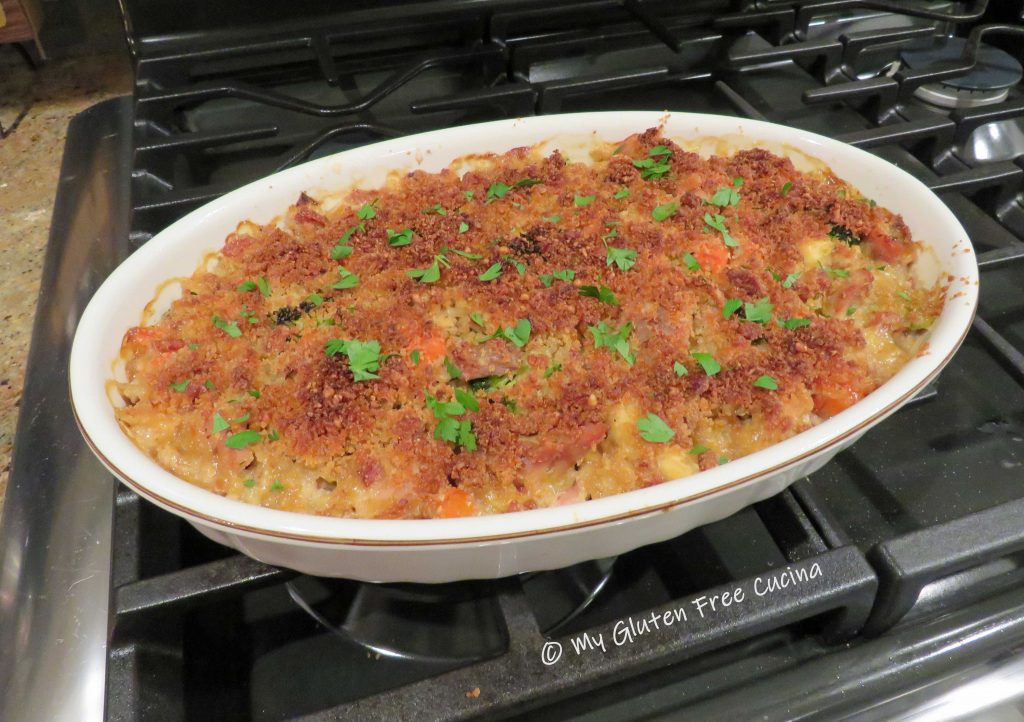
Whenever I make this flavorful casserole for a family dinner it gets rave reviews! Chicken drumsticks and Italian sausage come together with ingredients straight from the pantry, and you can use any veggies you have on hand! It’s easy and economical too. You can do most of the prep a day ahead and bake the next day. And that bacon breadcrumb topping- wow! It really gives this dish an extra punch of flavor, texture and crunch!
Brown rice takes about 50 minutes to cook, so start that first. Simmer 3/4 cup rice in 1-3/4 cups chicken broth and 1/4 tsp. seasoning of choice.
For the topping, coarsely chop the bacon, cook and drain on paper towels, reserving the fat in the pan.
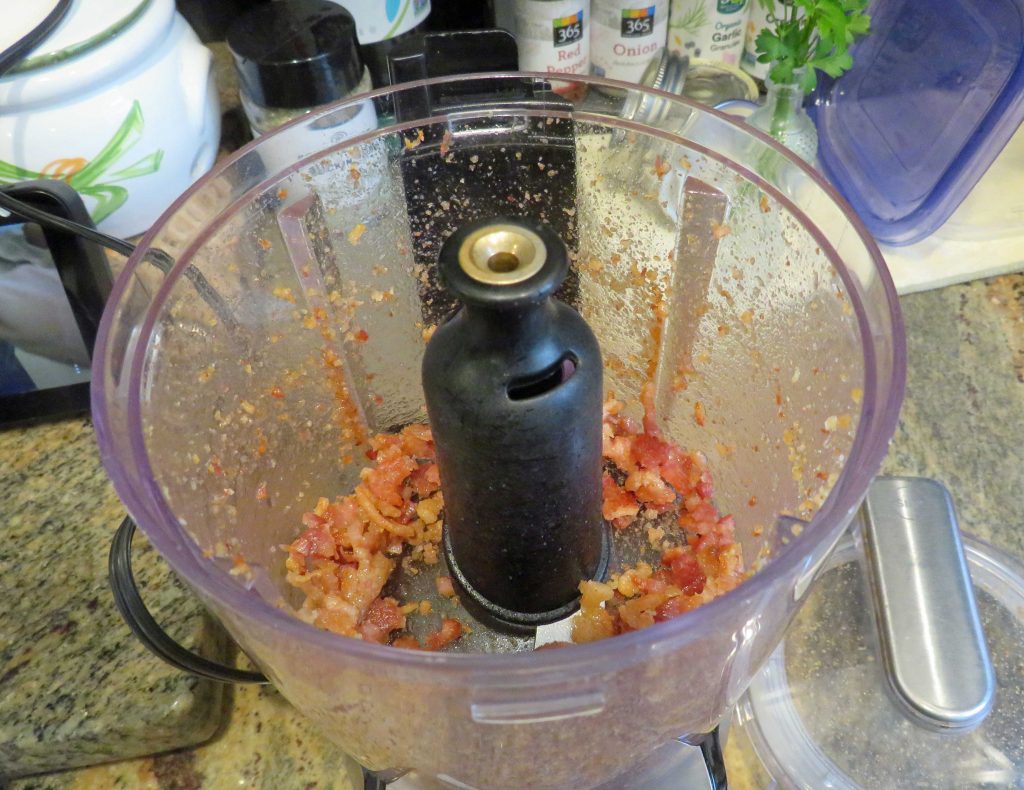
Crumble the bacon, or place in an electric chopper and pulse a few times to make bacon bits.
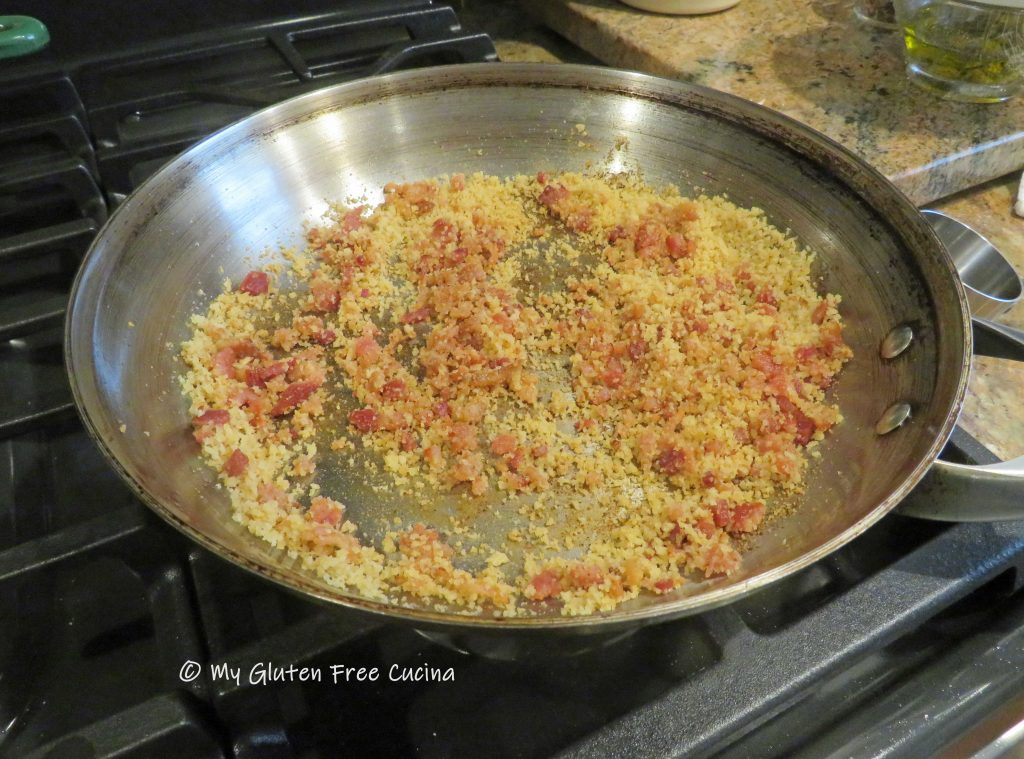
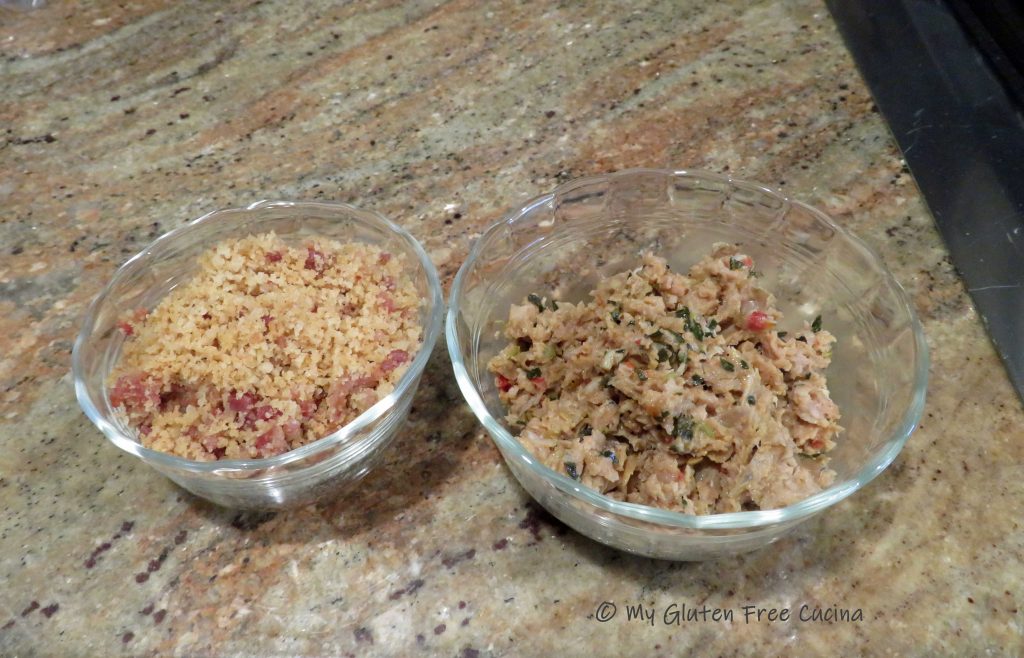
Add 1/3 cup of gluten free breadcrumbs to the skillet with the bacon fat and stir over low heat. Add back the crumbled bacon and stir well to combine. Set aside to cool, then mix with 1/4 cup grated parmesan cheese for topping.
I love Aleia’s Gluten Free Breadcrumbs, and I use this brand almost exclusively in my recipes. I promise, your family won’t even know they are gluten free!
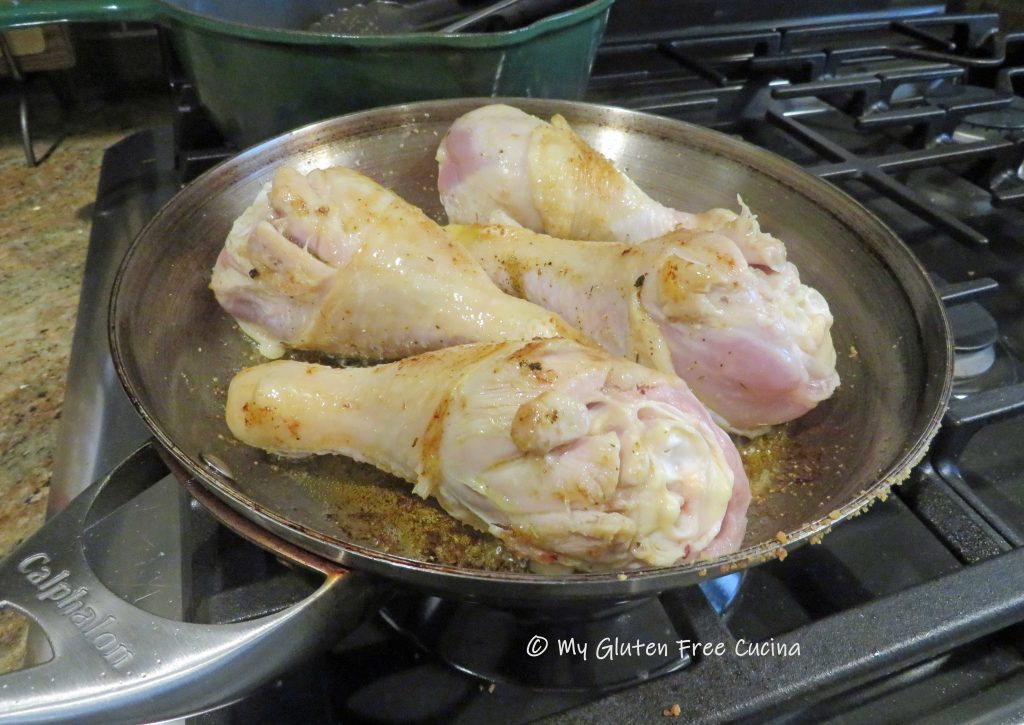
In the same skillet, brown the chicken on all sides in a little olive oil. Season both sides with salt and pepper.
Place browned chicken in a braising pan or Dutch oven, add ¼ cup white wine and 1/4 cup chicken broth. Cover and simmer 30 minutes.
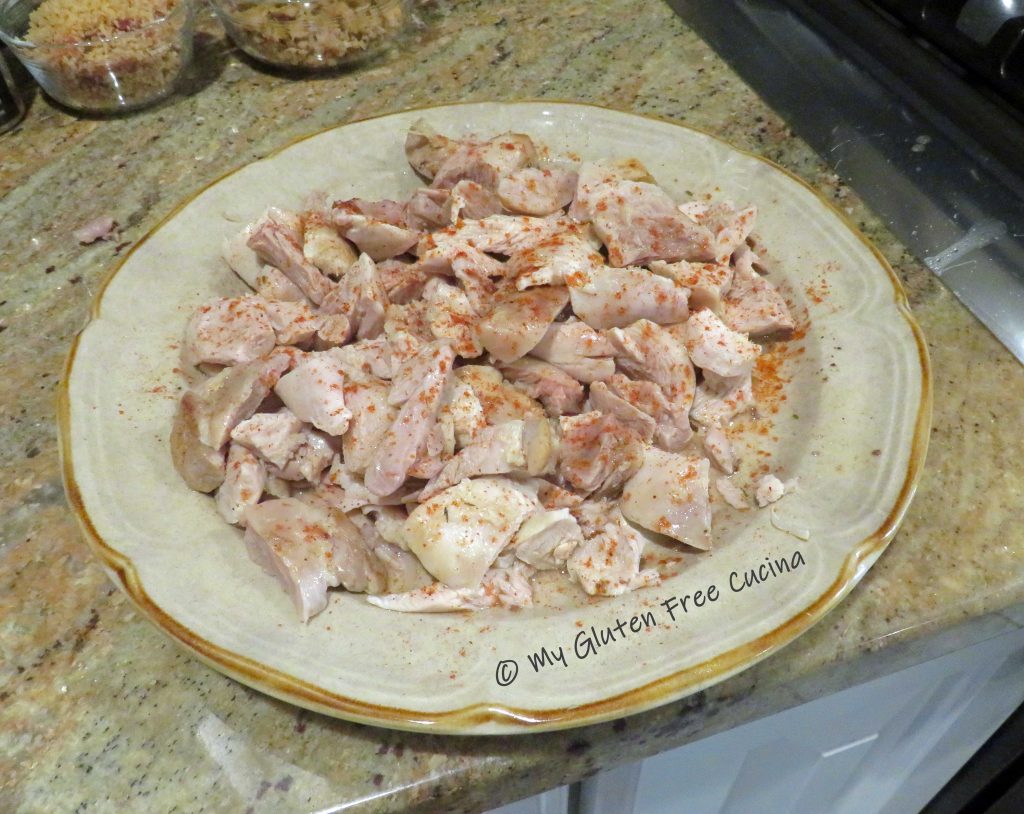
Transfer the cooked chicken to a plate, remove meat from the bones and sprinkle with paprika. Strain the liquid from the pan and reserve for later.
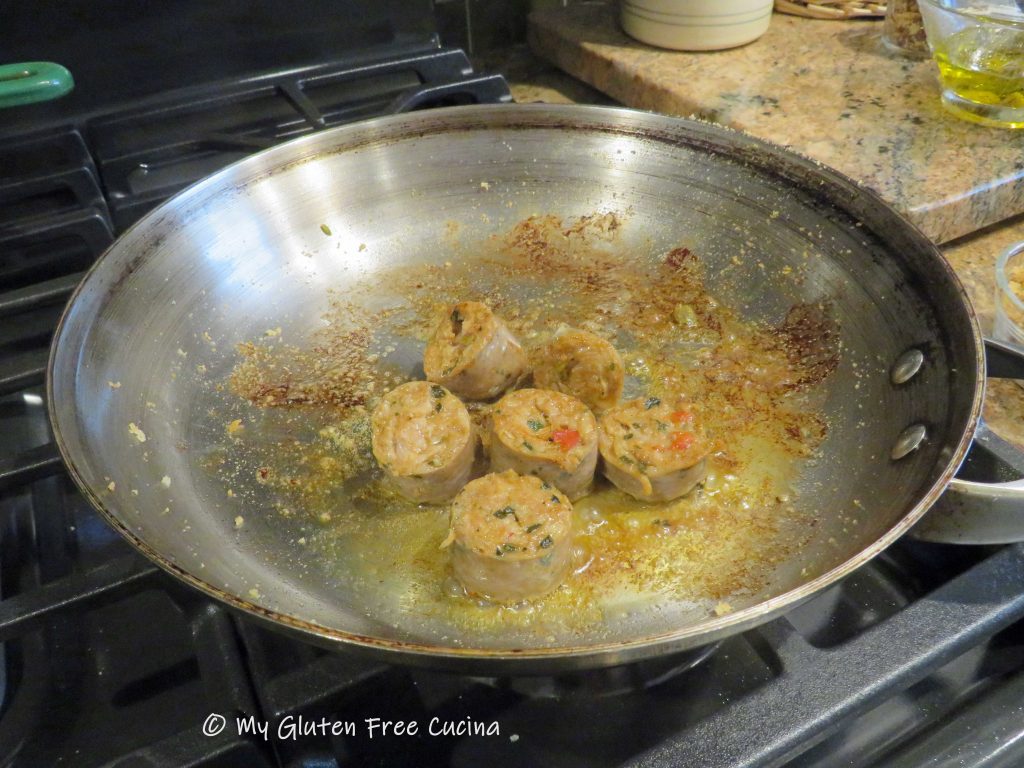
Slice the sausage and brown in olive oil. You can use store bought sausage or check out my recipe for homemade sausage patties! If using purchased sausage, always check labels for gluten containing ingredients.
Pulse the cooked sausage a few times in the chopper and set aside.
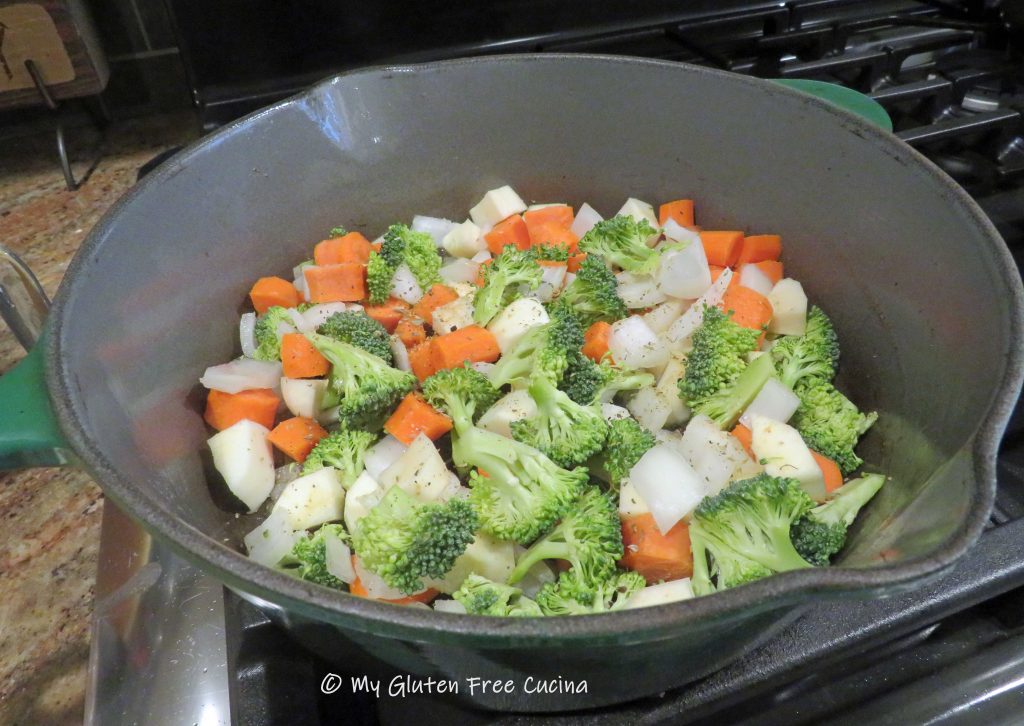
Wipe the braising pan or Dutch oven clean. Heat 1 tbsp. olive oil and add the veggies. Season and cook 10 minutes, stirring occasionally.
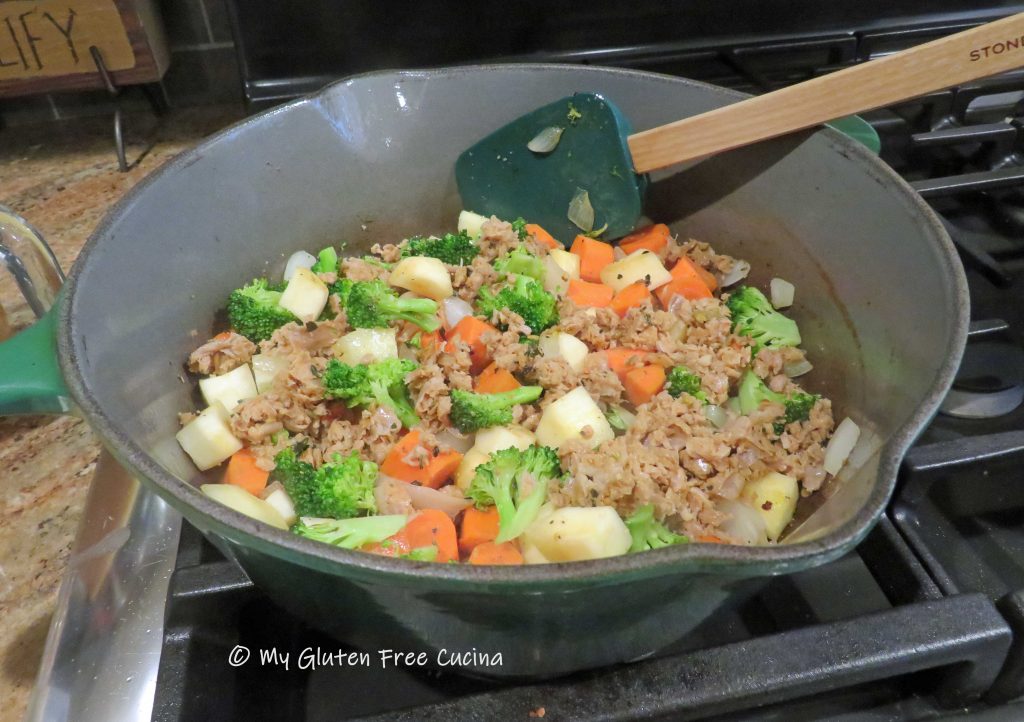
Add back the sausage and stir well.
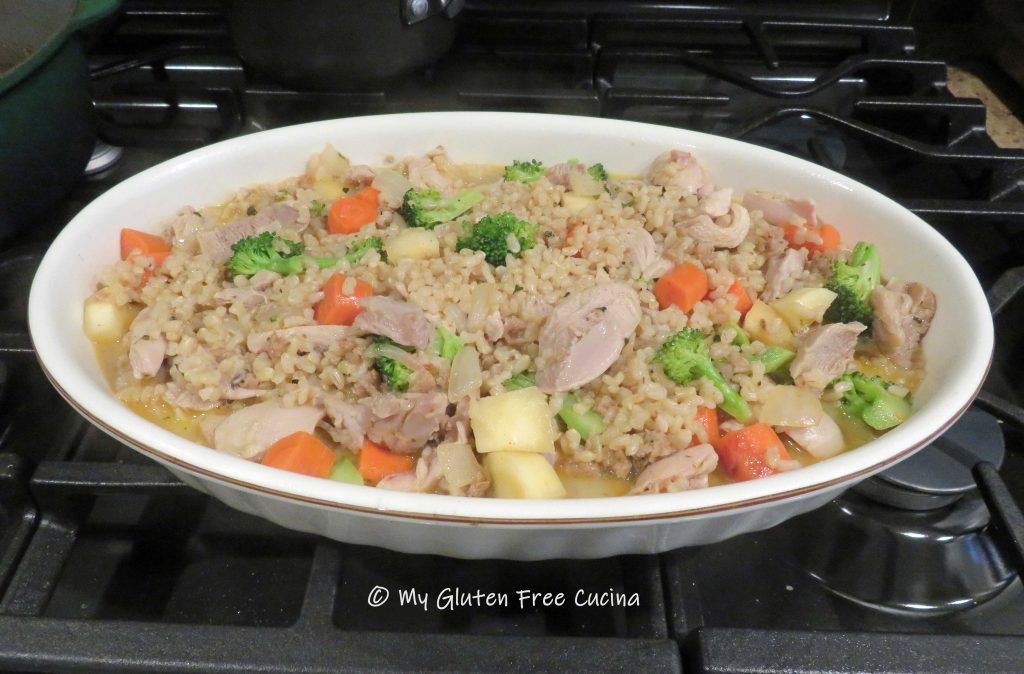
Now add the chicken and cooked rice. Measure the reserved liquid and add enough chicken broth to equal 1-1/4 cups. Combine with 1/4 cup milk and pour over the chicken and rice mixture.
Tip: Prepare the meal up to this point a day ahead. Cover and refrigerate.
Preheat the oven to 350º. You can bake the casserole in the same pan, or transfer to a pretty casserole dish for a nicer presentation. Note, if you made the casserole in the advance, take it out of the refrigerator and leave on the counter for at least 30 minutes (don’t place a refrigerated glass baking dish directly into a hot oven, it may shatter).
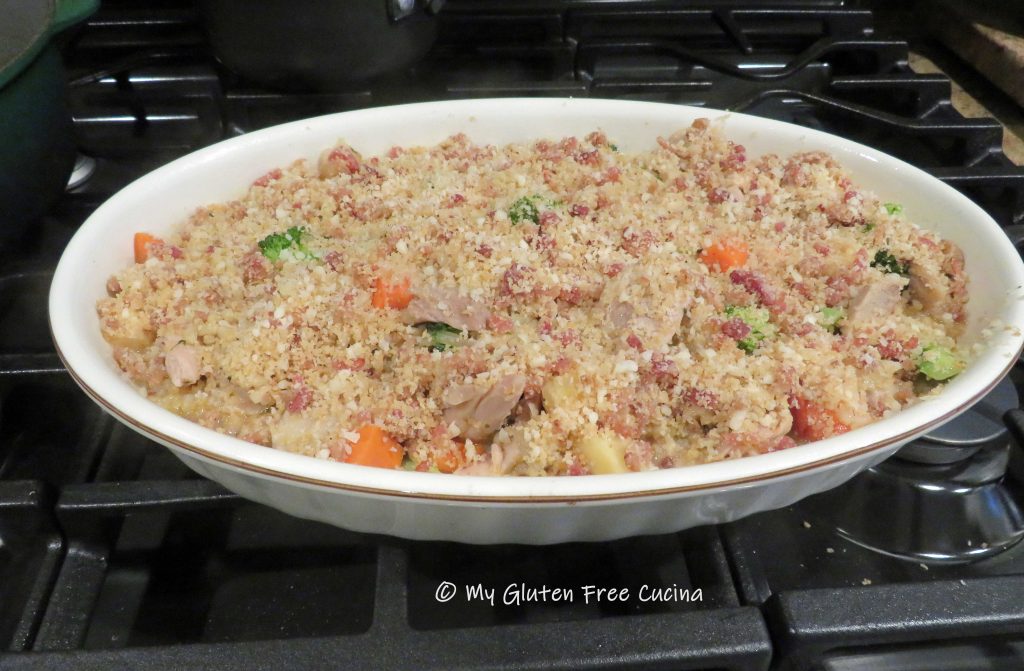
Spread the breadcrumb mixture over the casserole and bake uncovered for 45 minutes.
The liquid will bubble and thicken to create a nice sauce. I like to finish it off under the broiler, 3 minutes on low. Watch that it doesn’t burn!
Let it rest a few minutes to set up, then garnish with fresh herbs (or dried herbs) and bring it right to the table.
Notes ♪♫Remember, you can substitute any veggies you like in this recipe. Once I went out on a limb and used eggplant. Surprise, the reaction ranged from “I loved it” to “I didn’t even know it was in there”! Try broccoli, cauliflower, asparagus or zucchini. Use what you have on hand, use what you like!
Chicken and Italian sausage come together with ingredients straight from the pantry to make this flavorful casserole, and you can use any veggies you have on hand!
Brown rice takes about 50 minutes to cook, so start that first. Simmer 3/4 cup rice in 1-3/4 cups chicken broth and 1/4 tsp. seasoning of choice.
For the topping, coarsely chop the bacon, cook and drain on paper towels, reserving the fat in the pan.
Crumble the bacon, or place in an electric chopper and pulse a few times to make bacon bits.
Add 1/3 cup of gluten free breadcrumbs to the skillet with the bacon fat and stir over low heat. Add back the crumbled bacon and stir well to combine. Set aside to cool, then mix with 1/4 cup grated parmesan cheese for topping.
In the same skillet, brown the chicken on all sides in a little olive oil. Season both sides with salt and pepper.
Place browned chicken in a braising pan or Dutch oven, add ¼ cup white wine and 1/4 cup chicken broth. Cover and simmer 30 minutes.
Transfer the cooked chicken to a plate, remove meat from the bones and sprinkle with paprika. Strain the liquid from the pan and reserve for later.
Slice the sausage and brown in olive oil.
Pulse the cooked sausage a few times in the chopper and set aside.
Wipe the braising pan or Dutch oven clean. Heat 1 tbsp. olive oil and add the veggies. Season and cook 10 minutes, stirring occasionally.
Add back the sausage.
Now add the chicken and cooked rice. Measure the reserved liquid and add enough chicken broth to equal 1-1/4 cups. Combine with 1/4 cup milk and pour over the chicken and rice mixture.
Tip: Prepare the meal up to this point a day ahead. Cover and refrigerate.
Preheat the oven to 350º. You can bake it in the same pan, or transfer to a pretty casserole dish for a nicer presentation. Note, if you made the casserole in the advance, take it out of the refrigerator and leave on the counter for at least 30 minutes (don’t place a refrigerated glass baking dish directly into a hot oven, it may shatter).
Spread the breadcrumb mixture over the casserole and bake uncovered for 45 minutes.
The liquid will bubble and thicken to create a nice sauce. I like to finish it off under the broiler, 3 minutes on low. Watch that it doesn’t burn!
Let it rest a few minutes to set up, then garnish with fresh herbs (or dried herbs) and bring it right to the table.
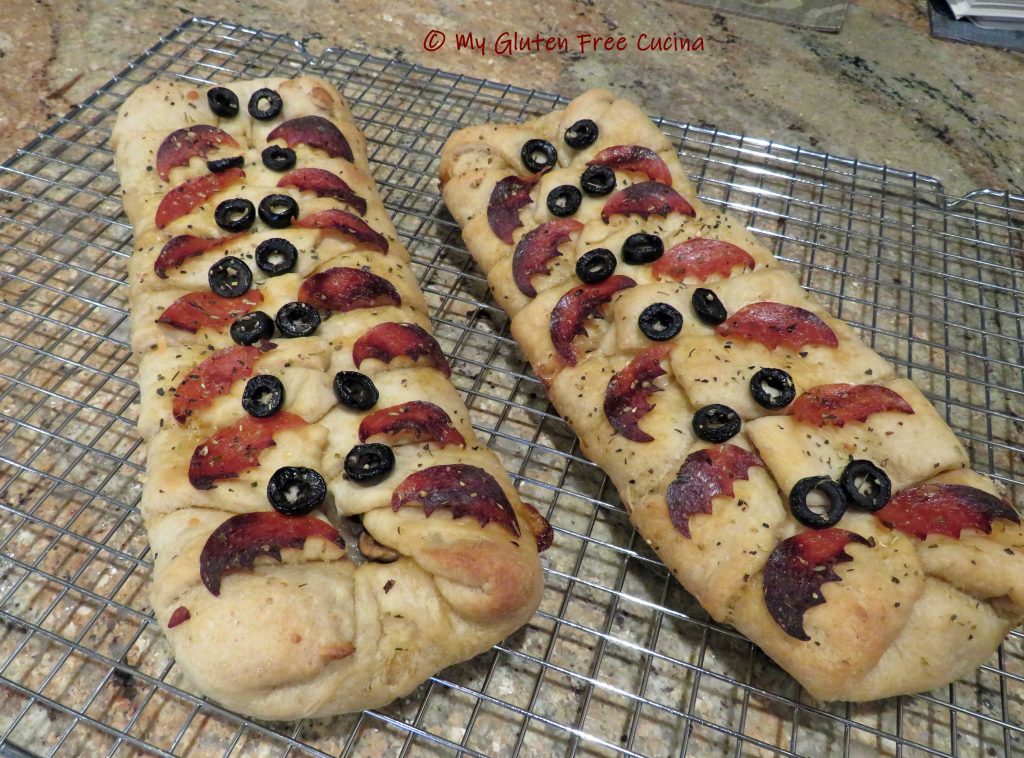
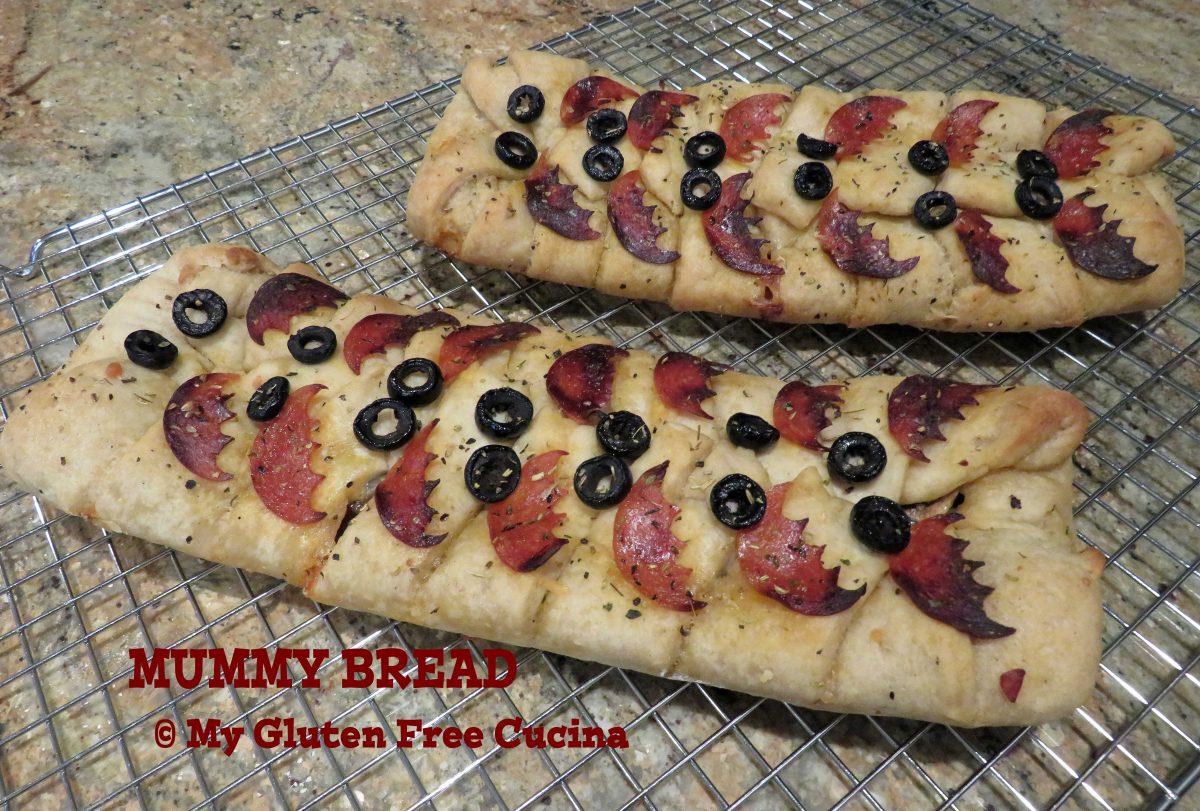
Mummy Bread has been a Halloween tradition in our family for years. It’s sure to be a hit at a Halloween party! This Stromboli style bread is fun to make with kids, and grownups will love it too.
Mix together all of the dough ingredients in the bowl of a stand mixer. Cover the dough and refrigerate for 1 hour.
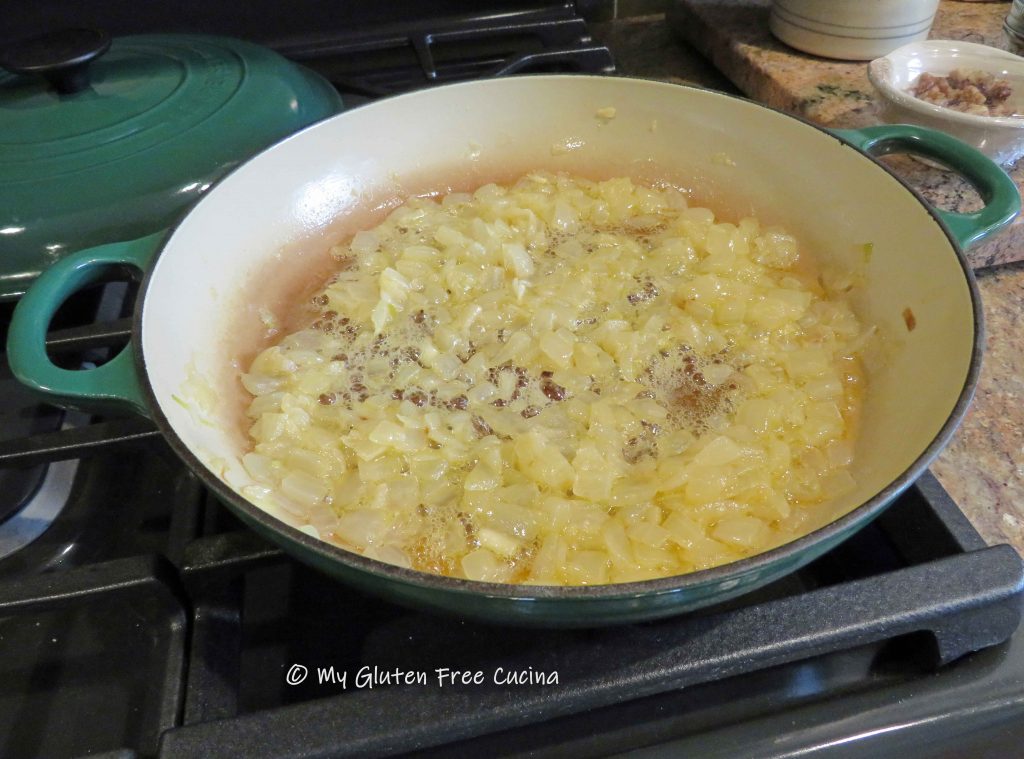
Add the onions to a heavy skillet with 2 tbsp. butter and 2 tbsp. oil. Cook covered, 20 minutes then uncover and cook for an additional 20 minutes, stirring frequently.
Cook the mushroom slices in 1 tbsp. butter and 1 tbsp. olive oil.
Drain the mushrooms and onions to remove as much liquid as possible.
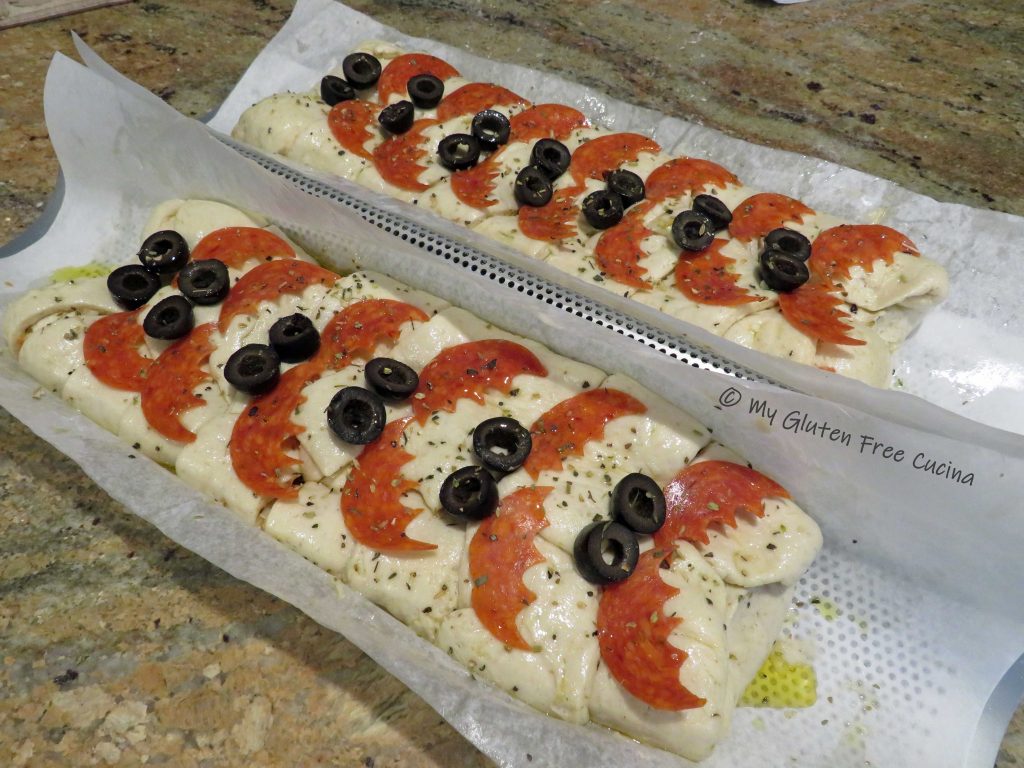
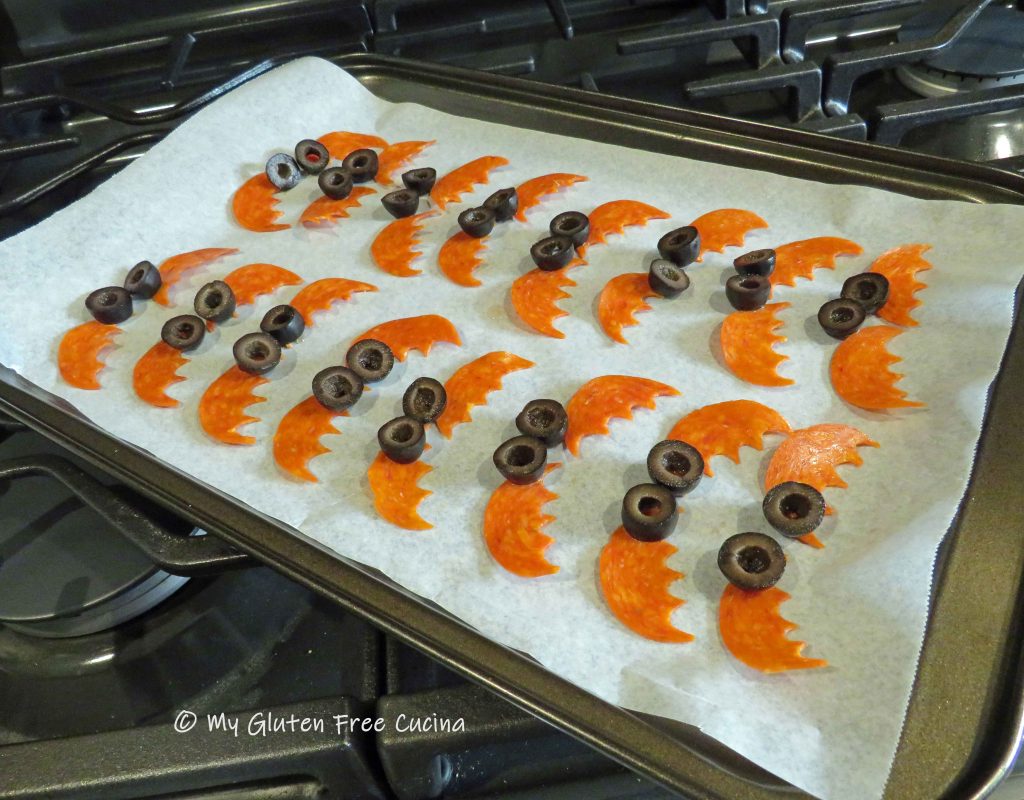
While the dough is rising, plan your decorative toppings. I made these pepperoni and olive bats!
After 1 hour in the fridge, turn the dough out onto floured parchment and use a bench knife to divide it in 2.
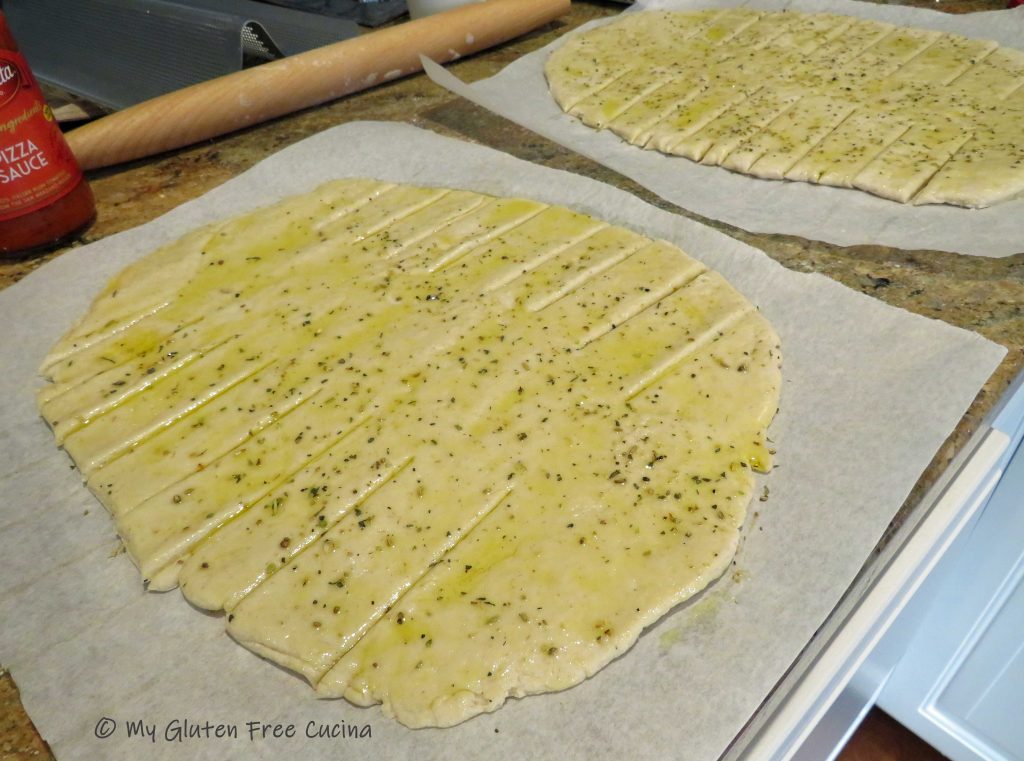
Roll out each piece into a thin rectangle, about 11 x 16″. Brush lightly with olive oil and sprinkle with seasoning. Use a bench knife to cut 1″ strips on either side of the dough.
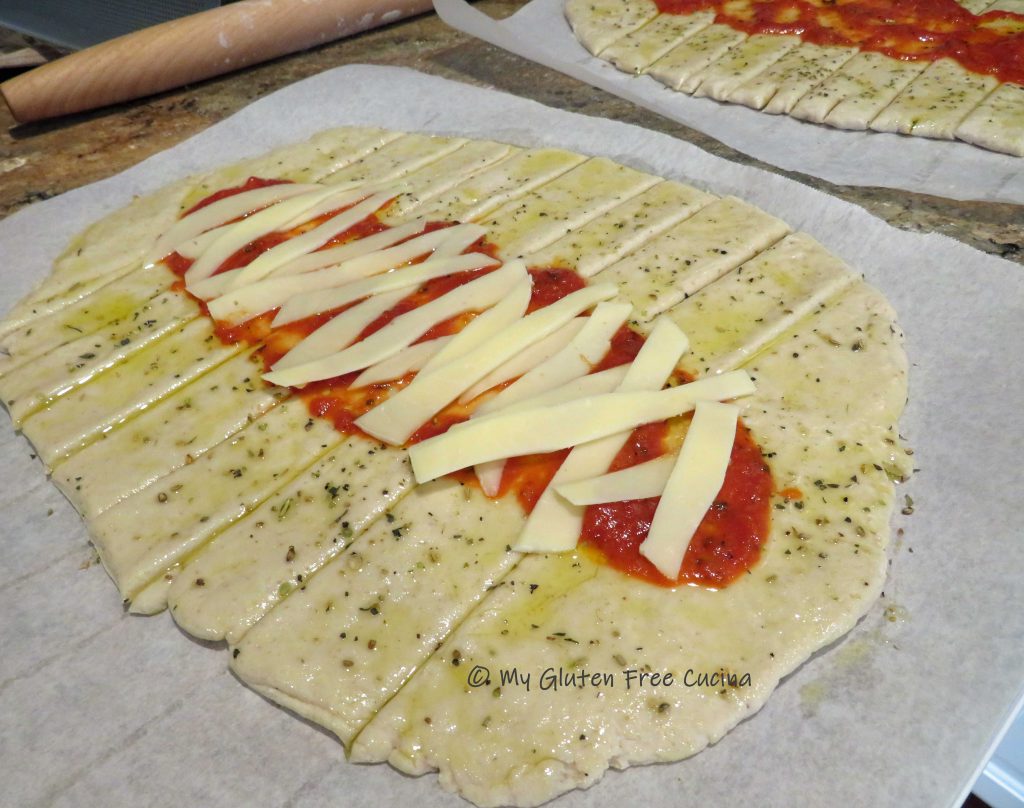
Brush the center of each mummy with 3-4 tbsp. of pizza sauce, then layer with strips of provolone cheese.
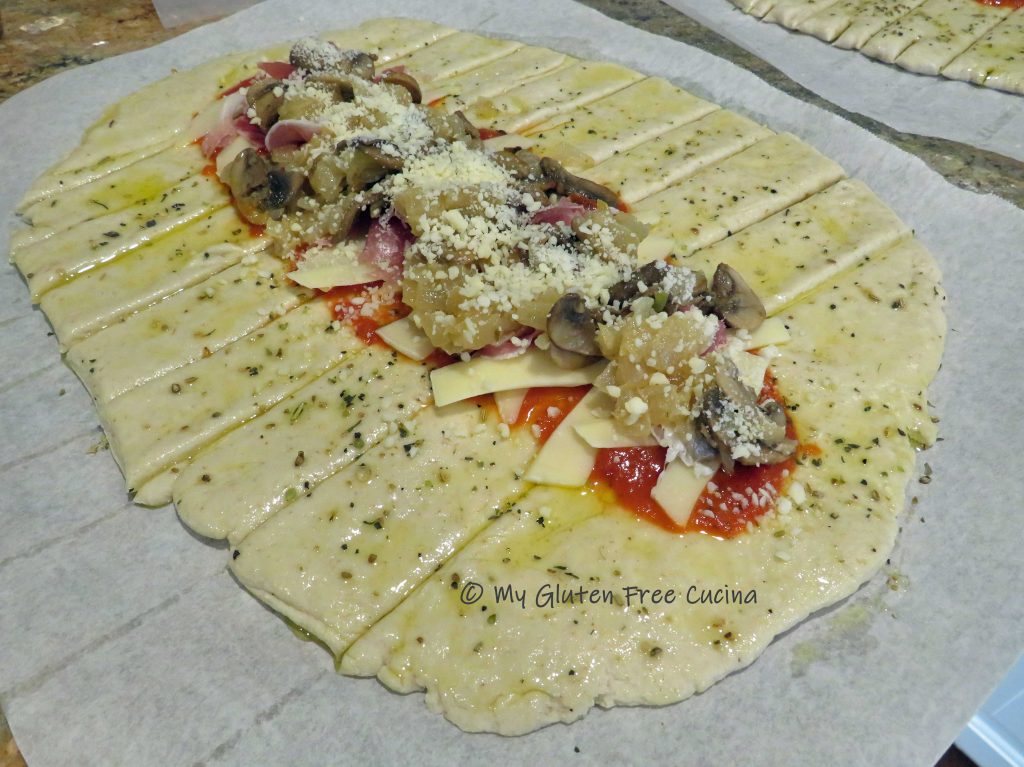
Top with torn pieces of cold cuts and divide the mushrooms and onions between the 2 mummies. Sprinkle with grated parmesan.
Hint: Don’t over fill the dough and make sure veggies are well drained, so it won’t be soggy!
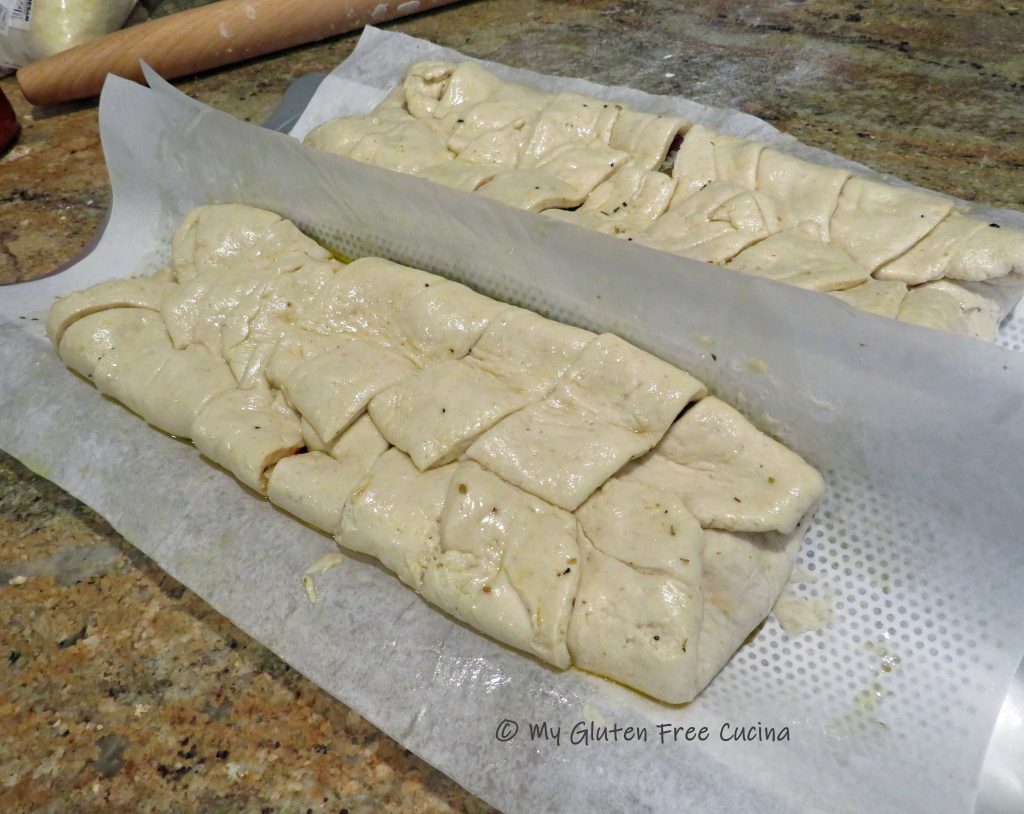
Starting at the bottom, fold the dough over the filling, then begin overlapping the strips from side to side. Continue folding to create the mummy. Transfer to a perforated loaf pan and trim the parchment to fit.
Preheat the oven to 500º. Decorate the mummies with olive and pepperoni slices. Be creative, you can use all sorts of veggies and herbs to dress up your mummy. Brush everything with olive oil and sprinkle with more Italian seasoning.
Place the loaf pan on a baking sheet for more stability and to prevent the bottom from burning. Bake for 20 minutes, and tent with foil if the mummies seem to be browning too quickly. Cool in the pan for 10 minutes before moving to a rack.
Mummy bread can be eaten warm or at room temperature. They will stay warm for several hours.
Leftovers (if you have any) can be reheated on a pizza stone.
Mix together all of the dough ingredients in the bowl of a stand mixer. Cover the dough and refrigerate for 1 hour.
Add the onions to a heavy skillet with 2 tbsp. butter and 2 tbsp. oil. Cook covered, 20 minutes then uncover and cook for an additional 20 minutes, stirring frequently.
Cook the mushroom slices in 1 tbsp. butter and 1 tbsp. olive oil.
Drain the mushrooms and onions to remove as much liquid as possible.
While the dough is rising, plan your decorative toppings. I made these pepperoni and olive bats!
After 1 hour in the fridge, turn the dough out onto floured parchment and use a bench knife to divide it in 2.
Roll out each piece into a thin rectangle, about 11 x 16″. Brush lightly with olive oil and sprinkle with seasoning. Use a bench knife to cut 1″ strips on either side of the dough.
Brush the center of each mummy with 3-4 tbsp. of pizza sauce, then layer with strips of provolone cheese.
Top with torn pieces of cold cuts and divide the mushrooms and onions between the 2 mummies. Sprinkle with grated parmesan.
Hint: Don’t over fill the dough and make sure veggies are well drained, so it won’t be soggy!
Starting at the bottom, fold the dough over the filling, then begin overlapping the strips from side to side. Continue folding to create the mummy. Transfer to a perforated loaf pan, and trim the parchment to fit.
Preheat the oven to 500º. Decorate the mummies with olive and pepperoni slices. Be creative, you can use all sorts of veggies and herbs to dress up your mummy. Brush everything with olive oil and sprinkle with more Italian seasoning.
Place the loaf pan on a baking sheet for more stability and to prevent the bottom from burning. Bake for 20 minutes, and tent with foil if the mummies seem to be browning too quickly. Cool in the pan for 10 minutes before moving to a rack.
Mummy bread can be eaten warm or at room temperature. They will stay warm for several hours.
Leftovers (if you have any) can be reheated on a pizza stone.
Unauthorized use and/or duplication of this material without express and written permission from this blog’s author and/or owner is strictly prohibited.
Better Batter Collaborator
When you shop Better Batter | Gluten Free Flour, use my Promo Code MGFC30 for 30% off your non-sale purchase!
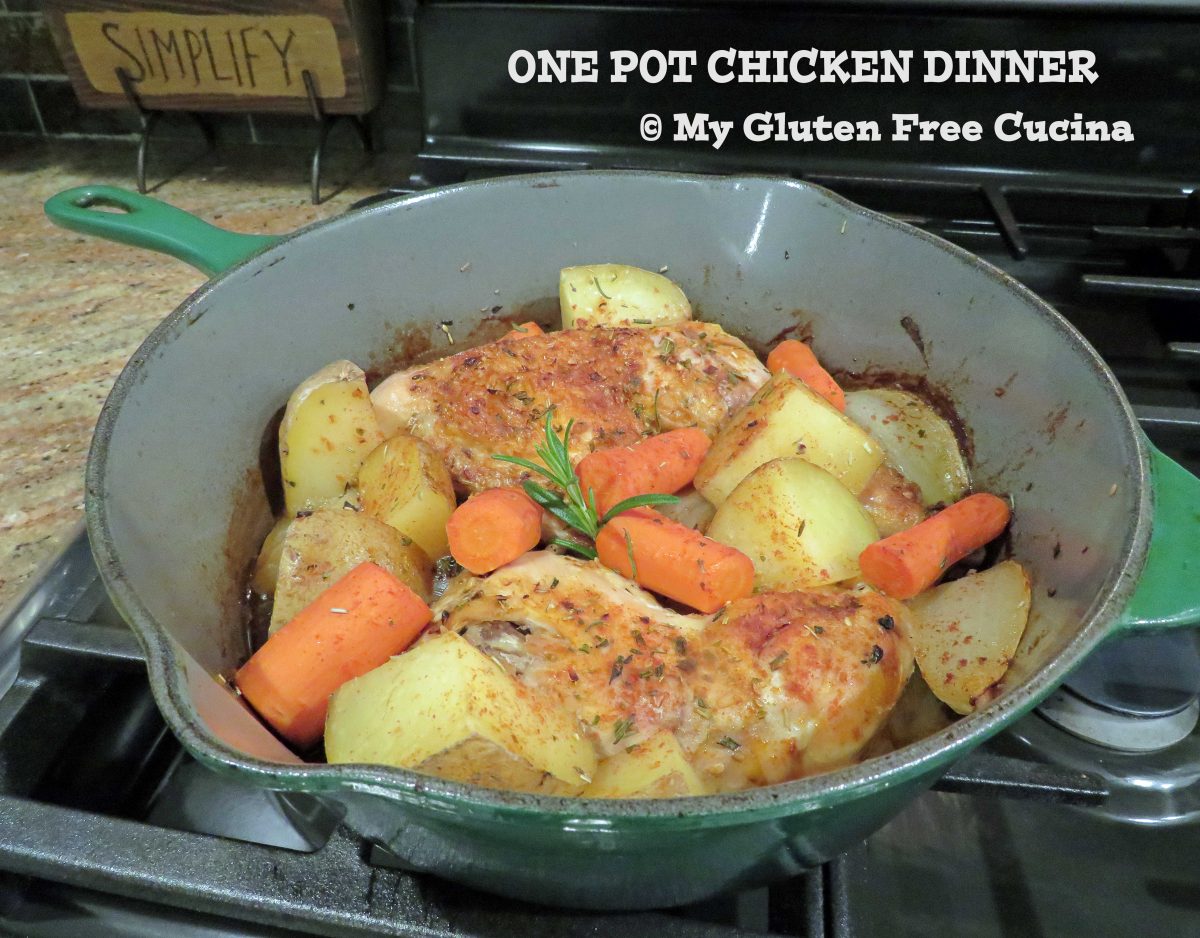
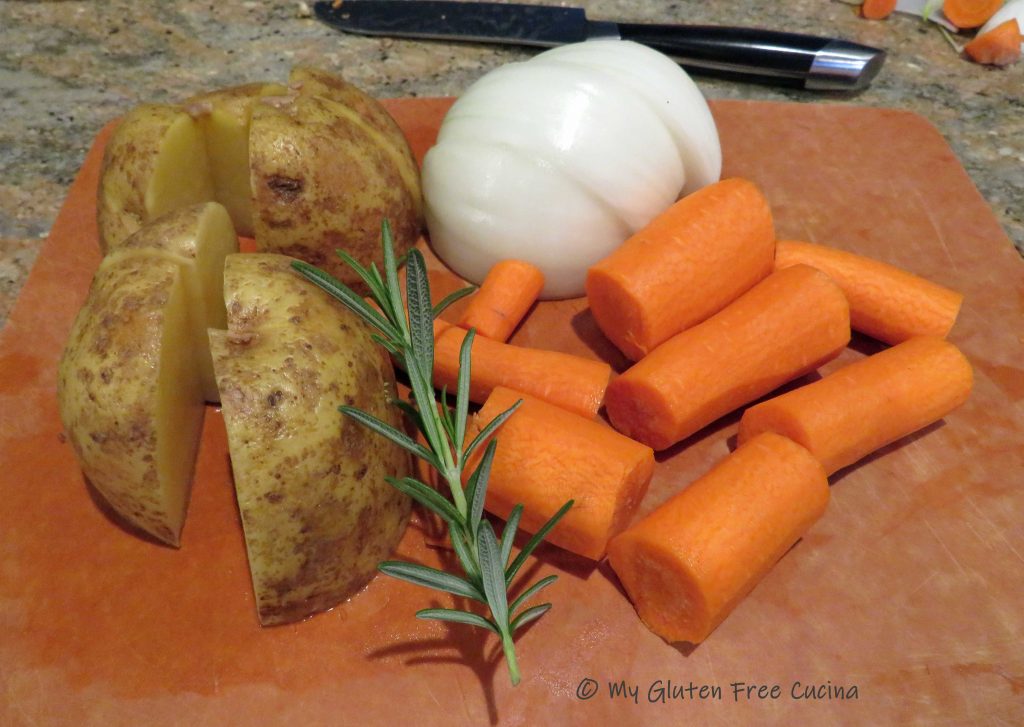
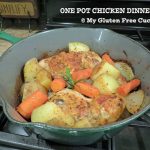
When casual comfort food is on your mind, keep the prep simple with this easy braised dinner. I used fresh, naturally gluten free ingredients like chicken, potato, carrots and onion. Slow braising ensures the chicken leg quarters are falling off the bone tender. As a bonus, this dish goes from oven to table in the same pan for easy cleanup.
Use a heavy, oven safe skillet with cover or a Dutch oven. With the heat on medium low, add 2 tbsp. olive oil and brown the chicken, skin side down for 10 minutes.
Turn the chicken skin side up. Add the onion, potato and carrot. Sprinkle with Italian Seasoning, paprika, and fresh rosemary.
Add a splash of white wine, cover and place in the oven for an hour and 45 minutes (1-3/4 hours) at 300º. Uncover, and cook for an additional 15 minutes to allow some liquid to evaporate. Broil on low for 3 minutes to finish. Garnish with a rosemary sprig and serve it right in the pan.
Notes ♪♫ Gluten free meals do not have to be fancy or difficult! This recipe, made with naturally gluten free ingredients is delicious and satisfying.
Use a heavy, oven safe skillet with cover or a Dutch oven. With the heat on medium low, add 2 tbsp. olive oil and brown the chicken, skin side down for 10 minutes.
Turn the chicken skin side up. Add the onion, potato and carrot. Sprinkle with Italian Seasoning, paprika, and fresh rosemary.
Add a splash of white wine, cover and place in the oven for an hour and 45 minutes (1-3/4 hours) at 300º. Uncover, and cook for an additional 15 minutes to allow some liquid to evaporate. Broil on low for 3 minutes to finish. Garnish with a rosemary sprig and serve it right in the pan.
Notes
Gluten free meals do not have to be fancy or difficult! This recipe, made with naturally gluten free ingredients is delicious and satisfying.
Unauthorized use and/or duplication of this material without express and written permission from this blog’s author and/or owner is strictly prohibited.



 Stir in 1 cup gluten free chicken broth and 2 tbsp. heavy cream.











 Line a baking sheet with foil and mist with cooking spray. Form 12 small meatballs and arrange on the baking sheet, leaving space in between.








 Preparation:



 Preparation:






 If you don’t have a probe (oven safe) thermometer, then roast for 20 minutes per pound and check with an


 Crumble the bacon, or place in an
 Add 1/3 cup of gluten free breadcrumbs to the skillet with the bacon fat and stir over low heat. Add back the crumbled bacon and stir well to combine. Set aside to cool, then mix with 1/4 cup grated parmesan cheese for topping.

 Place browned chicken in a


 Cook the mushroom slices in 1 tbsp. butter and 1 tbsp. olive oil.
 Drain the mushrooms and onions to remove as much liquid as possible.
 After 1 hour in the fridge, turn the dough out onto floured parchment and use a