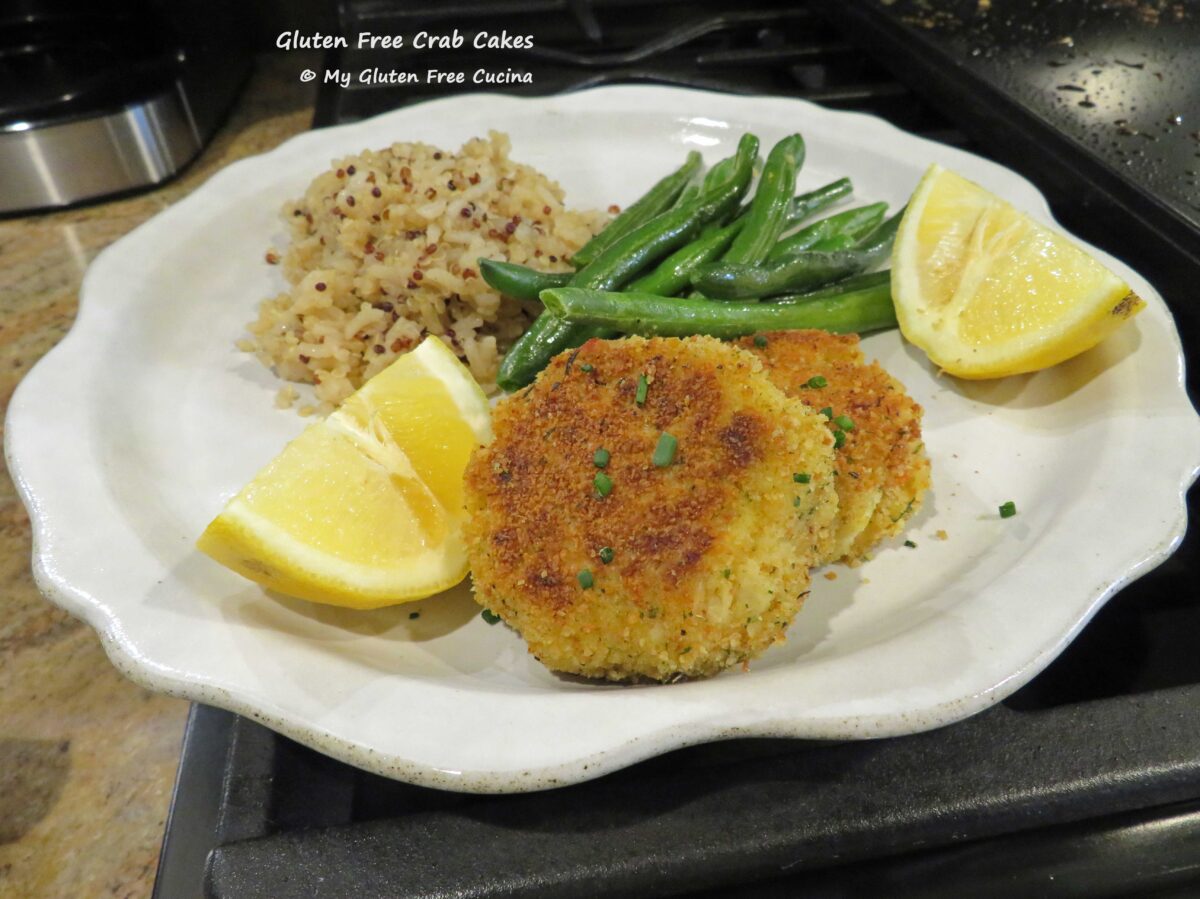
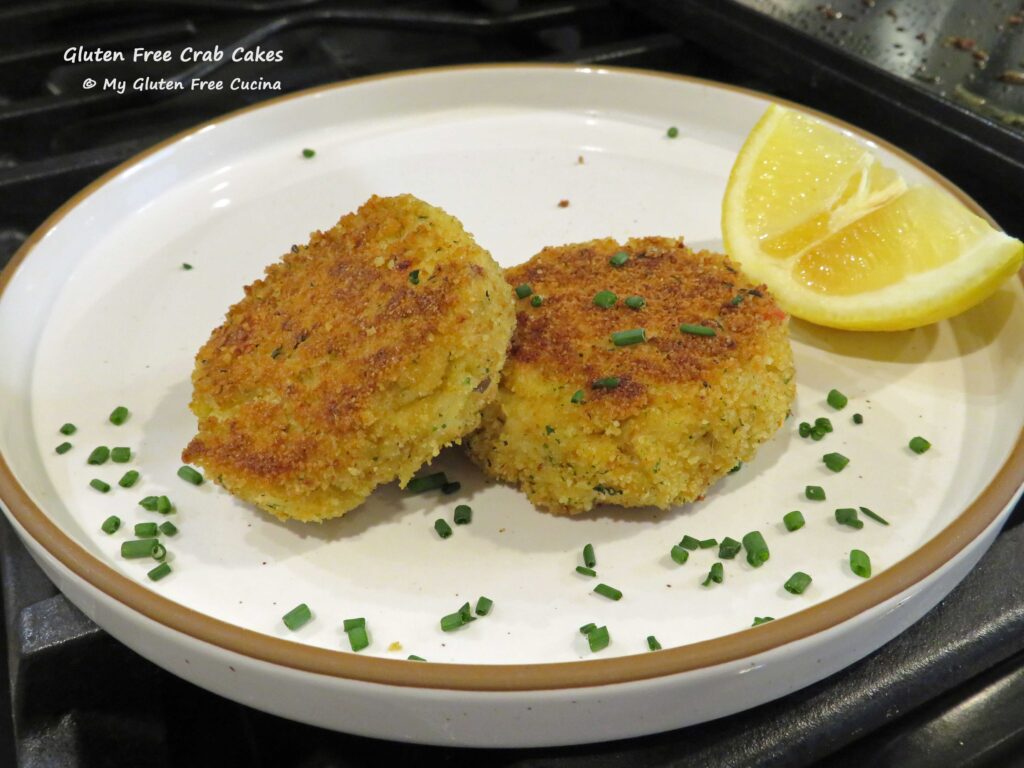
Crab Cakes are a New England classic, and I have always loved them. Of course, they are now off limits (ah breadcrumbs!). For a while, I had been thinking about making a gluten free version at home, and when I finally put my mind to it, they turned out great!
Like many of my recipes, this one came about because I was missing an old restaurant favorite from before my Celiac diagnosis. When recreating a recipe, I always aim to get all of the flavor and consistency of the original. In fact, I consider it the biggest compliment when people say they can’t tell something I made is gluten free. But the real advantage of making something from scratch is that you control what goes into it.
My Gluten Free Crab Cakes are not stingy with the crab meat (restaurants take note!). Fresh crab is wonderful, but if like me you are not up for cooking and cleaning a live crab, try using frozen crab meat. It is a very good alternative and worth seeking out. Of course, you can use canned if that is what you have available. Look for Fancy Lump Crab and be sure to check the ingredient label.
If you prep them in advance and refrigerate, you can have this entrée on the table in minutes!
 Yield: 5-6 crab cakes (plan for 1 each as an appetizer or 2 as a main course)
This post contains affiliate links.
Ingredients:
- 1 garlic clove, minced
- 1 tbsp. red bell pepper, minced
- 1 tsp. Canola oil
- 1 egg
- 3 tbsp. gluten free mayonnaise
- 1 tsp. gluten free Worcestershire sauce
- 1 tbsp. lemon juice
- 1/4 tsp. garlic powder
- 1/2 tsp. dried onion flakes
- ½ tsp. salt
- 1/8 tsp. red pepper flakes
- 1/4 cup mashed potato flakes
- 6 oz. Fancy Lump Crab meat (or use fresh, frozen or canned)
- 4 tbsp. gluten free seasoned breadcrumbs
- 1 tbsp. olive oil
- 1 tbsp. butter
- Lemon slices, optional for serving
- Fresh chives, optional for garnish

Preparation:
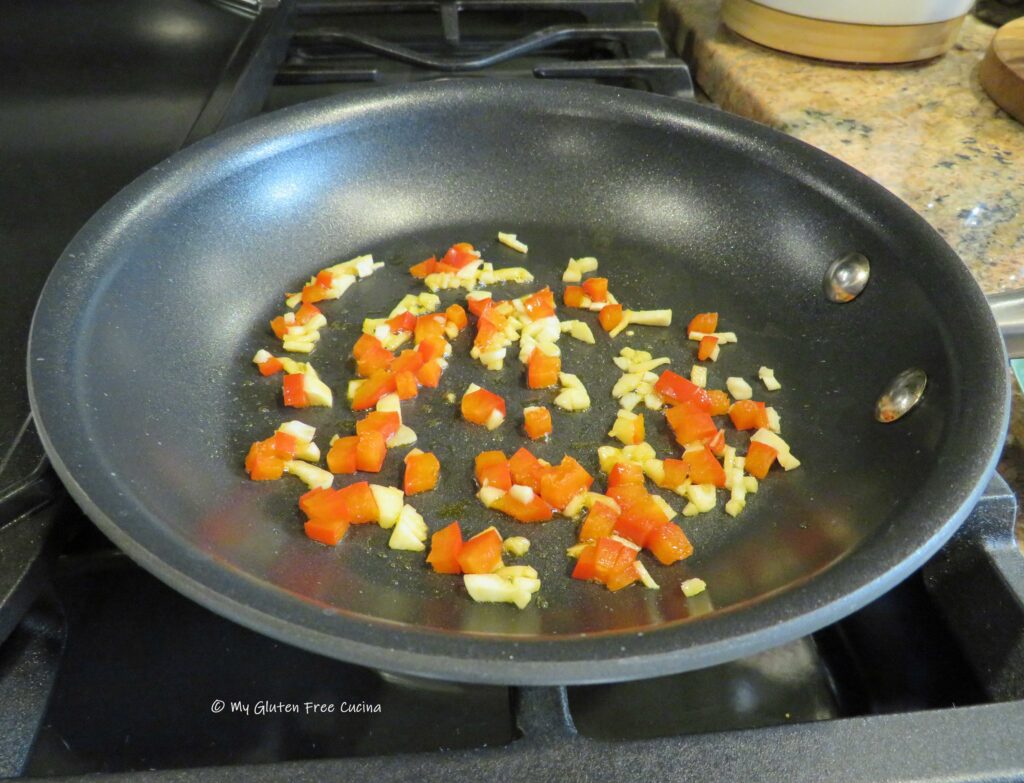
Chop the garlic and red bell pepper into fine mince. Sauté 2 minutes in 1 tsp. canola oil. Set aside and cool to room temperature.
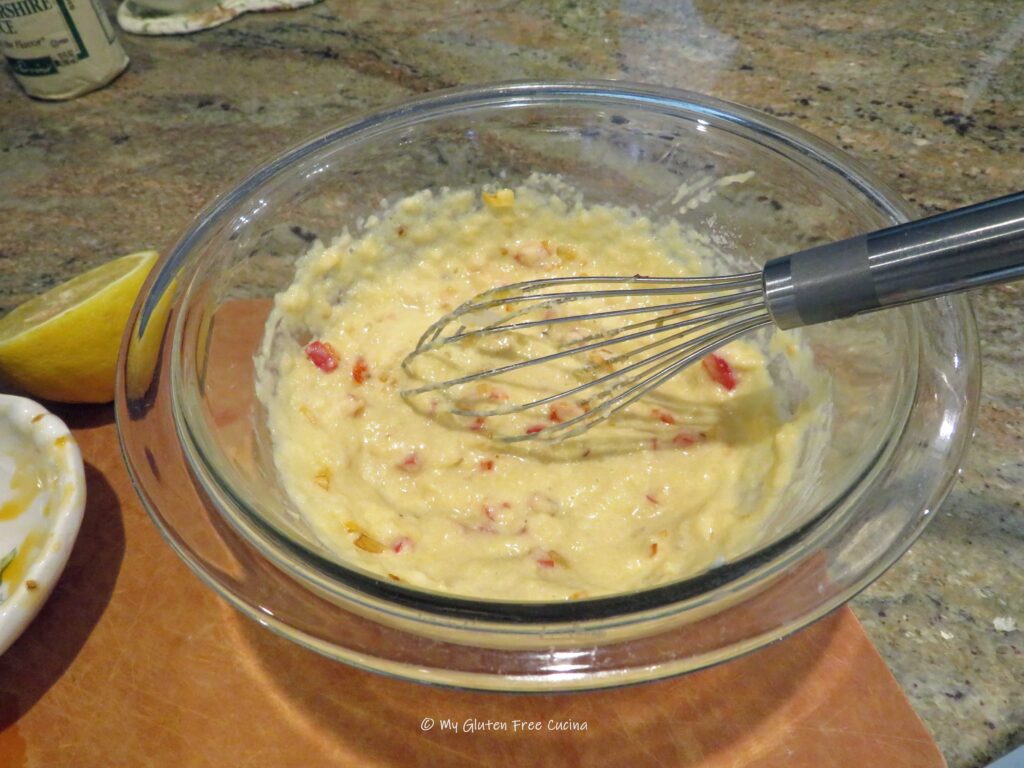
 Add the breadcrumbs to a shallow bowl. In a separate bowl, whisk the egg, mayonnaise, Worcestershire sauce, minced veggies, lemon juice and seasonings in a separate bowl. Add the potato flakes and whisk until smooth.
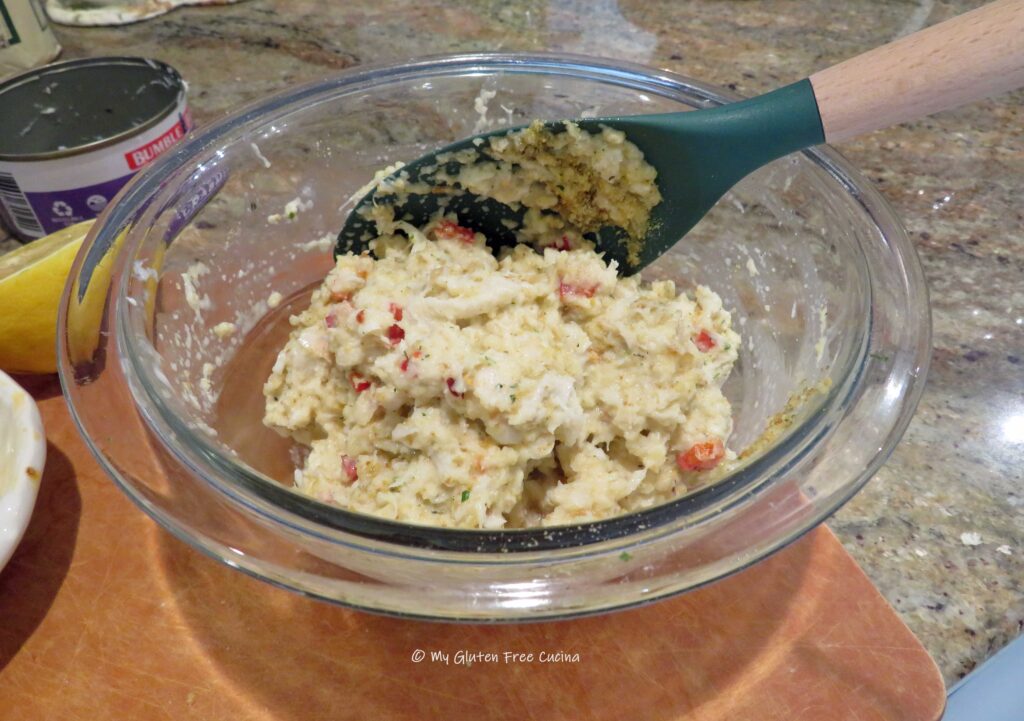
 Fold in the crab meat and 2 tbsp. (half) of the breadcrumbs.
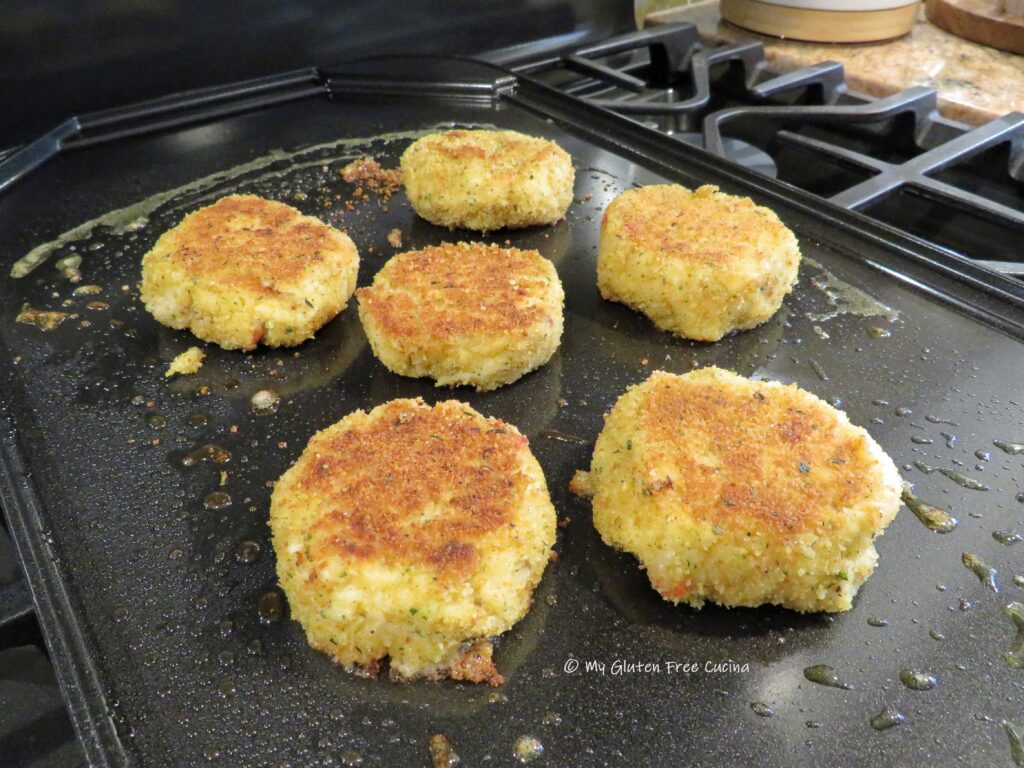
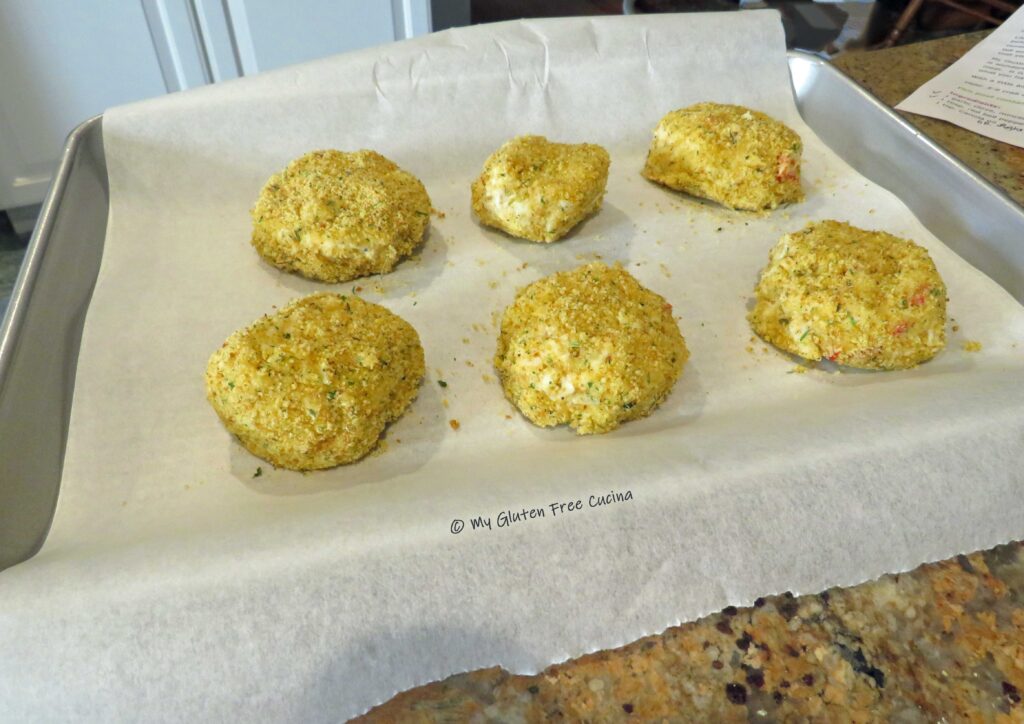
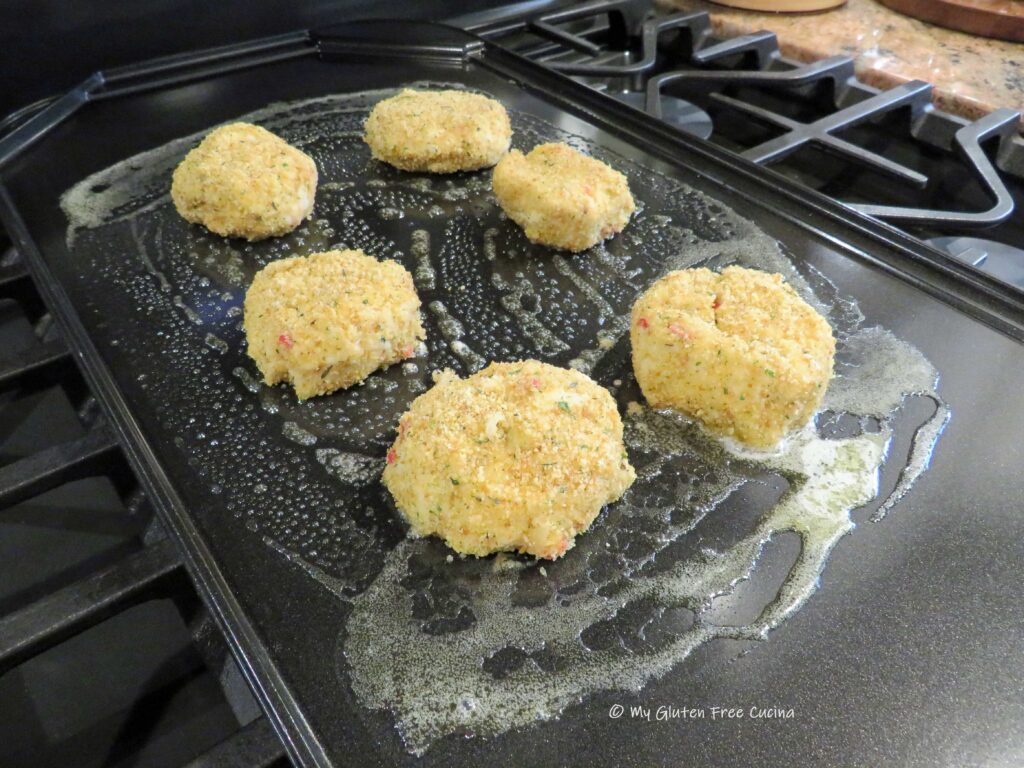
 Using a ¼ cup measuring cup, scoop out the mixture to form 5-6 crab cakes. Handle them gently and they should hold together (they will be wet). Carefully roll each crab cake in the remaining breadcrumbs to coat. Arrange them on a baking sheet lined with parchment and refrigerate for 1 hour. This will help retain their shape and hold together while cooking.
 Heat a non-stick griddle or large skillet over medium low with 1 tbsp. butter and 1 tbsp. olive oil.
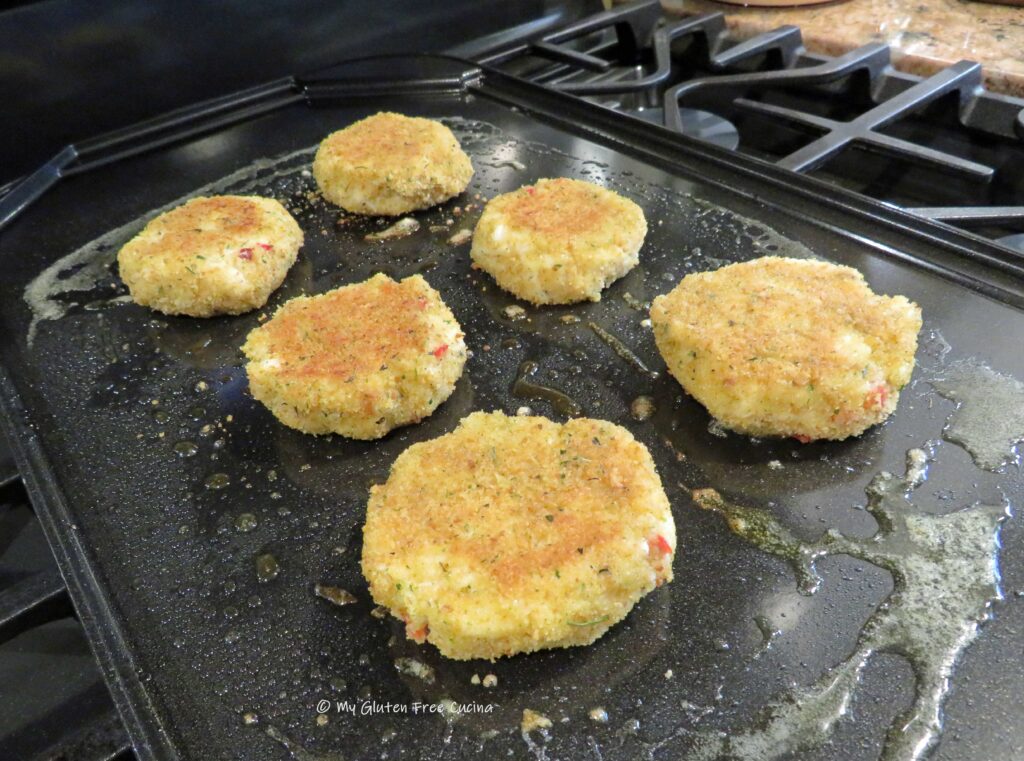
 Cook the crab cakes for 5 minutes per side. To get that golden crust, don’t move the crab cakes around until it’s time to flip them over. Transfer to a baking sheet and put them in a 350º oven for a few more minutes to finish, then lower the heat and keep warm until serving.
 Friends, they were so delicious! The recipe is easy enough, wouldn’t you say? A lovely appetizer to begin a meal or serve as a main course. Go on and give it a try, surprise your special someone or treat yourself.
 Notes ♪♫ Several of my readers have mentioned that Lea and Perrins Worcestershire Sauce is not gluten free in Canada, as it contains malt vinegar. (In the US, it is made with distilled white vinegar and is gluten free). Always check labels!
Originally published 5/26/19, Updated and rephotographed 6/16/26


 The recipe is easy and straightforward; made with common ingredients. Fresh tomatoes and basil are a must here (don’t use canned!). If you grow your own or can get them from a farmer’s market that would be great. But for everyone else, plum tomatoes from the grocery store are the best choice.
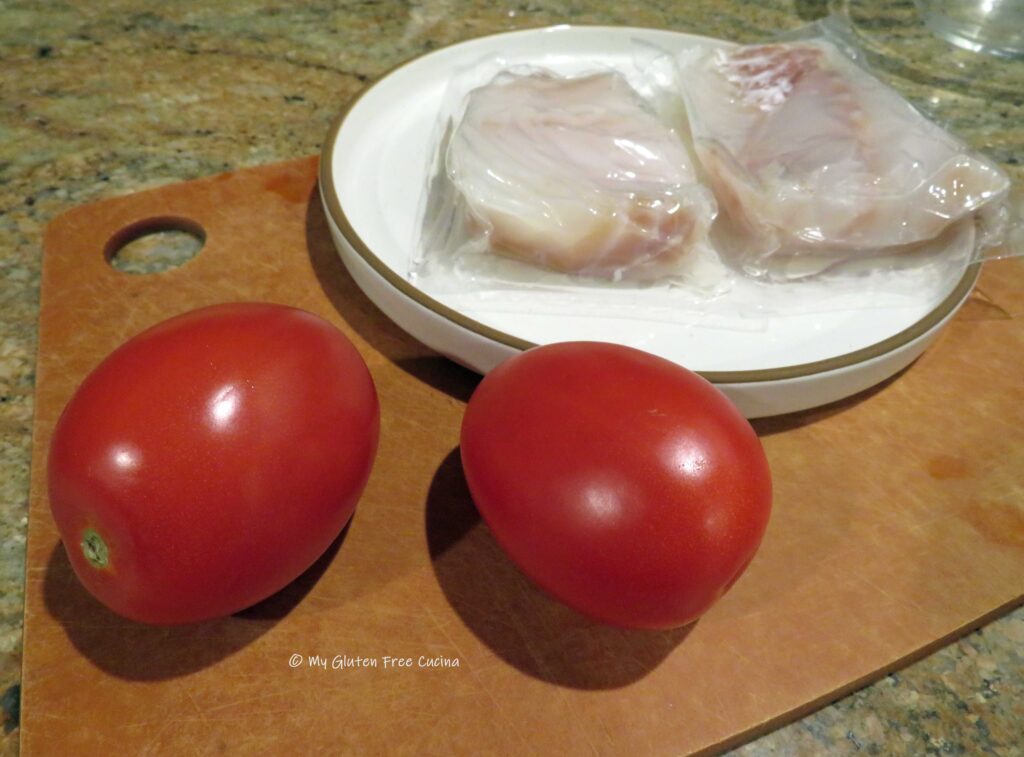 Preparation:
 Place the diced tomatoes in a small bowl, and toss with 1 tbsp. olive oil, the balsamic vinegar, sea salt and ground pepper. Cut one large basil leaf into thin strips (chiffonade) and stir into the tomatoes. Let the mixture stand for about 30 minutes at room temperature.
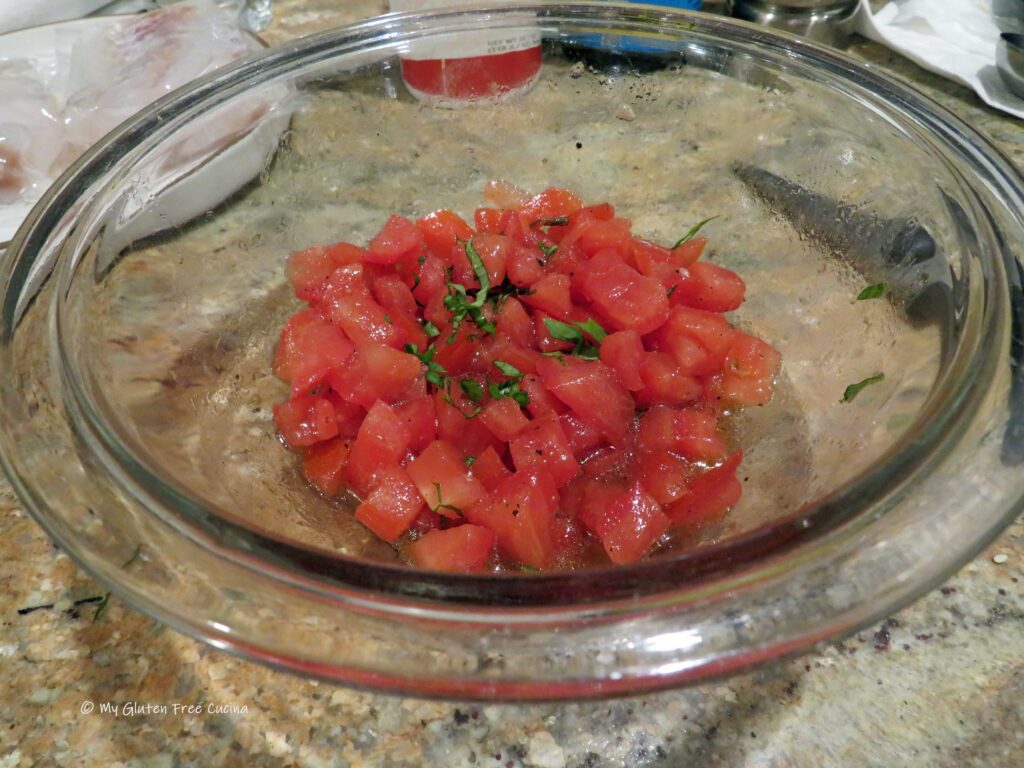 Preheat the oven to 350º. Coat a baking dish with cooking spray and arrange the cod with space in between. Drizzle with the remaining olive oil and a pinch of sea salt.
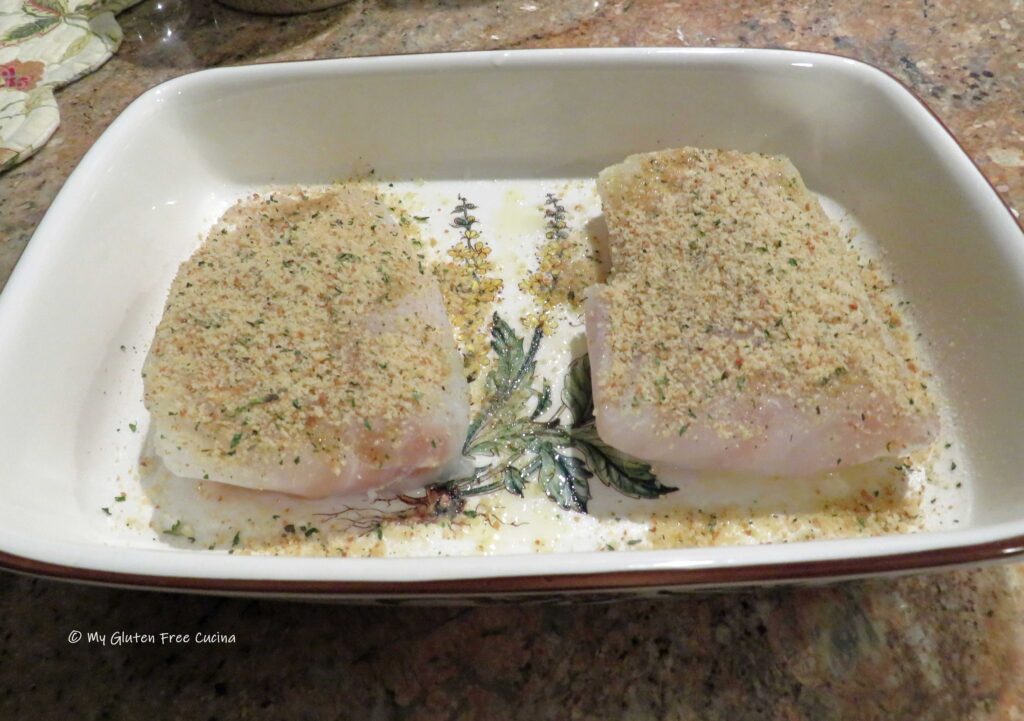 Top each piece of fish with 1 tbsp. of breadcrumbs, then divide the diced tomatoes evenly over each piece.
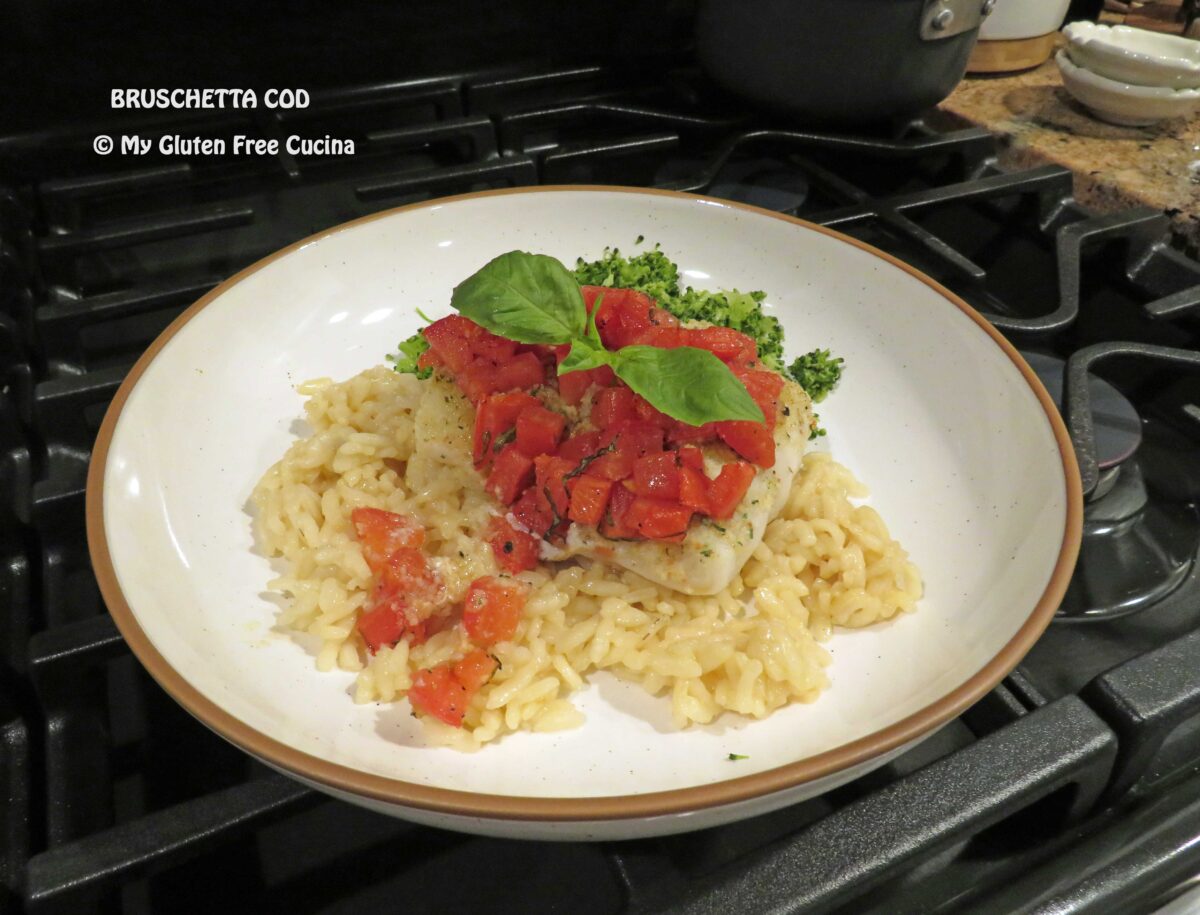
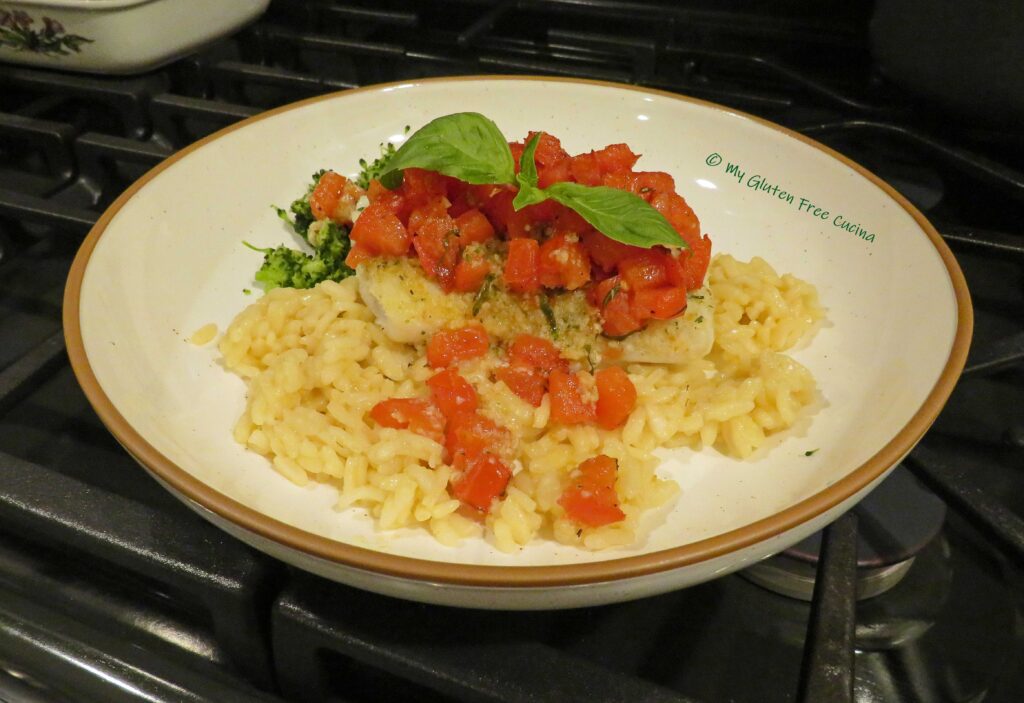
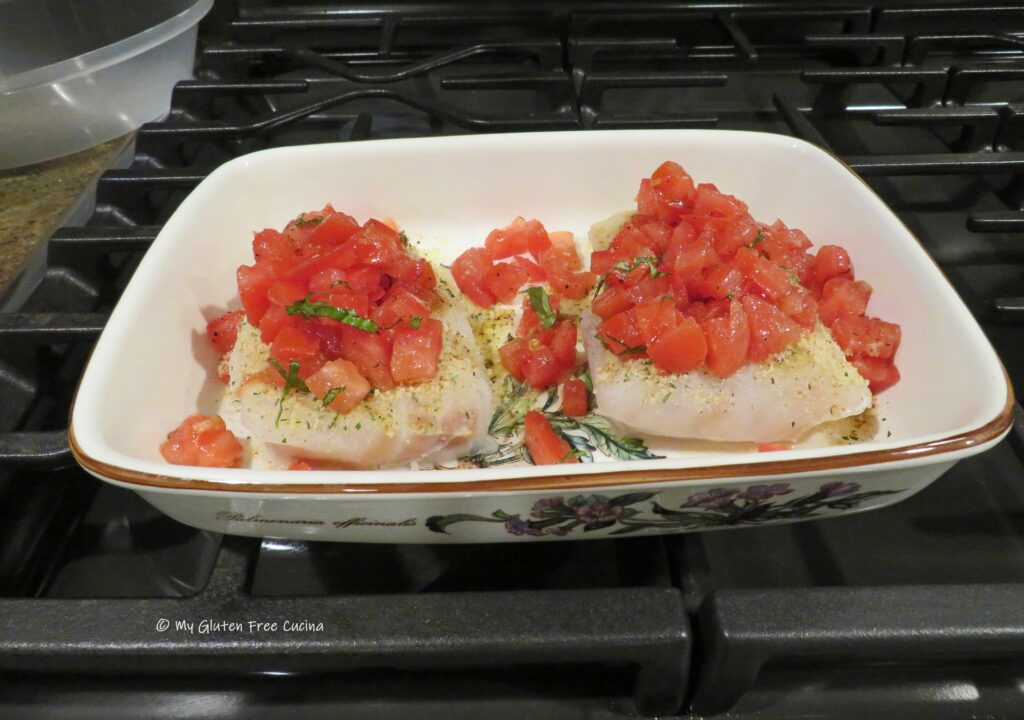 Bake for 25 minutes. That’s it! Plate with a garnish of fresh basil leaves.
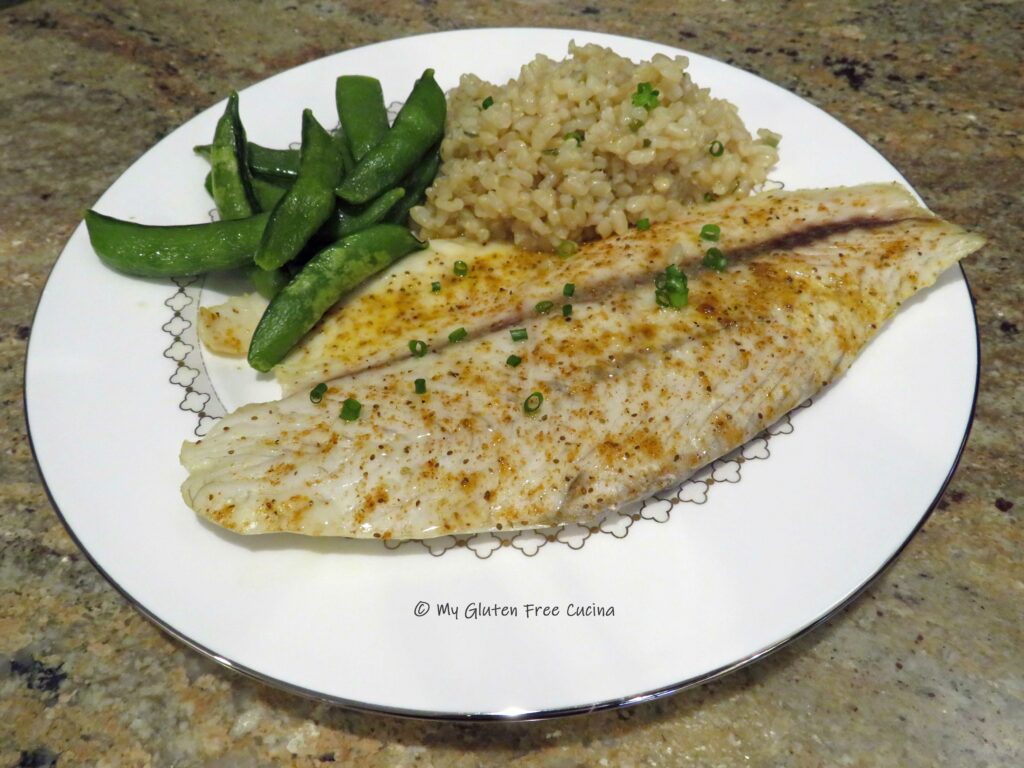
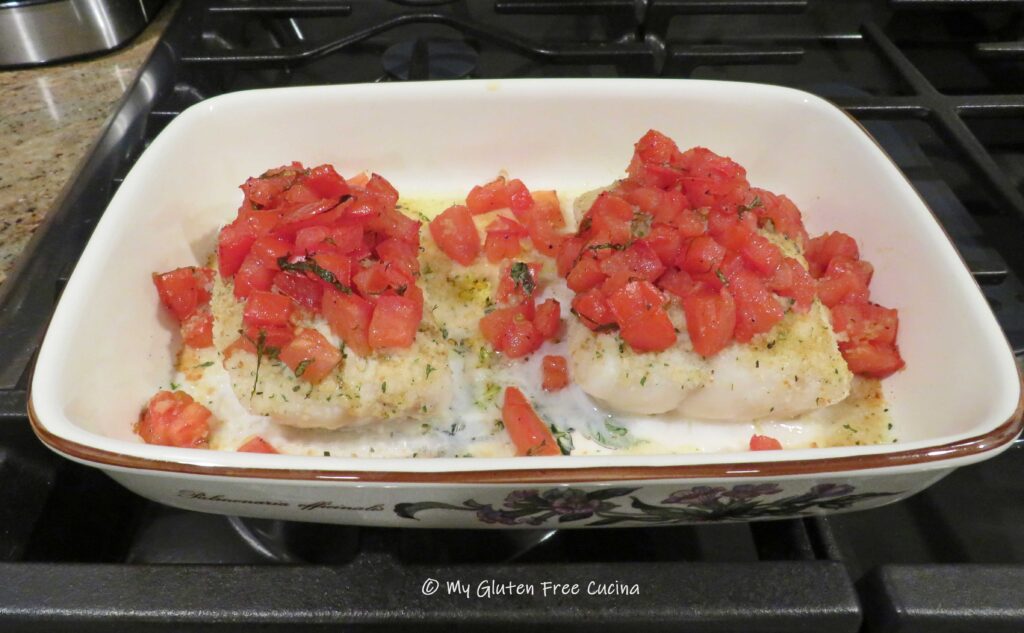 I served my Bruschetta Cod over risotto, and it was SO delicious. If you don’t know how to make risotto, jump over to
 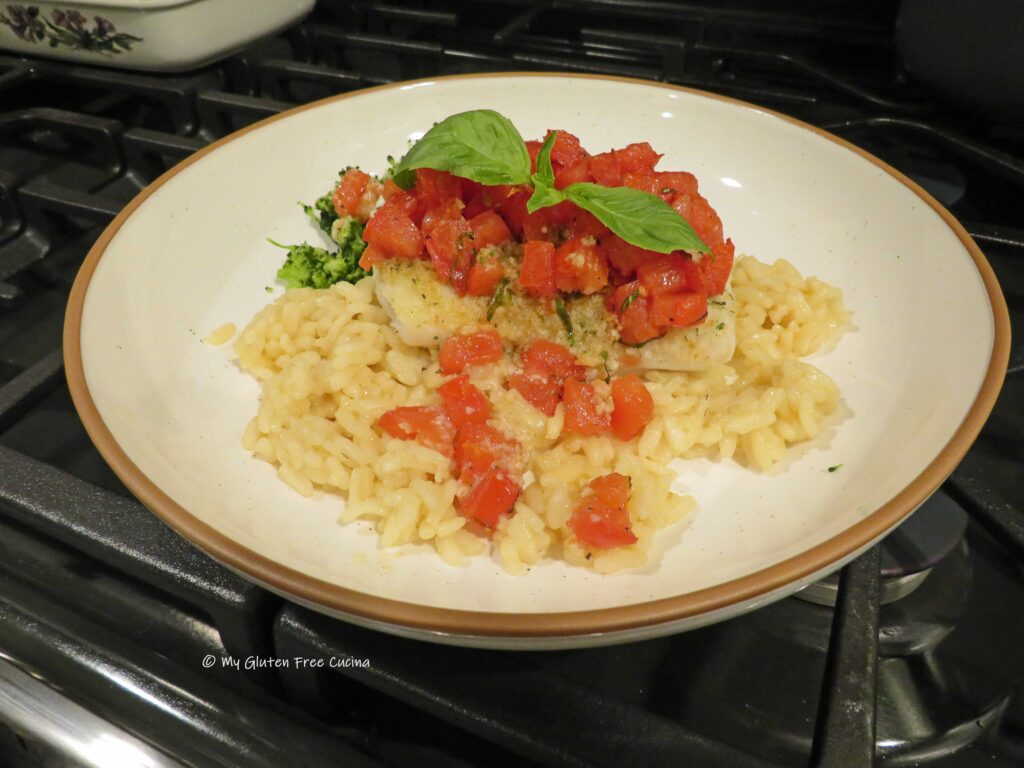 Notes ♪♫
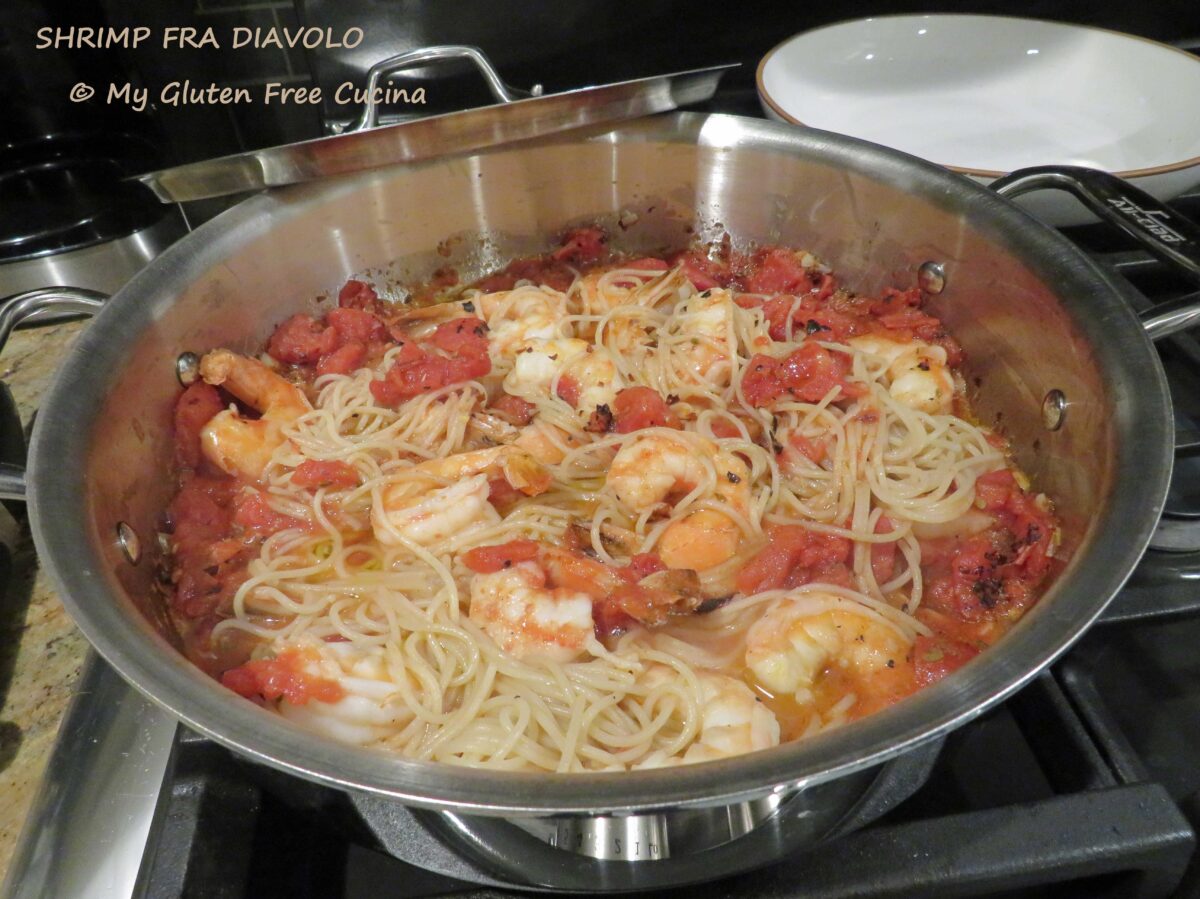
 Ingredients:
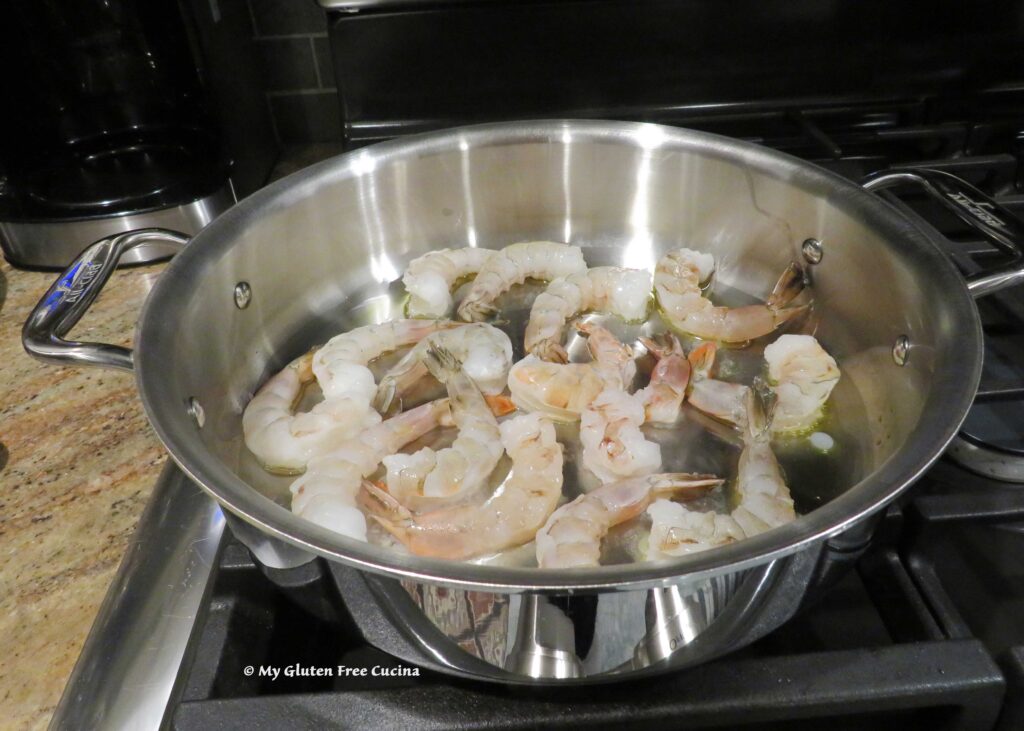
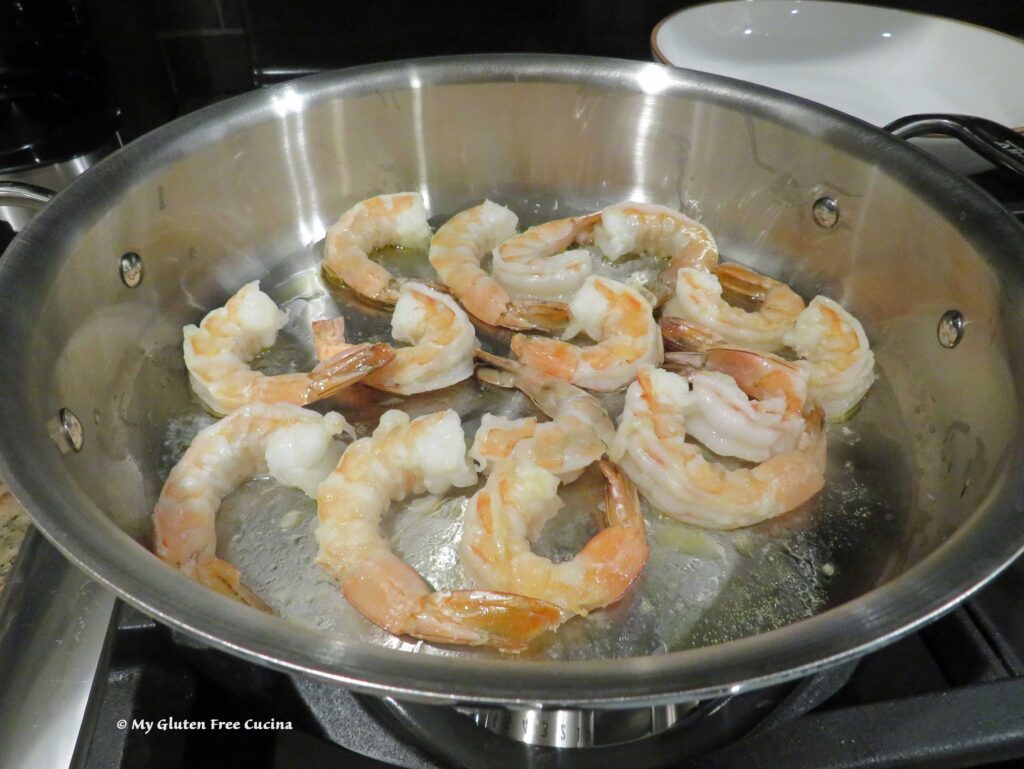 Remove the shrimp to a bowl and add another tbsp. olive oil to the skillet. Add the garlic and red pepper flakes, and cook for 30 seconds, stirring several times.
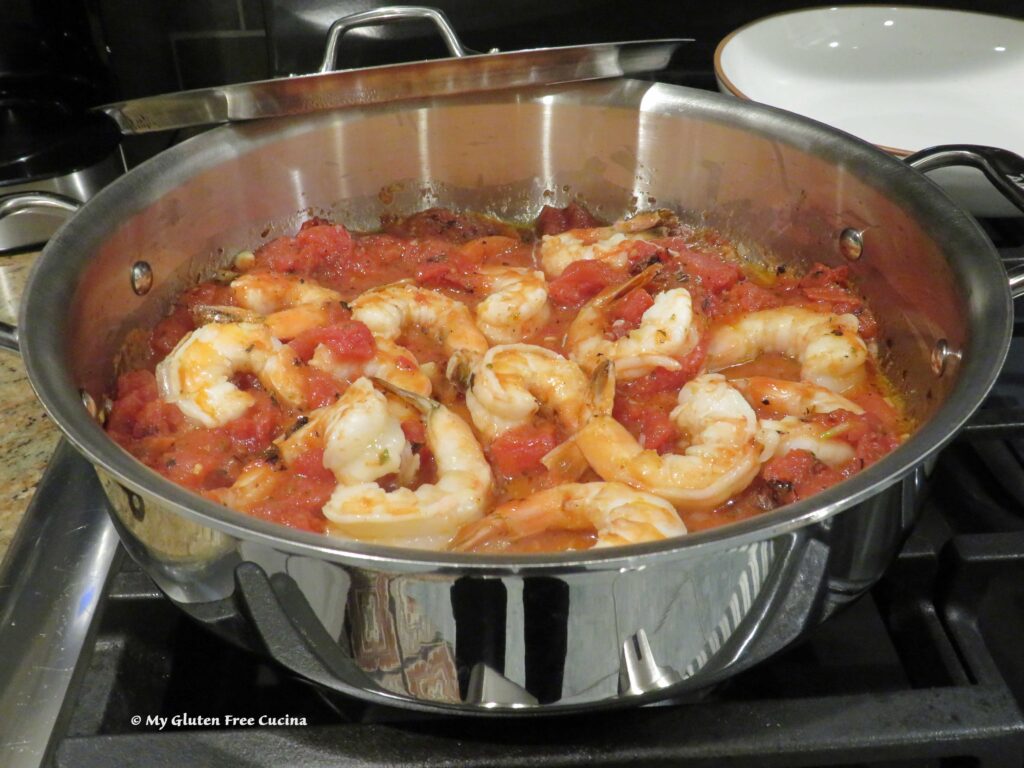
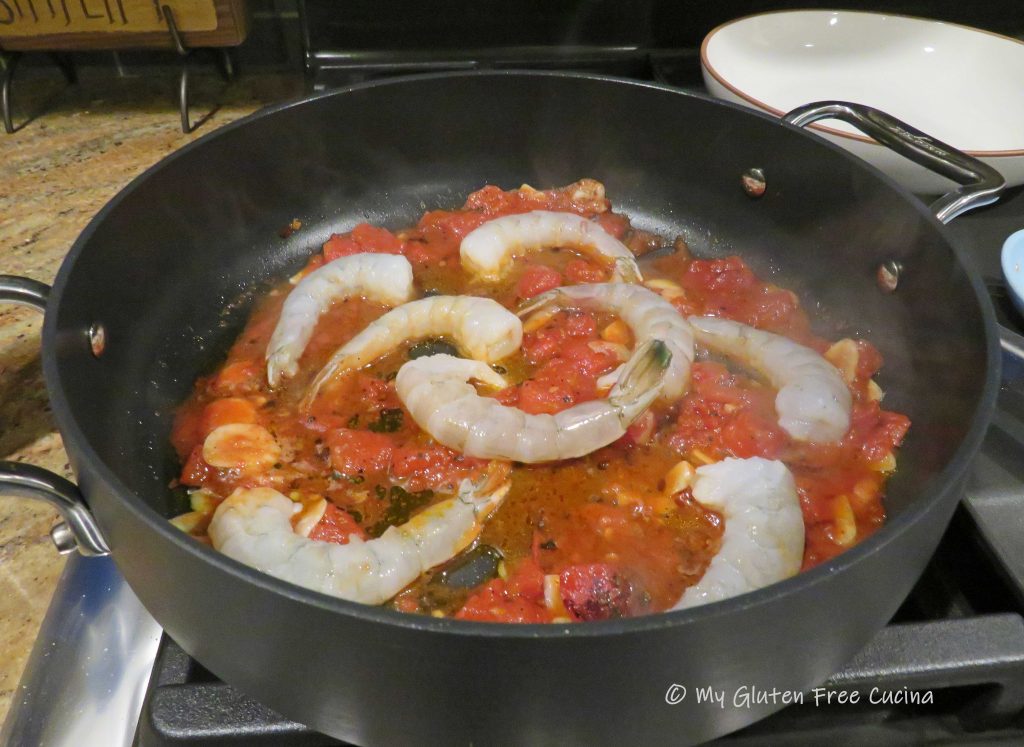
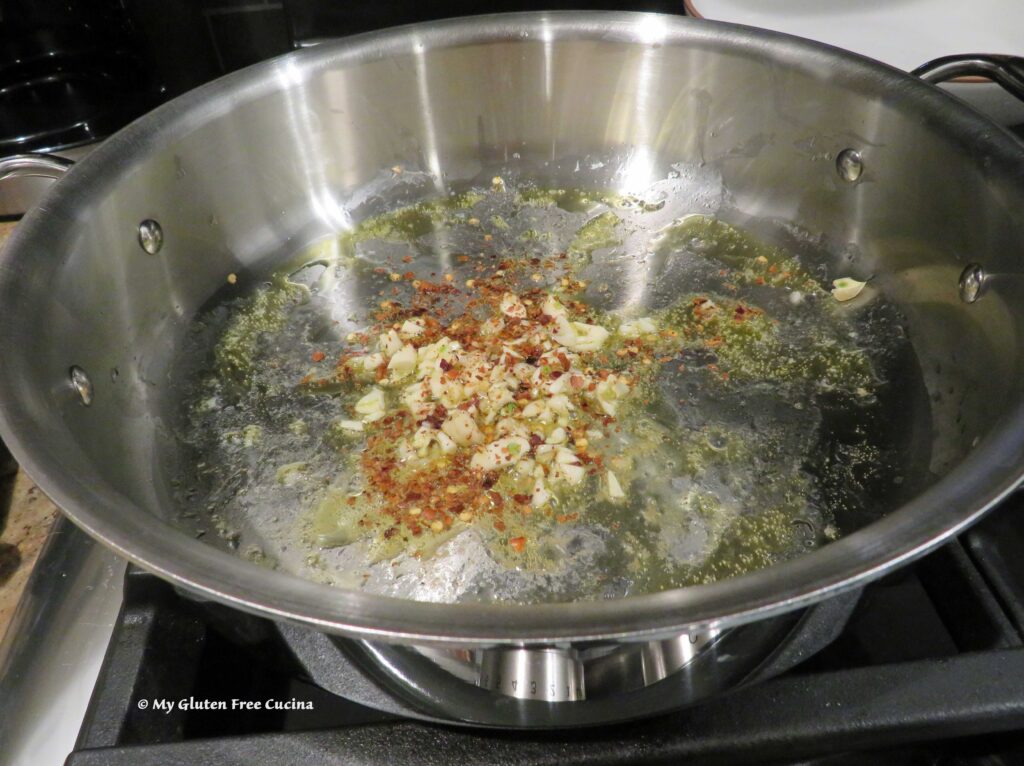 Add the fire roasted tomatoes with juice, 1/2 tsp. oregano and salt to taste.
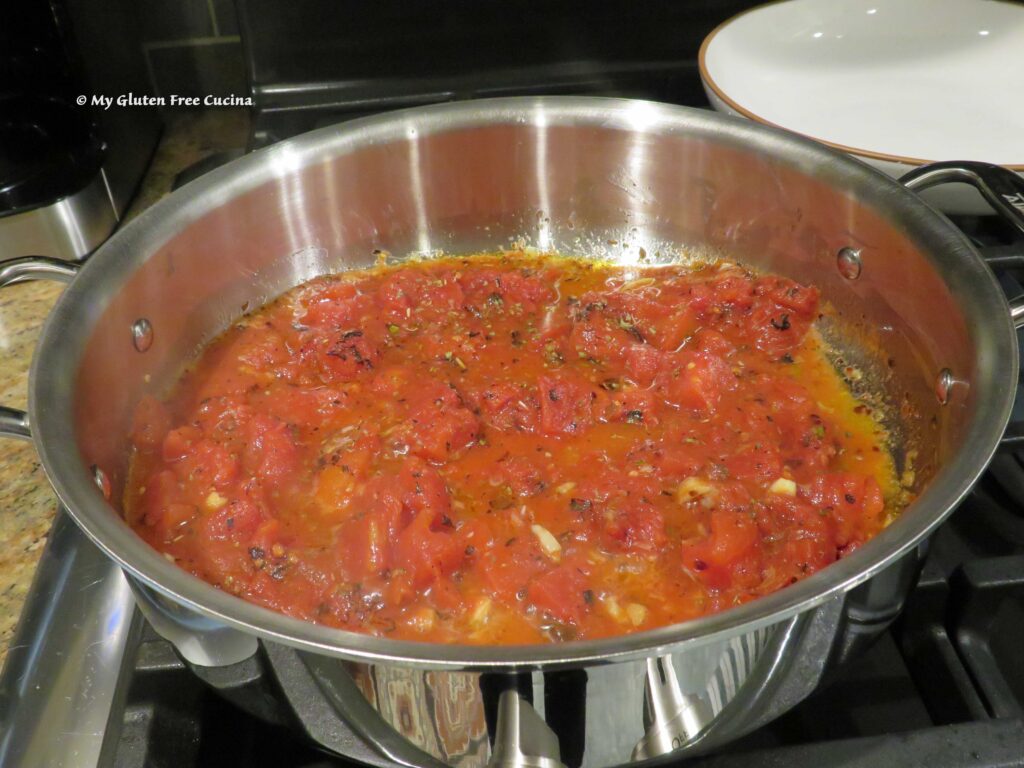 Cook the pasta to 2 minutes less than package directions. With 4 minutes to go on the pasta, add the shrimp to the sauce.
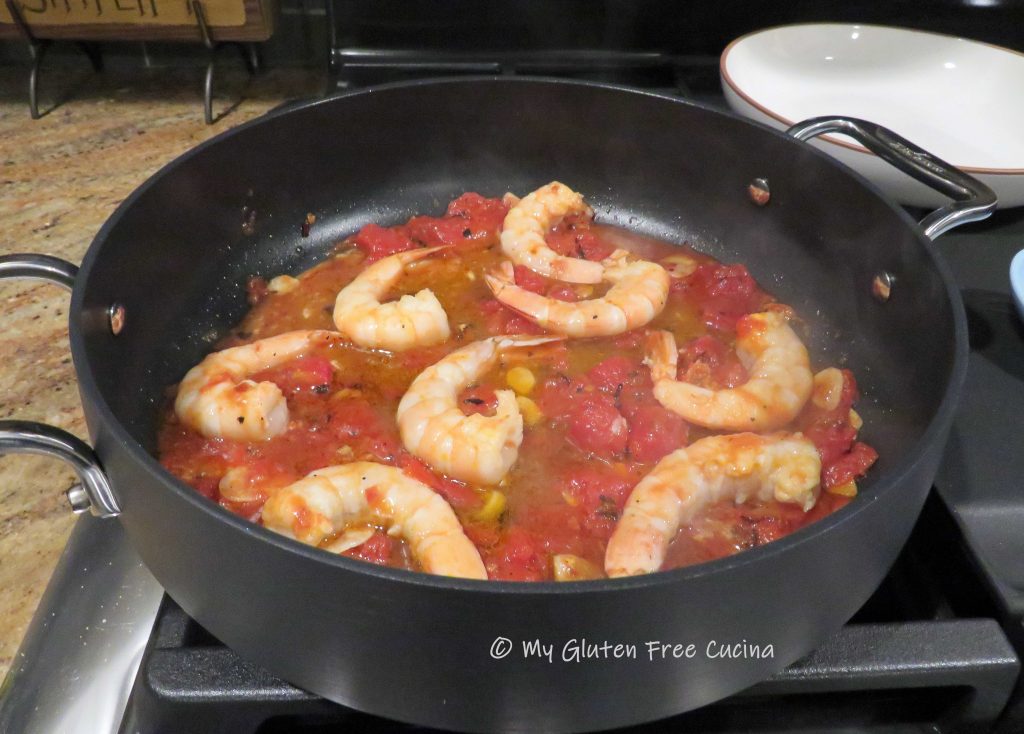
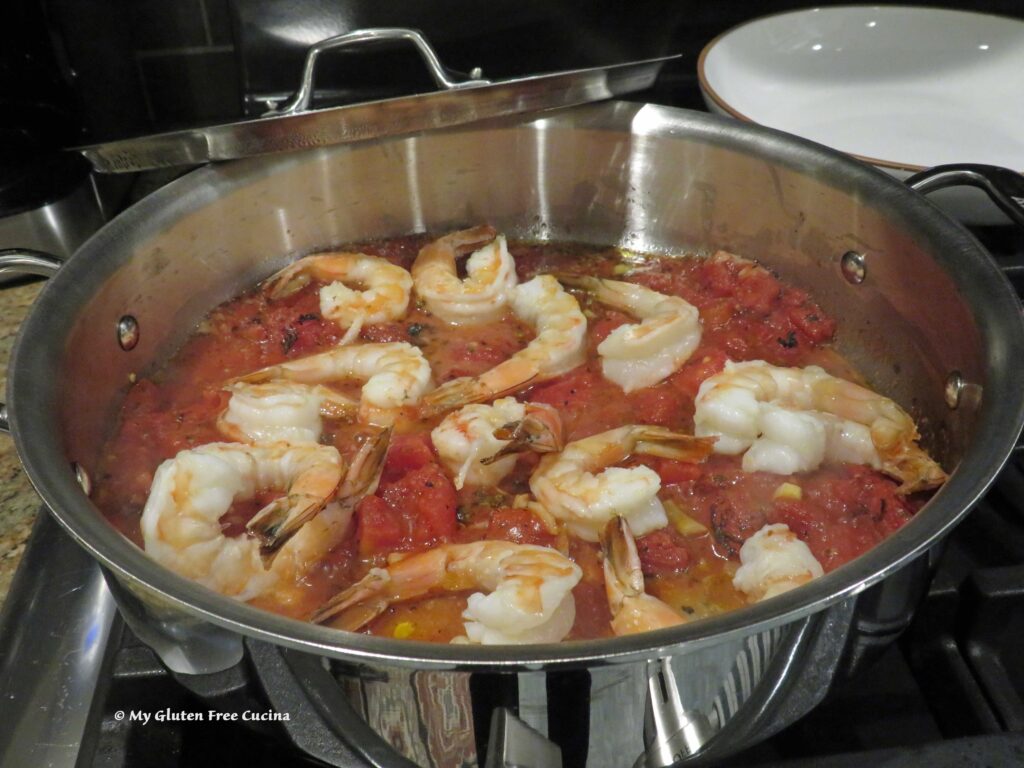 Drain the pasta, add it right into the sauce and toss with 1 more tbsp. olive oil and more red pepper flakes if you dare! ♨️
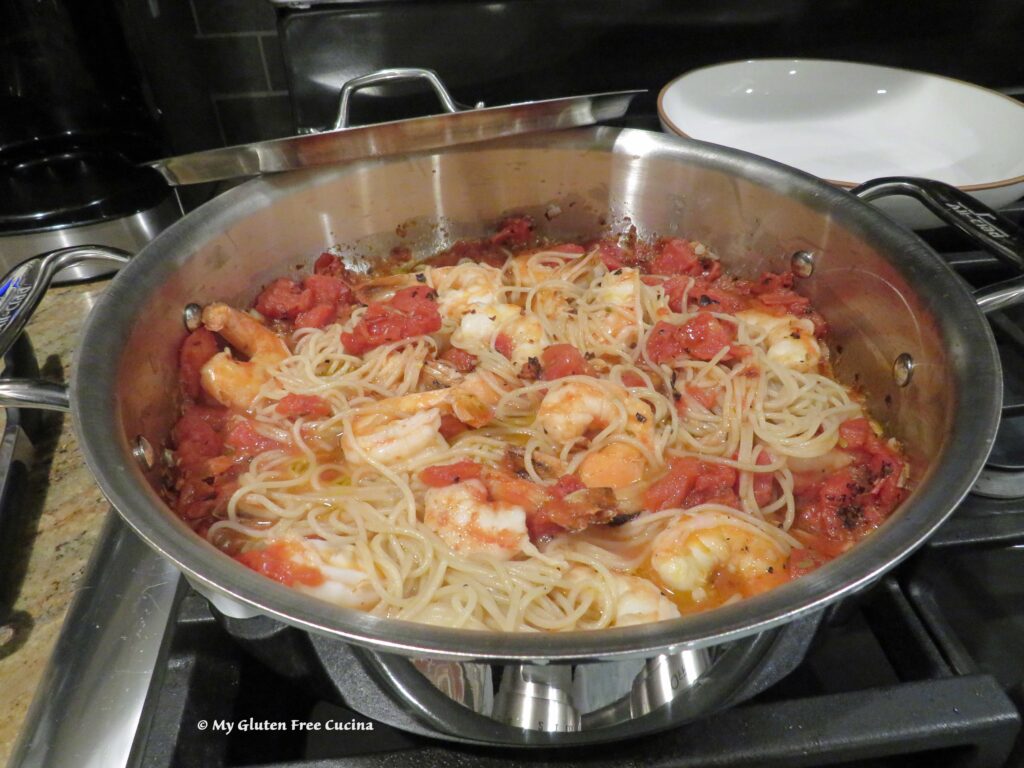 Transfer to serving bowls and garnish with fresh Italian parsley.
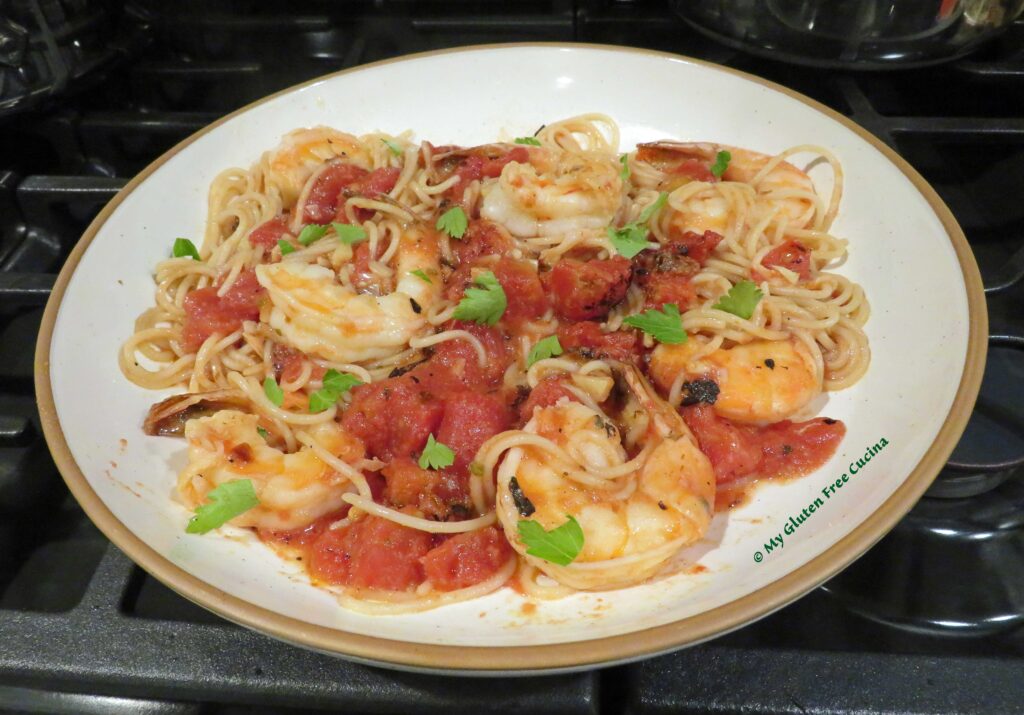


 Notes ♪♫
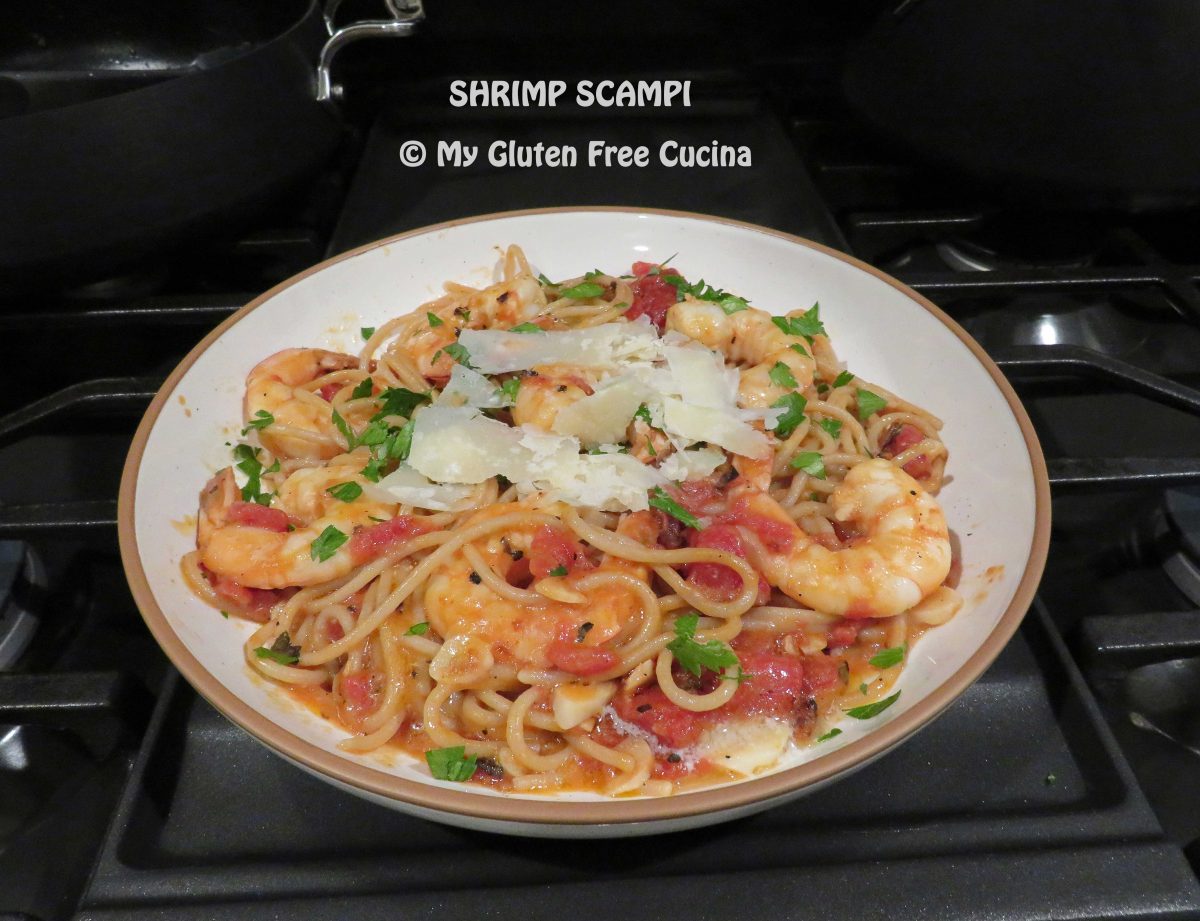


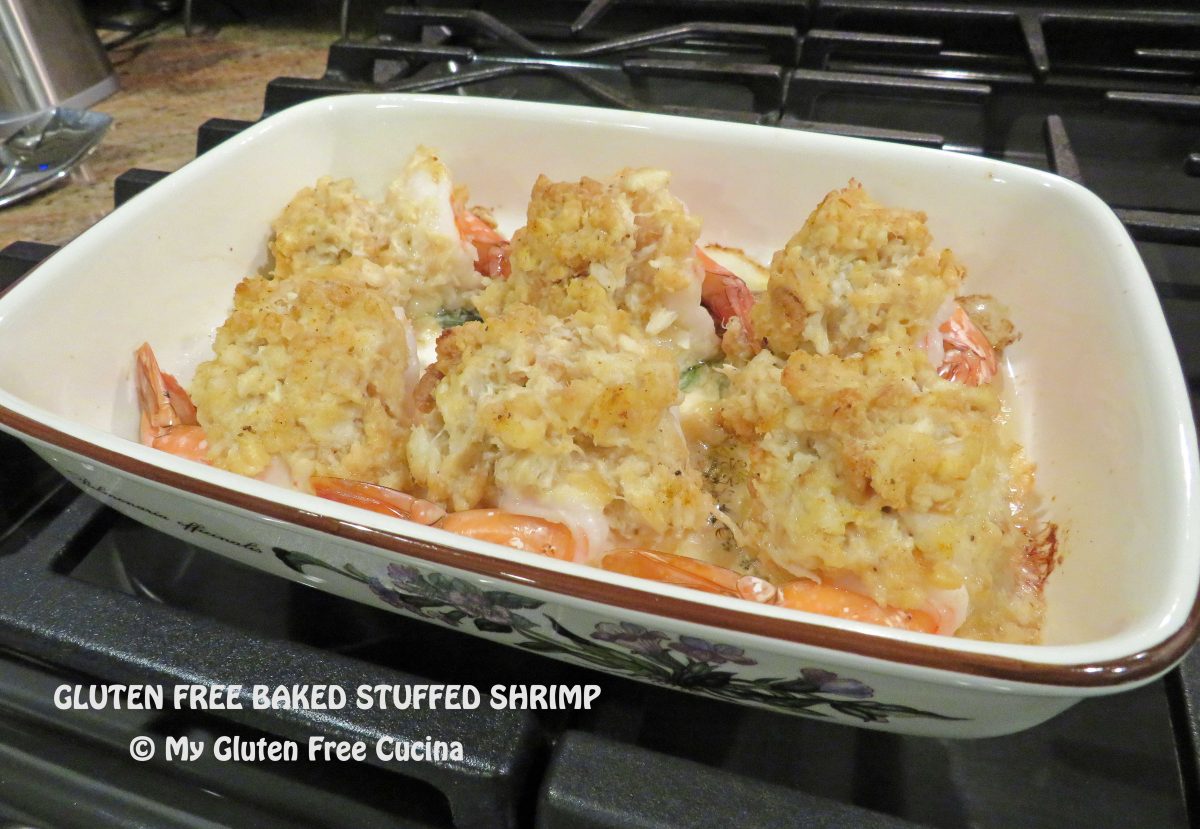
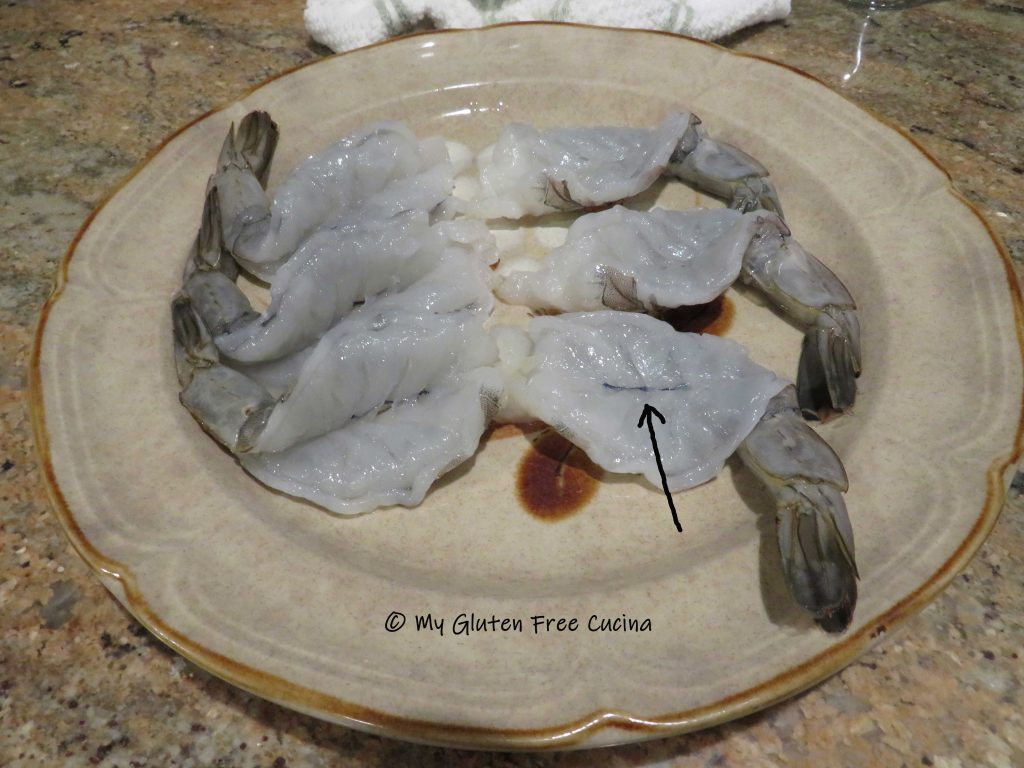
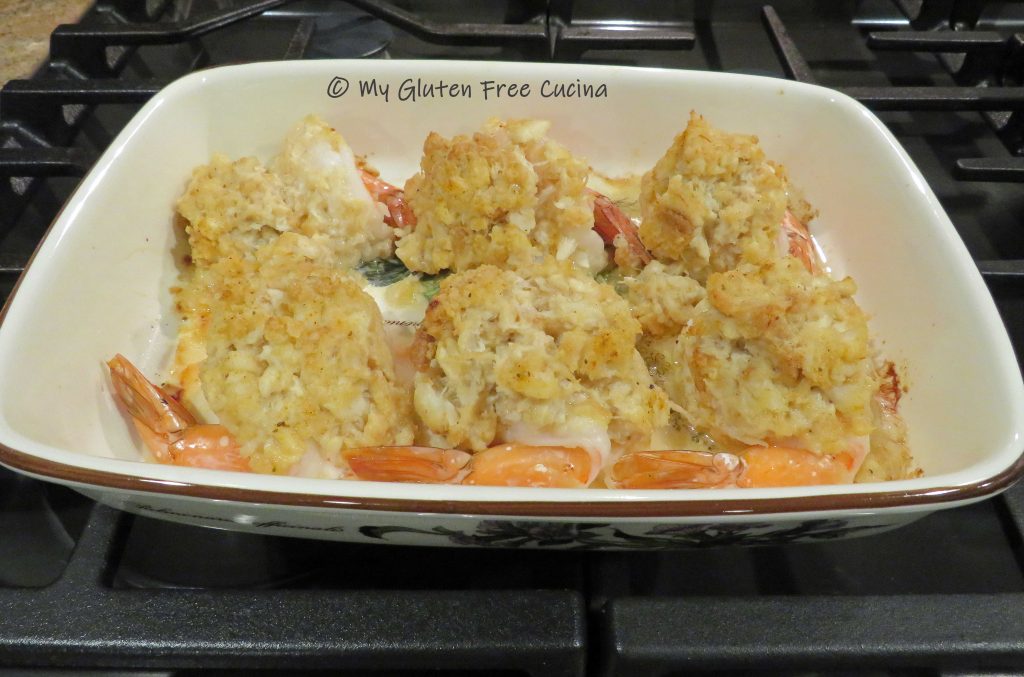
 Preparation:
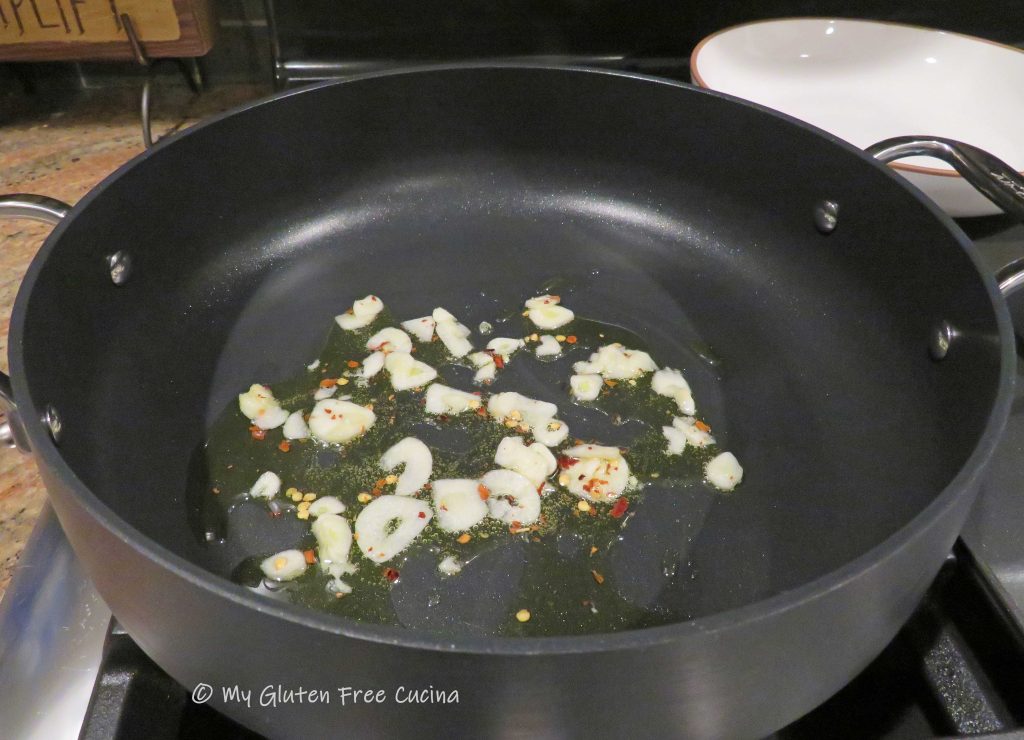


 Transfer to a