Turkey Stock

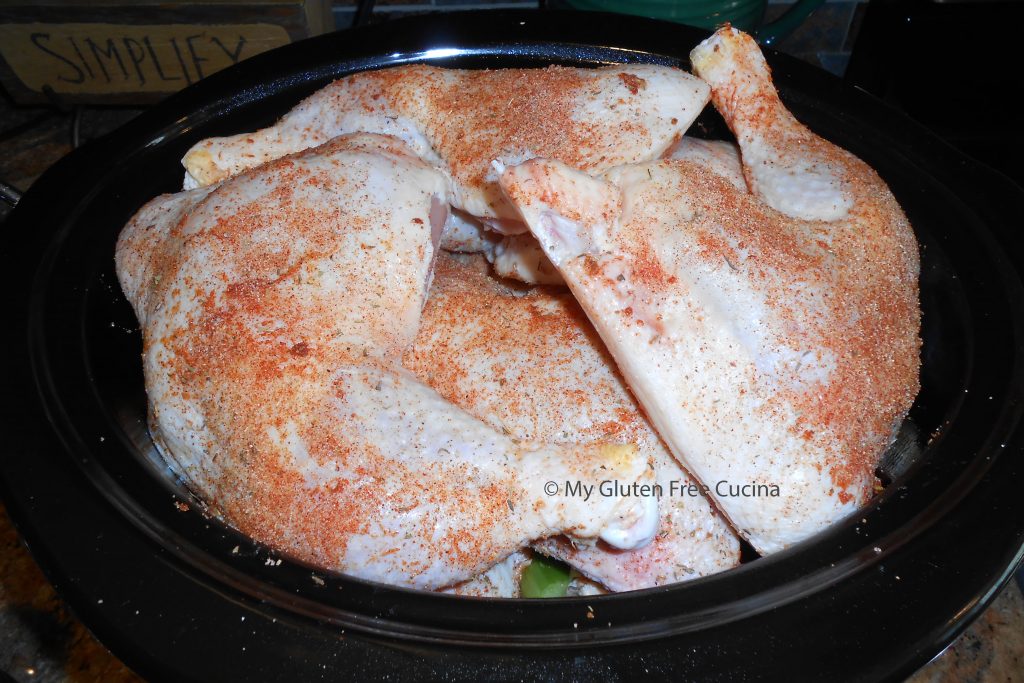
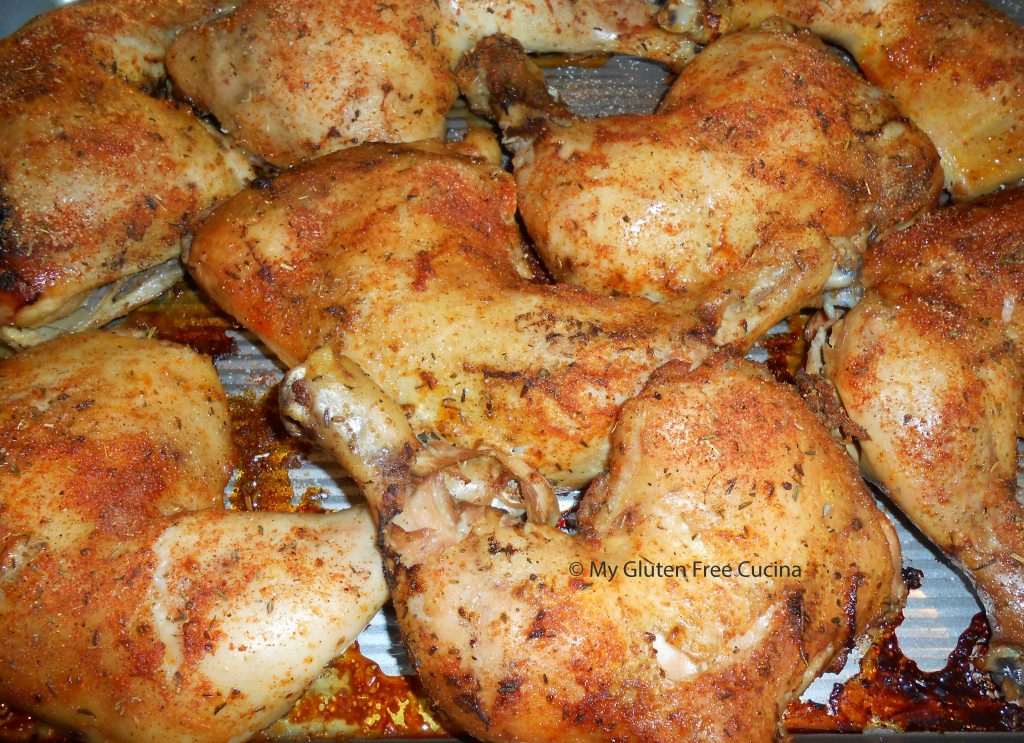
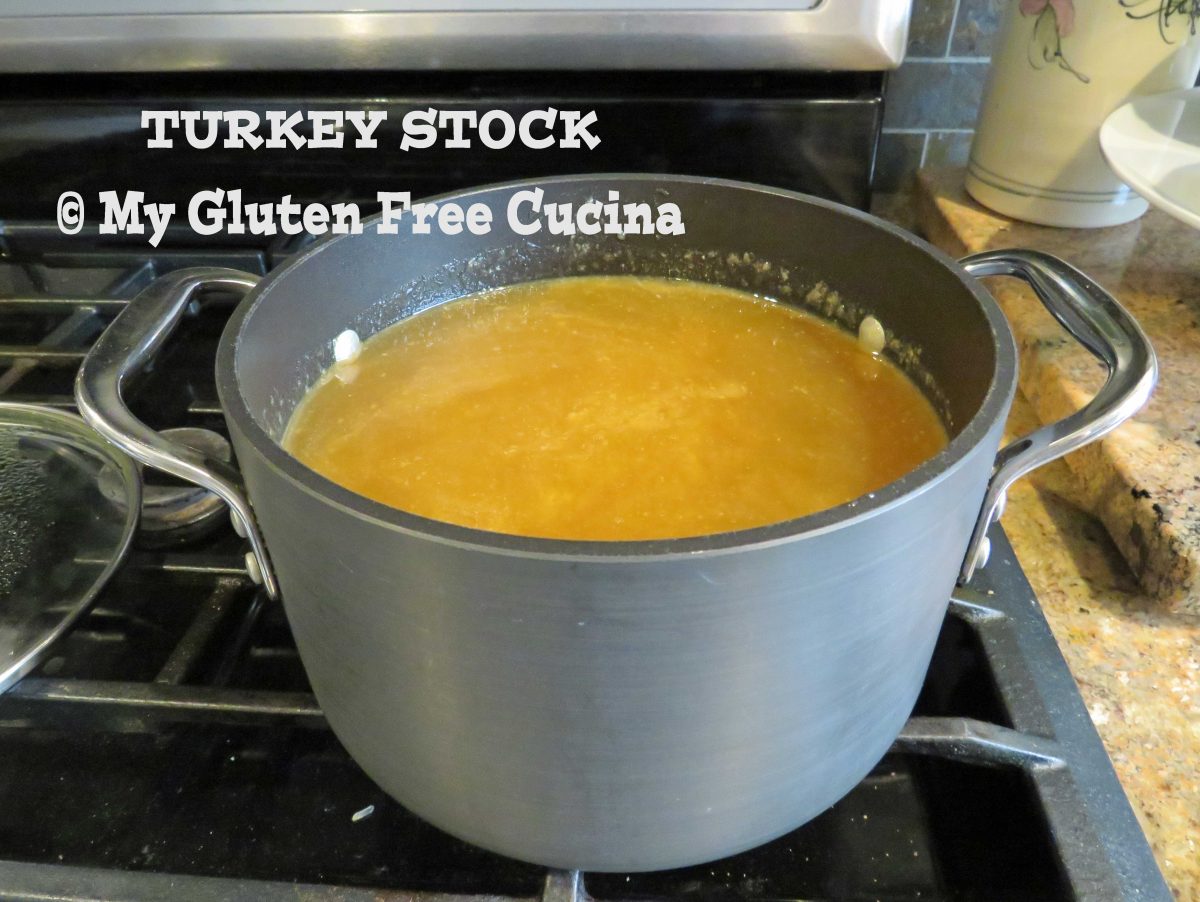
Look at this turkey stock!  It’s the pot of liquid gold at the end of our Thanksgiving rainbow!  An annual ritual, I almost can’t wait for this grand finale, when our Thanksgiving turkey gives up the last of it’s goodness to make a rich, golden stock.

Did you know that with a minimal amount of work, a turkey carcass can be transformed into stock to use as a base for your winter soups and stews?  Making your own stock means you control what goes into it, no artificial ingredients, no salt, no gluten.

This post contains affiliate links.

INGREDIENTS:

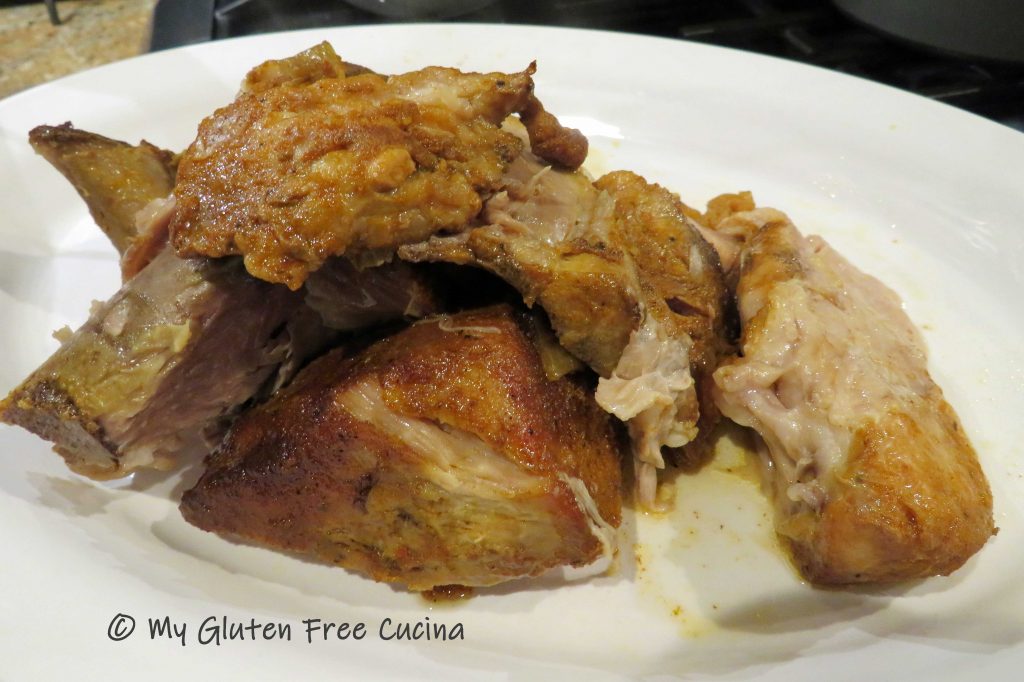
  • leftover turkey carcass (bones with a bit of skin and meat attached)
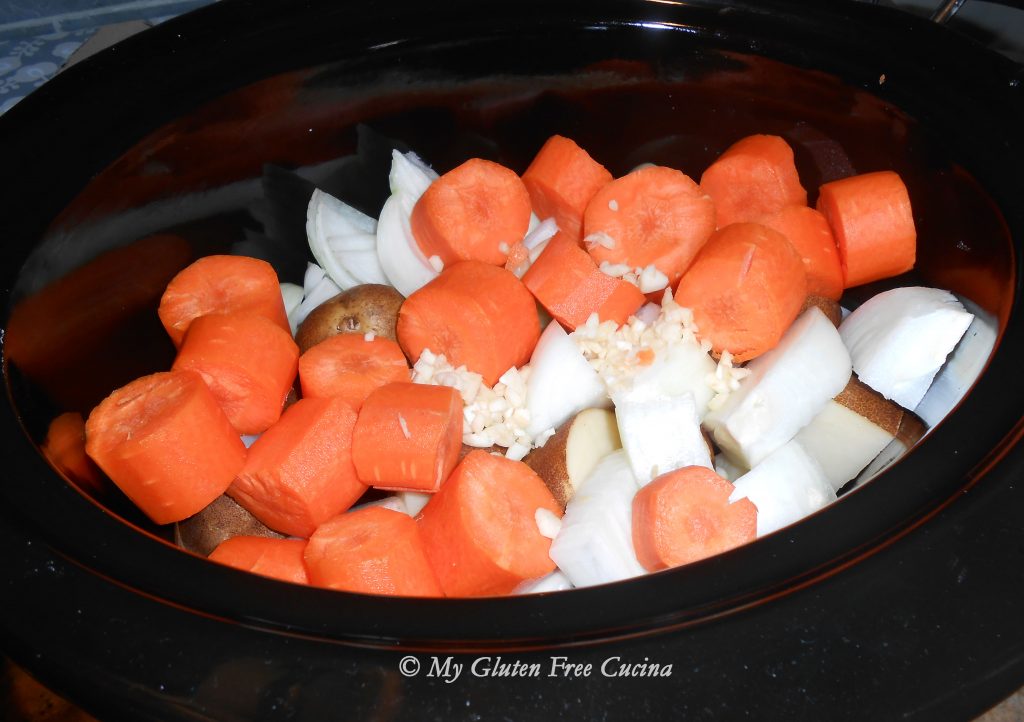
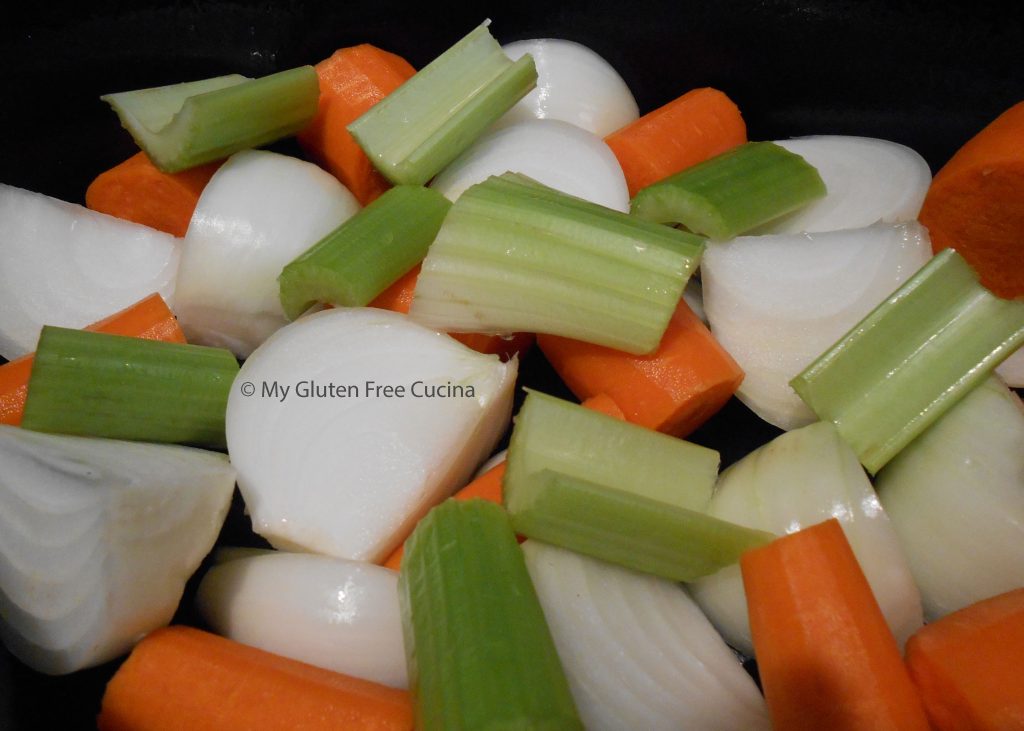
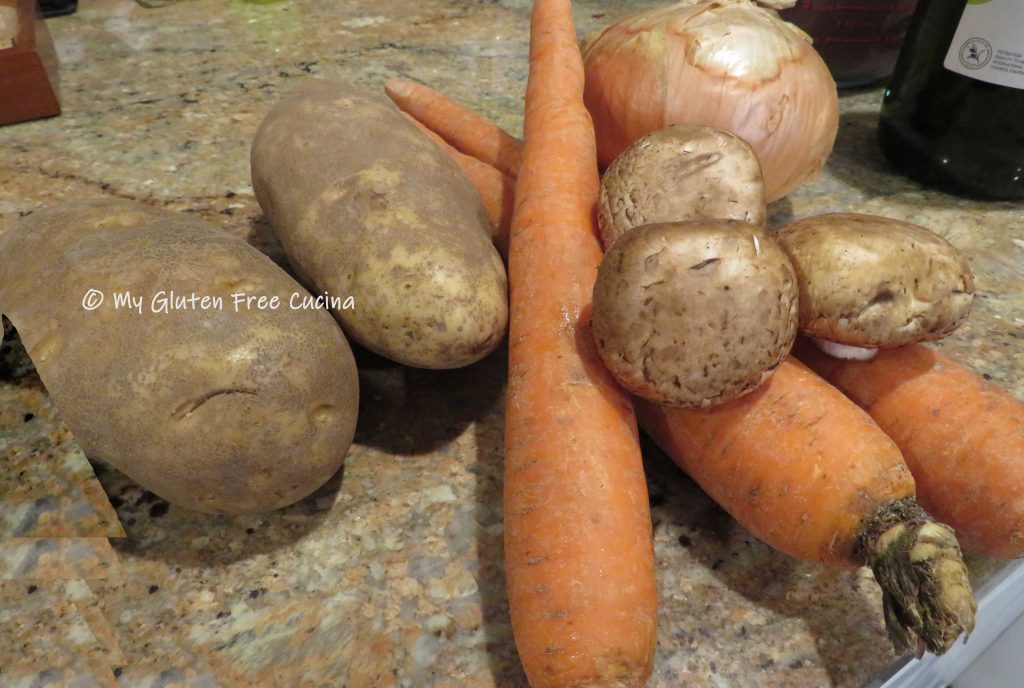
  • 2 onions, peeled and cut into large chunks
  • 4 celery stalks, cut into large chunks
  • 4 large carrots, peeled and cut into large chunks
  • 2 bay leaves
  • 1 tbsp. whole peppercorns

PREPARATION:

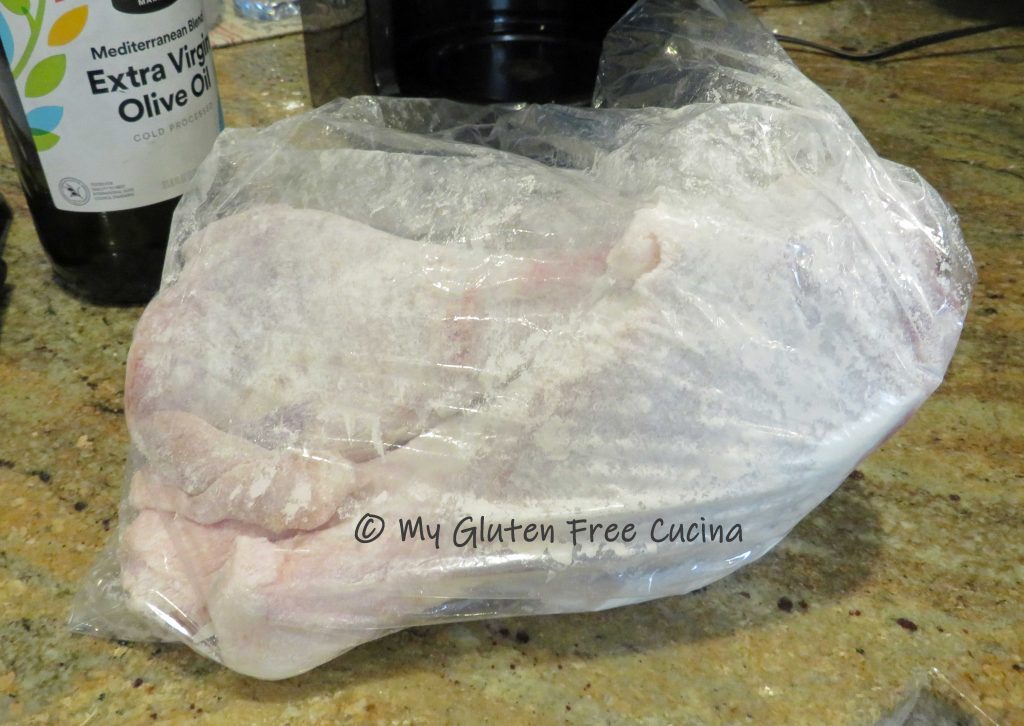
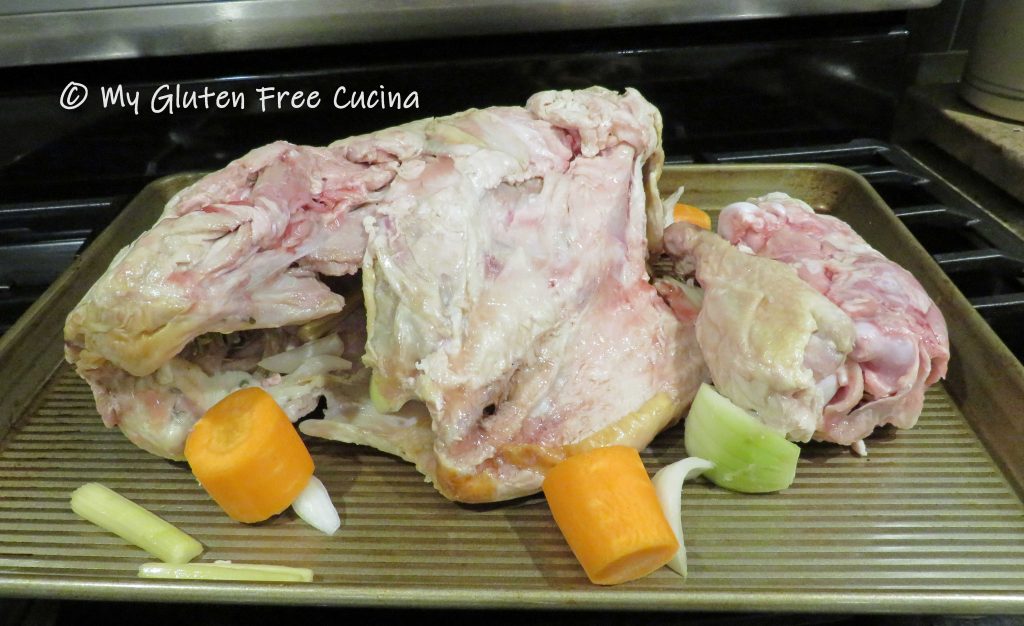
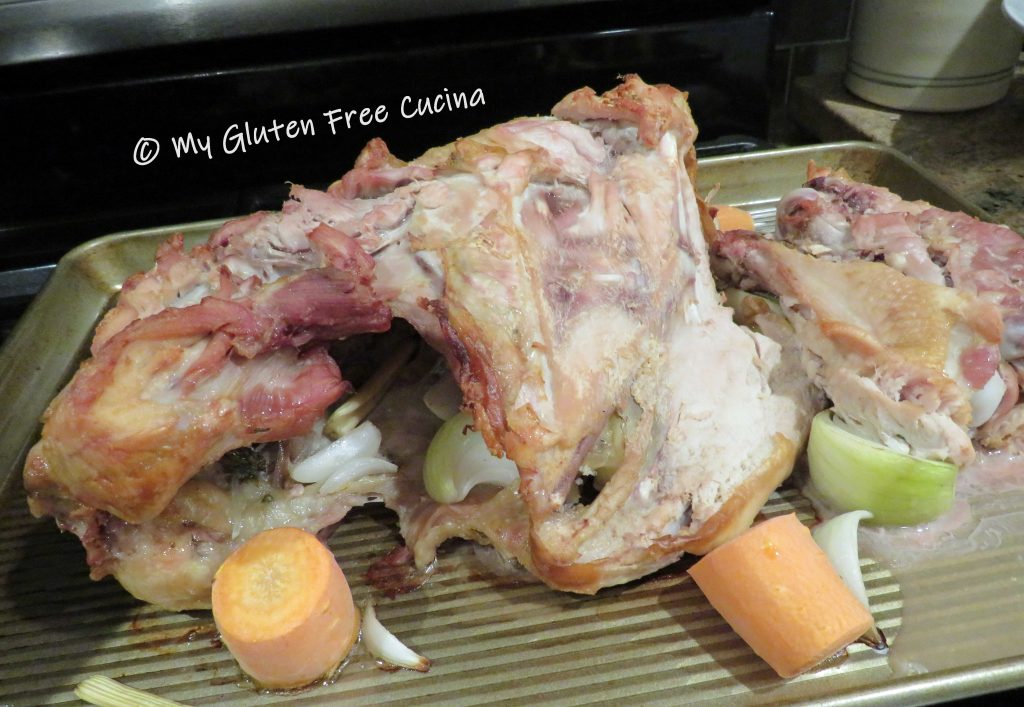
Place the turkey carcass, one onion, 2 celery stalks, and 2 carrots in a baking pan and roast for 45 minutes at 350º.  Roasting the bones creates an extra layer of flavor.  It will also be easier to break apart the roasted carcass to fit into your crock-pot.

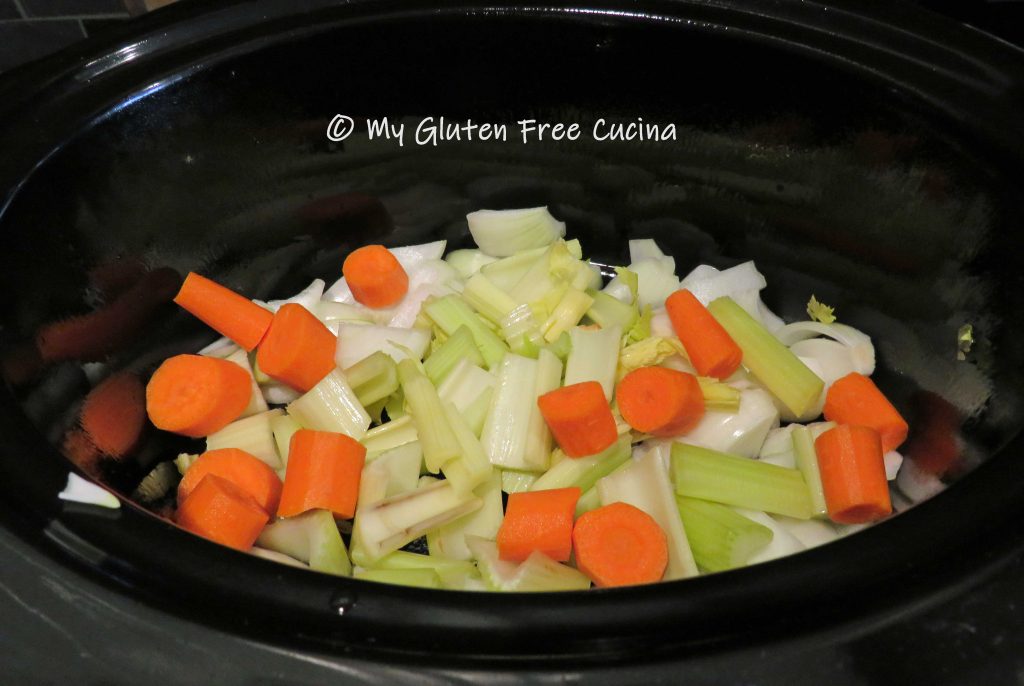
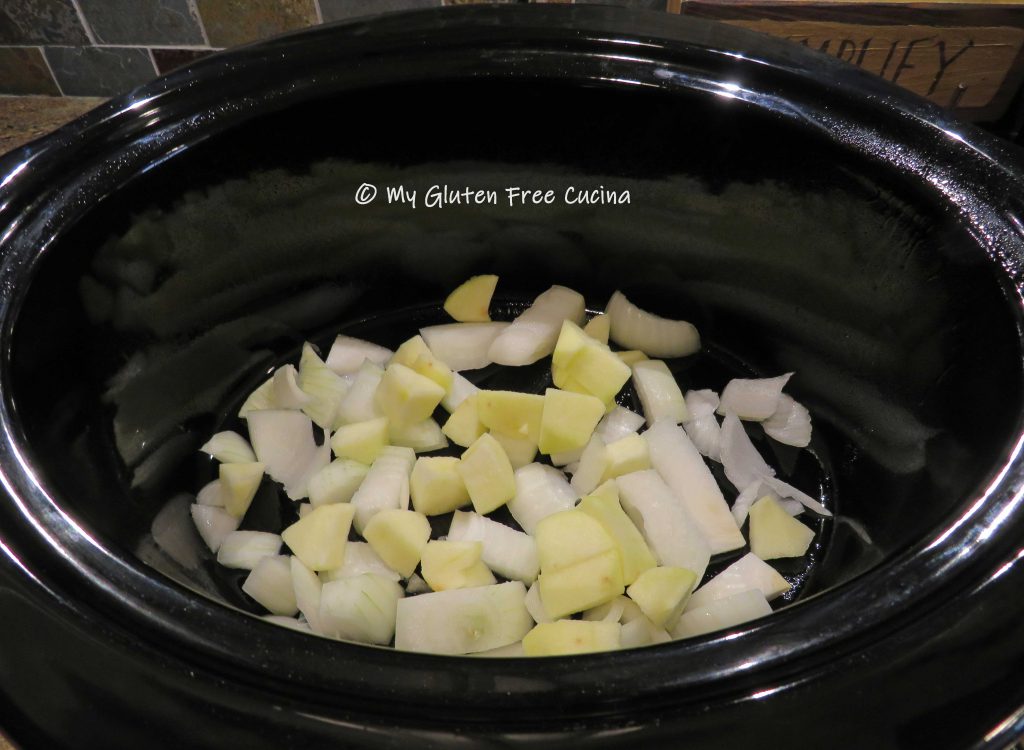
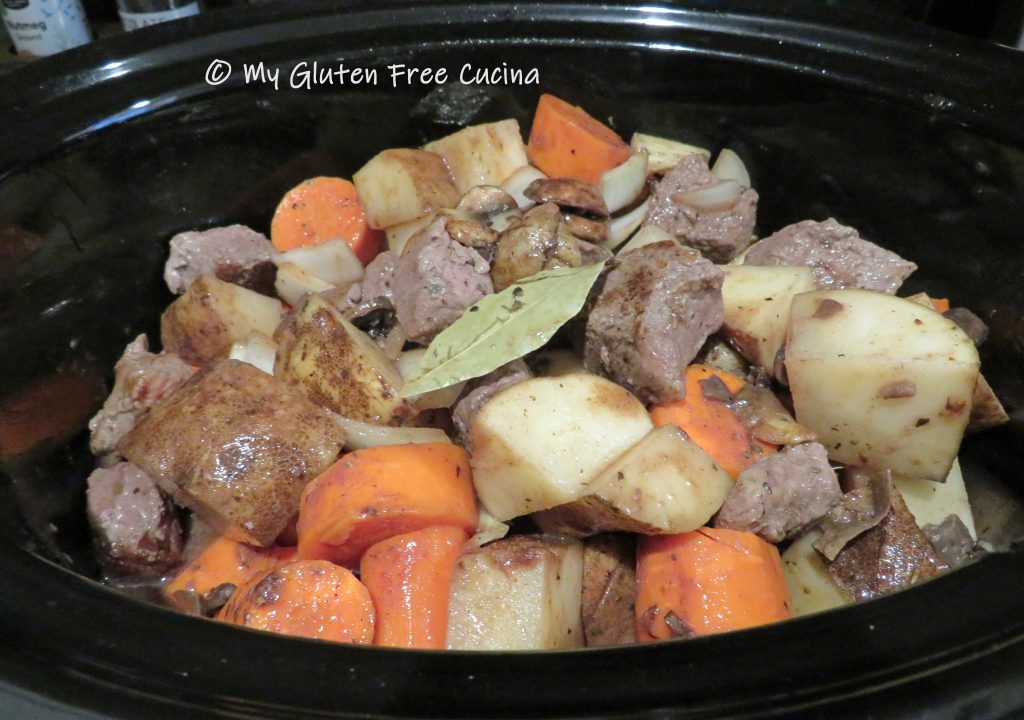
Next, set up your crock-pot and add the remaining onion, 2 carrots, 2 celery stalks, 2 bay leaves and 1 tsp. whole peppercorns.  

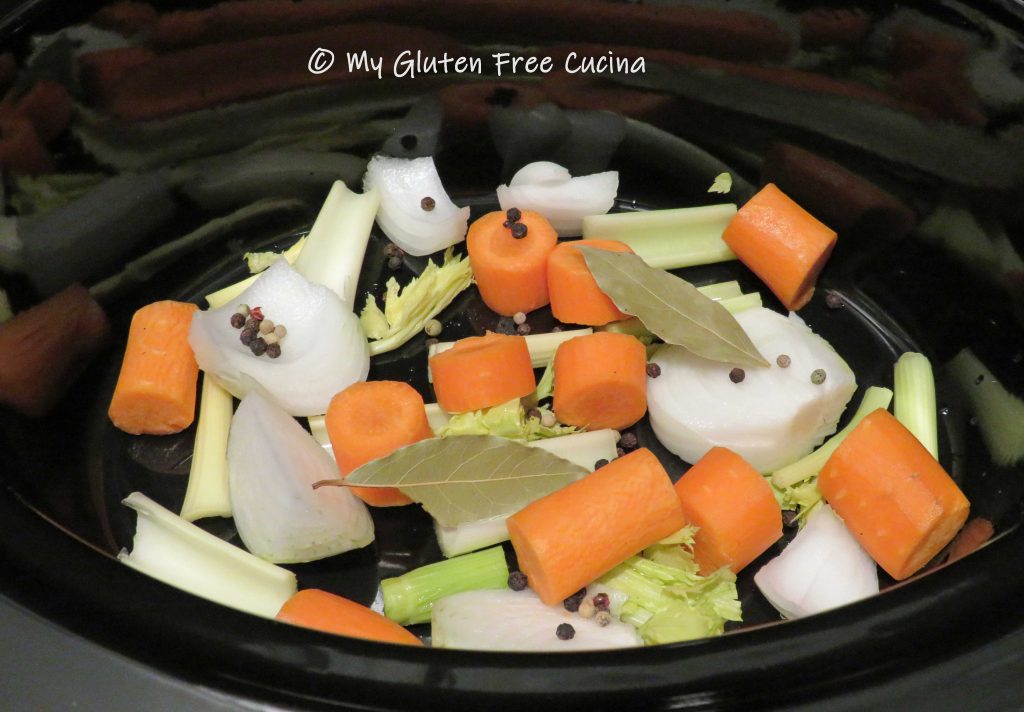
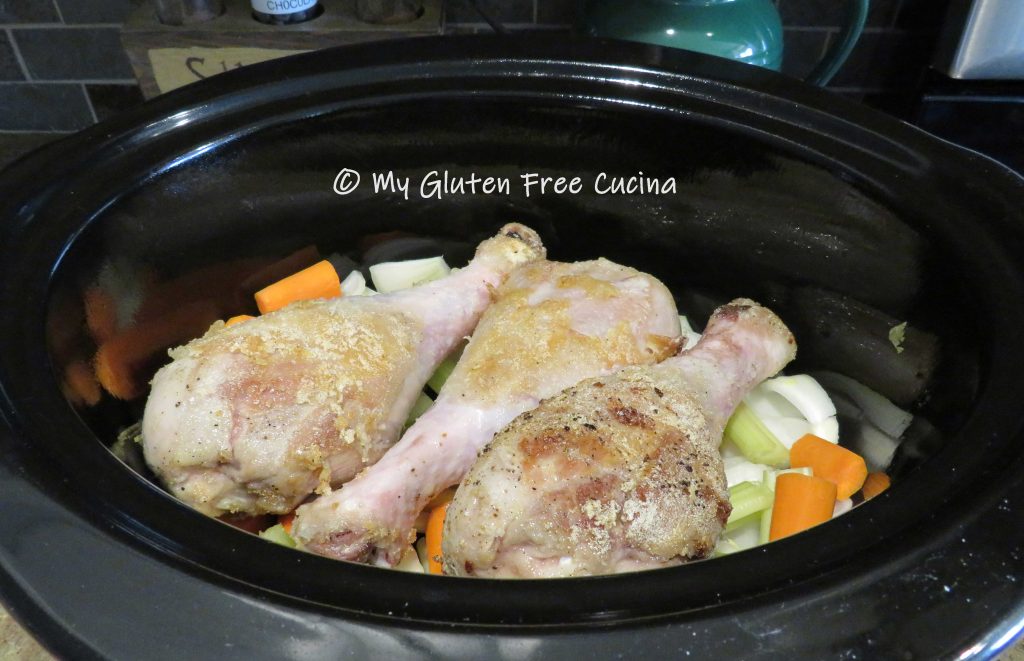
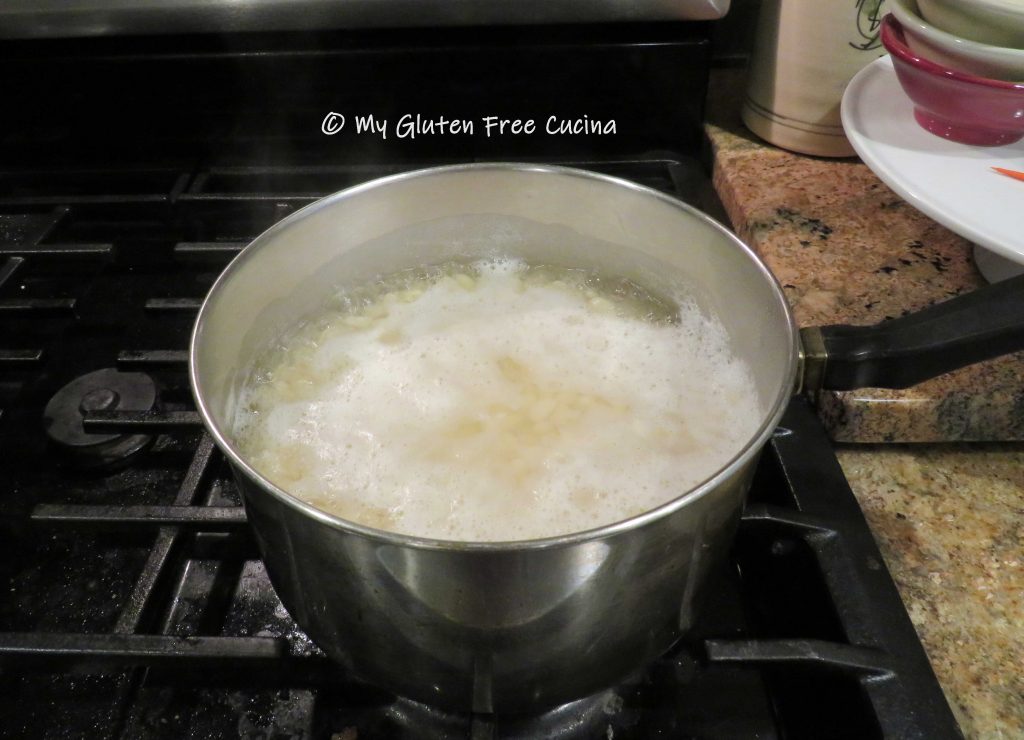
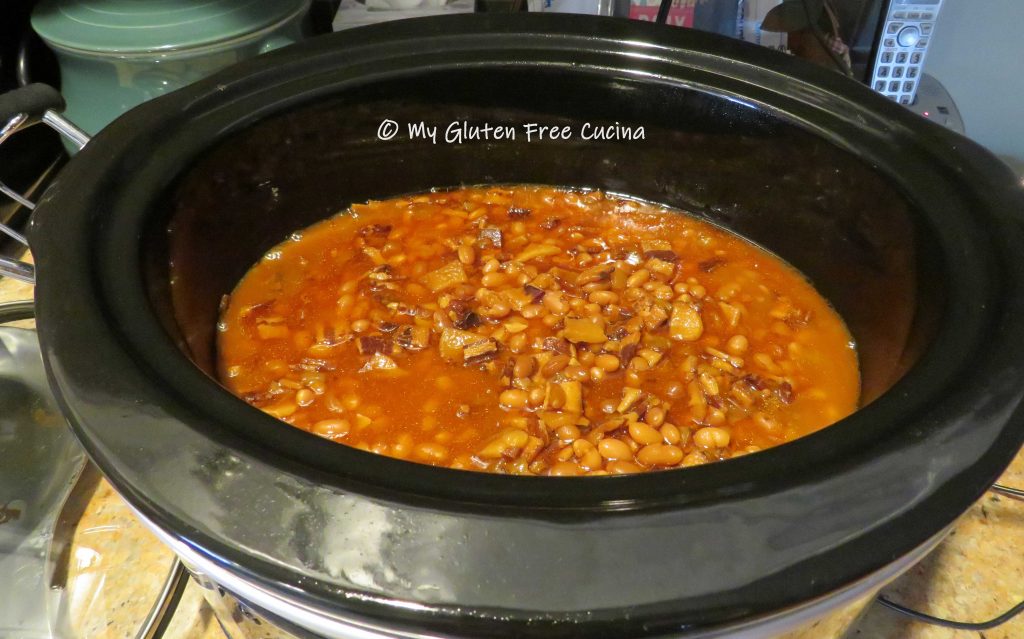
Add the roasted bones and vegetables with enough water to cover (about 10 cups).  It doesn’t look pretty at this point, but what an aroma as the stock slowly simmers!

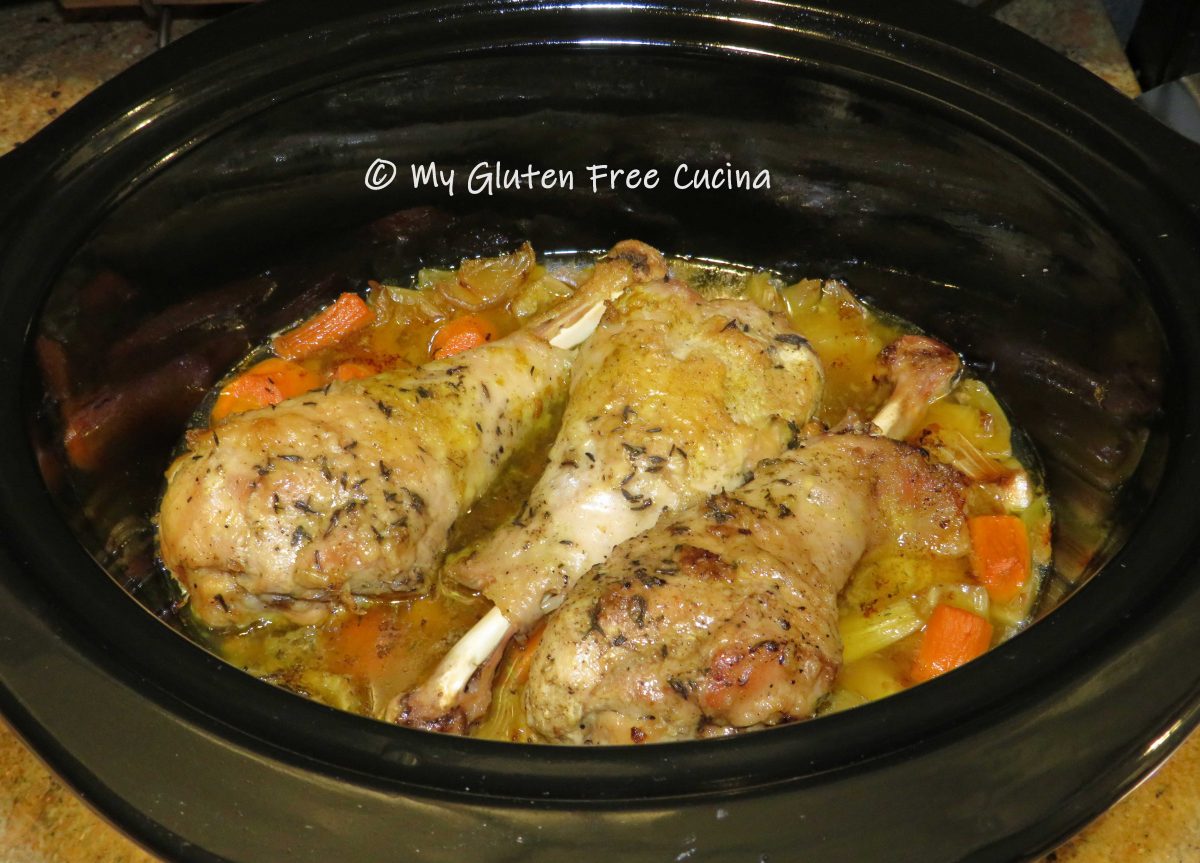
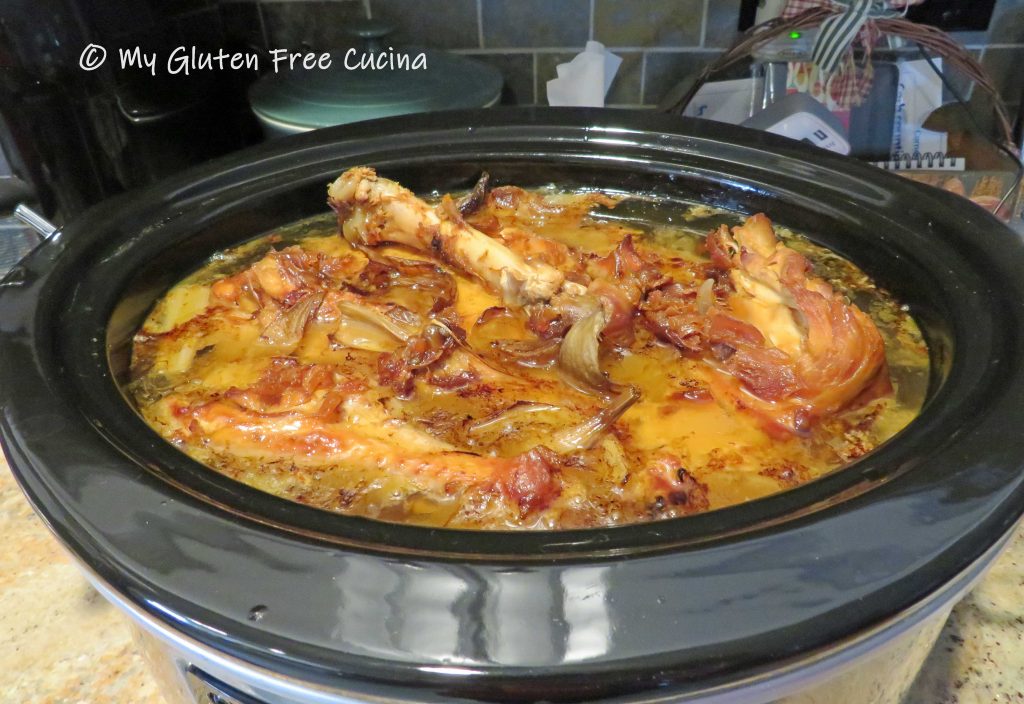
Now let your crock-pot do the work.  Cover and cook on low for 18 hours.  I timed mine so that it would simmer overnight, from 4:00pm to 10:00am.  Look at that color!  

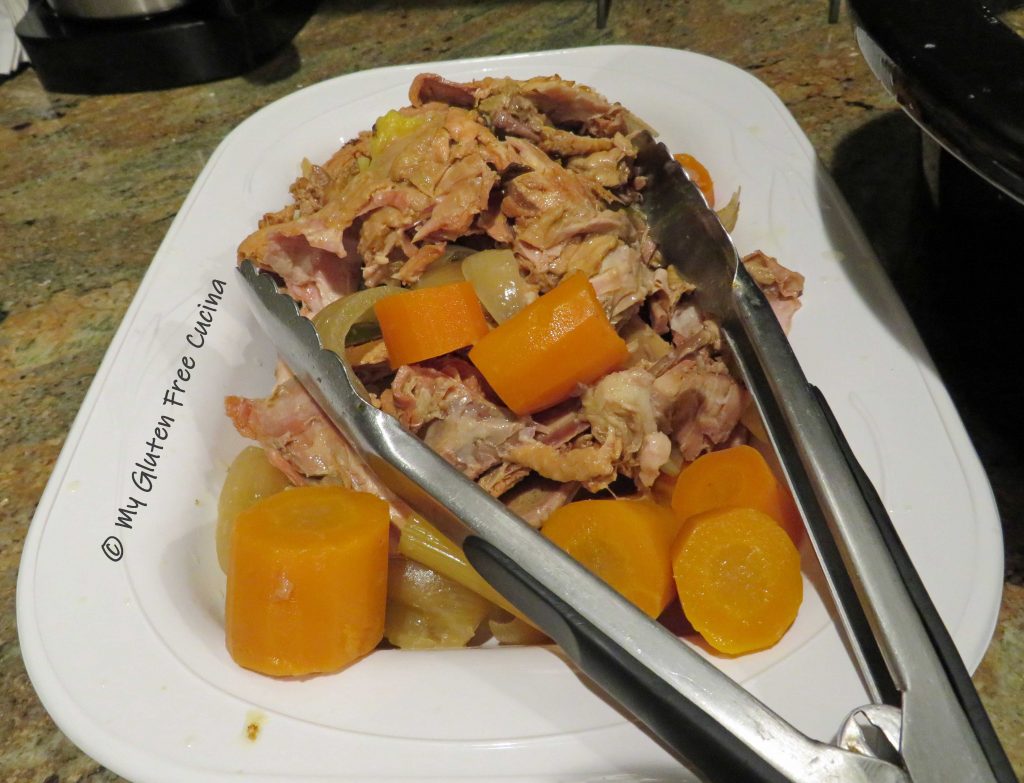
Pick out as many of the bones and vegetables as you can, and discard.  

Strain the stock through a fine mesh sieve or use cheesecloth, into a clean pot.

Let the strained stock cool to room temperature and refrigerate overnight.  The next day you will have a layer of fat on top that can easily be skimmed away, leaving a thick, golden gelatinous mixture.  

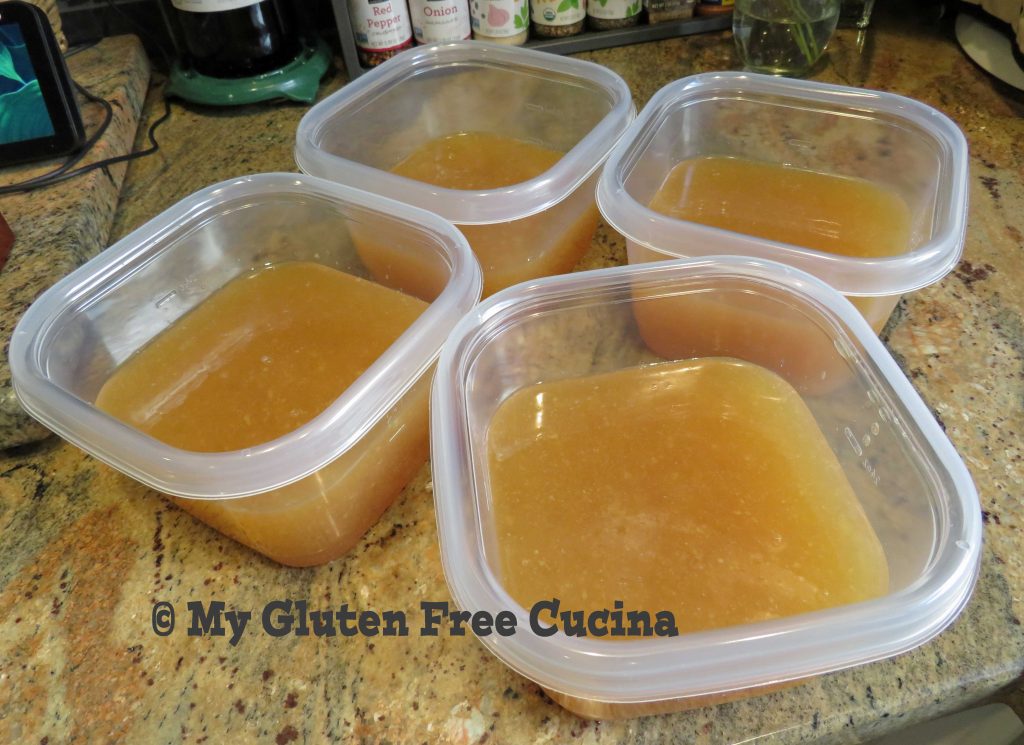
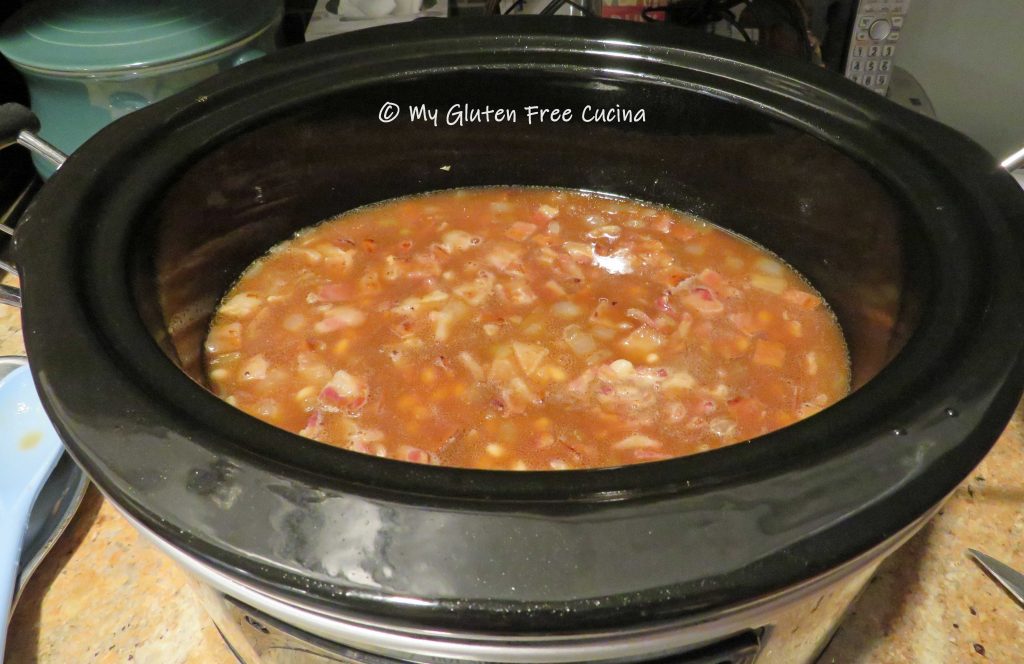
Divide the stock into containers to use or freeze for later.  Here’s a peek at my soon to be freezer stock!  I’m excited about all the tasty dishes I’ll be making over the winter months!

Use your stock as a base for soup, stews or casseroles.  It’s an easy and economical way to get every last bit of goodness from your next holiday turkey.  

Notes ♪♫ If you are too tired to think about making stock right after the holiday, just pop the remnants of the turkey into the freezer.  Once things calm down you can make it at your leisure.  

Print This Post Print This Post

Crock-Pot Pulled Pork

This is THE best melt in your mouth pulled pork!  Yes, it’s better than that local BBQ Restaurant you go to, and safer too because you made it at home!  The secret, don’t rush the recipe.  Twelve full hours in the crockpot on low heat will transform this tougher cut of meat into the most tender and moist BBQ dinner you have ever had!

This isn’t a new recipe, but I haven’t made it in years.  Not since my Celiac diagnosis.  So the first thing I did was to read over the ingredients, to see what I would have to change to make it gluten free.  Guess what?  I didn’t have to change a thing.  All of the ingredients were already gluten free!  Score!

The Meat:

Pork butt is a cut of pork that comes from (surprise) the upper part of the shoulder.  It’s tasty and economical, perfect in this slow cooked preparation.  If you don’t see it in the meat case, ask the butcher.  You will want 1/2 lb. per person.

This post contains affiliate links.

Ingredients:

  • 4 lb. pork butt (shoulder)
  • 1 onion, peeled and diced
  • 1 apple, peeled and diced
  • cooking spray

The Rub:

  • 2 tbsp. brown sugar
  • 1 tbsp. paprika
  • 1/2 tsp. salt
  • 1/2 tsp. pepper

The Sauce:

  • 1/2 cup apple cider vinegar
  • 2 tbsp. gluten free Worcestershire sauce
  • 1/2 tsp. red pepper flakes
  • 1 tsp. sugar
  • 1/2 tsp. mustard powder
  • 1/2 tsp. garlic powder
  • 1/8 tsp. cayenne pepper (optional)

Preparation:

Rinse the meat and pat dry.

Whisk together the brown sugar, paprika, salt and pepper, and rub it into the roast.

Mist your crock-pot with cooking spray.  Peel and dice the onion and apple, and spread in a single layer.

Place the meat on top.  You want the meat to be elevated an inch or so from the bottom of the pan, to keep it out of the liquid for the first few hours of cooking.

Whisk together the sauce ingredients and pour 1/4 cup of the mixture over the pork.  Don’t be tempted to add more.  The meat, onions and apples will cook down and create their own liquid.

Cover and cook 12 hours on low (time indicated is for a 4 lb. roast).

At the end of the cook time, you can set the crockpot to warm until ready to serve, up to 2 hours.  Spoon some of the pan juices over the meat.

Heat the reserved sauce on a low simmer.

Remove the meat to a serving dish and shred with 2 forks.

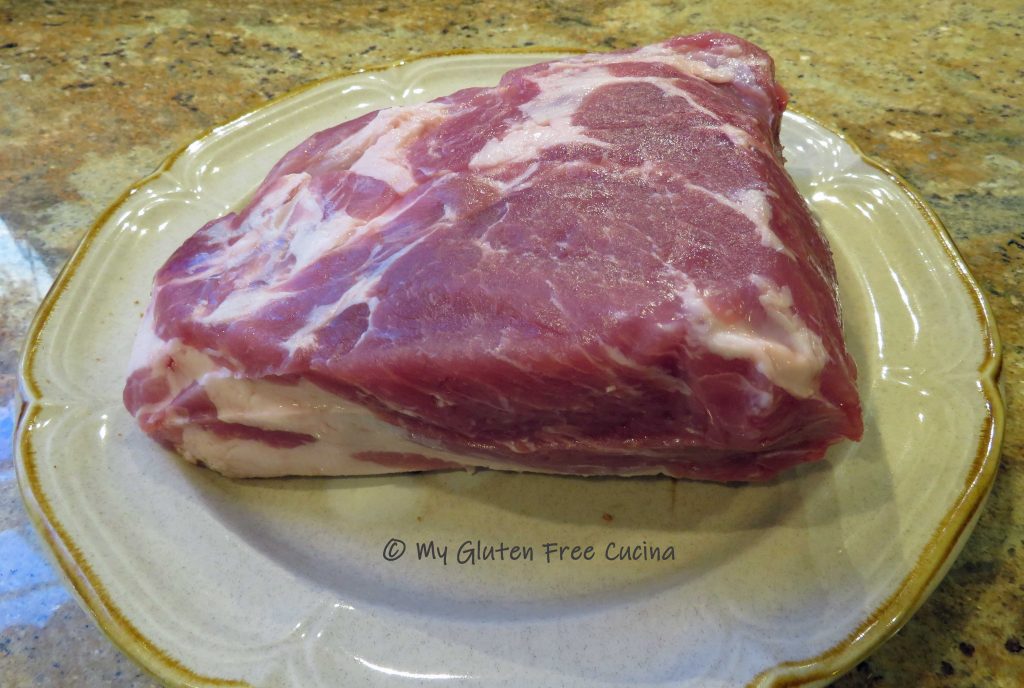
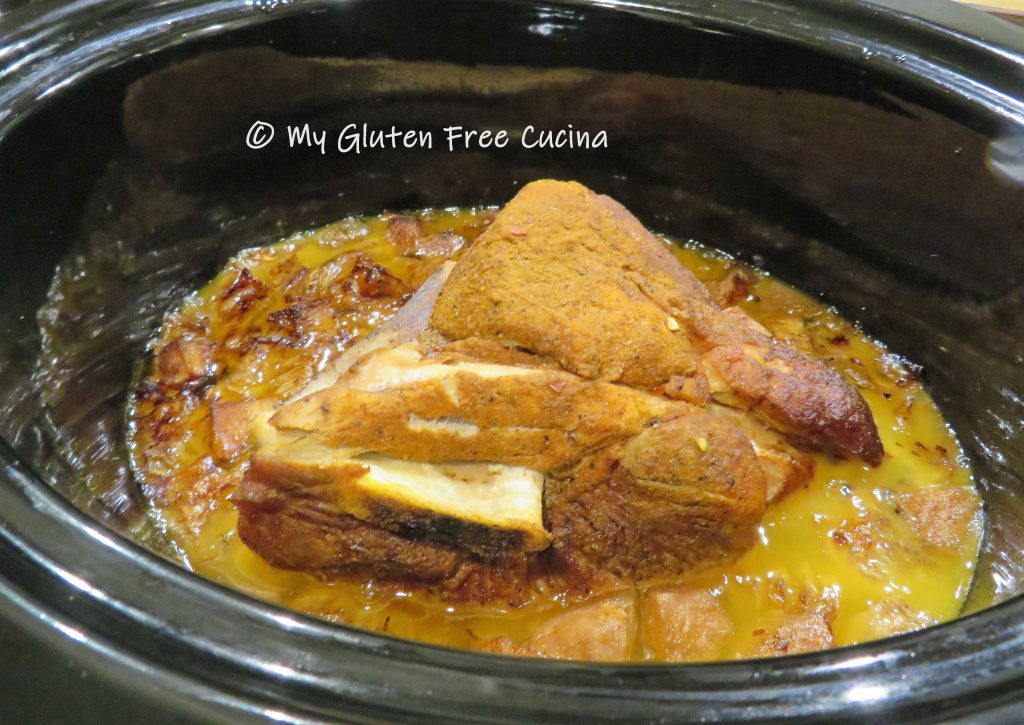
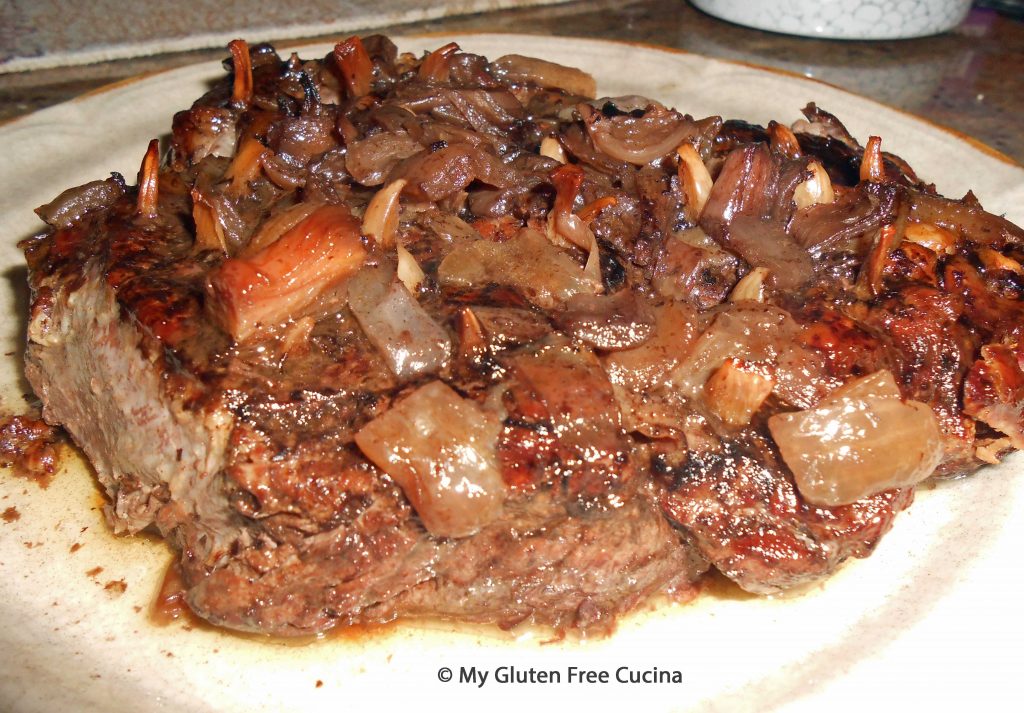
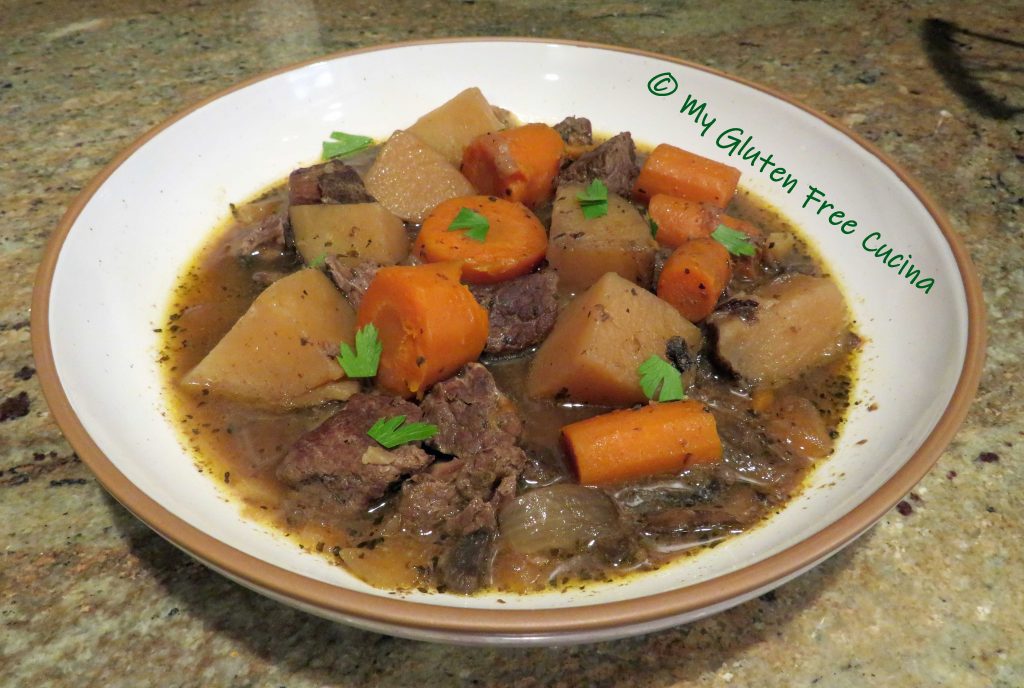
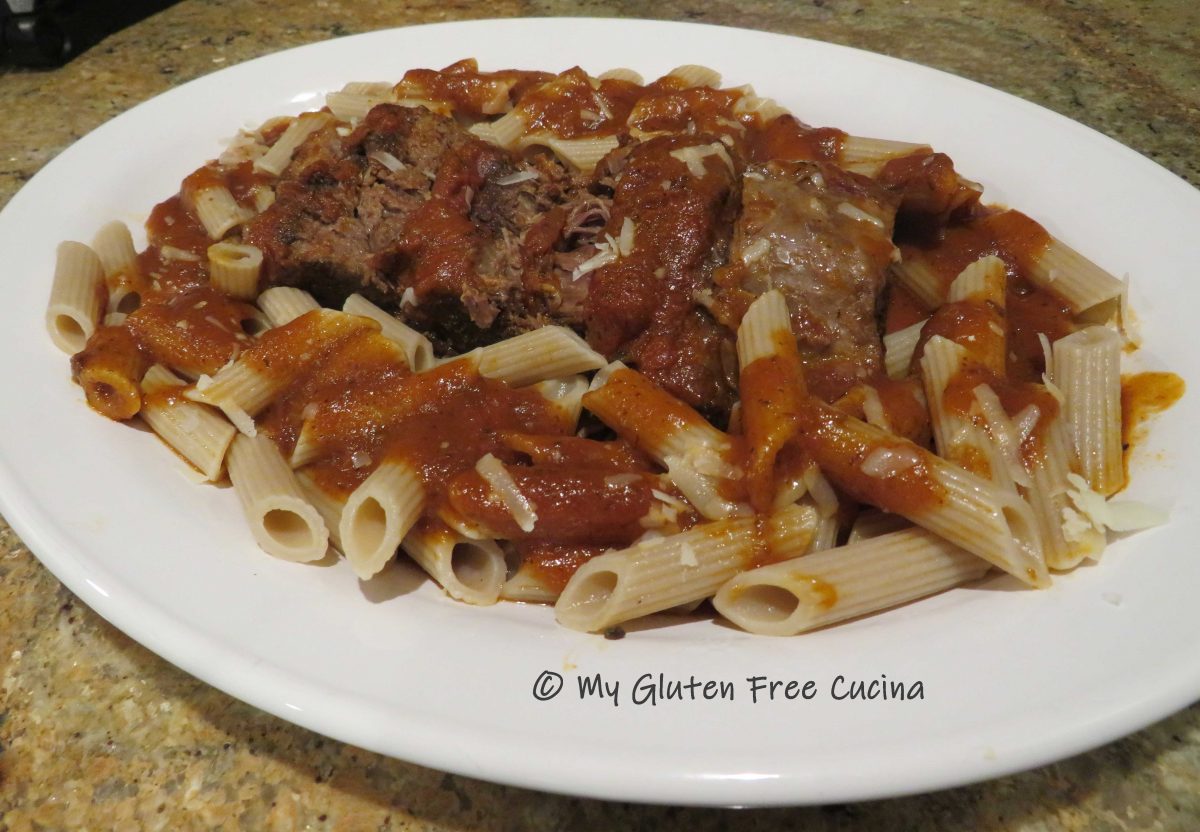
It should be falling apart tender.  Spoon a little of the reserved sauce over the top.  You can strain out the pepper flakes if you like.

Serve with a drizzle of your favorite BBQ sauce.  I also made air fryer French fries and broccoli to go with the meal.  For more serving ideas, check out my BBQ Baked Beans and this Easy Apple Sauté.

Notes ♪♫ You can make a small batch of Homemade BBQ Sauce to go with this meal or use your favorite store brand.  I love Stubbs, especially their Hickory Bourbon and Smokey Mesquite.

Print This Post Print This Post

Gluten Free Beef Stew

I have been making this beef stew for many years, decades in fact.  It’s a hearty meal simmered all day in the crock-pot, a real family favorite!  Most of the ingredients are naturally gluten free, so after my diagnosis it was easy to adapt my tried and true recipe to a gluten free version.

This post contains affiliate links.

Ingredients:

  • 1 lb. choice stew beef, cubed
  • 2-3 extra large carrots, peeled and cut into thick coins
  • 2 russet potatoes, skin on and cut into chunks
  • 1 large sweet onion, cut into wedges
  • 1/2 package crimini mushrooms, cut into quarters
  • 3 garlic cloves, minced
  • salt and pepper
  • olive oil
  • 1 can gluten free cream of mushroom soup
  • 1 cup red wine
  • 1 tsp. dry basil
  • 2 bay leaves
  • fresh Italian parsley

Preparation:

Before preparing any recipe I always go over the ingredient list to check for gluten.  Beyond the obvious things like flour, all seasonings and processed ingredients should be verified gluten free.  In this recipe, I have always used a can of cream of mushroom soup.  Since many canned soups contain gluten, I shopped around before making my stew and found this one.  It’s certified gluten free!


Now, let’s get started on the recipe.  Set up your crock-pot, and a large stainless steel skillet (not non-stick).  Yes, you can just throw all of the ingredients into the crock-pot, but I like to build layers of flavor by browning.  This can be the difference between a mediocre stew and a great one.  Whisk together the wine, cream of mushroom soup and dried basil.

Next, begin browning the ingredients in a small amount of olive oil.  Start with the beef.

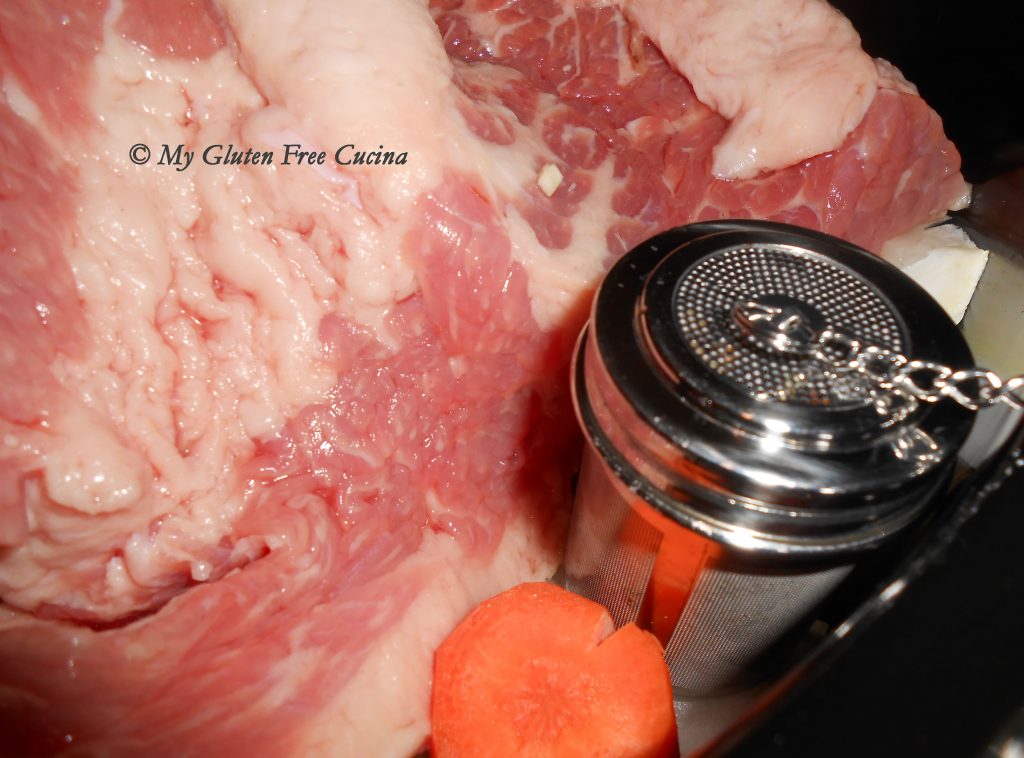
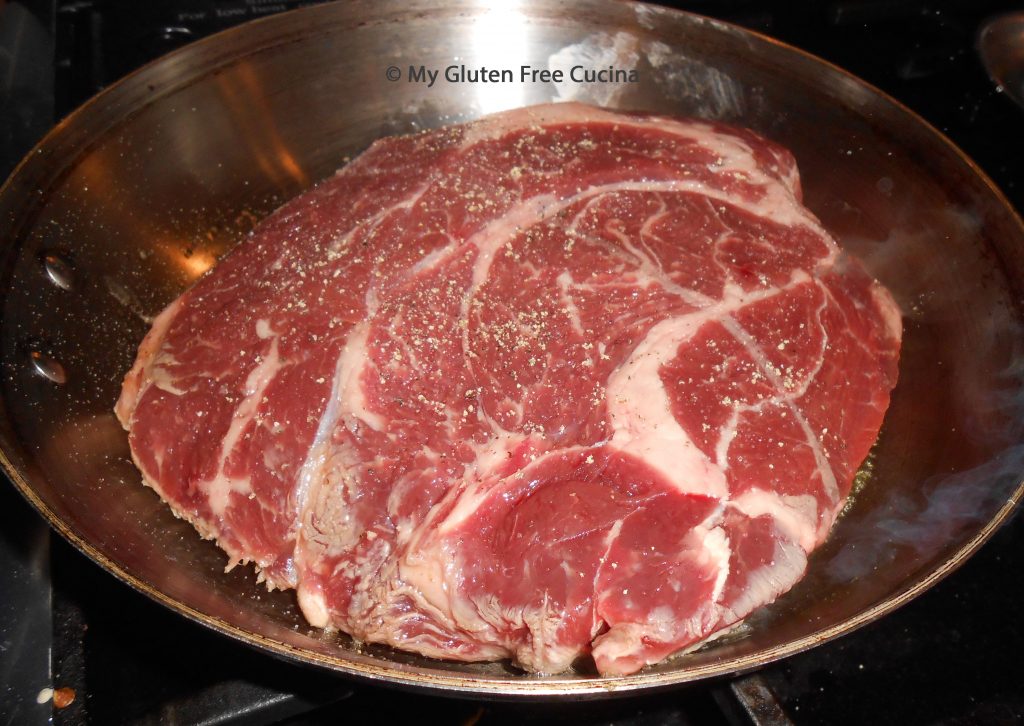
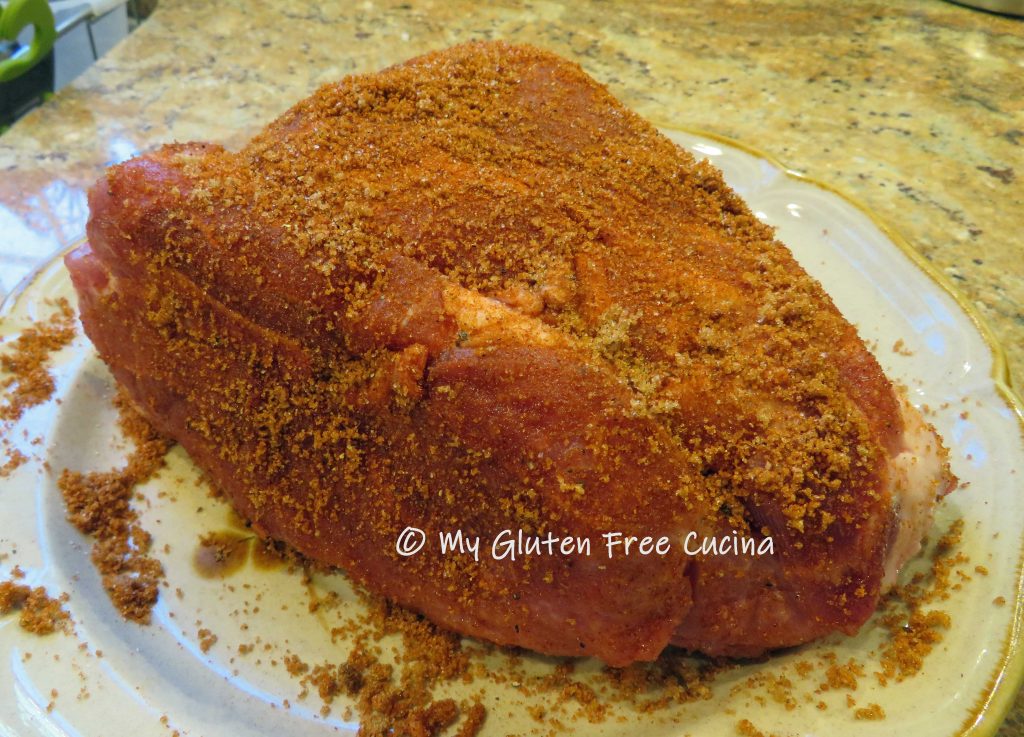
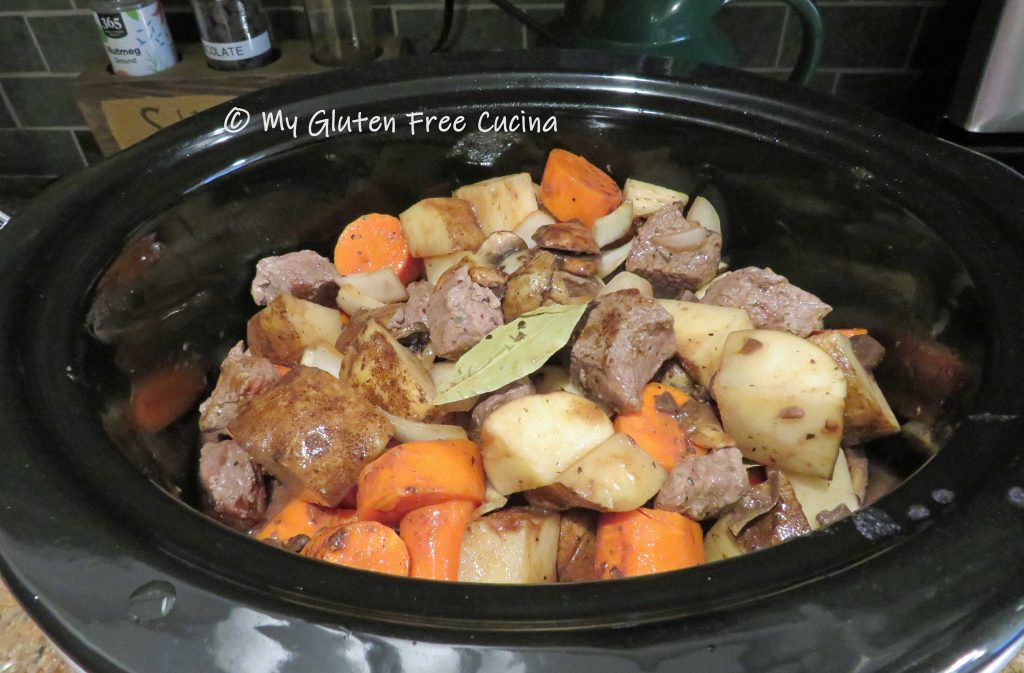
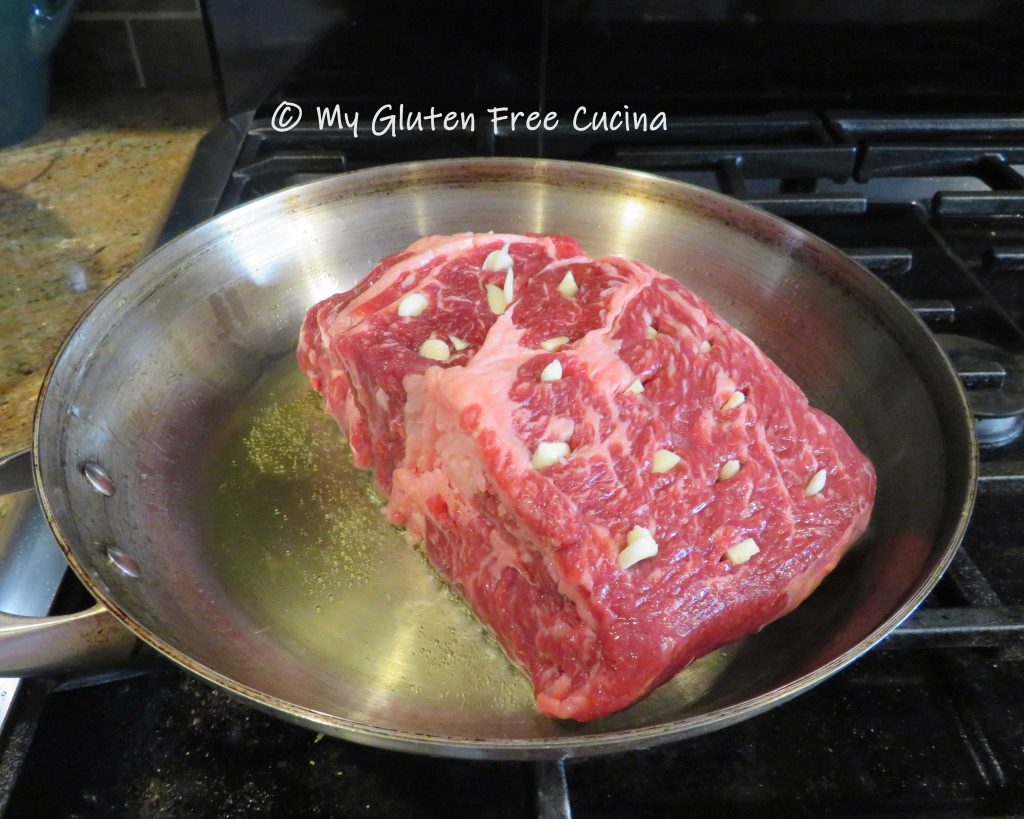
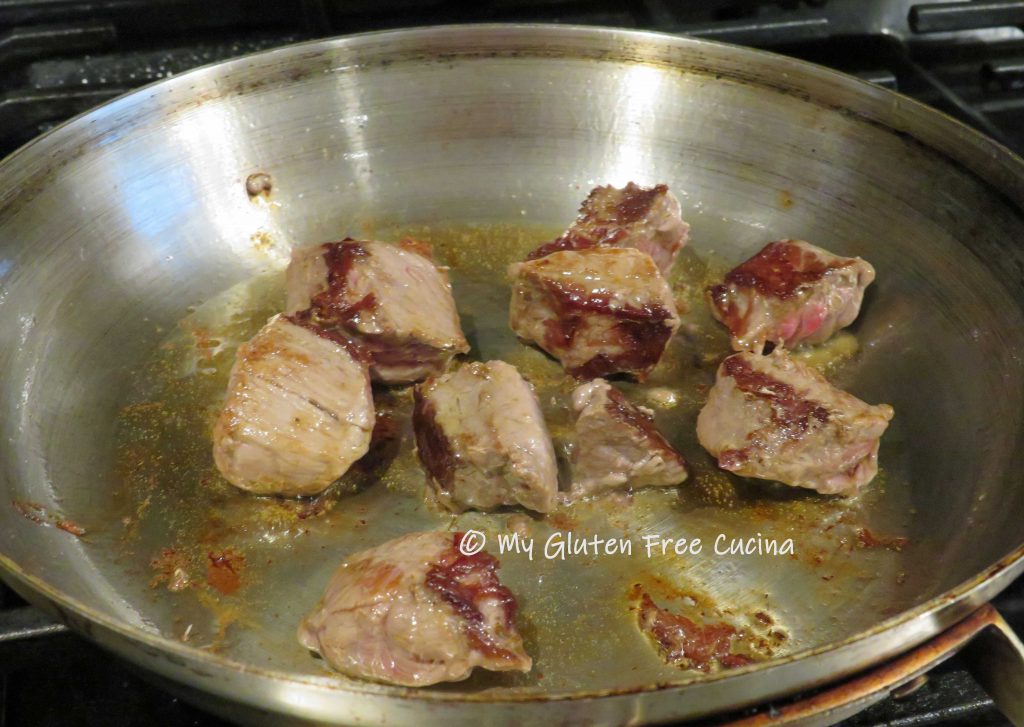
Don’t crowd the pan, you want to get some good color on the outside (if the pieces are too close together the meat will steam in its own liquid).  I did my beef in 2 batches.

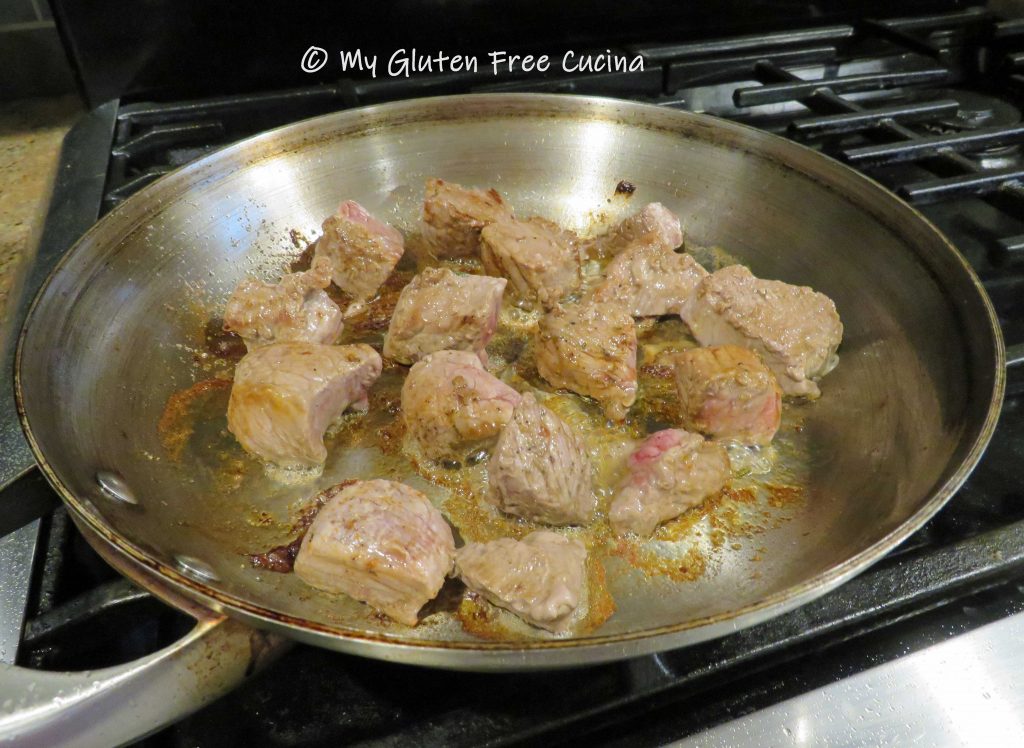
Once the beef goes into the crock-pot, you will see some nice browned bits on the bottom of your skillet.

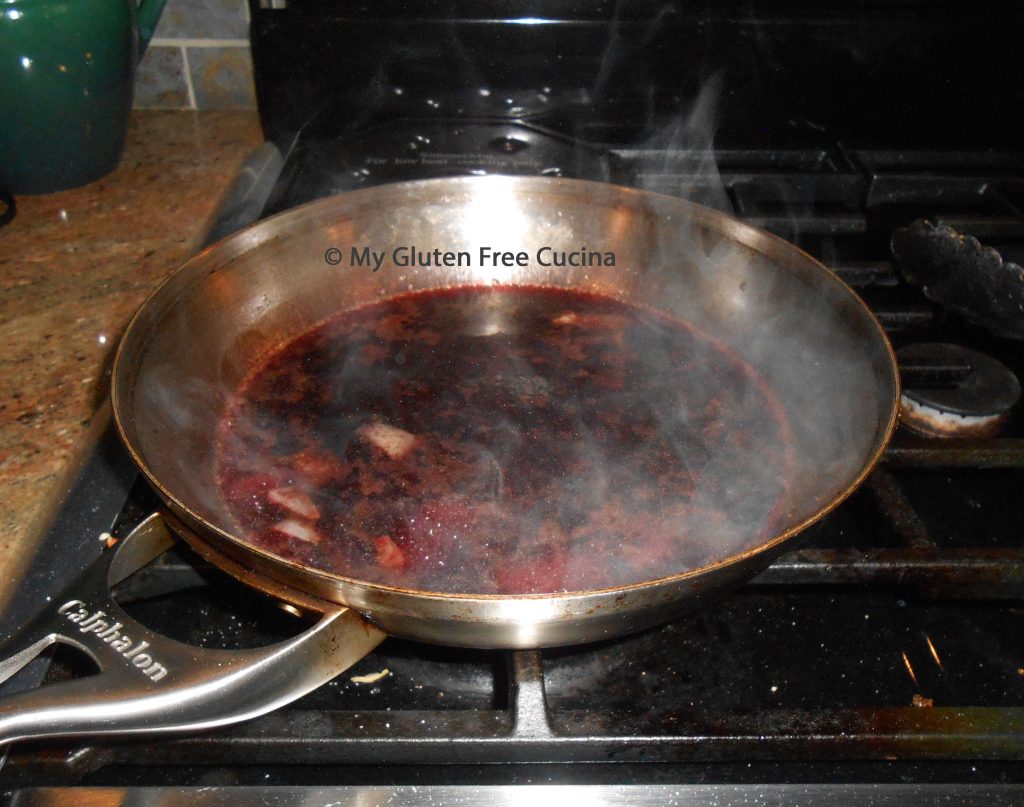
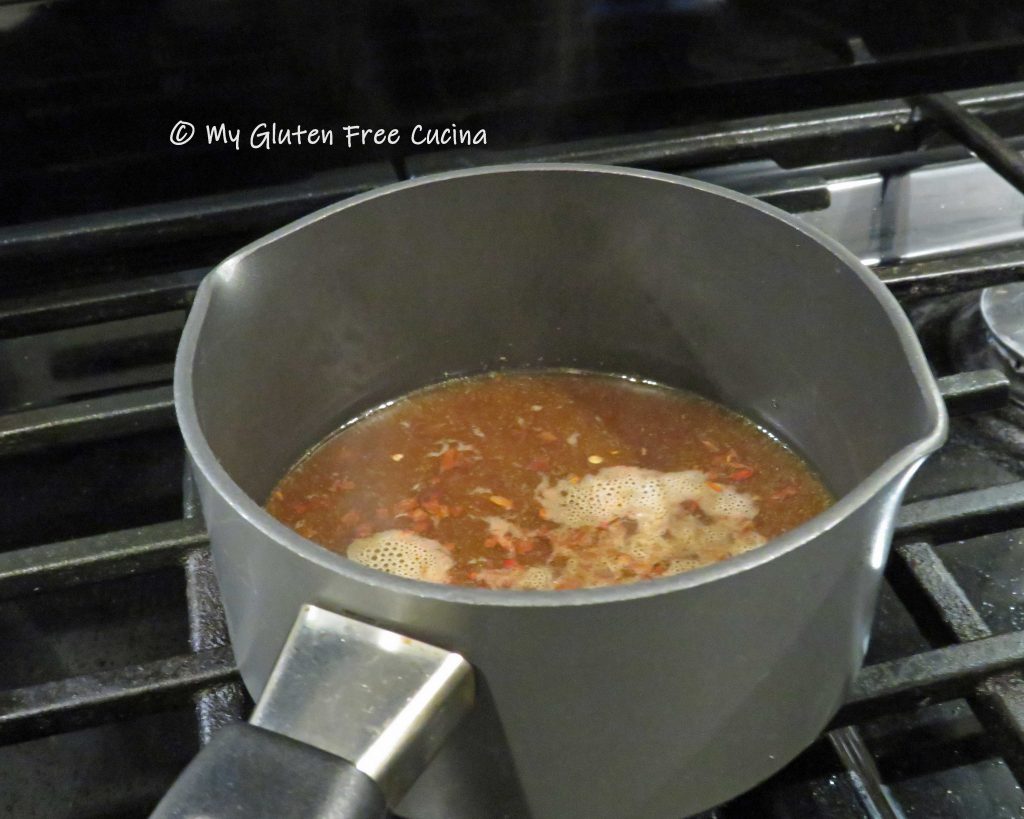
Pour 1/3 cup of the wine mixture into the hot pan to deglaze, using a spatula to scrape up all of the browned bits, they are full of flavor!

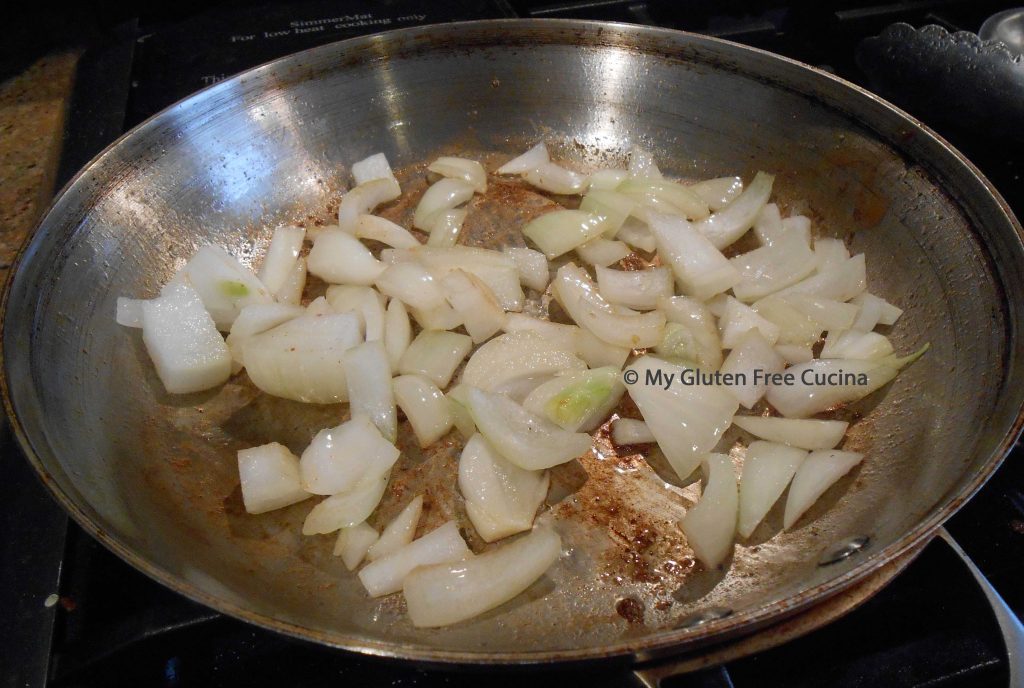
Pour the liquid into the crock-pot and add more olive oil to the skillet.  Begin browning the veggies, a few minutes each starting with the onions.

Continue with the mushrooms, followed by the potatoes and carrots.

As you brown the veggies, season with salt and pepper, and layer them in the crock-pot.  Pour the rest of the wine mixture into the crock-pot, along with the garlic and bay leaves.

Stir well, then cover and cook on low for 8 hours.  Tick-tock.


Halfway through, stir the ingredients again.  Looking good.

After 8 hours, the beef will be very tender, and a fork should slide easily through the veggies.  Serve in dinner bowls, with a sprinkle of fresh Italian parsley.

Notes ♪♫  I used Health Valley Cream of Mushroom Soup in this recipe.  I love that it is both gluten free and organic, but when I have time I also make my own Mushroom Soup from scratch.  You can find this surprisingly easy recipe here and see how I use it in my winter stews and casseroles.

Print This Post Print This Post

Slow Cooked BBQ Baked Beans

Be the star of your next cookout or potluck with these delicious, slow cooked beans.  The best part of the recipe, it cooks overnight!  This leaves you free to do other things the day of your event.  Be sure to have all of the ingredients on hand, to allow enough time for soaking and cooking, 24 hours total!  For best flavor and texture, don’t try to speed up the recipe.  Start soaking the beans in the morning, and prepare them for the crockpot in the evening.  You may find it hard to sleep, with all the amazing aromas coming from your kitchen!

This is an old family recipe that I have adapted to be gluten free.  The biggest change was that I left out beer, and substituted an equal amount of club soda.  Other than that, I just had to check the ingredient labels on my bacon, BBQ sauce, ketchup and Worcestershire.  Are beans gluten free?  Yes, they are a naturally gluten free food!  I always give them a thorough rinse before cooking to be on the safe side, in case of cross contact during processing.

This post contains affiliate links.

Ingredients:

  • 1 pound bag of navy beans
  • 12 oz. package of gluten free, lower sodium bacon (I used Smithfield)
  • 1/2 Vidalia or sweet onion, cut into small dice
  • 3 garlic cloves, minced
  • 1 cup of club soda
  • 3/4 cup gluten free BBQ sauce (I used Stubbs Smoky Mesquite)
  • 1 cup dark brown sugar
  • 1/4 cup gluten free, unsalted ketchup
  • 2 tbsp. molasses
  • 1 cup of Jack Daniels Tennessee whiskey
  • 2 tsp. dry mustard powder
  • 1/4 cup apple cider vinegar
  • 2 tbsp. gluten free Worcestershire sauce
  • up to 1 cup of water, only if needed, to adjust thickness
  • cooking spray

Preparation:

In the morning, place the beans in a sauce pan and add at least 6 cups of cold water.  Cover and soak (no heat) for 10 hours.  For guaranteed tender beans, never salt the soaking water!

The beans will double or more in size.

After 10 hours, drain the beans and rinse them thoroughly.  Return them to the pot, cover with water and bring to a simmer.  Cook for 30 minutes then drain and rinse again.

Set up your crockpot and mist it with cooking spray.  While the beans simmer, heat a large nonstick skillet and cook the bacon until crisp.  Drain on paper towels, then crumble or chop into 1/2″ pieces.

Skim the bacon fat and remove any burnt debris.  You should be left with a few tablespoons of clear fat in the pan.  Add the onions and cook just until lightly browned.  Add the garlic, stir for a few seconds then pour everything into the crockpot, fat included.

Add the club soda, sugar, ketchup, molasses, whiskey, mustard, cider vinegar and Worcestershire sauce to the crockpot and stir well to combine with the onion mixture.  Finally, stir in the drained beans and the chopped bacon.

Cover and cook for 12 hours on low overnight.  Stir every 4 hours (or whenever you wake up) and check the consistency as the sauce thickens, if the mixture is too dry add a bit more water.

After 12 hours, set the crock-pot to keep warm.  Let the beans sit for 2 more hours on warm to finish absorbing the liquid.

You can see why this recipe has become a family favorite!

You’ll get rave reviews when you make this dish!  I hope you will give it a try for your next family gathering!

Notes ♪♫ I opt for lower sodium ingredients wherever possible.  Given the amount of salt in the bacon, you will not notice if it is absent in some of the condiments.

Print This Post Print This Post

Italian Pot Roast

When I was growing up in the 1960’s, Sunday morning in our Italian neighborhood was all about making the sauce.  I can still see my Mom’s Farberware Stockpot simmering on the stove, filled to the rim.

She often cooked a pot roast right in the sauce, as it was so easy to do and the resulting meal was delicious.  The aromas filled our home and beyond, in fact it seemed every kitchen in the neighborhood was busy preparing their own Italian Sunday Dinner.

This post contains affiliate links.

I always think of my mom when I make this recipe, but instead of stovetop I prefer using my crock-pot, which makes it virtually hands off while you go about your busy day.  The roast can be cooked on the weekend and reheated during the week, for an easy meal when you get home from work.  Chuck roast is an economical cut of beef and after nine hours in the crock-pot the meat will be melt in your mouth tender!

Ingredients:

  • 2-4 lb. chuck roast, allow 1/2 lb. per serving
  • 4 garlic cloves cut into slivers
  • 1/2 sweet onion, diced
  • cooking spray
  • olive oil
  • 1/2 cup red wine
  • 1 large can (28 oz.) tomato sauce
  • 3 tbsp. tomato paste
  • 1-1/2 tsp. basil
  • 1 tsp. oregano
  • 1/2 tsp. marjoram
  • 1/2 tsp. parsley
  • 1 tbsp. brown sugar

Preparation:

I got a great deal on a 4 lb. chuck roast, so I cut it into 2 pieces and froze half.  A roast like this will shrink during cooking, so when planning portions I allow 1/2 lb. per person.  If you have leftovers, this pot roast is great in sandwiches the next day.

To get started, set up your crock-pot and mist with cooking spray.  Cut the garlic cloves into long slivers.  Use a paring knife to make slits in the top of the roast and insert the garlic slivers.

Sear the roast on all sides in a hot skillet with olive oil, then place it in the crock-pot.

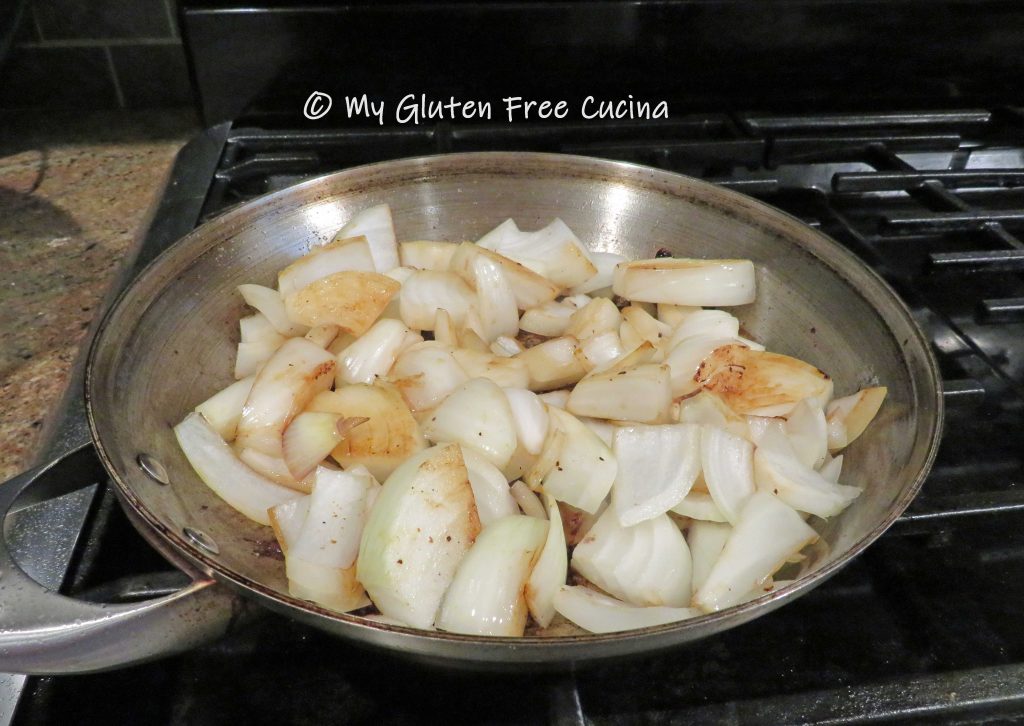
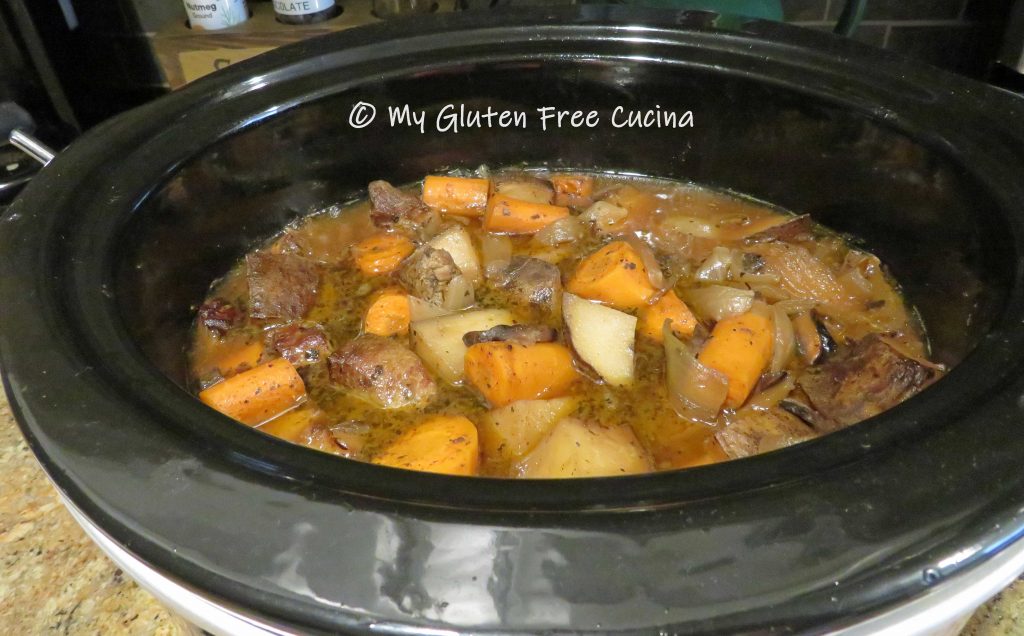
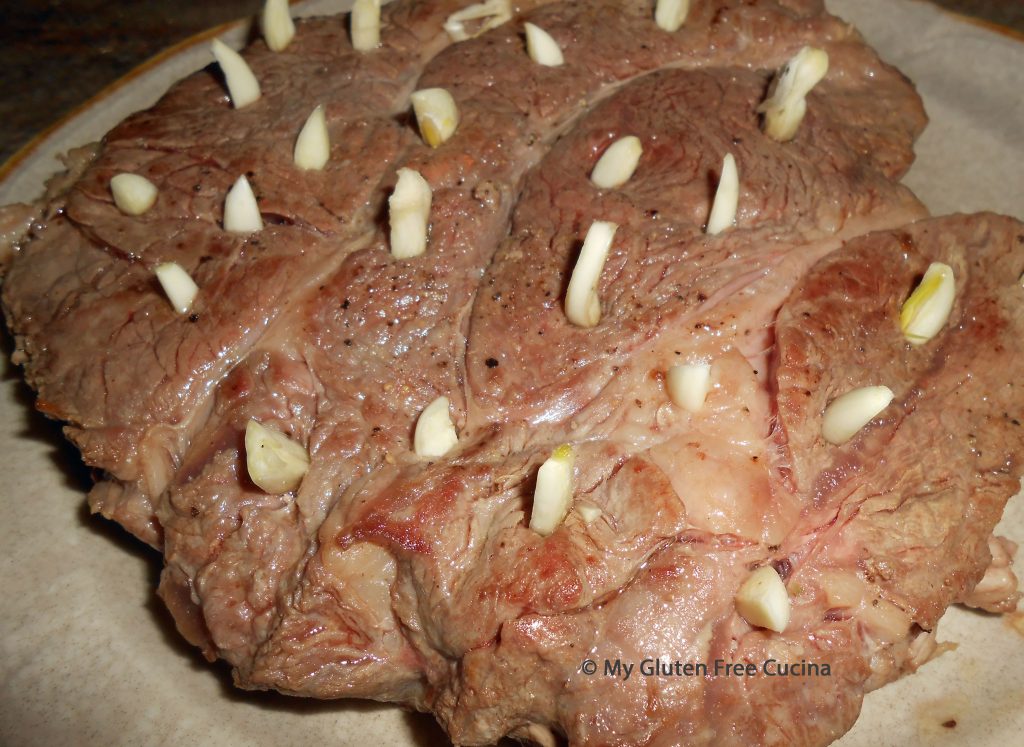
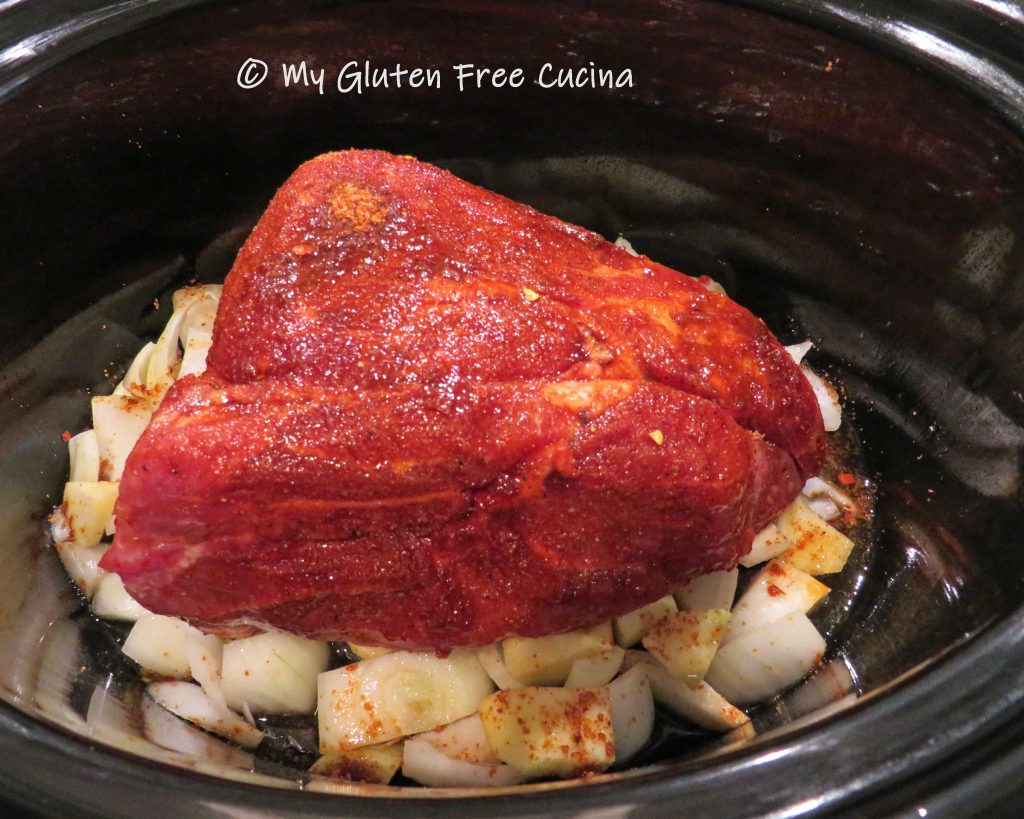
Add onions to the same skillet and cook until translucent.  Add them to the roast then deglaze the skillet with the red wine and pour over everything.

Whisk the tomato paste into the tomato sauce along with the remaining ingredients, through brown sugar.  Add to the crock-pot and cook on low for 9 hours.  Give it a stir about halfway through.  You can serve it immediately, but my personal preference is to refrigerate it overnight.  The flavors will continue to meld, and the sauce will thicken.

The next day, reheat the roast on the stovetop over low heat.  You can see that mine was so tender that it had broken into two pieces.

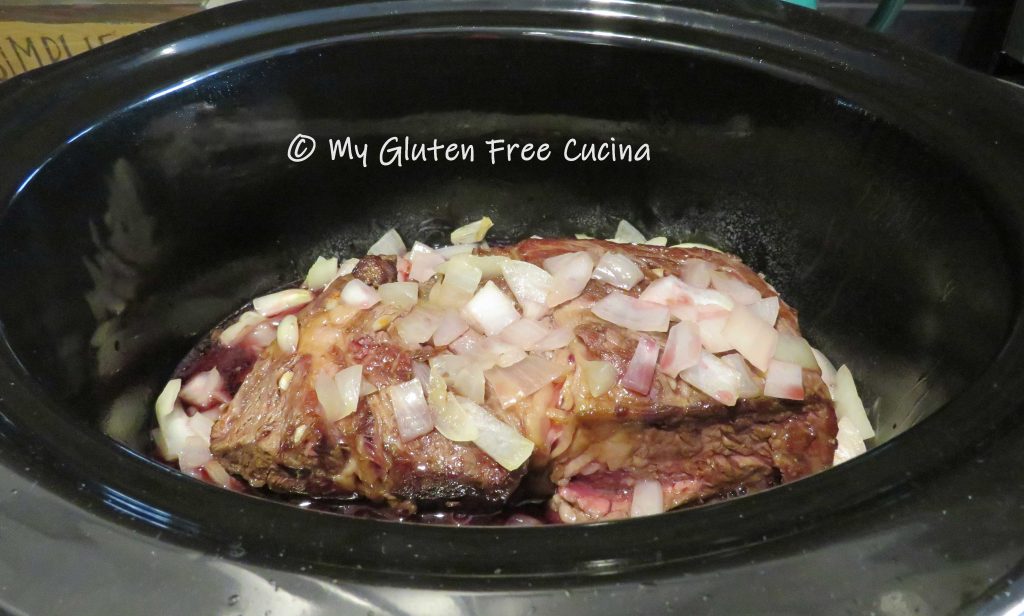
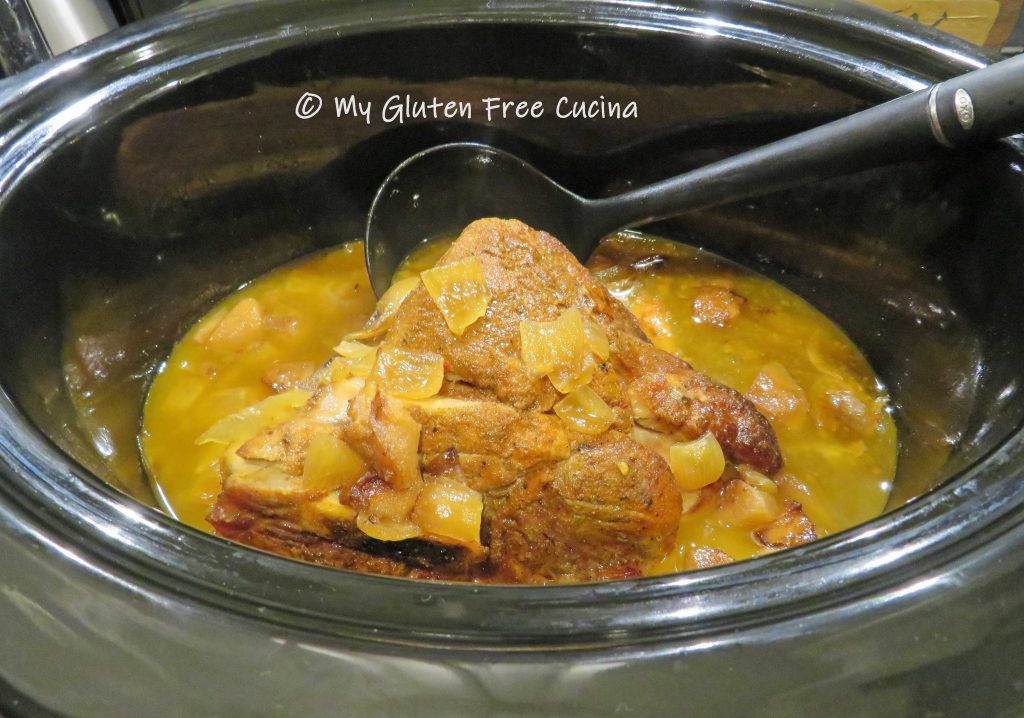
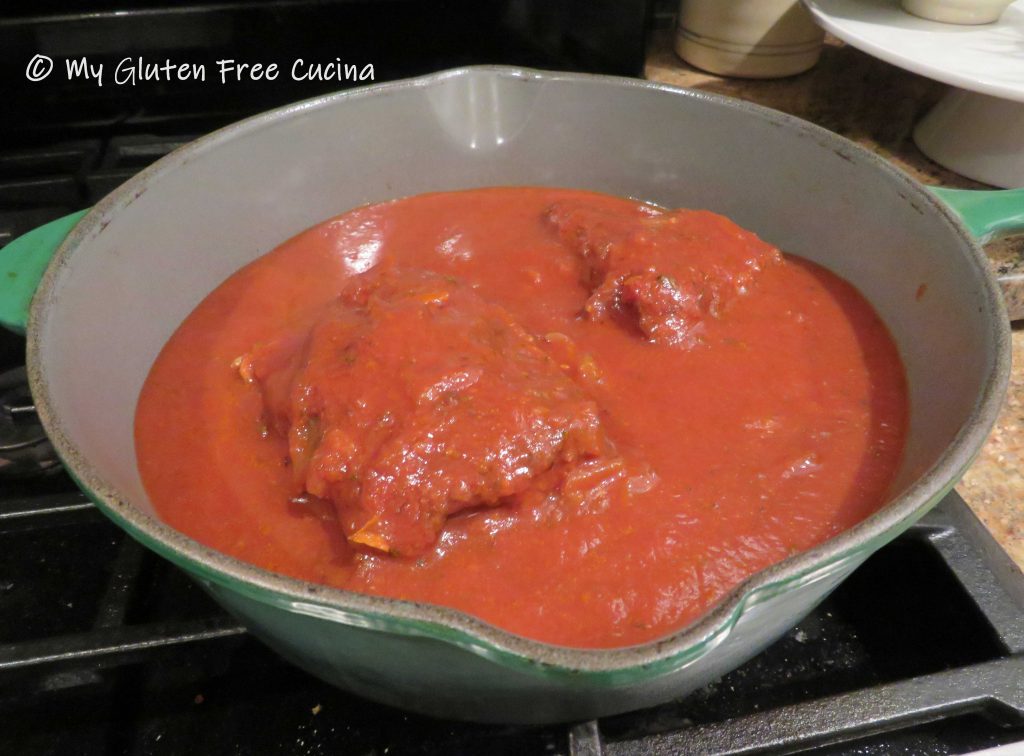
Most of the onions will have melted into the sauce at this point, but if you want an extra smooth sauce (or have picky eaters) you can puree it with a stick blender.

Slice the roast and arrange on a serving platter.

Serve with your favorite gluten free pasta.  Jovial gluten free penne is one of mine.

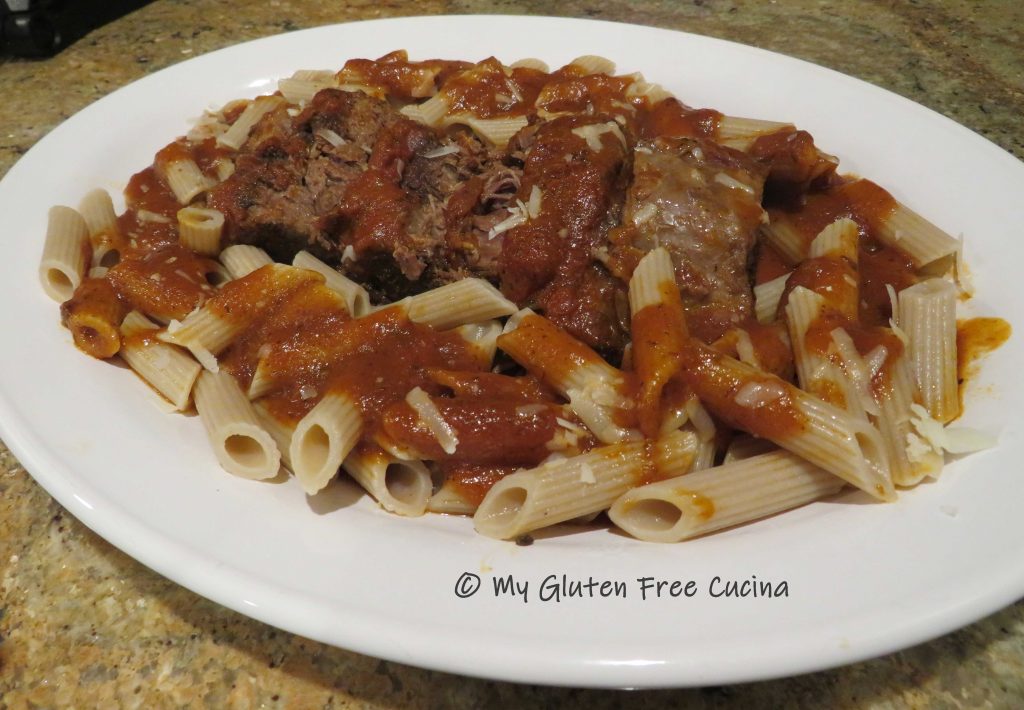
Bring to the table with extra sauce and grated cheese.  The only thing missing here is fresh parsley from my herb garden.  I guess I’ll have to wait for summer and make this again!

Notes ♪♫ When starting the gluten free diet, you may feel like you will never enjoy your old family recipes again.  The truth is, many recipes like this one are naturally gluten free.  The only thing I changed was the pasta.  With a little patience and experimentation, I have learned that many of my childhood favorites can be recreated in My Gluten Free Cucina.

Print This Post Print This Post

Gluten Free Crock-Pot Turkey Drumsticks

Turkey Drumsticks can be dry and tough when roasted, but they come out moist and falling off the bone tender when cooked in the Crock-Pot.  This time of year, it is easy to find turkey drumsticks at the market for a very good price.  Crock-Pot recipes like this one are so easy and can really free up my schedule.  I started this dish around 11:00am and it was ready in time for dinner at 6:30.

This post contains affiliate links.

Ingredients:

  • Turkey Legs (plan on one per person)
  • 1 medium sweet onion
  • 5 celery stalks
  • 2 carrots
  • 1/4 cup sweet white rice flour
  • salt and pepper to taste
  • olive oil
  • 1/2 cup white wine
  • 1/2 cup gluten free chicken broth
  • 1/2 tsp. sage
  • 1/2 tsp. thyme
  • 1/2 tsp. garlic powder
  • 1/4 tsp. turmeric
  • cooking spray
  • fresh rosemary for garnish

Preparation:

Chop the onions, celery and carrots into large chunks.  Mist the crock-pot with cooking spray and add the veggies in an even layer.

Rinse the turkey legs and pat dry.  Add the flour to a food safe plastic bag, they place the turkey legs in the bag.  Twist to close and shake to coat the legs evenly with flour.

Use a stainless-steel skillet (not non-stick) to brown the legs in olive oil, about 5 minutes per side.  Don’t crowd the pan, brown the meat in batches if necessary.  Season with salt and pepper to taste.

Place the drumsticks in the crock-pot on top of the vegetables.

Next deglaze the pan.  Remove the skillet from the heat and slowly pour in the wine.  Return to the heat and use a spatula to scrape up all the little brown bits, then let it simmer for a minute.  Strain the solids and reserve the wine.

Whisk together the reserved wine, chicken broth, sage, thyme, garlic powder and turmeric.  Drizzle over the turkey legs.  The vegetables and meat will release their own liquid as they cook, so don’t add more.

Now set your crock-pot to low and cook for 7 – 8 hours.

That’s all there is to it!  Arrange the drumsticks on a serving platter and drizzle a bit of the pan juices over the meat.  For a nice presentation you can garnish with fresh rosemary sprigs or other herbs.

Notes ♪♫ Don’t discard those veggies and juices in the bottom of the crockpot.  They will make an incredible soup stock or base for sauces and gravies.  I like to puree it then store in the refrigerator or freezer, ready for my next creation!

Print This Post Print This Post 


Crock-Pot Asian Chicken

Crock-Pot meets Stir-Fry

Hello friends!  While so many are staying home and ordering takeout these days, I’m feeling a bit left out.  Most restaurants offering curbside delivery in our area are not dedicated gluten free, and I am not comfortable ordering when I cannot speak to staff face to face about their allergen protocol.

So today it’s off to the kitchen to satisfy my craving!  I’m using the Crock-Pot along with my skillet to create an absolutely amazing dish that rivals any restaurant!

The Lazy Gastronome

Crock-Pot Ingredients:

  • 1 lb. boneless chicken breast
  • 1/4 cup honey
  • 2 tbsp. tamari (gluten free soy sauce)
  • 1 tbsp. dry minced onion flakes
  • 1 tbsp. ketchup
  • 2 tsp. canola oil
  • 1/4 tsp. garlic powder
  • 1/4 tsp. powdered ginger
  • cooking spray
  • 2 tsp. cornstarch + 2 tbsp. water
  • 1 tsp. toasted sesame seeds

Stir-Fry Ingredients:

  • 1 cup brown rice
  • 1 cup water
  • 1 cup chicken broth
  • pinch of garlic granules or garlic powder
  • salt, to taste
  • 1 large egg + 1 tbsp. water
  • 1/2 cup slivered carrots
  • 1/2 cup diced onions
  • 1/3 cup mushrooms
  • 1/2 cup frozen peas
  • 1/4 cup scallions
  • 1 cup baby bok choy
  • sesame oil
  • gluten free tamari
  • 1/3 to 1/2 cup more chicken broth

Preparation:

Coat the crock-pot with cooking spray and add the whole chicken breast.  Whisk together the honey, tamari, dried onion flakes, ketchup, canola oil, garlic and ginger.  Pour it over the chicken, cover and cook on high for one hour, then reduce heat to low and cook 2 more hours.

While the chicken cooks, make the rice.  Cook 1 cup of brown rice in 1 cup chicken broth, 1 cup water, seasoned with salt and garlic powder.  When the rice is finished, let it cool to room temperature and set aside until the chicken is ready.

After 3 hours the chicken should be cooked through and very tender.  Remove to a cutting board and cut into 1″ pieces.

Skim fat from the crock-pot and whisk in 2 tsp. cornstarch.

Return the diced chicken and turn heat back to high to thicken the sauce.  Alternately you can transfer to a small sauce pot as I’ve done here.  Keep warm while you finish the dish.

Heat a large nonstick skillet over medium low heat.  Whisk the egg with 1 tbsp. water, scramble and chop into small pieces.  Transfer to a bowl and keep warm.  Wipe the skillet clean and begin cooking the veggies in a little sesame oil.  I started with the carrots and onions as they take longest.

After a few minutes, add the peas, mushrooms and scallions with a little more oil and cook 2 minutes more.  Finally, add the bok choy with a few shakes of tamari and stir well to blend.

To finish, add back the rice and the scrambled egg with a few more shakes of tamari, along with 1/3 to 1/2 cup chicken broth.  Quickly toss and stir to incorporate the rice and veggies until the liquid has been absorbed and the rice is heated through.  Transfer to a serving platter.

Spoon the chicken over the fried rice and garnish with toasted sesame seeds.

Notes: ♪♫  Many are surprised to learn that soy sauce is not gluten free.  The soy is fermented in wheat, making it unsafe for those of us with Celiac disease.  In this recipe I used San J brand gluten free Tamari in place of soy sauce.  It is a great addition to any Asian inspired recipe and also great for marinades.

Print This Post Print This Post

Crock-Pot Corned Beef and Cabbage

Today we are making a traditional Crock-Pot Corned Beef and Cabbage dinner for St. Paddy’s!  Go about your day while your crock-pot does all the heavy lifting, and enjoy this dish when you get home from work.  Look for brisket that is labeled gluten free, if it’s not check with the meat department or consult the manufacturer’s website to be safe!

The secret to perfectly cooked Corned Beef and Cabbage is in the layering- veggies on the bottom, then the meat, and finally the cabbage wedges resting on top.  Resist adding more water than specified in the recipe, as the meat and veggies will create a sufficient amount of liquid as they cook down.

Corned beef is often sold with a spice packet, but if yours doesn’t have one or you suspect it may contain gluten, just toss it and make your own!

Ingredients:

  • 2-4 lbs. corned beef brisket
  • 1 head of cabbage
  • 2 medium potatoes
  • 4 large carrots
  • 1 large sweet onion
  • 2 cloves garlic
  • 3 cups water
  • 5 tsp. cider vinegar
  • 5 tbsp. sugar

 For the spices:

  • 1 tbsp. mustard seed
  • 1 tbsp. coriander seed
  • 1 tbsp. peppercorns
  • 2 tsp. fennel seeds
  • 2 bay leaves
  • 1/2 tsp. red pepper flakes
  • 3 whole clove
  • 4 allspice berries

Preparation:

Place all of the spices except the bay leaves in a tea ball, or tie them up in cheesecloth.

Peel and chop the potatoes, carrots and onion into large chunks.  Mince the garlic.  Arrange the veggies in an even layer on the bottom of the crock-pot and add the bay leaves.

Rinse off the brisket and place it on top of the vegetables.  If your brisket weighs more than 2 lbs. you may want to cut it in half.  This one is a point cut, just under 4 lbs. and I did end up cutting it in two pieces.

Snuggle the tea ball or cheesecloth bundle about halfway down so that it will be submerged in liquid.

Cut the cabbage into wedges and arrange them on top of the meat.  Whisk together the water, sugar and cider vinegar, and pour the liquid over everything.  Again, it may not look like enough, but more liquid will be created as the meat and cabbage cook down.  Cover and cook on low setting for 8-9 hours, depending on the size of your brisket.  The internal temperature of the corned beef should be 160º or higher.

It’s that easy friends.  Remove the spice bundle and transfer the corned beef to a cutting board.  Slice the meat against the grain.

Arrange on a serving platter with the vegetables and dinner is ready.  Let the festivities begin!

Notes ♪♫ Brisket – flat cut or point cut?  Choose a flat cut for leaner meat and even thickness (a good option if you are limiting fat or your crock-pot is small).  Point cut is a fattier piece of meat that is so flavorful and juicy, it is my personal favorite!  Whichever you choose, buy more than you think you will need as the meat shrinks considerably during cooking.  Both cuts are suitable for this slow-cooked preparation.

Print This Post Print This Post

Crock-Pot Braised Pot Roast

Think you don’t have time to prepare a delicious Italian Sunday dinner?  With the help of your crock-pot, I’ll show you how to create a wonderful meal that virtually cooks itself while you go about your busy day.  With a nine hour cook time, you can easily fit this into your schedule.

Ingredients:

  • 2 lb. chuck roast
  • 3 garlic cloves, cut into slivers
  • 1/2 sweet onion, diced
  • olive oil
  • salt and pepper
  • 3/4 cup red wine

Preparation:

Crock-pots are wonderful, but there are a few things they can’t do, like caramelize meat and veggies.  Throwing all of the ingredients into the crock-pot is easy, but you won’t get the depth of flavor created by searing the meat first.  Take a few extra minutes to do this and you won’t be disappointed.

Here is my chuck roast.  All of that nice marbling is going to break down into melt in your mouth tenderness, but first I’m going to sear the meat in a little olive oil.  Use a stainless steel or cast iron skillet, don’t use non-stick.  Season both sides with salt and pepper.

Next, use a paring knife to make small slits all over the top of the roast and insert a sliver of garlic into each.

Spray the crock-pot with cooking spray and place the roast in the crock-pot.  Use the same skillet to saute the onions 2-3 minutes then add them to the crock-pot.

Deglaze the pan with the red wine, scraping up the caramelized bits.

Bring to a simmer and pour it over the roast.  Cover and cook on low for 9 hours.


Fast forward, nine hours later your house smells amazing and your family will think you have been in the kitchen all day.  Let it be your little secret!

Carefully lift the beef onto a serving dish.  You won’t even need a knife to cut it!  Serve over polenta with a little marinara sauce and grated cheese for a really special Italian Sunday dinner.


Notes: ♪♫ Try to select a chuck roast that has an even thickness all around.  Most grocers have a meat department where you can ask to have a larger roast cut to your desired size.

Print This Post Print This Post


Crock-Pot Rotisserie Chicken

Deliciously seasoned, falling off the bone tender chicken, just like the Rotisserie Chicken you buy at the market made right in your own kitchen!  This unbelievably simple recipe will give you the same moist flavorful chicken that everyone loves.  I used a 6 quart Crock-Pot to make this meal.  I had a family pack of 8 chicken leg quarters and not only was it very economical but I also ended up with 2 cups of chicken stock that I have frozen for making soup next month.  There are only 4 basic steps to the recipe.  Make the rub, prep the vegetables, cook in the crock-pot for 8 hours, then finish in the oven.  It doesn’t get any easier than this and you can plan it around your work day.  Wouldn’t you like to come home to this?

Ingredients:

  • 6 tsp. sea salt
  • 2 tsp. paprika
  • 2 tsp. onion powder
  • 2 tsp. garlic powder
  • 1 tsp. thyme
  • 1 tsp. Italian seasoning
  • 1 tsp. ground pepper
  • 1/2 tsp. ground fennel
  • 1/2 tsp. ground coriander
  • 1/2 tsp. dehydrated bell pepper
  • 8 chicken leg quarters
  • 1 large sweet onion, chopped
  • 2 carrots, sliced
  • 2 celery stalks, sliced
  • cooking spray

Preparation:

Rinse the chicken, trim any excess skin and pat dry.  Whisk together the first 10 ingredients to make the rub and liberally coat both sides of the chicken.  Leave a little aside for finishing.

Mist the crock-pot with cooking spray.  Chop the onion, carrot and celery and place it in the bottom.  Do not add liquid, the vegetables should hold the chicken up above any liquid that forms during cooking.


Arrange the seasoned chicken on top of the vegetables.  I was able to fit all 8 leg quarters in my 6 quart crock-pot.

Cover and cook on high for 2 hours, then reduce heat to low for 6 more hours.  It can go a little longer if you are running late.  About half way through, rotate the chicken in the crock-pot.  Remove the chicken and spoon out some of the excess liquid.  Then place the pieces that were on top in first, and the rest on top.  If you like, you can strain the liquid and reserve it for soup stock as I did.  After 8 hours preheat the oven to 350º.  Arrange the chicken in a single layer on a baking sheet, sprinkle with more seasoning and finish in the oven for 30 minutes.

That last 30 minutes in the oven is the magic!  The most tender, juicy chicken you will ever have at home.  Gluten free!

Notes: ♪♫ Most single ingredient seasonings are gluten free, but always  check your ingredient labels, especially for seasoning blends!


Print This Post Print This Post