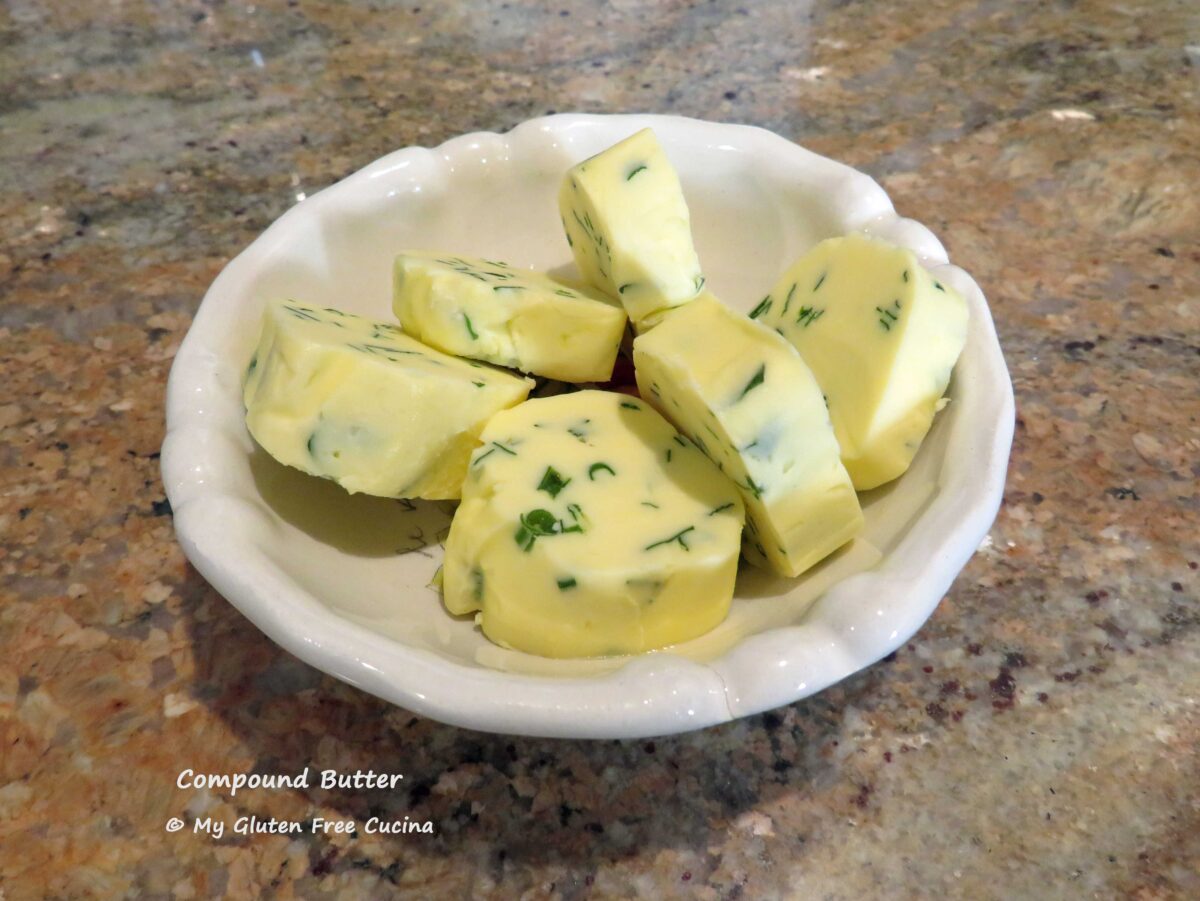
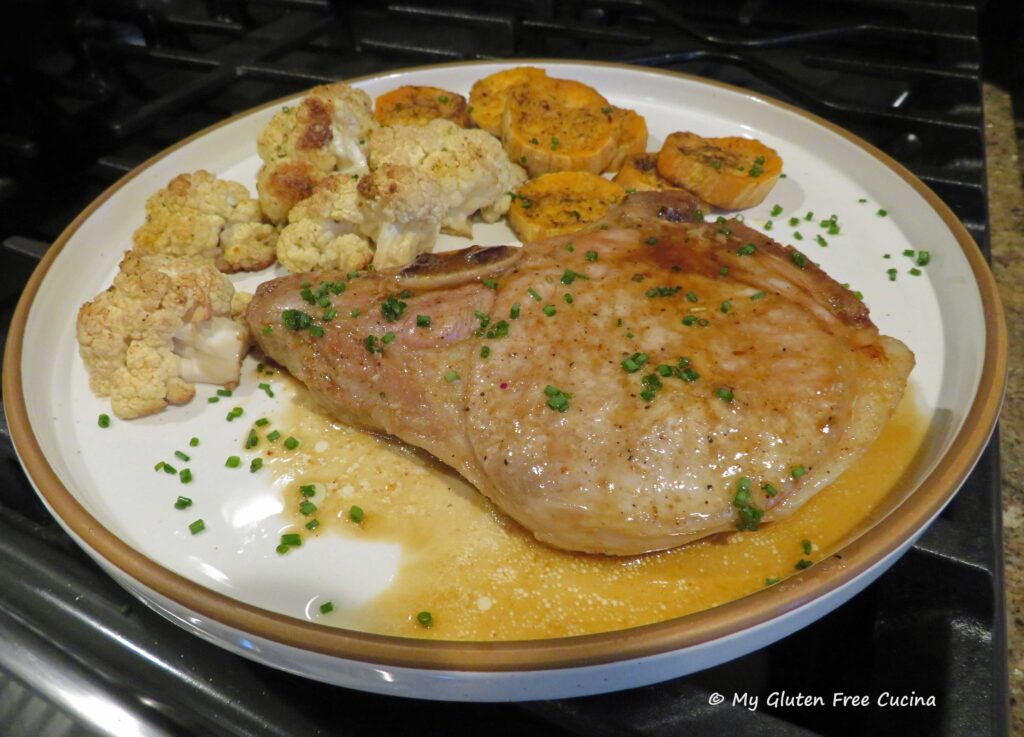
What is compound butter?
Compound Butter, a/k/a Beurre Composé, sounds pretty fancy, doesn’t it? Like something you would need a culinary degree to make. Fortunately though, that’s not the case. In fact, compound butter is simply butter that has been softened and blended with other ingredients. Phew!
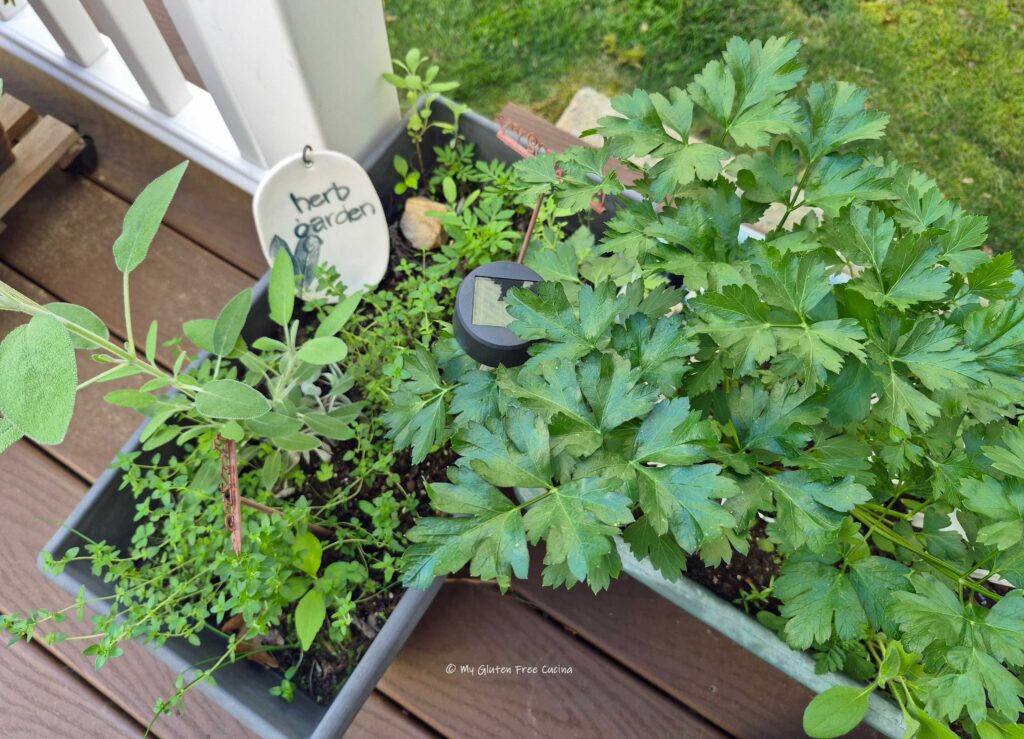
Now that the secret’s out, I’ll show you two of my favorite compound butter variations that I make at home, one for summertime when fresh herbs are growing in the garden and another for winter made with dried herbs. You can try different combinations of herbs and seasonings to make it your own!
This post contains affiliate links.
Herbed Compound Butter
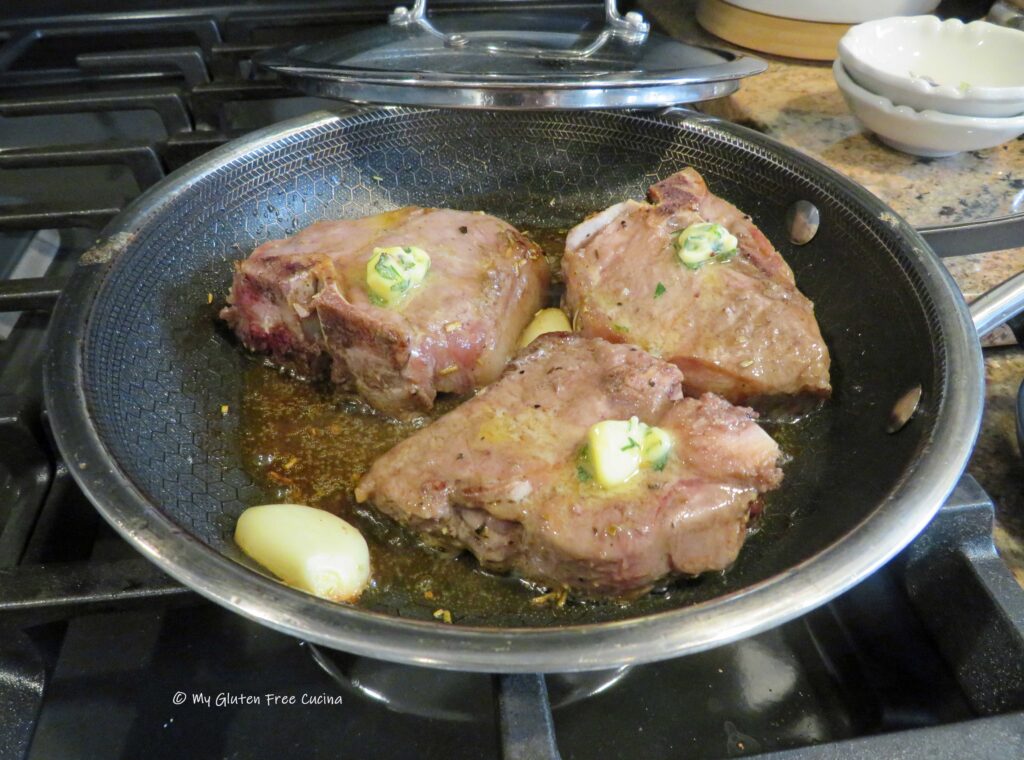
When summer days are here and you have fresh herbs from the garden, this easy compound butter comes together in minutes. A simple classic to melt over a steak or veggies. I also love it for cooking scrambled eggs and omelets.
Ingredients:
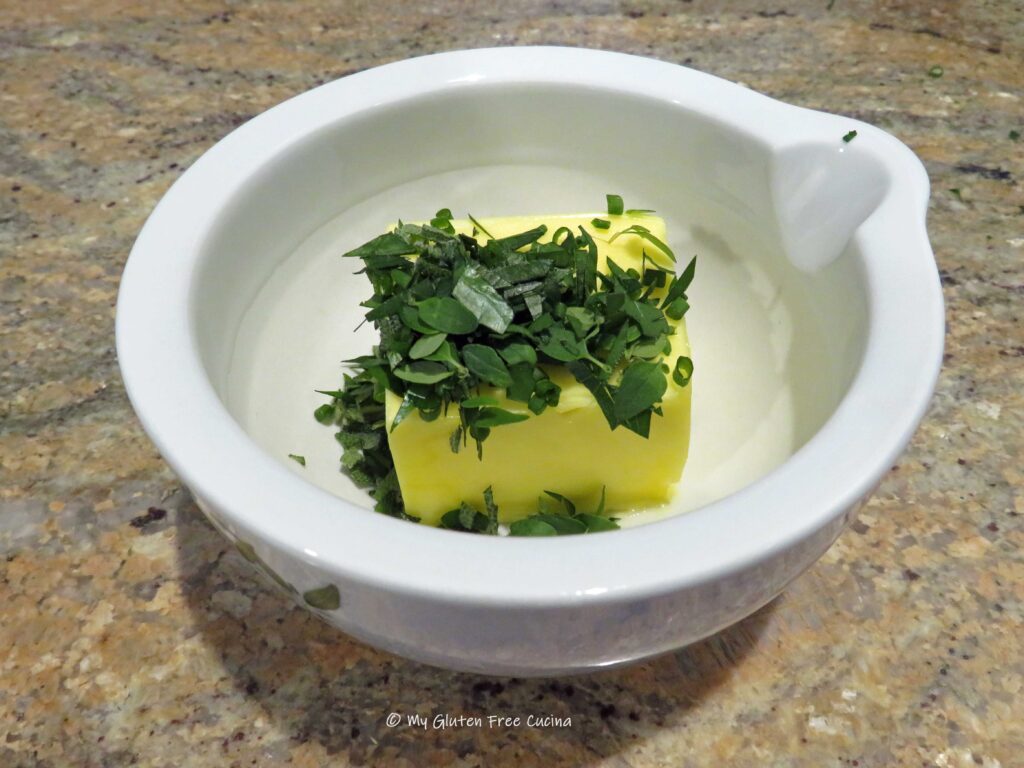
- 4 tbsp. softened unsalted butter (1/2 stick)
- 1 tbsp. minced fresh herbs (I used parsley, chives, sage, thyme)
- pinch of sea salt (optional, omit for low sodium diets)
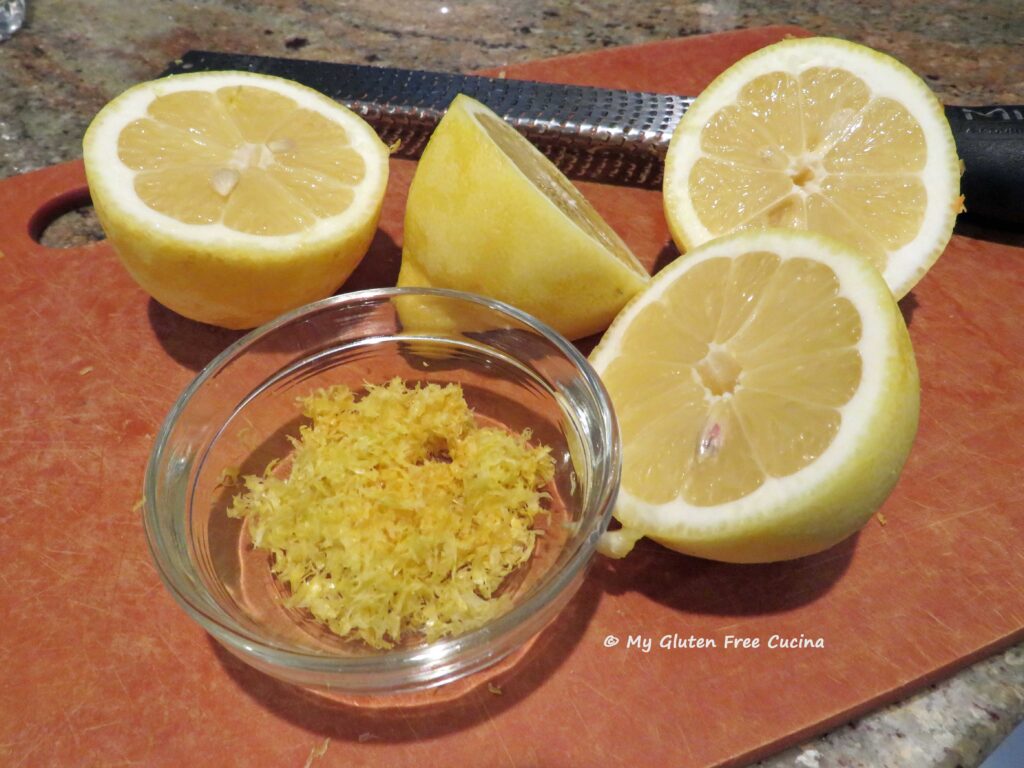
Use your favorite herbs here, whatever you like to grow. Or maybe you get them at the farmer’s market or grocery store. Just chop the herbs into fine mince and mash them into the butter using a fork, or a mortar and pestle. Finish with a pinch of sea salt.
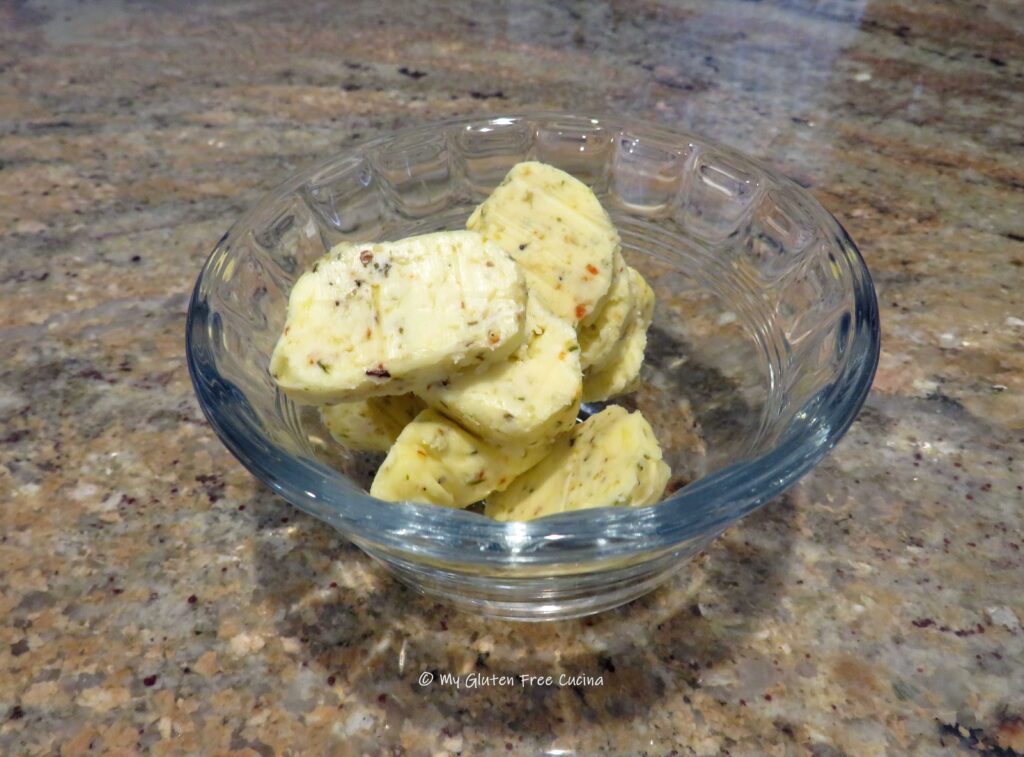
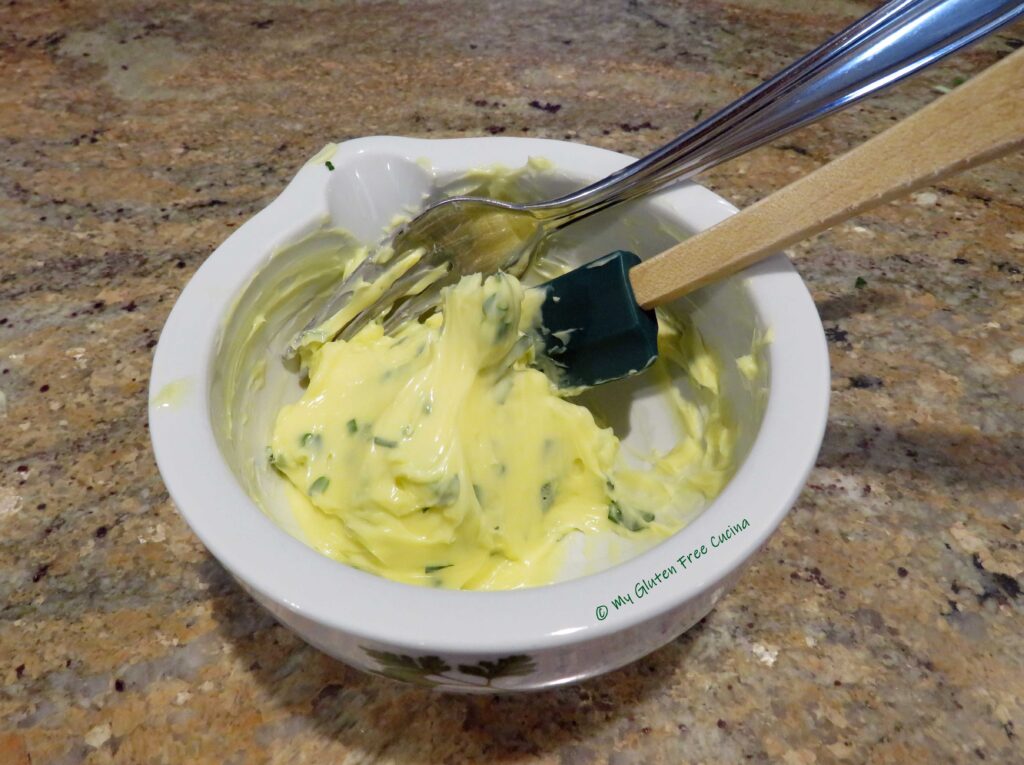 You can refrigerate it just like this or roll the butter into a cylinder shape with parchment paper and refrigerate. When it firms up, slice it into rounds and store in an airtight container.
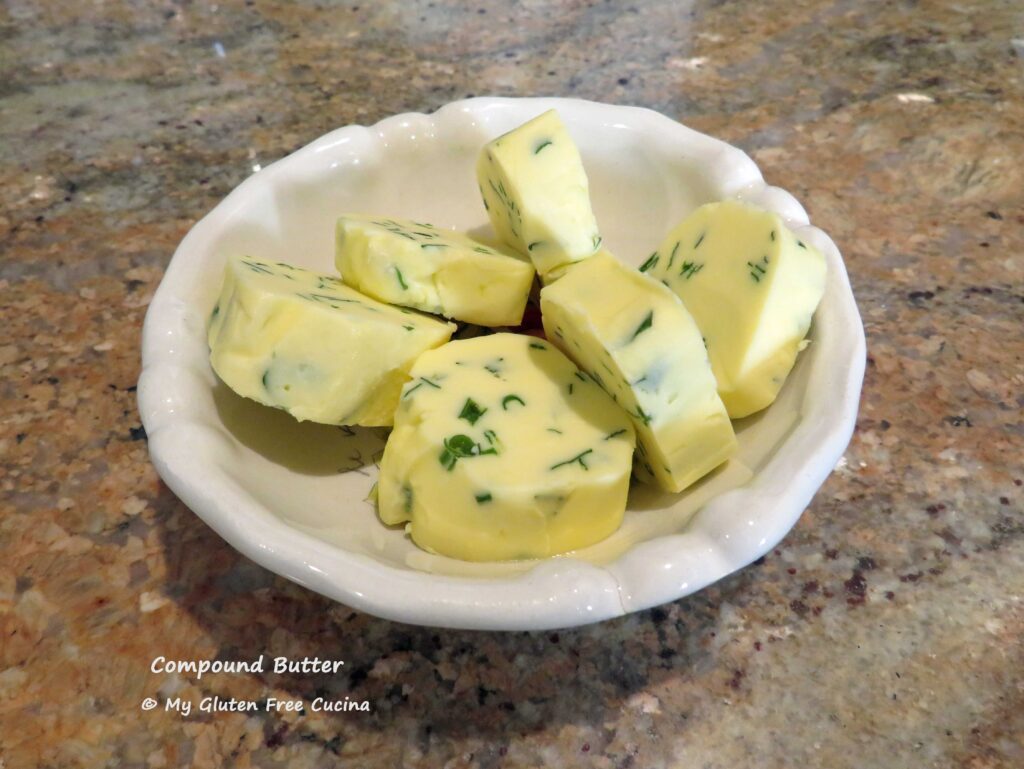
This butter keeps well in the refrigerator, but I promise you it will disappear quickly!
Garlic Compound Butter
This is the one to make during the winter months, using garlic and dried herbs. A wonderful spread that is perfect for making garlic bread or for basting vegetables and potatoes. It can be a nice homemade touch for your holiday breadbasket. Try serving it in mini ramekins, where each guest gets their own little pat of garlic butter (those who are gluten free will really appreciate this!).
Ingredients:
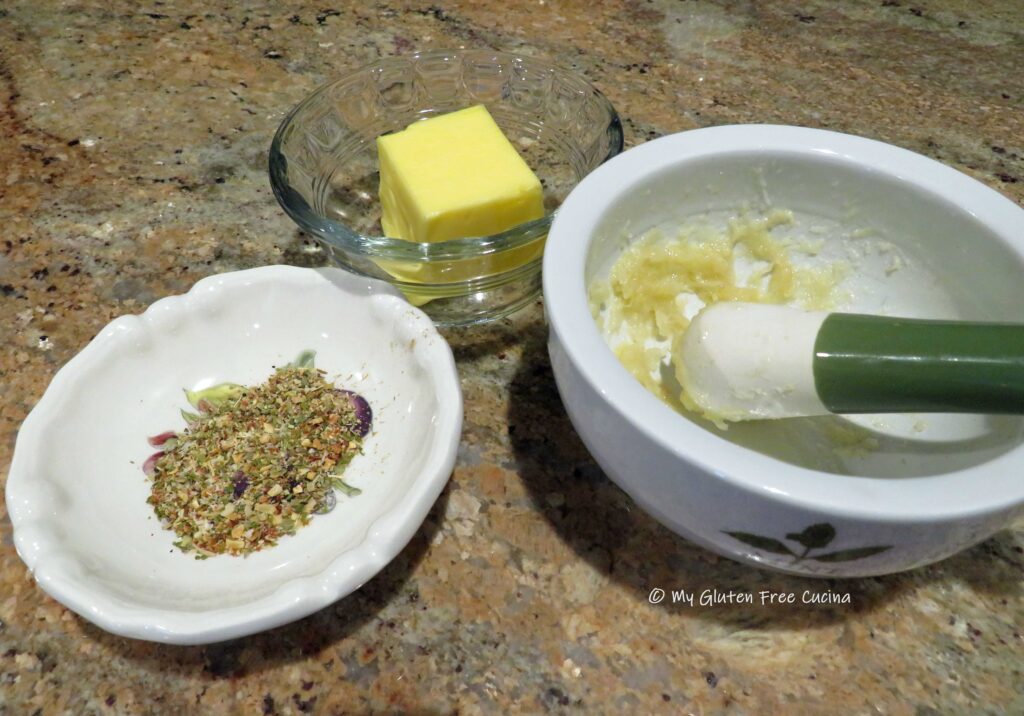
- 1 large clove of garlic, peeled
- 2 tsp. olive oil
- 4 tbsp. (1/2 stick) unsalted butter at room temperature
- 1/4 tsp. dried herbs, use your favorites
- 1/8 tsp. oregano
- pinch of crushed fennel seed (optional)
- pinch of sea salt (optional)
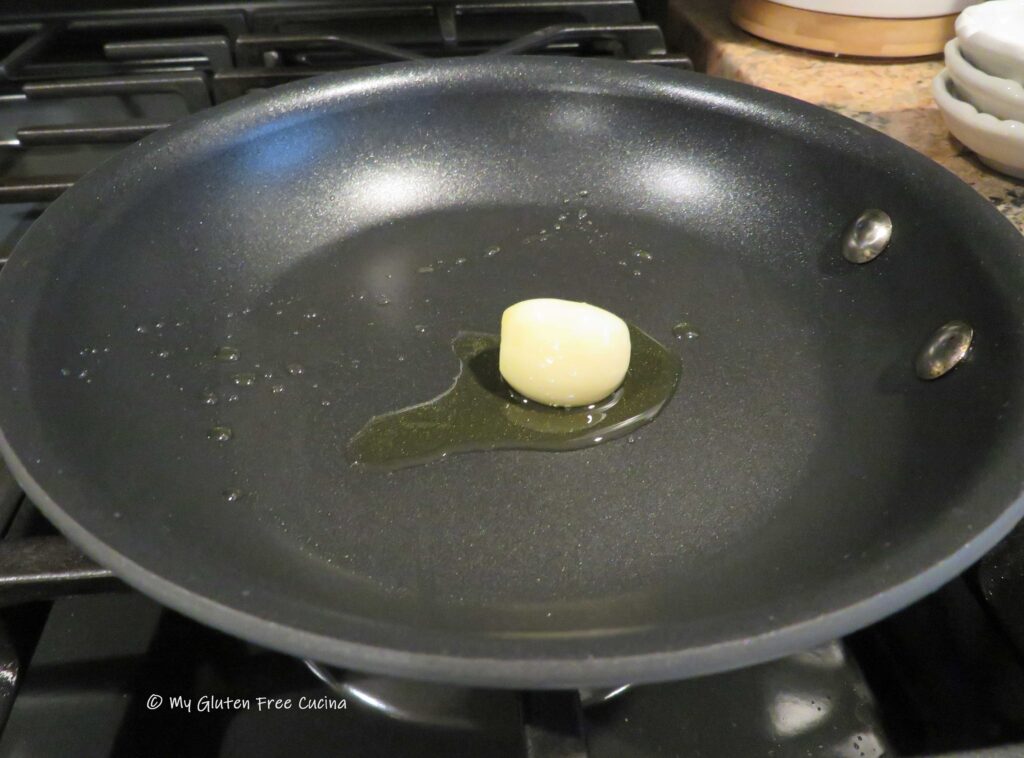
Heat the olive oil in a small heavy skillet over lowest heat. Cook the garlic until it is soft and just beginning to brown.
 Remove the garlic and mash it with 1/2 tsp. of the olive oil. You can use a mortar and pestle, a fork or the back of a spoon.
 Combine the garlic mash with the softened butter and remaining ingredients. I like to use a Tuscan style seasoning blend along with a tiny bit or oregano and fennel.
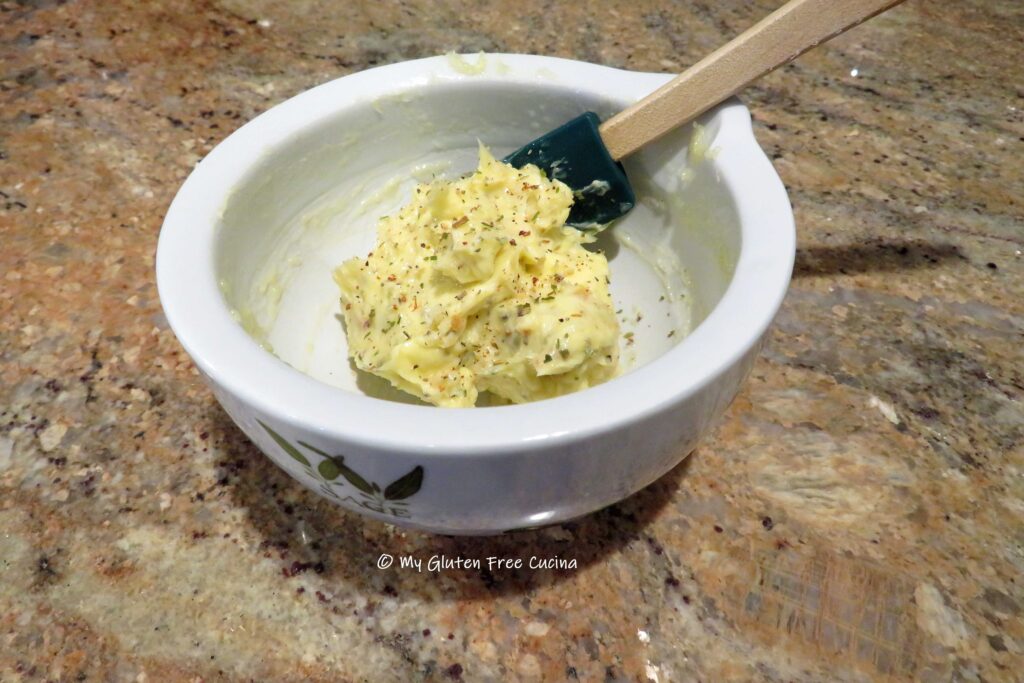 Mix well to incorporate and let it stand for several hours at room temperature, then place it in an airtight container and refrigerate (or freeze) until ready to use.
 Notes ♪♫ Compound Butter can be as simple or as fancy as you want. Always start with a good quality grass fed butter. Make it gourmet with grated truffles or minimalist with herbs from your garden. Sea salt can be added to suit your taste or omitted for low sodium diets.
Originally posted 10/14/2019 Updated 6/30/2026


Compound Butter (beurre composé)
- Diet: Gluten-Free
Description
Compound butter is simply butter that has been softened and blended with other ingredients. In this post, I’ll show you two of my favorite compound butter variations that I make at home, one for summertime when fresh herbs are growing in the garden and another for winter made with dried herbs.
Ingredients
- 4 tbsp. softened unsalted butter (1/2 stick)
- 1 tbsp. minced fresh herbs (I used parsley, chives, sage, thyme)
- pinch of sea salt (optional, omit for low sodium diets)
- 1 large clove of garlic, peeled
- 2 tsp. olive oil
- 4 tbsp. (1/2 stick) unsalted butter at room temperature
- 1/4 tsp. dried herbs, use your favorites
- 1/8 tsp. oregano
- pinch of crushed fennel seed (optional)
- pinch of sea salt (optional)
Instructions
For Herbed Compound Butter
Just chop the herbs into fine mince and mash them into the butter using a fork, or a mortar and pestle. Finish with a pinch of sea salt.
You can refrigerate it just like this or roll the butter into a cylinder shape with parchment paper and refrigerate. When it firms up, slice it into rounds and store in an airtight container.
For Garlic Compound Butter:
Heat the olive oil in a small heavy skillet over lowest heat. Cook the garlic until it is soft and just beginning to brown.
Remove the garlic and mash it with 1/2 tsp. of the olive oil. You can use a mortar and pestle, a fork or the back of a spoon.
Combine the garlic mash with the softened butter and remaining ingredients. I like to use a Tuscan style seasoning blend along with a tiny bit or oregano and fennel.
Mix well to incorporate and let it stand for several hours at room temperature, then place it in an airtight container and refrigerate (or freeze) until ready to use.
Notes
Compound Butter can be as simple or as fancy as you want. Always start with a good quality grass fed butter. Make it gourmet with grated truffles or minimalist with herbs from your garden. Sea salt can be added to suit your taste or omitted for low sodium diets.
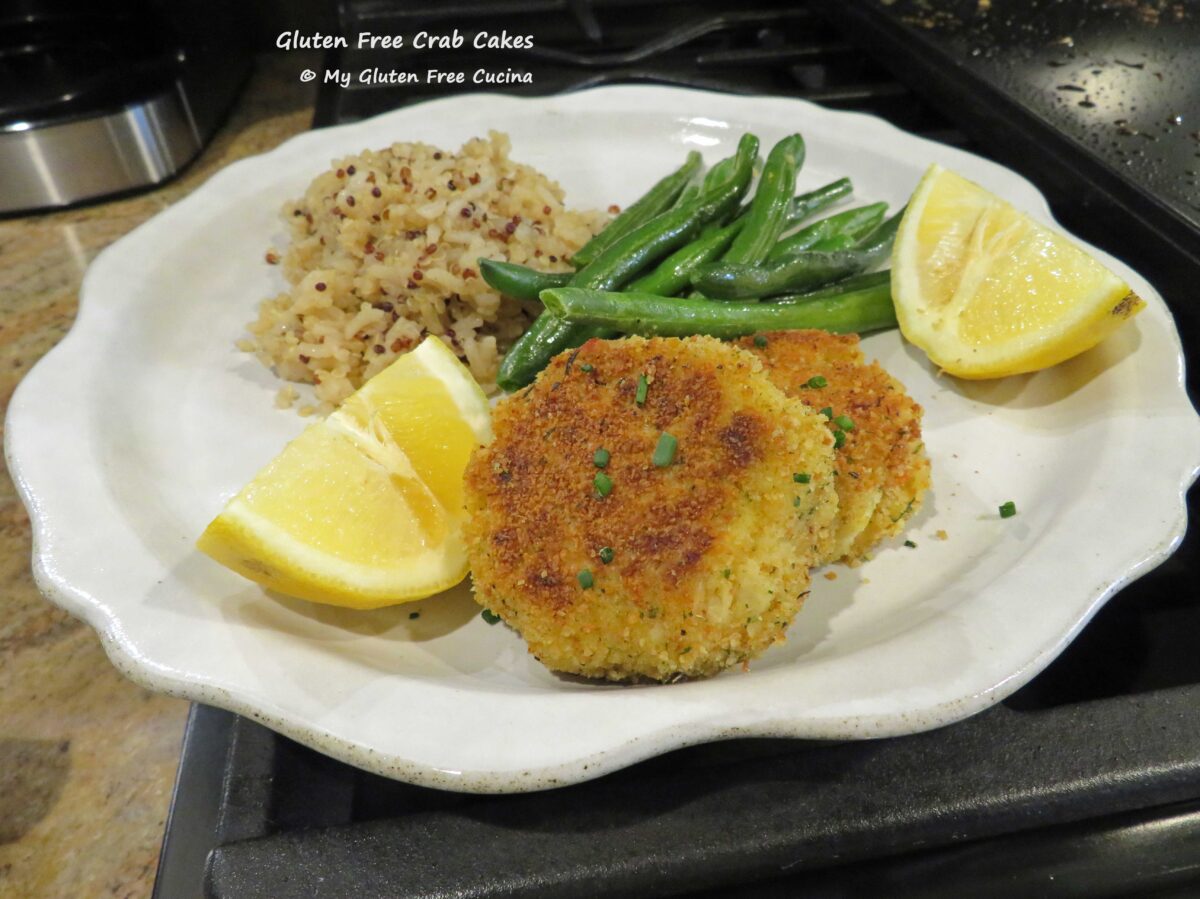
 Yield: 5-6 crab cakes (plan for 1 each as an appetizer or 2 as a main course)
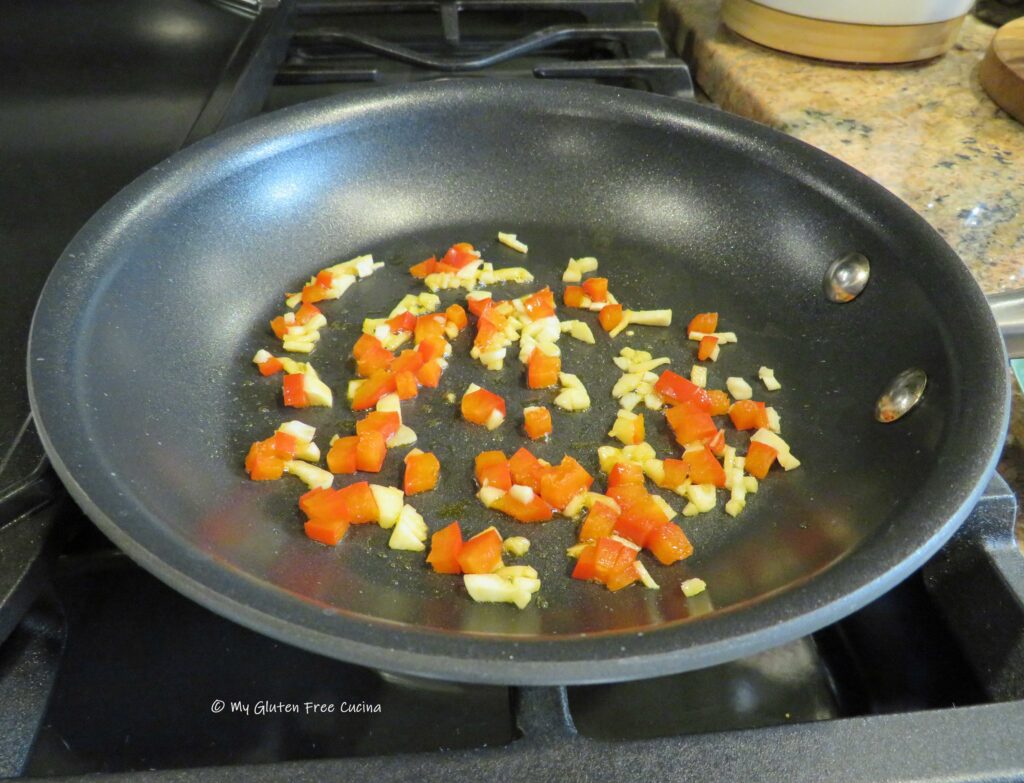 Add the breadcrumbs to a shallow bowl. In a separate bowl, whisk the egg, mayonnaise, Worcestershire sauce, minced veggies, lemon juice and seasonings in a separate bowl. Add the potato flakes and whisk until smooth.
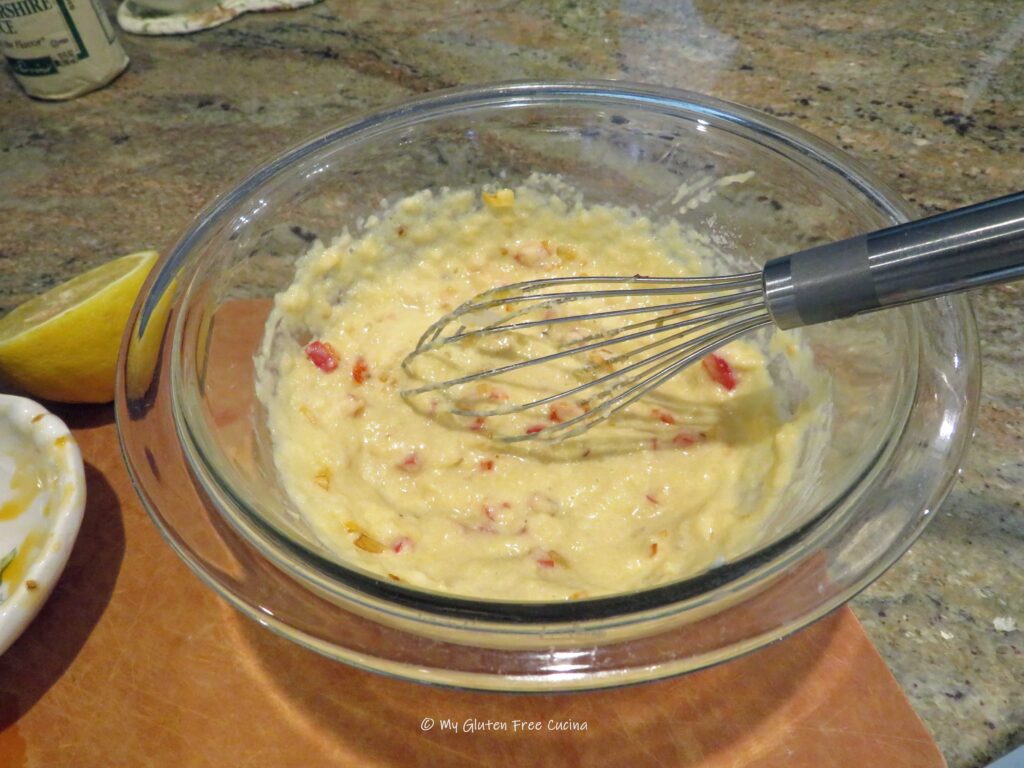 Fold in the crab meat and 2 tbsp. (half) of the breadcrumbs.
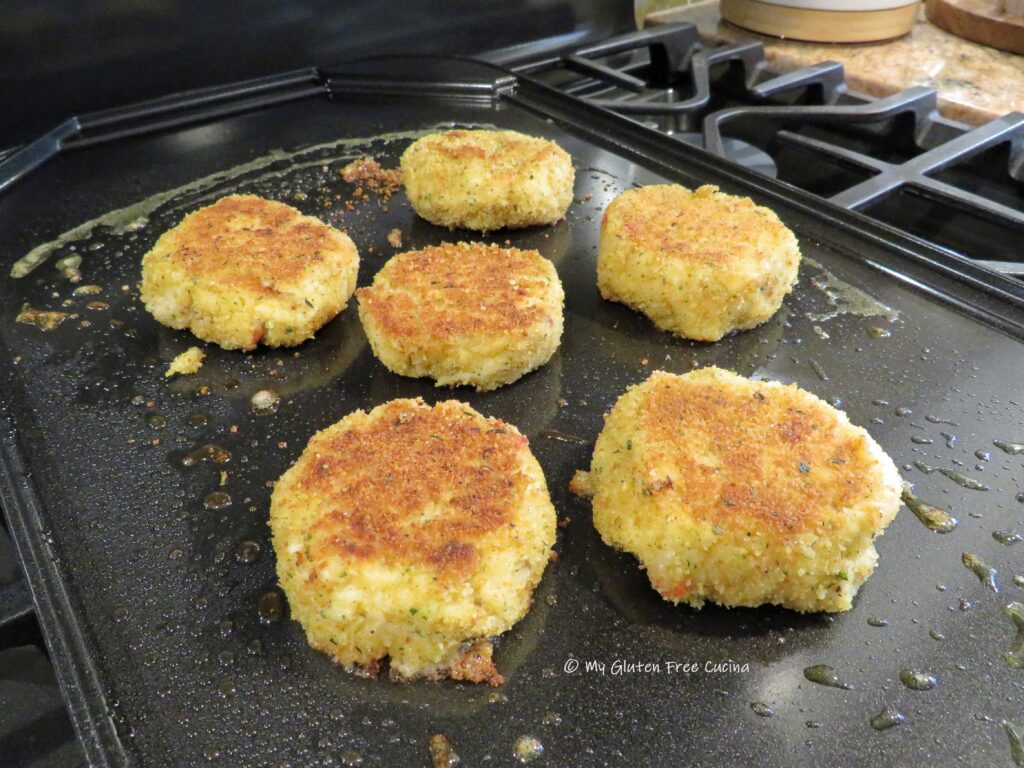
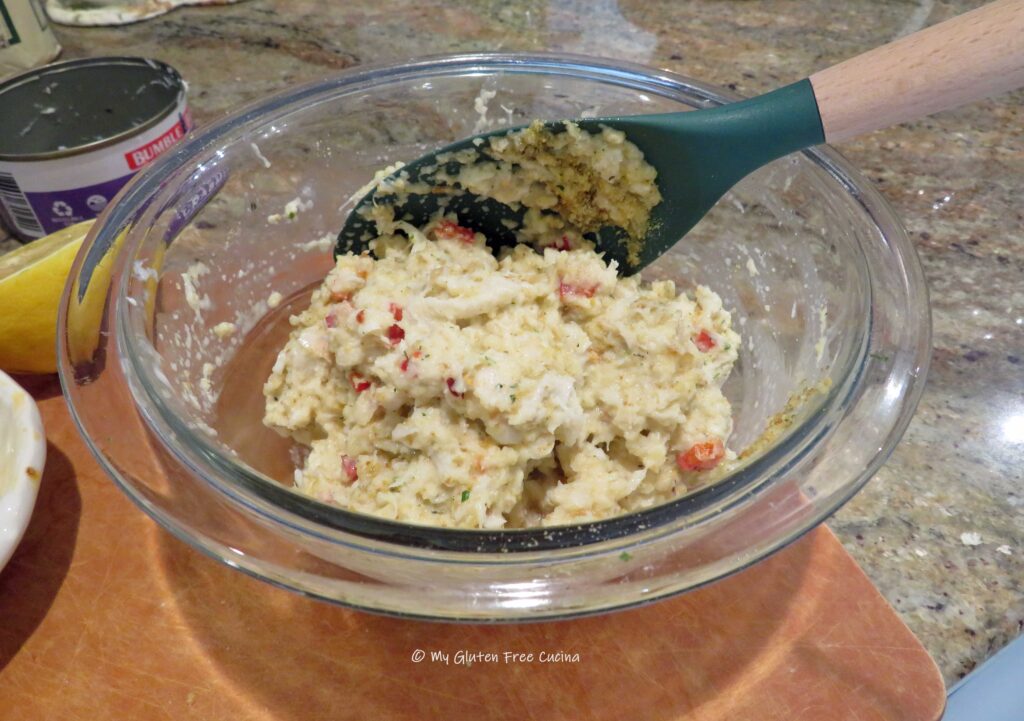 Using a ¼ cup measuring cup, scoop out the mixture to form 5-6 crab cakes. Handle them gently and they should hold together (they will be wet). Carefully roll each crab cake in the remaining breadcrumbs to coat. Arrange them on a baking sheet lined with parchment and refrigerate for 1 hour. This will help retain their shape and hold together while cooking.
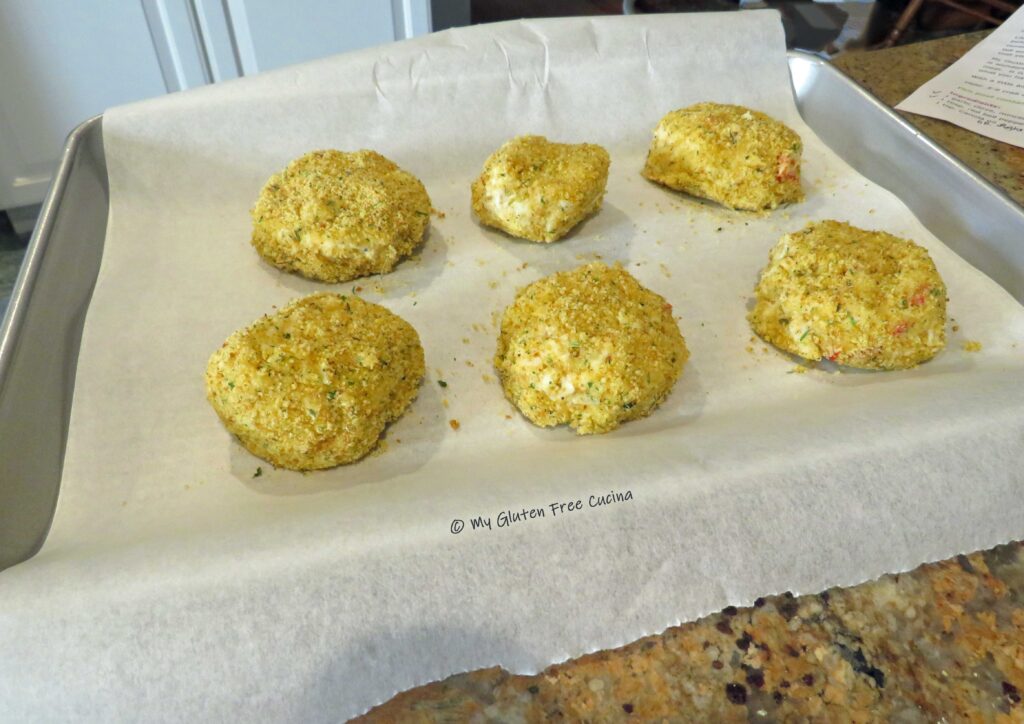 Heat a
 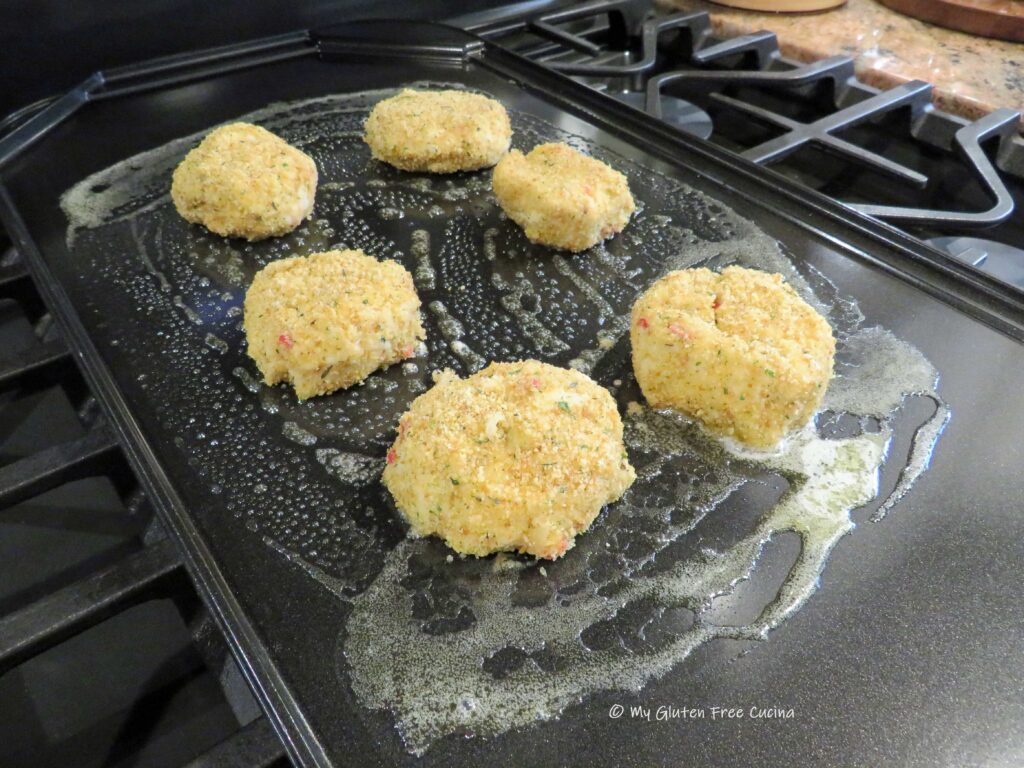 Cook the crab cakes for 5 minutes per side. To get that golden crust, don’t move the crab cakes around until it’s time to flip them over. Transfer to a baking sheet and put them in a 350º oven for a few more minutes to finish, then lower the heat and keep warm until serving.
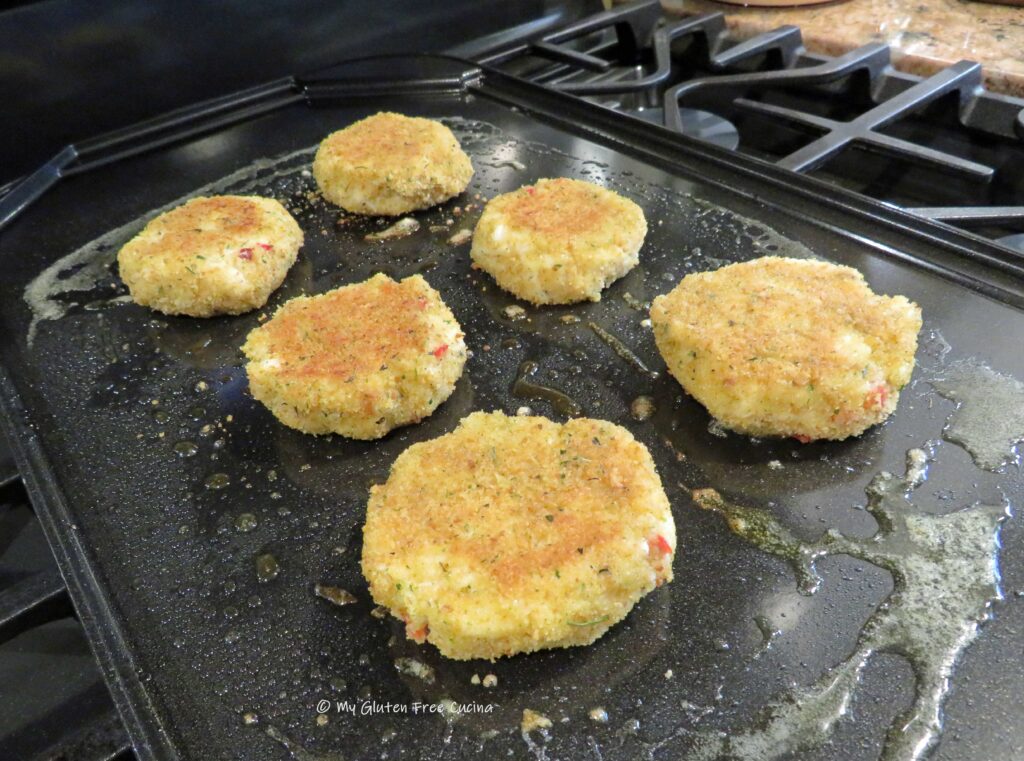 Friends, they were so delicious! The recipe is easy enough, wouldn’t you say? A lovely appetizer to begin a meal or serve as a main course. Go on and give it a try, surprise your special someone or treat yourself.
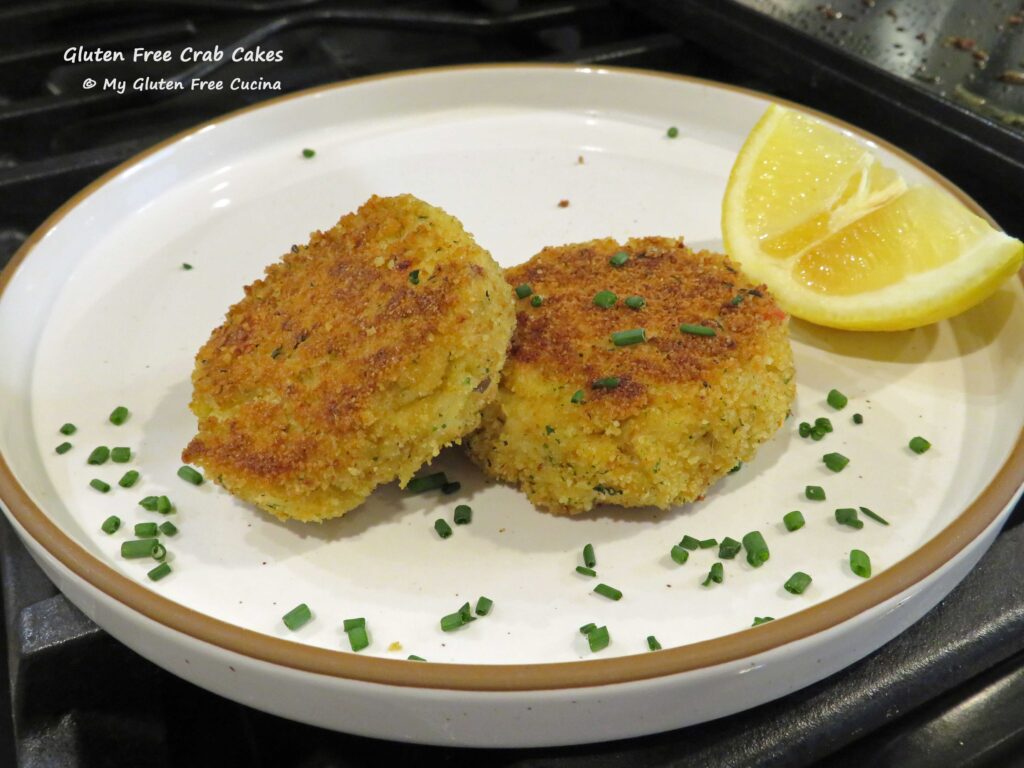 Notes ♪♫


 Dry the beef with paper towels, this helps with browning.
 Place the beef cubes in a food safe plastic bag with 2 tbsp. rice flour and shake to coat.
 Heat 1 tbsp. olive oil in a
  Leave those caramelized brown bits in the bottom of the pan, they are full of flavor! Set the beef aside and keep warm.
 Add more olive oil to the pan with the onion, carrot, celery and garlic. Cook for several minutes, stirring frequently, then clear a space in the center for the tomato paste.
 Toast the tomato paste for a minute, then stir it into the vegetables. Add the wine, using a spatula to scrape up those browned bits at the bottom of the pan. Reduce heat to a simmer and continue cooking until the wine is reduced by half.
 Stir in the beef broth and crushed tomatoes, cover and simmer on lowest heat for 2-½ hours.
 Stir the sauce frequently to be sure it isn’t sticking to the bottom of the pan. A
  A sauce like this deserves an extra special pasta. Check out these Gluten Free Paccheri Rigati – OMG what a find! I got them from
 Variations:

 Mist a
 Cook the bacon, drain on paper towels and cut into small dice. Cover and set aside.


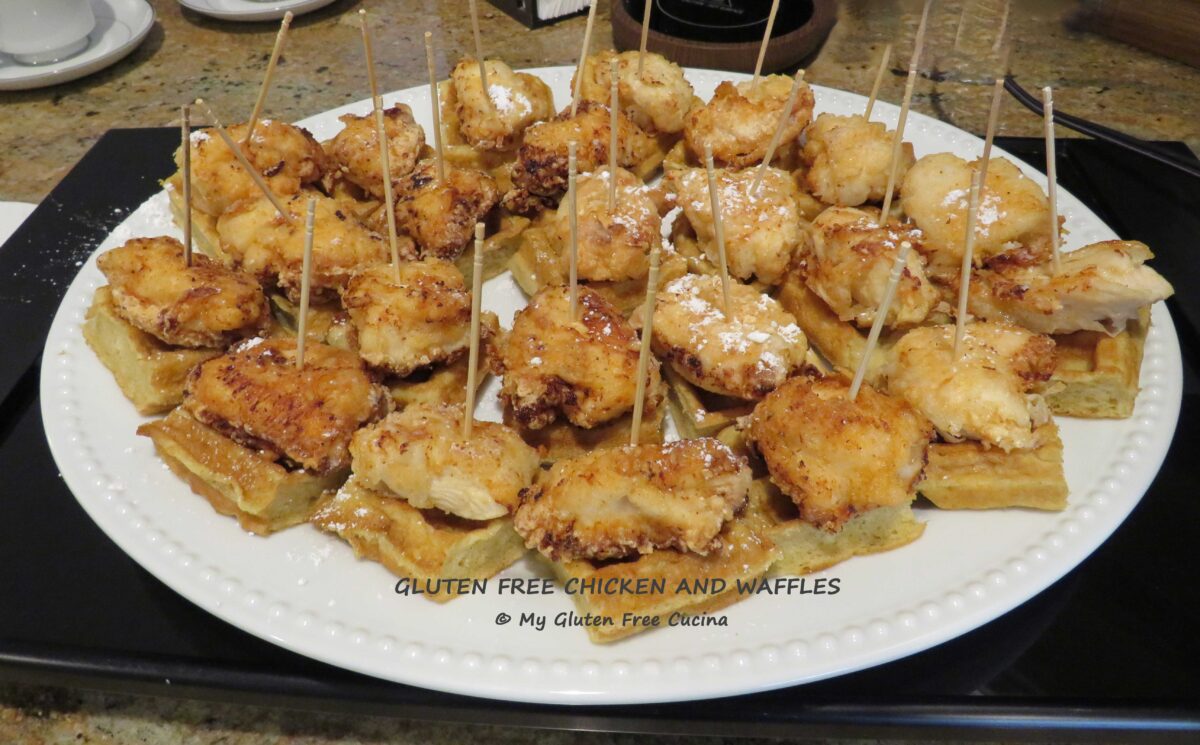

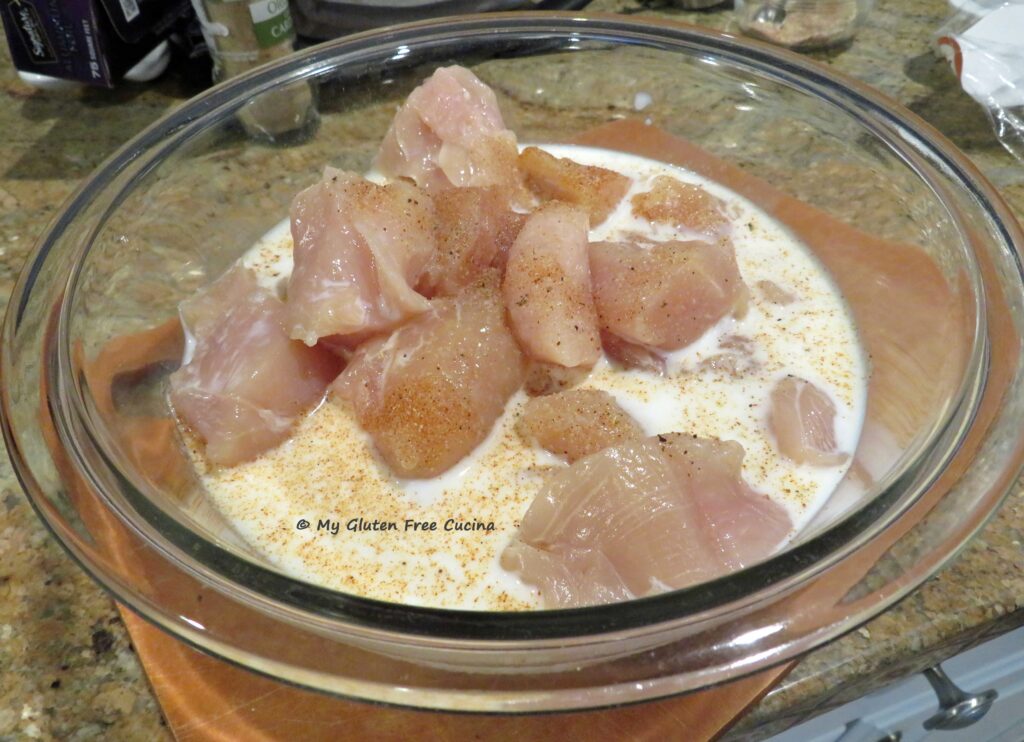 The next morning, heat the canola oil in a deep skillet. Add the cornstarch and the rest of the seasoning mixture to a small bowl. When oil is very hot, use tongs to pick up one piece of chicken at a time and dredge in the cornstarch, shaking off the excess. Add to the hot oil and cook until browned on both sides and the internal temperature reaches 165º. If you’re not sure, use a thermometer.
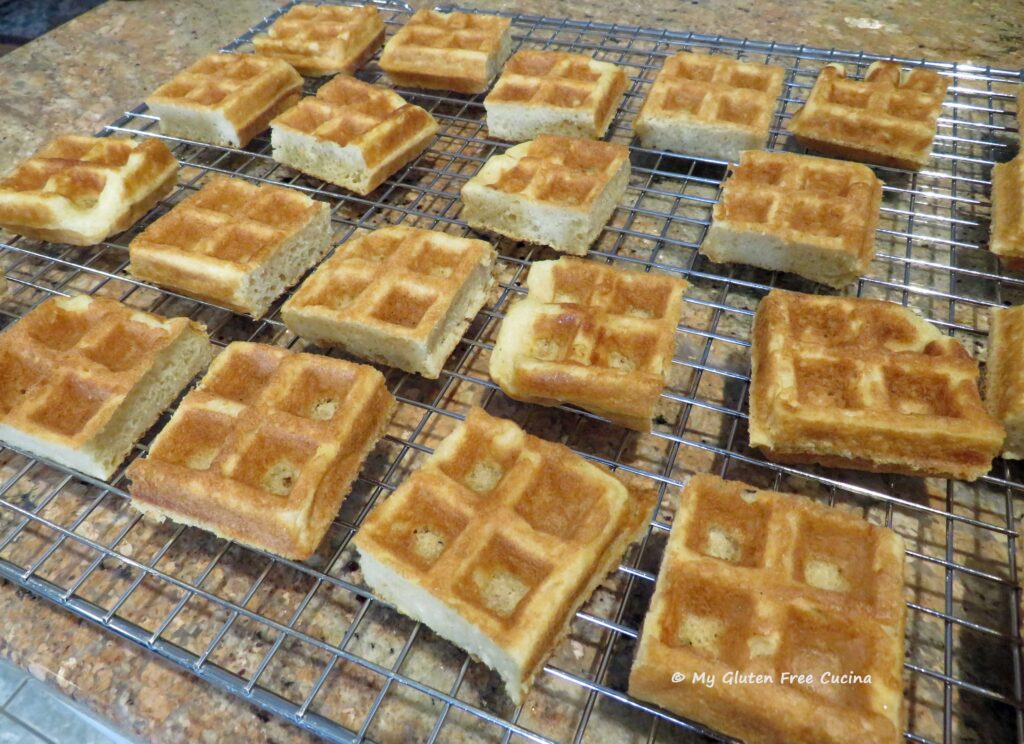
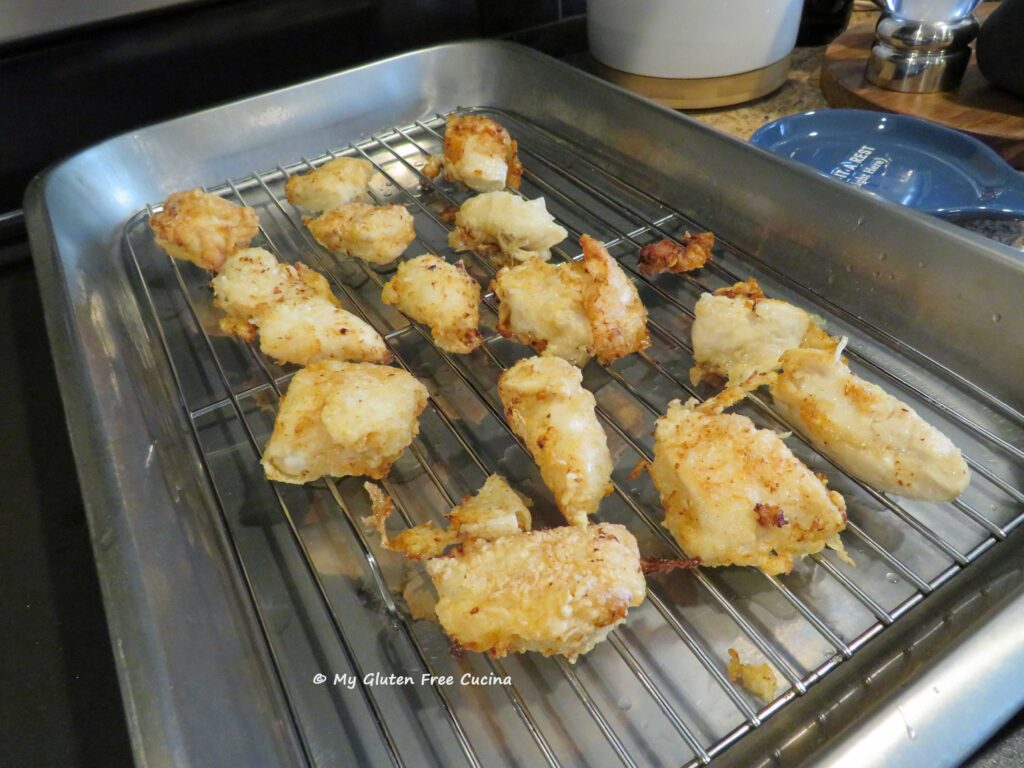 To assemble, arrange the waffles on a serving dish in a single layer (if you made them the night before, pop them into the microwave for 1 minute to reheat). Top each waffle section with a piece of chicken and secure with a skewer or toothpick.
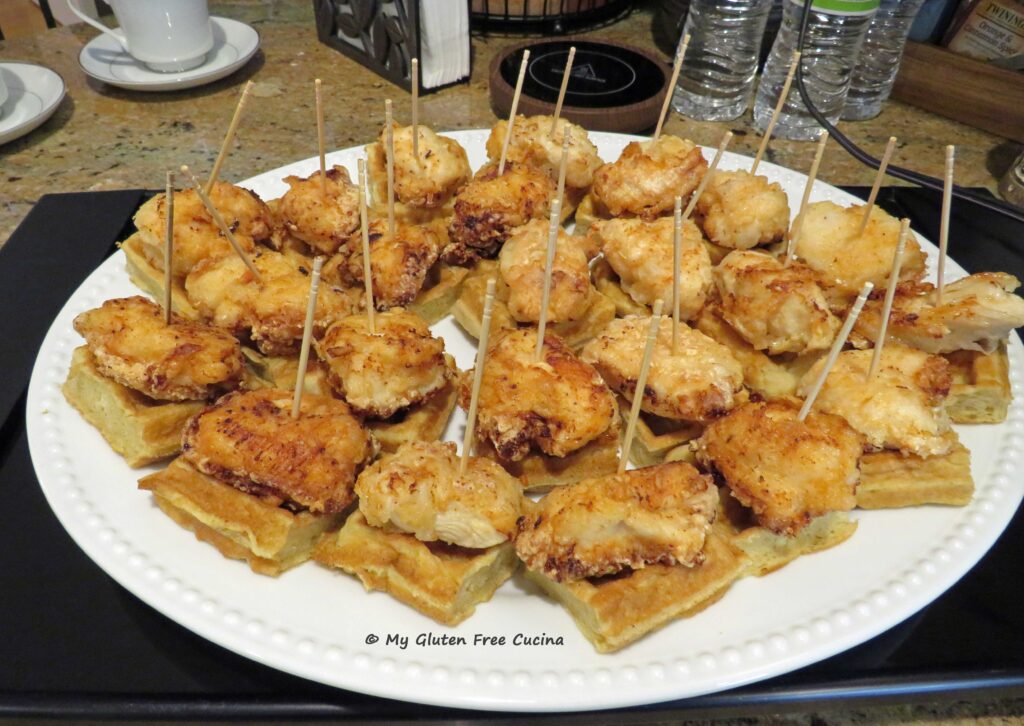 Wow, these little skewers were so tasty! The recipe was a bit of extra work, but I think everyone enjoyed them along with my usual brunch offerings. As I said before, it was all about trying something different. And would you believe, I myself had never had Chicken and Waffles before?
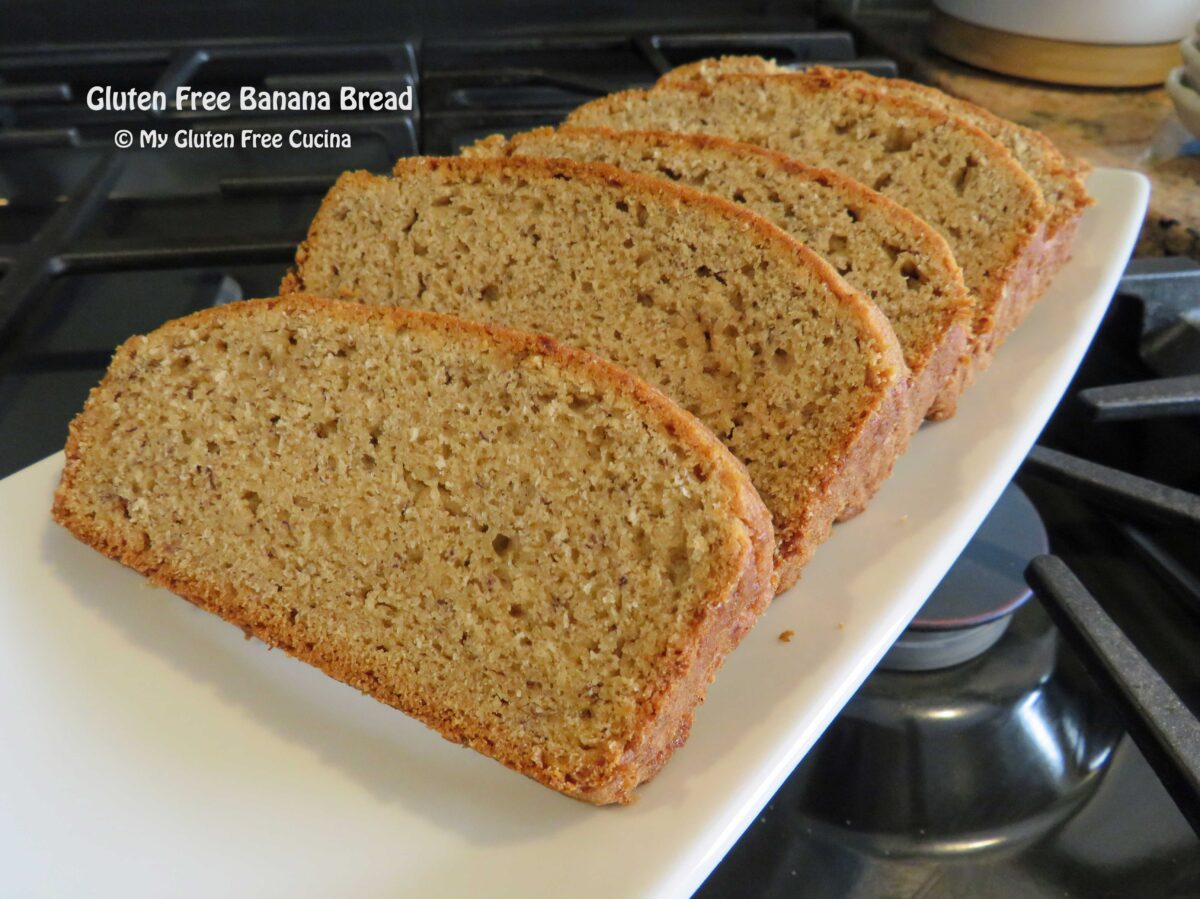
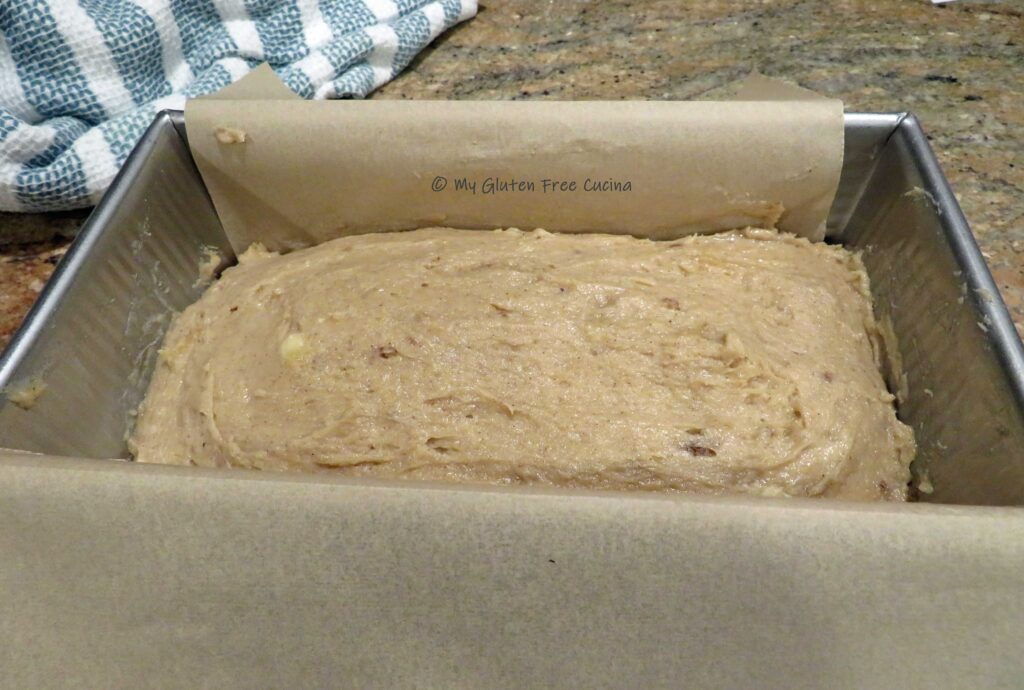
 Transfer to the prepared loaf pan and use a wet spatula to smooth the top out.
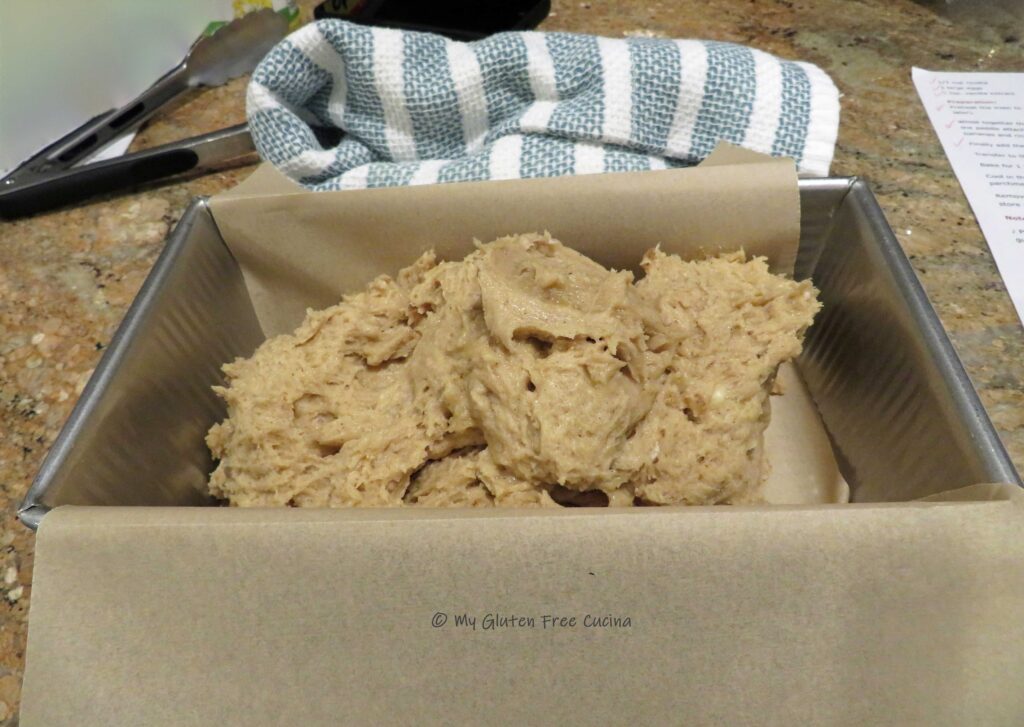
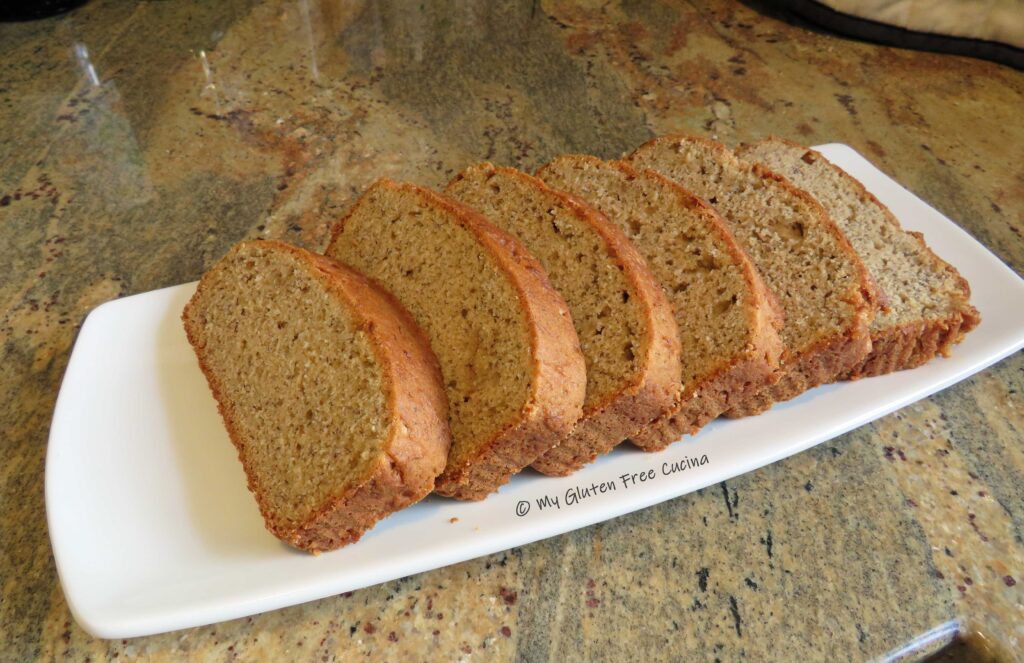
 Bake for 1 hour and check the center with a toothpick. The top should be nice and golden brown.
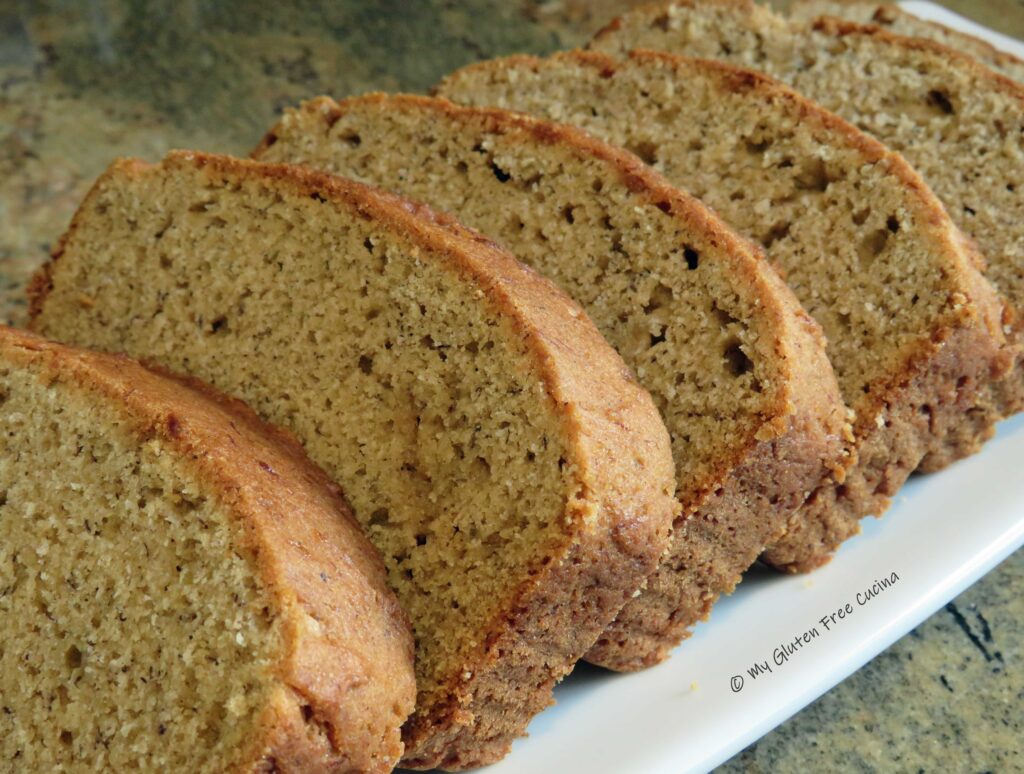
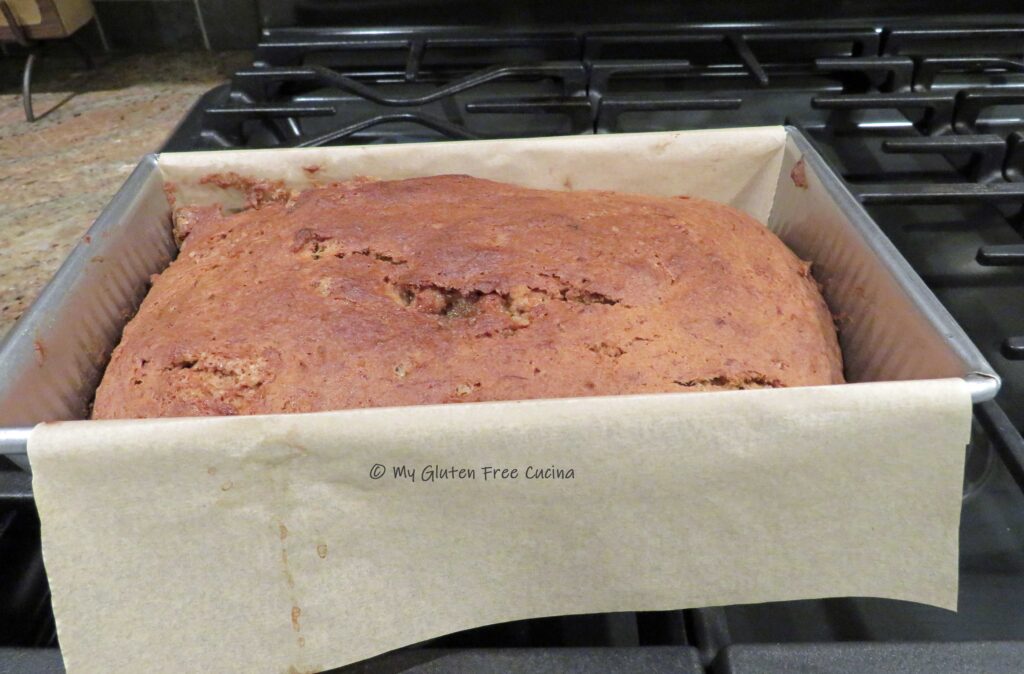 Cool in the pan for 10 minutes, then lift the loaf out of the pan by grasping both sides of the parchment paper (you’re welcome).
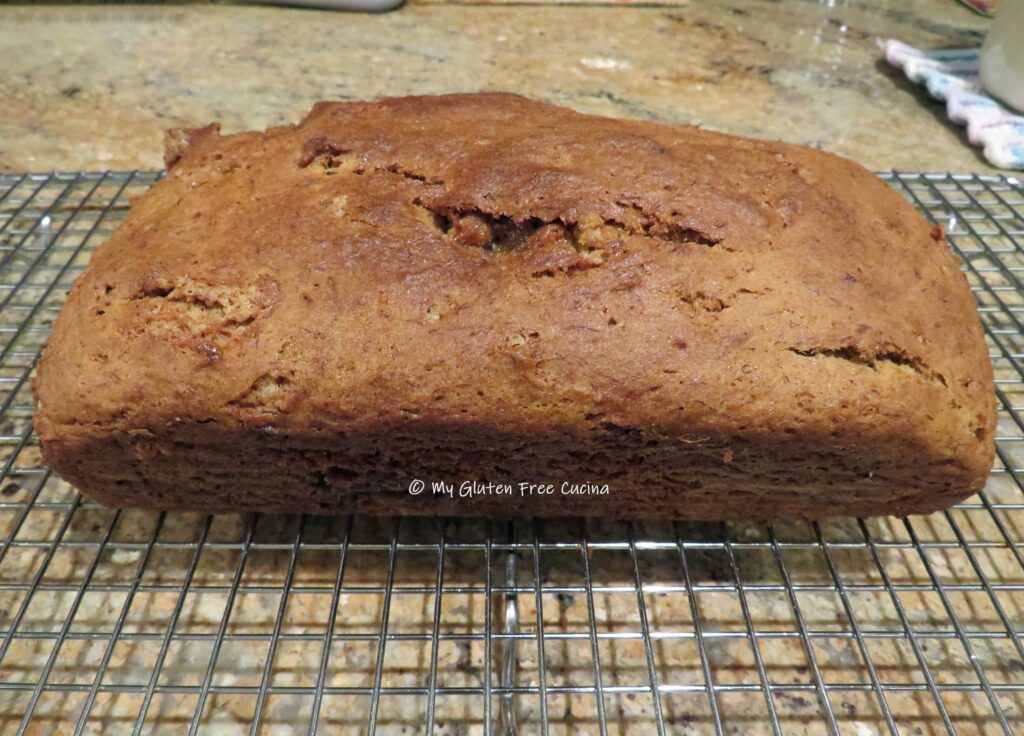 Remove the parchment and cool on a rack before slicing. Cover any leftovers in plastic wrap and store at room temperature for up to 3 days.
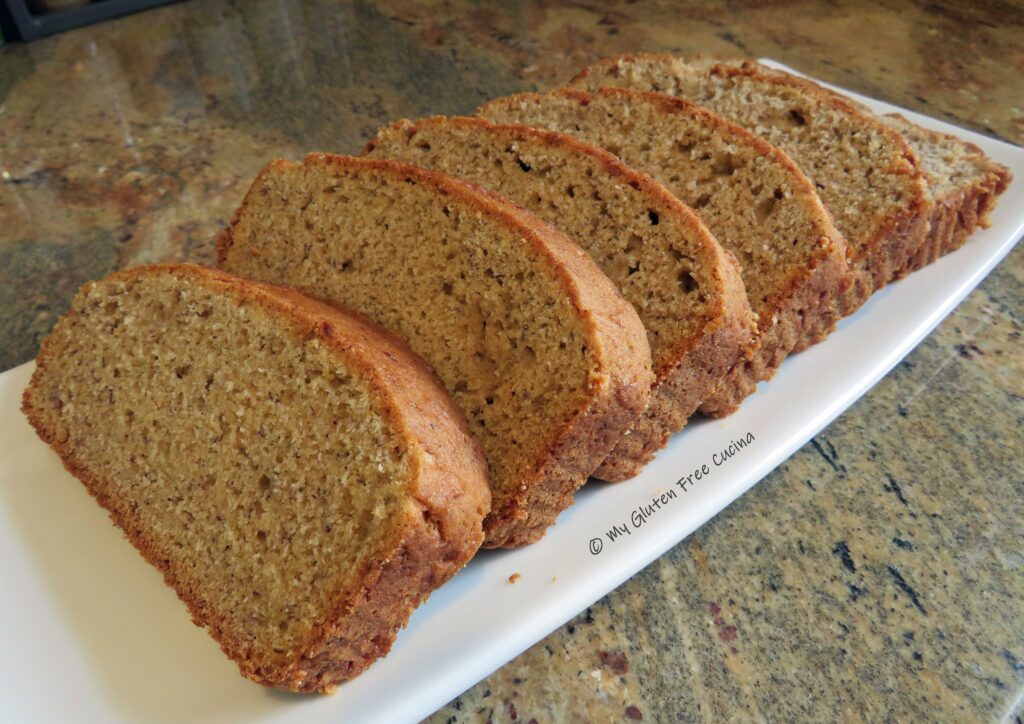 Notes:


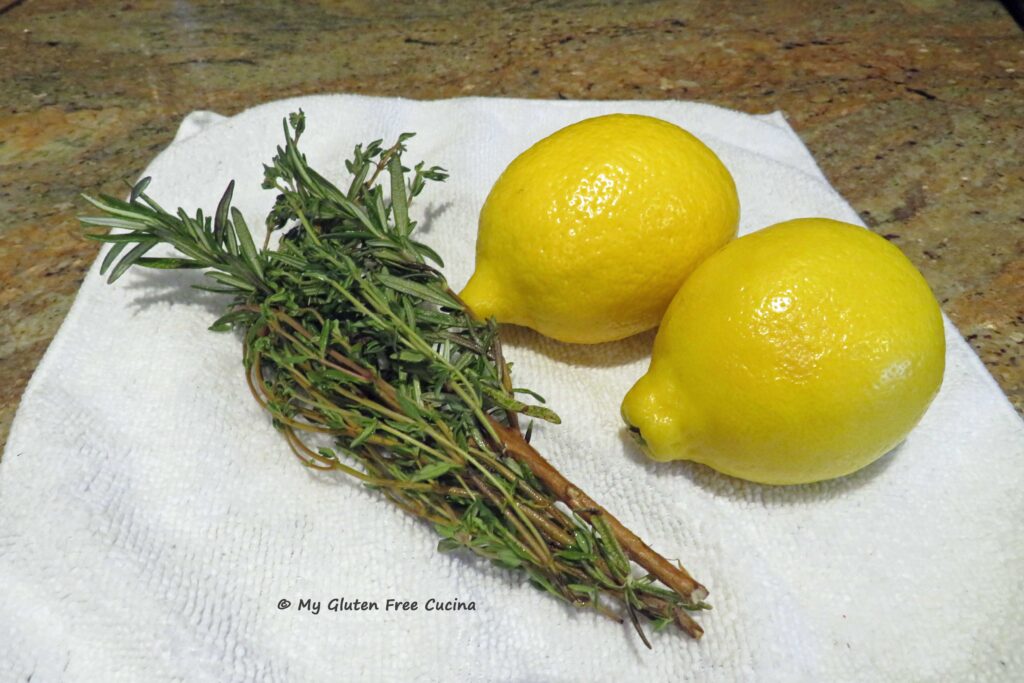
 Peel the garlic cloves and slowly warm them in the olive oil over lowest possible heat. A
 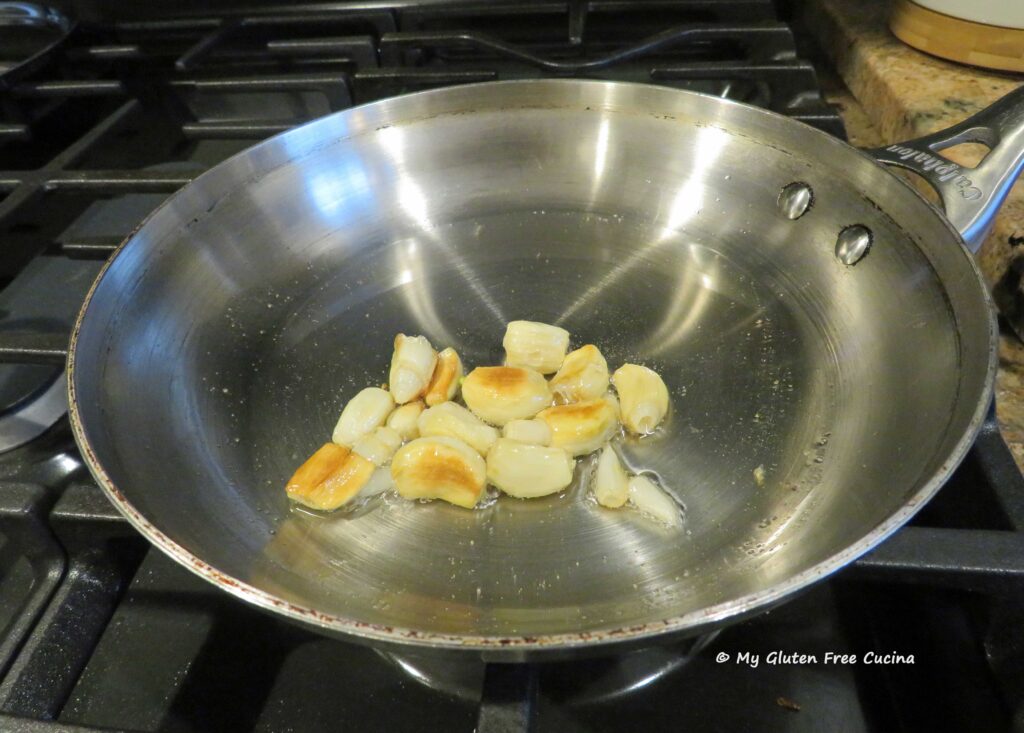 Mince half of the rosemary and thyme and add to the butter along with the lemon zest. Mash it together with a fork.
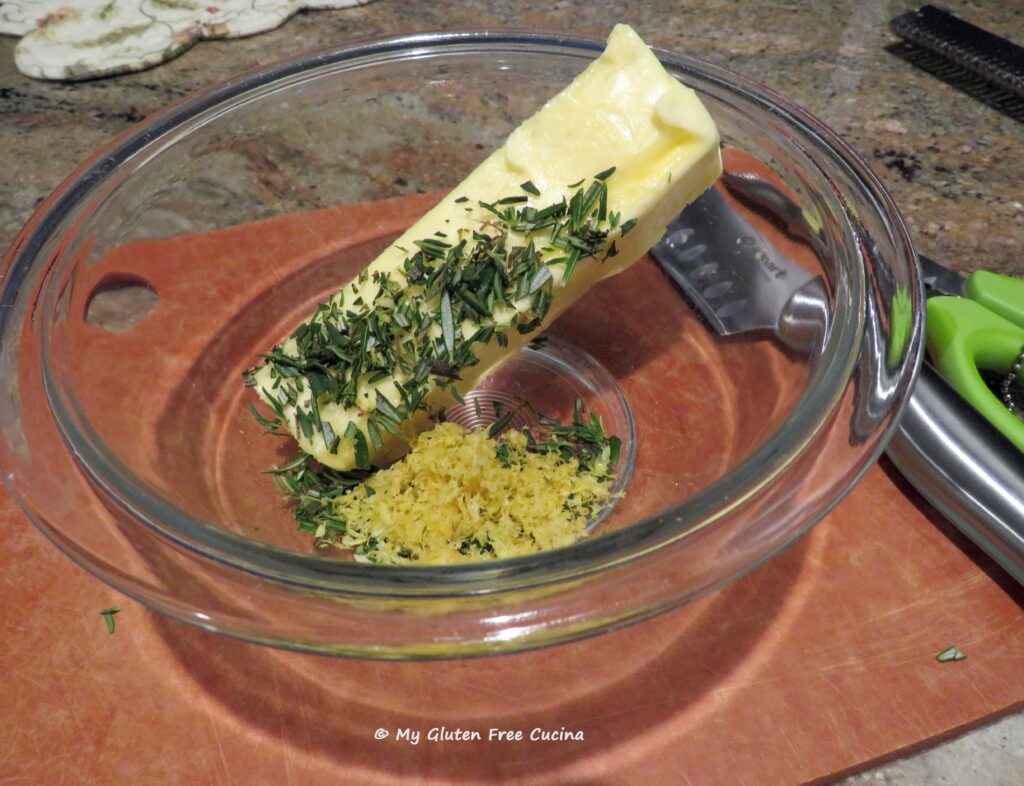
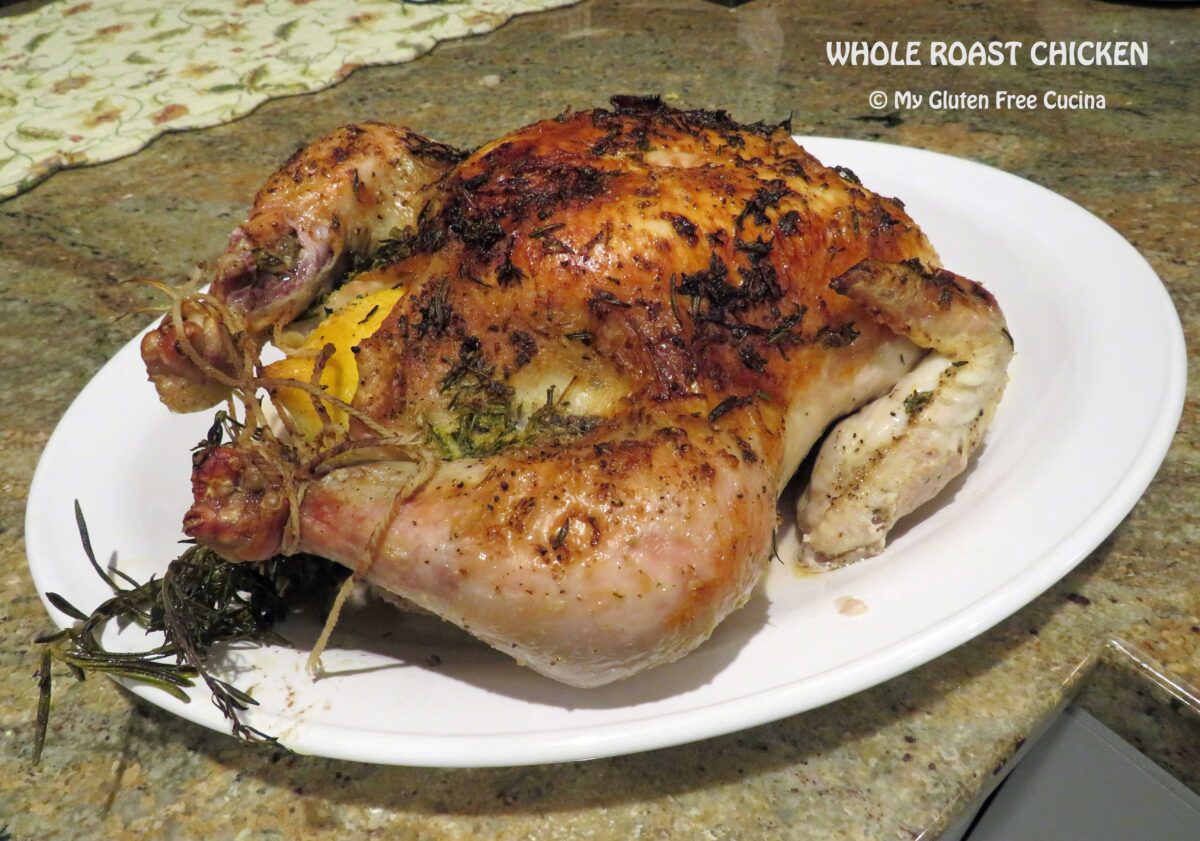
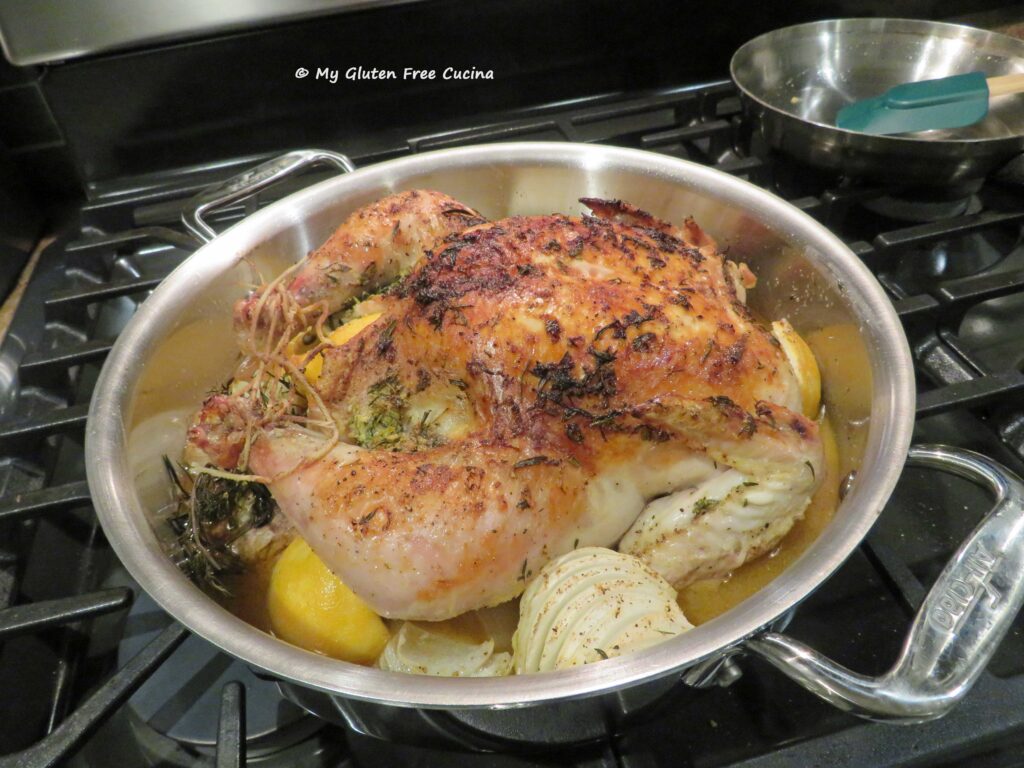
 -Preheat the oven to 425º. Remove the giblets packet from the chicken.
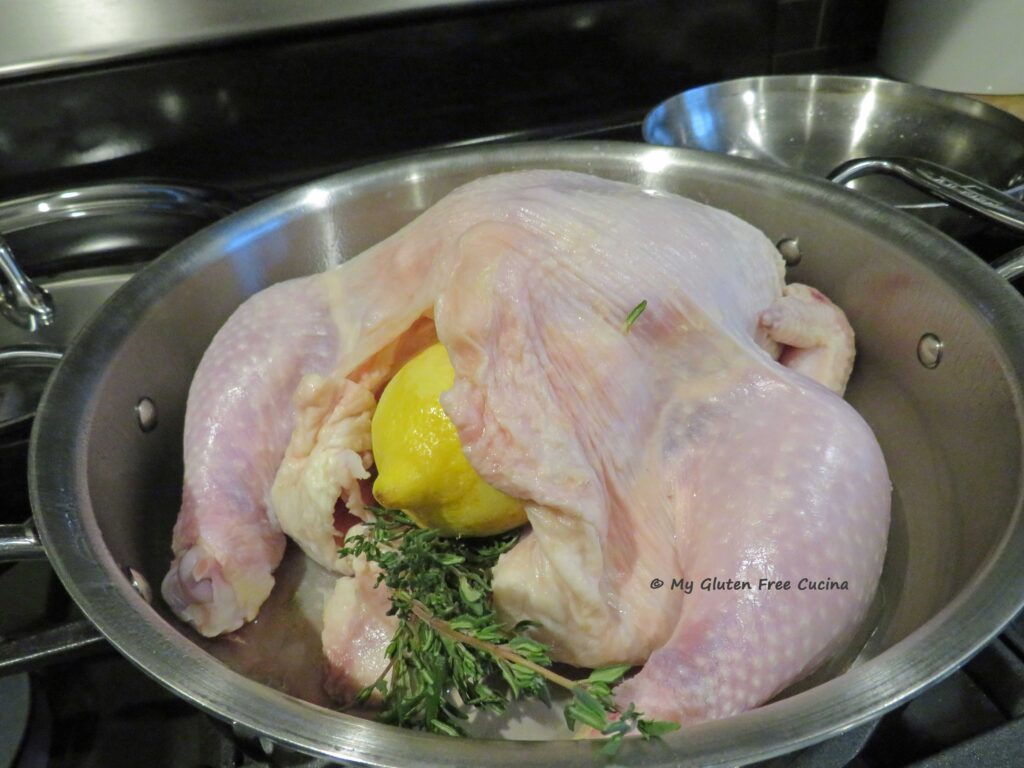 -Rub the butter mixture all over the chicken, be sure to coat the wings and legs. Season with salt and pepper.
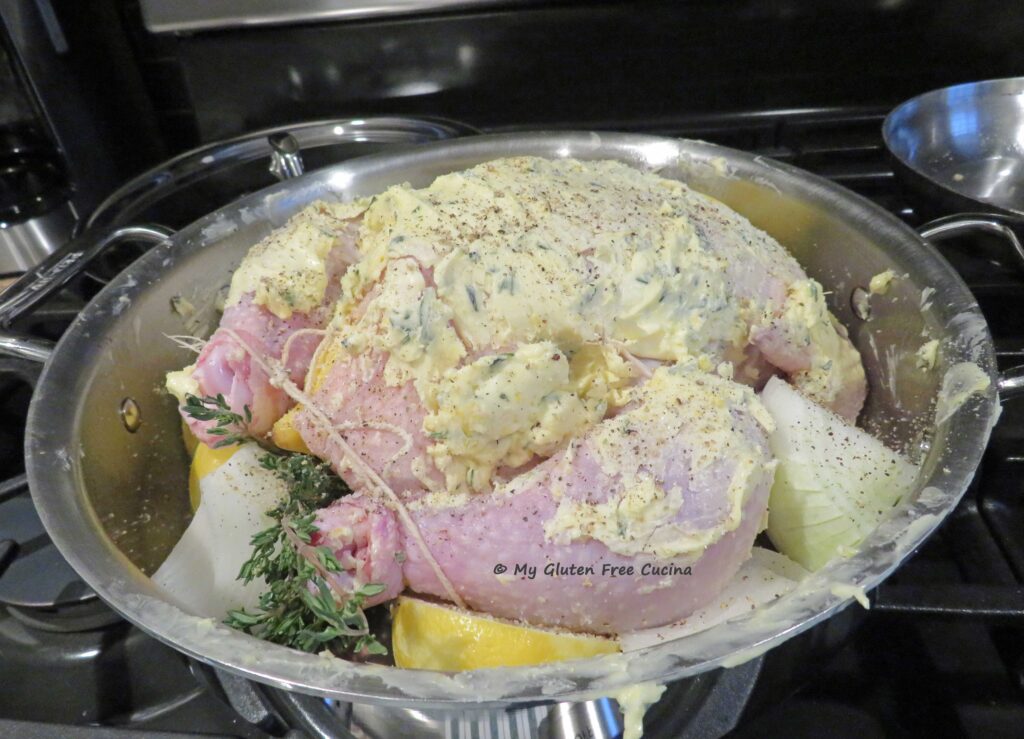 Roast uncovered for 1 to 1-1/2 hours, or until a
 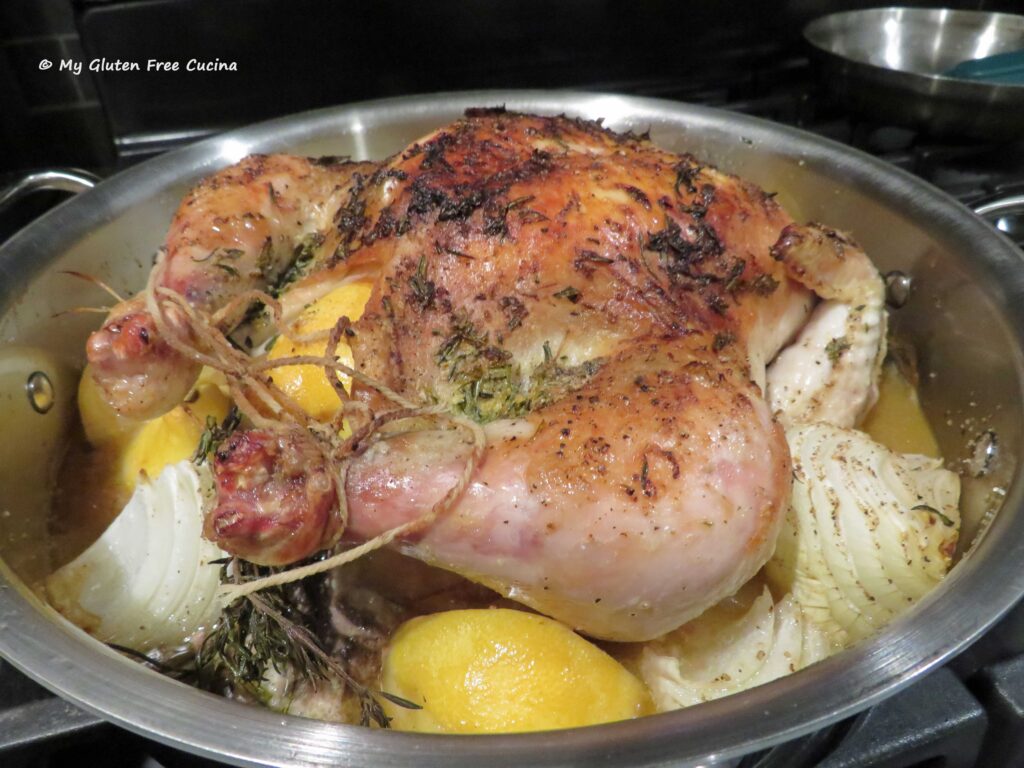 The skin should be nicely browned. Be sure to let it rest for 10 minutes before carving.
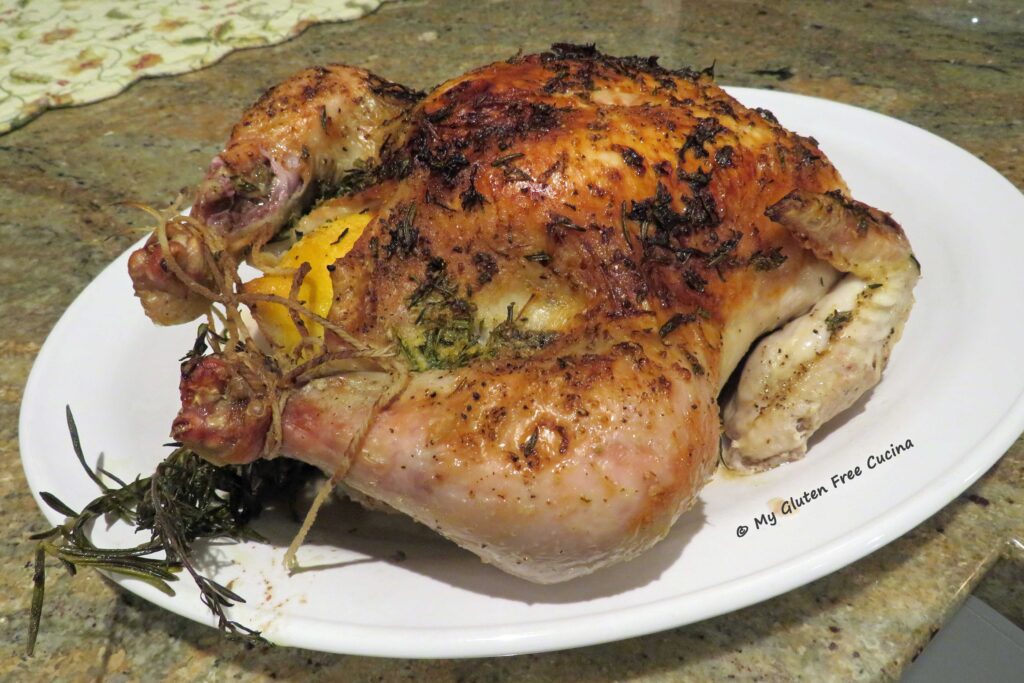 Notes ♪♫

 Preparation:
 I did think the veggies were a bit large for fried rice, so I cut them into smaller pieces. Season the veggies with salt and pepper to taste. Sprinkle with garlic and ginger powder and leave them out to defrost.