I was planning to make Shepherd’s Pie recently and headed out to the store to pick up the ingredients. Mashed rutabaga is usually my topping of choice for this familiar comfort food, but when I couldn’t find it early in the fall season I started thinking about alternatives.
I did not want to use mashed potatoes, but when I looked in the pantry, it suddenly clicked. This was going to be a nice little twist on my usual Shepherd’s Pie.
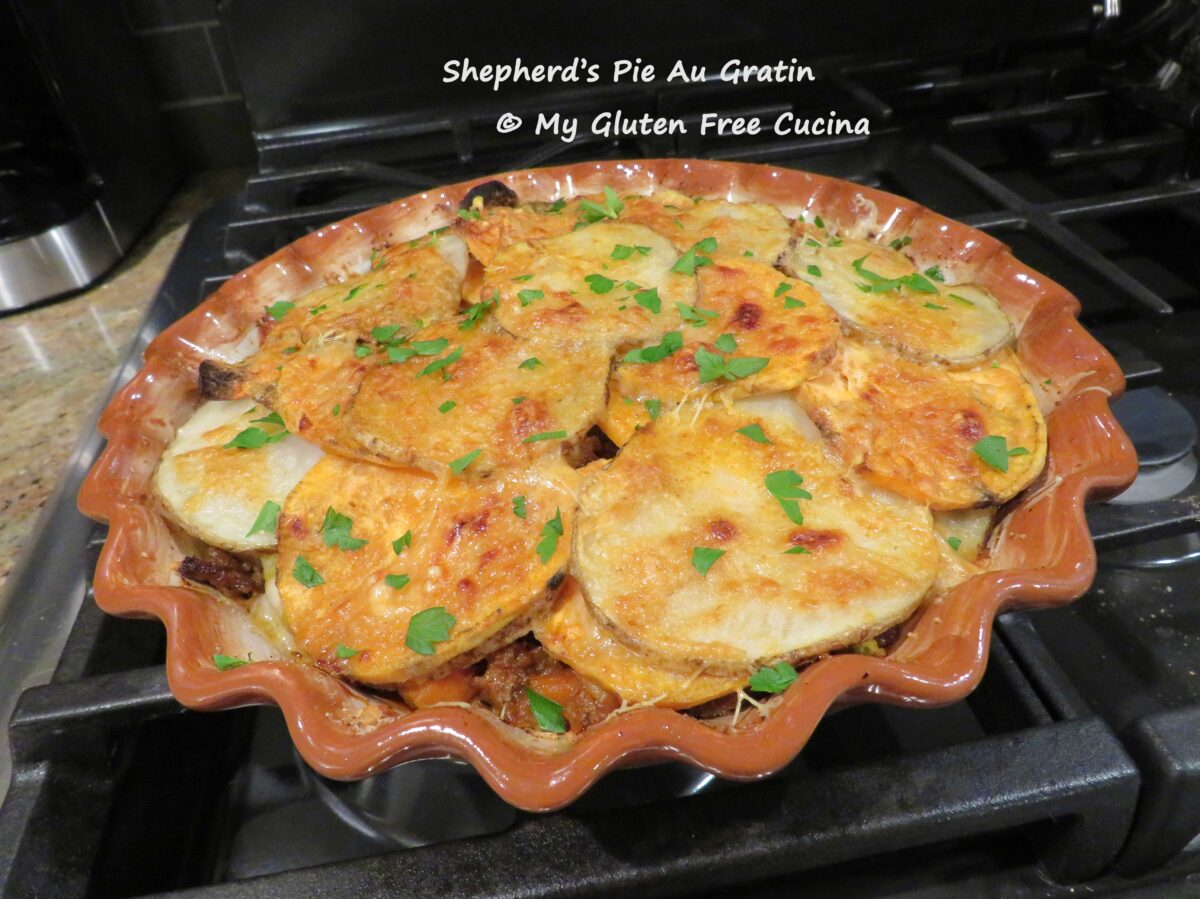
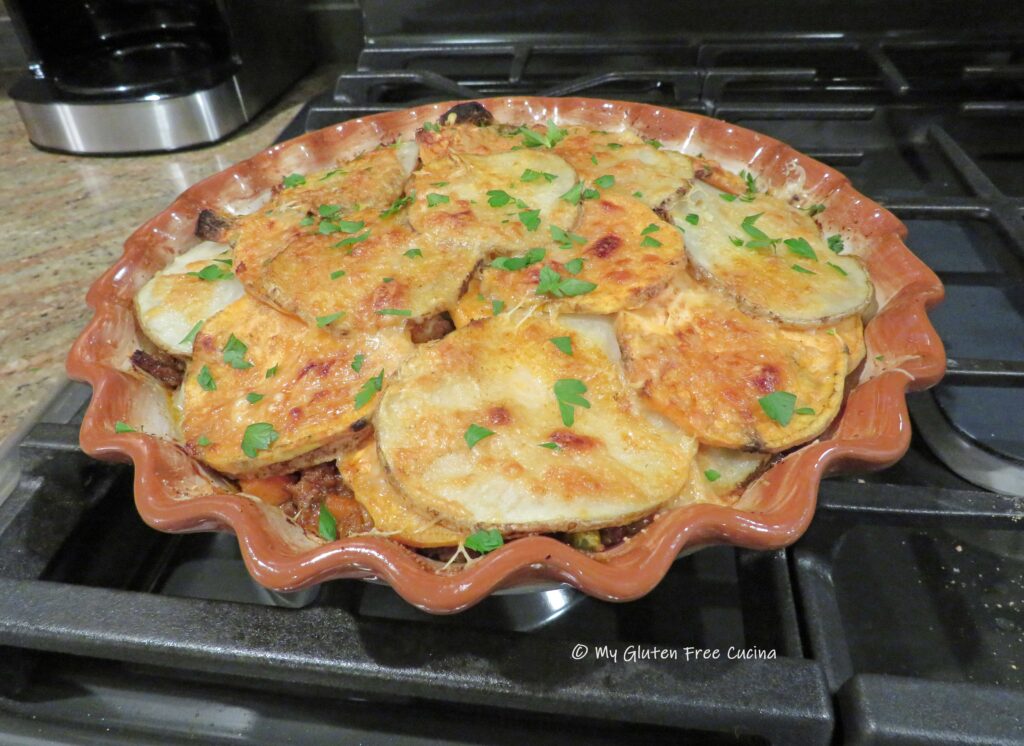
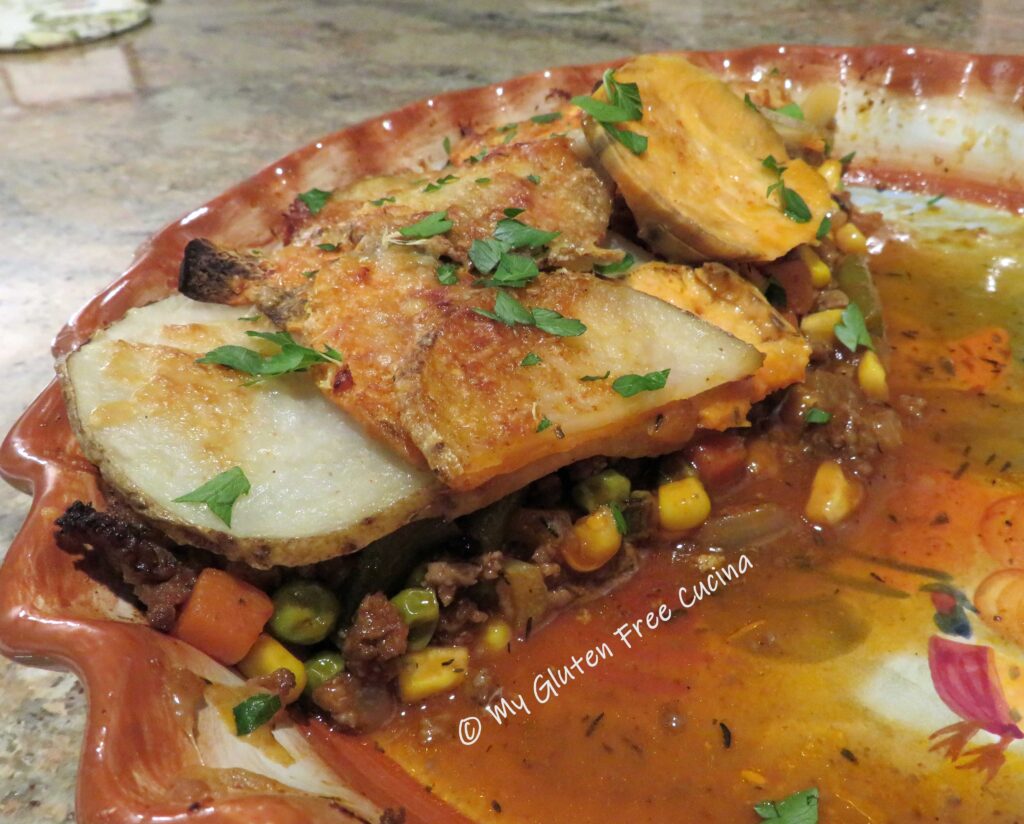
I think the white and sweet potato au gratin topping makes for a guest worthy presentation, or a little extra love for any family dinner.
1 cup gluten free broth (beef, chicken or vegetable)
rice flour, for dusting
For the Topping:
1 white russet potato, sliced thin
1 sweet potato, peeled and sliced thin
2 tbsp. butter
seasoned salt, to taste
1 cup grated Gruyere cheese
1/4 cup grated parmesan cheese
paprika
fresh Italian parsley for garnish
This post contains affiliate links.
Preparation:
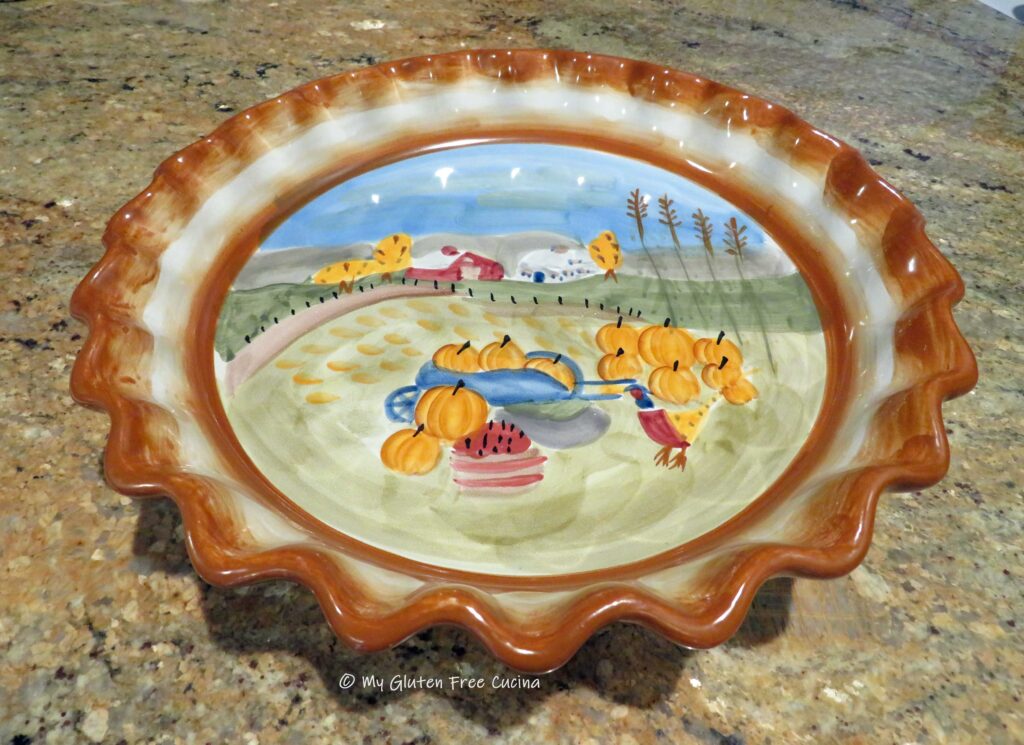
I made the filling in a stainless-steel pan to give it a good browning. You can actually make the entire dish in one pan, but I’m going to finish it in this pretty pie plate. I wish I could tell you where I got it, it’s decades old but isn’t it perfect for fall?
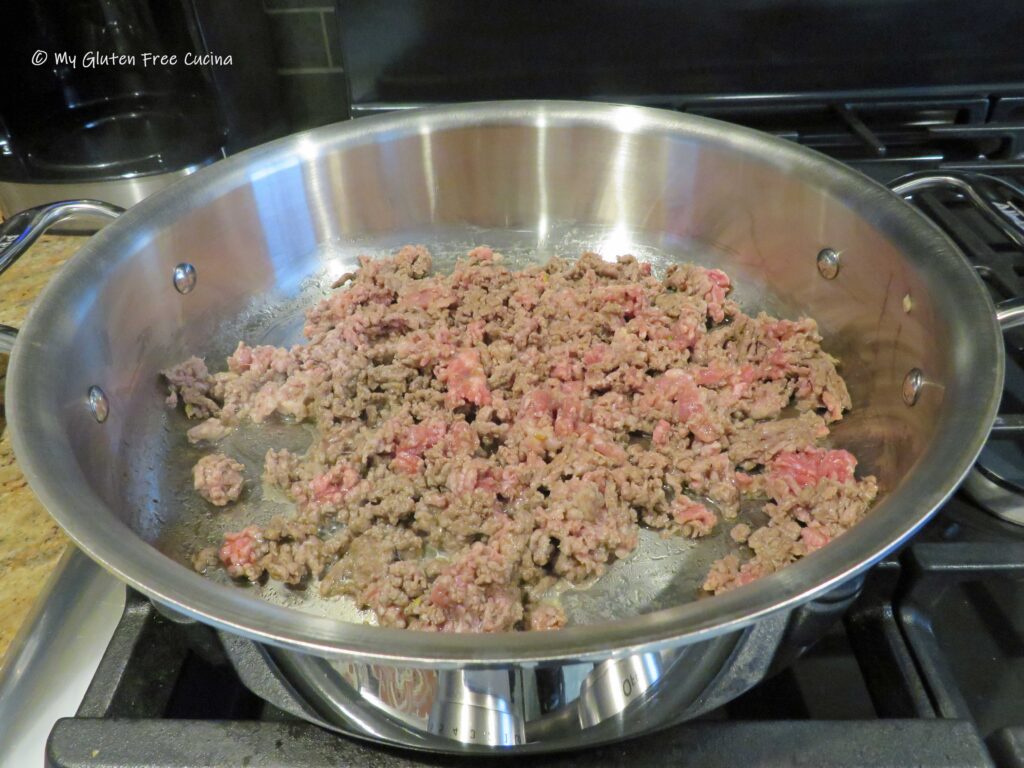
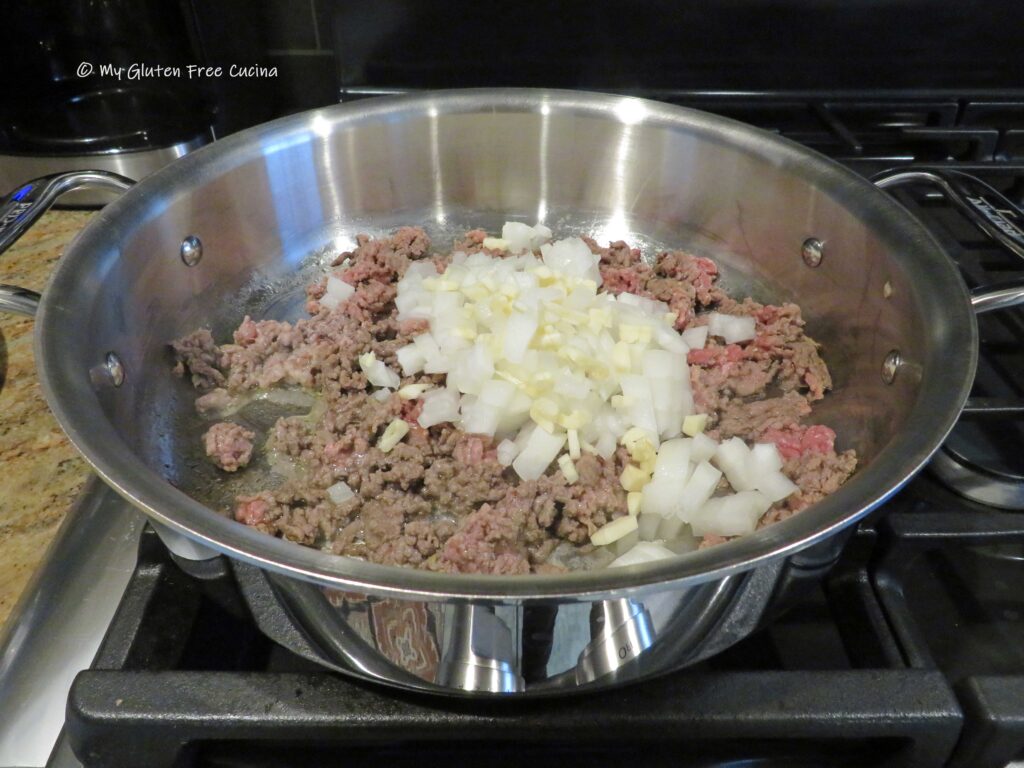
Heat a little olive oil in the pan over medium low and add the ground beef and sausage, breaking up the meat with a spatula to brown.
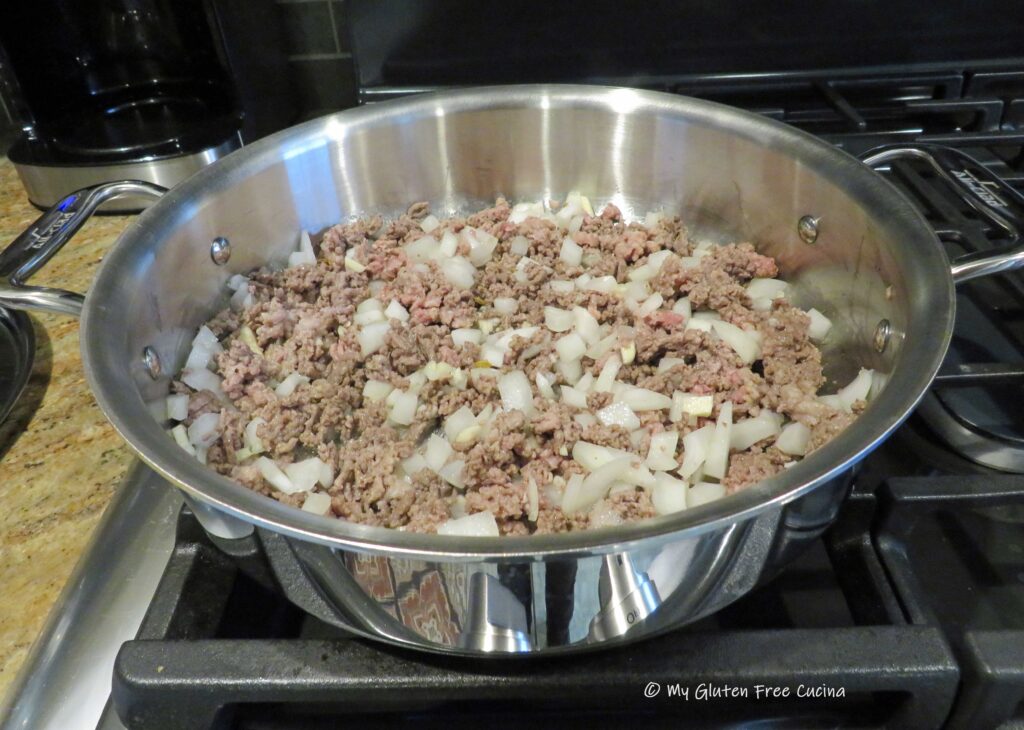
Add the onion and the garlic.
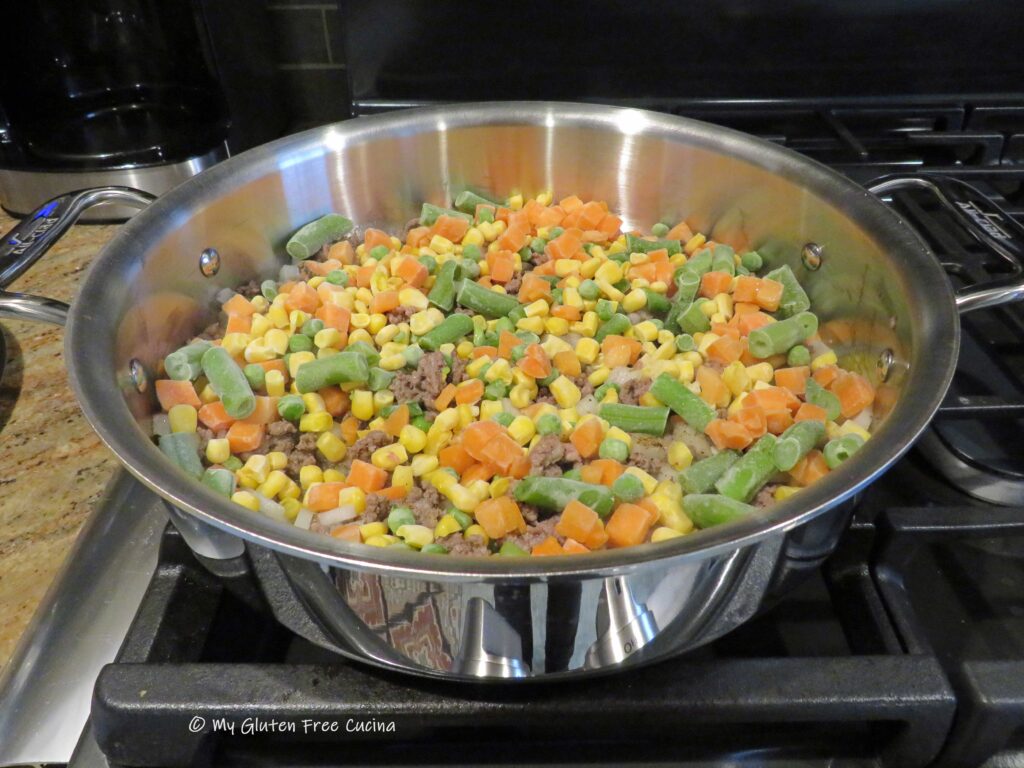
Next add the vegetables (you can throw them in frozen). Cook for 4 minutes.
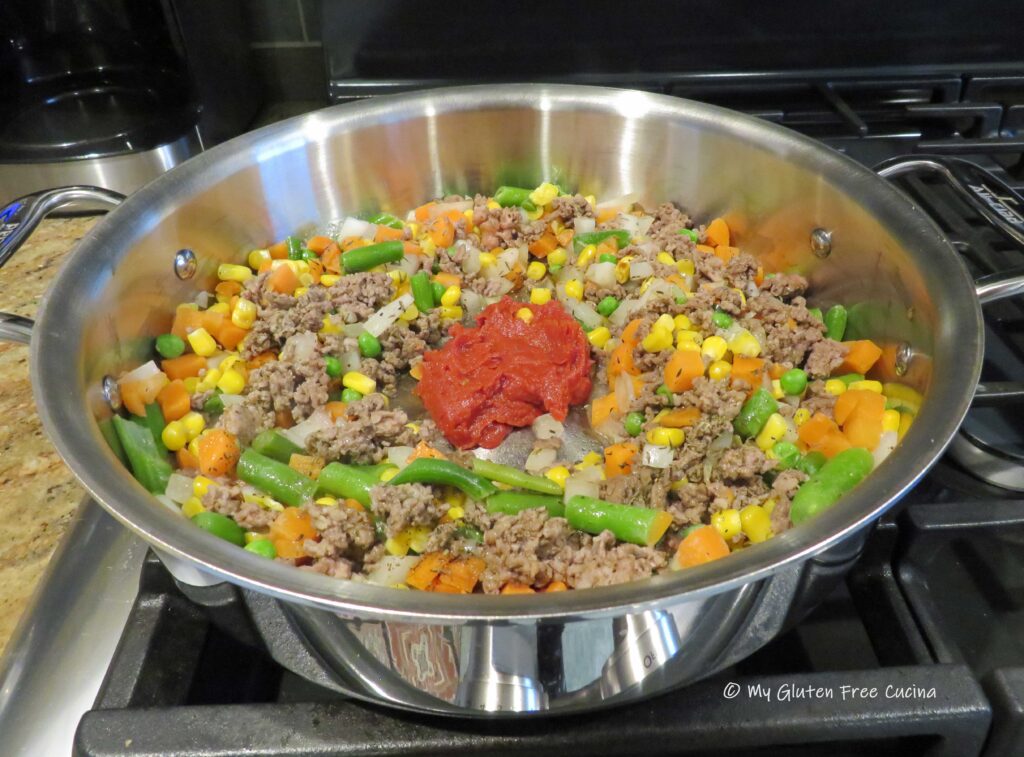
Clear a spot in the center of the pan and add the tomato paste. Let it toast for a minute before stirring it into the meat and veggie mixture. Season with salt and pepper.
Bring to a simmer, then reduce the heat to low and simmer 30 minutes uncovered until most of the liquid has evaporated.
Preheat the oven to 400º and transfer the filling to a pie dish coated with cooking spray.
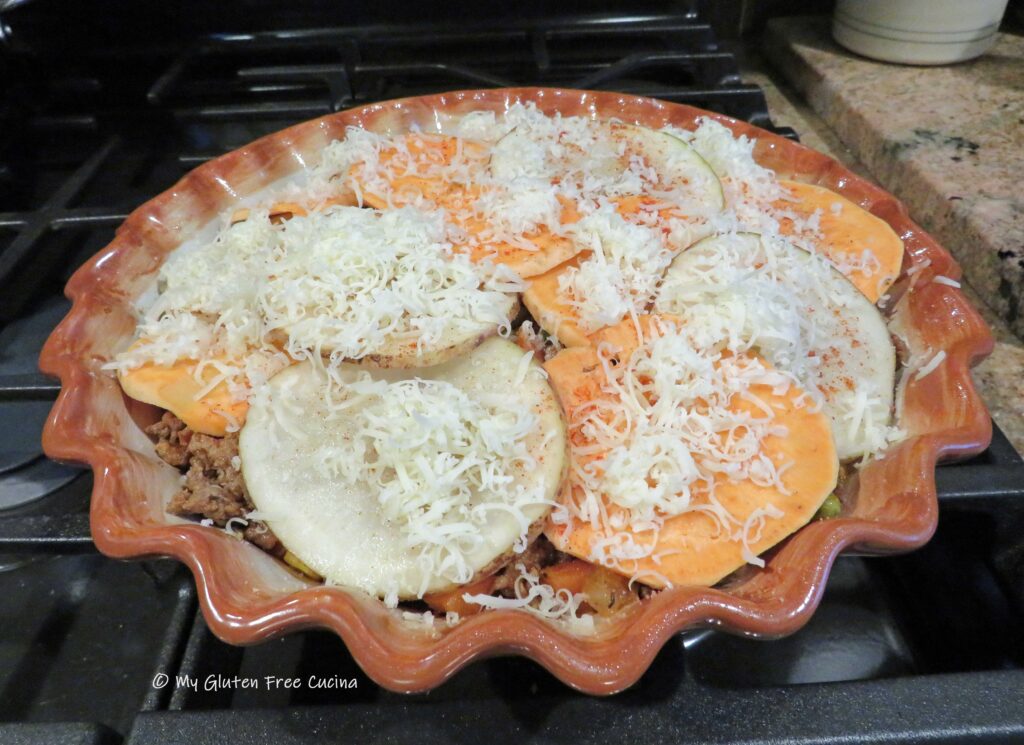
Use a mandoline to slice the potatoes as thin as possible. Begin arranging the potato slices in a single layer over the filling in a circular pattern. Sprinkle with paprika, top with half the gruyere cheese and half of the parmesan.
Continue layering with the remaining potato slices, the rest of the cheese and pat with butter.
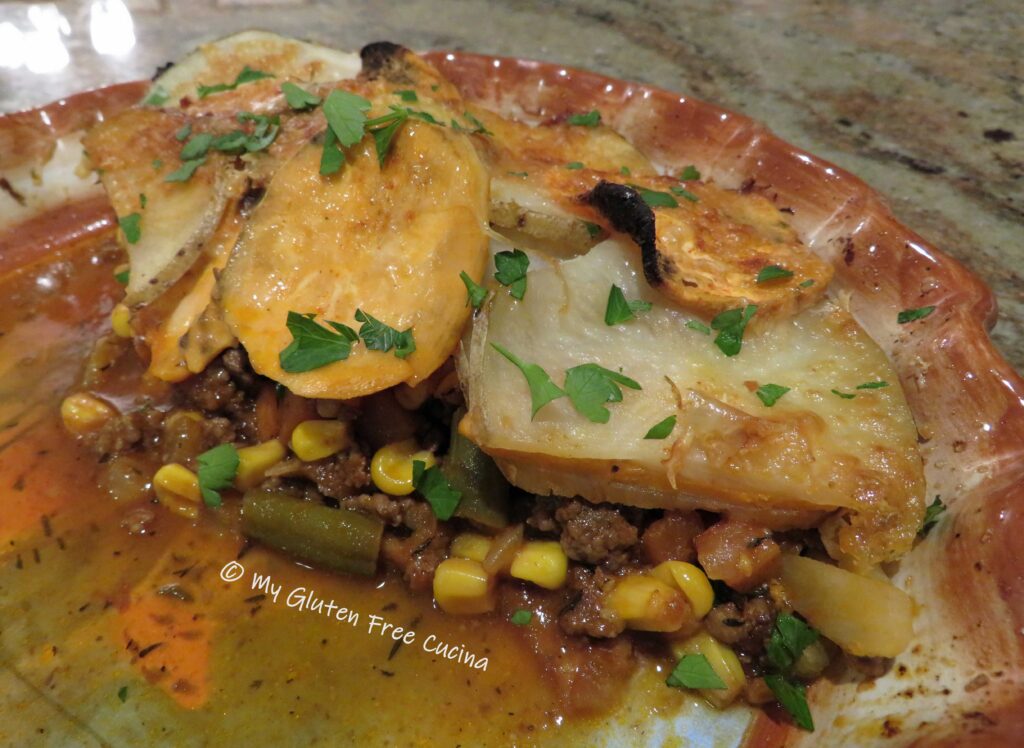
Cover with foil and bake for 30 minutes, then carefully remove the foil (please use gloves and tongs!) and continue baking another 25-30 minutes until potatoes are soft. You can finish it off under the broiler for a few minutes if you like, for color. Garnish with Italian parsley and serve.
Oh, so good! I think this may be my new favorite.
Notes ♪♫ You can slice the potatoes with a knife, but using a mandoline for this task is a real time saver. Plus, all your slices will be uniform in size which means they will cook evenly.
This recipe comes from a beloved family tradition that had gone by the wayside since my Celiac Diagnosis.
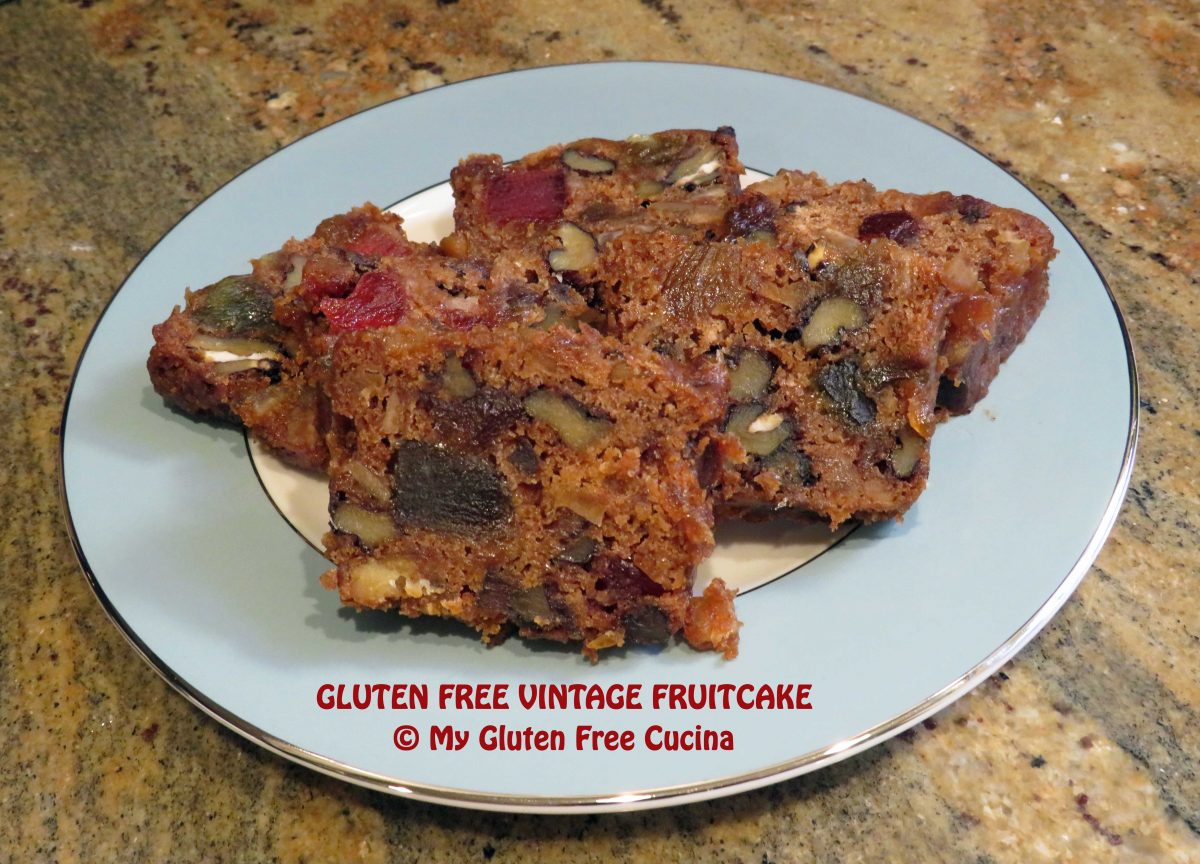
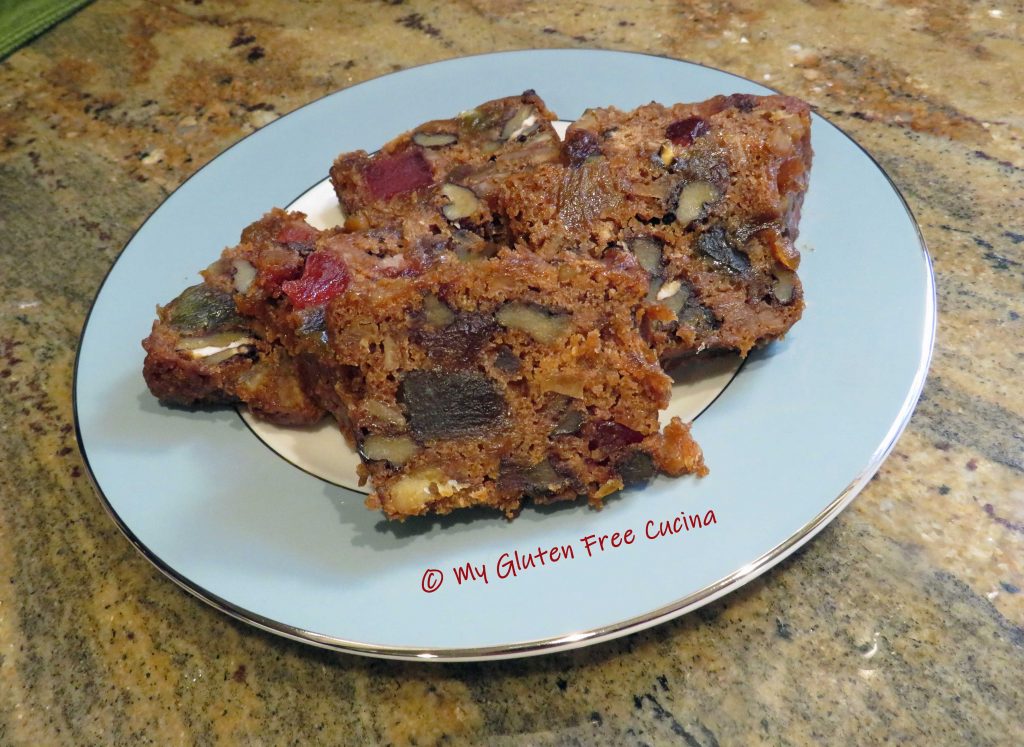
An heirloom recipe passed down for generations in my late husband’s family, he treasured the memory of his mother making this Fruitcake at Christmas, and I have been proud to carry on the tradition.
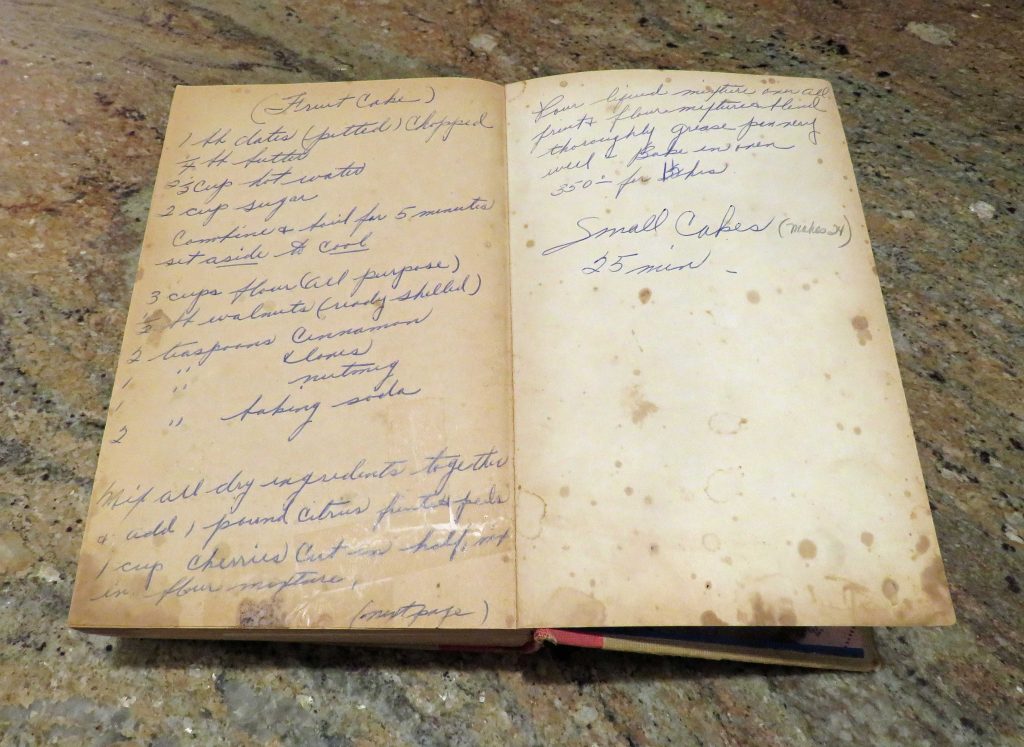
The original recipe was lovingly handwritten into the back cover of a favorite cookbook. As with other heirloom recipe adaptations, my intent is to always stay as true to the original as possible, changing only those ingredients that had to be gluten free.
This post contains affiliate links.
First up, the all-purpose flour. If you follow me, you know that I am a huge fan of Better Batter Gluten Free Flour. I used their Original Blend, which I have used with great success in other cakes and desserts.
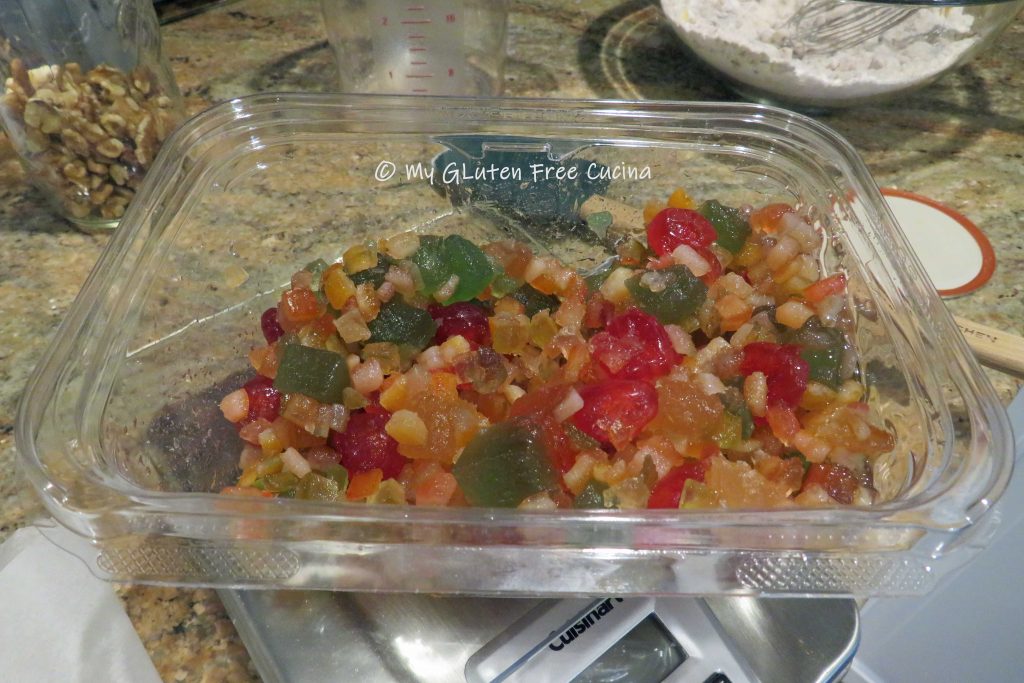
If you prefer a dried fruit mix (not candied), this Sun-Dried Baker’s Fruit Medley from Trainais gluten free and comes in a generous 2-lb. bag, great if you wanted to double this recipe.
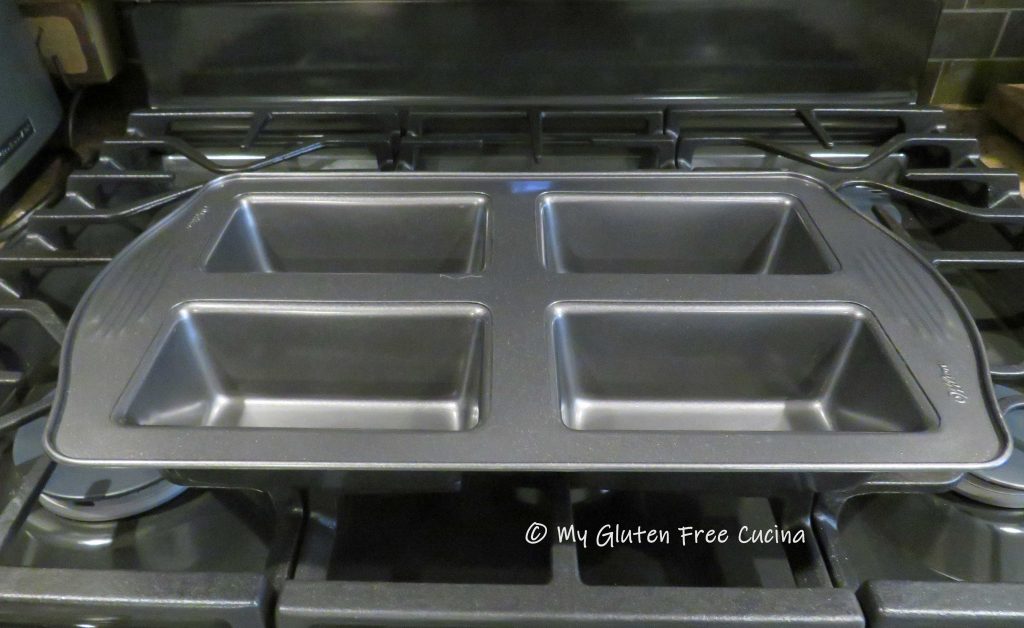
The rest of the ingredient list consists of common pantry items and the preparation is straightforward. There is no special equipment needed, other than a loaf pan. This recipe makes 1 loaf (9″ loaf pan) or 4 mini loaves.
Combine the butter, water and sugar in a small saucepan and boil for 5 minutes. Set aside to cool.
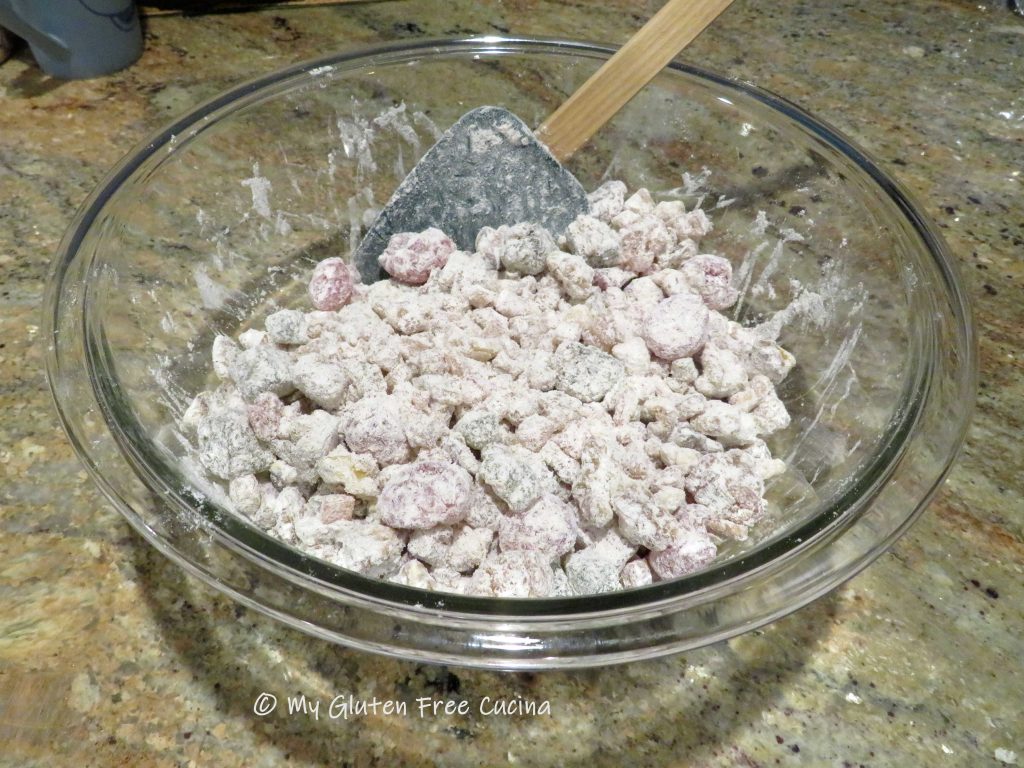
Whisk together the flour, spices and baking soda in a large bowl. Add the walnuts and dried fruit. Toss well with the flour mixture.
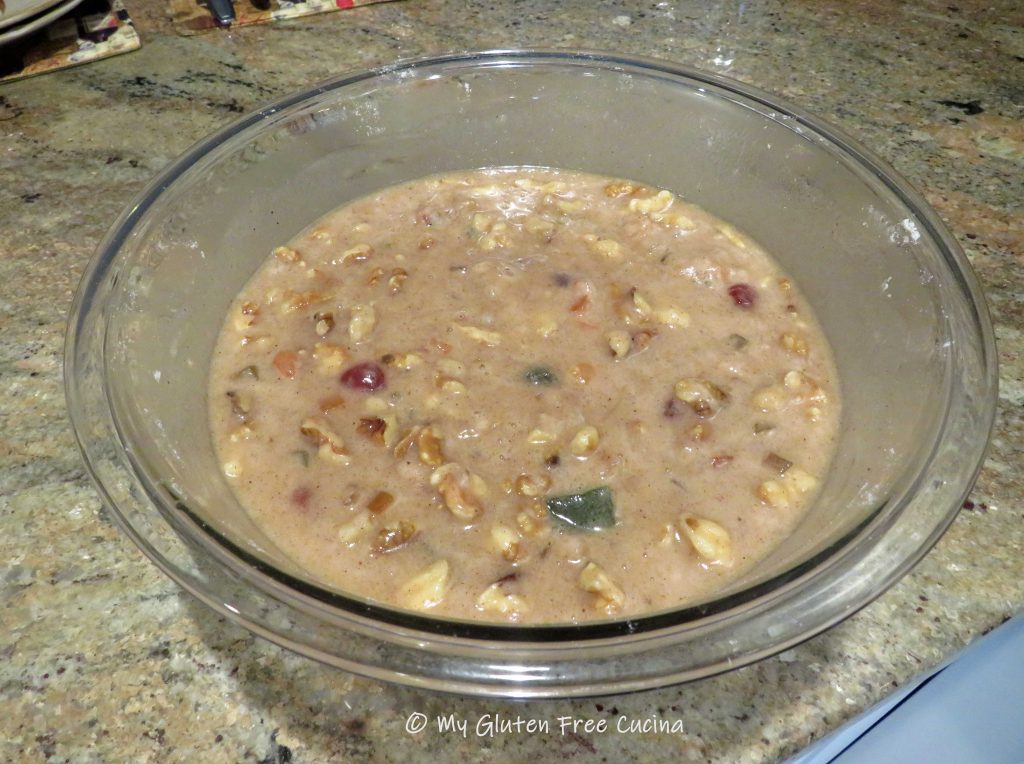
Pour the liquid mixture over the fruit and flour mixture and blend thoroughly with a spatula. Give the batter a few minutes to rest and thicken.
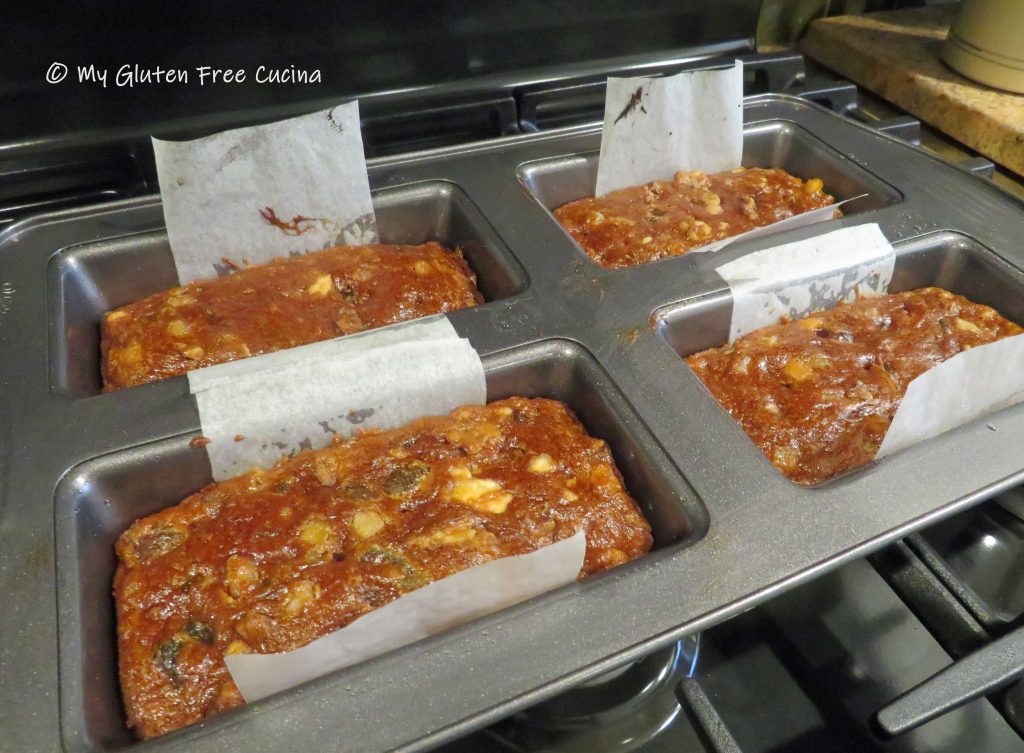
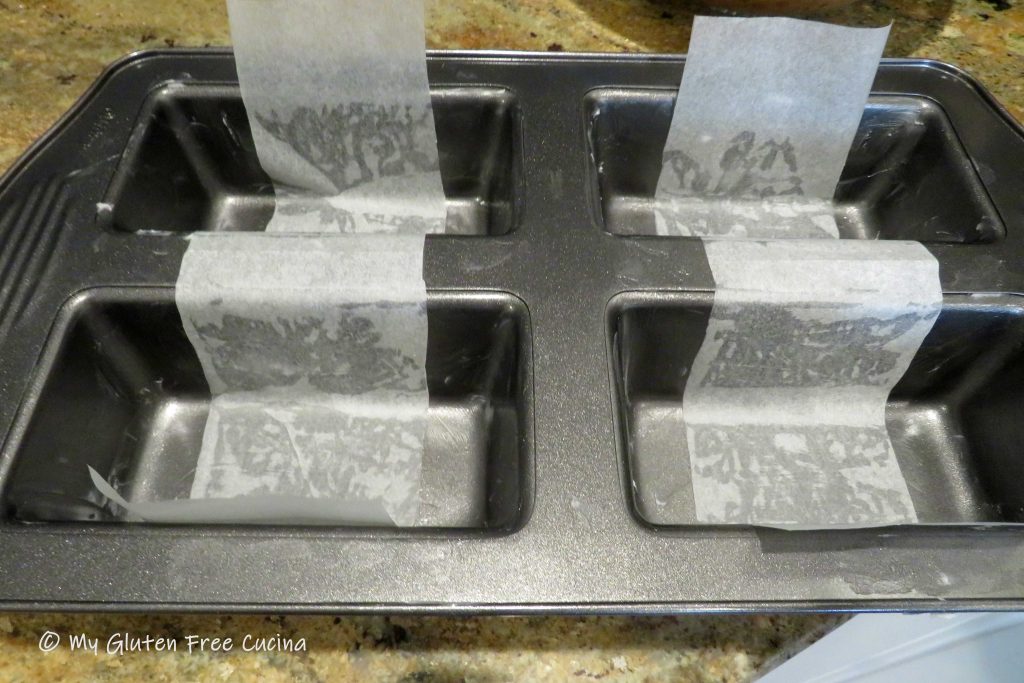
Preheat the oven to 350º. Grease the loaf pan liberally with Crisco (or butter). Even though my loaf pan is nonstick, I lined it with strips of parchment for a little added insurance.
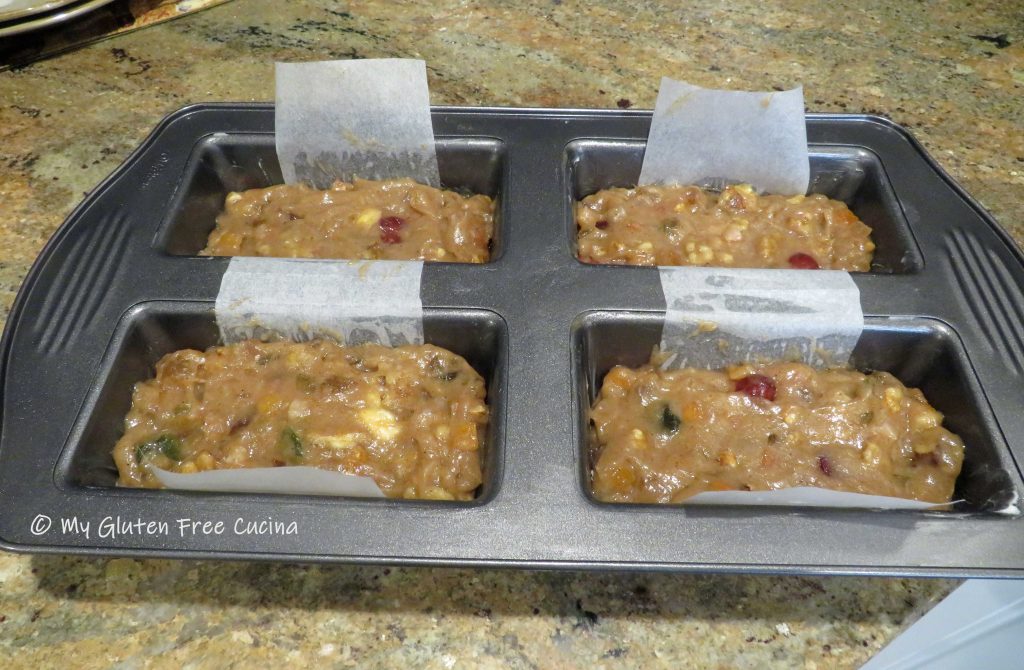
Spoon the batter into the prepared pan. Smooth the top with a spatula, making sure it gets into all the corners.
If using a 9″ loaf pan, bake for 1 to 1.5 hours, testing for doneness after 1 hour. The original recipe instructions said 1.5 hours and it will depend largely on your oven and the amount of moisture in the fruit blend.
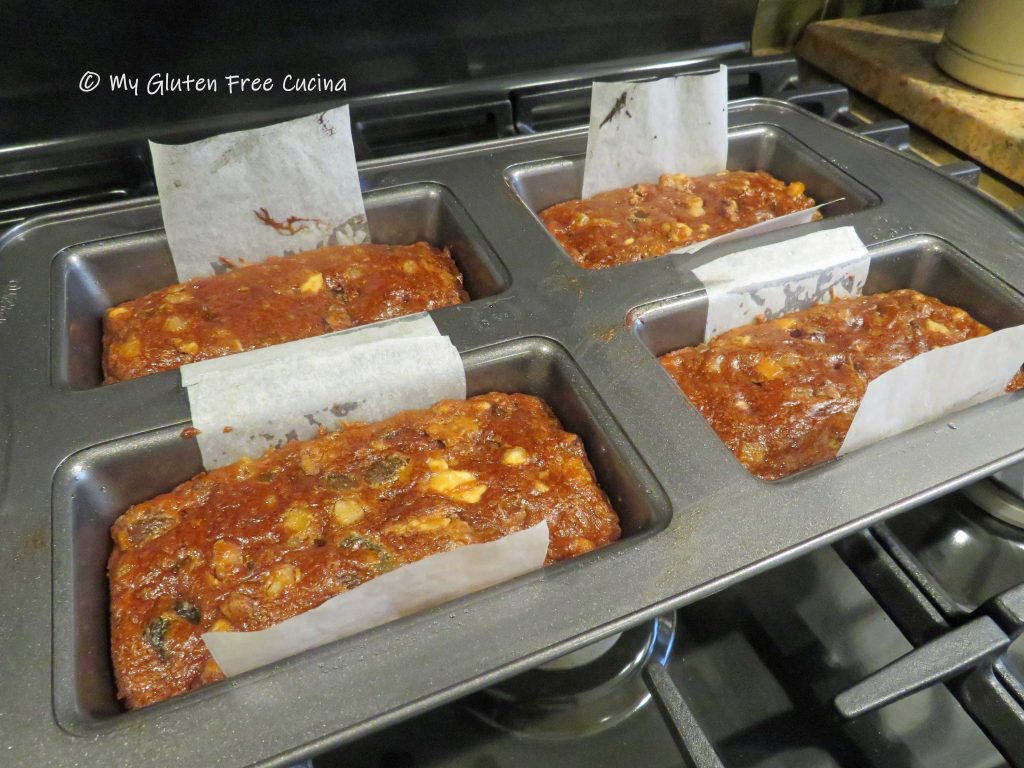
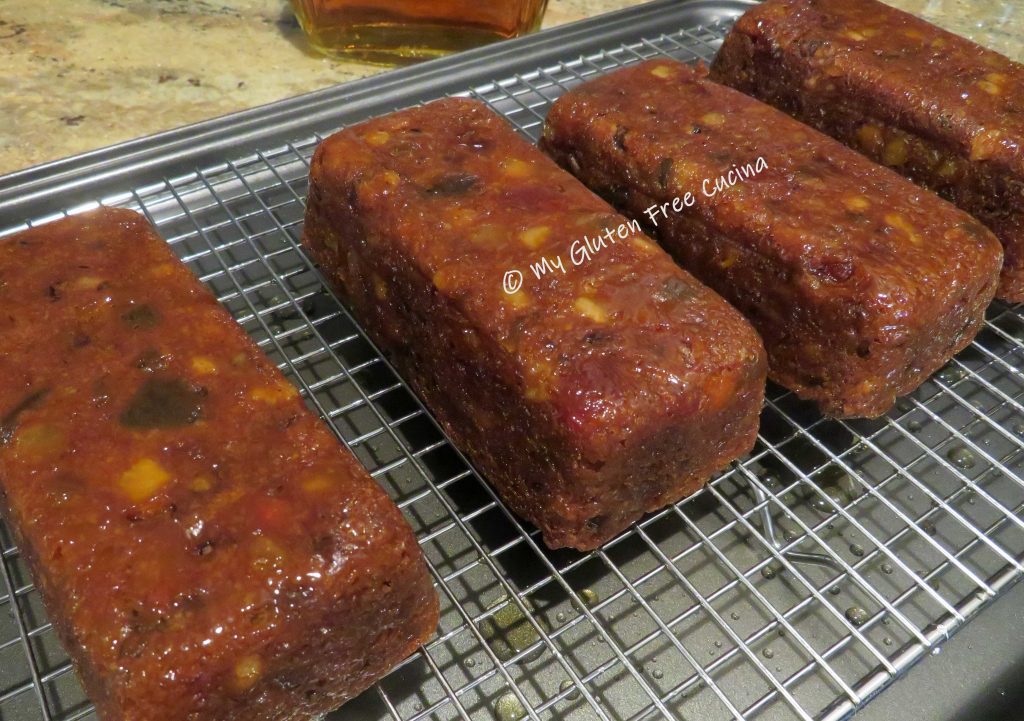
For mini loaves, the baking time will be 45-50 minutes. After baking I turned the oven off and opened the door slightly, leaving the loaves in for another 30 minutes to cool. I used a toothpick to check for doneness, and you can see that the loaves are starting to pull away from the sides of the pan.
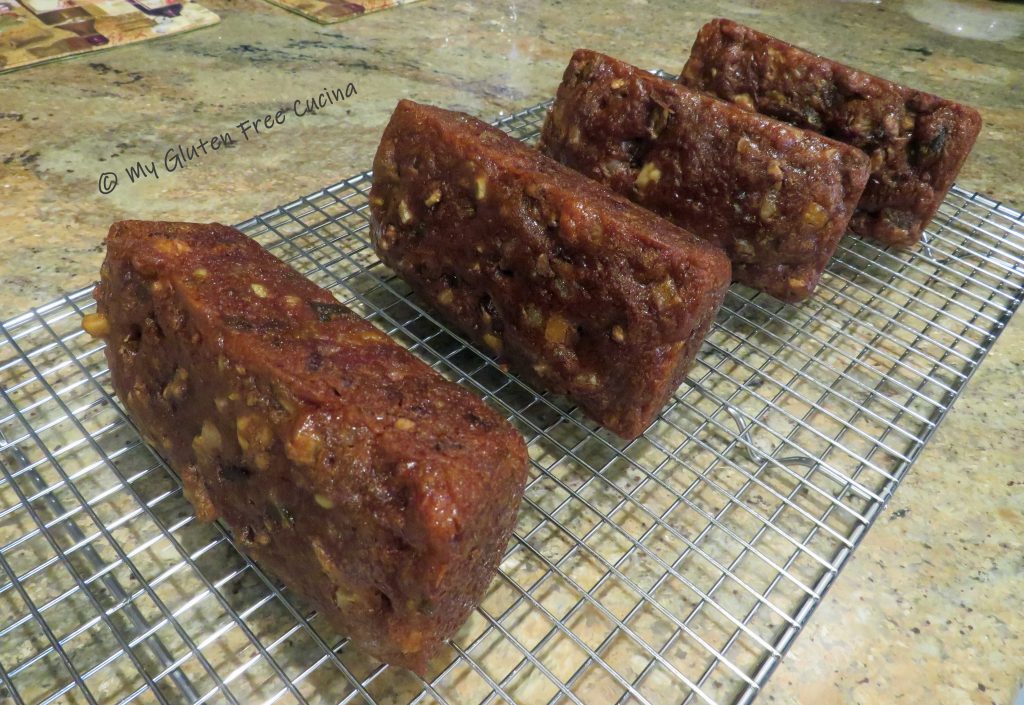
Remove pan from the oven and cool on a rack for 15-20 minutes, then run a knife or thin spatula around the edges. Grasp the sides of the parchment to lift the cakes out of the pan.
I was so glad I used parchment, look how the cakes released perfectly from the pan with no cracks or sticking.
When the cakes have completely cooled, brush them liberally on all sides with brandy. I used just under 1/2 cup for all 4 cakes.
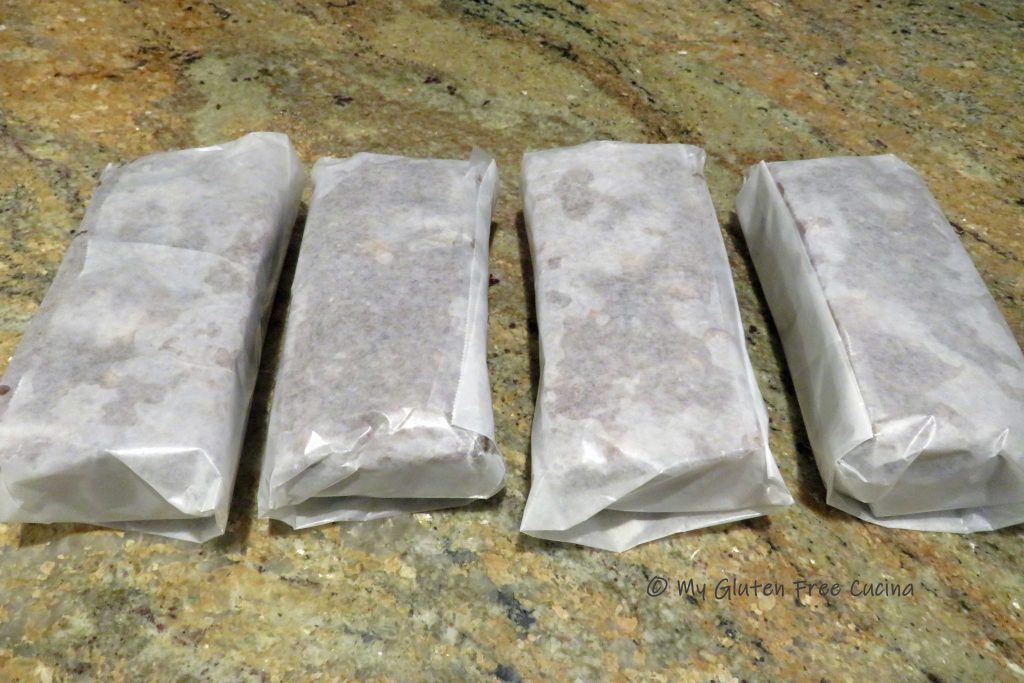
Tightly wrap each cake in wax paper, pressing the paper into the moistened cake to seal. Tape the edges.
Wrap again in foil, place in zip lock bags and store in a cool, dark place for about 8 weeks. I keep mine in a pantry closet that is on an outside wall.
I usually make the fruitcakes in early October, and they are ready to enjoy from Thanksgiving Day through the New Year. It is well worth the wait! After many years of being gluten free, it is such a treat for me to make this old recipe again and my heart is full remembering how much my husband loved when I made this for him.
Notes ♪♫Always reach out to a manufacturer when you are not sure if a product contains gluten. In past years, I have used King Arthur’s dried fruit blend for my Fruitcakes. Unfortunately, they confirmed to me via email that they do not test for gluten in their Bakers Fruit Blend and cannot guarantee no cross contact with gluten in this specific product.
Originally posted on 10/15/2022 Updated 10/24/2024
This recipe comes from a beloved family tradition that had gone by the wayside since my Celiac Diagnosis. An heirloom recipe passed down for generations in my late husband’s family, he treasured the memory of his mother making this Fruitcake at Christmas, and I have been proud to carry on the tradition.
Ingredients
UnitsScale
Wet Ingredients
· 4 tbsp. butter (1/2 stick)
· 1-1/4cups hot water
· 1cupsugar
Dry Ingredients
· 180g. Better Batter Original Gluten Free Flour
· 1 tsp. cinnamon
· 1/2 tsp. cloves
· 1/2 tsp. nutmeg
· 1 tsp. baking soda
· 1/4lb. shelled walnuts (4 oz.)
· 16oz. candied fruit or dried fruit mix
Other
· Crisco, or butter for greasing pans
· brandy, for brushing
Instructions
Combine the butter, water and sugar in a small saucepan and boil for 5 minutes. Set aside to cool.
Whisk together the flour, spices and baking soda in a large bowl. Add the walnuts and dried fruit. Toss well with the flour mixture.
Pour the liquid mixture over the fruit and flour mixture and blend thoroughly with a spatula. Give the batter a few minutes to rest and thicken.
Preheat the oven to 350º. Grease the loaf pan liberally with Crisco (or butter). Even though my loaf pan is nonstick, I lined it with strips of parchment for a little added insurance.
Spoon the batter into the prepared pan. Smooth the top with a spatula, making sure it gets into all the corners.
If using a 9″ loaf pan, bake for 1 to 1.5 hours, testing for doneness after 1 hour. The original recipe instructions said 1.5 hours and it will depend largely on your oven and the amount of moisture in the fruit blend.
For mini loaves, the baking time will be 45-50 minutes. After baking I turned the oven off and opened the door slightly, leaving the loaves in for another 30 minutes to cool. I used a toothpick to check for doneness.
Remove pan from the oven and cool on a rack for 15-20 minutes, then run a knife or thin spatula around the edges. Grasp the sides of the parchment to lift the cakes out of the pan.
When the cakes have completely cooled, brush them liberally on all sides with brandy. I used just under 1/2 cup for all 4 cakes.
Tightly wrap each cake in wax paper, pressing the paper into the moistened cake to seal. Tape the edges.
Wrap again in foil, place in zip lock bags and store in a cool, dark place for about 8 weeks. I keep mine in a pantry closet that is on an outside wall.
I usually make the fruitcakes in early October, and they are ready to enjoy from Thanksgiving Day through the New Year. It is well worth the wait!
Notes
The original recipe was lovingly handwritten into the back cover of a favorite cookbook. As with other heirloom recipe adaptations, my intent is to always stay as true to the original as possible, changing only those ingredients that had to be gluten free. Always reach out to a manufacturer when you are not sure if a product contains gluten.
Unauthorized use and/or duplication of this material without express and written permission from this blog’s author and/or owner is strictly prohibited.
Better Batter Collaborator
When you shop Better Batter | Gluten Free Flour, use my Promo Code MGFC30 for 30% off your non-sale purchase!
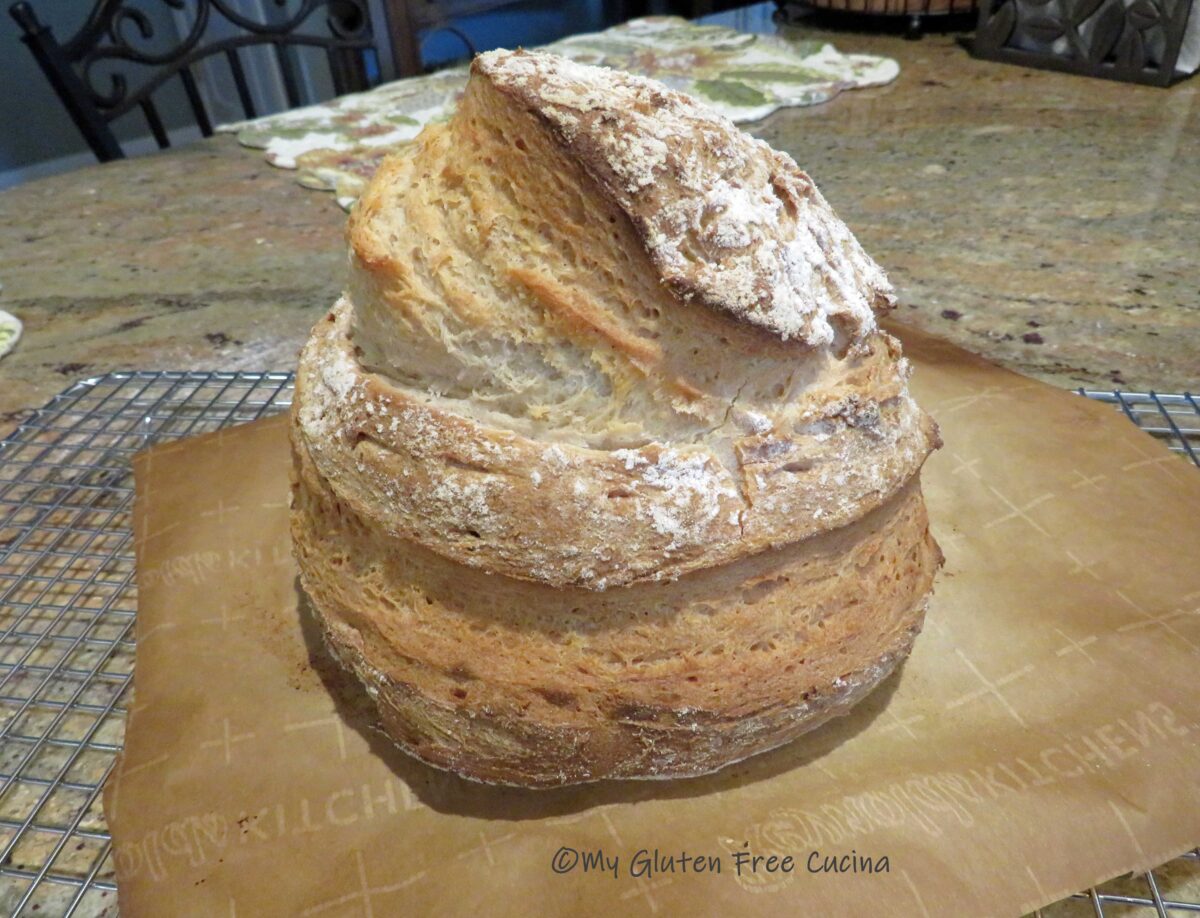
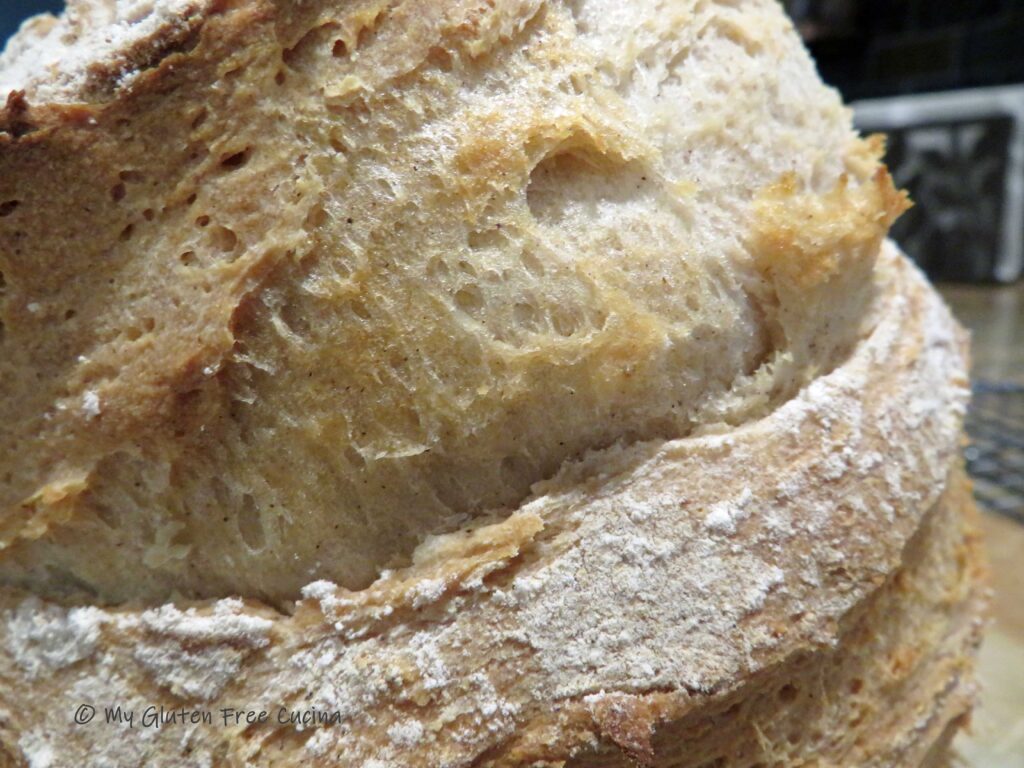
This is the stuff that gluten free dreams are made of. This loaf just blew me away and it was so hard to wait for it to cool down so that I could slice it! Well worth it though when I had my first sandwich with this amazing bread. It is hands down the best white bread that I have made since my gluten free life began seven years ago. It is soft, supple and doesn’t fall apart in your hands! And guess what else? It doesn’t need toasting!
This post contains affiliate links.
Note ♪You will need a fully active sourdough starter for this recipe. If you don’t have one yet, jump over to this post where I show you how to make a gluten free sourdough starter.
Have you ordered the new Bread Flour from Better Batter yet?
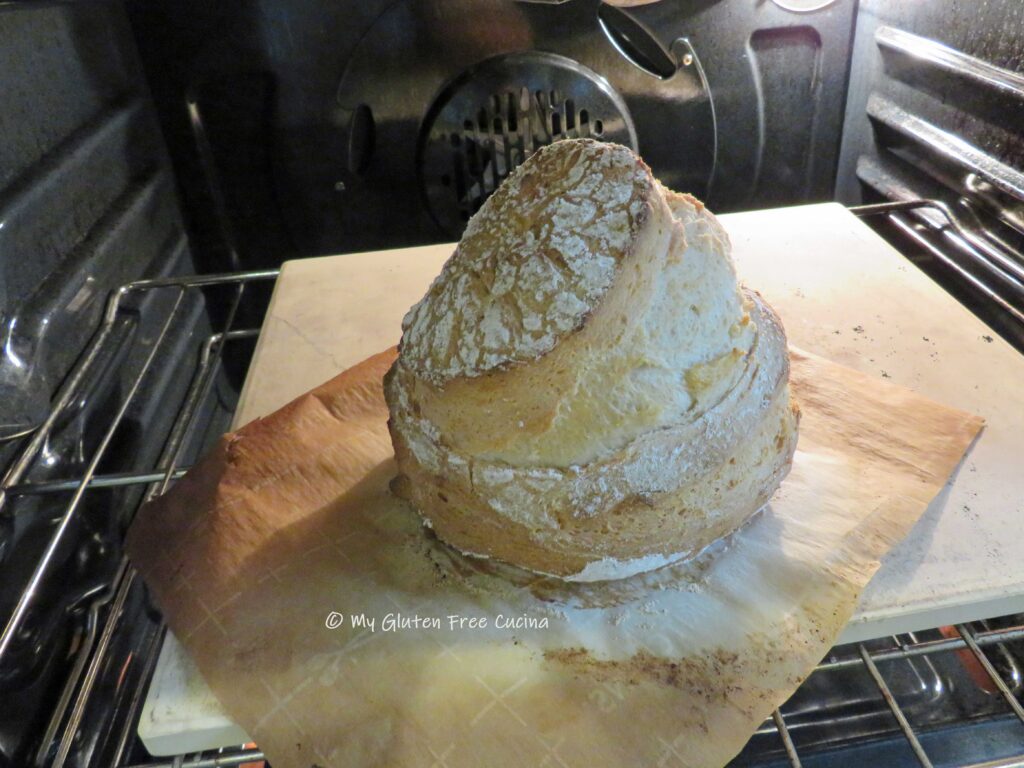
That’s what I used to make this beautiful Gluten Free Sourdough Boule and well, just look at that oven spring! So, what are you waiting for? Now that fall is here go on over to Better Batter, grab yourself a bag and let’s bake together! Be sure to use my Promo Code MGFC30 at checkout for 30% off!
Preparation:
Whisk together the flour, salt and instant yeast.
Hint: That scant 1/8 tsp. of instant yeast will give your sourdough starter a little boost without affecting the flavor!
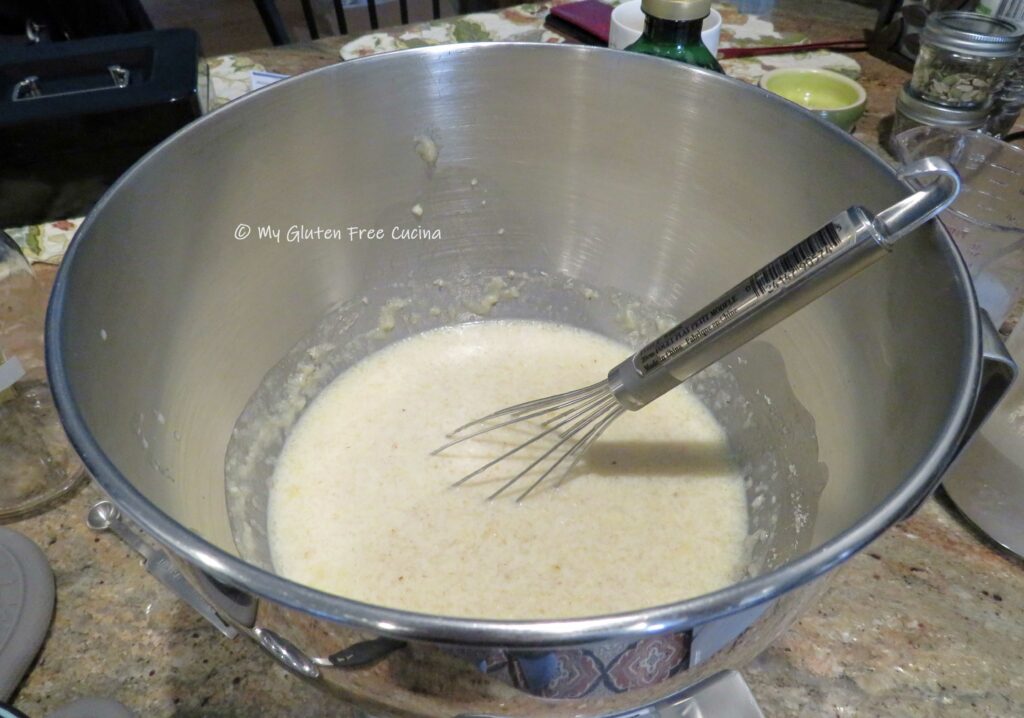
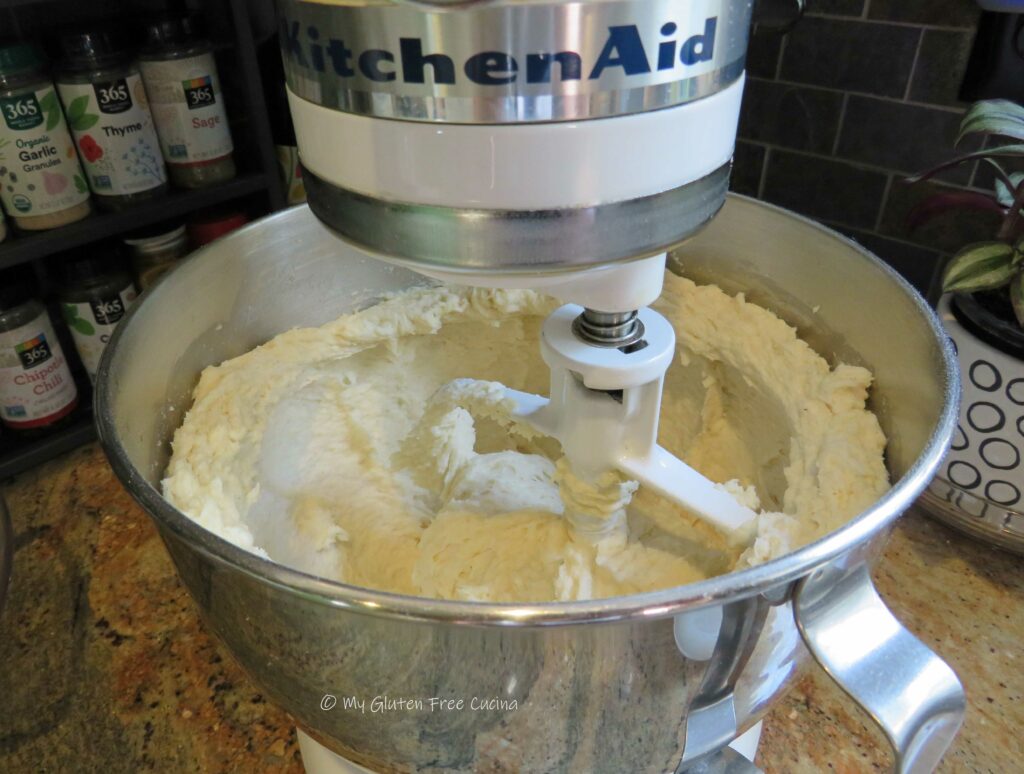
In the bowl of a stand mixer, add the sourdough starter, water and oil. Add the flour mixture and beat with the paddle attachment for 5 minutes.
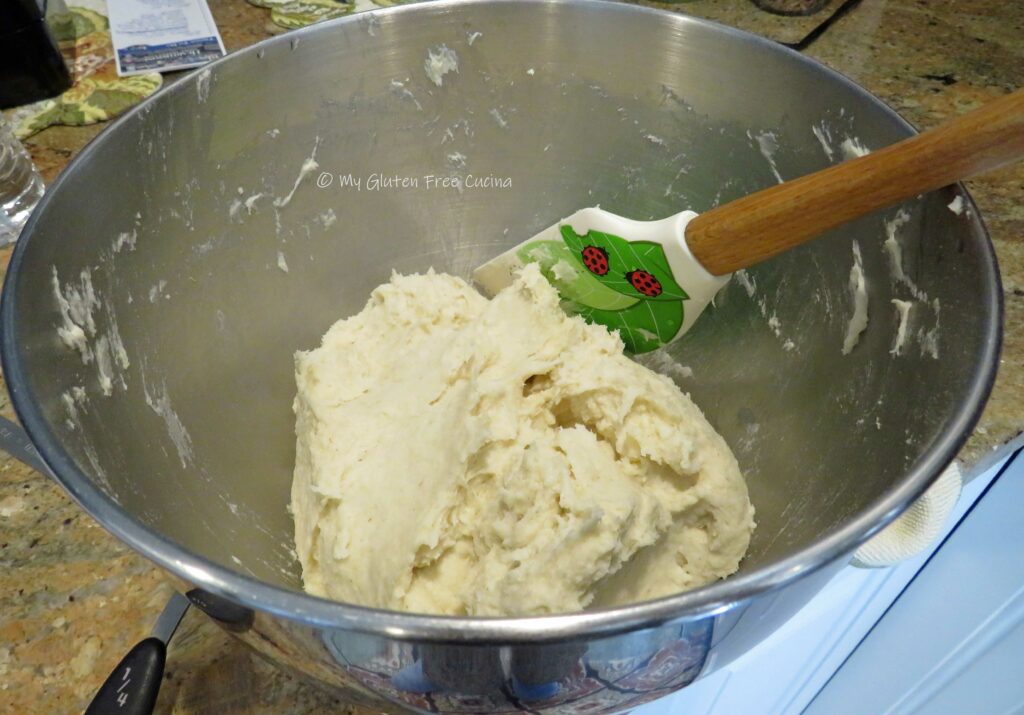
Gather the dough together, cover with oiled plastic wrap and let it rest for 20 minutes, then turn it out onto a lightly floured cutting board.
Using a bench knife, turn the dough over on itself about 2 dozen times as you rotate the cutting board so that everything is well incorporated.
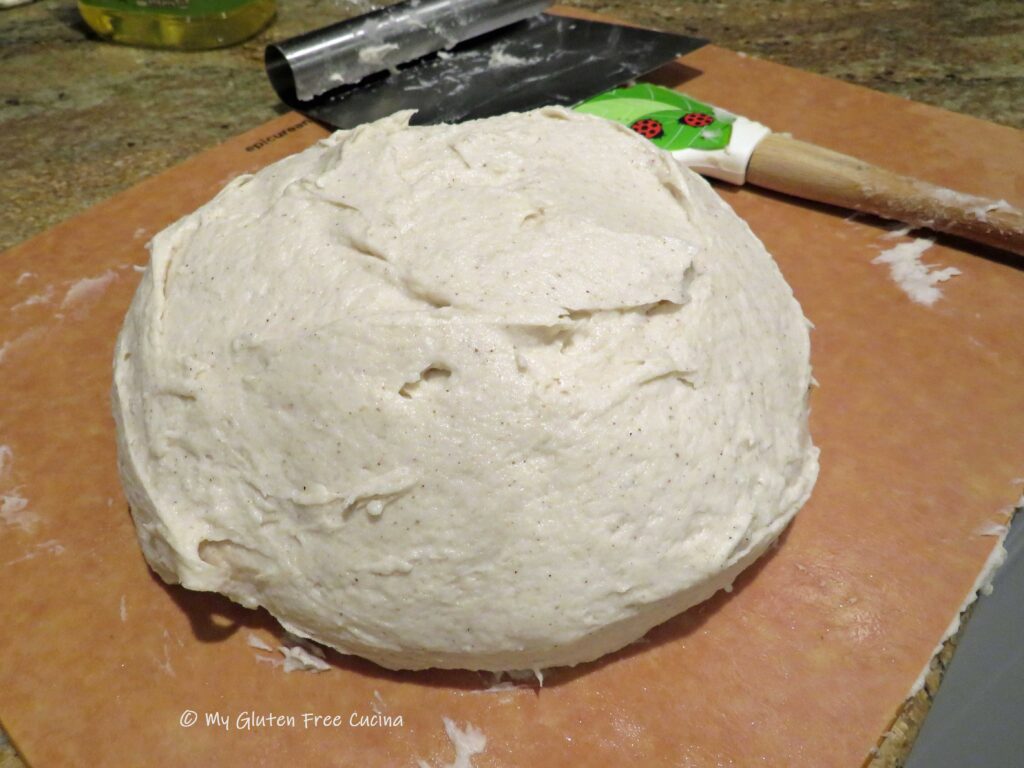
Use a spatula to smooth the dough into a round.
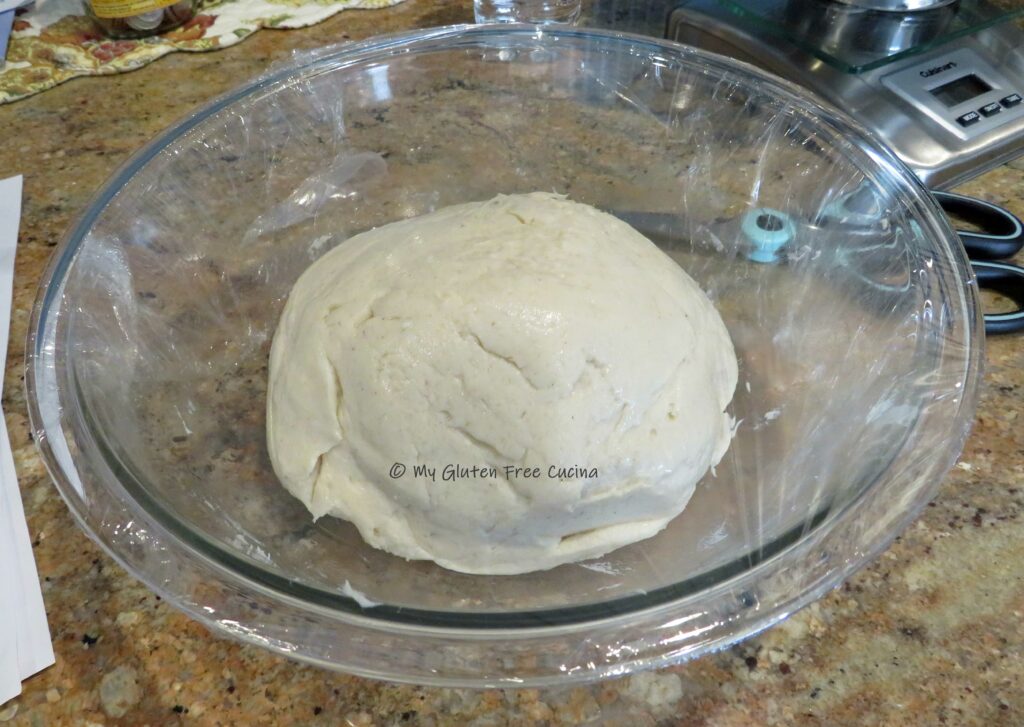
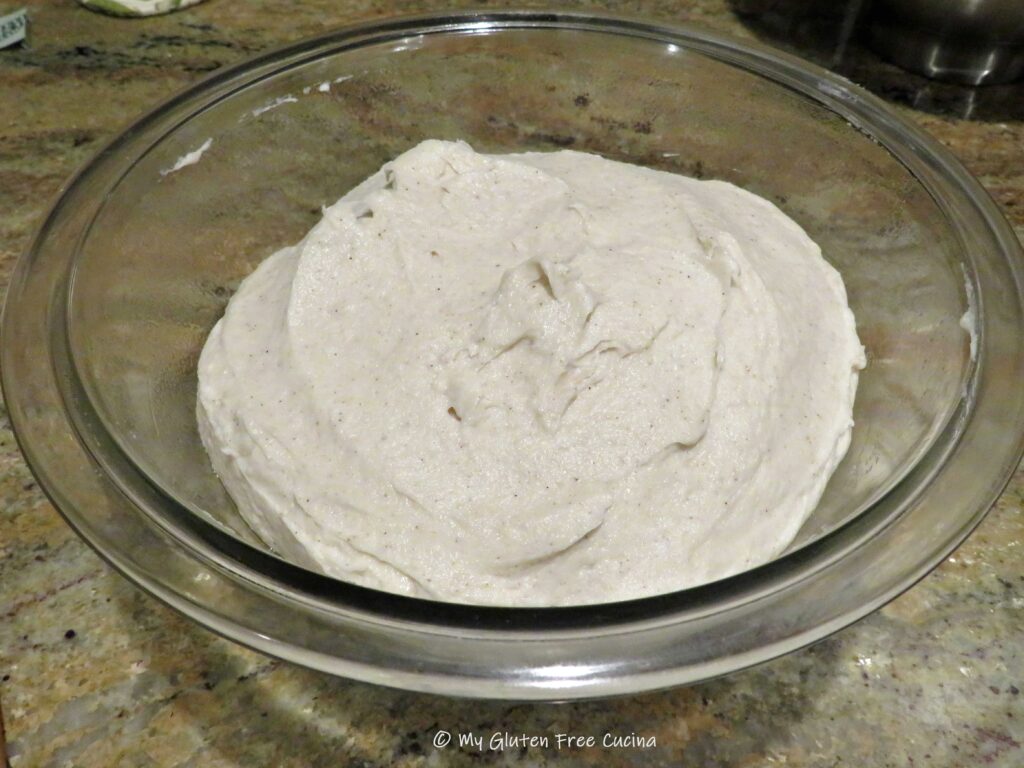
Place the dough ball in an oiled bowl, cover with plastic wrap and refrigerate overnight for 12 hours.
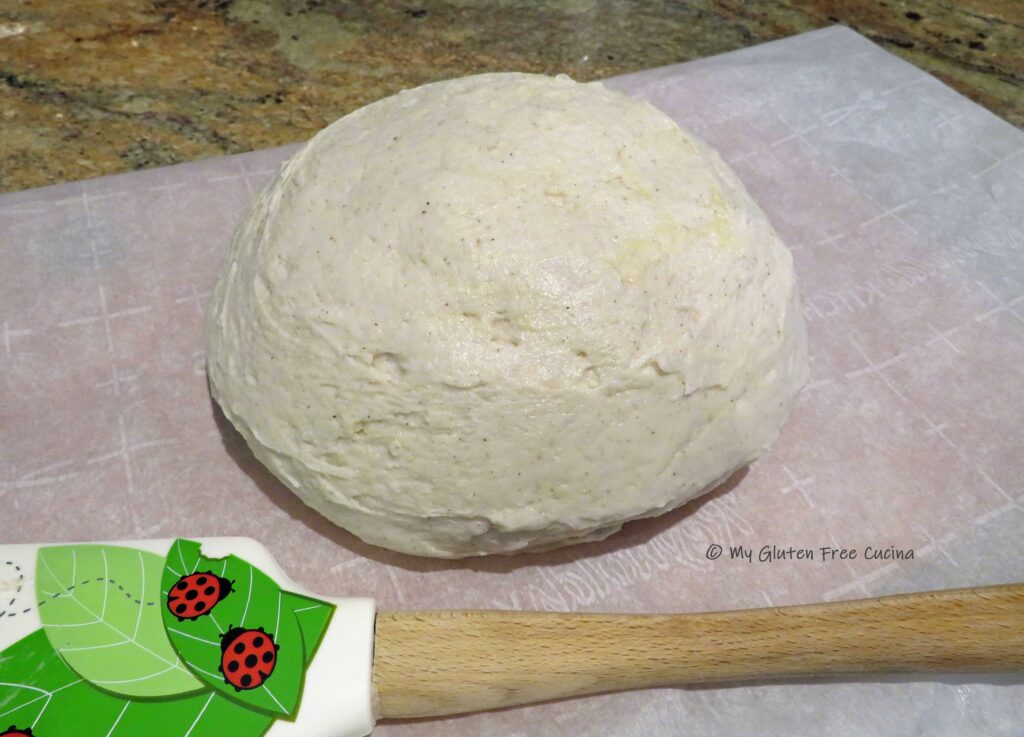
In the morning, preheat the oven to 475º with baking stone. Take the dough out of the refrigerator and invert it onto a sheet of parchment.
Use a spatula to smooth it into a round shape.
Use a lame or sharp knife to score 2 circles around the dough and sprinkle a little flour over the top.
Transfer the dough, with parchment to the oven. Throw a few ice cubes onto the bottom of the oven and quickly shut the door. After the first 5 minutes throw in a few more ice cubes.
After 30 minutes, reduce the oven temperature to 350º, and continue baking for another 30 minutes or until the internal temperature reaches 210º.
Cool completely on a rack then store in a plastic bag at room temperature. Wait 24 hours to slice.
Once the bread is sliced, serve immediately and freeze any leftovers.
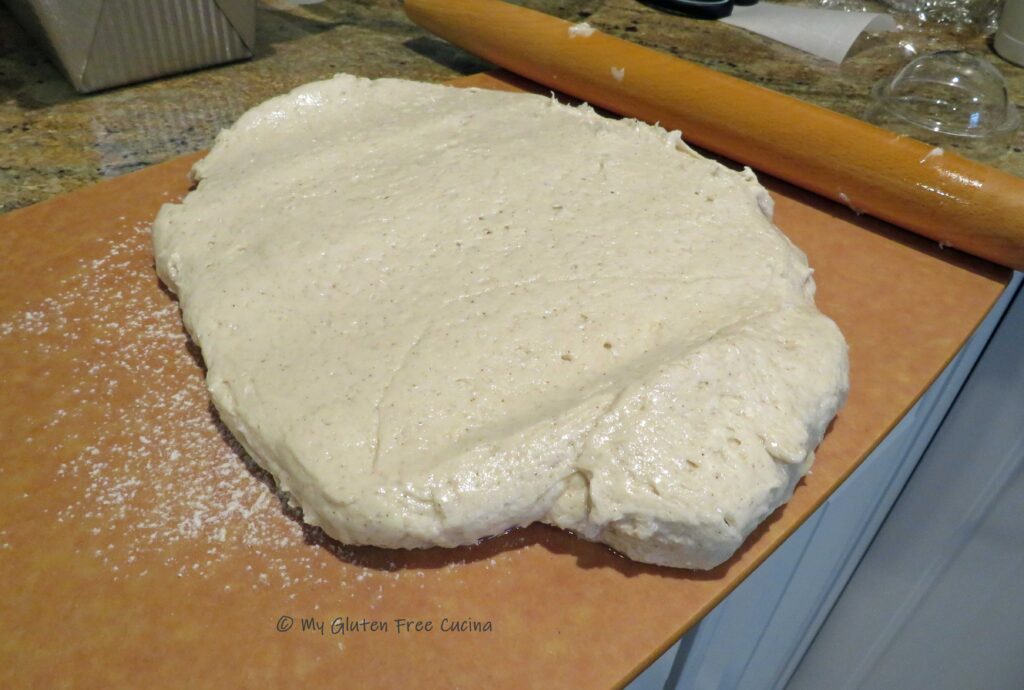
If you’re wondering if you can make this bread in a loaf pan, the answer is yes! Follow the directions through overnight proofing. The next morning, roll the loaf out to a rectangle and do a letter fold.
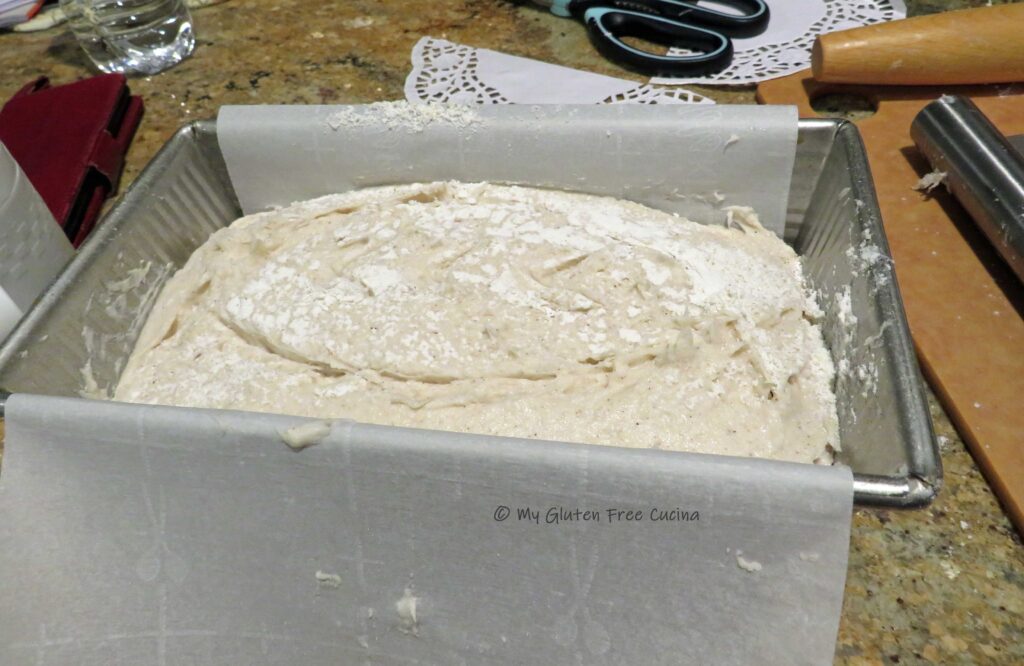
Repeat rolling and letter fold from the opposite direction, then pat the dough into a loaf shape. Place it seam side down in a 1 lb. loaf pan lined with parchment. Smooth the top with a spatula, lightly flour and score the top.
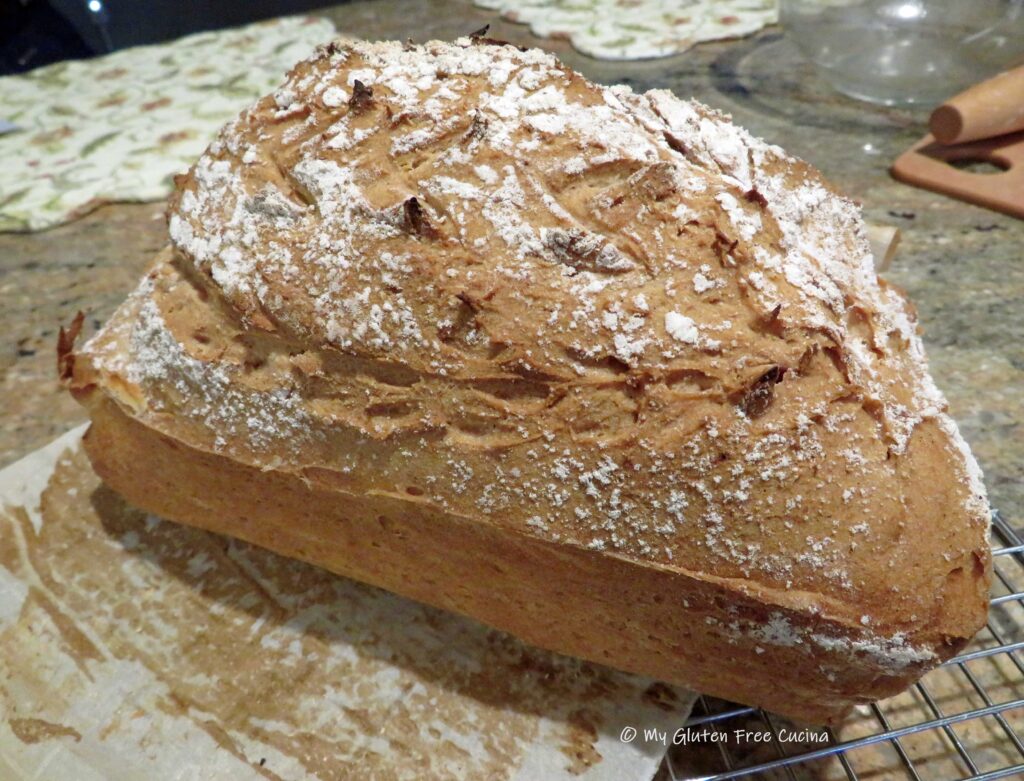
Throw a few ice cubes into the preheated oven and bake for 30 minutes at 475º. Then, carefully remove the loaf from the pan, lower the heat to 350º and finish baking directly on the stone for another half hour or until the internal temperature reaches 210º. Wait 24 hours to slice!
Which way is best? I actually prefer the loaf shape for everyday sandwiches, but the round boule is quite a nice presentation. You should probably make one of each, just to be sure 😉
Notes ♪♫ I took my starter out of the fridge about 5 hours before I made the dough, fed it and waited until it had a full head of foam on top. Your starter may require more time to fully activate, depending on how often you feed.
Questions? Let me know in the comments and I’ll do my best to troubleshoot or offer advice!
This simple side dish has it all, veggies, carbs, and a little protein happily blended together in every bite. It’s a savory side, with an unexpected hint of sweetness from a drizzle of maple syrup at the end.
The pasta I used in this dish is called Pipe Rigate, an Italian pasta shape that translates to “ridged pipes”. The short, curved shape with ridges resembles a smoking pipe or snail shell. I found Gluten Free Pipe Rigate available locally, but you can also get it on Amazon from Le Veneziane. It was the perfect size pasta to complement the Brussels sprouts in this recipe and I also like adding it to soups.
2 Servings, recipe can be doubled for larger families.
This post contains affiliate links.
Ingredients:
1/2 bag (about a dozen) Brussels sprouts, cleaned and halved
Rinse the Brussels sprouts and slice in half lengthwise. Dice the bacon into 1/2″ pieces. Arrange in an 8″ baking dish and toss with 1 tbsp. olive oil. Season with salt and pepper to taste.
Bake at 375º for 30 minutes, stirring every 10 minutes.
While the Brussels are baking, cook the pasta according to package directions. Drain and set aside until veggies are done.
Remove baking dish from the oven and stir in the cooked pasta. Finish with 1 tbsp. butter, 1 tbsp. maple syrup and shaved parmesan. Return to the oven and bake for 5 minutes longer.
Give it a good stir, a few more grinds of black pepper and serve right from the baking dish for easy cleanup.
Just add a protein of your choice and you’ll have dinner on the table in no time!
Notes ♪♫ This recipe was inspired by Savory and adapted to be gluten free by subbing gluten free pasta.
Rinse the Brussels sprouts and slice in half lengthwise. Dice the bacon into 1/2″ pieces. Arrange in an 8″ baking dish and toss with 1 tbsp. olive oil. Season with salt and pepper to taste.
Bake at 375º for 30 minutes, stirring every 10 minutes.
While the Brussels are baking, cook the pasta according to package directions. Drain and set aside until veggies are done.
Remove baking dish from the oven and stir in the cooked pasta. Finish with 1 tbsp. butter, 1 tbsp. maple syrup and shaved parmesan. Return to the oven and bake for 5 minutes longer.
Give it a good stir, a few more grinds of black pepper and serve right from the baking dish for easy cleanup.
Notes
The pasta I used in this dish is called Pipe Rigate, an Italian pasta shape that translates to “ridged pipes”. The short, curved shape with ridges resembles a smoking pipe or snail shell. I found Gluten Free Pipe Rigate available locally, but you can also get it on Amazon from Le Veneziane.
Unauthorized use and/or duplication of this material without express and written permission from this blog’s author and/or owner is strictly prohibited.
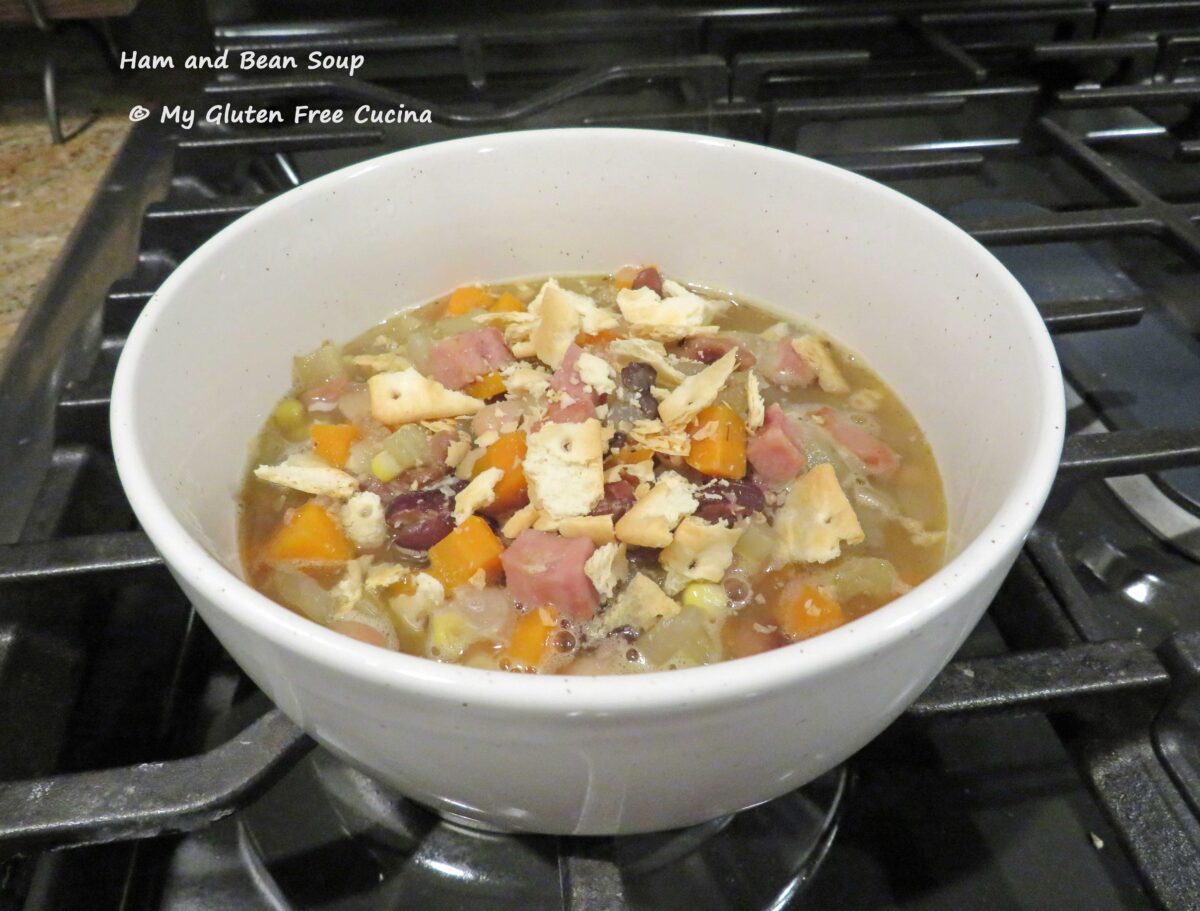
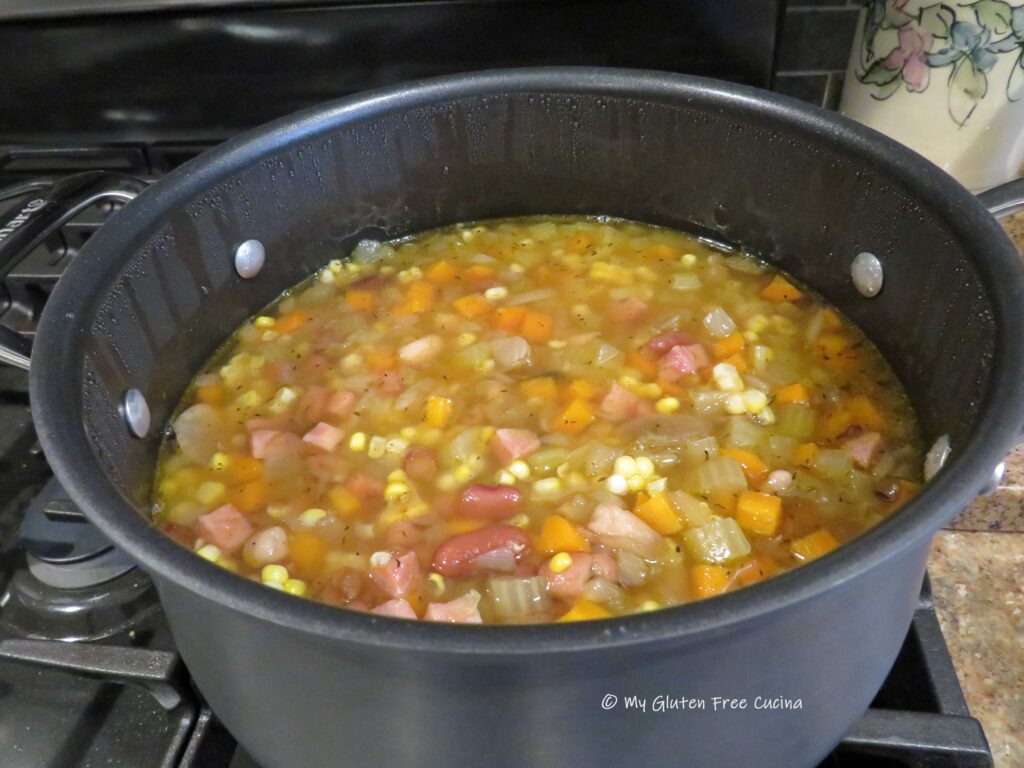
This hearty soup will hit the spot on chilly fall nights. It is one of the best soups I’ve made lately. I shared with a neighbor, who said I outdid myself- high praise indeed. You will be glad to know that most of the ingredients are pantry staples, and you can use canned beans for a short cut. Here are the step-by-step instructions along with some notes on avoiding gluten!
This post contains affiliate links.
Ingredients:
1 large, sweet onion, diced
4 carrots, peeled and diced
6 celery stalks, washed and diced
olive oil
sea salt and fresh ground pepper
8 oz. cubed ham (I used Smithfield)
10 oz. mixed beans (I used a half bag of Hambeens)
Note ♪ I used HamBeens 15 Bean Soup blend in this recipe. The package is labeled gluten free. Be aware though, that other brands of mixed beans may contain barley and should be avoided by anyone with Celiac disease. I recommend that all beans, regardless of labeling be rinsed several times to minimize potential cross contact.
Preparation:
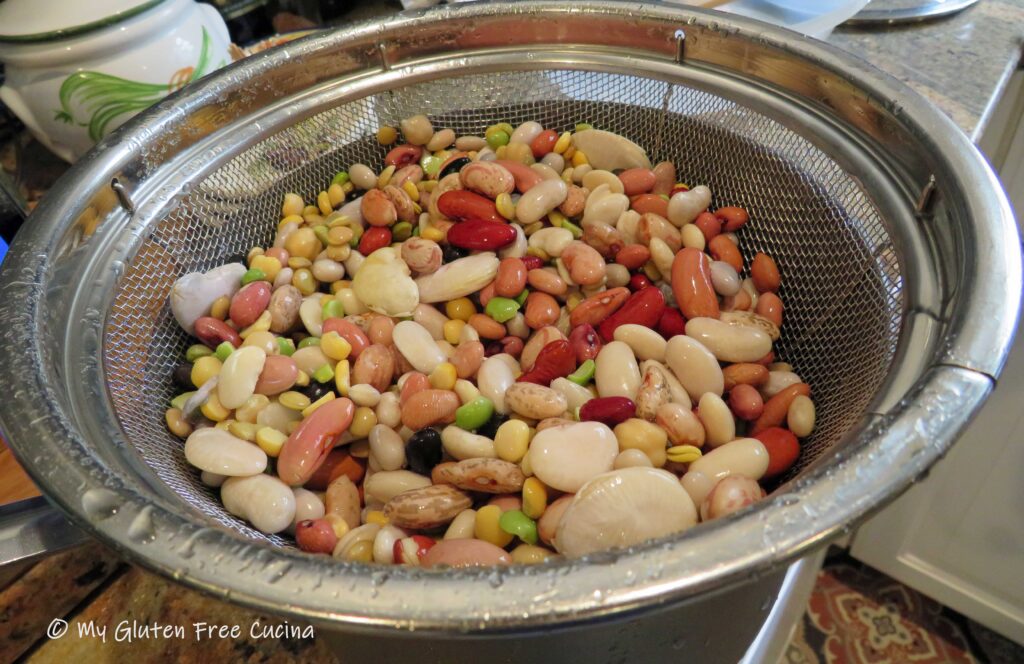
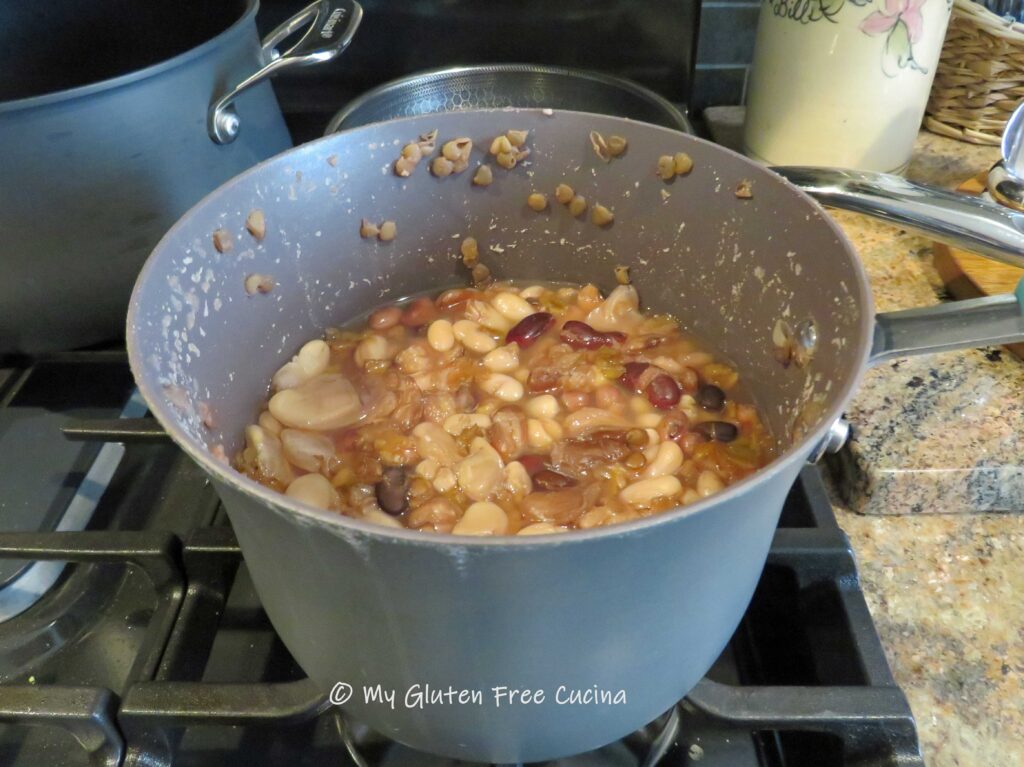
Rinse the beans under cold water and drain. Place them in a saucepot and add cold water to cover. Cover and let them soak overnight.
The next morning, drain and rinse again. Add back to the saucepot with COLD water, cover and turn the heat on low. Simmer gently for 2 hours.
Drain and rinse again and set the beans aside.
Heat olive oil in a stainless-steel skillet. Begin sautéing the veggies, beginning with the carrots as they take the longest to cook. Season with sea salt and fresh ground pepper and stir frequently for 3-4 minutes. Transfer the carrots to a 5-quart stock pot and proceed to do the same with the celery and onions.
Hint: Sauté the veggies in olive oil before adding them to the soup for extra depth of flavor.
When the veggies are done, wipe the skillet clean and add the diced ham with a bit more olive oil.
Note ♫ For extra convenience I used Smithfield Anytime Cubed Ham, it is labeled gluten free. Always check ingredients on prepared foods like ham!
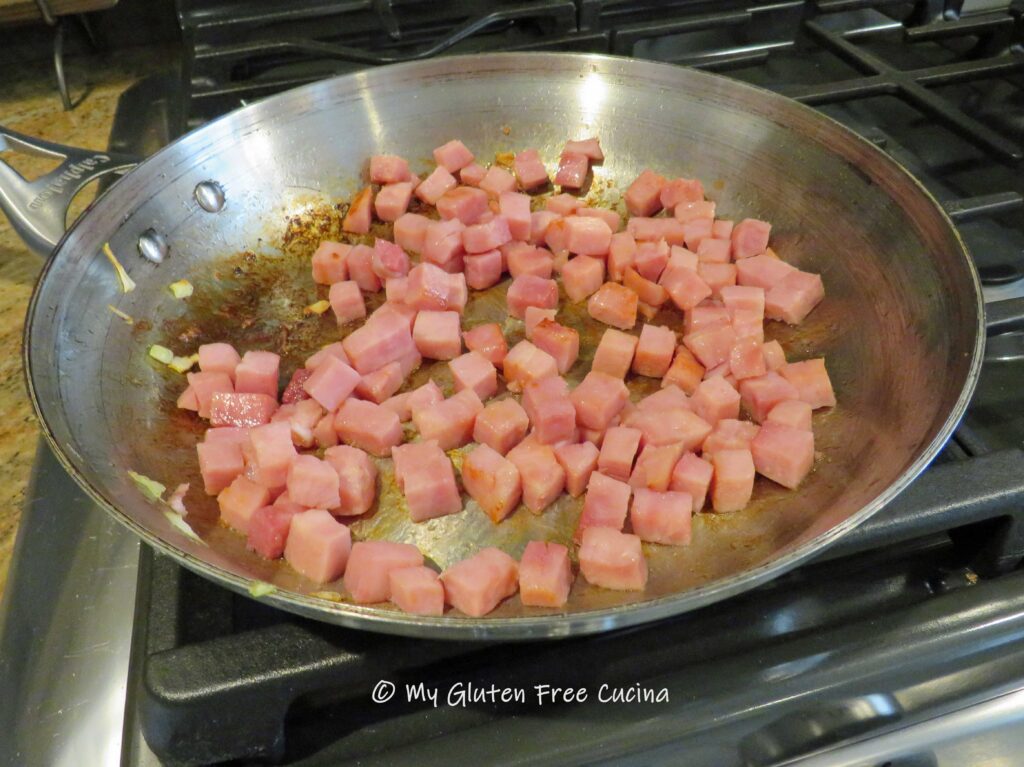
Cook the ham until the liquid reduces and you can see some caramelization on the bottom of the pan.
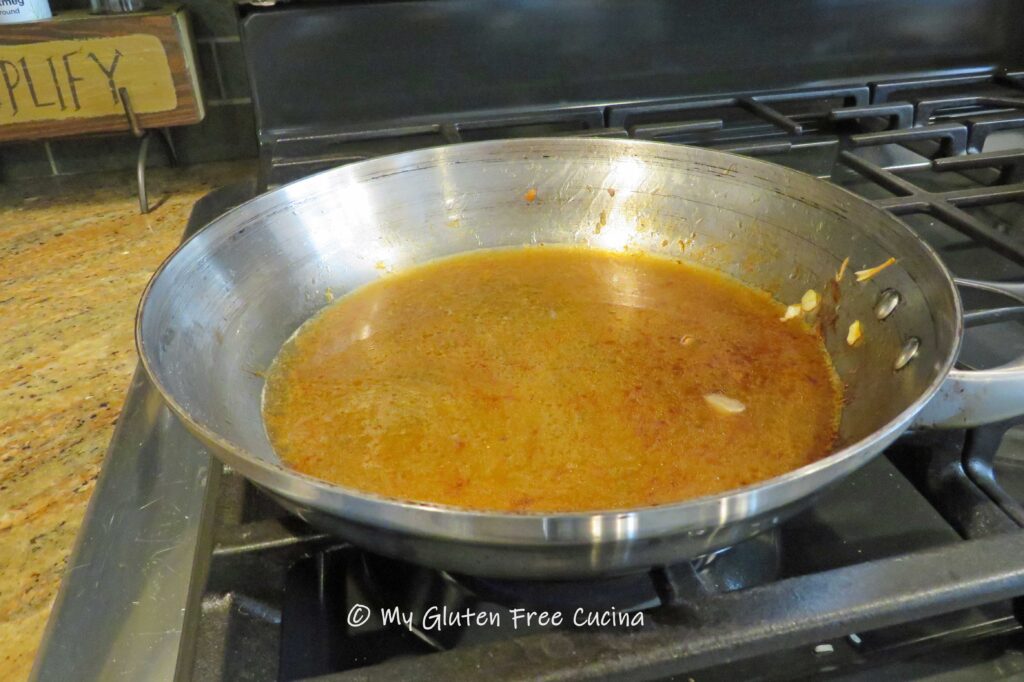
Add the ham to the stock pot, and deglaze the skillet with a little beef broth, scraping up the caramelized bits at the bottom. Pour the liquid into the stock pot.
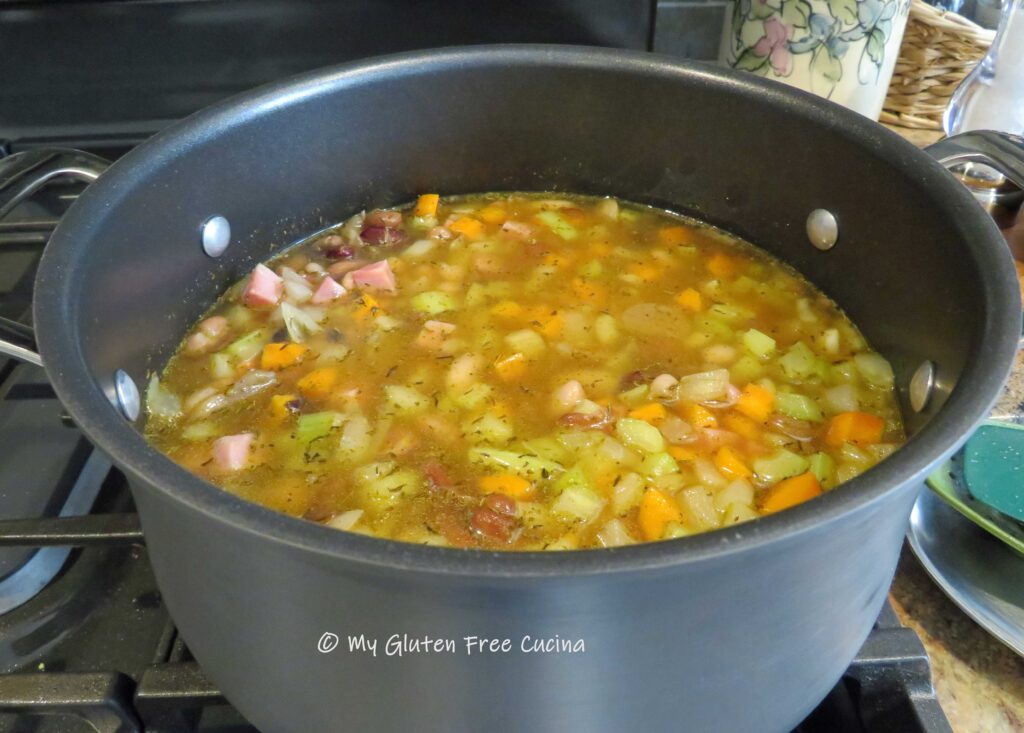
Next, add equal parts of chicken and beef broth, enough to cover the ham and veggies. Return the cooked beans to the pot, along with the bouillon, sage and thyme.
Simmer until the veggies are soft, then add the corn kernels in to heat through (adding the corn at the end of cooking gives the soup a little textural contrast to the soft beans and veggies).
Soup is ready to enjoy with gluten free crackers or bread. Leftovers (if you have any!) can be refrigerated for up to a week. Don’t worry though, it won’t last that long!
Notes ♪♫ I used lower sodium broth and salt free bouillon in this recipe (got to watch that blood pressure 🙄). I did lightly salt the veggies and of course the ham had plenty of salt, so that was enough for me. If you follow a low sodium diet you can cut it down further by using unsalted broth, be sure it’s gluten free!
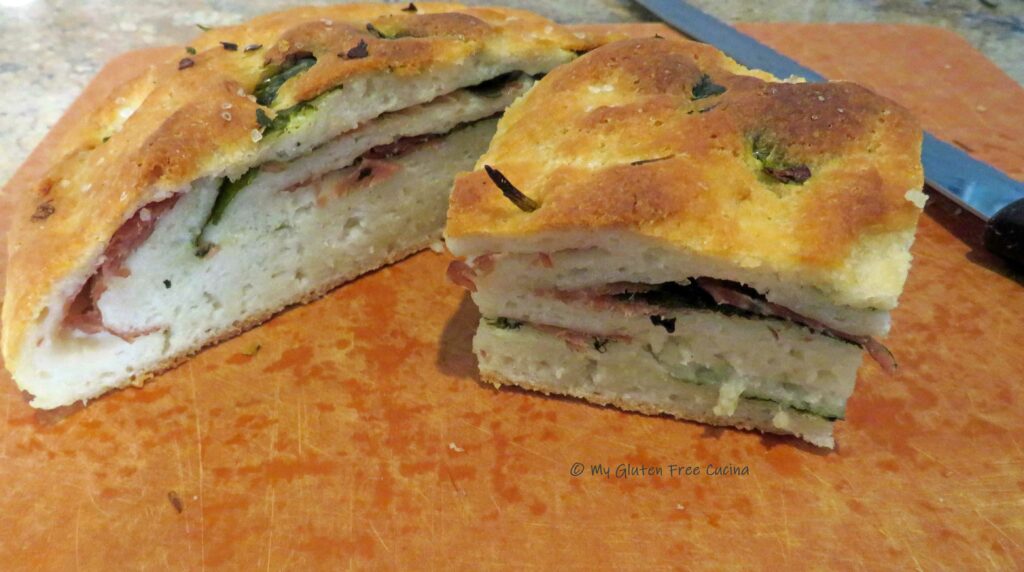
Look at this beautiful Focaccia Bread, filled with baby spinach leaves and prosciutto! It is a meal in itself, great for breakfast, lunches and snacking. Learn how to make it here with step-by-step instructions.
This post contains affiliate links.
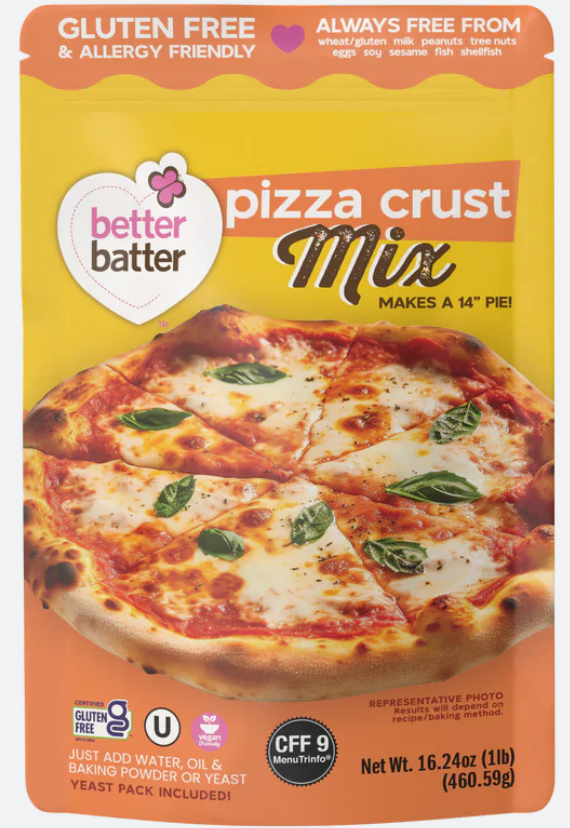
I’m really excited to share this recipe with you, because I made it with the new Pizza Crust Mix from Better Batter. Yes, it’s a pizza crust mix, but this versatile new product is all that and so much more!
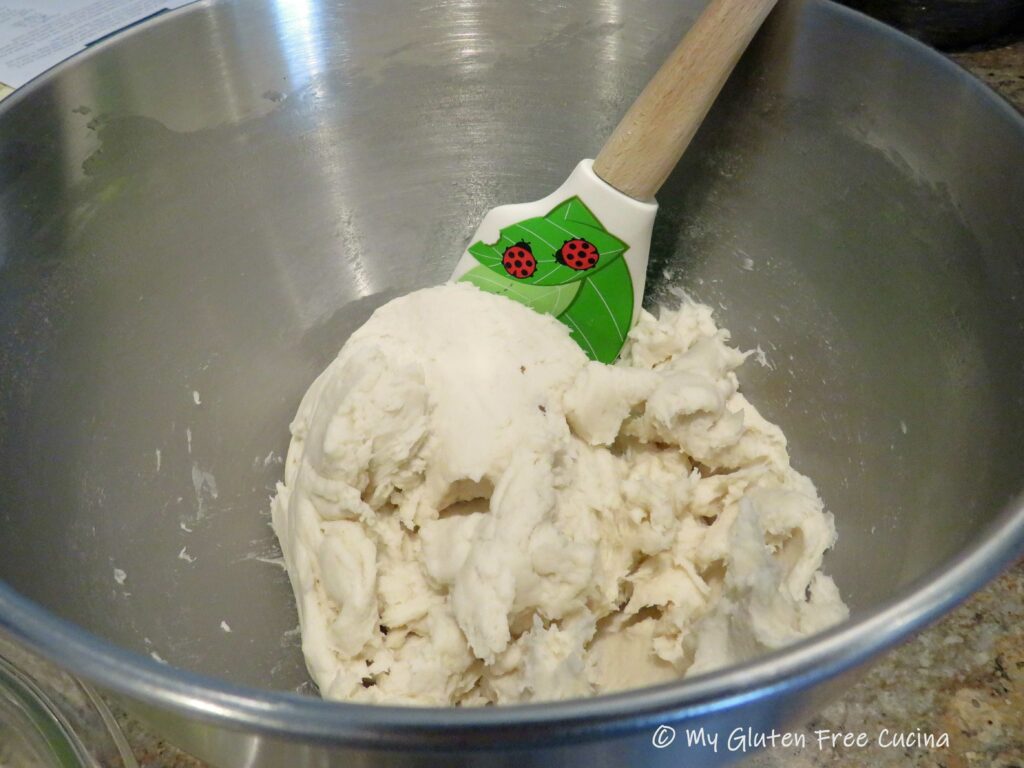
Whisk together the water, honey, yeast and 1 tbsp. olive oil in the bowl of a stand mixer and let it sit for 10 minutes. Next add the pizza crust mix and combine on low speed with the paddle attachment. Increase the speed and mix for 5 minutes to form a smooth dough.
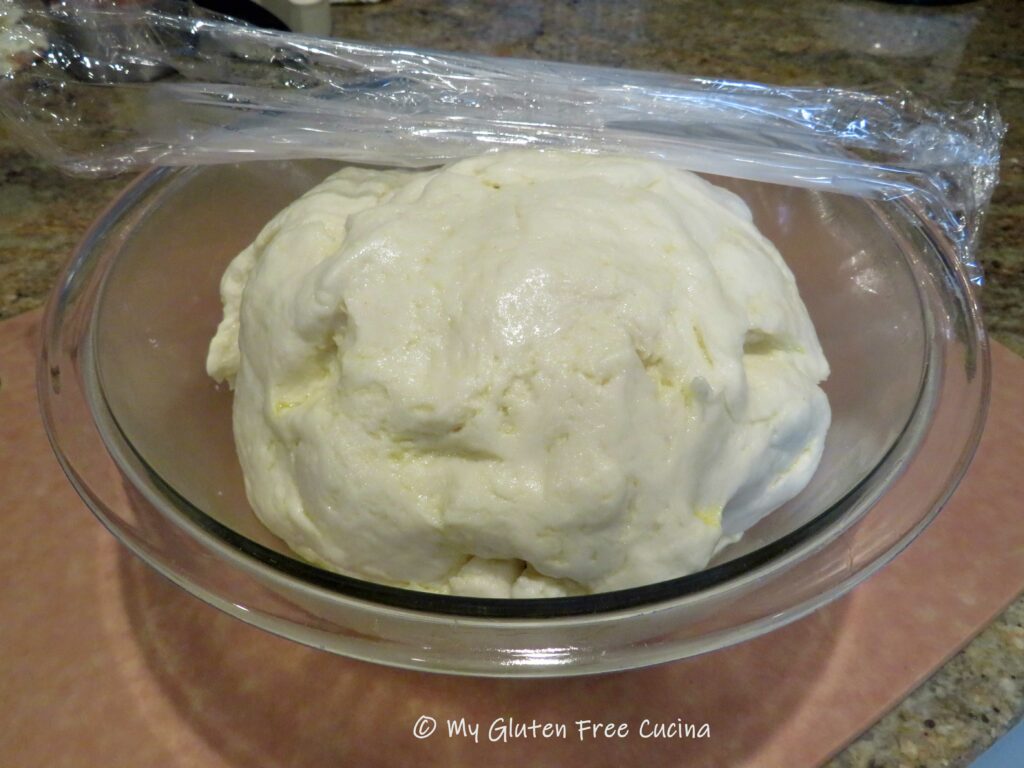
Coat a large bowl with 1-2 tbsp. of the infused olive oil and use a stiff spatula to scrape the dough into the bowl. Turn the dough to coat with oil. Cover the bowl with plastic wrap and let the dough rise for 30 minutes.
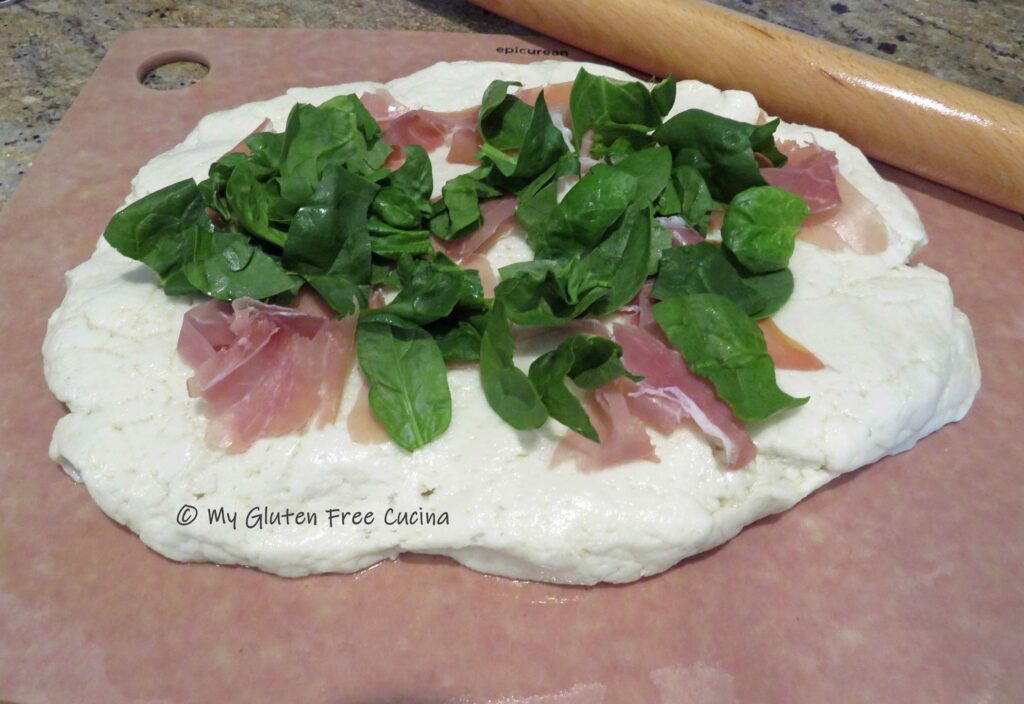
Turn the dough out onto an oiled cutting board. With oiled hands, stretch and pat the dough into an oval and roll to 1-1/2″ thick. Top with half of the spinach and prosciutto.
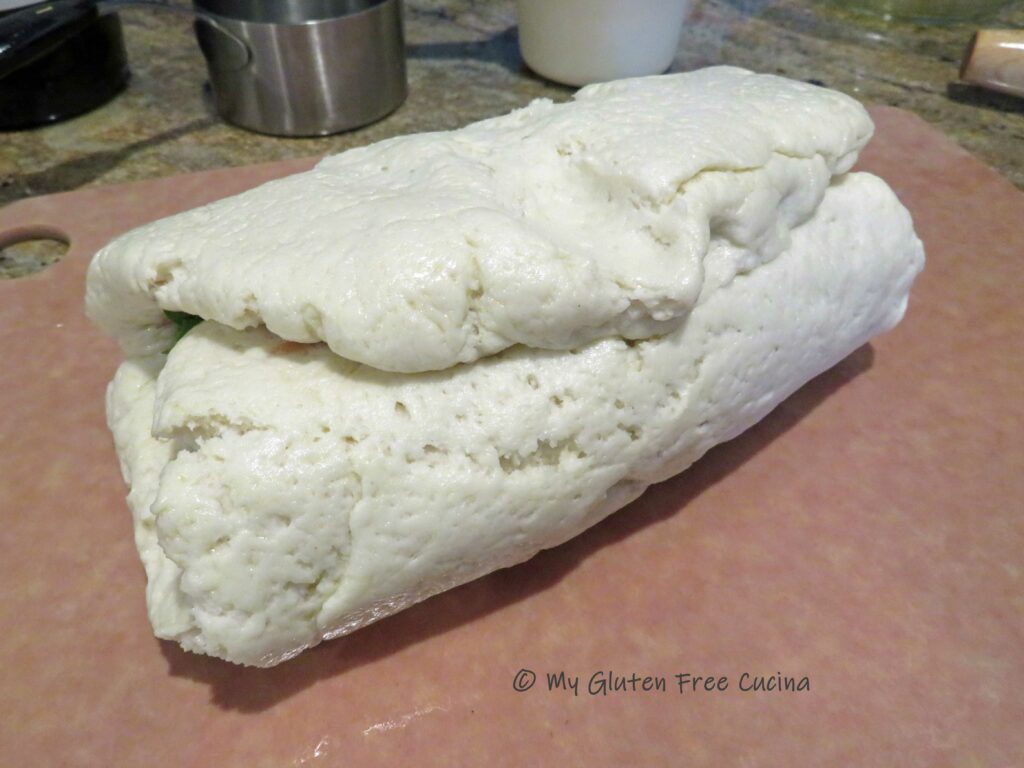
Fold the dough over letter style.
Carefully roll the dough into an oval shape and spread with the remaining spinach and prosciutto. Fold it up again, then turn seam side down and shape into a round.
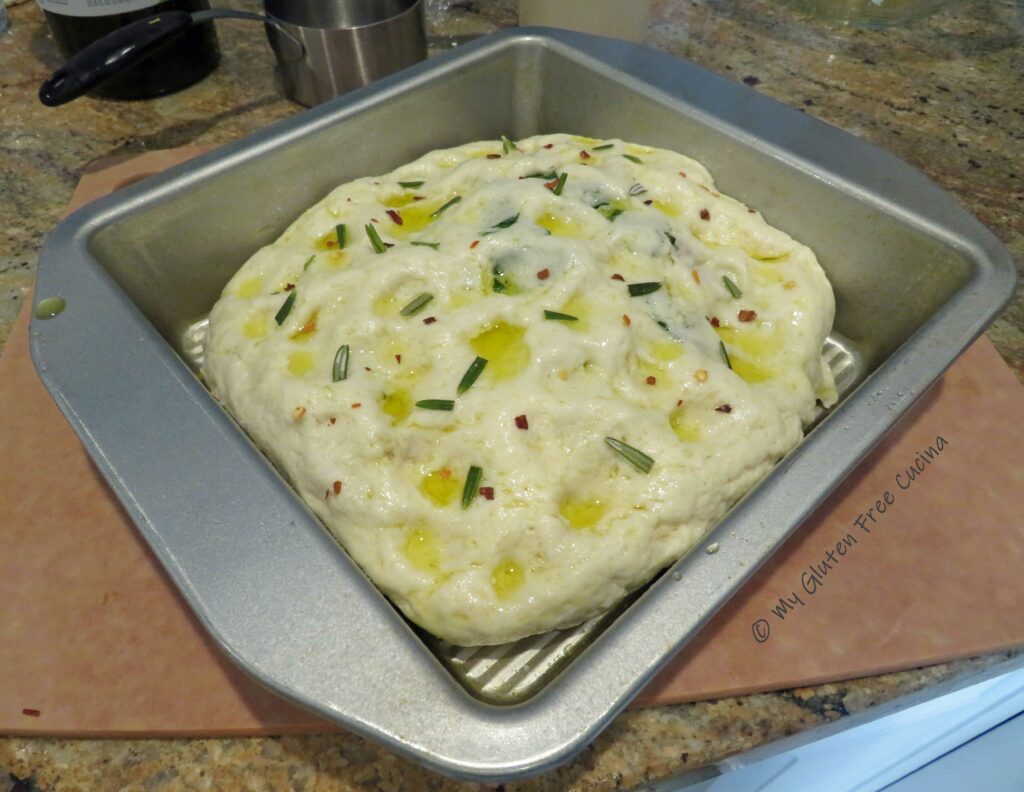
Place the shaped dough into an oiled 8 x 8″ square pan and pat it down to flatten slightly. Cover and set aside to rise again for 25 minutes. Place a baking stone in the oven and preheat to 400º.
Now use oiled fingers to press dimples into the dough. Brush the top liberally with the remaining infused oil, sprinkle with coarse salt and chopped fresh rosemary.
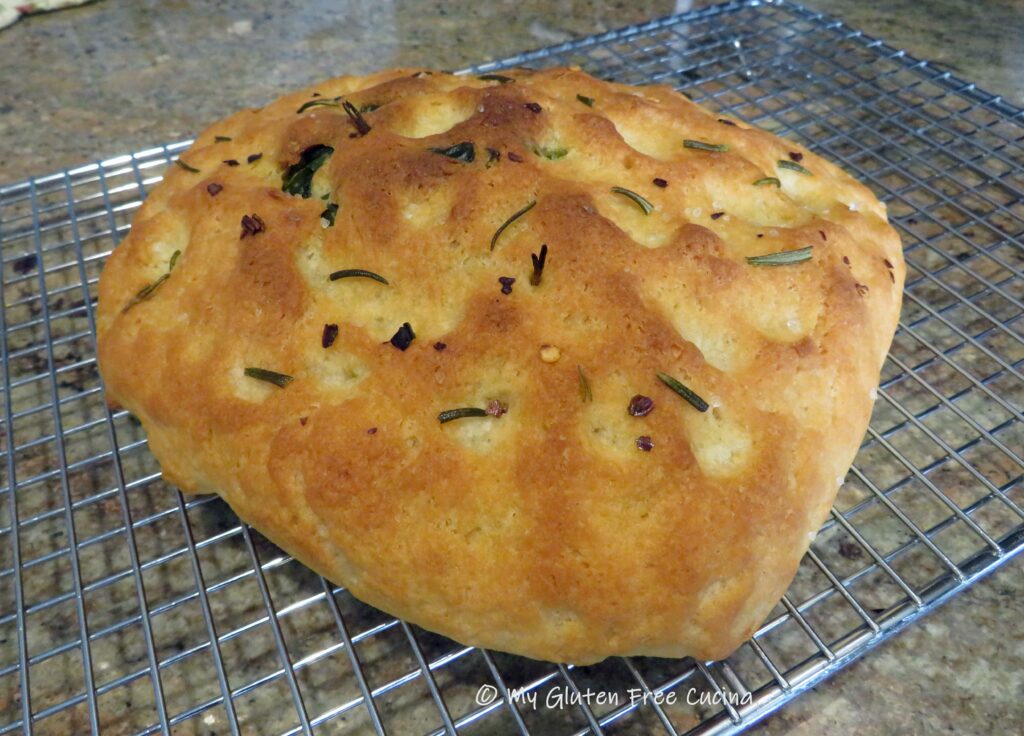
Bake for 45 minutes or until the internal temperature reaches 210º. During the last 10 minutes of baking, remove the focaccia from the pan and bake directly on the pizza stone.
Remove from the oven and cool on a rack for about 1 hour and serve warm.
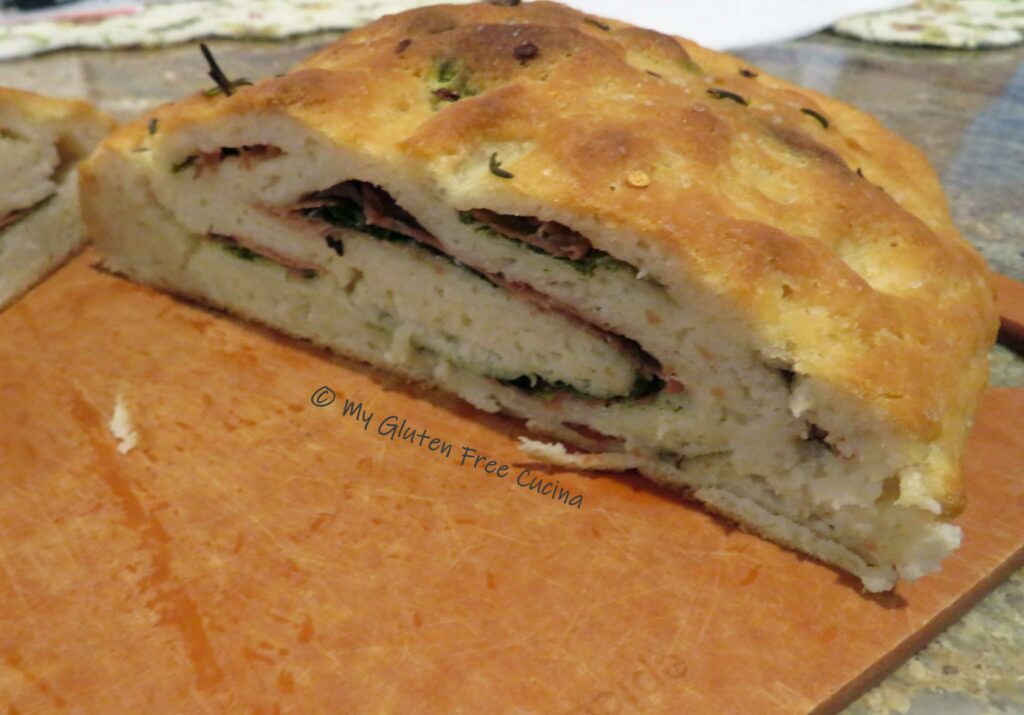
Slice the focaccia into squares for serving. You can see the prosciutto and spinach in every slice!
I hope you’ve enjoyed today’s bake and that you will try the new Pizza Crust Mix from Better Batter. Remember, when you shop Better Batter, use my Code MGFC30 at checkout for 30% off full price!
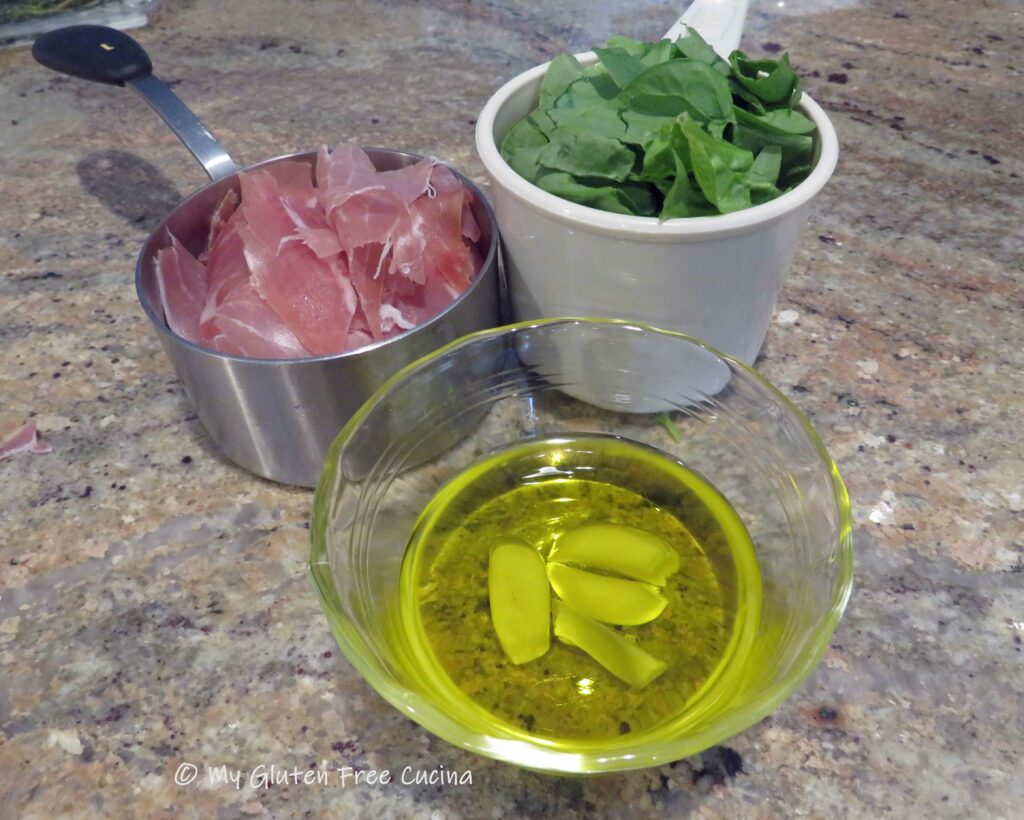
Notes ♪♫ The day before I baked this loaf, I set aside 1/2 cup of olive oil and added 2 garlic cloves and a sprig of fresh rosemary. The infused oil adds another layer of flavor to the bread dough and is great for dipping.
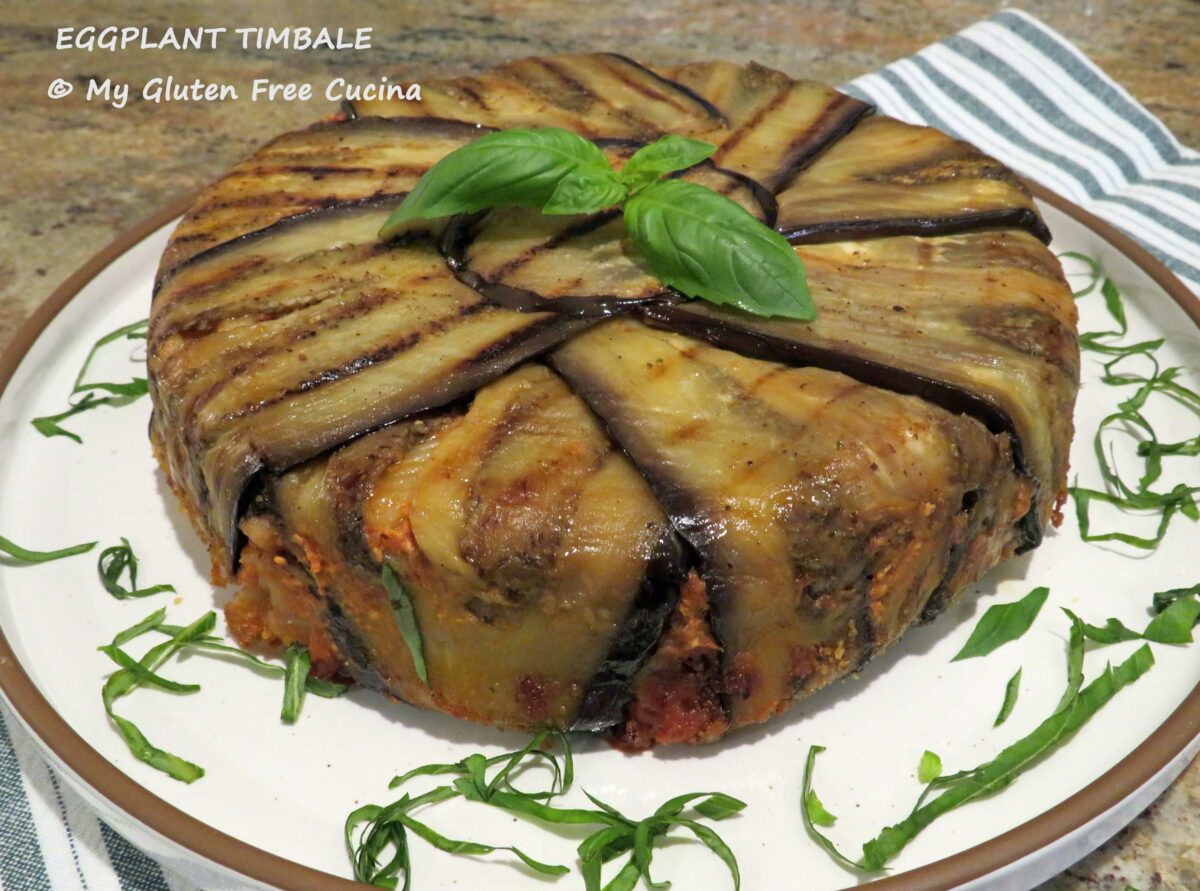
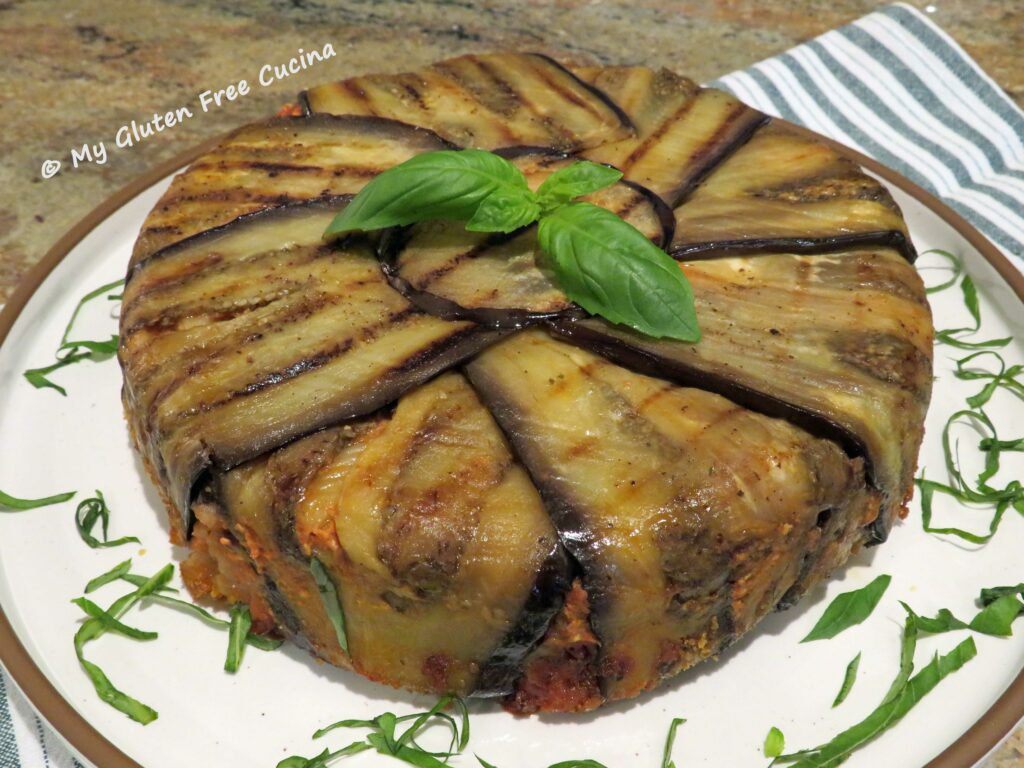
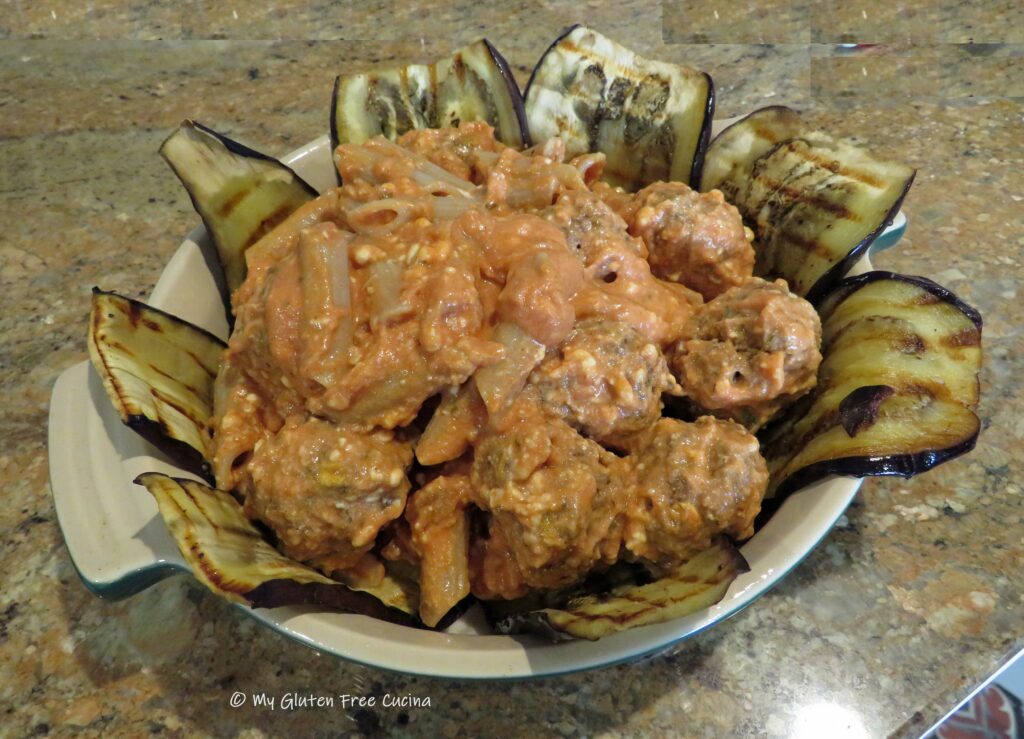
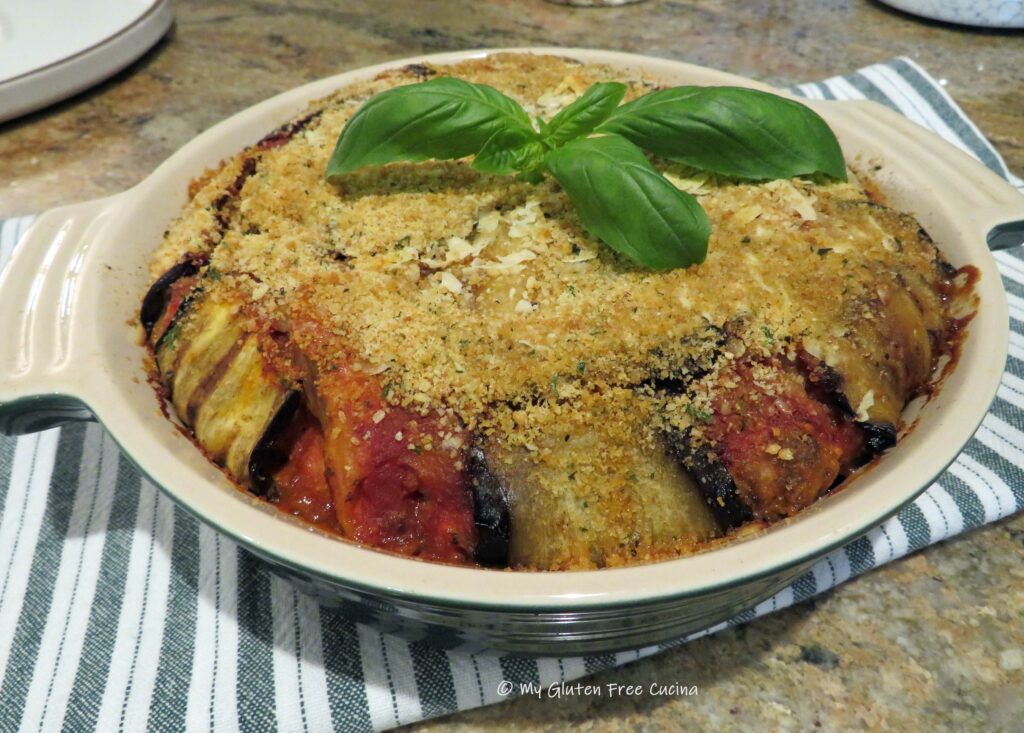
Also known as Timballo, or Timpano, this dish gets its name from the Italian word for “drum” and refers to how the contents are pressed into the pan to create the drum shape. It is truly a dramatic presentation.
It had long been on my culinary bucket list to make this classic Sicilian pasta dish. Labor intensive? Yes, but well worth the time and effort when you bring this stunning dish to the table. Perfect for Italian Sunday Dinner!
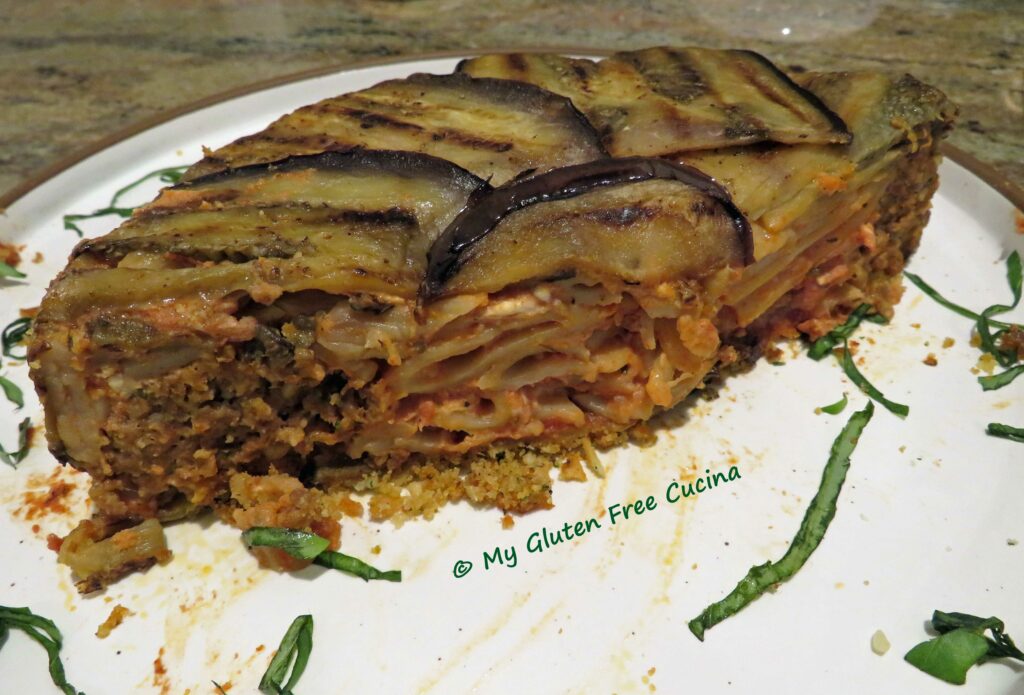
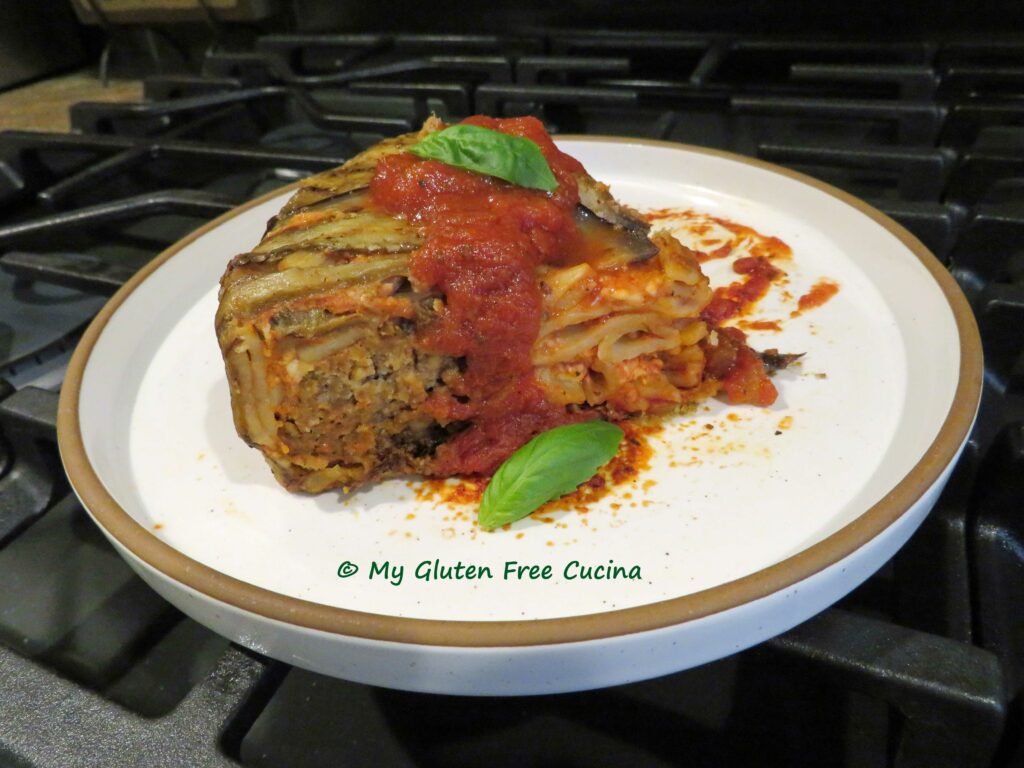
There are many variations of Timbale throughout Italy. The Sicilian style, like this one is traditionally wrapped in eggplant. What else is in it- gluten free penne, meatballs, tomatoes and cheese. Ordinary ingredients perhaps, but this recipe puts them all together in a most impressive presentation! It looks and tastes amazing! Like a classy, sophisticated lasagna.
It took me several hours total to prep the ingredients and assemble the dish, although I made the sauce and the meatballs a day ahead.
Don’t be intimidated by all the steps. In this post I break the recipe down and make it easy for you to follow. You can opt to do some of the prep in advance as I did, or all at once if time permits. Remember to allow for a few hours rest in the refrigerator before baking, as this helps the Timbale to set up and hold its shape.
This dish is often baked in a springform pan, but for a small family, an 8” round baking dish pan works perfectly (although it was a little tricky flipping it over!). For a larger family, use 2 eggplant and make extra sauce, then bake in a springform pan or make 2 of the 8” cake pans.
This is an incredible meal, and you will be surprised at how filling it is. Even with this smaller version you may have leftovers for lunch.
4-6 servings
This post contains affiliate links.
INGREDIENTS:
Sauce
28 oz. Can tomato sauce (reserve ½ cup for the meatballs)
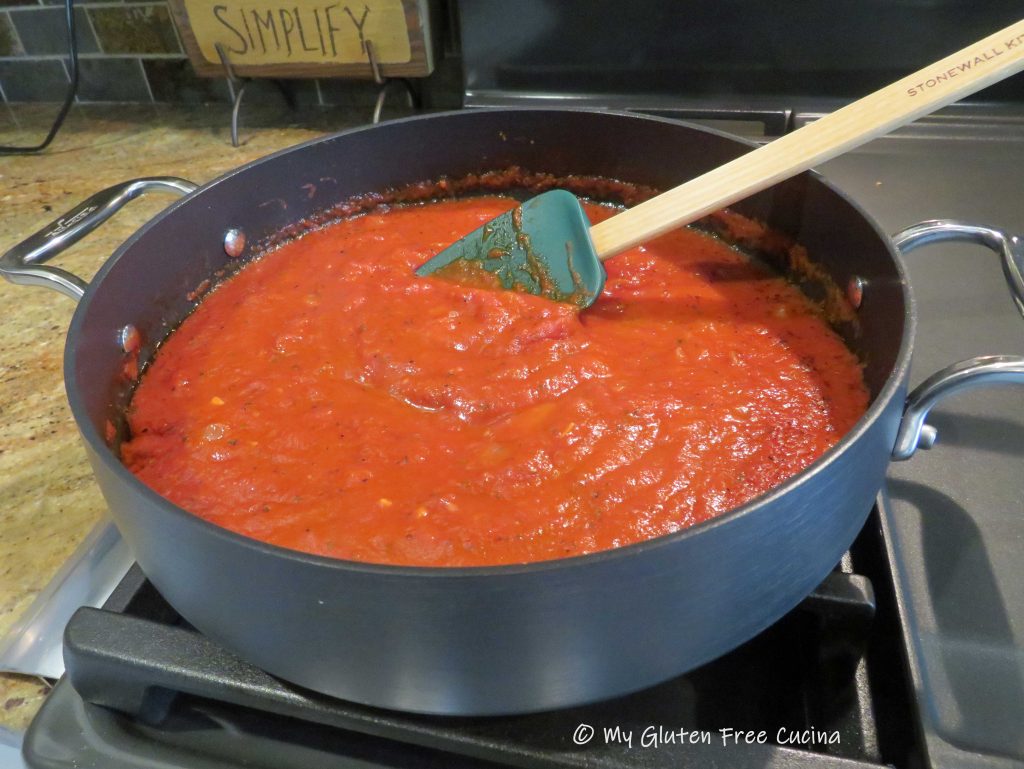
First, make the marinara sauce. Heat a heavy saucepan or deep skillet with 1 tbsp. Olive oil. Add the diced onions and cook, stirring frequently until they are translucent. Add the garlic and stir for 30 seconds. Next add the tomato sauce, reserving ½ cup for the meatballs. Stir in the sugar, basil, oregano and fresh ground pepper. Cover and simmer on low for ½ hour, then remove from the heat and cool to room temperature. Check out this post for more detailed instructions on making a marinara sauce.
Now I can just hear you saying, can’t I cheat and use jar sauce? Of course you can, just be sure it’s gluten free and I’ll never tell! 😉
Next, we will make the meatballs. Whisk together the egg, reserved ½ cup of tomato sauce and Italian seasoning. In a separate bowl, combine the rolled oats, potato flakes and breadcrumbs. Add the beef and sausage to the egg mixture and work it in with your hands. Read more about making meatballs in this post.
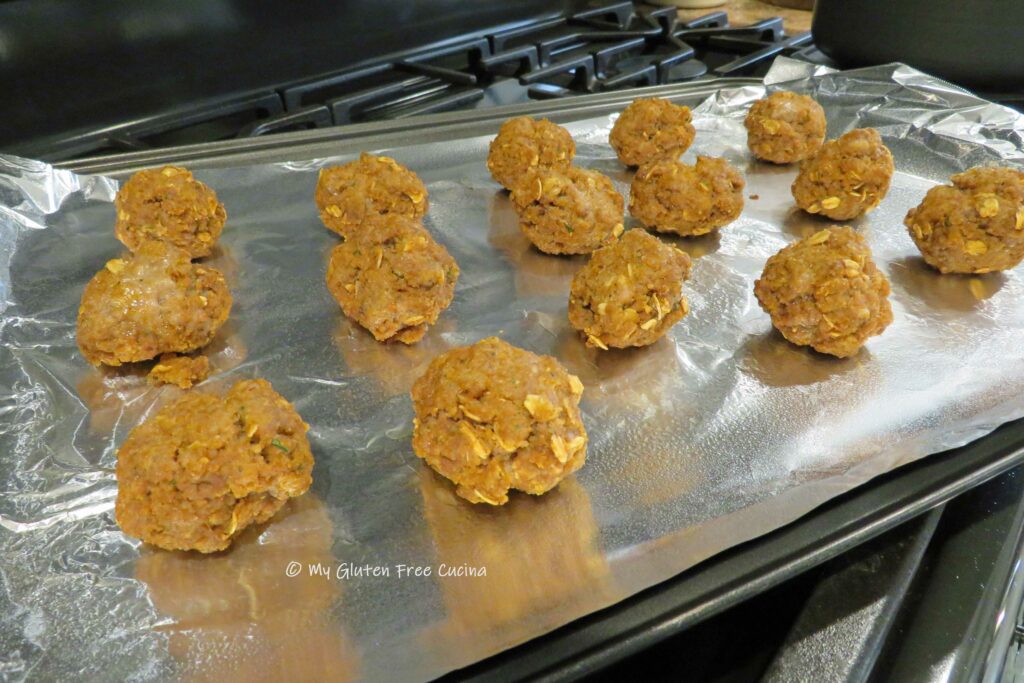
When the meat is well combined, add the dry ingredients and continue working the mixture to distribute everything evenly. Line a baking sheet with foil and mist with cooking spray. Form 24 small meatballs (about 1-½ inch) and place them on the baking sheet with space in between. Broil 3 minutes per side on high, then set them aside and cool to room temperature. *Note that I only used one dozen meatballs in this recipe, you will need all of them if you make a double batch or use a larger pan.
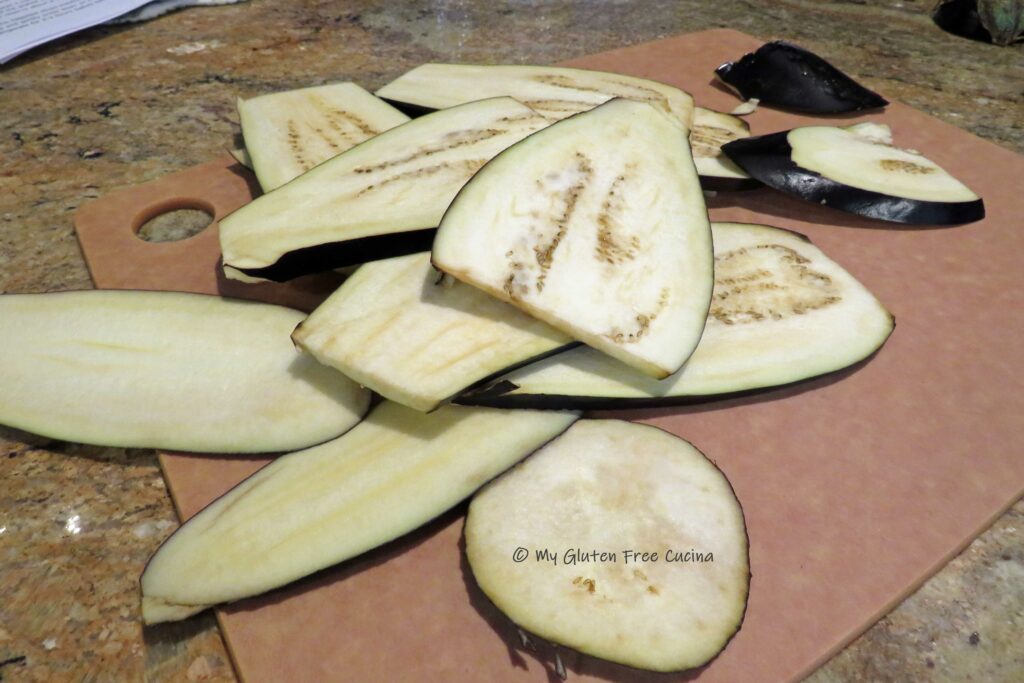
For the eggplant, cut off a slice at the stem and one from the bottom so that you can stand it up on your cutting board. If you prefer, peel the eggplant by running a sharp knife down the sides to remove the skin. If you don’t mind the skin, leave it on, it will look beautiful in the finished dish.
Cut one small round off the top then slice the eggplant lengthwise into thin strips, about ¼” wide. I used a mandoline so that my slices would all be the exact same thickness.
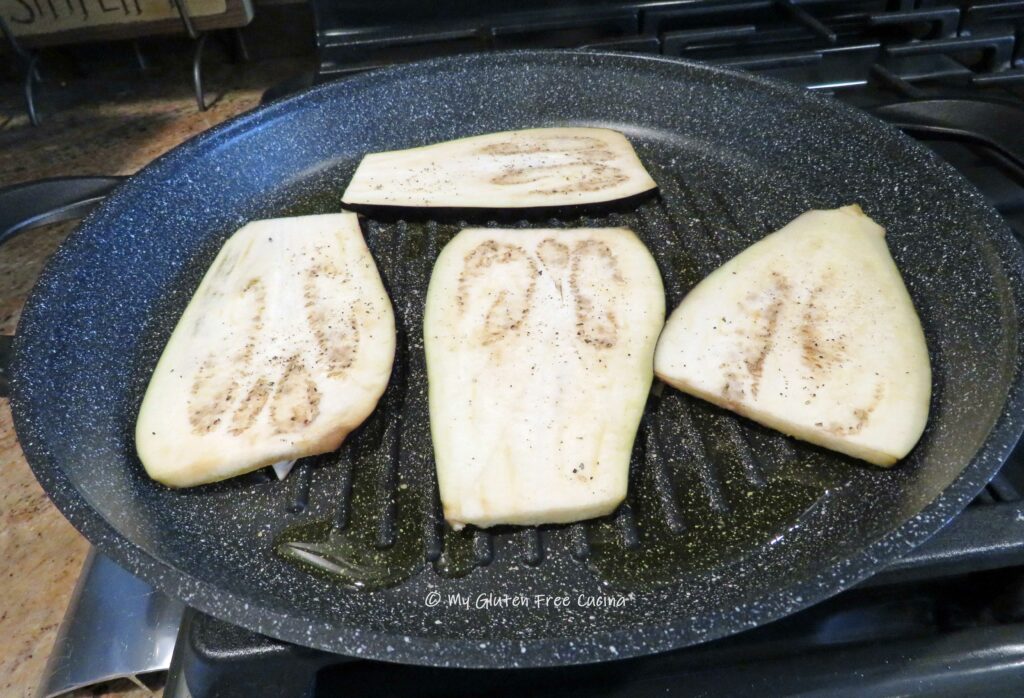
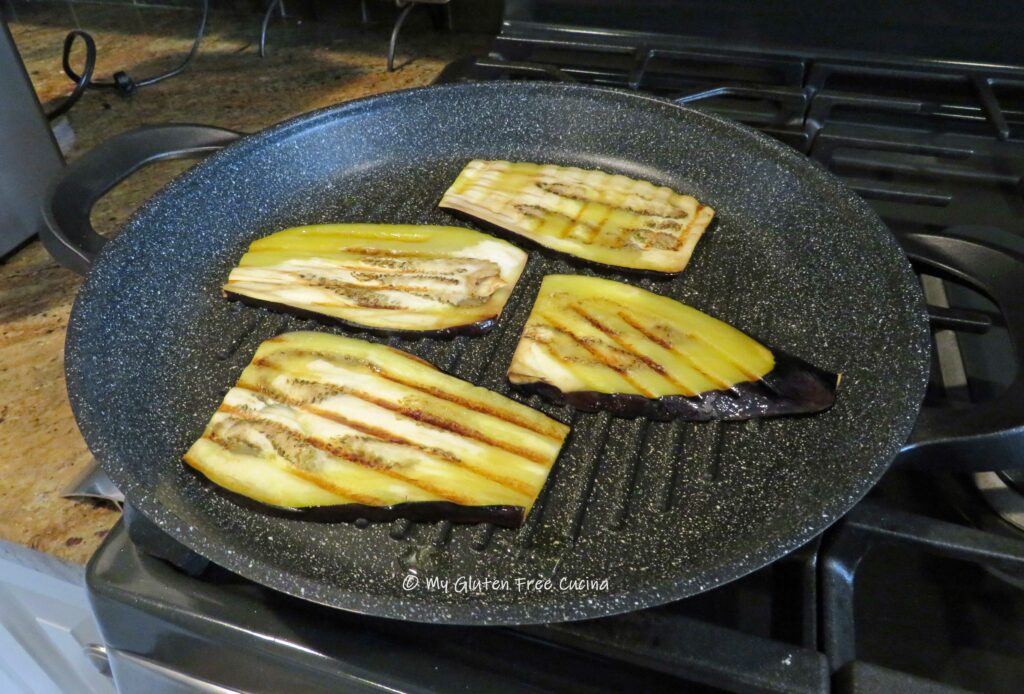
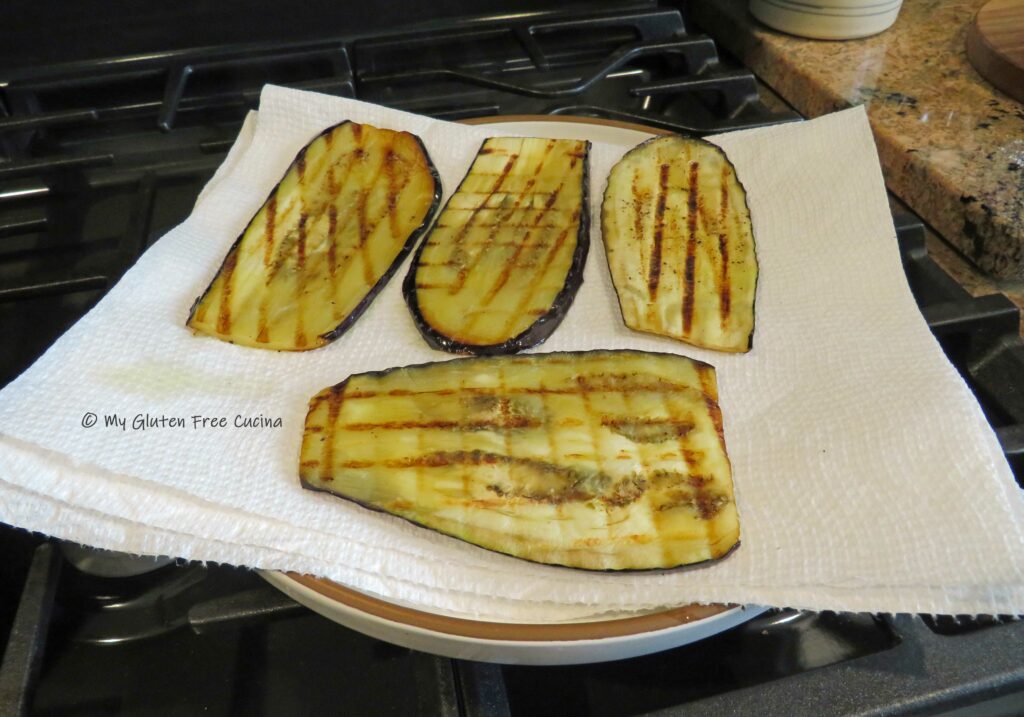
Cook the eggplant in a large grill pan brushed with olive oil. Season the slices as you cook them. The goal here is to cook the eggplant just to where the slices are bendable, they will finish cooking in the oven. Don’t crowd the pan, cook it in batches if needed and drain the slices on paper towels.
Finally, cook the pasta to 2 minutes less than the package directions. I recommend Jovial Brown Rice Pasta for this recipe because it holds up well to boiling and baking. After cooking, drain and rinse the pasta under cold water.
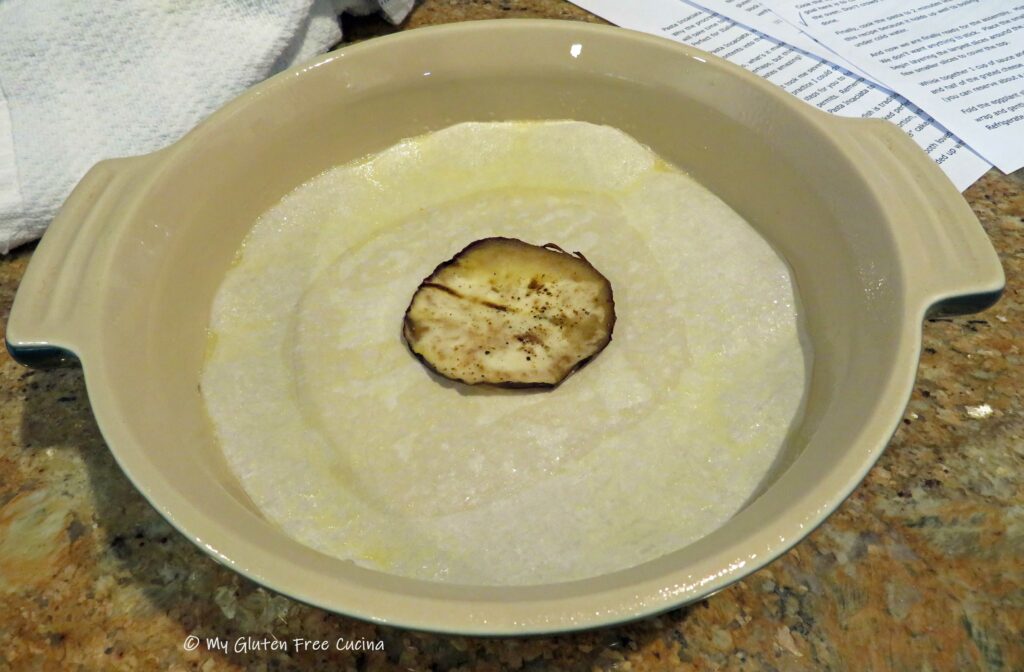
And now (finally) we are finally ready for the assembly. Mist your baking pan or springform pan generously with cooking spray. Cut a circle of parchment paper to fit the bottom of your pan and place the small round of eggplant in the center.
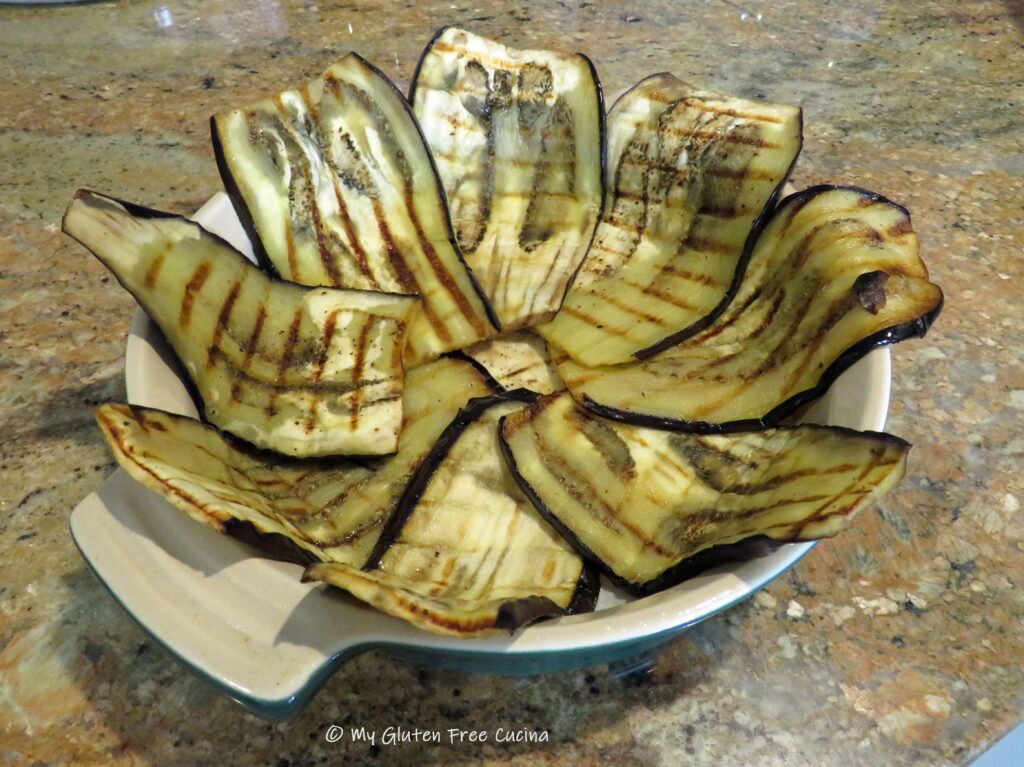
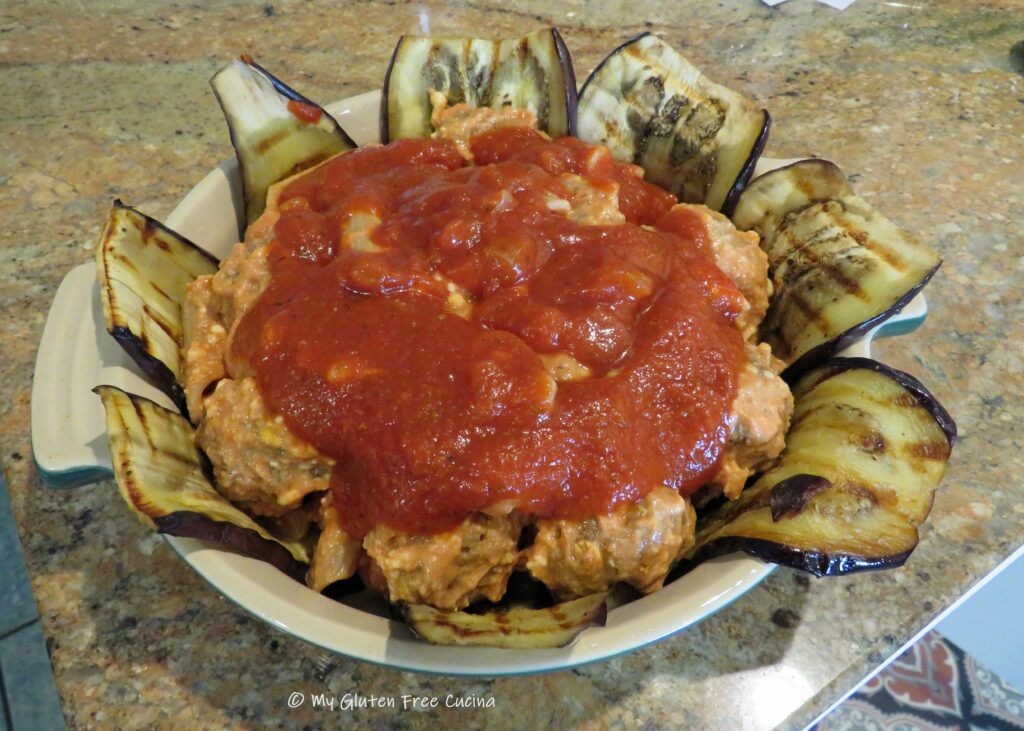
Next begin layering the largest slices around the pan, letting them drape over the side, like this. Save a few smaller slices to cover the top.
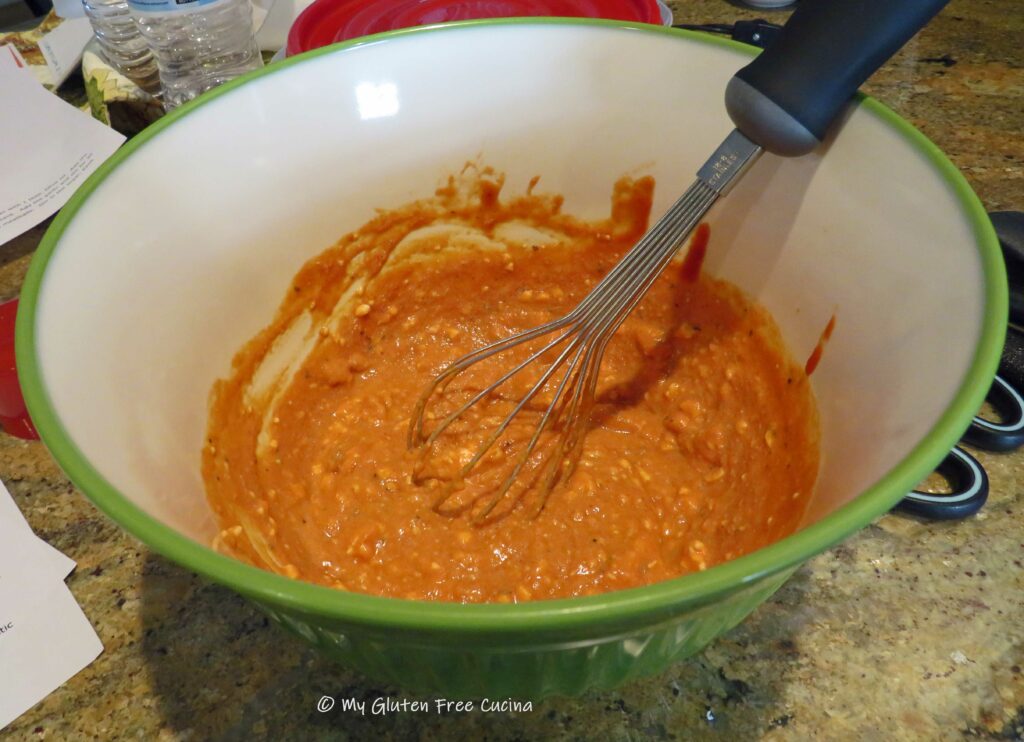
Whisk together 1 cup of sauce and ½ cup of ricotta cheese. Fold in the pasta, half of the meatballs (about a dozen) and half of the grated cheese, then spoon the mixture over the eggplant and top with more sauce (you can reserve a cup of the sauce for serving).
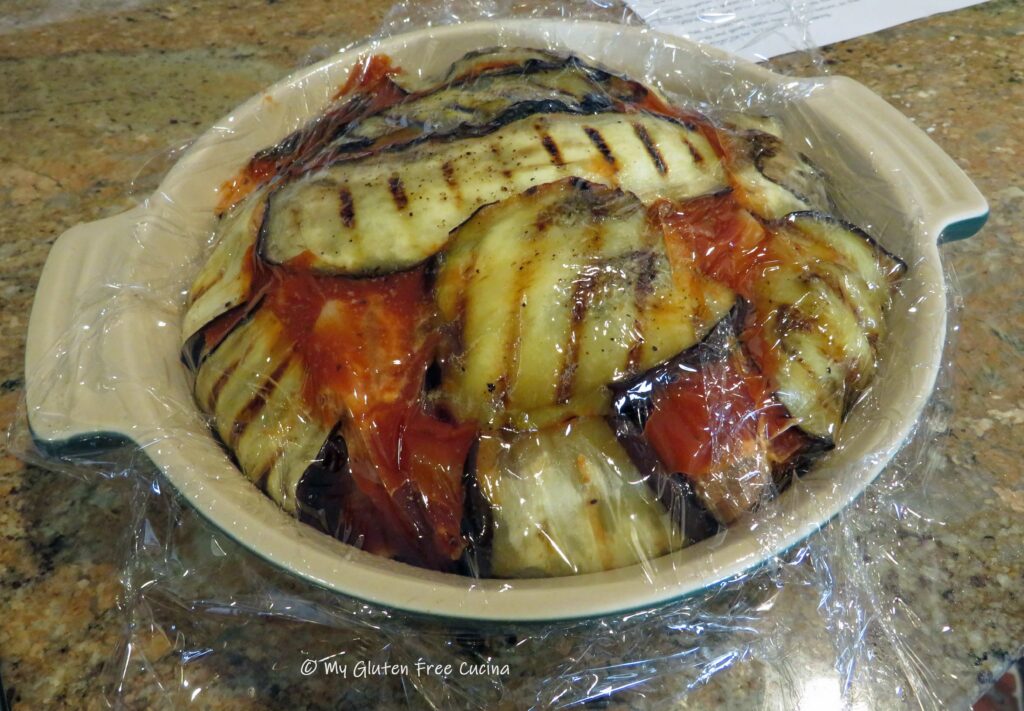
Fold the eggplant slices inward, then use the smaller slices to fill in the center. Cover with plastic wrap and gently press down on the mixture, so that it will set up in the shape of the pan. Refrigerate for 2-3 hours before baking.
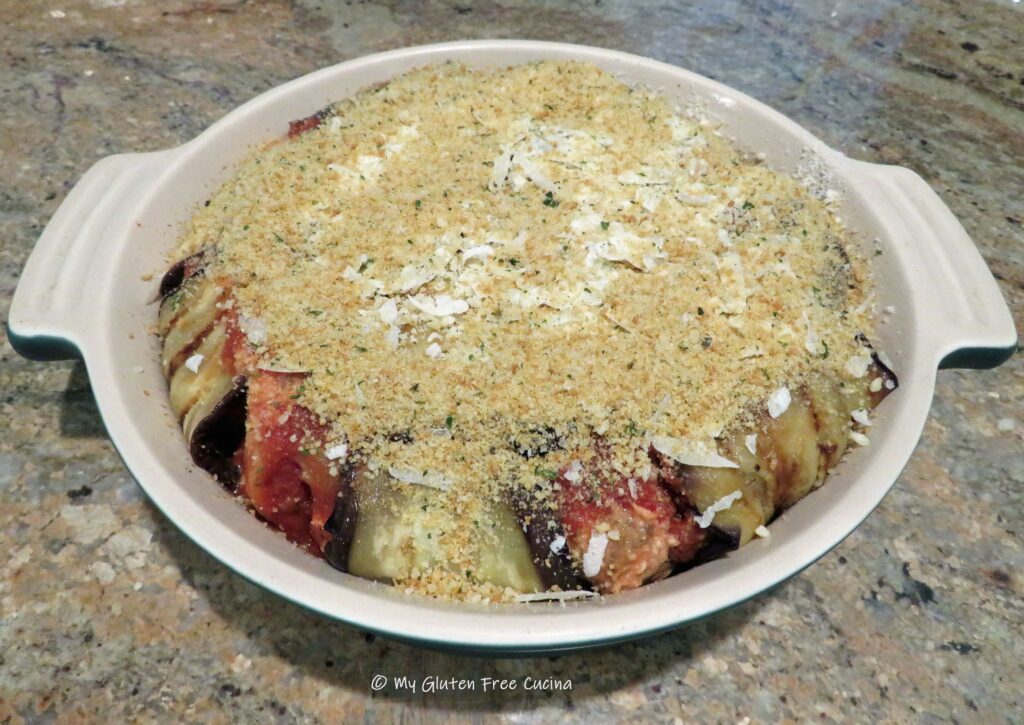
Preheat the oven to 350 degrees. Remove the plastic wrap and sprinkle with the remaining grated cheese and breadcrumbs.
Mist a sheet of foil with cooking spray and cover the pan. Don’t make it too tight, you don’t want the foil to stick. Bake for 30 minutes, then carefully remove the foil and bake 30 minutes more. You should see bubbling on the sides of the pan.
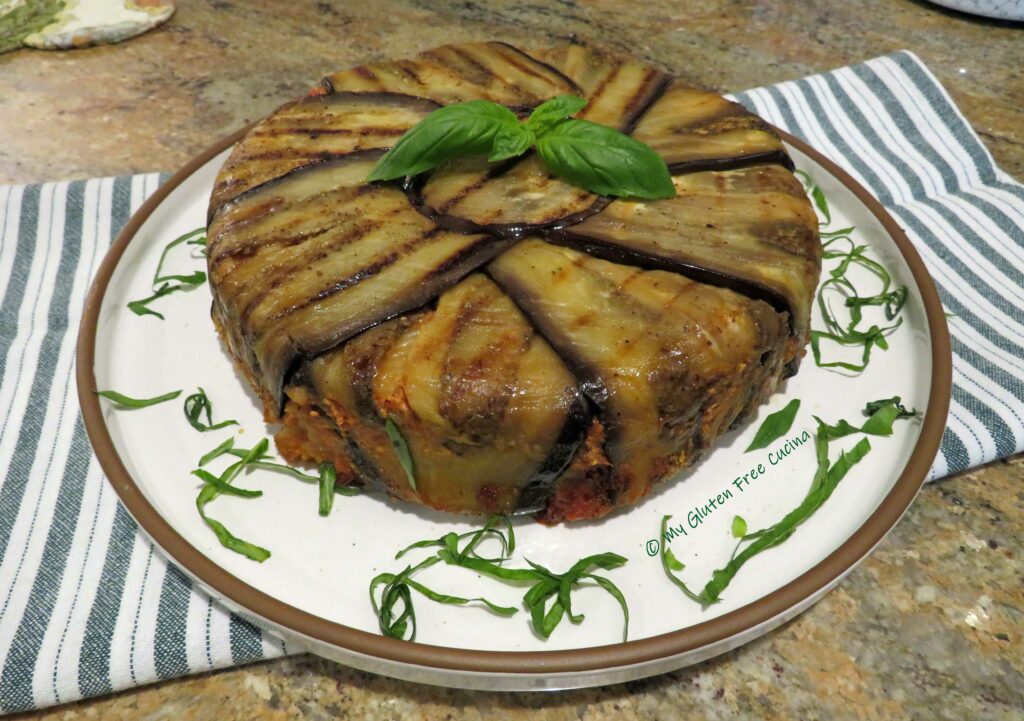
Now for the unveiling. You really could serve it just like this, and I took a lot of pictures in case of a faux pas when I flipped it over!
The easiest way to do this is to run a butter knife around the edges then cover the pan with a plate and quickly invert it. Careful, the pan will still be hot.
TADA!!! There it is! Peel away the parchment paper and let it rest for 10 minutes before serving. I like to garnish with fresh basil.
Slice into wedges and serve with more sauce and grated cheese.
Friends, what a meal! This is not a dish that I will make often, but it is truly a joy for this home cook to say that I’ve done it! And as for being gluten free, I promise no one will even know. You do not have to give up delicious pasta dishes on the gluten free diet, and this recipe is a true testament.
Notes ♪♫ Always check ingredient labels. You know that your pasta and breadcrumbs must be gluten free, but don’t forget to check the sausage. How about that grated cheese? I always buy a block of cheese and grate my own, so I don’t have to worry about additives. For those who cannot have oats, you can add a bit more potato flakes and breadcrumbs to the meatballs.
There are many variations of Timbale throughout Italy. The Sicilian style, like this one is traditionally wrapped in eggplant. What else is in it- gluten free penne, meatballs, tomatoes and cheese. Ordinary ingredients perhaps, but this recipe puts them all together in a most impressive presentation!
Ingredients
UnitsScale
Sauce
28oz. Can tomato sauce (reserve 1/2 cup for the meatballs)
First, make the marinara sauce. Heat a heavy saucepan or deep skillet with 1 tbsp. Olive oil. Add the diced onions and cook, stirring frequently until they are translucent. Add the garlic and stir for 30 seconds. Next add the tomato sauce, reserving ½ cup for the meatballs. Stir in the sugar, basil, oregano and fresh ground pepper. Cover and simmer on low for ½ hour, then remove from the heat and cool to room temperature.
Next, make the meatballs. Whisk together the egg, reserved ½ cup of tomato sauce and Italian seasoning. In a separate bowl, combine the rolled oats, potato flakes and breadcrumbs. Add the beef and sausage to the egg mixture and work it in with your hands
When the meat is well combined, add the dry ingredients and continue working the mixture to distribute everything evenly. Line a baking sheet with foil and mist with cooking spray. Form 24 small meatballs (about 1-½ inch) and place them on the baking sheet with space in between. Broil 3 minutes per side on high, then set them aside and cool to room temperature. *Note that I only used one dozen meatballs in this recipe, you will need all of them if you make a double batch or use a larger pan.
For the eggplant, cut off a slice at the stem and one from the bottom so that you can stand it up on your cutting board. If you prefer, peel the eggplant by running a sharp knife down the sides to remove the skin. If you don’t mind the skin, leave it on, it will look beautiful in the finished dish.
Cut one small round off the top then slice the eggplant lengthwise into thin strips, about ¼” wide. I used a mandoline so that my slices would all be the exact same thickness.
Cook the eggplant in a large grill pan brushed with olive oil. Season the slices as you cook them. The goal here is to cook the eggplant just to where the slices are bendable, they will finish cooking in the oven. Don’t crowd the pan, cook it in batches if needed and drain the slices on paper towels.
Finally, cook the pasta to 2 minutes less than the package directions. Drain and rinse the pasta under cold water.
For the assembly: Mist your baking pan or springform pan generously with cooking spray. Cut a circle of parchment paper to fit the bottom of your pan and place the small round of eggplant in the center.
Next begin layering the largest slices around the pan, letting them drape over the side, like this. Save a few smaller slices to cover the top.
Whisk together 1 cup of sauce and ½ cup of ricotta cheese. Fold in the pasta, half of the meatballs (about a dozen) and half of the grated cheese, then spoon the mixture over the eggplant and top with more sauce (you can reserve a cup of the sauce for serving).
Fold the eggplant slices inward, then use the smaller slices to fill in the center. Cover with plastic wrap and gently press down on the mixture, so that it will set up in the shape of the pan. Refrigerate for 2-3 hours before baking.
Preheat the oven to 350 degrees. Remove the plastic wrap and sprinkle with the remaining grated cheese and breadcrumbs.
Mist a sheet of foil with cooking spray and cover the pan. Don’t make it too tight, you don’t want the foil to stick. Bake for 30 minutes, then carefully remove the foil and bake 30 minutes more. You should see bubbling on the sides of the pan.
Run a butter knife around the edges then cover the pan with a plate and quickly invert it. Careful, the pan will still be hot.
Peel away the parchment paper and let it rest for 10 minutes before serving. Garnish with fresh basil.
Slice into wedges and serve with more sauce and grated cheese.
Notes
For those who cannot have oats, you can add a bit more potato flakes and breadcrumbs to the meatballs.
Unauthorized use and/or duplication of this material without express and written permission from this blog’s author and/or owner is strictly prohibited.
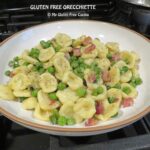
One of my favorite pasta shapes, orecchiette are a small, cup shaped pasta said to originate in the Puglia region of southern Italy. Orecchiette means “little ears” in Italian. You can see why!
Forming this rustic pasta is easy and kid friendly, everyone will enjoy making it as much as they love to eat it. It’s a wonderful project for a Sunday afternoon, when you can take your time and enjoy the process!
A little dough goes a long way! This recipe makes plenty for two people and you can double or triple the ingredients as needed. Follow the easy steps, showing you just how to make this pasta along with the classic pairing of pancetta and peas!
Note ♪♪ I used the new Gluten Free Bread Flour from Better Batter in this recipe. Shop Better Batter and use my code MGFC30 at checkout to receive30% offanynon-sale item!
Weigh the flour. I have tested this recipe many times to come up with exactly the right dough consistency for this pasta, and accuracy is important if you want to get the same result! Combine all of the dough ingredients in the bowl of a stand mixer. Beat with the paddle attachment for 5 minutes on low. The dough will be soft, but not wet. It should not stick to the beater.
Scrape down the sides of the bowl and bring the dough together in a ball. Wrap it in plastic wrap and let it rest at room temperature for 10-15 minutes.
Lightly flour a cutting board and divide the dough ball into 4 sections.
Work with one section at a time and keep the remaining dough covered so it doesn’t dry out. Start by rolling each section into a cylinder, like this.
Cover and let it rest for 10 minutes. This is the secret to working with gluten free dough. Remember, it doesn’t stretch like gluten dough, but after a little rest it will be more cooperative. I repeated this process twice, before I finally was able to roll each section of dough into a rope, 3/4″ thick.
Use a bench knife to cut the ropes into 1/2″ pieces (note- smaller is better, they will grow quite a bit when cooked!)
Roll each piece between your palms to form round, dime sized balls. For the final shaping, use a knife to pull the dough ball toward you, like this.
Then invert it over your thumb or forefinger, to form the “ear” shape.
Line a baking sheet with parchment or waxed paper, and dust lightly with flour. Place the finished Orecchiette on the baking sheet. Cover with plastic wrap and refrigerate if not cooking immediately.
To finish the dish, bring a large pot of salted water to a rolling boil. Render the pancetta in 2 tbsp. olive oil for about 5 minutes then add the peas, Italian seasoning and red pepper flakes. Cook several minutes longer, stirring frequently.
Slide the Orecchiette into the water and cook for 3 minutes, stirring occasionally. They will float to the top.
Gently remove them with a slotted strainer and toss with the pancetta and peas.
Drizzle with more olive oil and finish with grated cheese and some fresh ground black pepper.
Notes ♪♫ Orecchiette is one of those pasta shapes that is very hard to find in gluten free (here’s one). Fortunately, they are very easy to make, and even a simple meal becomes extra special when you add fresh, homemade pasta.
Orecchiette are a small, cup shaped pasta said to originate in the Puglia region of southern Italy. Orecchiette means “little ears” in Italian. You can see why!
Weigh the flour. Combine all of the dough ingredients in the bowl of a stand mixer. Beat with the paddle attachment for 5 minutes on low. The dough will be soft, but not wet. It should not stick to the beater.
Scrape down the sides of the bowl and bring the dough together in a ball. Wrap it in plastic wrap and let it rest at room temperature for 10-15 minutes.
Lightly flour a cutting board and divide the dough ball into 4 sections.
Work with one section at a time and keep the remaining dough covered so it doesn’t dry out. Start by rolling each section into a cylinder, like this.
Cover and let it rest for 10 minutes.
Use a bench knife to cut the ropes into 1/2″ pieces (note- smaller is better, they will grow quite a bit when cooked!)
Roll each piece between your palms to form round, dime sized balls. For the final shaping, use a knife to pull the dough ball toward you then invert it over your thumb or forefinger, to form the “ear” shape.
Line a baking sheet with parchment or waxed paper, and dust lightly with flour. Place the finished Orecchiette on the baking sheet. Cover with plastic wrap and refrigerate if not cooking immediately.
To finish the dish, bring a large pot of salted water to a rolling boil. Render the pancetta in 2 tbsp. olive oil for about 5 minutes then add the peas, Italian seasoning and red pepper flakes. Cook several minutes longer, stirring frequently.
Slide the Orecchiette into the water and cook for 3 minutes, stirring occasionally. They will float to the top.
Gently remove them with a slotted strainer and toss with the pancetta and peas.
Drizzle with more olive oil and finish with grated cheese and some fresh ground black pepper.
Notes
Orecchiette is one of those pasta shapes that is very hard to find in gluten free (here’s one). Fortunately, they are very easy to make, and even a simple meal becomes extra special when you add fresh, homemade pasta.
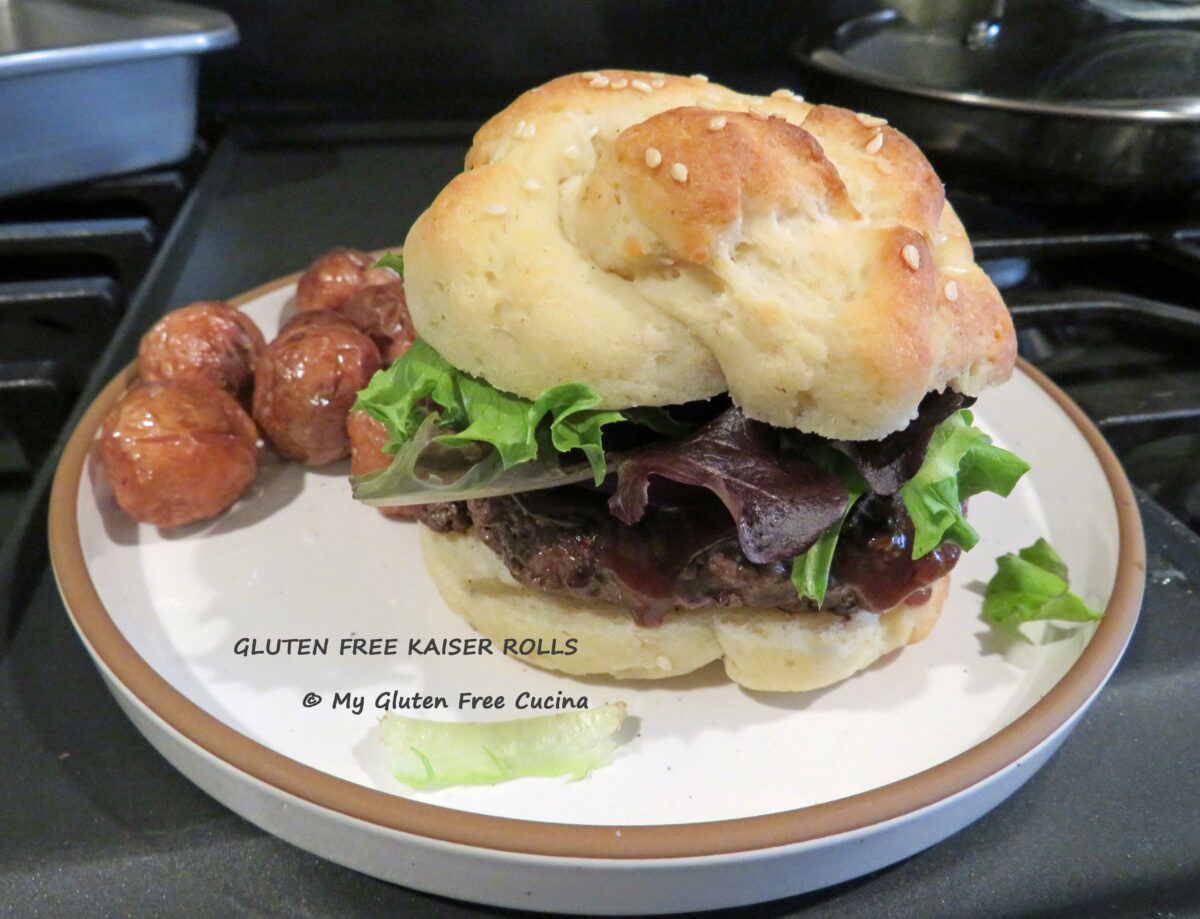
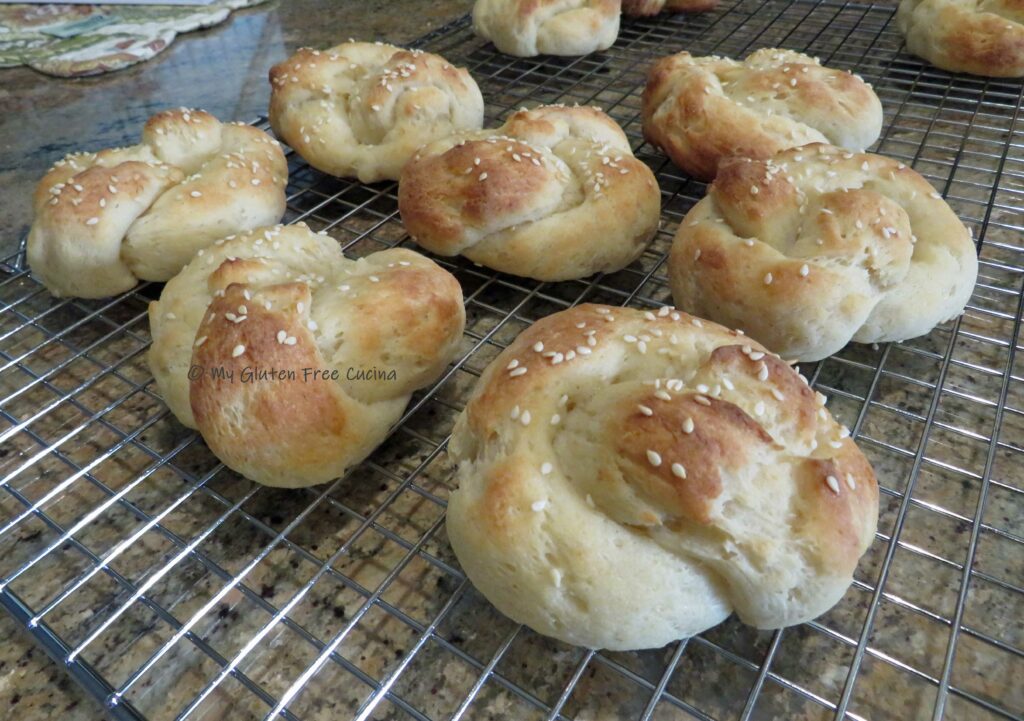
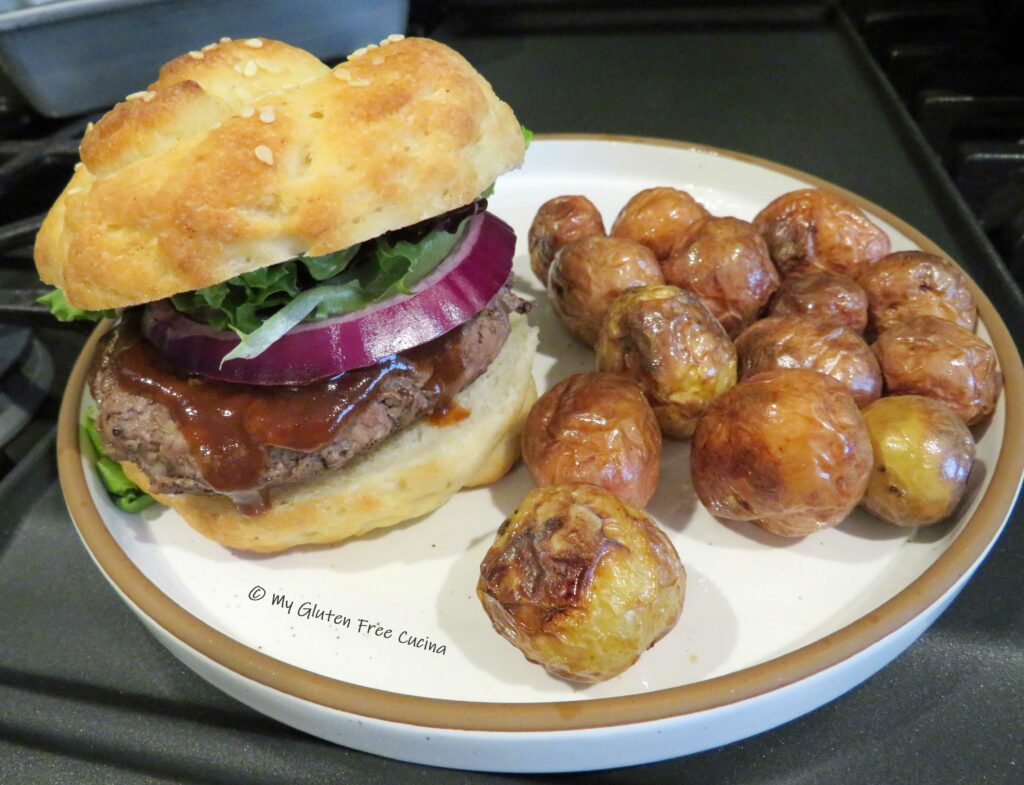
Have you struggled with rolling and shaping gluten free dough? I’ve been dreaming of a gluten free Kaiser roll since my Celiac diagnosis 7 years ago. They are just a little more fancy than regular hamburger buns and they look like they came from a bakery!
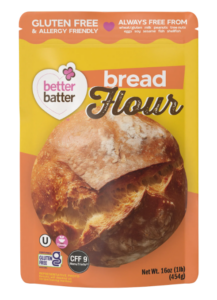
I used the new Gluten Free Bread Flour from Better Batter to make a soft enriched dough that can be rolled into long ropes and yes, even tied in a knot!
Follow the steps and learn how to shape these rolls. This recipe makes 6-10 Kaiser rolls, depending on size.
Want to try the new Gluten Free Bread Flour from Better Batter? Order yours hereandbe sure to use my Code MGFC30 at checkout for 30% off any non-sale purchase!
Preparation:
Whisk together the flour and salt. In the bowl of a stand mixer, combine the sugar, egg, butter, psyllium husk, sourdough and instant yeast. Let it stand for a few minutes to thicken.
Next add the flour mixture, 160g milk and 270g water, and beat with the paddle attachment for 5 minutes. If the dough seems a bit dry, add water one tablespoon at a time, up to 3 tablespoons.
Gather the dough together with a spatula and transfer it to an oiled bowl (use about 1 tbsp. canola oil), turn to coat and cover with plastic wrap.
Proof the dough in a warm place for 6 hours. I used a proofing box set to 80 degrees.
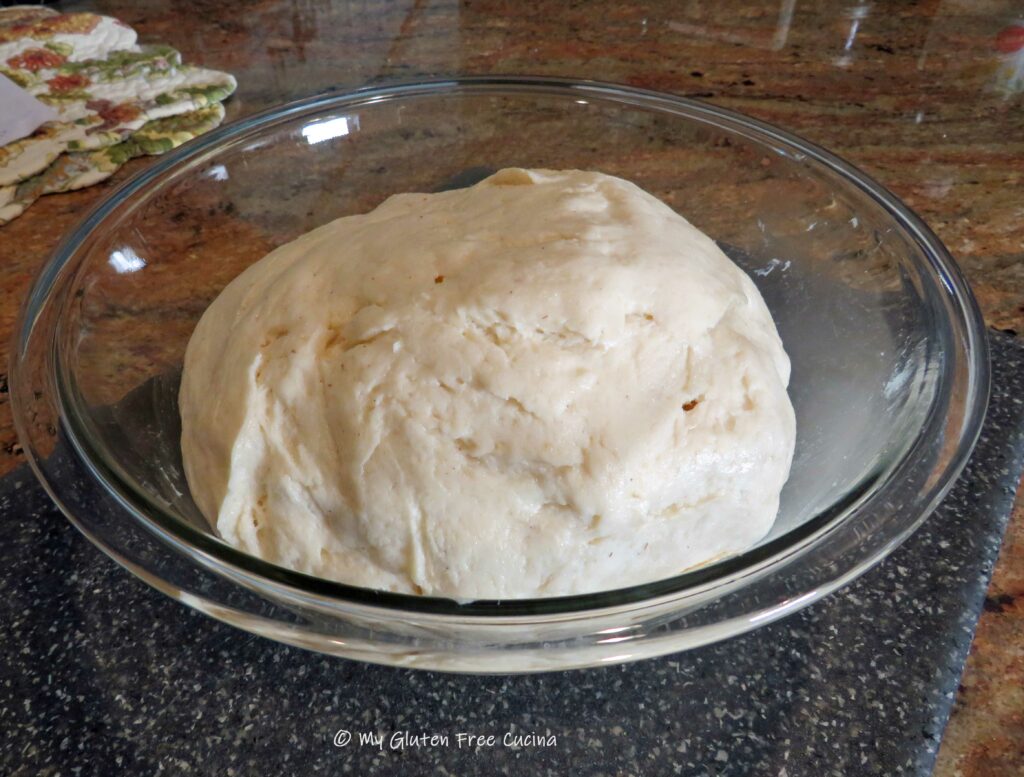
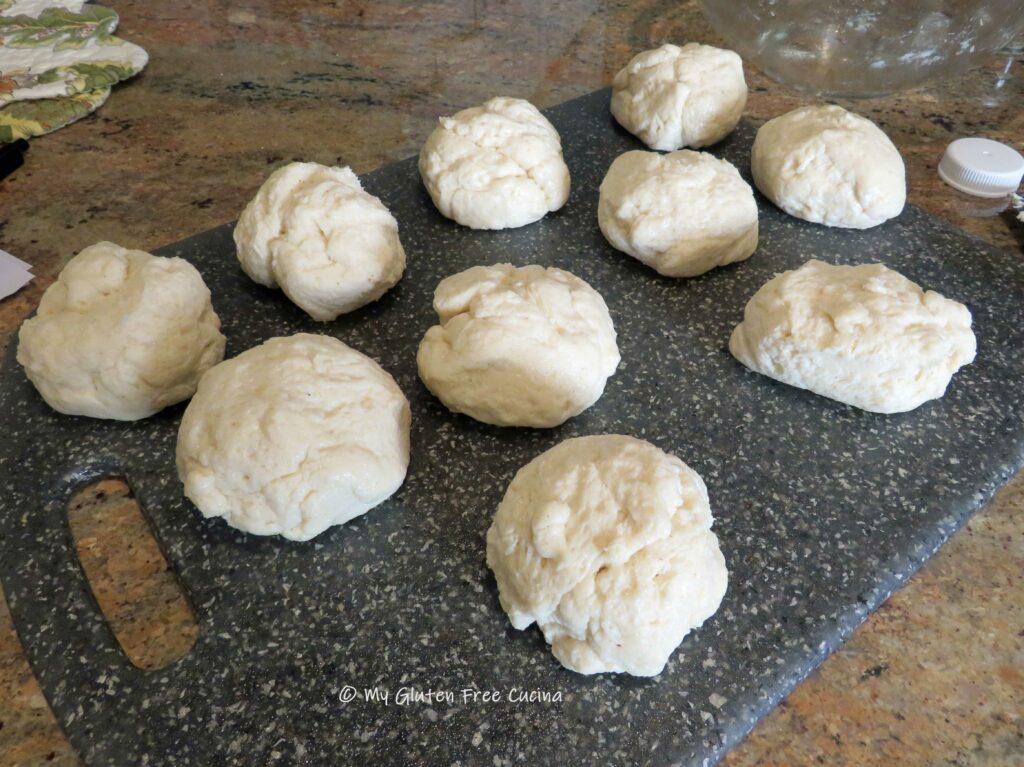
Turn the dough out onto an oiled cutting board. Divide the dough into pieces with a bench knife and use oiled hands to roll each piece into a ball. If you want to be really precise, weigh the dough and divide by the number of rolls you want to make. My dough weighed 36 oz. total, and I made 10 rolls just over 3.5 oz. each. Perfect for burgers!
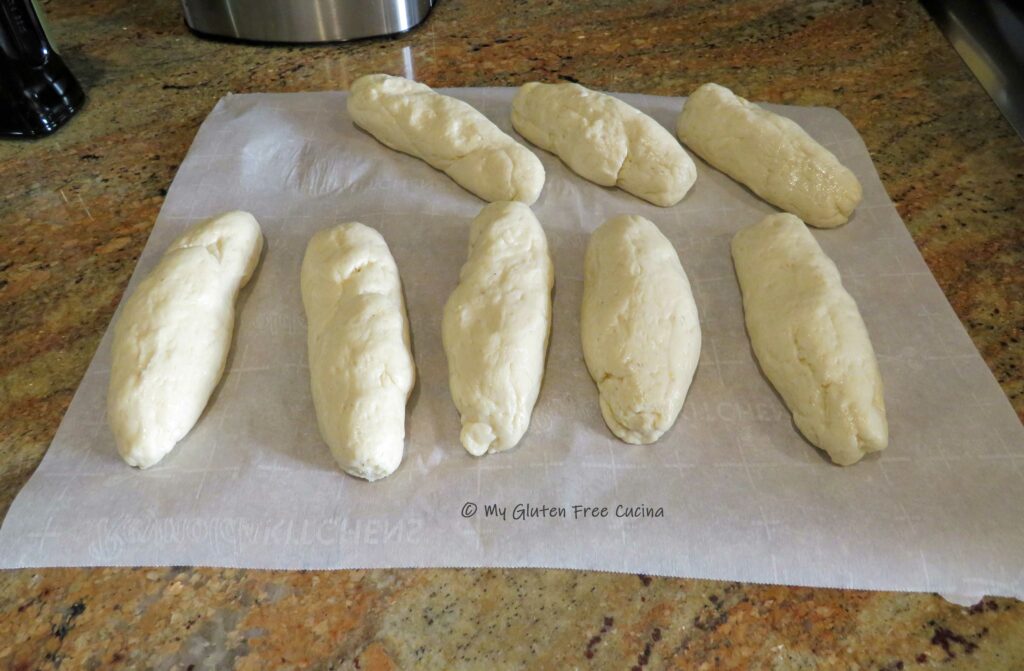
Now here’s the trick, don’t immediately try to roll the dough into ropes. Cover with a dish towel and let the dough balls rest for 10 minutes, then gently roll each one into a 6″ cylinder. Be sure to keep a light coating of oil on your hands and cutting board. Cover and rest again for 5-10 minutes. Repeat rolling and resting as needed, and with each “rest”, the dough will become more relaxed and easier to roll.
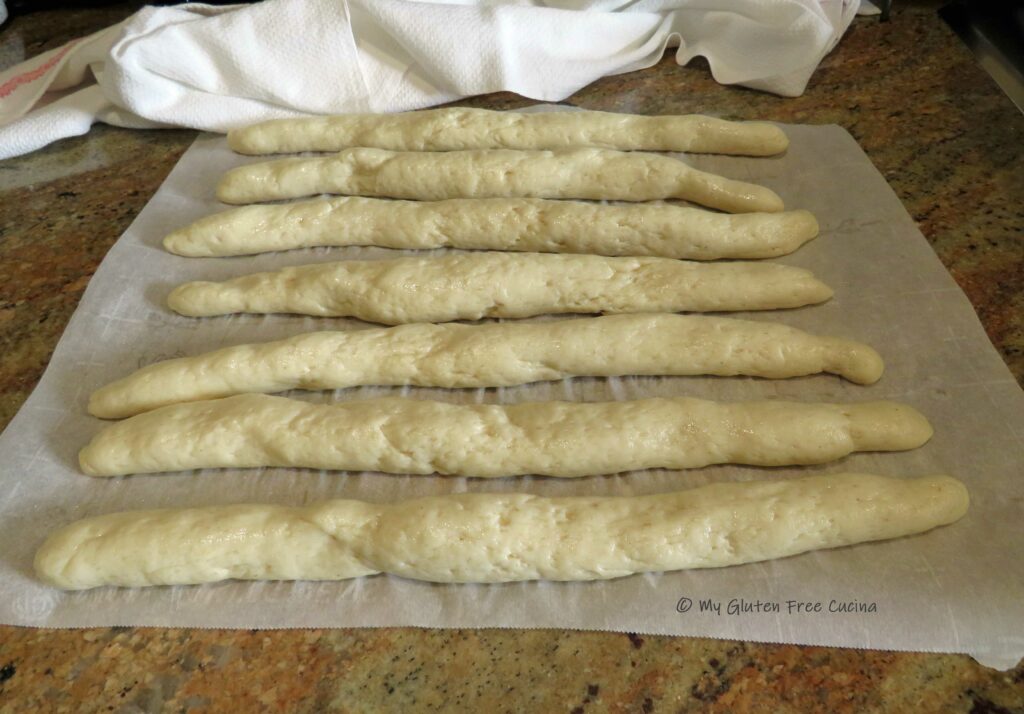
By the 3rd rest you should be able to roll the dough into ropes, about 14″ long. To keep the dough from splitting, start at the bottom of the cutting board and roll in one direction toward the opposite side. Then reverse and roll back. Repeat until the rope reaches the desired length.
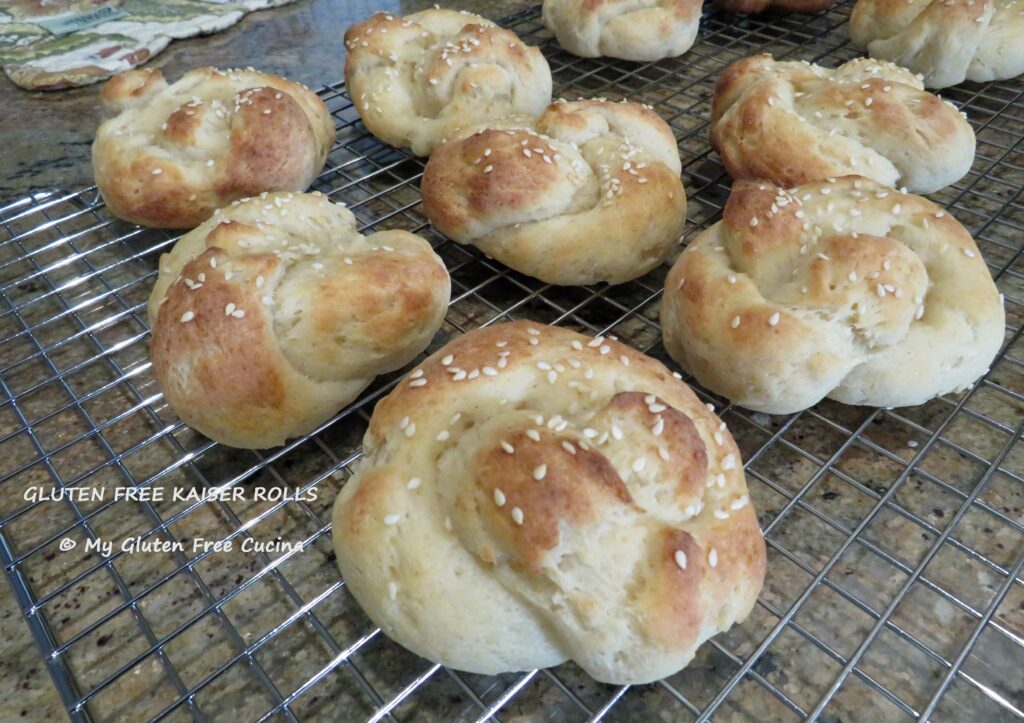
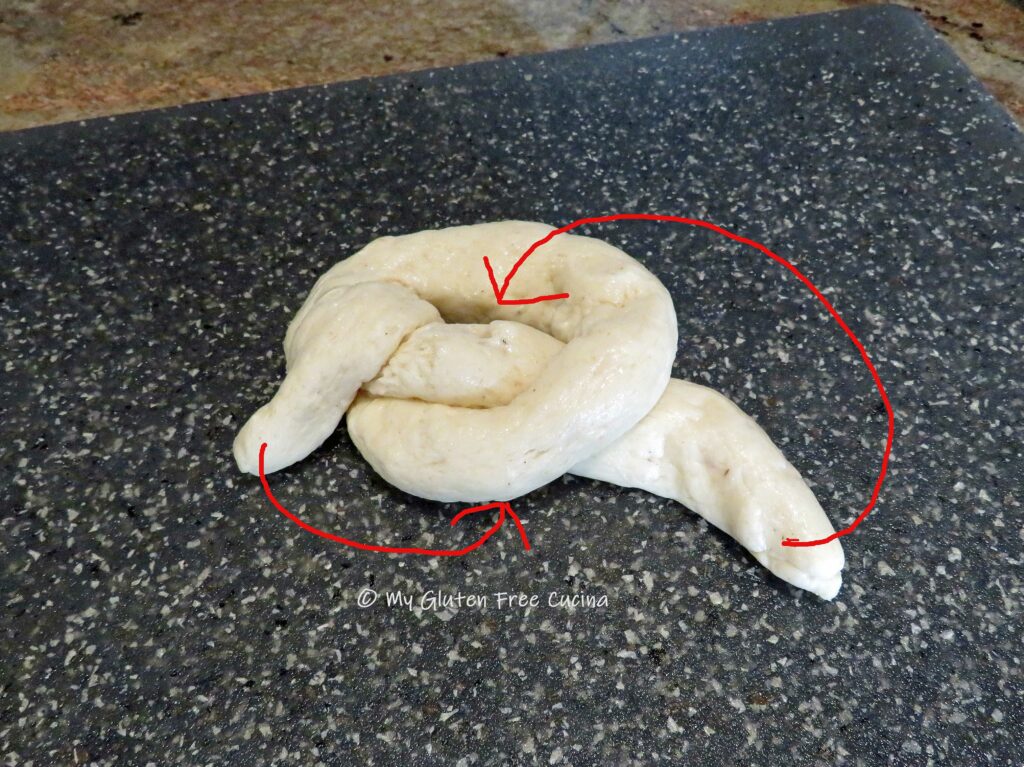
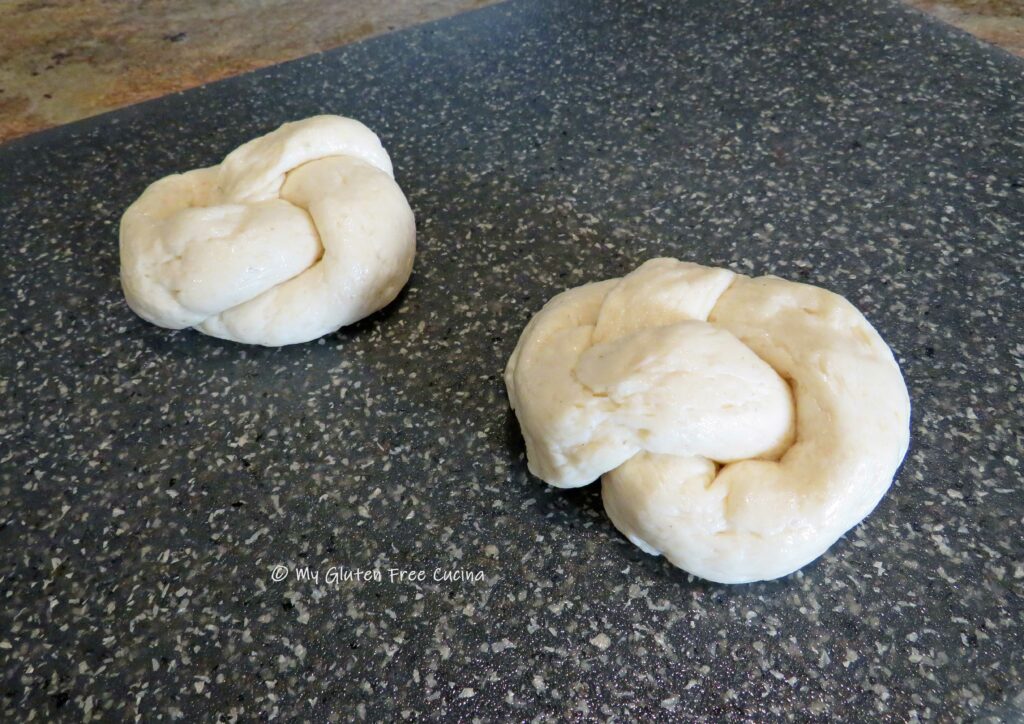
To form the Kaiser rolls, tie each rope into a loose knot. Then bring the bottom end up over the knot and tuck it into the center. Tuck the other end underneath.
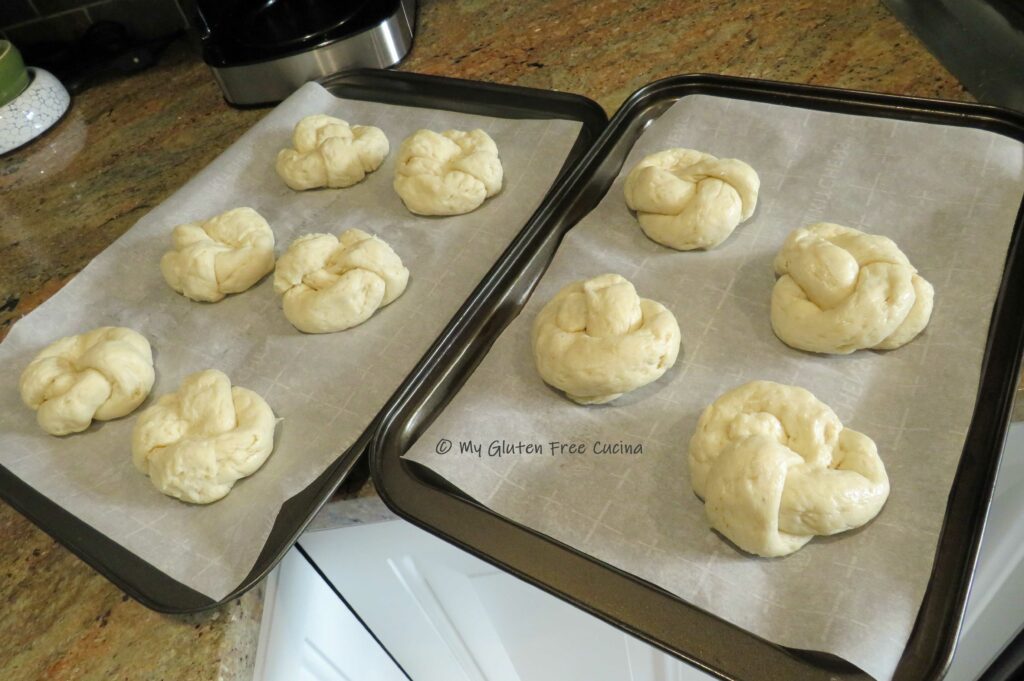
Place the shaped rolls on a baking pan lined with parchment. Don’t crowd them together, use 2 pans if needed.
Cover with plastic wrap and proof for another 15 minutes while you preheat the oven to 425º.
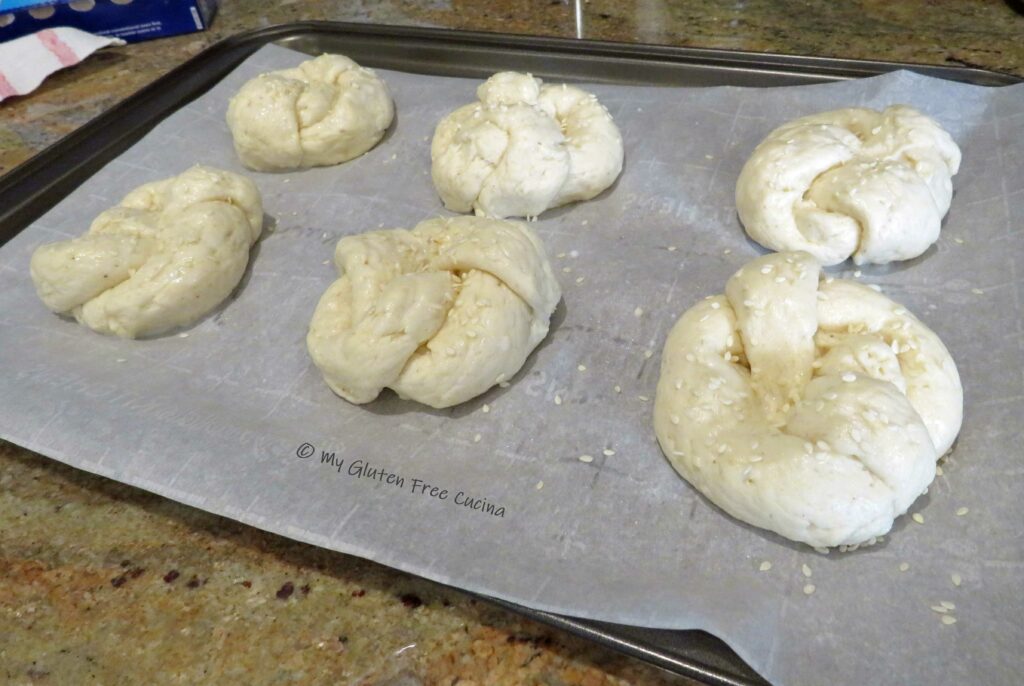
Brush the rolls with milk and sprinkle with sesame seeds. Bake for 20 minutes or until the internal temperature reaches 210º.
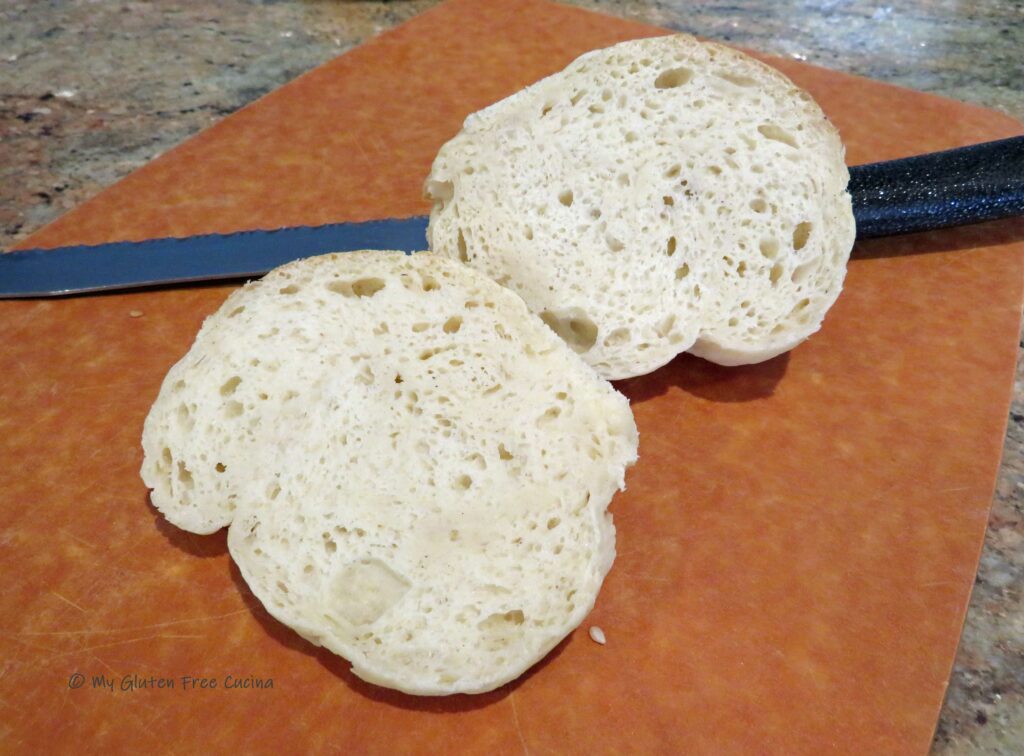
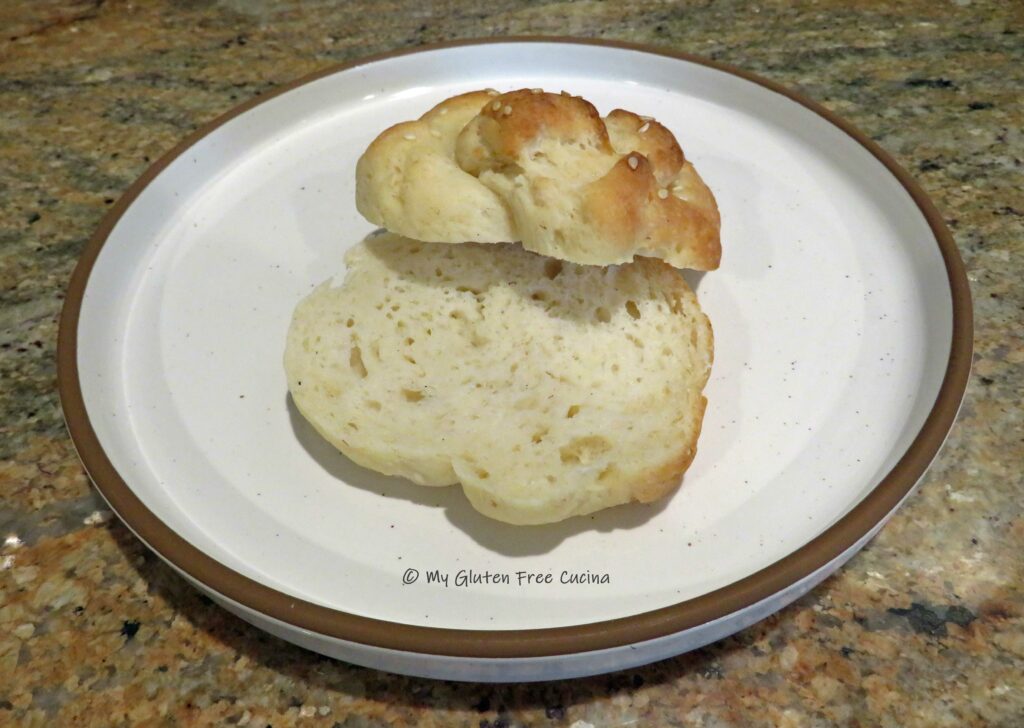
When you remove the rolls from the oven, be sure to let them cool completely before slicing. I left mine on a rack for several hours, then stored them in a plastic bag at room temperature overnight.
When I sliced them the next day, I was quite pleased with the texture and crumb. Check it out!
Notes ♪ I have been experimenting with this recipe and thought the addition of sourdough really enhanced the flavor of the rolls. If you want to make this recipe without the sourdough, increase the flour by 25g. and increase the water by 50g. Instead of 1/8 tsp. instant yeast, use 2-1/4 tsp (1 packet). Proofing time will be 30-45 minutes (not 6 hours).
Notes ♫ My favorite Chef, Patrick Auger who is the mastermind of product development at Better Batter reminded me that the Gluten Free Bread Flour from Better Batter was designed to work without gums or psyllium husk. In my experimentation I decided to go rogue and add psyllium husk to the dough. Do or do not, you be the judge! The rolls turned out beautifully, but if you cannot have psyllium husk, it’s good to know this flour works well without it.
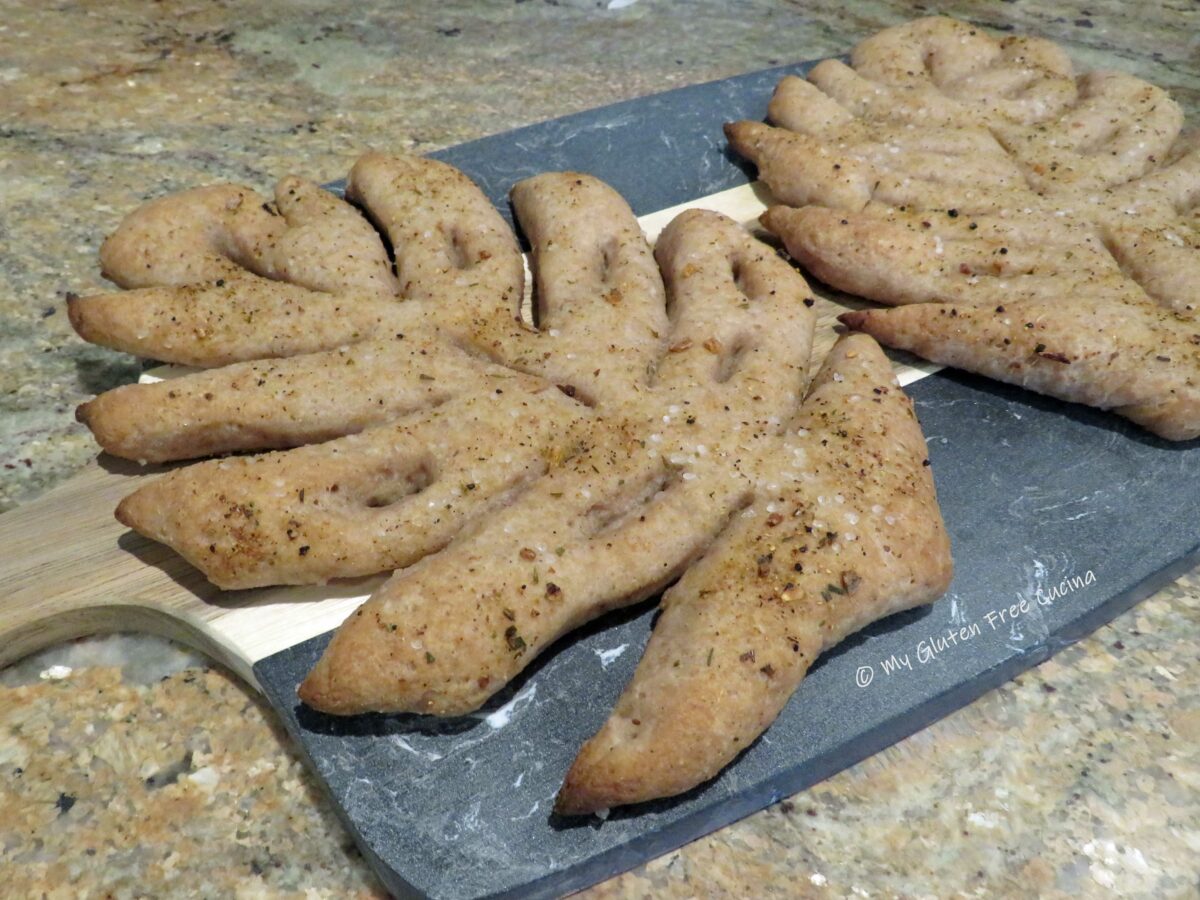
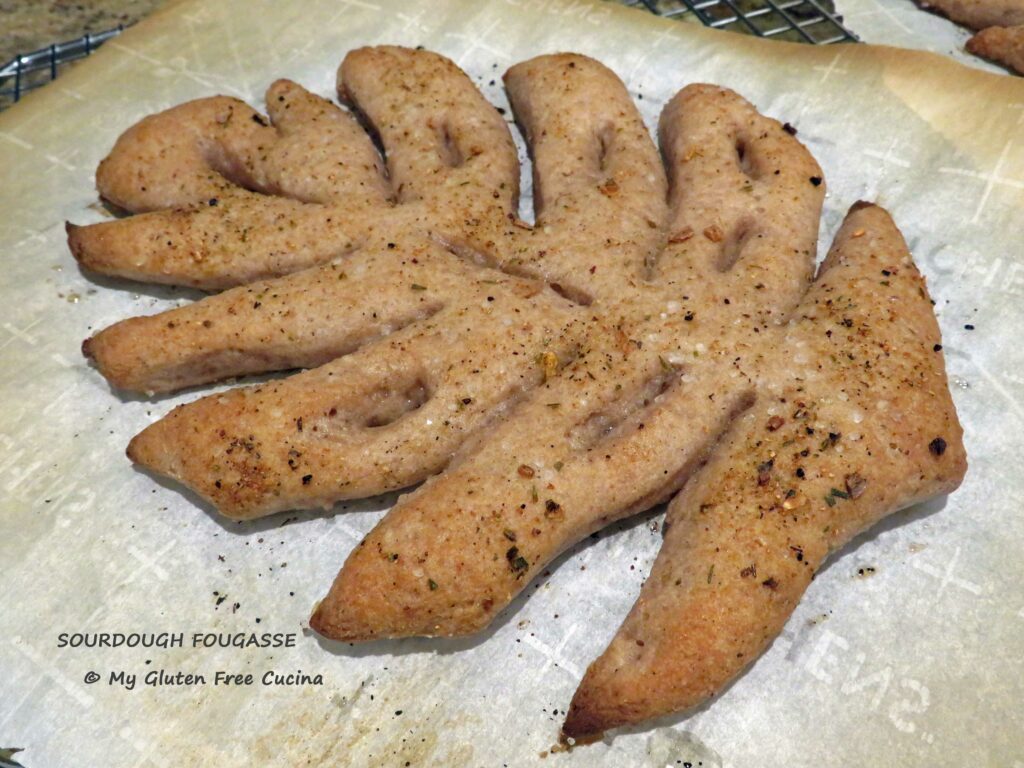
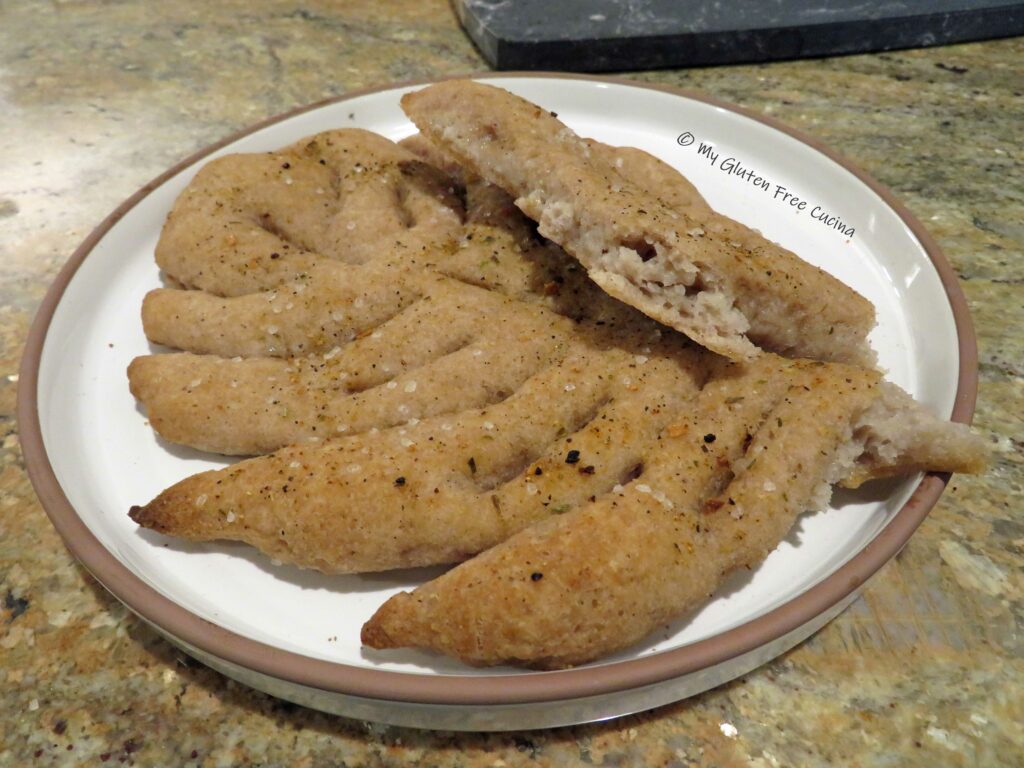
Another bucket list recipe on the books, look at this beauty! It’s called Fougasse (pronounced foo-gaas), a French inspired flatbread that is similar to focaccia. The characteristic slashes in the bread create a crisp exterior with a soft chewy center, like a pretzel. Unlike most gluten free breads, this one can be eaten warm or even hot out of the oven!
I used Better Batter Artisan Flour Blend to make the dough, along with my sourdough starter. For this recipe, the dough requires just the right amount of hydration to hold the shape of the bread without closing up. A tall order for gluten free!
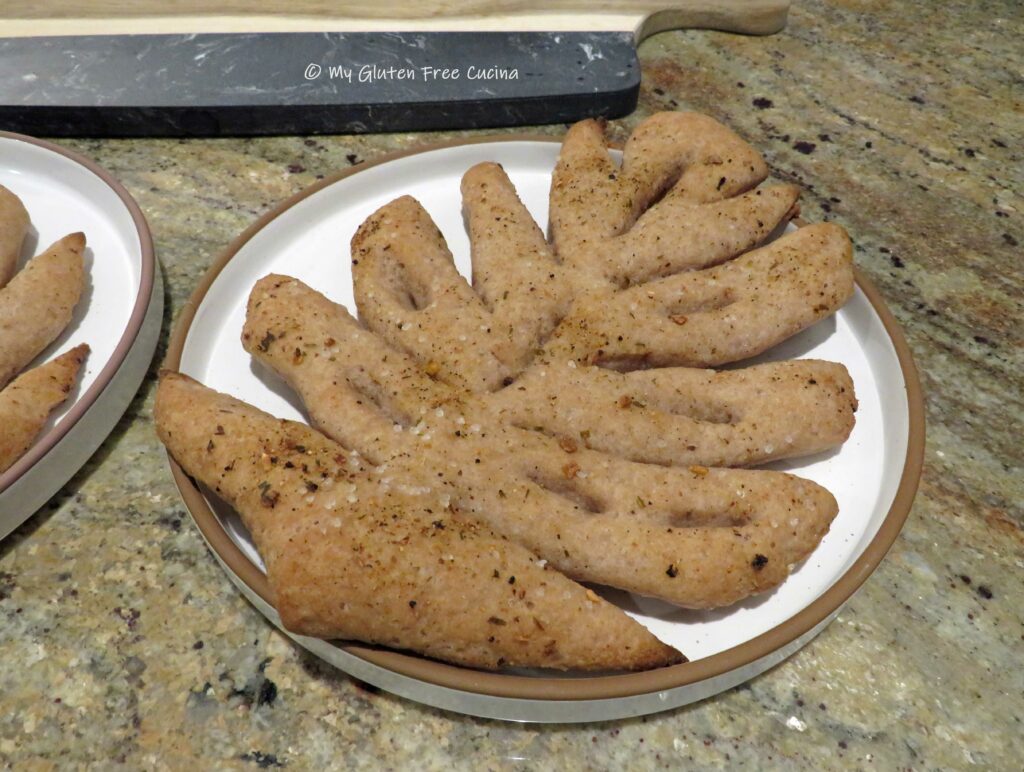
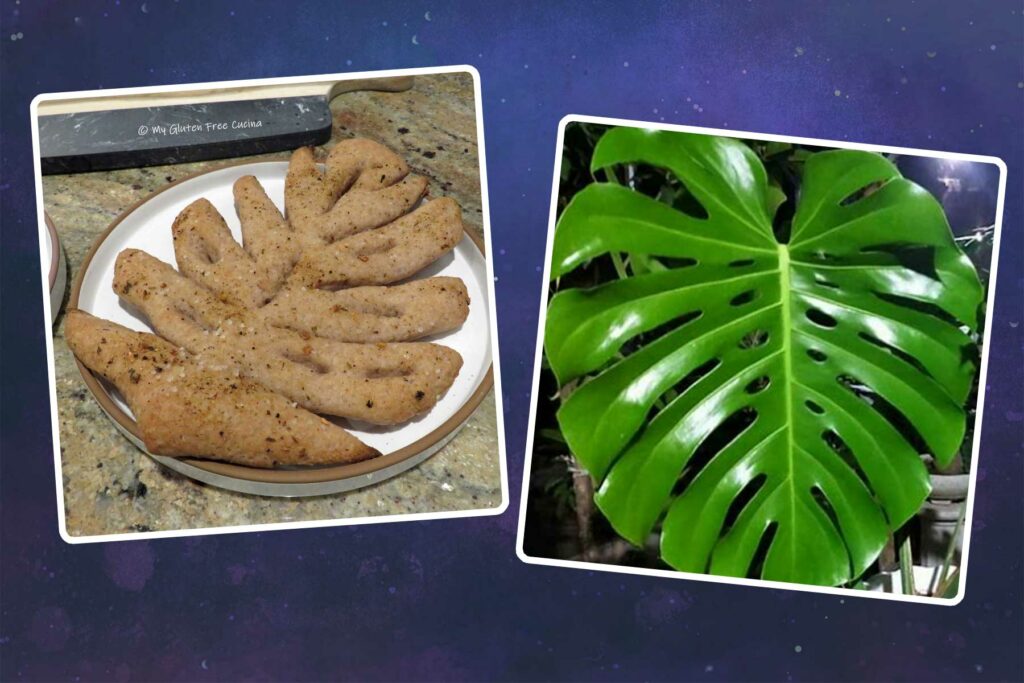
I have been practicing the leaf shape, and although you do not have to get this fancy, I think the presentation is gorgeous. It reminds me of a monstera plant- gardening peeps, what do you think? 😄🪴
This post contains affiliate links.
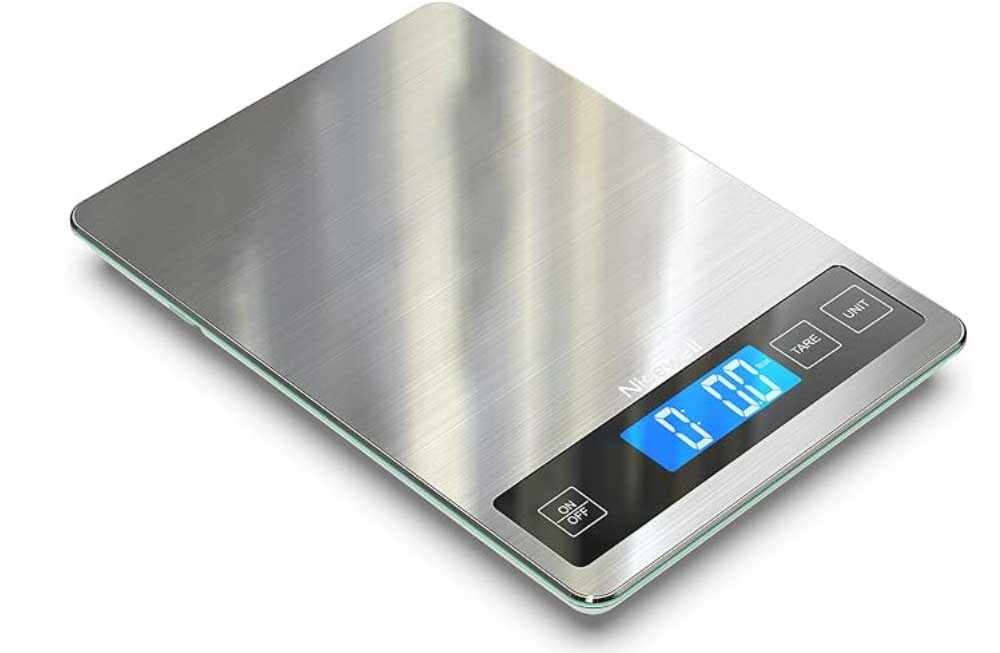
Before we begin, let’s talk about measuring. I strongly recommend that you weigh all the ingredients (yes, even the water). A digital kitchen scale can be a most helpful tool for baking, and especially in gluten free baking where precision really matters.
1/8 tsp. instant yeast (optional, if your starter needs a little help)
more olive oil for brushing
seasoning, for topping (use your favorite blend)
coarse salt, for topping
Preparation:
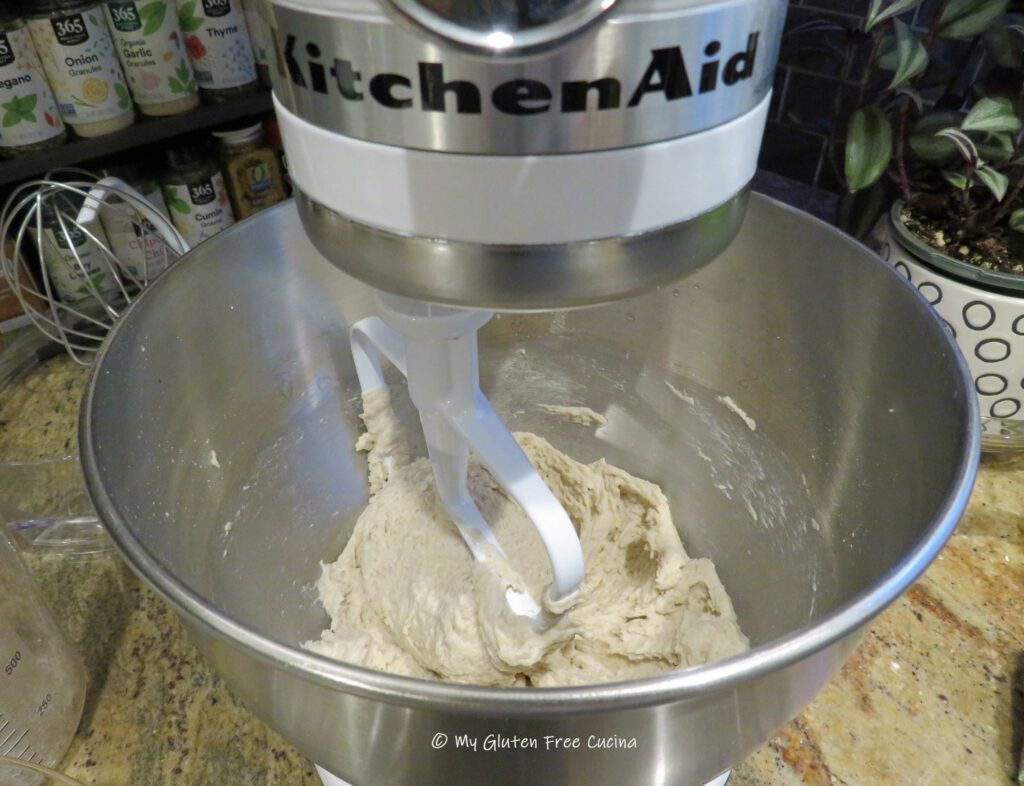
Combine the first seven ingredients together in the bowl of a stand mixer with the paddle attachment. Gradually increase speed and beat for 5 minutes to form a smooth dough. The dough should easily come away from the sides of the bowl, like this.
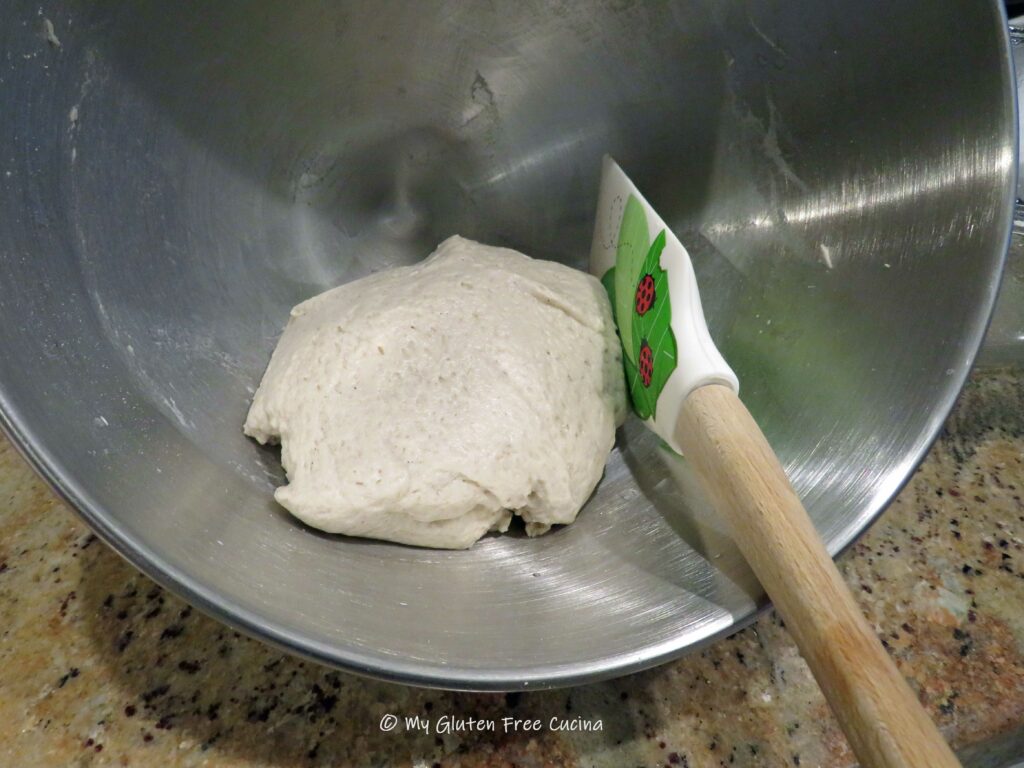
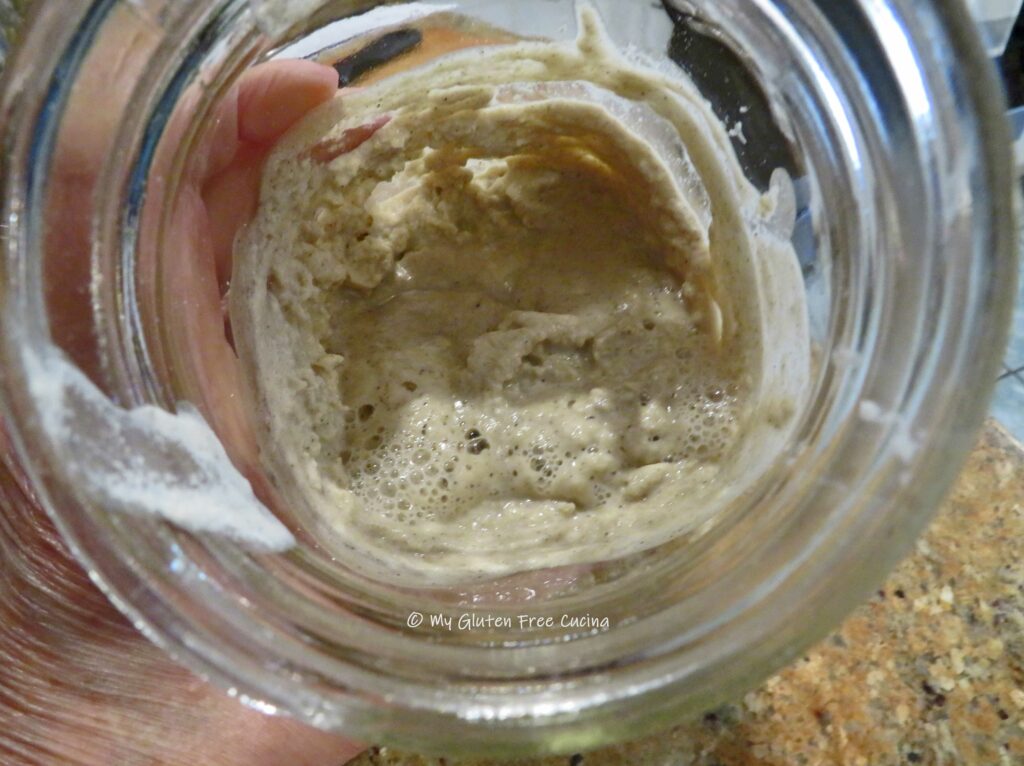
Transfer the dough to an oiled bowl and smooth it with a spatula. Cover and let it sit at room temperature (or proofing box) for 4 hours. I usually time this for late afternoon, so it’s ready to go into the refrigerator overnight (12-18 hours). The overnight proof really develops the sourdough flavor.
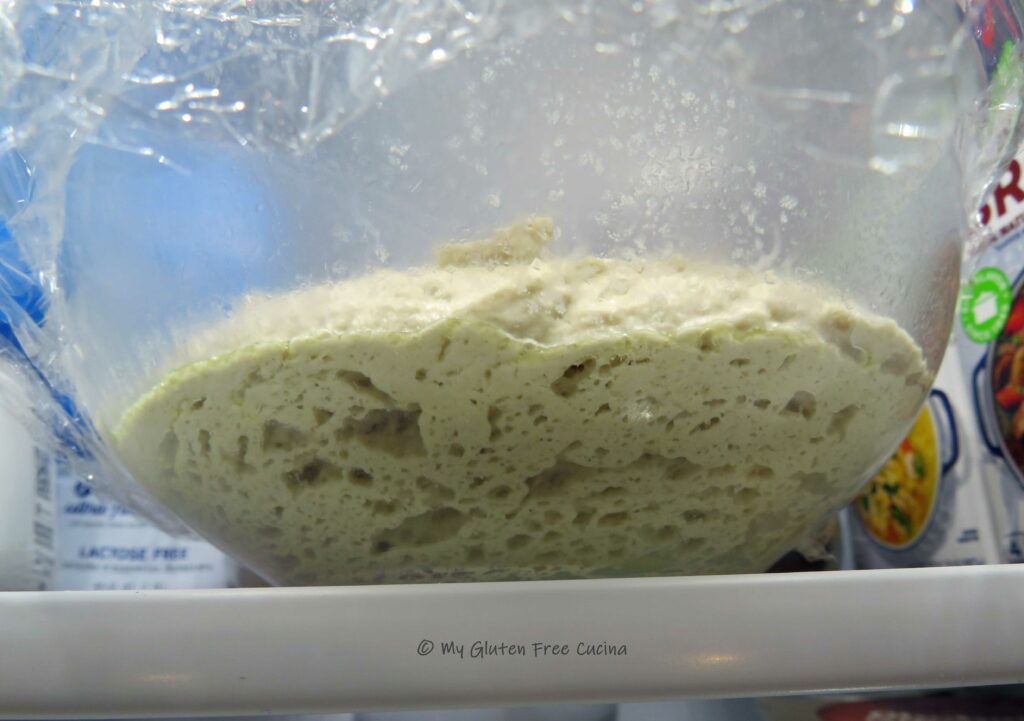
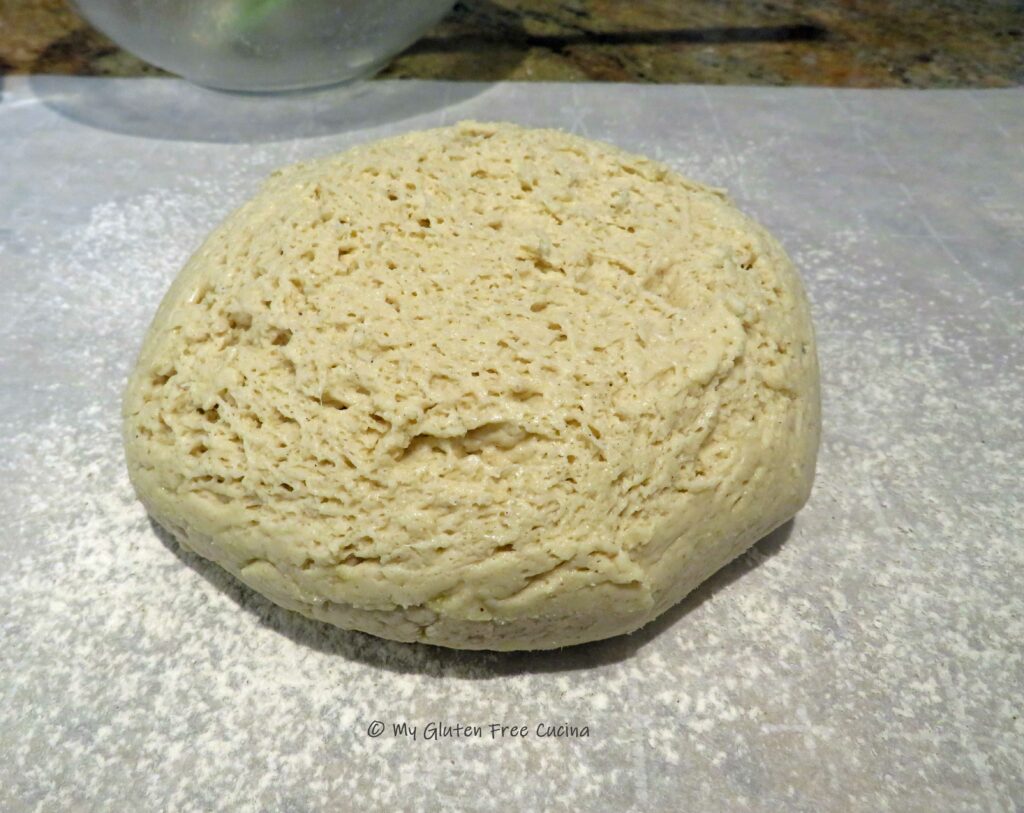
In the morning, the dough should be full of air bubbles (I like using glass bowls, so you can really see what’s going on). Try not to deflate them as you transfer the dough to a floured sheet of parchment.
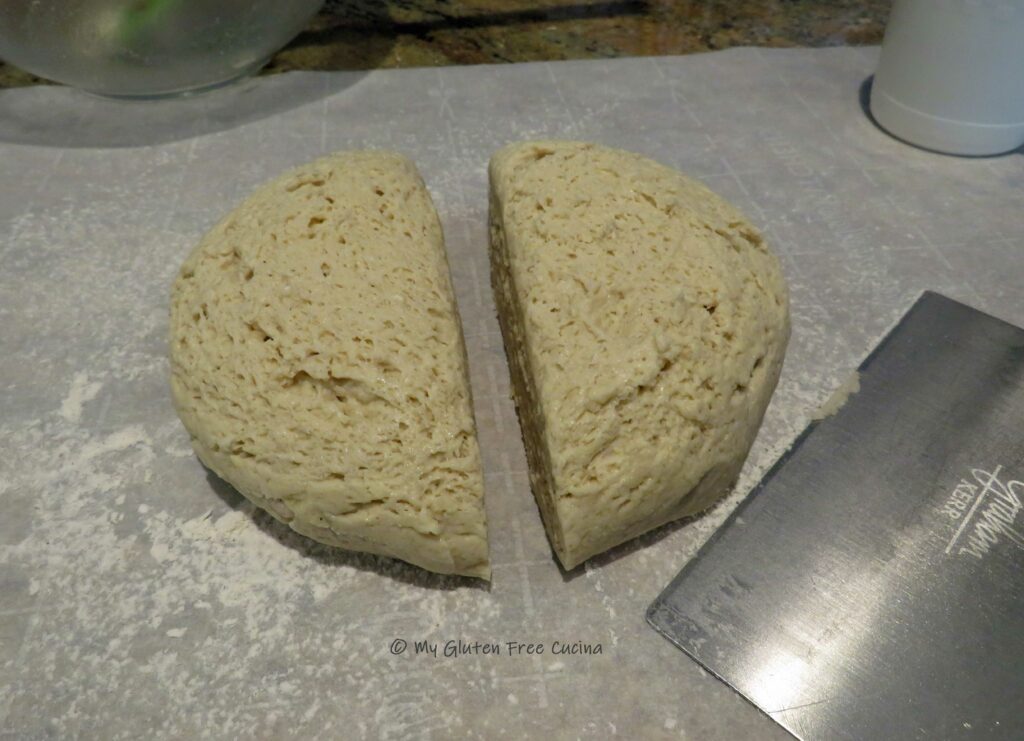
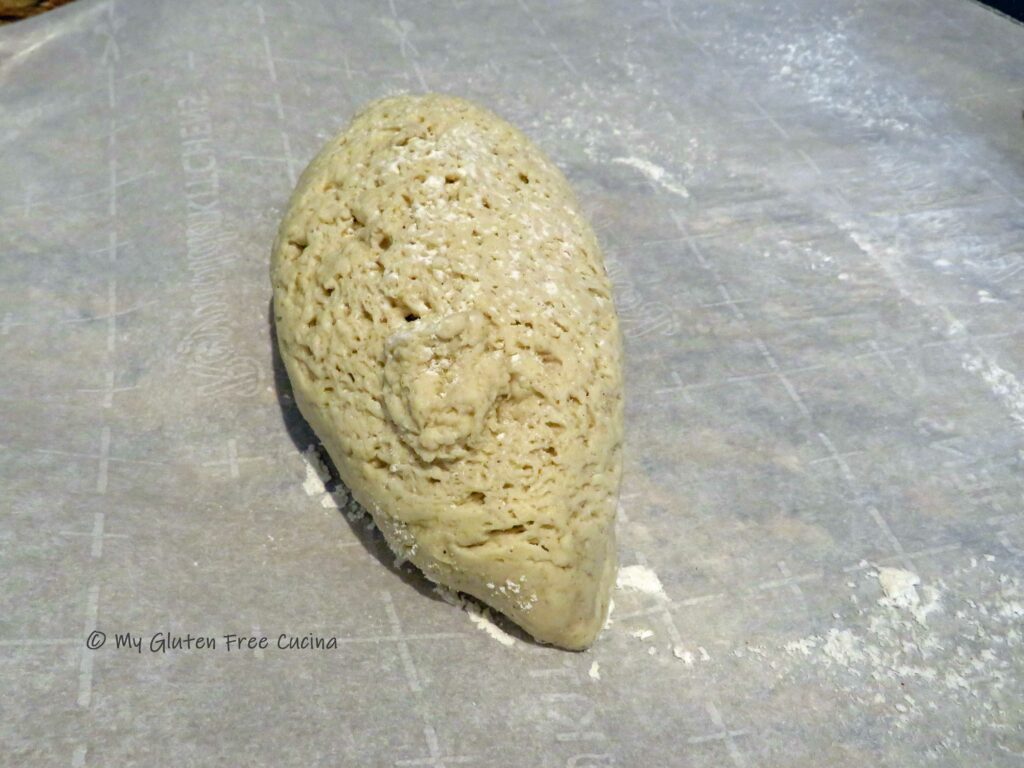
Use a bench knife to divide the dough in half. Gently shape each half into an oval, try to maintain the shape of the pointed ends.
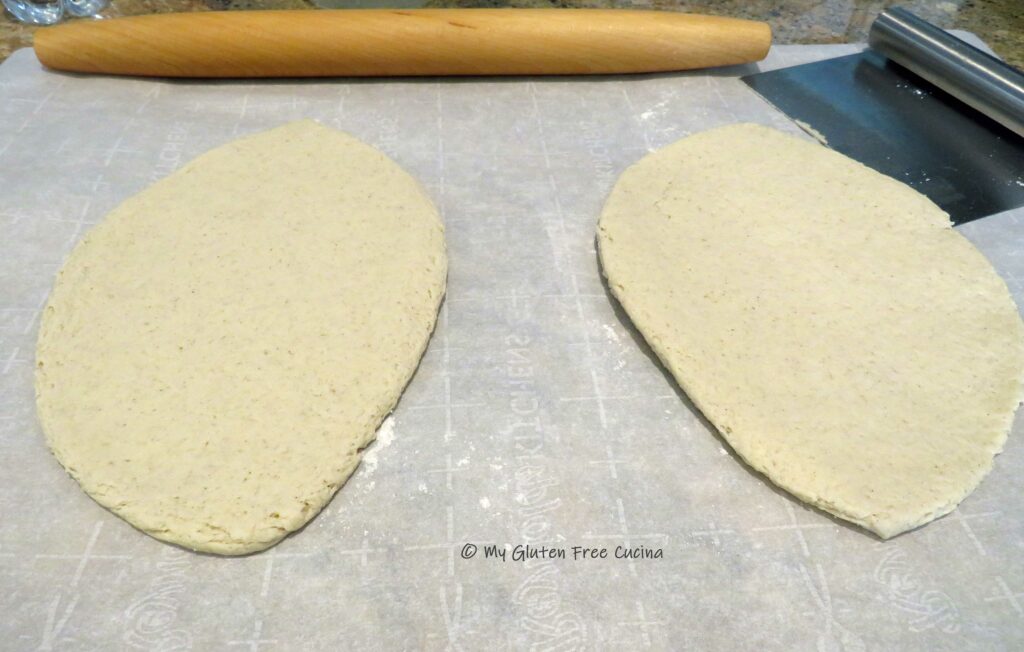
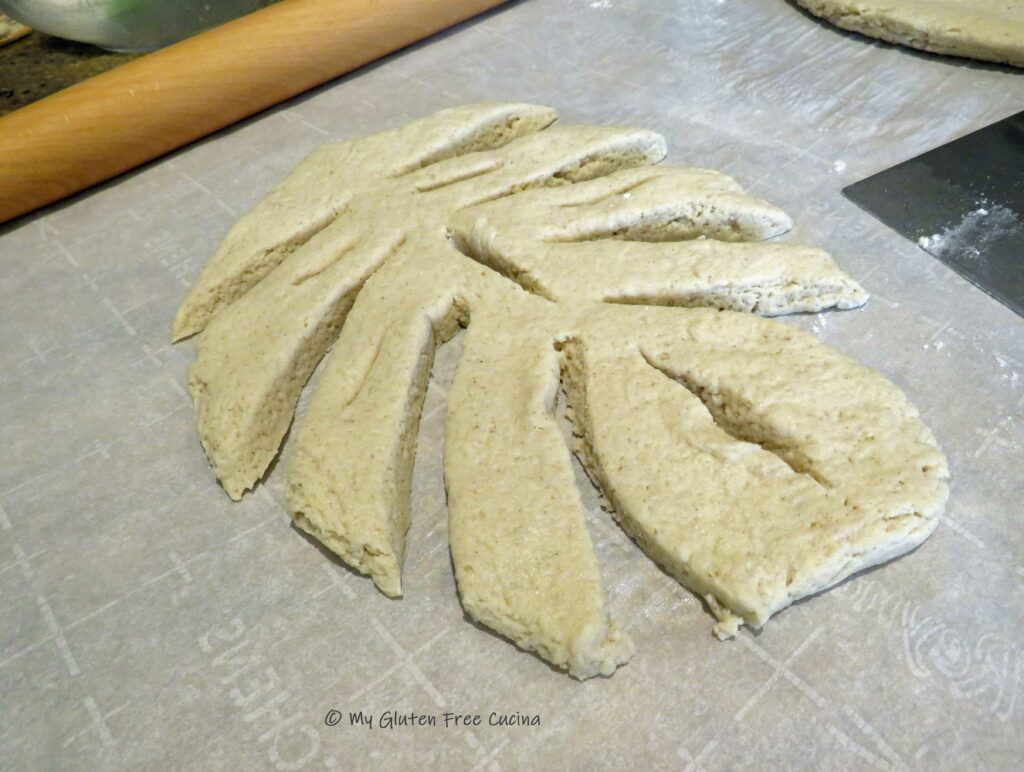
Next, gently roll each section into an oblong shape, about 3/4″ thick.
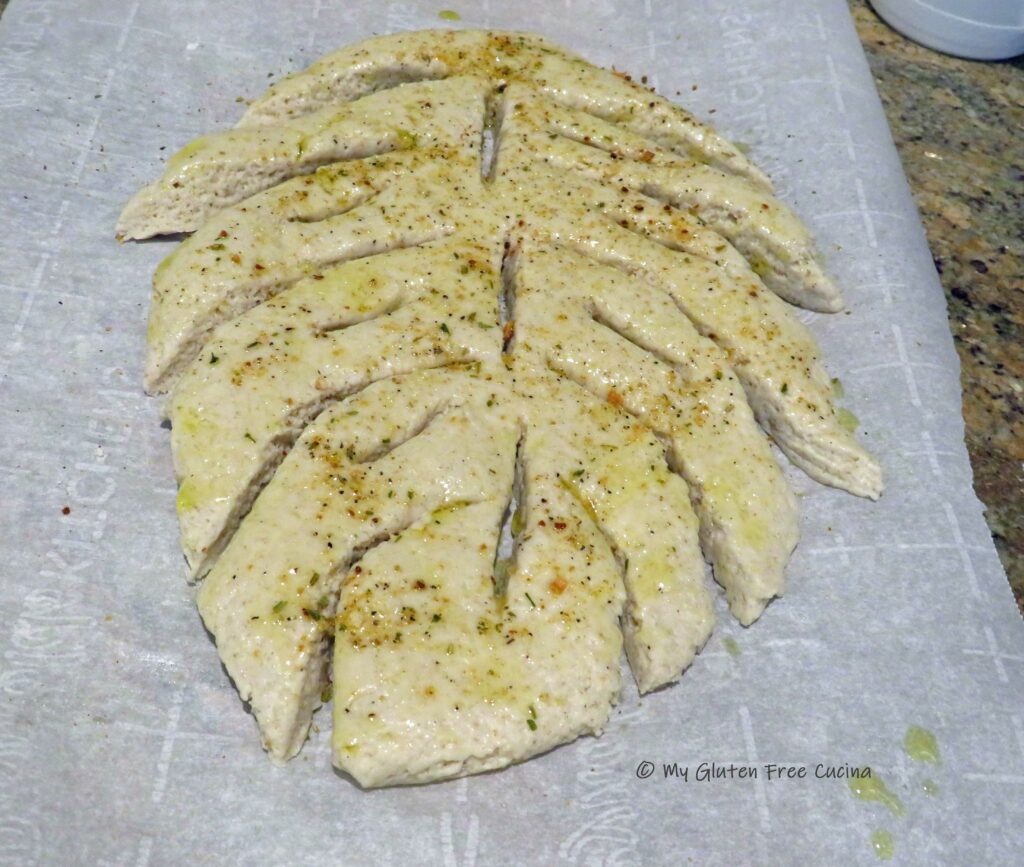
To score, make curved slits along each side, and several interior slits. After practicing this a few times, I found that my bench knife was the best tool for scoring. As I made each cut, I used the edge of the bench knife to spread the dough apart, so it doesn’t seal back up.
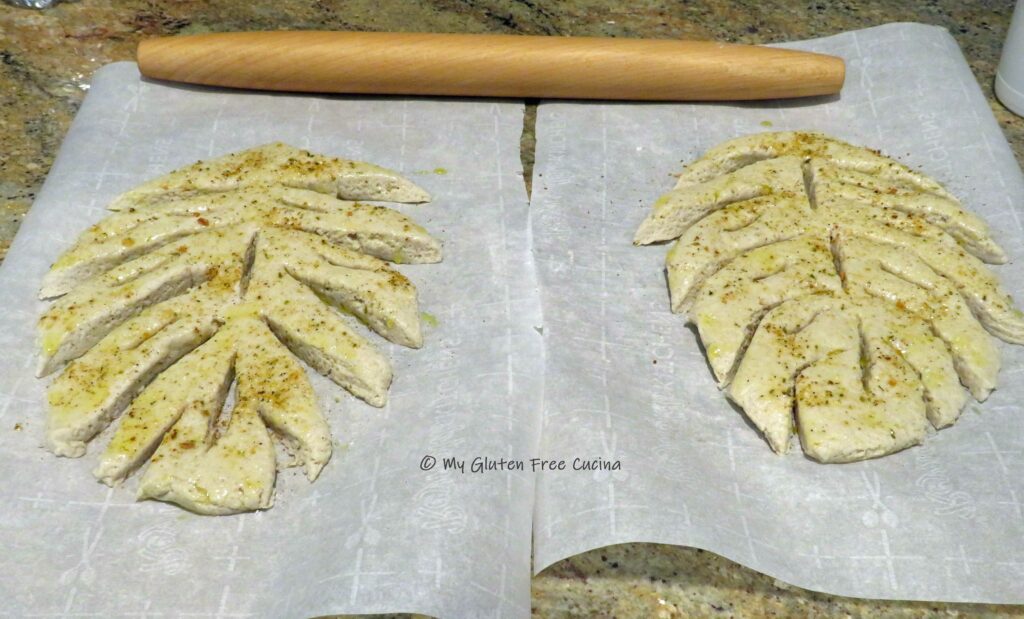
Brush the shaped dough with olive oil and sprinkle with seasoning and coarse sea salt. Herbes De Provence would be most traditional, but you can use any seasoning you prefer. I used a Tuscan blend.
Let the dough rest for 20-30 minutes while you preheat the oven to 450º. If you have a pizza stone, place it in the oven (if you do not have a pizza stone use a light-colored sheet pan).
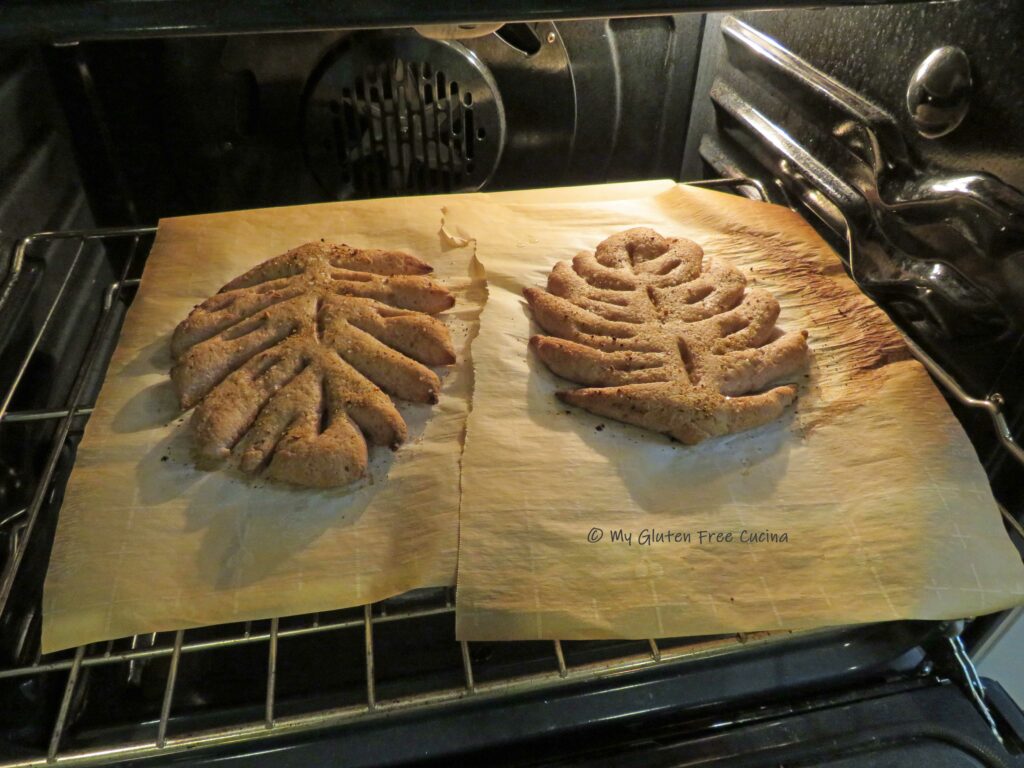
Cut the parchment down the middle so each section is on a separate sheet. I used a pizza peel to transfer the shaped bread with parchment to my pizza stone. Bake for 20 minutes, watching that the edges don’t burn.
Wow! Too pretty to eat? Not a chance, this bread is going to disappear!
Fougasse is best eaten right away. The combination crunchy crust and chewy crumb is amazing. Tear it apart with your hands and serve as is or with olive oil for dipping. Leftovers can be stored at room temperature for one day, then refrigerate or freeze. To reheat, use a toaster or air fryer. You can microwave it but be sure to cover or wrap in a napkin, microwaving will soften the texture in the crust.
Notes ♪♫ How robust is your sourdough starter? My starter, Sophie is about 6 months old at this writing and will need about 12 hours to be fully active. For this recipe, I took her out of the fridge for a feeding early in the morning and placed her in my proofing box for most of the day. Your starter may need more time to fully activate, so it is important to plan ahead when you want to bake. Read more about Sophie the Sourdough in this post.

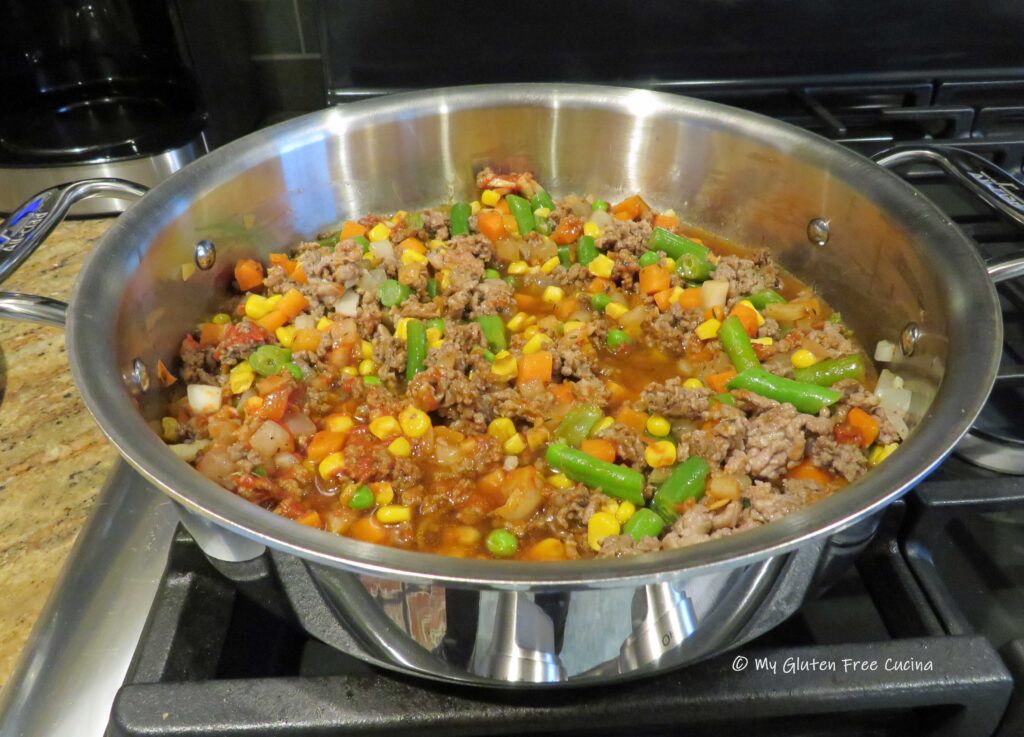 Bring to a simmer, then reduce the heat to low and simmer 30 minutes uncovered until most of the liquid has evaporated.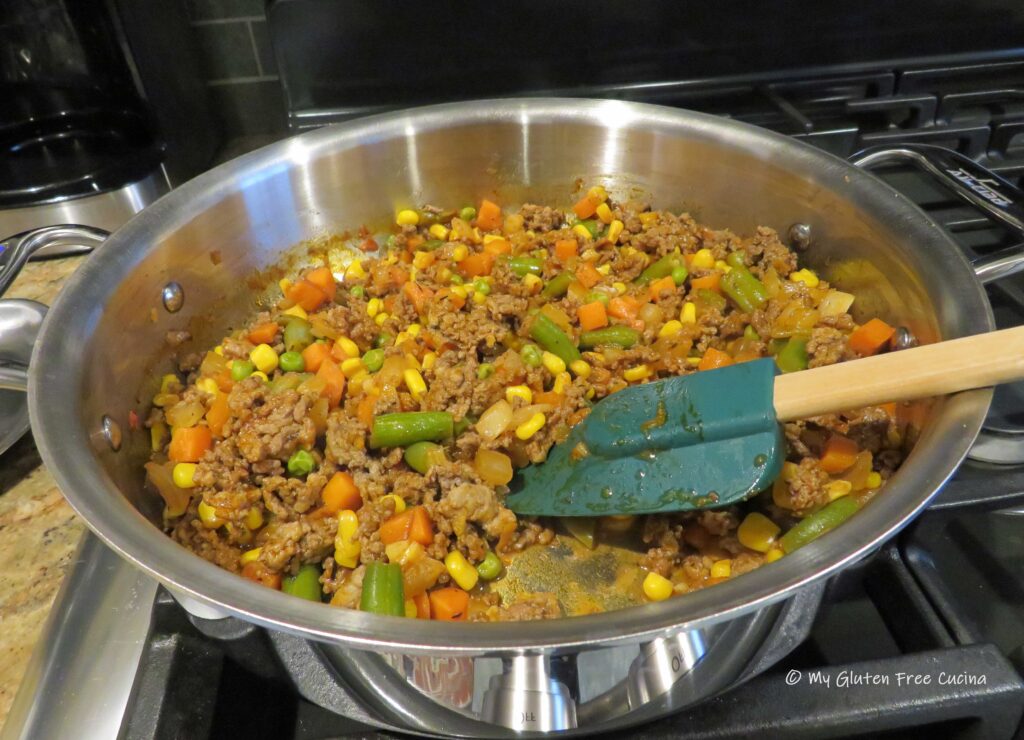
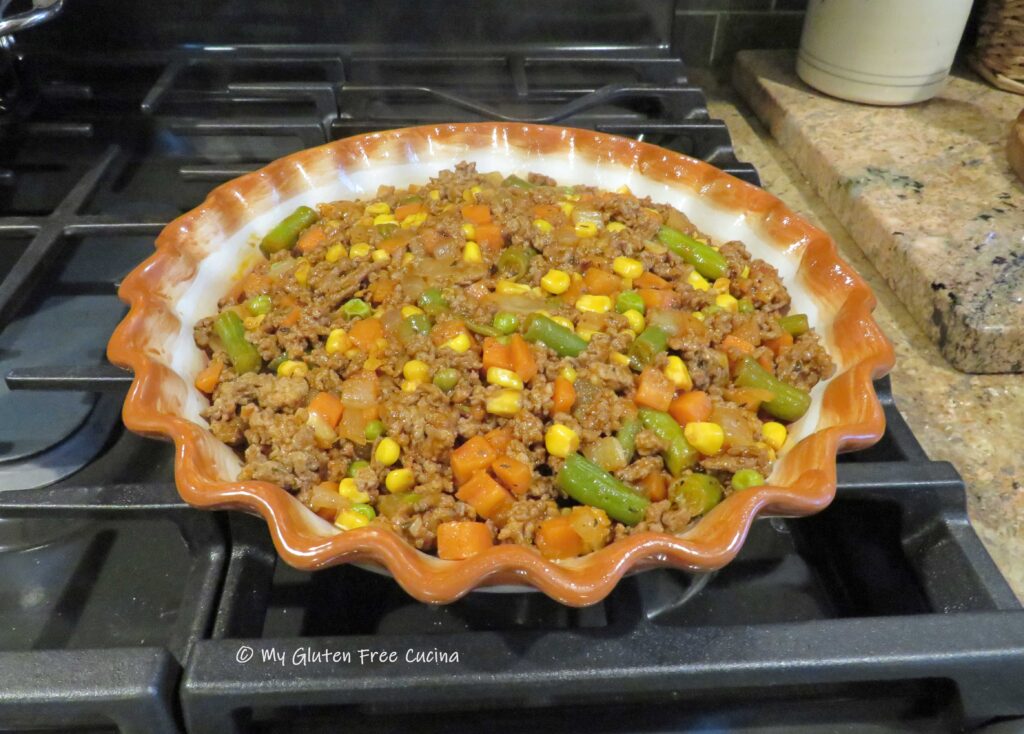
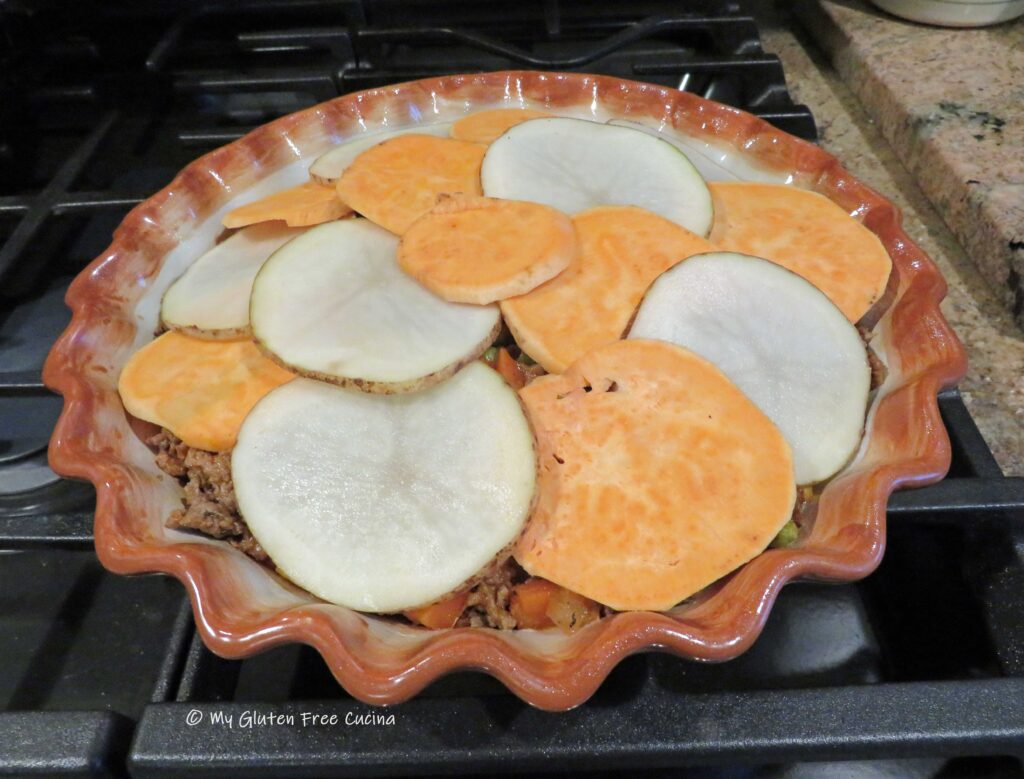 Sprinkle with paprika, top with half the gruyere cheese and half of the parmesan.
 Continue layering with the remaining potato slices, the rest of the cheese and pat with butter.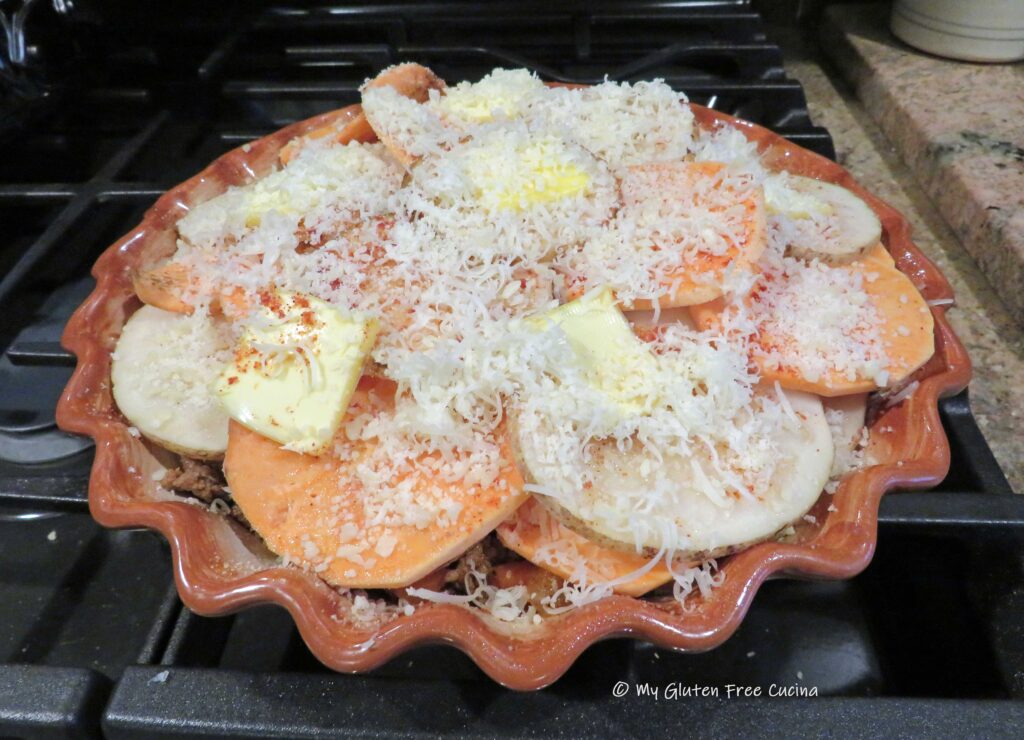

 Preparation: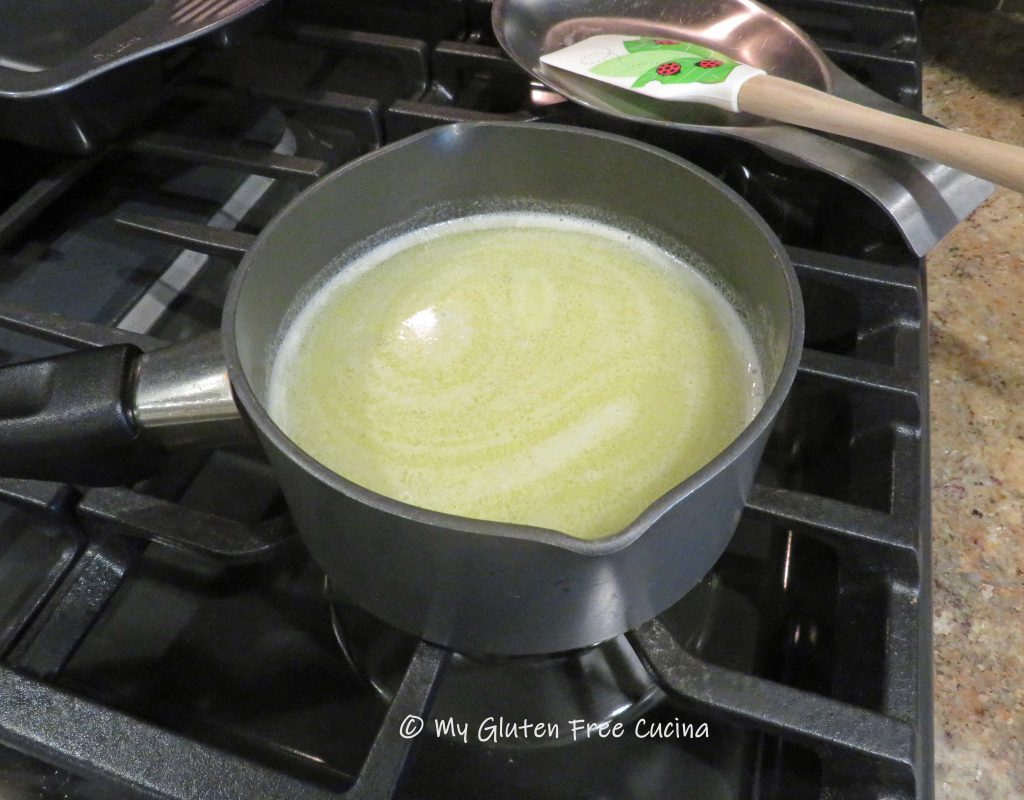
 If using a 9″ loaf pan, bake for 1 to 1.5 hours, testing for doneness after 1 hour. The original recipe instructions said 1.5 hours and it will depend largely on your oven and the amount of moisture in the fruit blend.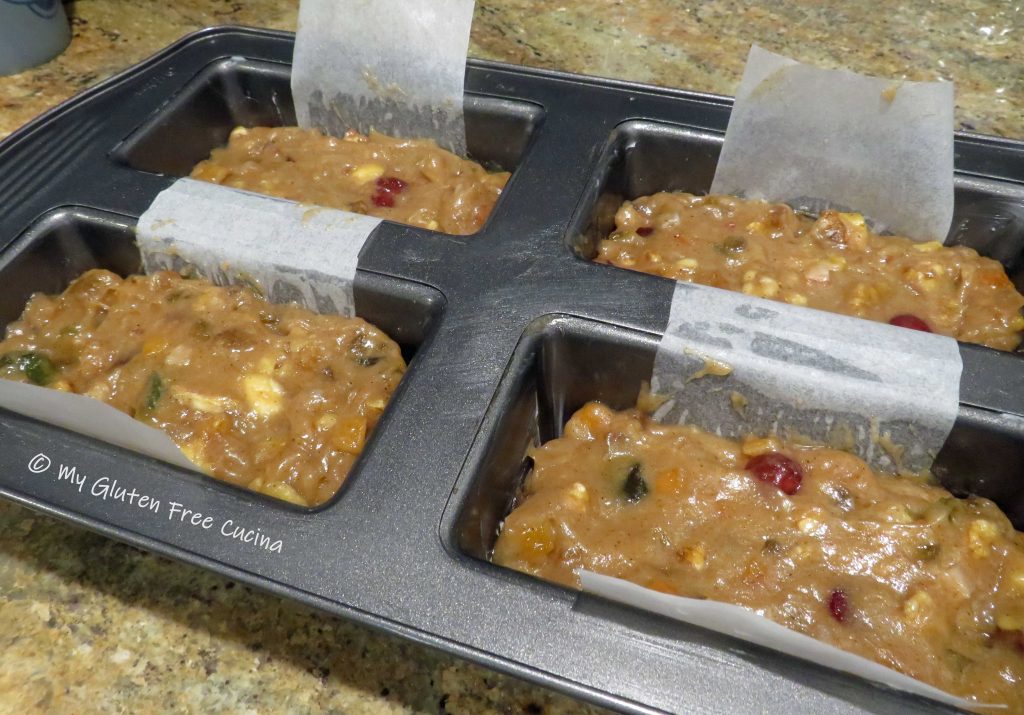





 Have you ordered the new Bread Flour from Better Batter yet?
 Preparation: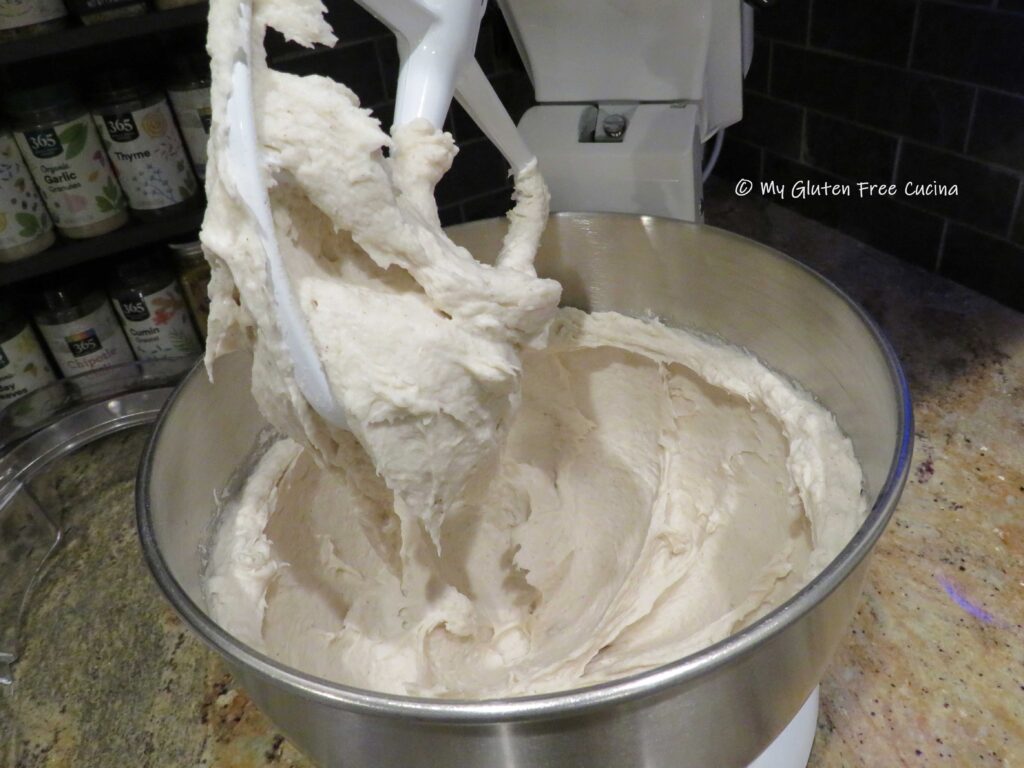


 Place the dough ball in an oiled bowl, cover with plastic wrap and refrigerate overnight for 12 hours.
 In the morning, preheat the oven to 475º with
  Use a spatula to smooth it into a round shape.
 Use a
Use a 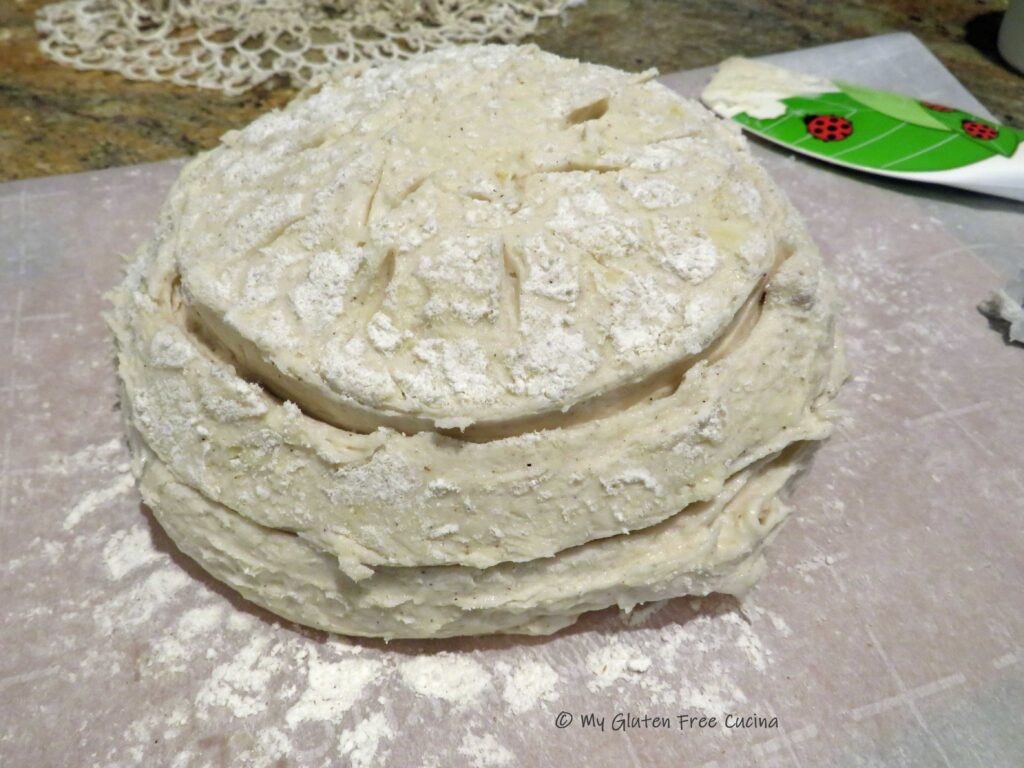 Transfer the dough, with parchment to the oven. Throw a few ice cubes onto the bottom of the oven and quickly shut the door. After the first 5 minutes throw in a few more ice cubes.
 Cool completely on a rack then store in a plastic bag at room temperature. Wait 24 hours to slice.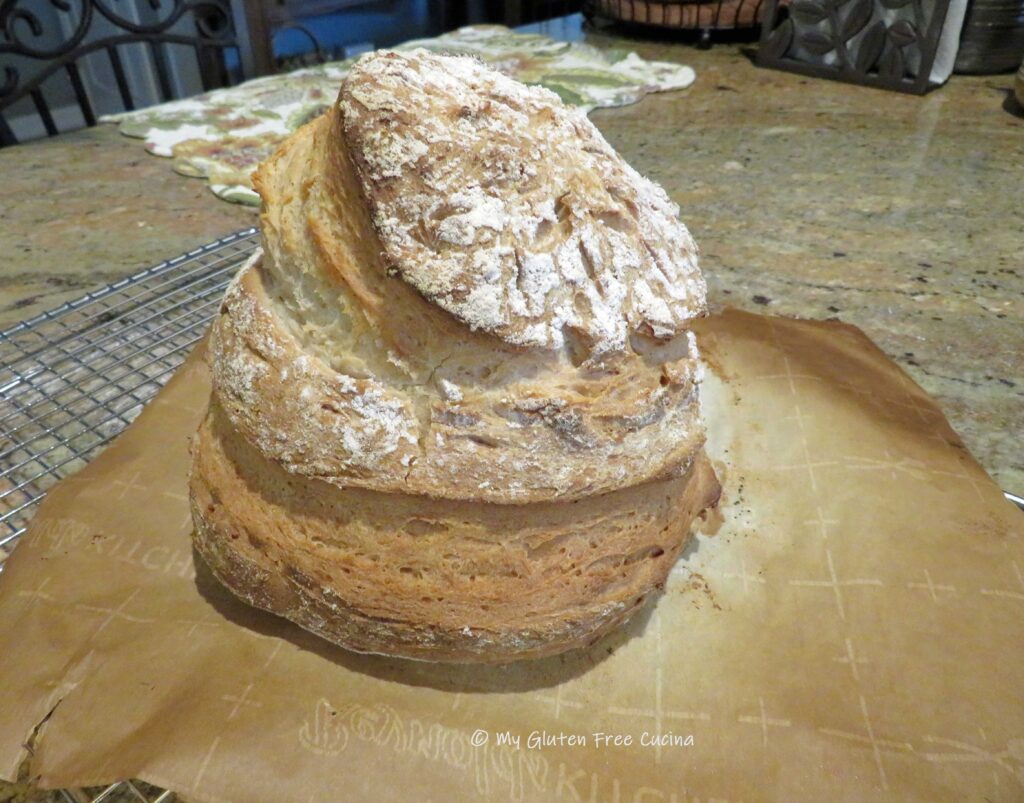




 This post contains affiliate links.
 Note ♪
 The next morning, drain and rinse again. Add back to the saucepot with COLD water, cover and turn the heat on low. Simmer gently for 2 hours.
 Drain and rinse again and set the beans aside.
 Heat olive oil in a stainless-steel skillet. Begin sautéing the veggies, beginning with the carrots as they take the longest to cook. Season with sea salt and fresh ground pepper and stir frequently for 3-4 minutes. Transfer the carrots to a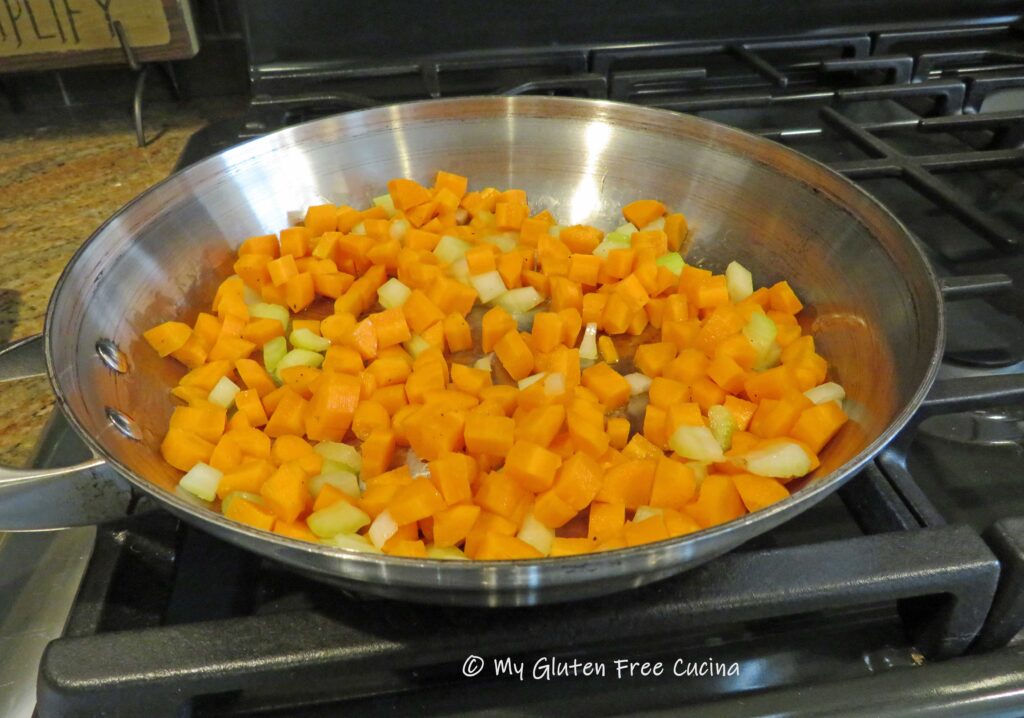
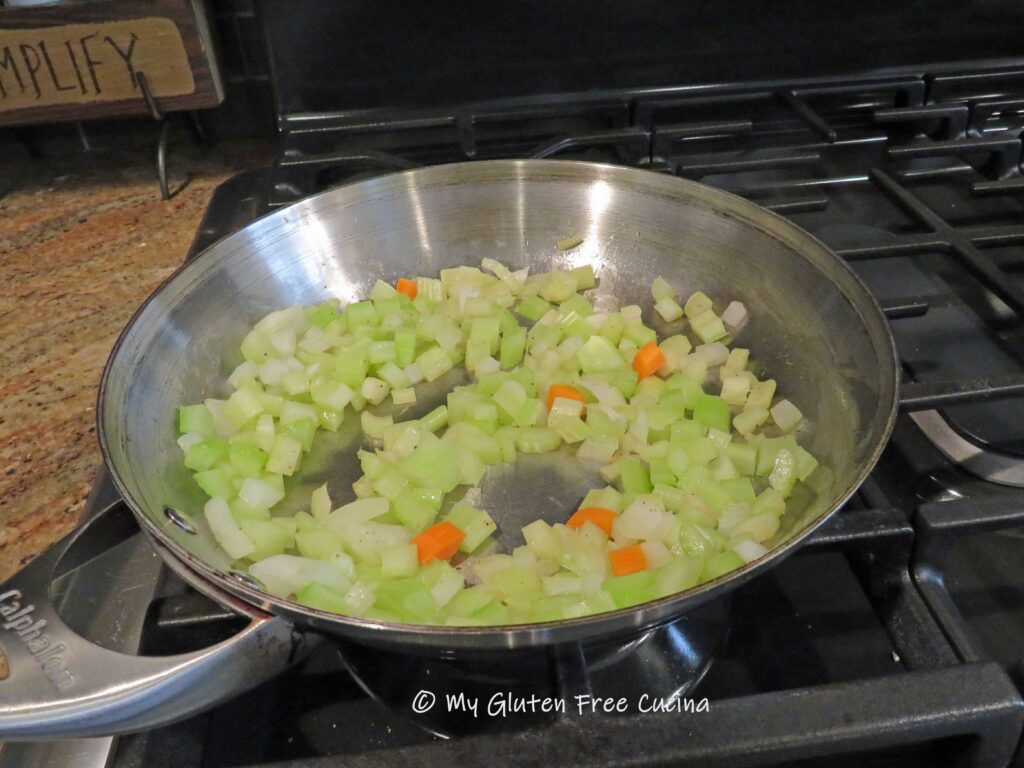
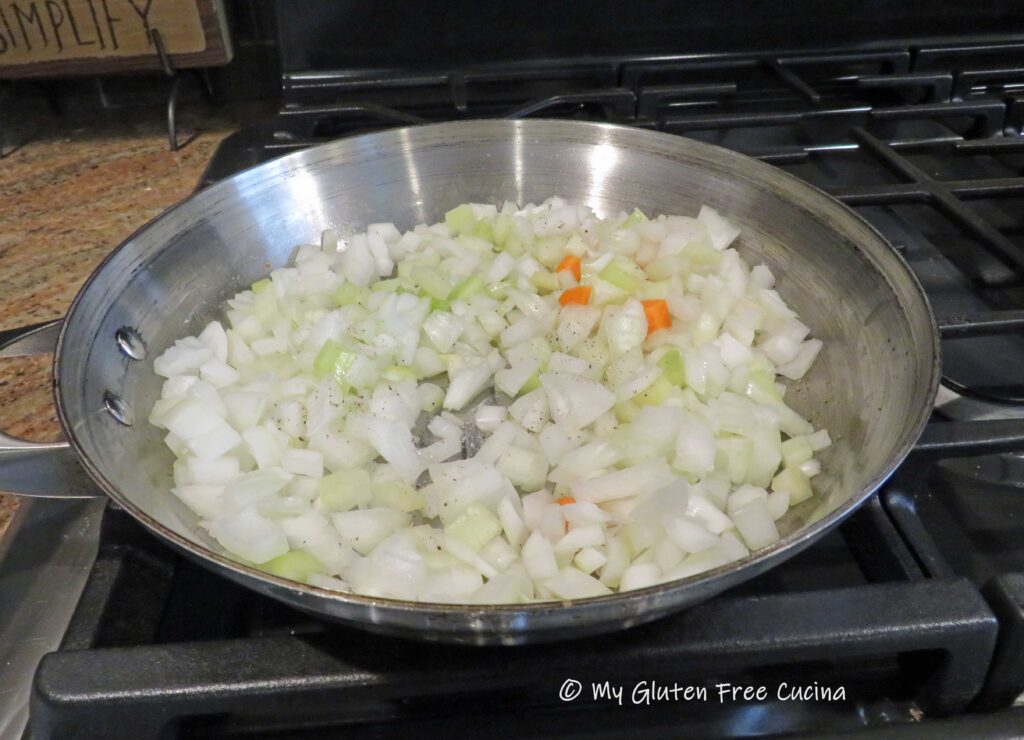 When the veggies are done, wipe the skillet clean and add the diced ham with a bit more olive oil.
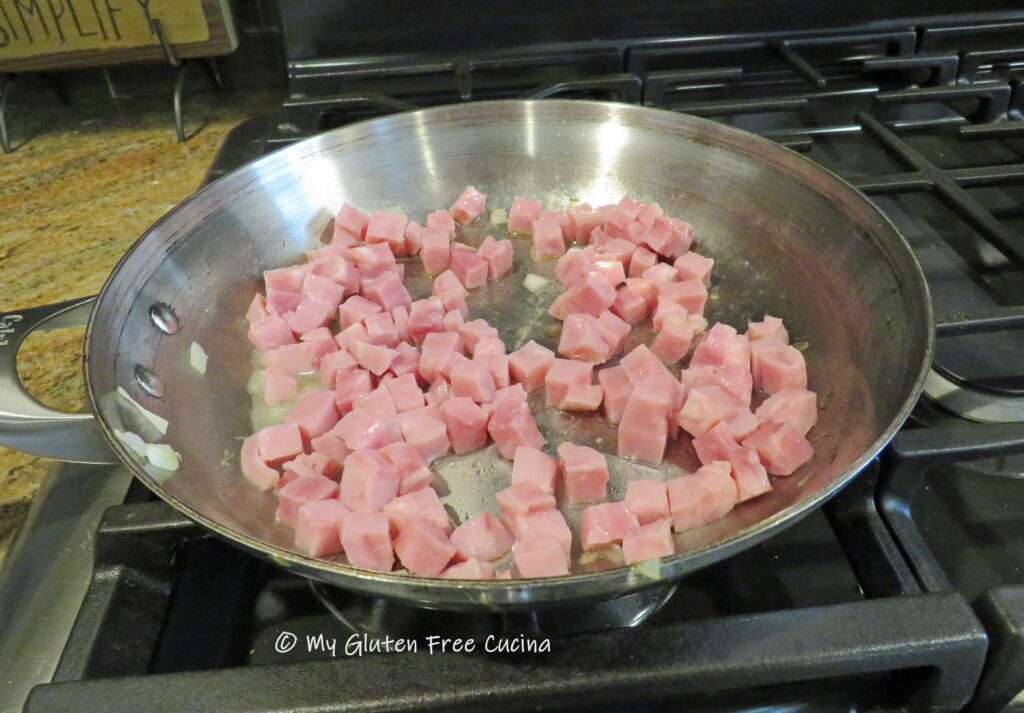 Note ♫
 Add the ham to the stock pot, and deglaze the skillet with a little beef broth, scraping up the caramelized bits at the bottom. Pour the liquid into the stock pot.
 Next, add equal parts of chicken and beef broth, enough to cover the ham and veggies. Return the cooked beans to the pot, along with the bouillon, sage and thyme.
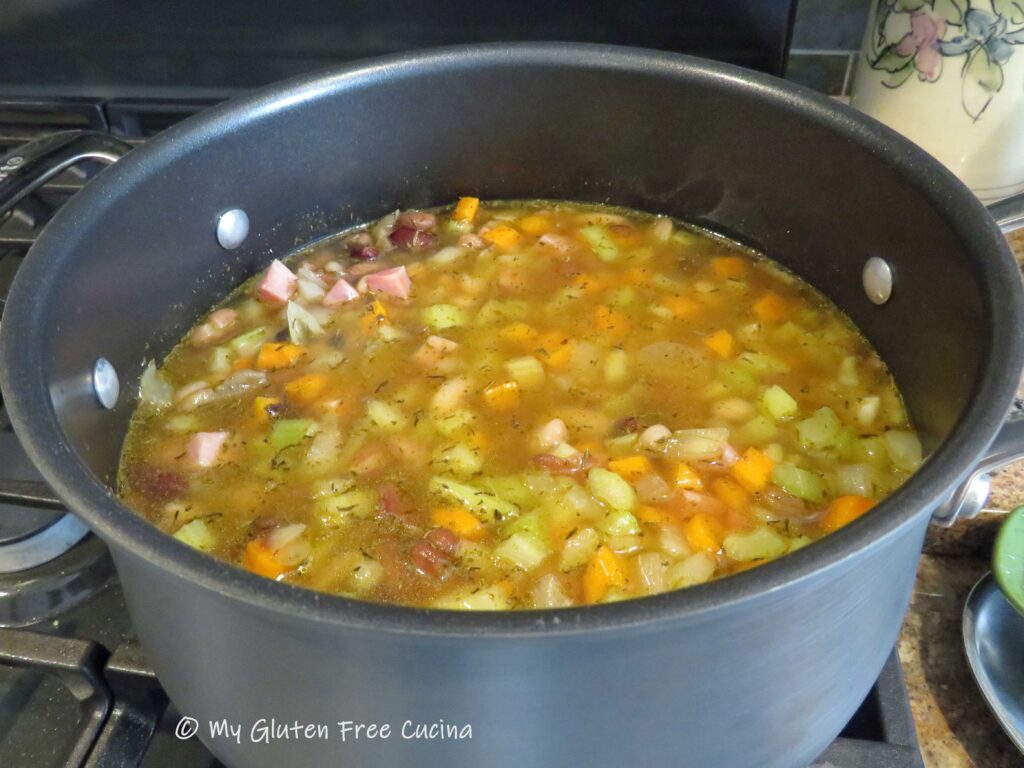 Simmer until the veggies are soft, then add the corn kernels in to heat through (adding the corn at the end of cooking gives the soup a little textural contrast to the soft beans and veggies).
 Soup is ready to enjoy with gluten free crackers or bread. Leftovers (if you have any!) can be refrigerated for up to a week. Don’t worry though, it won’t last that long!
 Notes ♪♫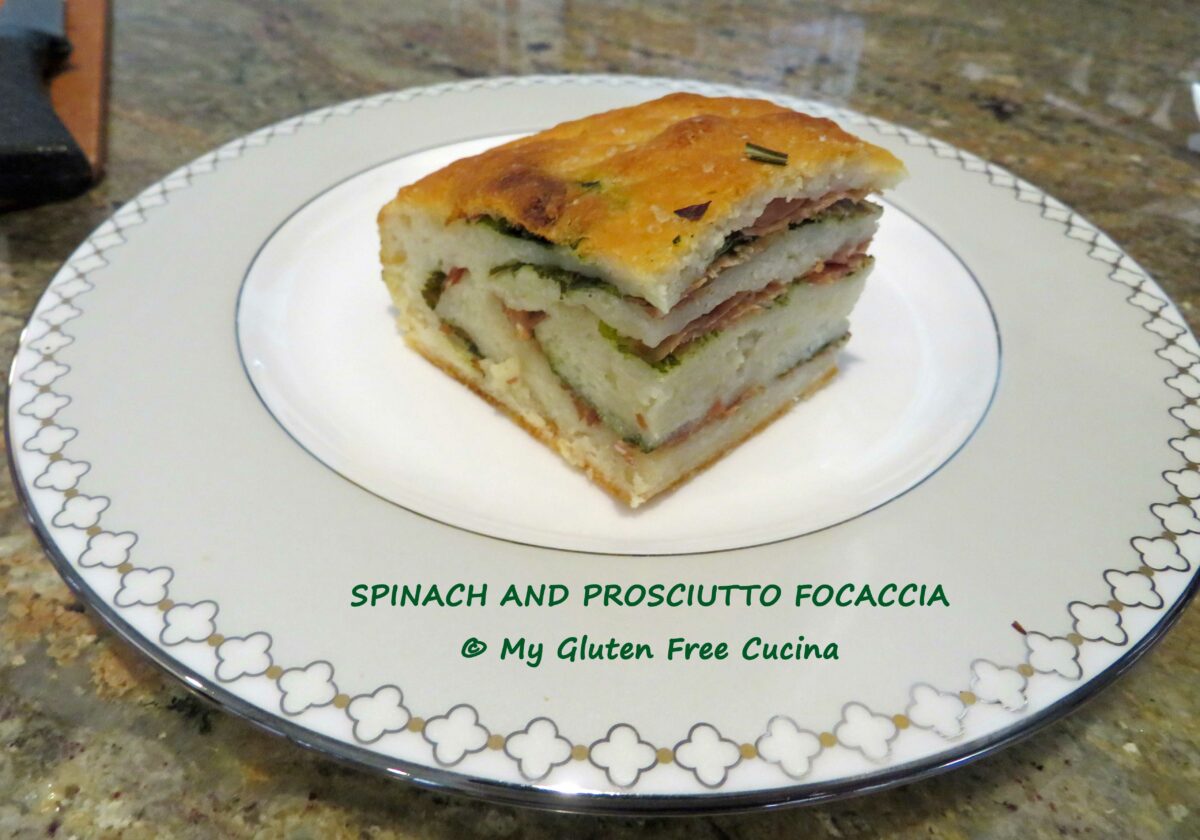






 Ingredients:
 Preparation:

 Work with one section at a time and keep the remaining dough covered so it doesn’t dry out. Start by rolling each section into a cylinder, like this.
 Cover and let it rest for 10 minutes. This is the secret to working with gluten free dough. Remember, it doesn’t stretch like gluten dough, but after a little rest it will be more cooperative. I repeated this process twice, before I finally was able to roll each section of dough into a rope, 3/4″ thick.
 Use a
Use a 

 Line a baking sheet with parchment or waxed paper, and dust lightly with flour. Place the finished Orecchiette on the baking sheet. Cover with plastic wrap and refrigerate if not cooking immediately.

 Slide the Orecchiette into the water and cook for 3 minutes, stirring occasionally. They will float to the top.