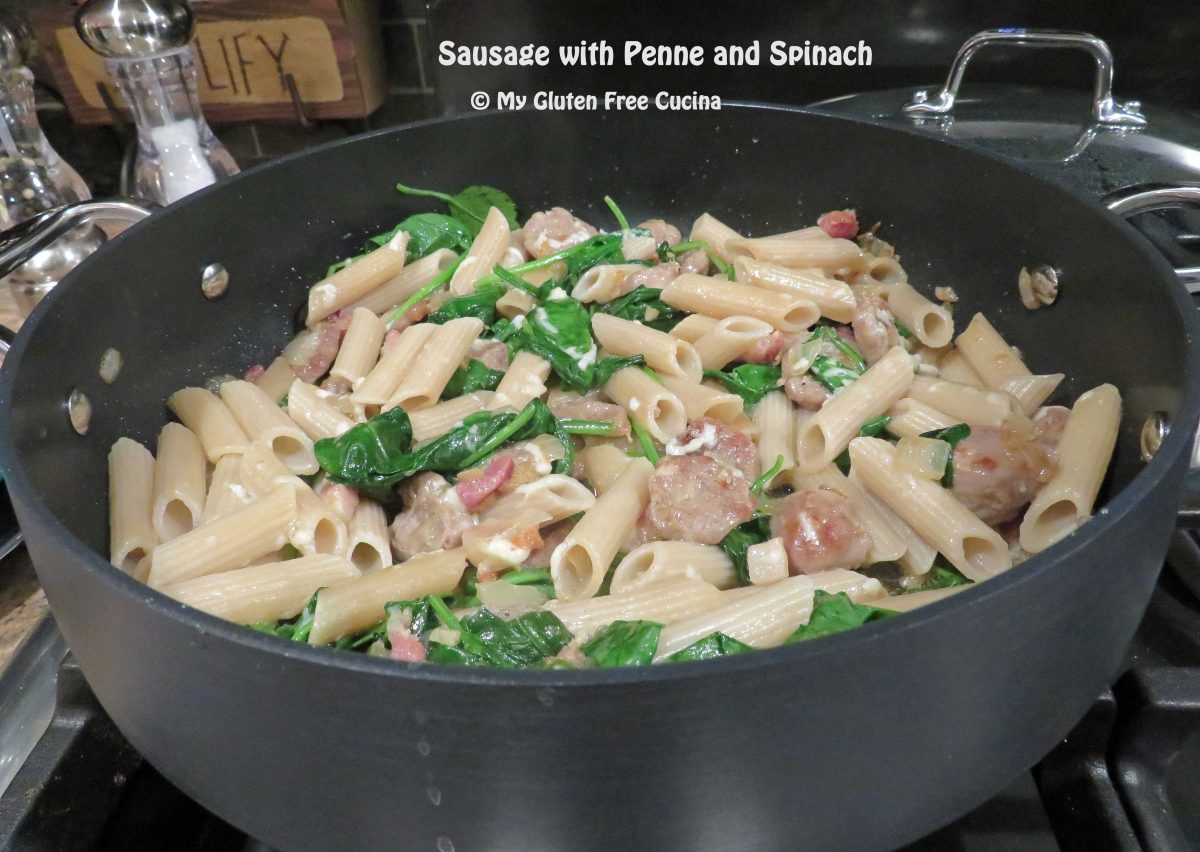
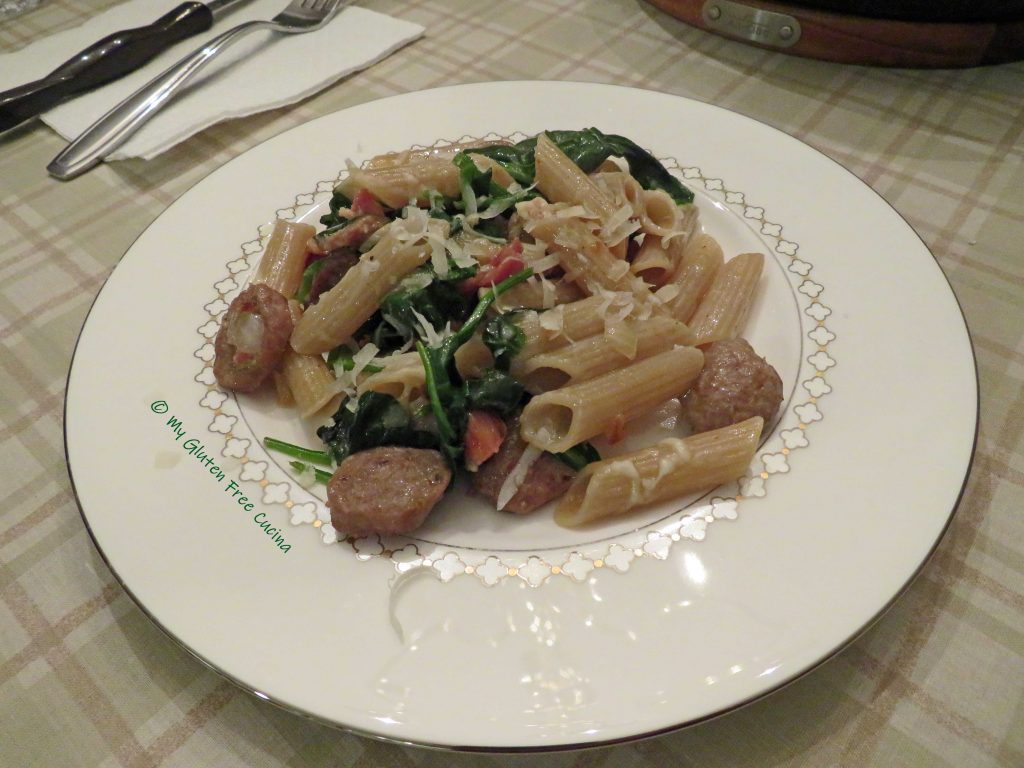
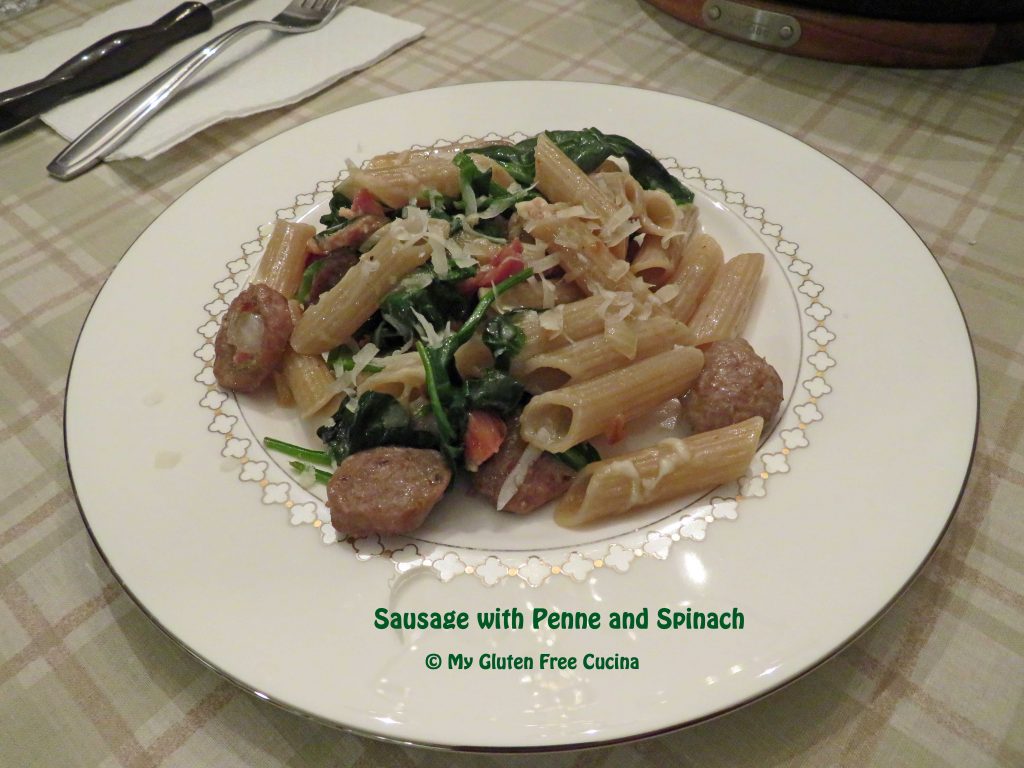
Sausage with Penne and Spinach

For an easy gluten free weeknight meal, look no further than this delicious skillet dinner.  Thanks to my sister for turning me on to the sausage and spinach combo, she made this meal for me shortly after my Celiac diagnosis!  Today I always like to have a variety of sausage on hand in my freezer pantry.  It’s delicious and the bold seasonings are enough to flavor an entire dish.  So, grab a pack, along with some gluten free penne and fresh baby spinach and let’s prepare a quick, satisfying weeknight dinner.

This post contains affiliate links.

3-4 Servings
Ingredients:

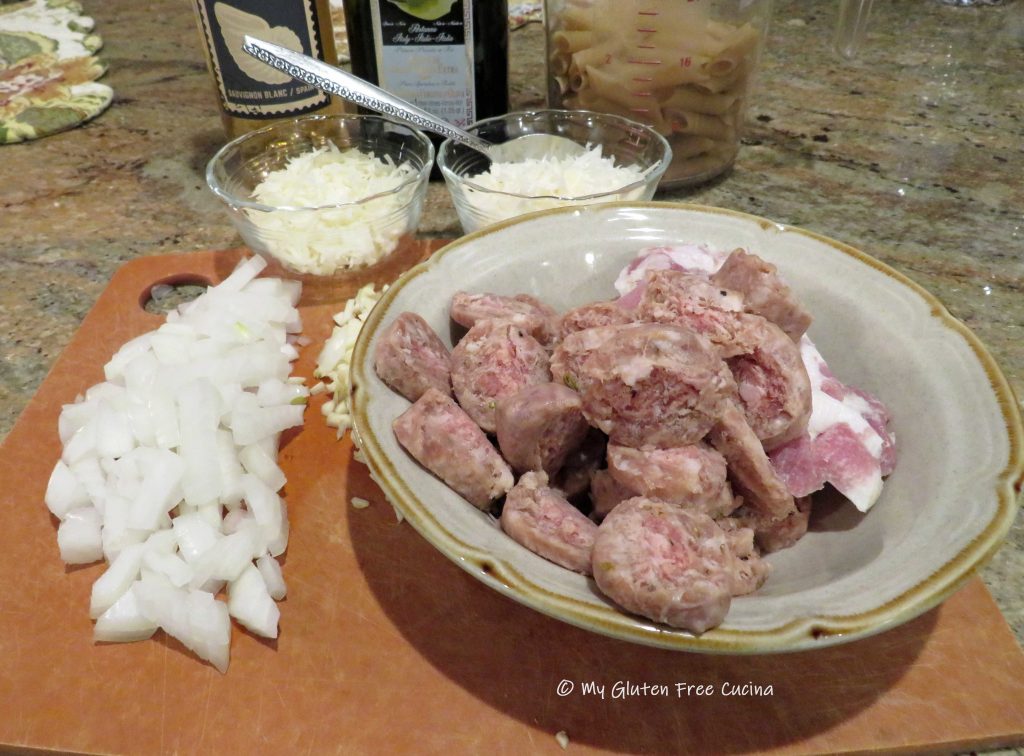
  • 1/2 lb. gluten free Italian sausage sliced into coins
  • 2 oz. diced pancetta
  • 1/2 lb. gluten free penne
  • 1/2 bag fresh baby spinach
  • 1/2 sweet onion, small dice
  • 2 cloves of garlic, minced
  • 1/4 cup white wine (not cooking wine)
  • 1 ladle of pasta water
  • olive oil
  • salt and pepper to taste
  • grated cheese for finishing (Parmesan or Romano)
  • Italian parsley for garnish optional

Preparation:

Cook the penne for 5 minutes less than the package directions, drain and set aside, reserving 1 ladle of the pasta water.  I find that most gluten free pasta is done to al dente long before the package instructions.  So, to be on the safe side I always under cook it, then finish it in the skillet.

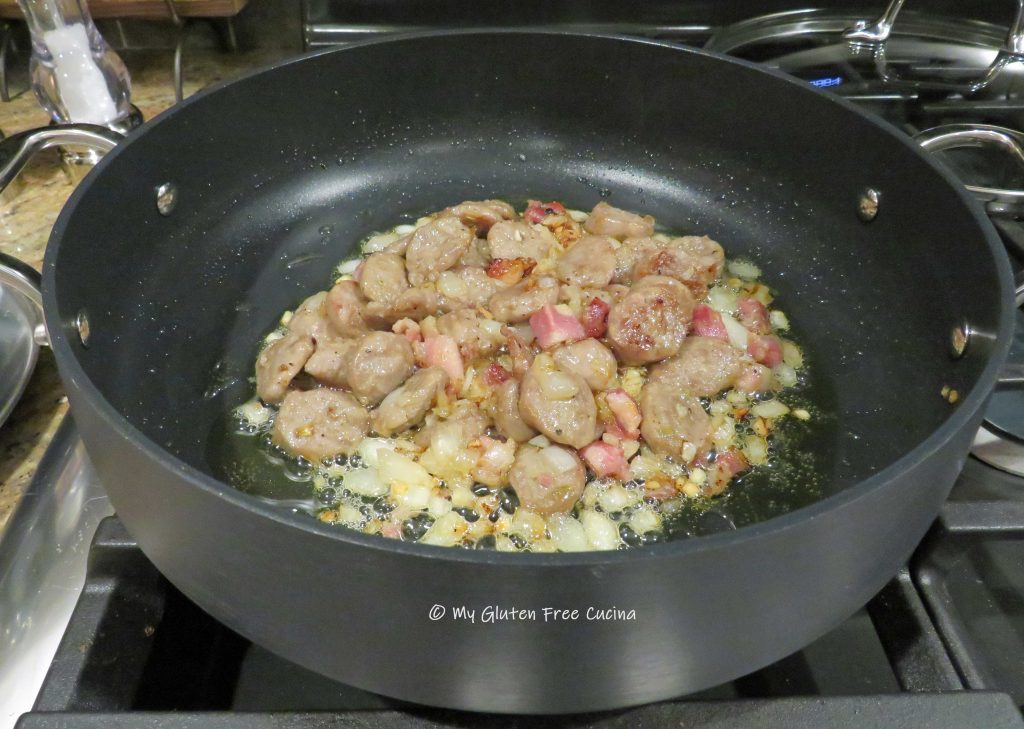
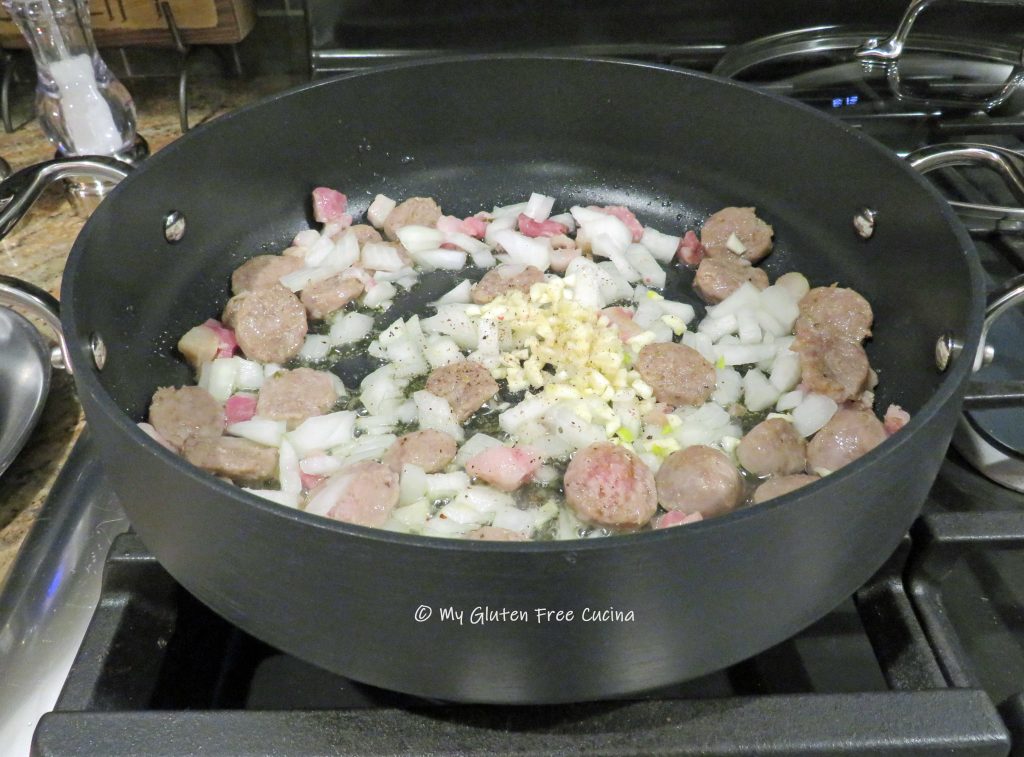
Heat a large skillet over medium low and begin browning the sausage and pancetta in a little olive oil.

When nicely browned on both sides add the onion and garlic.  Continue cooking and stir frequently so the garlic doesn’t burn.
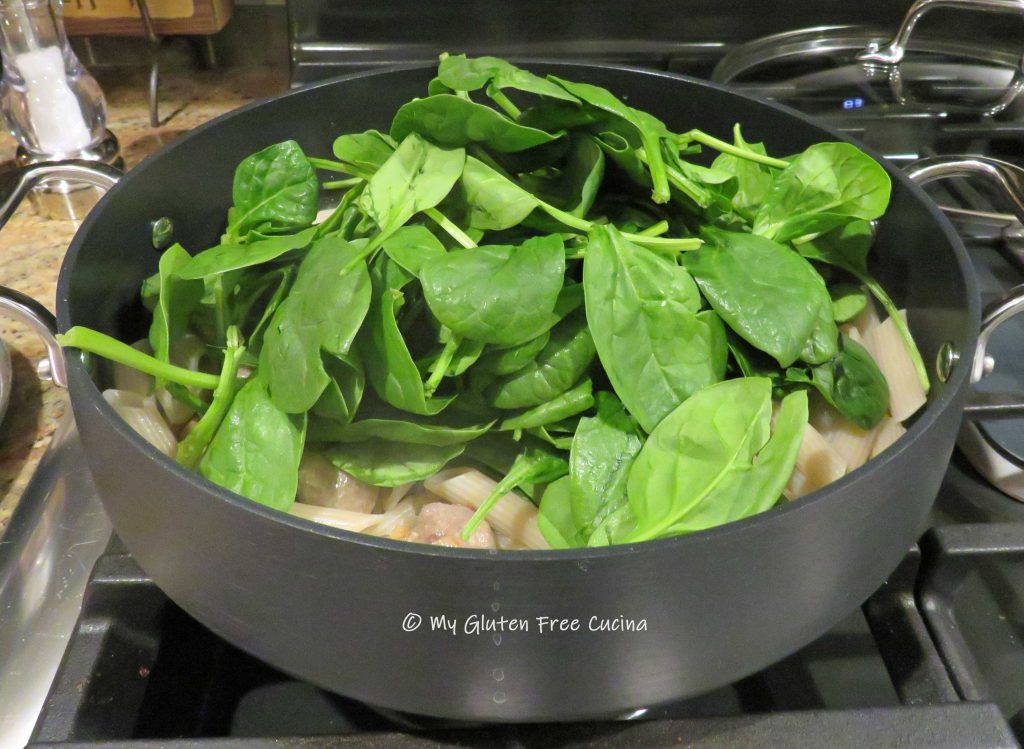
Next add the drained penne, all of the spinach, white wine and a ladle of the pasta water.
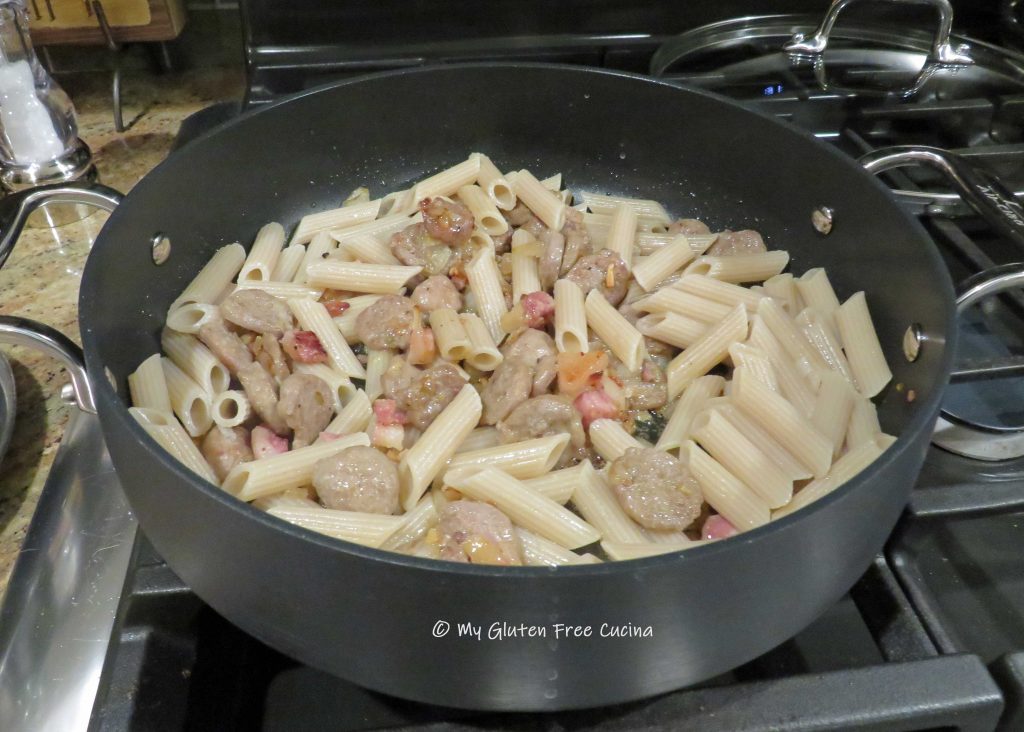
Cover and cook 1-2 minutes longer, or just until the spinach is wilted.  Drizzle with a little more olive oil, toss and finish with grated cheese and chopped parsley.
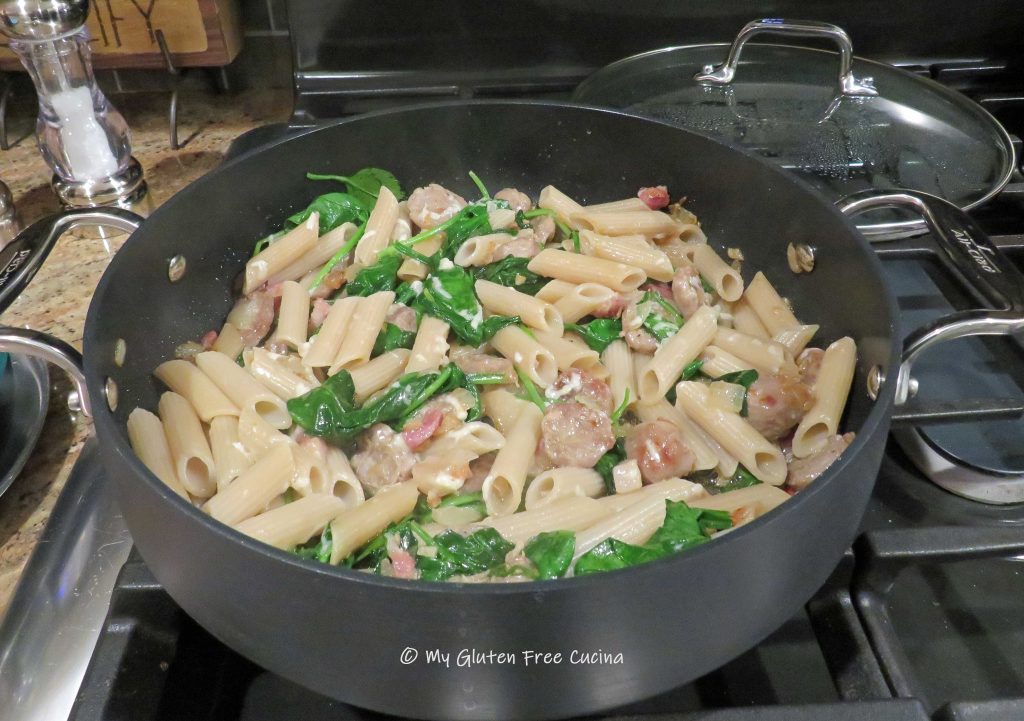
Dinner is on the table in under a half hour.  Perfect for those busy weeknights!
Notes ♪♫ Today there are so many types of gluten free sausage available.  Just in the 6 years since my Celiac diagnosis, the availability of delicious gluten free sausage has expanded so much.  So don’t hesitate to take advantage of easy meals like this one.  And if you’re worried about sodium or other ingredients, learn to make your own.  Check out my Gluten Free Italian Sausage Patties, and my Gluten Free Breakfast Sausage Patties.  Both are easy to make, and you control what goes into them!


Originally published 6/3/2018             Revised 1/17/2024

Print This Post Print This Post


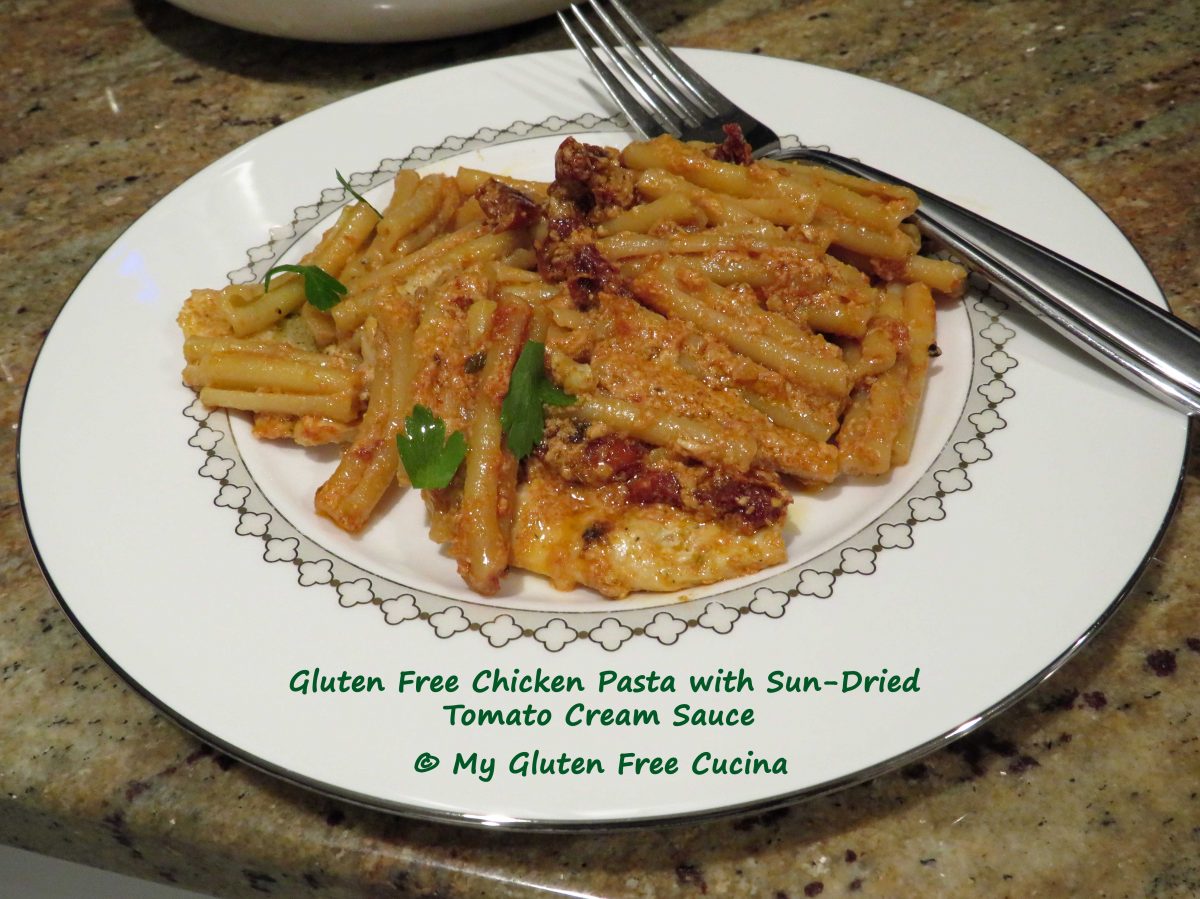
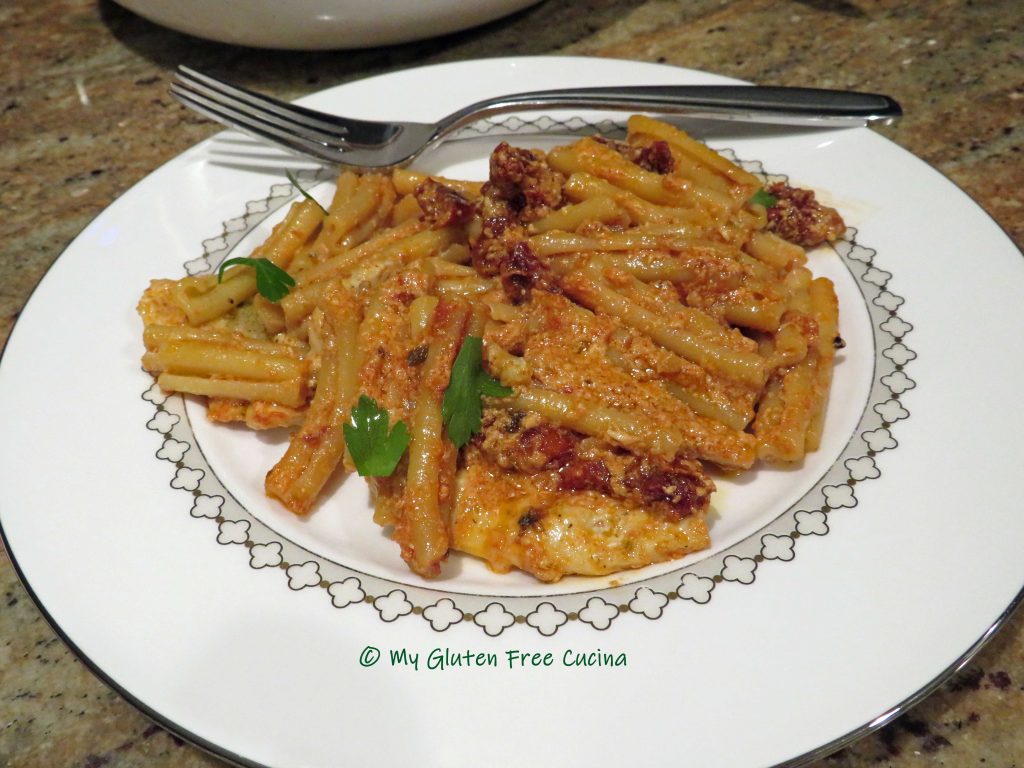
Gluten Free Sun-Dried Tomato Chicken Pasta

Using simple ingredients from the pantry, this plate full of happiness is a feast for the eyes and the taste buds!  Other than the pasta, the ingredients are naturally gluten free.  A fast easy dinner to enjoy any night of the week!

Dinner for two

This post contains affiliate links.

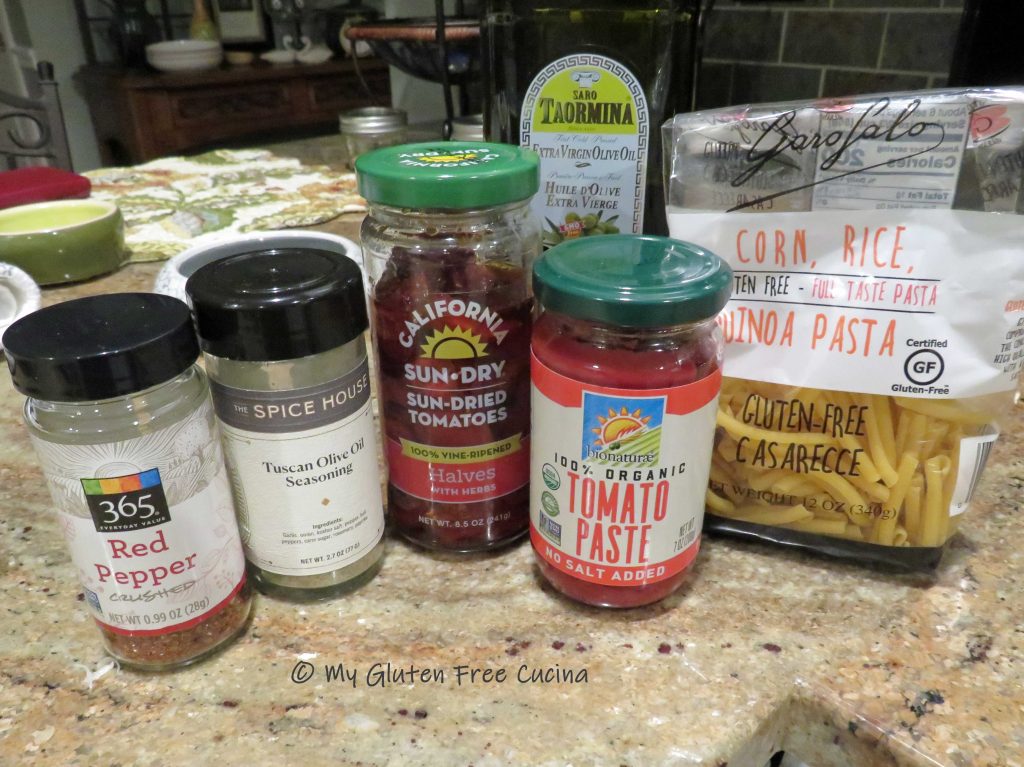
Ingredients:

Preparation:

This is one of those recipes that goes very quickly once you begin, so you want to have all of your ingredients at the ready.  Heat a pot of salted water for the pasta.  Mince the garlic and grate the cheese.

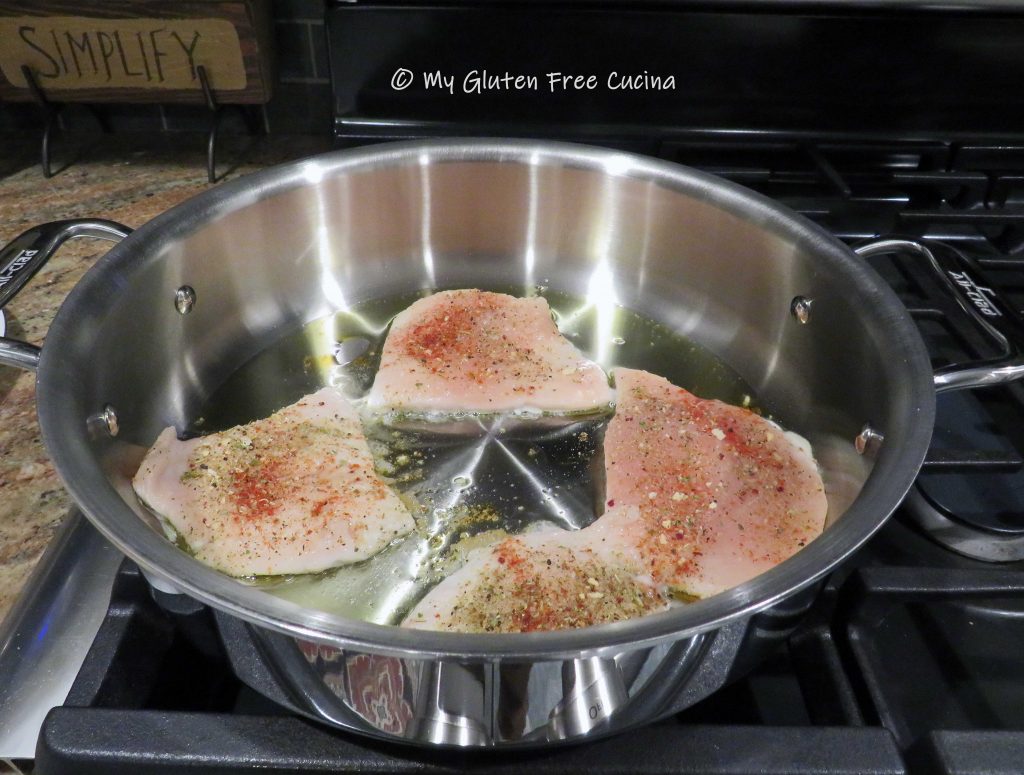
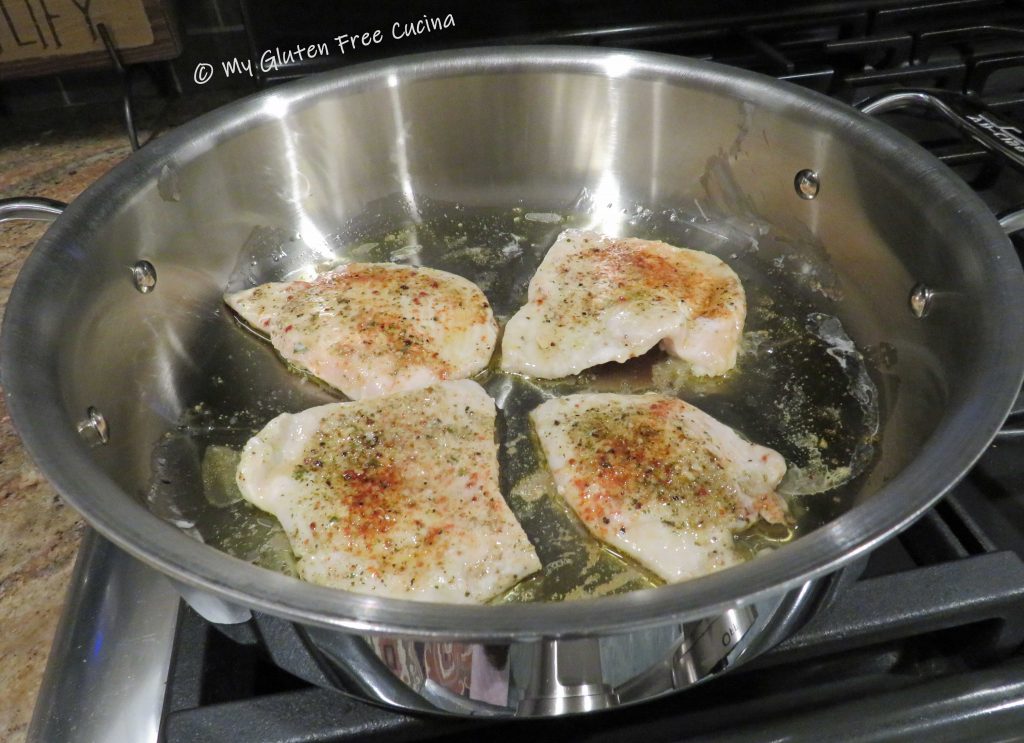
Heat a deep skillet with 1 tbsp. of the olive oil and add the chicken.  Sprinkle it with Italian seasoning and paprika.  Cook for 1 minute each side (longer if you have thicker slices) and remove to a plate.

By now the pasta water should be ready, cook the pasta to a few minutes less than the package directions, it will finish cooking in the sauce.
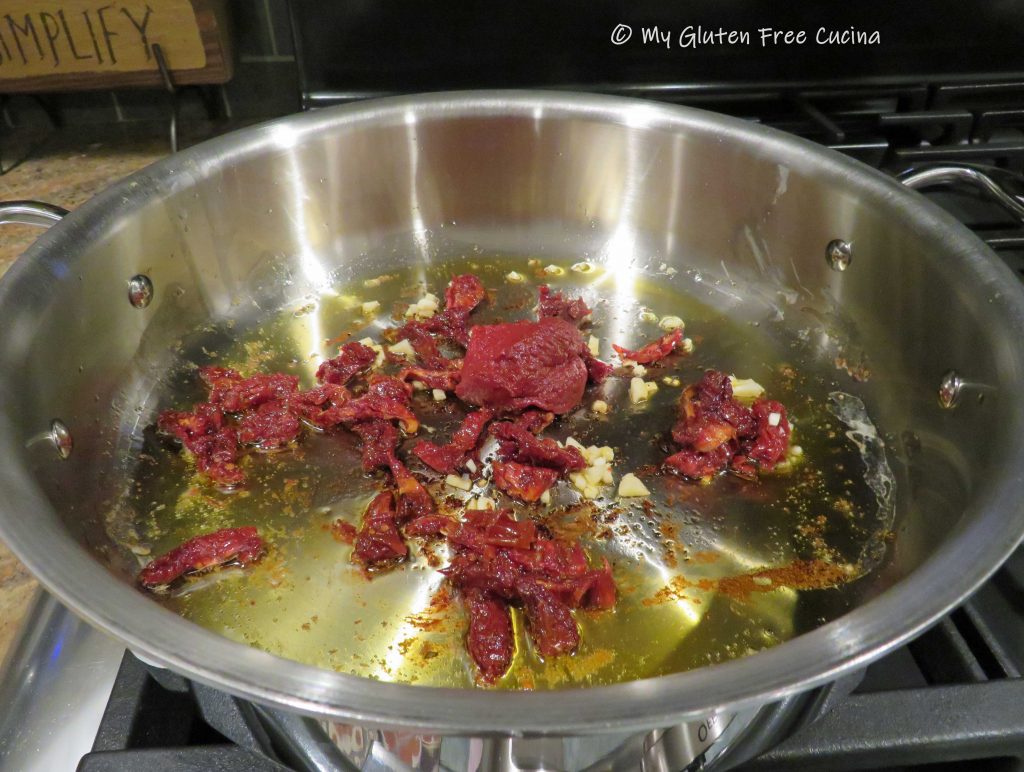
Next add the sun-dried tomatoes to the pan with their oil.  Cook until they begin to sizzle, then remove and rough chop them or use kitchen shears to julienne.

Return the sun-dried tomatoes to the pan with the minced garlic and 1 tbsp. tomato paste.

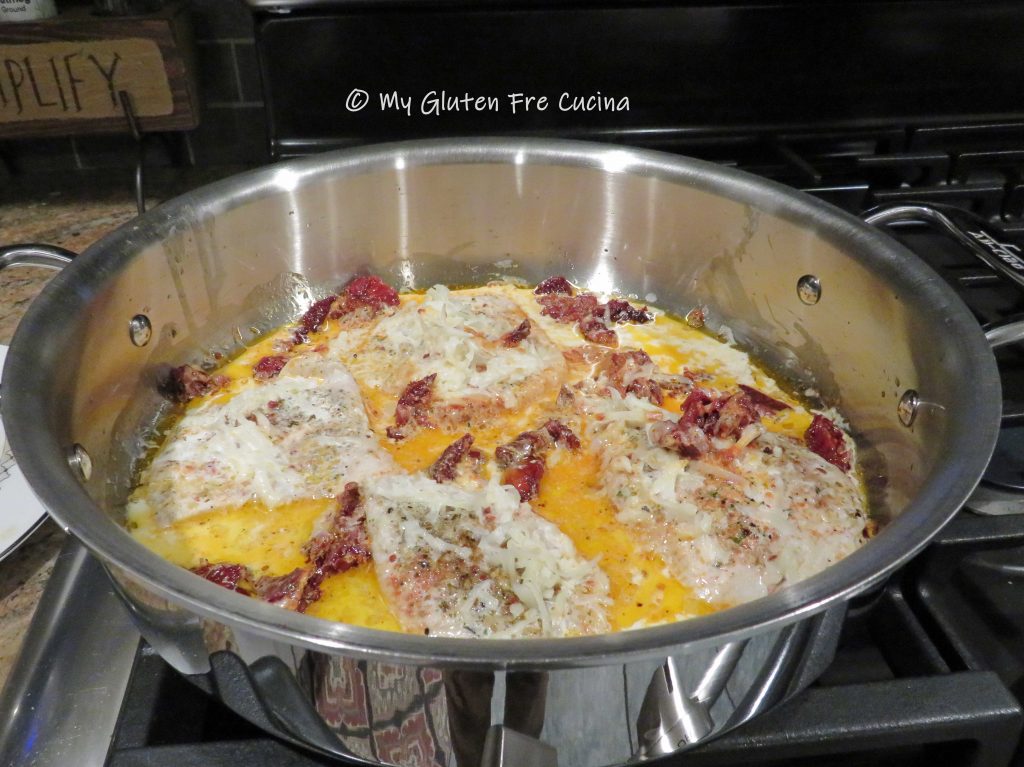
Cook for 1 minute, stir it all together and return the chicken to the pan.
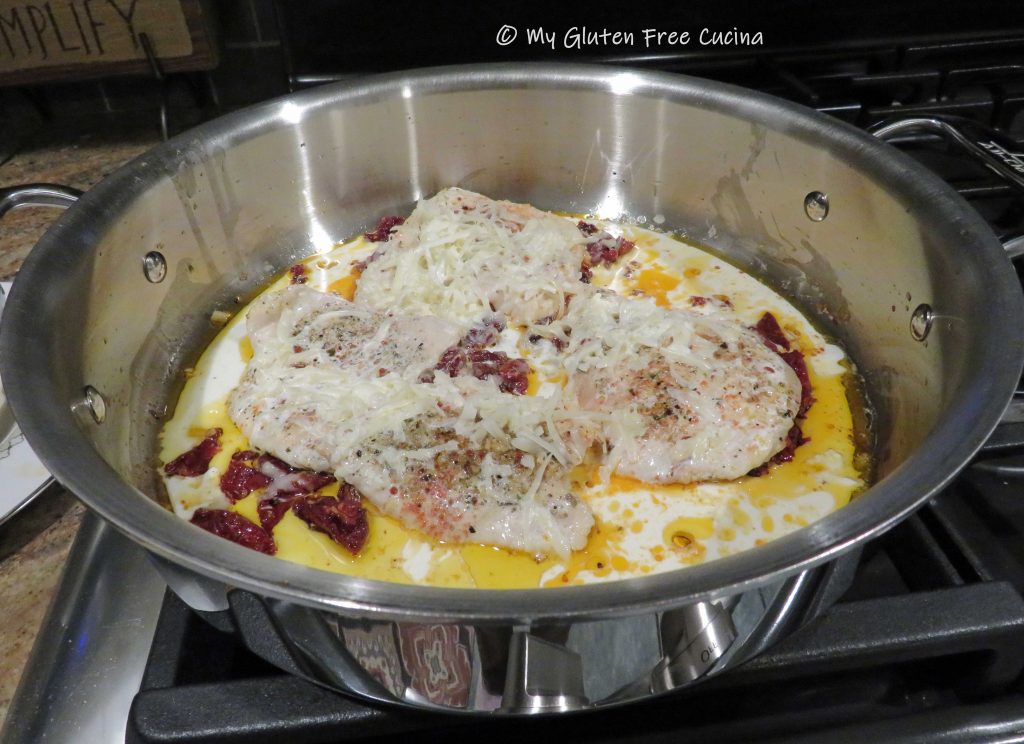
Top it with the Gruyere cheese and pour in the half and half.  Add a pinch of red pepper flakes and stir to combine.

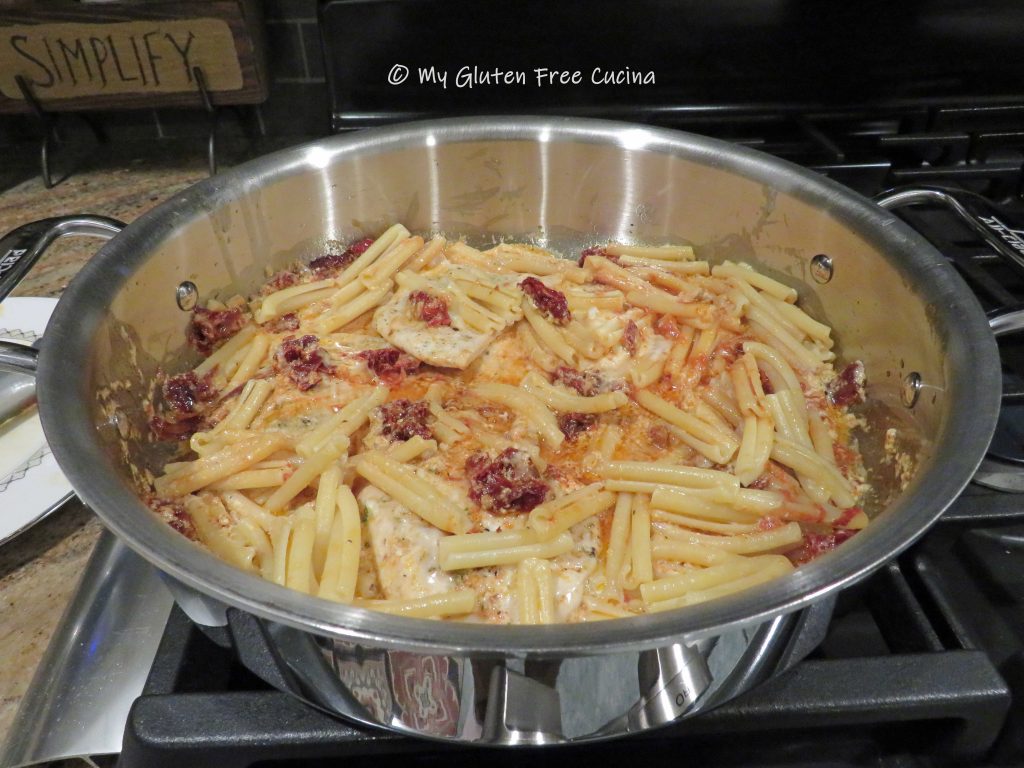
Drain the pasta and add to the pan, toss well and cook for one more minute.
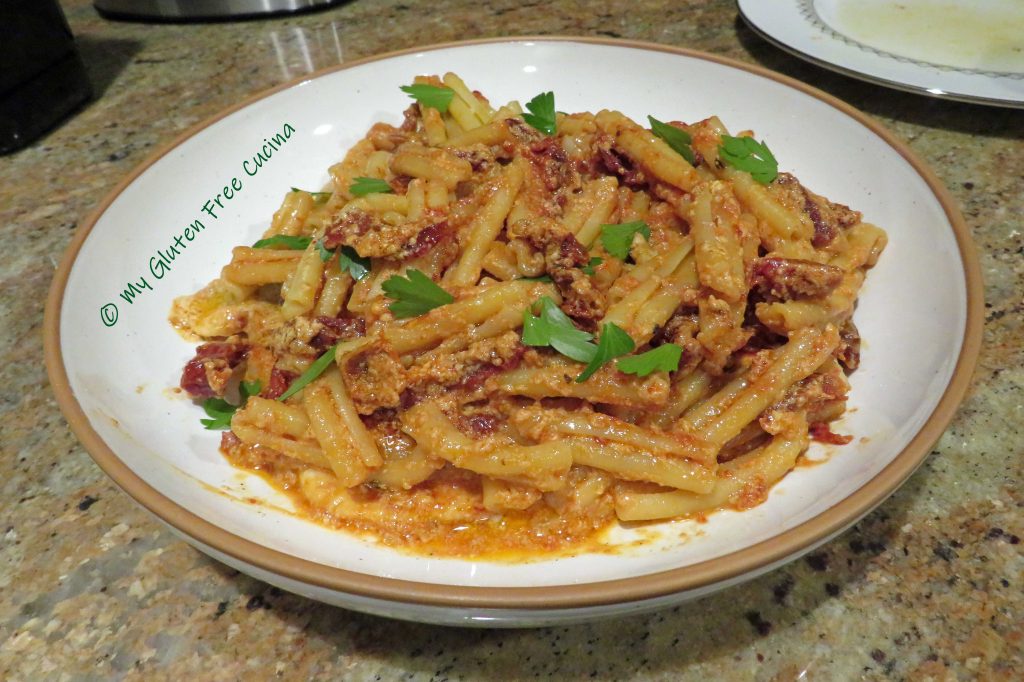
Transfer to a serving dish, drizzle with the remaining tbsp. of olive oil and garnish with Italian parsley.

Mmm, mmm, mmm.  This was SO good!  Sometimes I even amaze myself.

Notes ♪♫ For this dish, use sun-dried tomatoes in oil.  The oil in the jar is infused with flavor and gives the entire dish a beautiful color.

Print This Post Print This Post

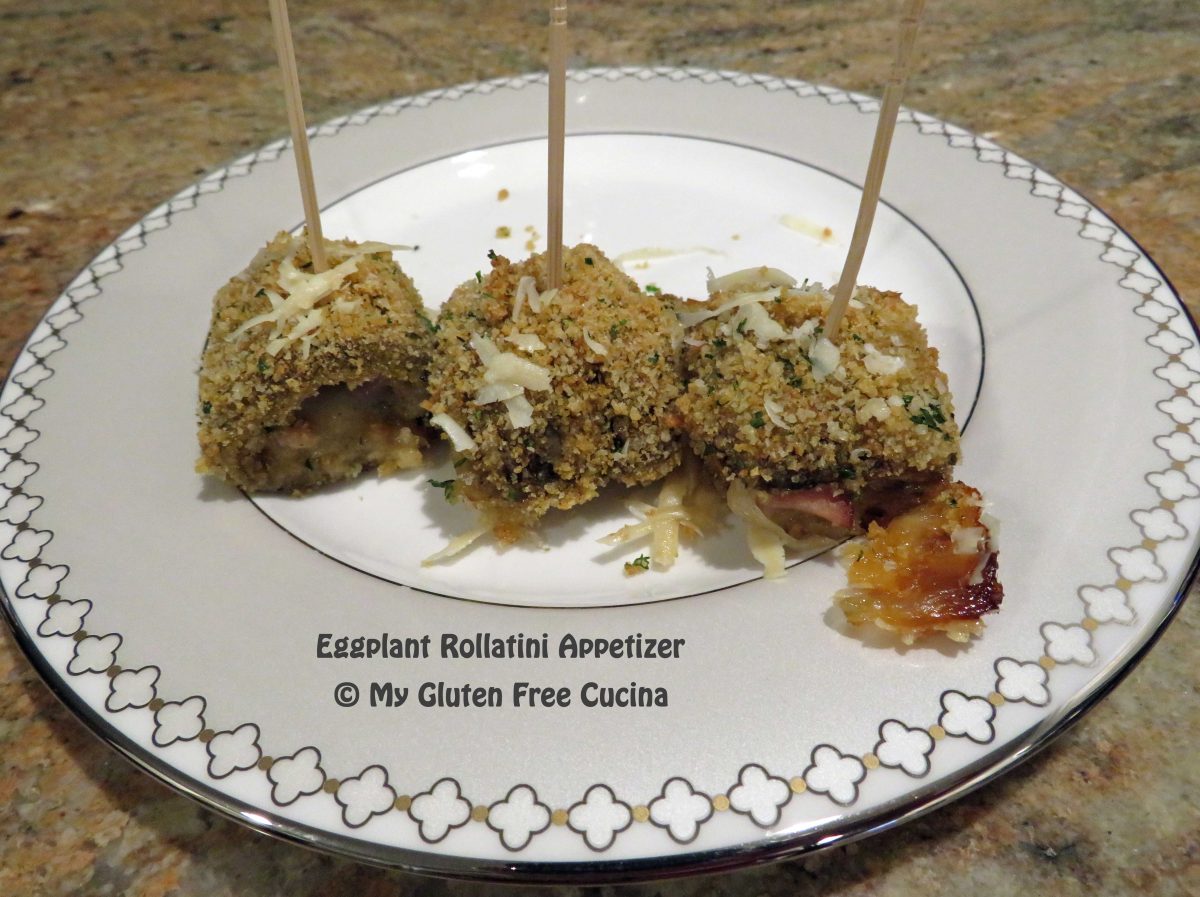
Gluten Free Eggplant Rollatini Appetizer

Bite sized Eggplant Rollatini are the perfect finger food for holidays, parties or game day!  If you are looking for a gluten free appetizer for your next get-together, give this recipe a try.  They are really tasty and different than the usual party snack.  This recipe will make 20-24.

This post contains affiliate links.

Ingredients:

Preparation:

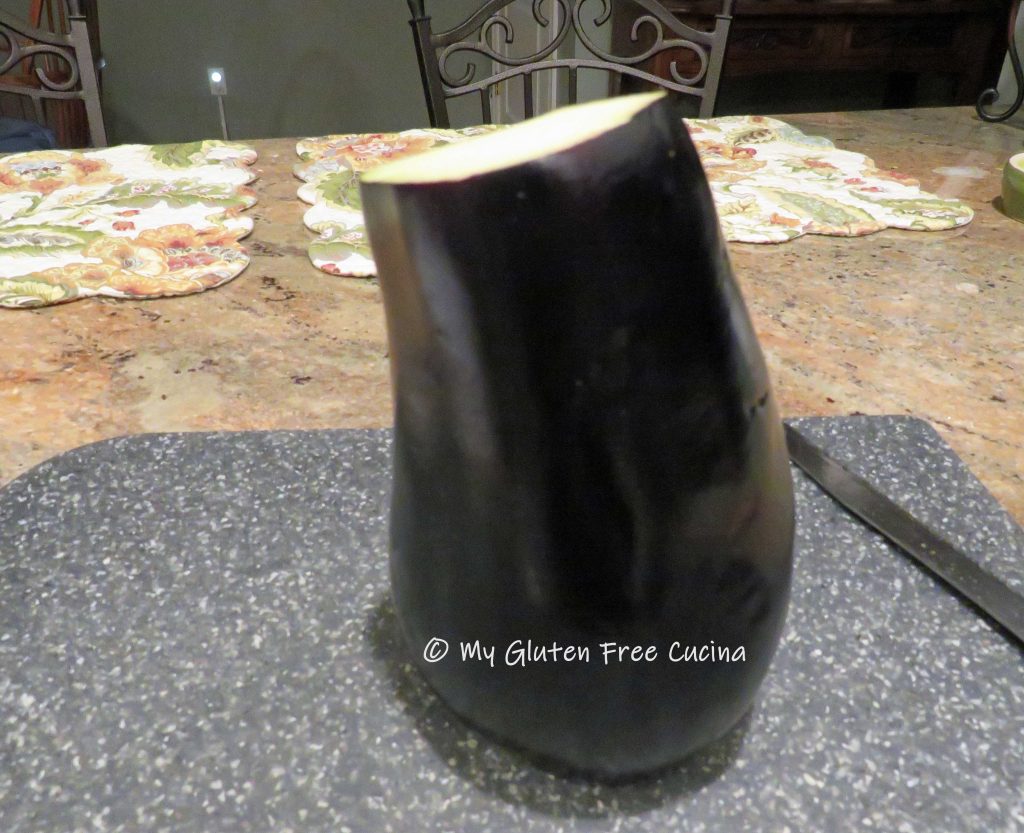
Cut the top and bottom off the eggplant, stand it on its side and peel.

Slice it lengthwise into 12 strips, make them as thin and even as you can.  Trim away any heavily seeded areas.

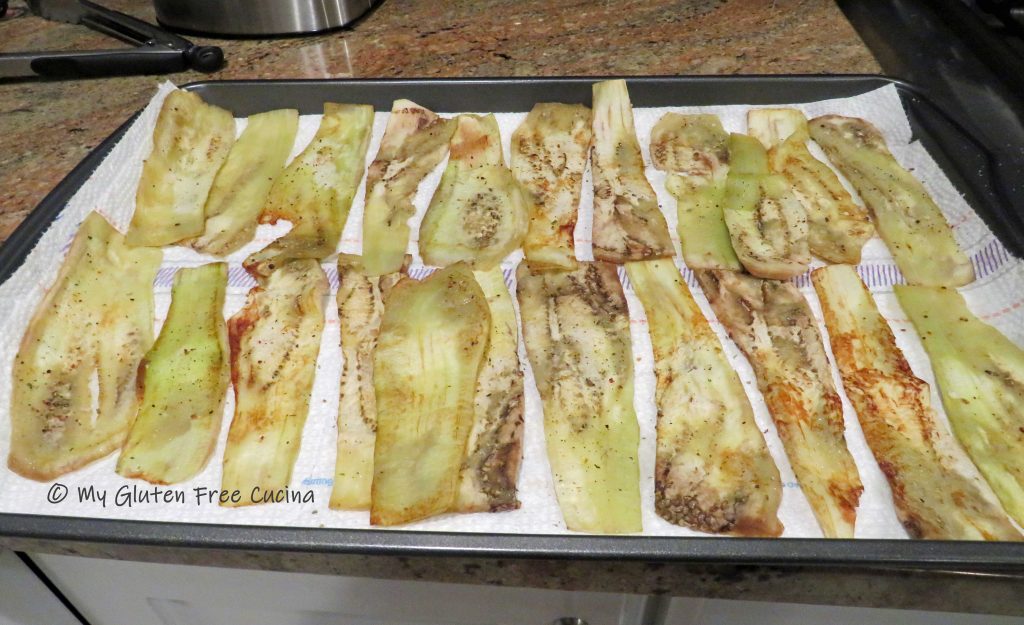
Heat a griddle or large nonstick skillet and coat lightly with olive oil.  Add the eggplant slices in one layer (do it in batches) and cook briefly on each side, enough so that they can be rolled without breaking.  Sprinkle with Italian seasoning.

Lay the cooked slices on a sheet pan lined with paper towel, to remove some of the moisture.

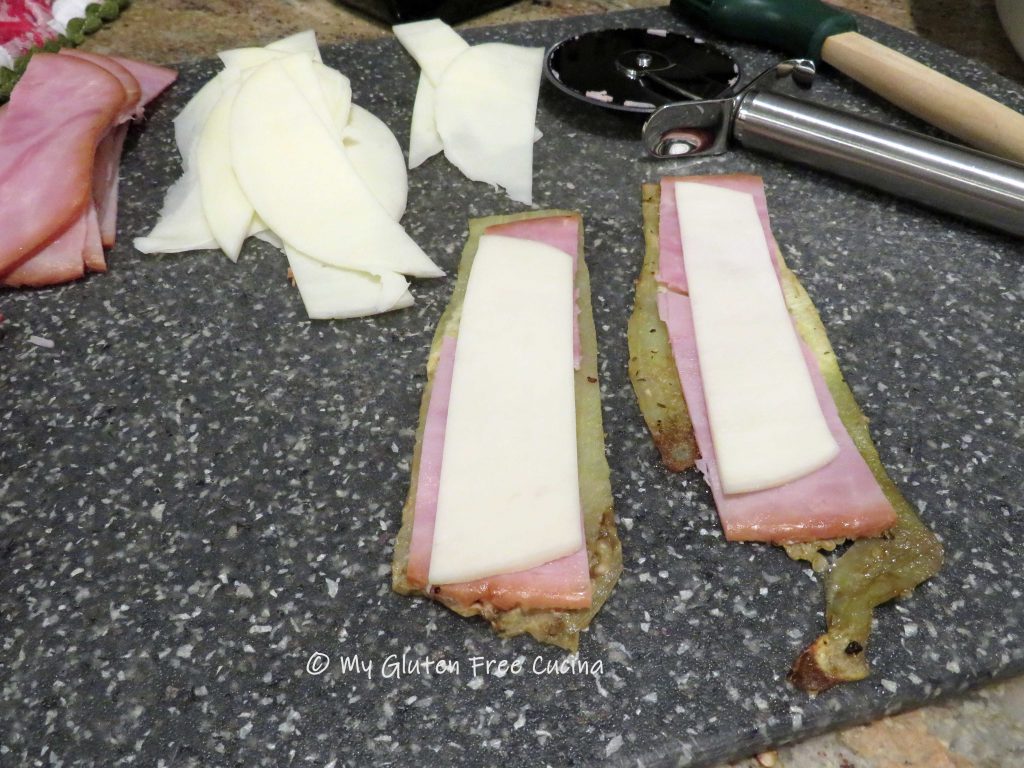
Cut each slice of eggplant down the middle lengthwise to form strips.  Layer each strip with a slice of ham and cheese.

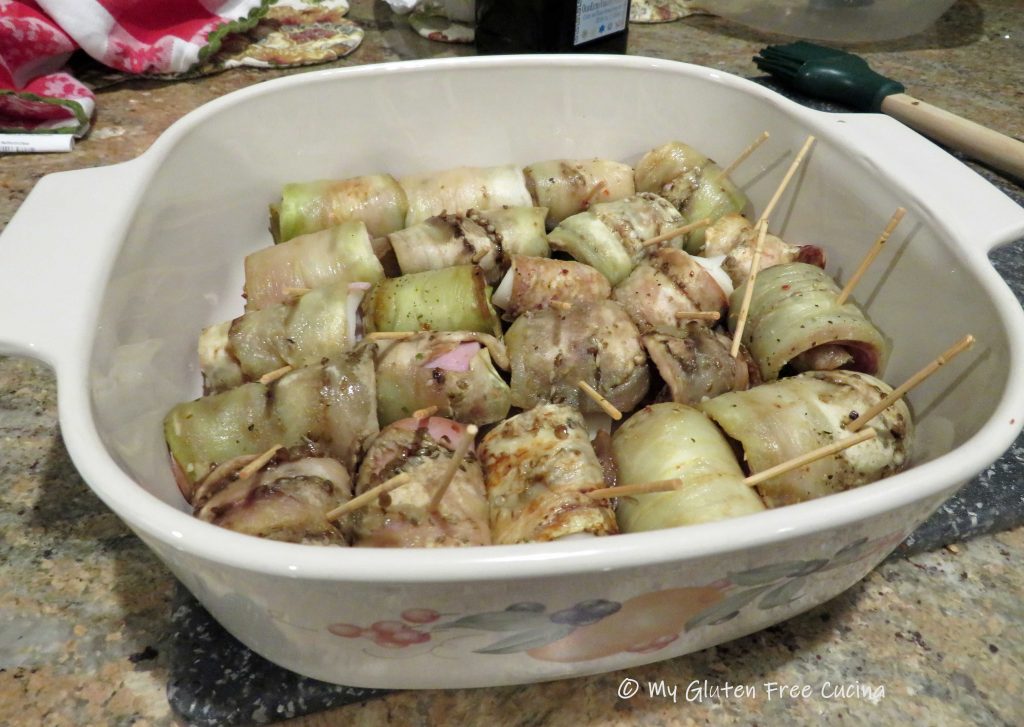
Carefully roll up the eggplant slices and place seam side down in a baking dish.  Use toothpicks to hold the bundles together.  You can make the recipe ahead to this point and refrigerate, in fact chilling the eggplant rolls at this point will make them easier to work with.

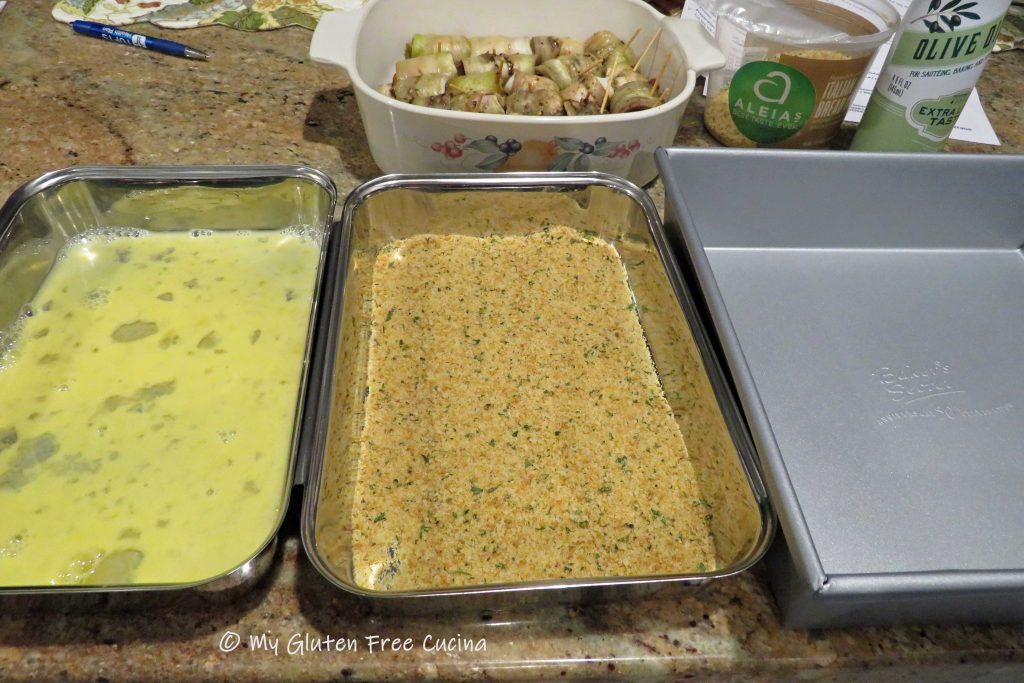
Preheat the oven to 325° and set up 2 breading trays.  In one bowl beat the egg with 1 tbsp. water.  Add the breadcrumbs to the other bowl.

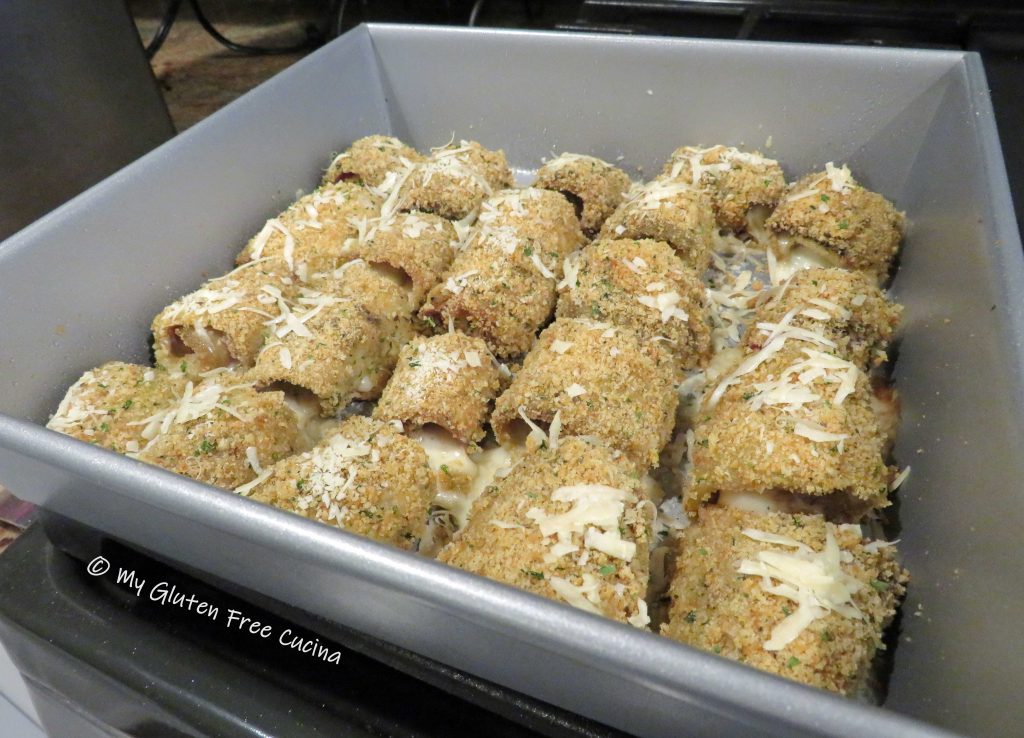
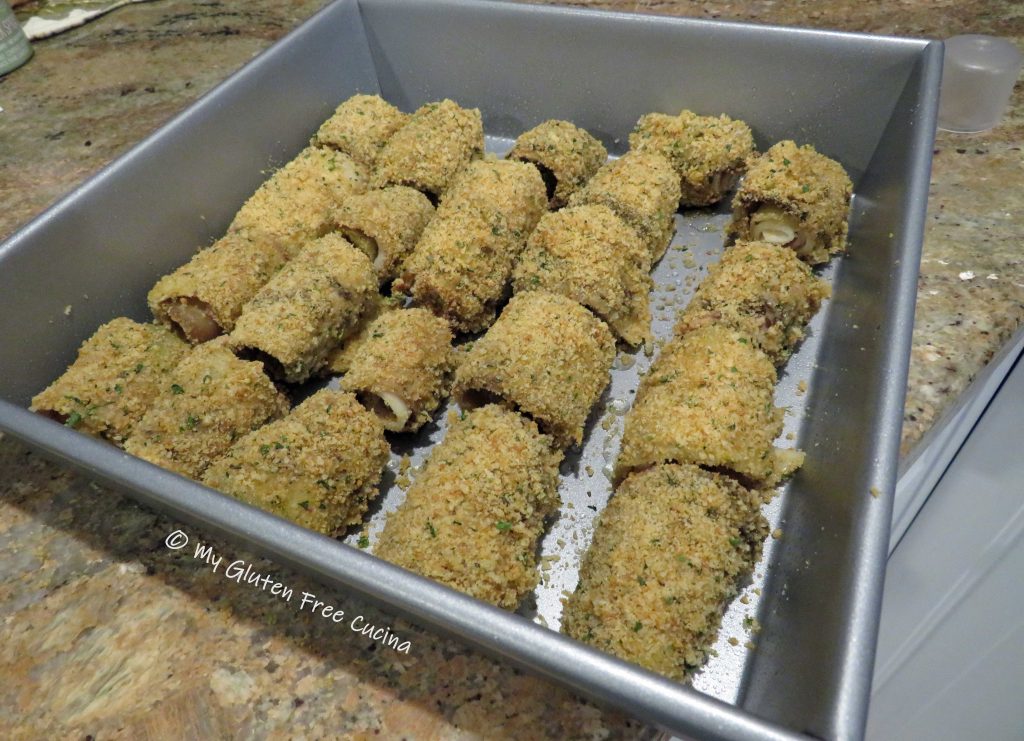
Mist a clean square baking dish with cooking spray.  Using your fingers, carefully pick up one bundle at a time and dip it in the egg, shaking off the excess.  Roll in breadcrumbs and place seam side down in the clean baking pan.  Continue until all the bundles are breaded.  Be sure to remove all toothpicks before baking.

Sprinkle with Parmesan cheese and bake for 25 minutes.

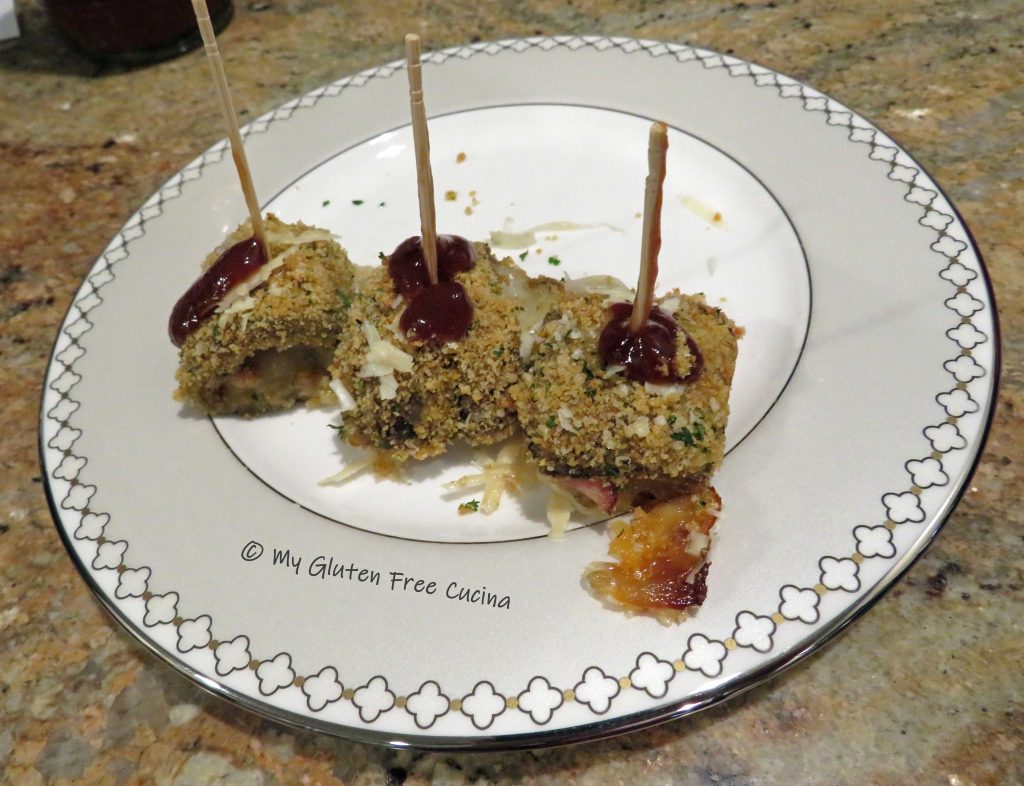
Finish with a drizzle of your favorite BBQ sauce and serve immediately or reheat just before serving.

Notes ♪♫ Most of the ingredients in this recipe are naturally gluten free.  Be careful when purchasing cold cuts.  Look for gluten free brands like Boar’s Head and be sure that they have a dedicated slicer for gluten free products at the deli.  For the breading, I always use Aleia’s Gluten Free Italian Breadcrumbs.  They are just the best!

Originally published 12/31/2019            Updated 12/27/2023


Print This Post Print This Post

Gluten Free Almond Biscotti

Biscotti are at the top of my list of treats to bake for Christmas visits and gifting.  Everyone loves this traditional Italian cookie, even Santa!

Before my Celiac diagnosis, I would bake biscotti every Christmas for my family, friends and co-workers.   I had truly missed this tradition, and so I resolved to make a gluten free biscotti with all the flavor and texture of my old recipe.

There are so many variations of biscotti, but this almond and dark chocolate combo is my favorite.  If you bake only one cookie for Christmas, let it be this one!

Almonds, almond flour and almond extract deliver a triple punch of flavor in these beloved Italian treats.  And you will be surprised at how easy they are to make!

This post contains affiliate links.

Ingredients:

  • 60 g. brown rice flour
  • 55 g. potato starch
  • 25 g. tapioca starch
  • 1 tsp. xanthan gum

OR

PLUS

Preparation:

Line a half sheet pan with parchment or use a silicone mat.  If using sliced raw almonds, you need to toast them first.  Just spread them in a single layer and bake for 5 minutes at 350º.  Watch that they don’t burn!  Set them aside in a bowl to cool down before adding to the batter.

If you have whole toasted almonds, you can skip this step and just blitz them a few times in an electric chopper.

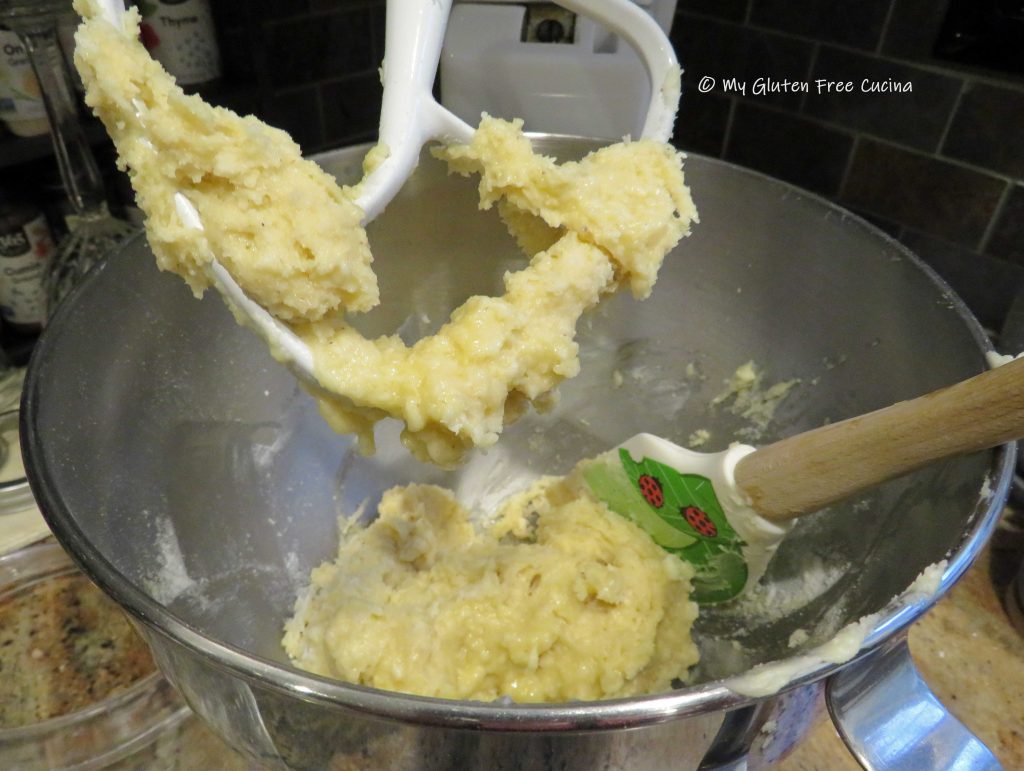
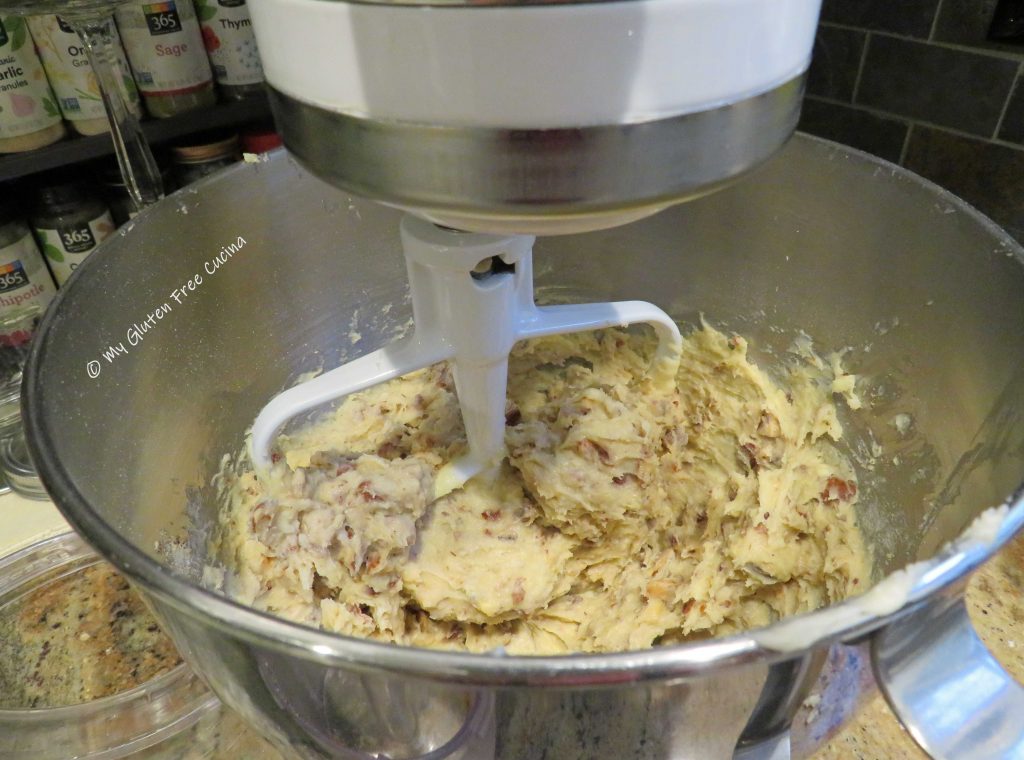
Next, whisk together the dry ingredients (through nutmeg).  In the bowl of a stand mixer, cream together the butter and sugar, beat for 3 minutes.

Next add the eggs, one at a time with the almond extract.

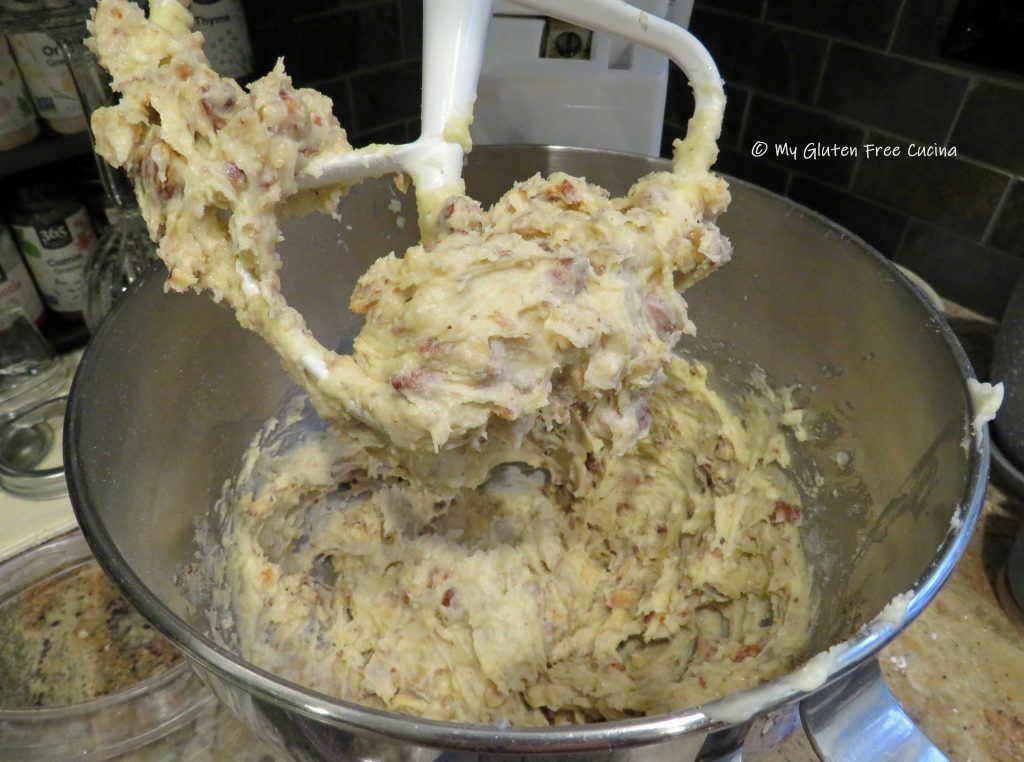
Beat well for 1 minute then incorporate the flour mixture, just until moistened.  Last add the nuts and mix on low for a few seconds to incorporate.

Spread the dough onto the lined baking sheet in a log shape.

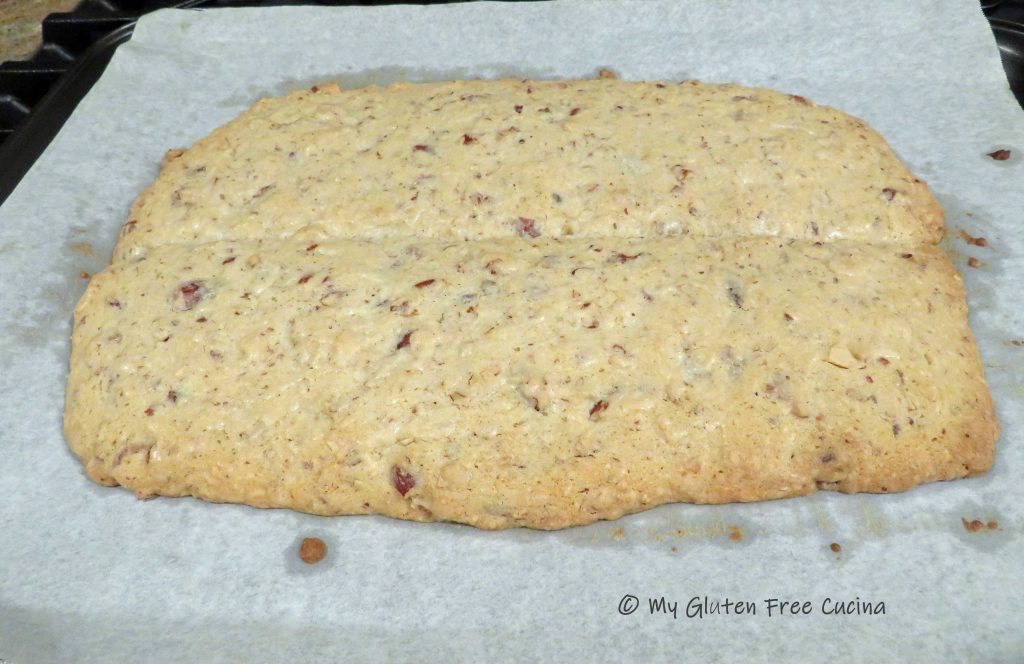
Use a spatula to smooth and pat it into a log, about 1/2″ thick.  Divide the log in 2 lengthwise (I used a dough scraper).  Run the spatula around the sides of the dough to smooth the rough edges.  Put the dough in the refrigerator for 20 minutes while you preheat the oven to 350º.

Then bake for 30 minutes.

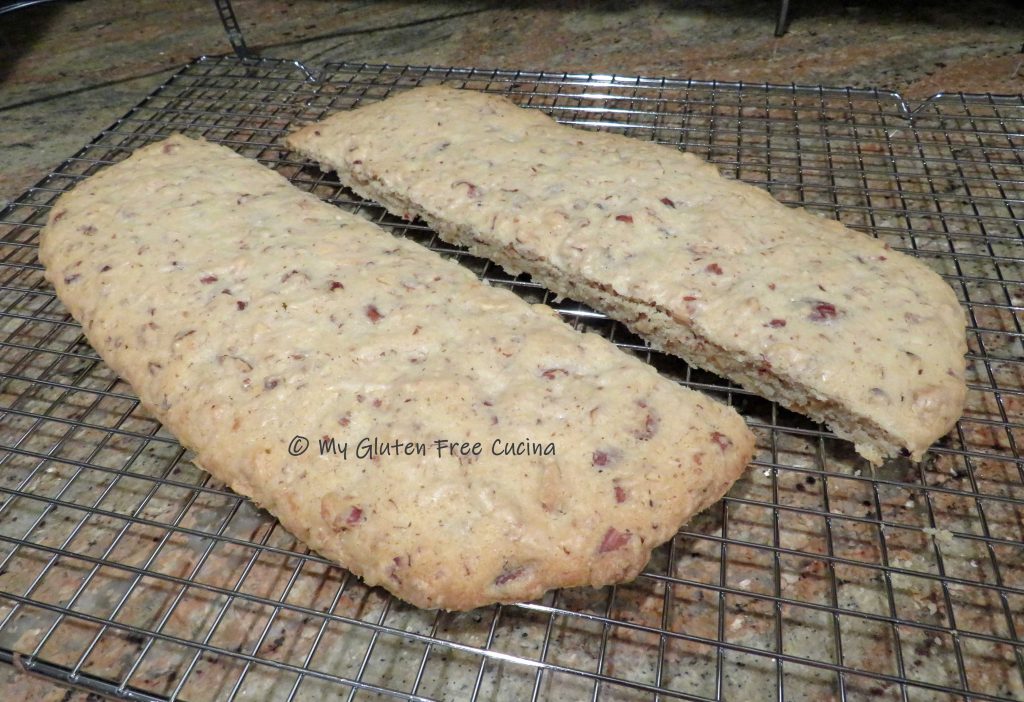
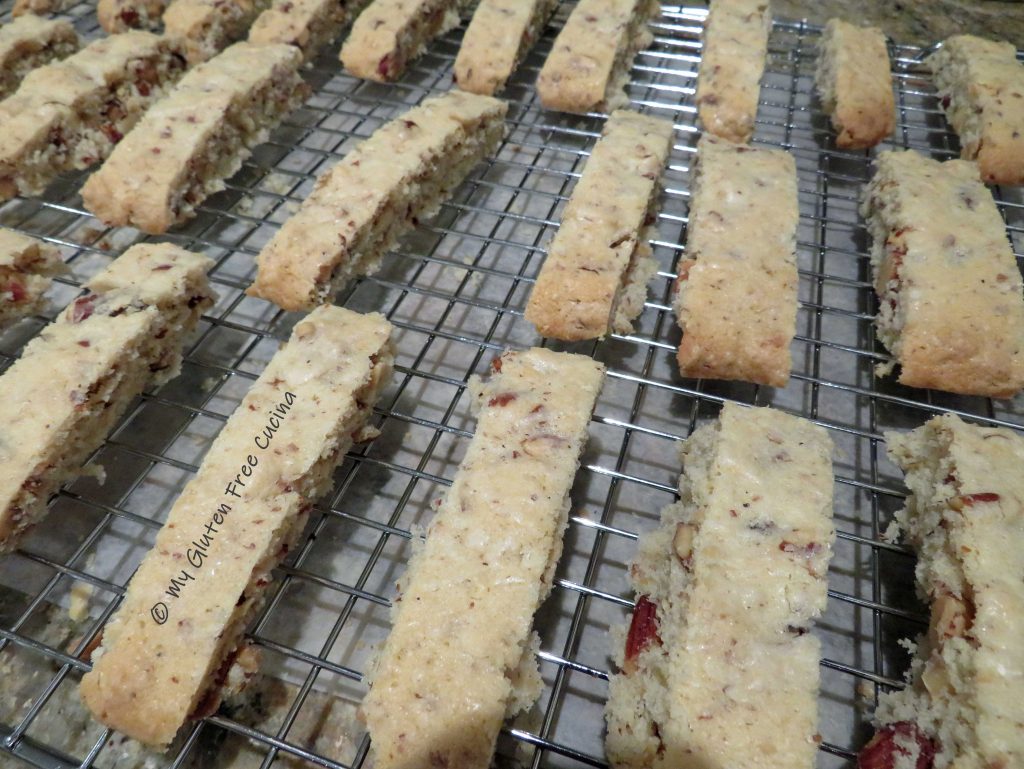
I divided the dough along the crease before moving it to a rack to cool.

Probably the biggest difference between gluten free biscotti and those made with wheat flour is that instead of waiting 5-10 minutes before slicing you will need to cool it for a full 30 minutes.  You might be tempted to slice into it right away, but don’t do it or your biscotti will crumble to bits!  Allow the cookies to set for at least 30 minutes and your patience will be rewarded.

If you like a crisp, hard cookie (great for dunking) return the sliced biscotti to the baking sheet cut side up and bake for 10 minutes longer.

Before frosting, arrange the biscotti on a rack over a sheet of wax paper to keep the counter clean, and let them cool completely.  Melt the dark chocolate in a double boiler or the microwave.  I like to use a spoon or spatula to drizzle the chocolate in a zig-zag pattern over each cookie.

Let the biscotti stand at room temperature until the chocolate is completely set, then arrange on a platter.  If you are in a hurry, you can place biscotti in the refrigerator for 20 minutes to speed things up.

Now that you know how easy it is to prepare this holiday treat, start your own Christmas tradition and bake up a batch for gifting your family and friends.

Merry Christmas from My Gluten Free Cucina

Notes ♪♫ Since gluten free baked goods are notorious for crumbling, I find that using sliced almonds rather than whole helps the biscotti hold together with nice, clean slices.  Either way, they taste great!


Originally published 12/29/2019                 Updated 12/15/23

Print This Post Print This Post

Hoisin Pork Fried Rice

One of the things I miss most since my Celiac diagnosis is Chinese takeout.  Oh, how I loved those noodles, veggies and fried rice!

At first glance you might think that many of these dishes are gluten free, but did you know that soy sauce contains gluten?  It’s true, traditional soy sauce is fermented with wheat so it is off limits on the gluten free diet.

Fortunately for us, there is a gluten free alternative called Tamari.  Since I started using it in my Asian inspired dishes, I have come to like Tamari even more than soy sauce.  Use it like regular soy sauce, as much or as little as you prefer.

Another favorite condiment, Hoisin Sauce can also be found in the Asian aisle in most markets.  It’s sweeter and much thicker than soy sauce and can be used for glazing and dipping.  In this recipe I use both Hoisin sauce and Tamari for a sweet and savory flavor profile.

This post contains affiliate links.

Ingredients:

  • 3/4 cup uncooked brown rice
  • 1 cup water
  • 1 cup gluten free chicken broth
  • 1/2 tsp. chive seasoning
  • 1/3 cup frozen peas, thawed
  • 1/2 cup sweet onion, diced
  • 1/4 cup celery, diced
  • 1/2 cup carrot, diced
  • 1/4 cup zucchini, diced
  • 1/4 cup mushroom, diced
  • 2 tbsp. red bell pepper, small dice
  • 1 large garlic clove, minced
  • 1/2 lb. boneless pork
  • gluten free Hoisin sauce
  • 1 egg
  • 1 tbsp. water
  • sesame oil
  • cooking spray
  • gluten free soy sauce or Tamari
  • garlic powder
  • ginger powder
  • fresh scallions or chives for garnish

Preparation:

Cook the rice according to package directions.  I did mine in a rice cooker with 1 cup gluten free chicken broth, 1 cup water and 1/2 tsp. chive seasoning.  This step can be done ahead, in fact the rice works better in this recipe if it has been cooked in advance and refrigerated.

While the rice cooks, prep all the vegetables.  You should have about 2 cups of diced veggies, total.  Dice the pork and toss it with 1 tbsp. Hoisin sauce.  Sprinkle with garlic and ginger.

With the prep work done, the rest of the dish comes together quickly.  Heat a large nonstick skillet over medium low and mist with cooking spray (I like Bertolli because it doesn’t damage my nonstick pans).  Whisk the egg with 1 tbsp. water and scramble.  Crumble the egg and set aside.

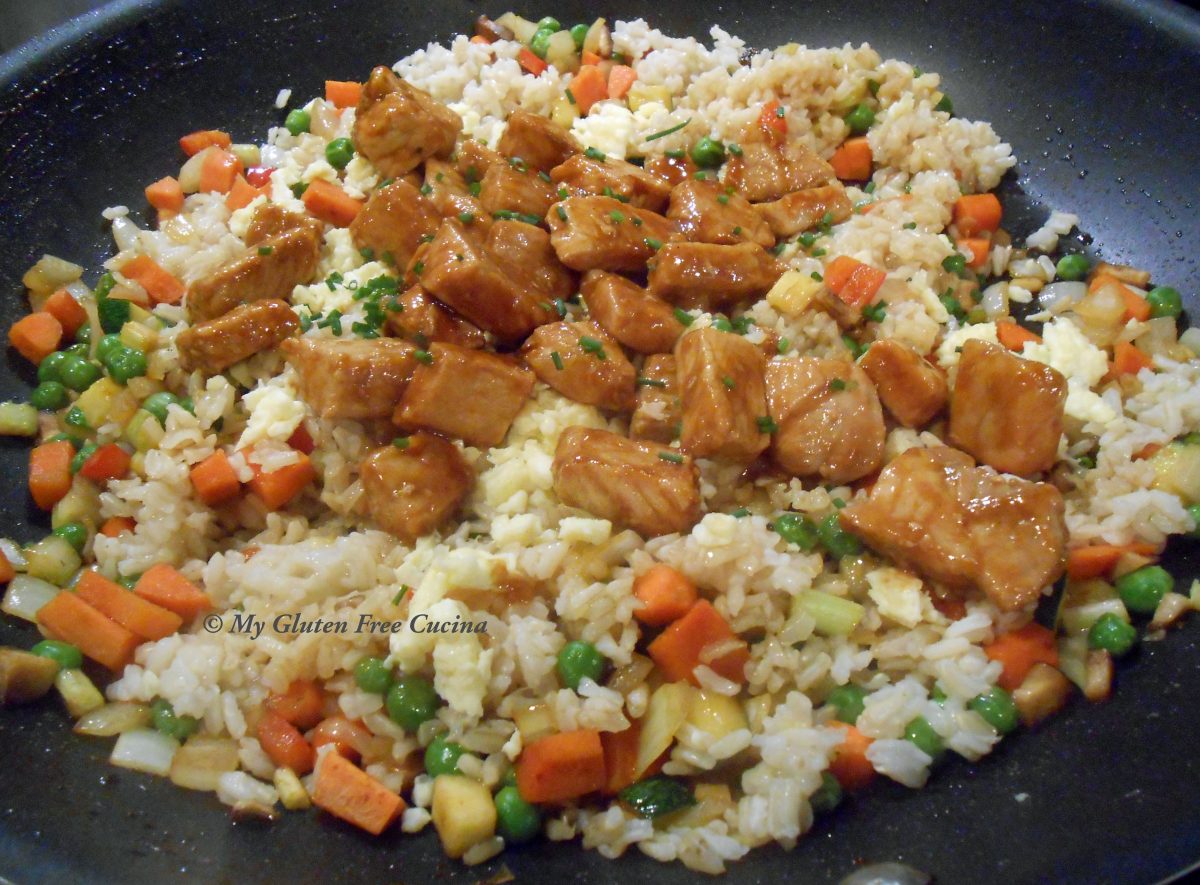
Next, add 2 tsp. sesame oil to the skillet and cook the pork.

Transfer the pork to a clean bowl and drizzle with more Hoisin sauce.  Wipe the skillet clean and cook the veggies in 2 tsp. sesame oil, about 5 minutes.  Sprinkle with garlic and ginger and drizzle with Tamari.

Add the cooked rice and egg back to the skillet with more Tamari.

Top with the pork, more Tamari and toss to heat through.

Garnish with fresh scallions or chives and plate.

I just loved this dish, all the flavors that I have been missing!

Notes ♪♫ I love San J brand Tamari and Hoisin sauce.  Both are clearly labeled gluten free and can be found in markets and online.

Originally posted 10/21/2019           Updated 12/13/2023

[print_link]

Gluten Free Jordan Marsh Blueberry Muffins

If you are from the Northeast and of a certain age, you will no doubt remember Jordan Marsh, the iconic department store.  It was my mother’s favorite store back in the day, and I vividly recall buying one of my prom dresses there, 50 years ago (eek!).

Before food courts and fast food, the Jordan Marsh Bakery was a popular destination for shoppers to refuel and continue on with their day, i.e., you didn’t have to go home if you got hungry- smart!

Although the store chain closed in the 1990’s, their Blueberry Muffins remain legendary to this day.  I recently read an interesting article about the origins of this recipe in the New York Times, which claimed it was adapted from an 1847 cookbook called The New England Economical Houskeeper and Family Receipt Book.

Wherever its origin may have been, the muffins are not only delicious, but only require a substitution of one ingredient to be gluten free.  How about that?

This post contains affiliate links.

Ingredients:

  • 300 g. (about 2 cups) Better Batter Original Gluten Free Flour
  • 1/2 tsp. salt
  • 2 tsp. baking powder
  • 1/2 cup milk (I used 2%)
  • 1 stick of unsalted butter, softened (not melted)
  • 1 cup of sugar
  • 2 large eggs
  • 1 tsp. vanilla extract
  • 6 oz. package (1 cup) fresh blueberries

*** Get 30% off your full price purchase at Better Batter when you use my code MGFC30***

Preparation:

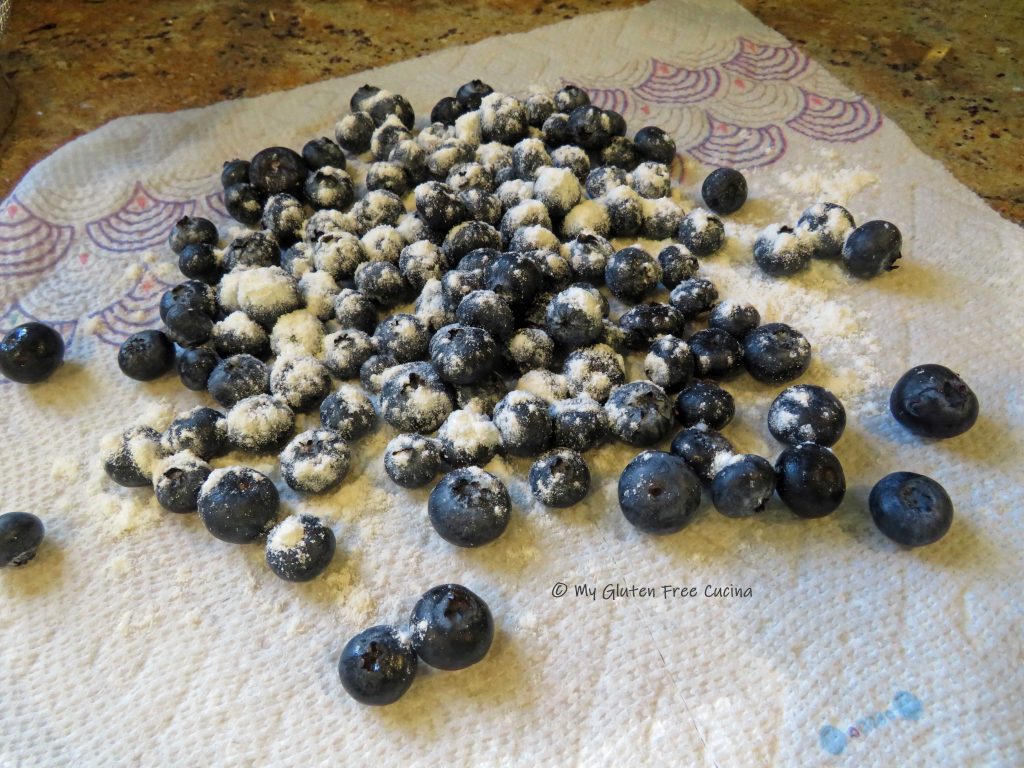
Take the butter out of the refrigerator and let it soften at room temperature.  Mist a 12-cup muffin pan with cooking spray and preheat the oven to 375 degrees.  Rinse and dry the blueberries on a clean dishtowel.

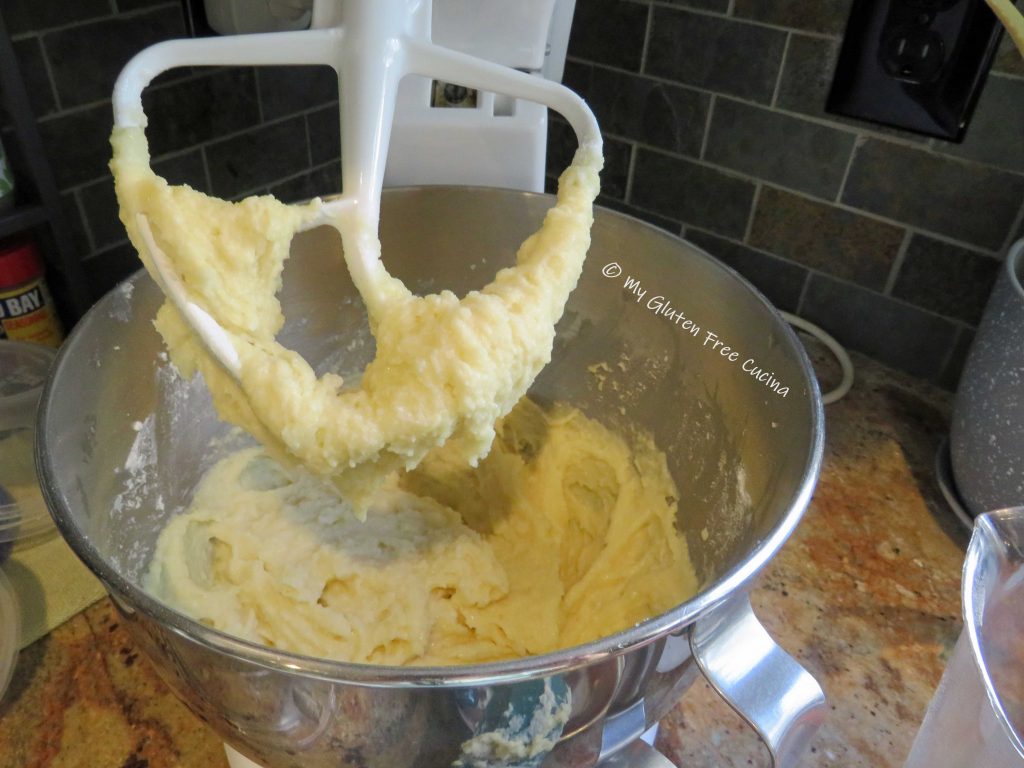
In the bowl of a stand mixer, cream together the softened butter and sugar with the whisk attachment.  Add the eggs and vanilla extract and beat until well combined.

In a separate bowl, whisk together the flour, salt and baking powder.  Reserve 1 tbsp. to sprinkle over the blueberries.

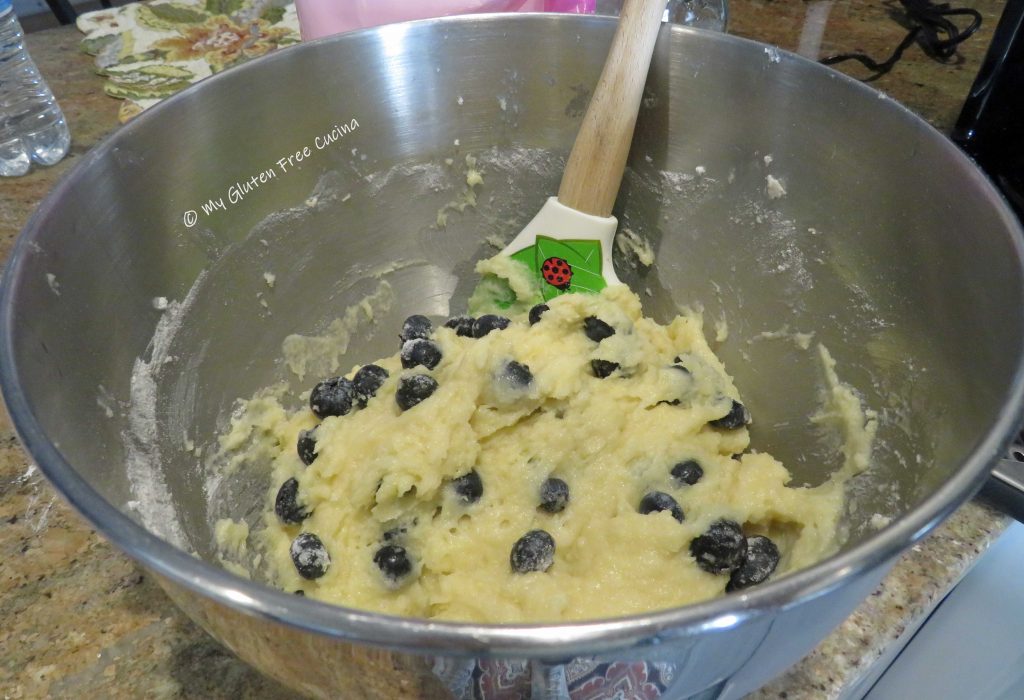
Add the dry ingredients to the mixer bowl along with the milk and combine with the paddle attachment until moistened.

Crush half of the blueberries with a fork and fold into the batter with the remaining whole blueberries.

Spoon the batter evenly into the prepared muffin pan.  Dip a small spatula in warm water and use it to smooth out the tops.  If you wish, you can sprinkle the tops of the muffins with more sugar.

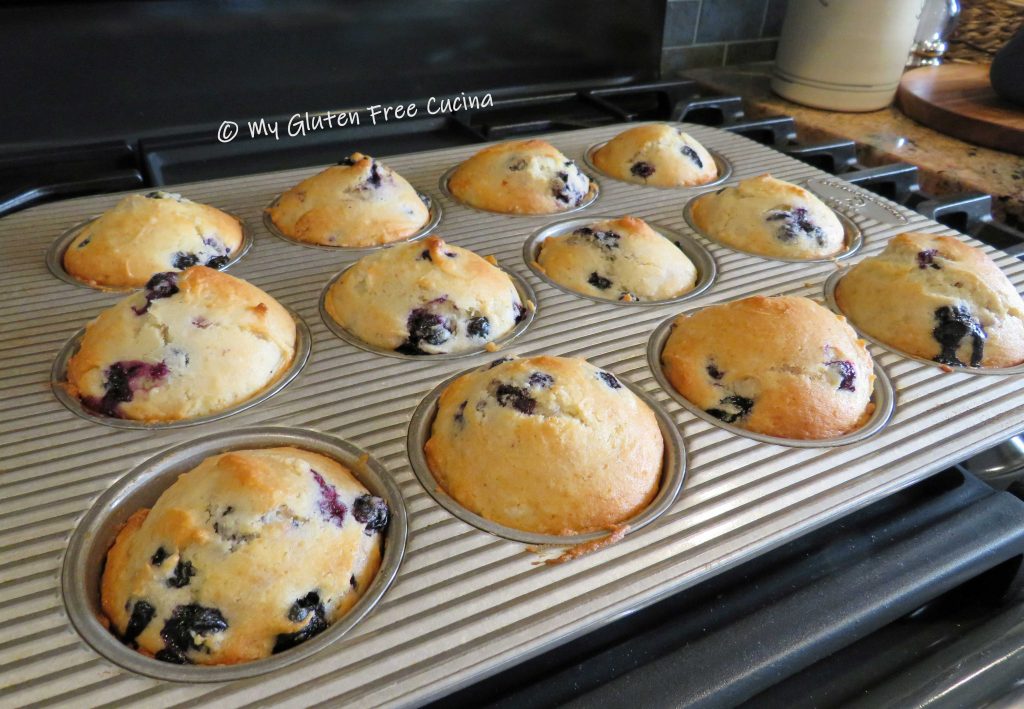
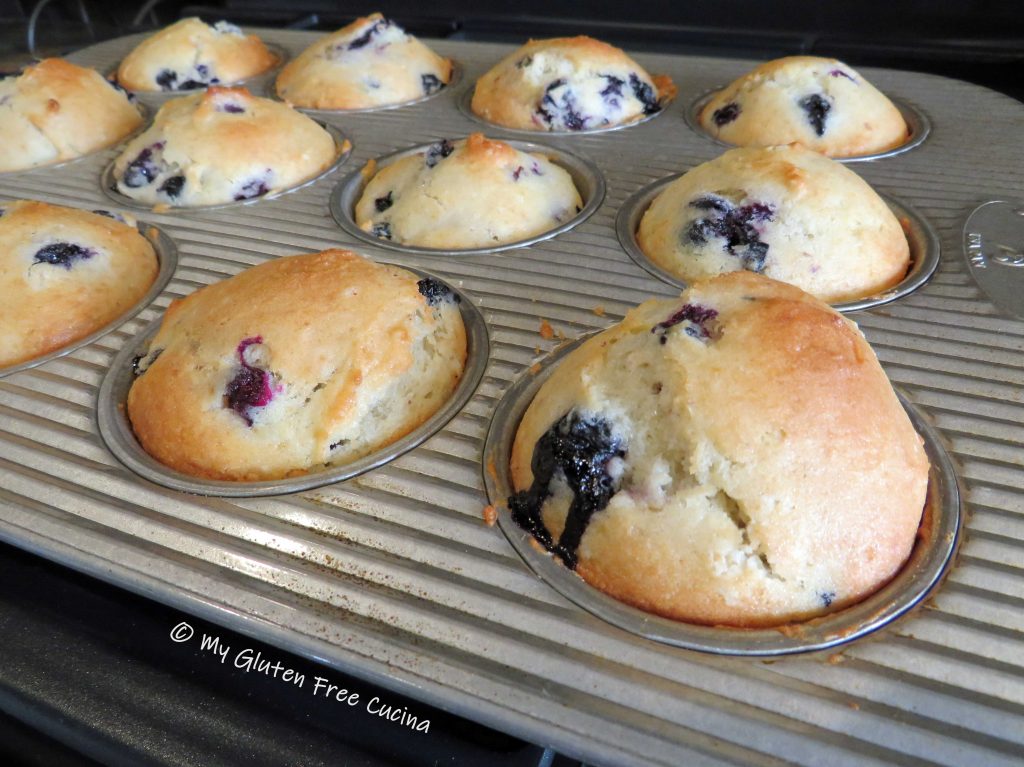
Bake for 25 minutes at 375 degrees.  Test with a toothpick.  Cool in the pan for 10 minutes then transfer to a rack.  Let them stand at room temperature for at least 4 hours.  I’ve got my eye on that big one in front!

Leftovers, if you have any can be frozen for an easy breakfast.

Notes ♪♫ For muffins and quick breads, I use and recommend Better Batter Original Gluten Free Flour.  Most recipes can be converted at 120-150g. per cup.  If you use a different brand, be sure that your flour contains xanthan gum.  Even if you do not weigh any of your other ingredients, I encourage you to invest in a kitchen scale to weigh the flour.

Print This Post Print This Post

Gluten Free Shrimp Scampi

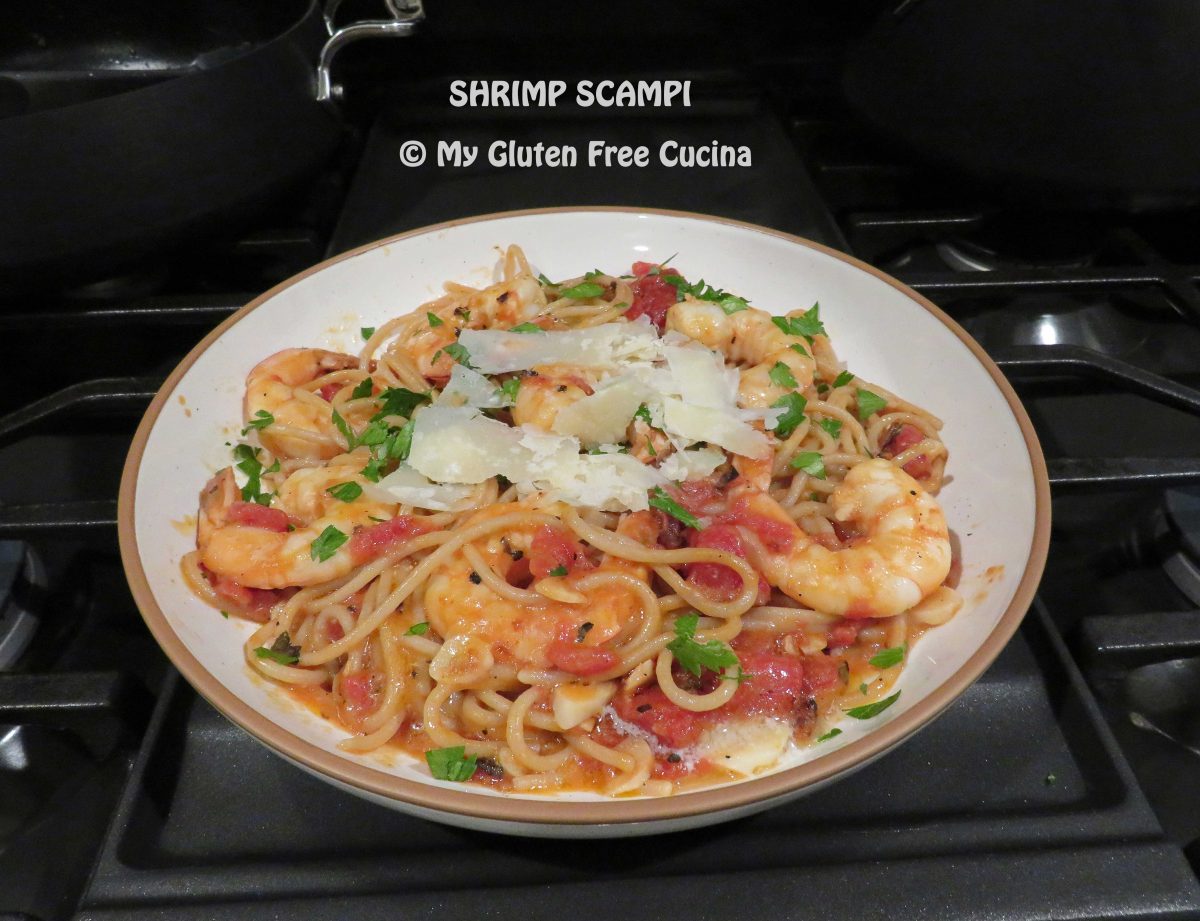
Sometimes you have a meal in a restaurant, and it just sticks in your mind until you finally take the time to recreate it at home.  This is one of those meals.  I love seafood pasta and Shrimp Scampi has to be at the top of my list for all-time favorites.

Did you know this dish is super-fast and easy to prepare?  Yes, a five-star dinner that is quick enough to make on a weeknight!

Dinner for two

This post contains affiliate links.

Ingredients:

  • 2 garlic cloves, sliced thin
  • 1/8 tsp. red pepper flakes
  • 2 tbsp. olive oil
  • 1 cup (about half of a 14.5 oz. can) fire roasted diced tomatoes
  • 1/2 lb. large shrimp, peeled and deveined
  • 1/2 tsp. sea salt
  • 2 tbsp. white wine
  • 2 tsp. lemon juice
  • 2 tbsp. unsalted butter
  • 4 oz. gluten free spaghetti
  • 2 tbsp. shaved Parmigiano Reggiano
  • 1 tbsp. chopped Italian parsley

Preparation:

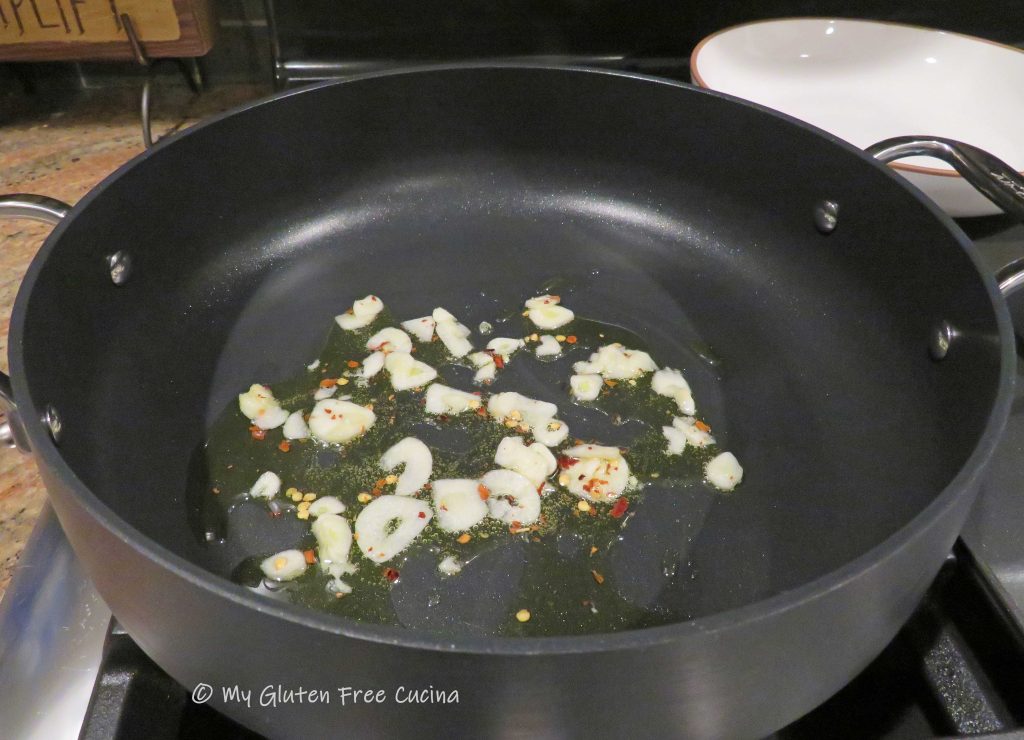
Heat the olive oil in a nonstick deep skillet or Sauteuse Pan.  Add the sliced garlic and red pepper flakes.  Cook for 30 seconds.

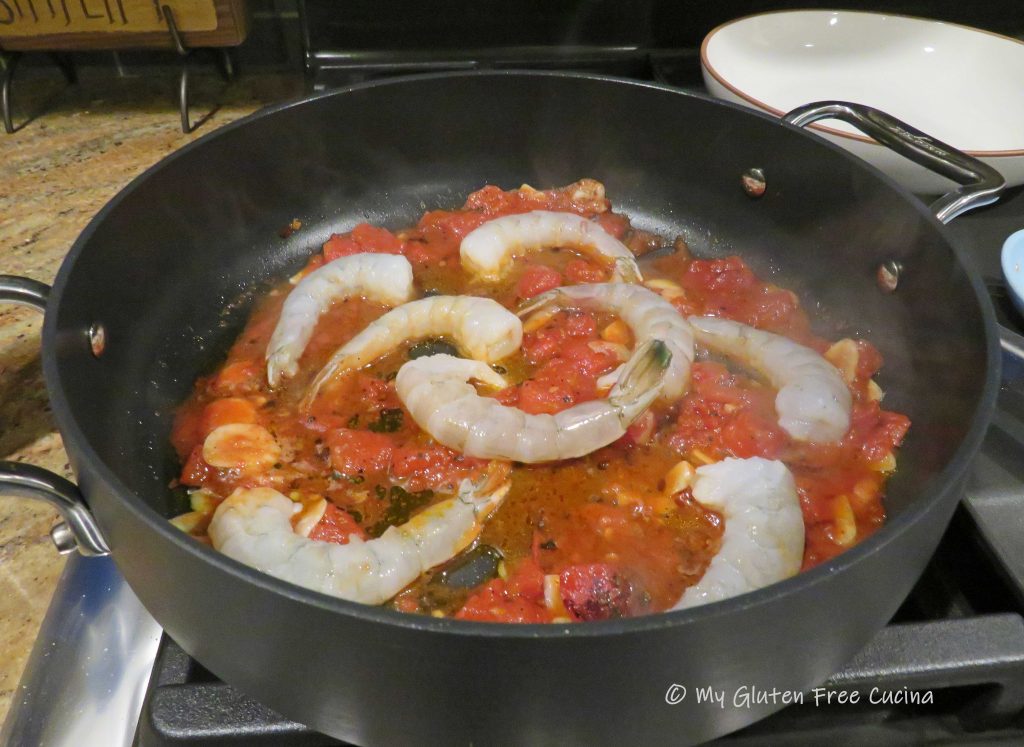
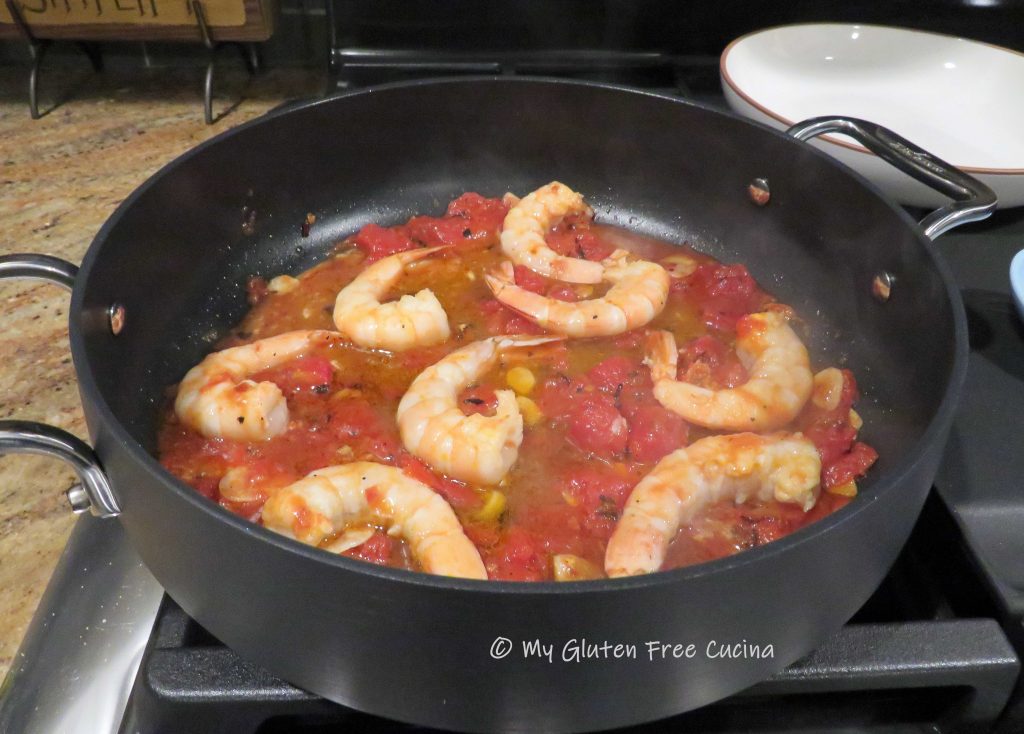
Add the tomatoes, salt, and wine.  Simmer 10 minutes.  Heat a large pot of salted water for the spaghetti and bring to a boil.  Add the spaghetti and set your timer for 1 minute less than the package directions.

When you have 8 minutes to go on the spaghetti, add the shrimp to the sauce with the lemon juice.  Cook for 3 minutes then turn to finish.

Drain the spaghetti and add it to the pan with 2 tbsp. unsalted butter.  Cook for 1 minute longer to marry the flavors.

Transfer to a serving bowl and garnish with fresh Italian parsley and shaved Parmigiano.

Notes ♪♫ I know the food police will say that combining cheese with seafood flies in the face of Italian culinary tradition.  But when I had this dish at a restaurant, it came topped with Parmesan shavings and let me tell you it was out of this world!  Use the good stuff, real Parmigiano Reggiano, shaved fresh right before serving.  I am 100% Italian and trust me, it’s wonderful.

Print This Post Print This Post

Gluten Free Multigrain Sandwich Loaf

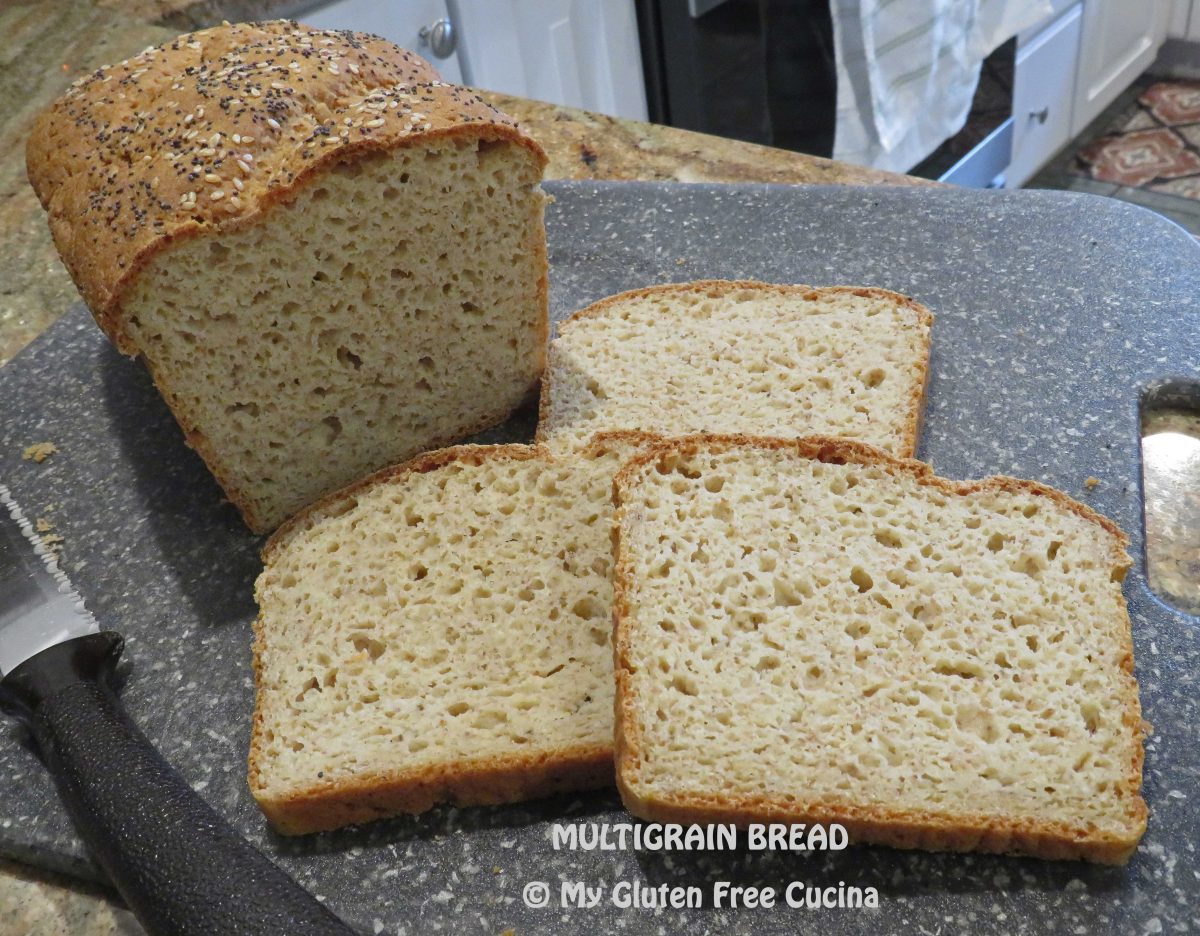
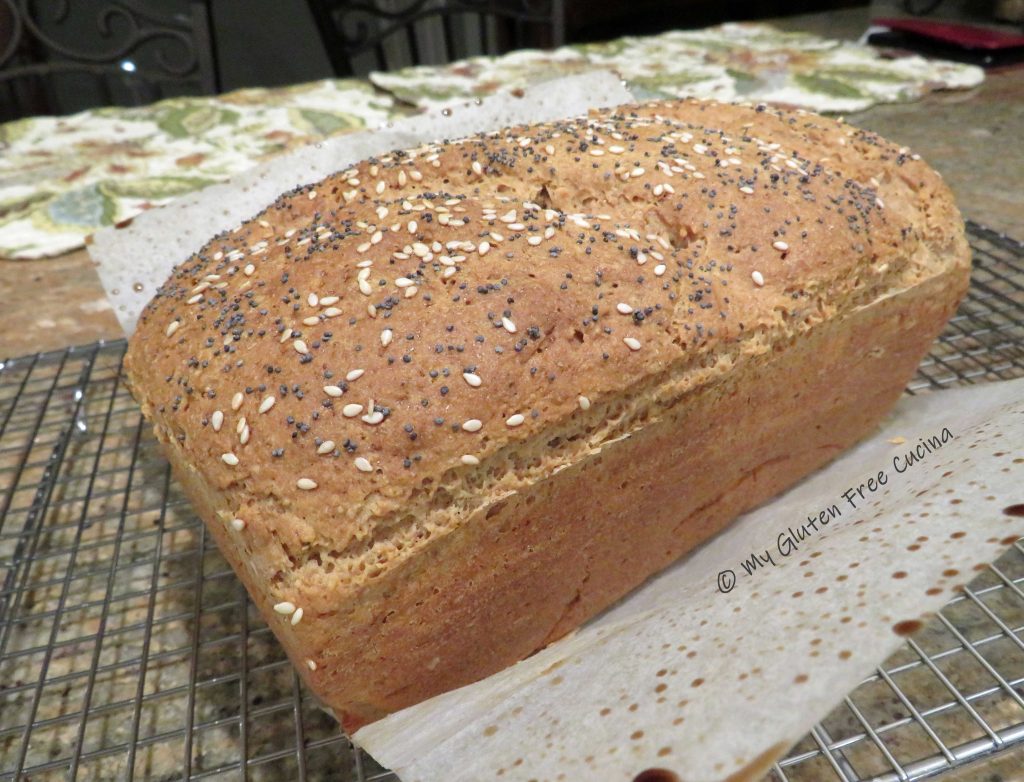
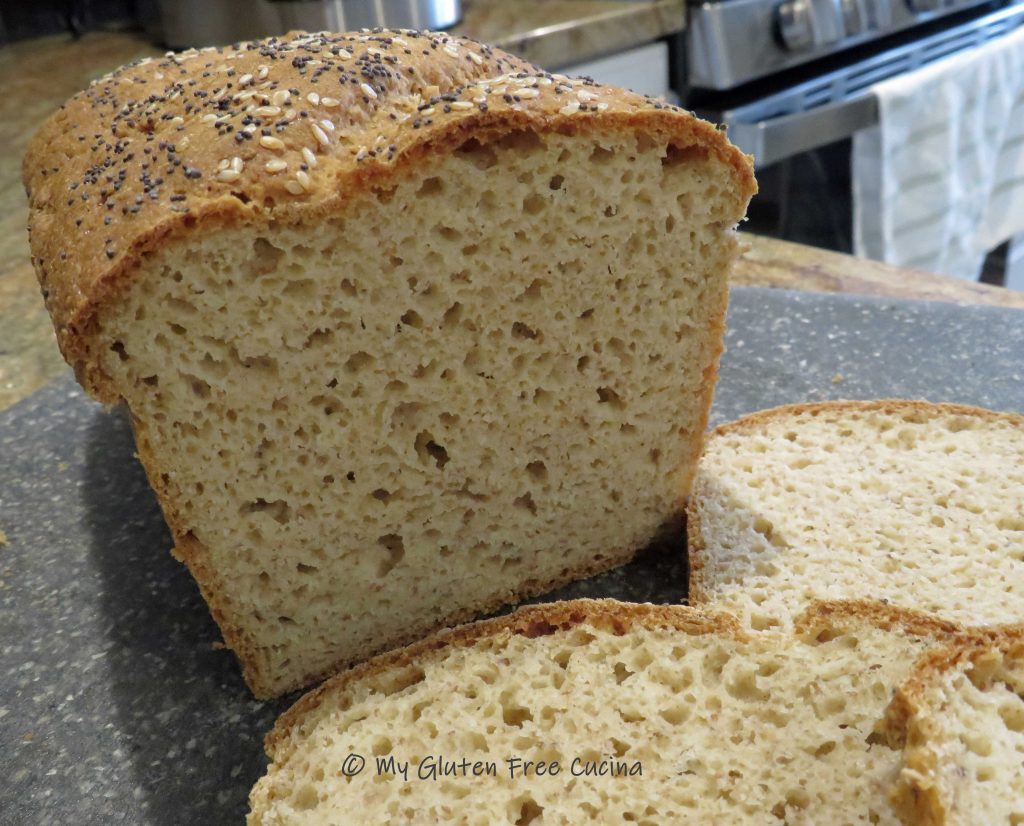
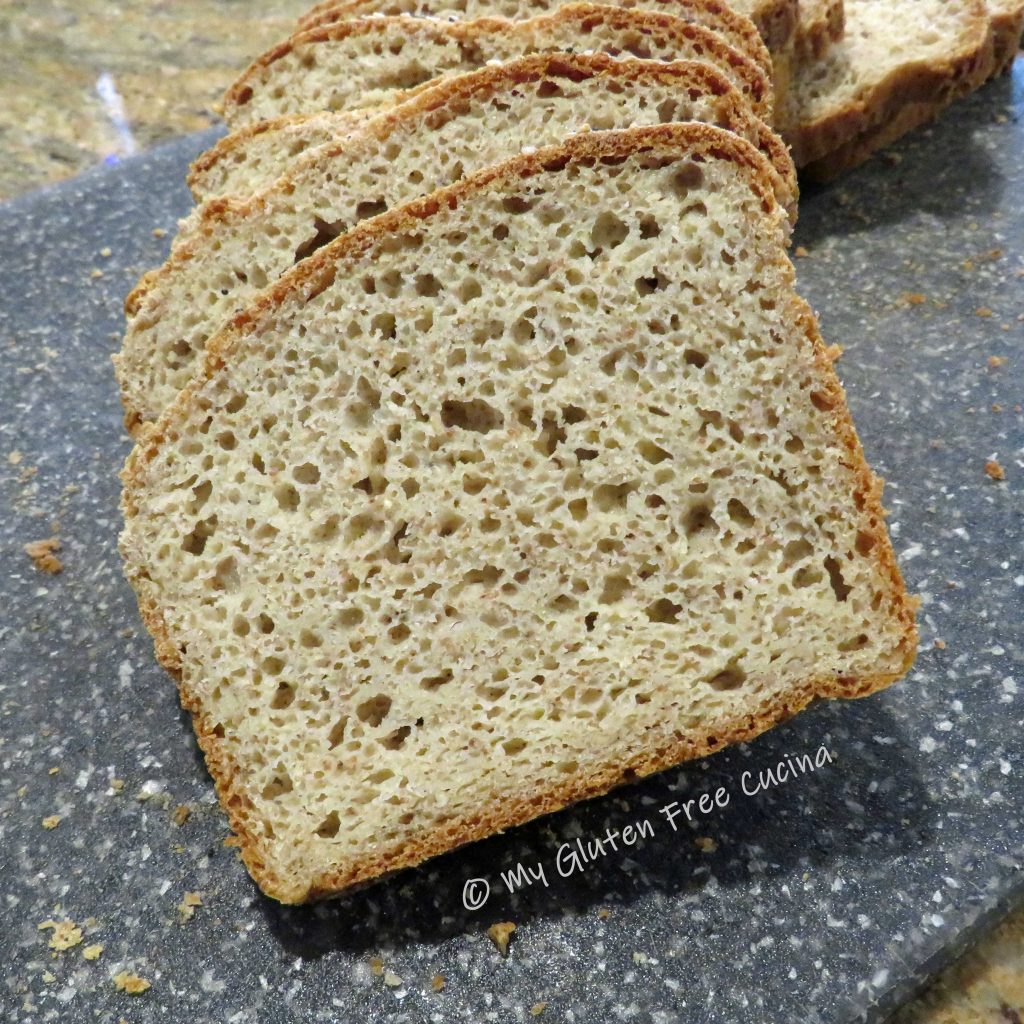
Just look at that beautiful loaf of bread!  In the gluten free universe, this is what dreams are made of!  Not only does it taste great, but it is also nutritious and wholesome, made with a combination of grains that delivers real bread flavor without the gluten.

If you like to mix up your own flour blends, then this recipe is for you!

I adapted this recipe from one of my own, Gluten Free Sandwich Thins.  I always made them for lunch when I worked in an office, but now that I’m home most of the time I find that I like to have sliced bread in the house.  When you make a loaf, you can slice it as thin or as thick as you want for sandwiches, toast or just to go with dinner.

This bread is wonderful for sandwiches.  It doesn’t need toasting, doesn’t fall apart in your hands and the middle is not wet or tacky at all.  It’s a gluten free dream come true!

This post contains affiliate links.

Ingredients:

  • 1 tbsp. yeast
  • 1 tbsp. ground chia seeds
  • 1 tbsp. sugar
  • 1/2 cup warm water
  • 127 g. whole grain sorghum flour
  • 183 g. brown rice flour
  • 56 g. tapioca starch
  • 56 g. arrowroot starch
  • 56 g. potato starch
  • 21 g. teff grain, ground
  • 1 tsp. gelatin
  • 1.5 tsp. xanthan gum
  • 1 tsp. salt
  • 1 large egg
  • 3 tbsp. olive oil
  • 3/4 cup warm milk (I used 2%)
  • 1/2 cup warm water
  • 2 tbsp. milk, for brushing
  • sesame seeds
  • poppy seeds

Preparation:

Line a 1 lb. loaf pan with parchment paper and mist with cooking spray.

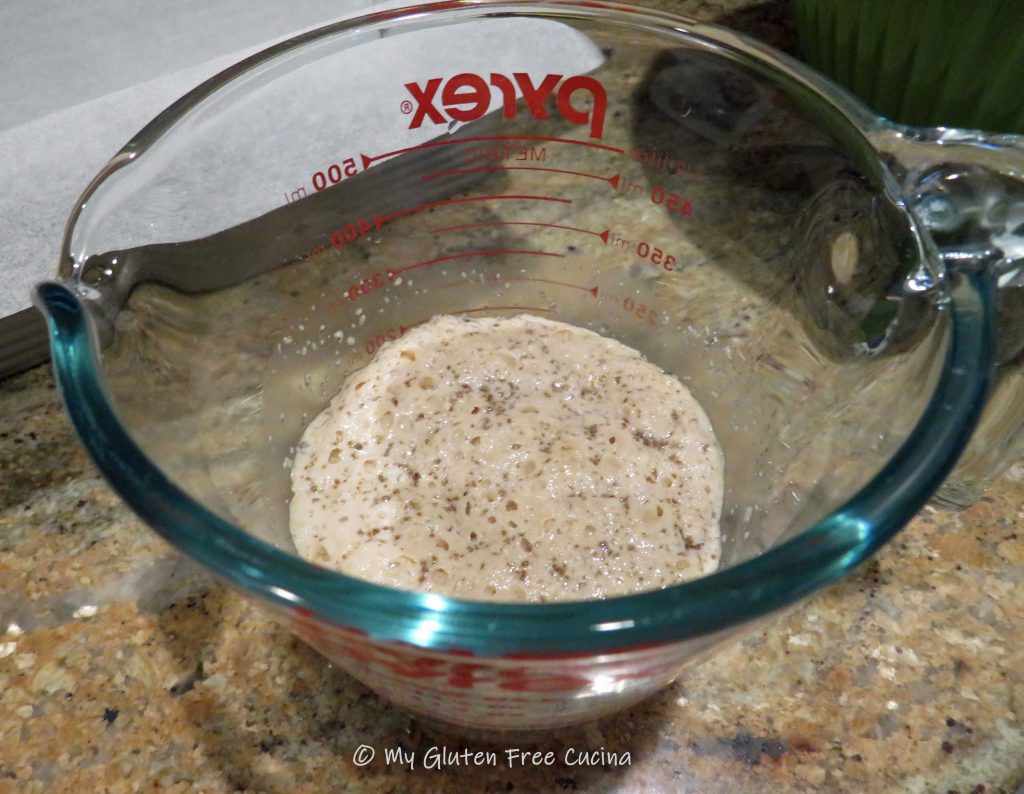
Combine the yeast, ground chia seeds, sugar and 1/2 cup water in a small bowl or measuring cup.  Let the mixture rest for 10 minutes.
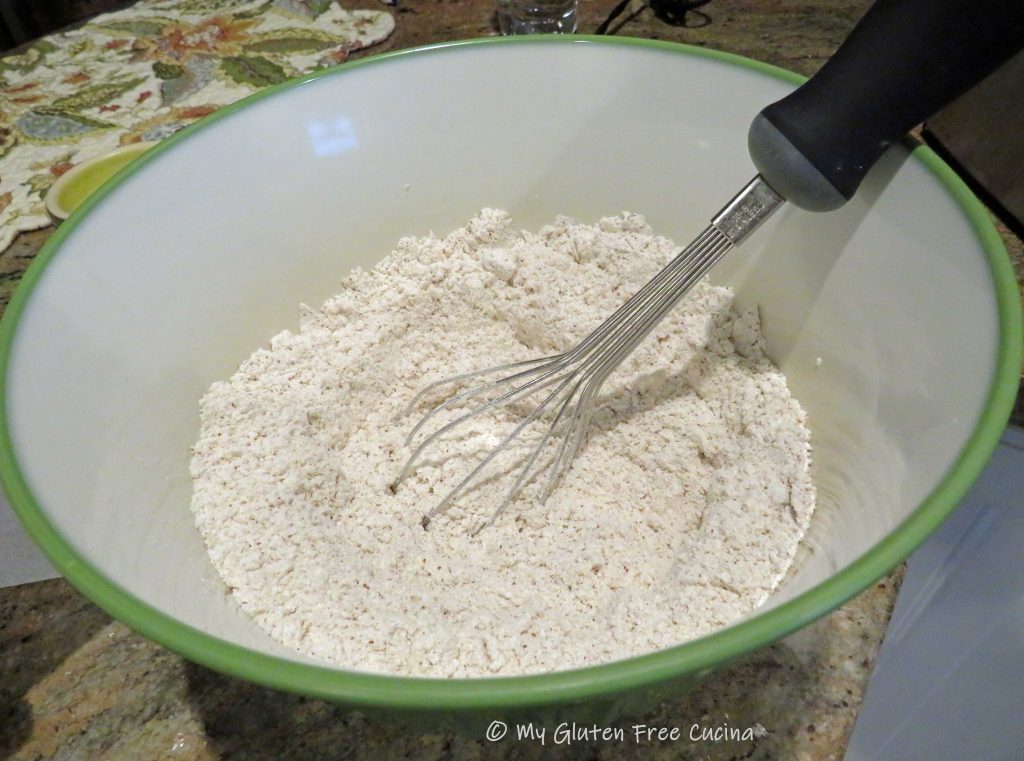
In a separate bowl, whisk together all of the dry ingredients, sorghum flour through salt.

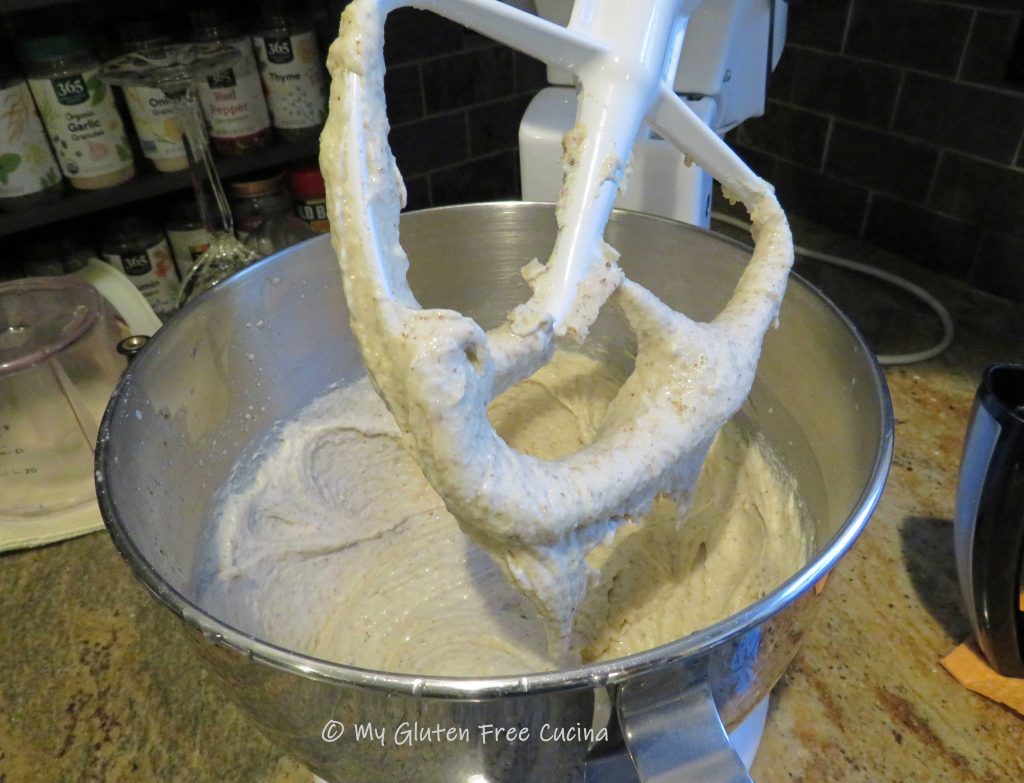
When the yeast has bloomed, add the mixture to the bowl of a stand mixer along with the egg, olive oil, milk and water.

Whisk it all together, and then add the dry ingredients into the wet.  Mix for 5 minutes with the paddle attachment.  The dough will be heavy and wet.
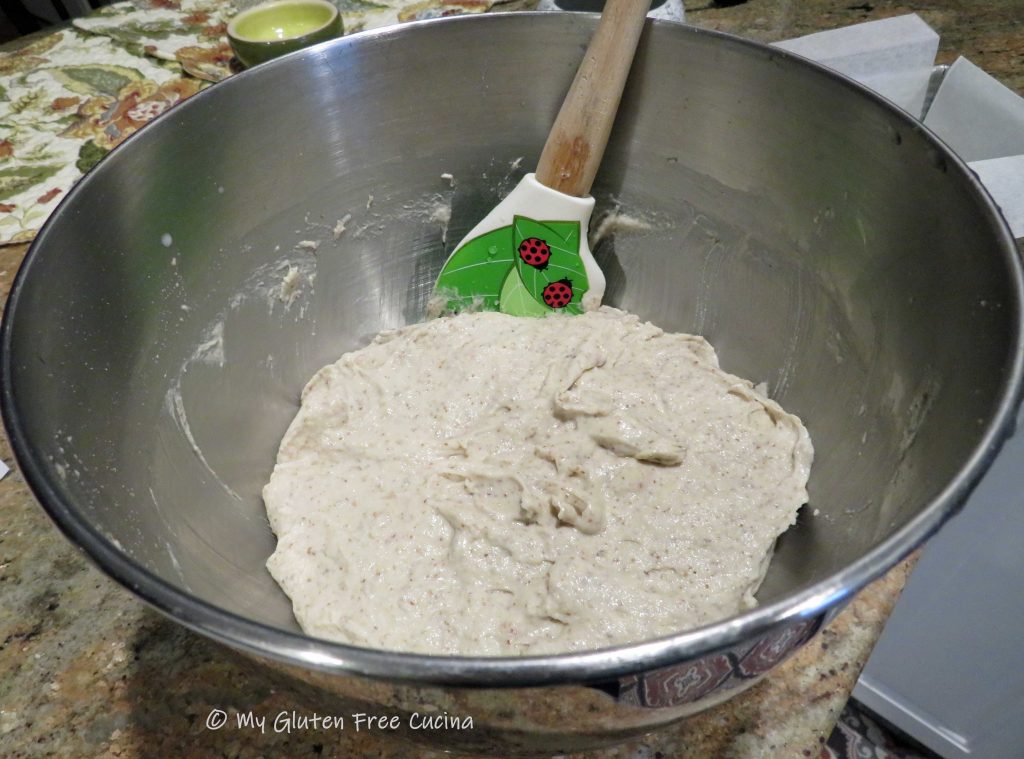
Scrape the dough into the prepared pan, smoothing out the top with a spatula dipped in water.
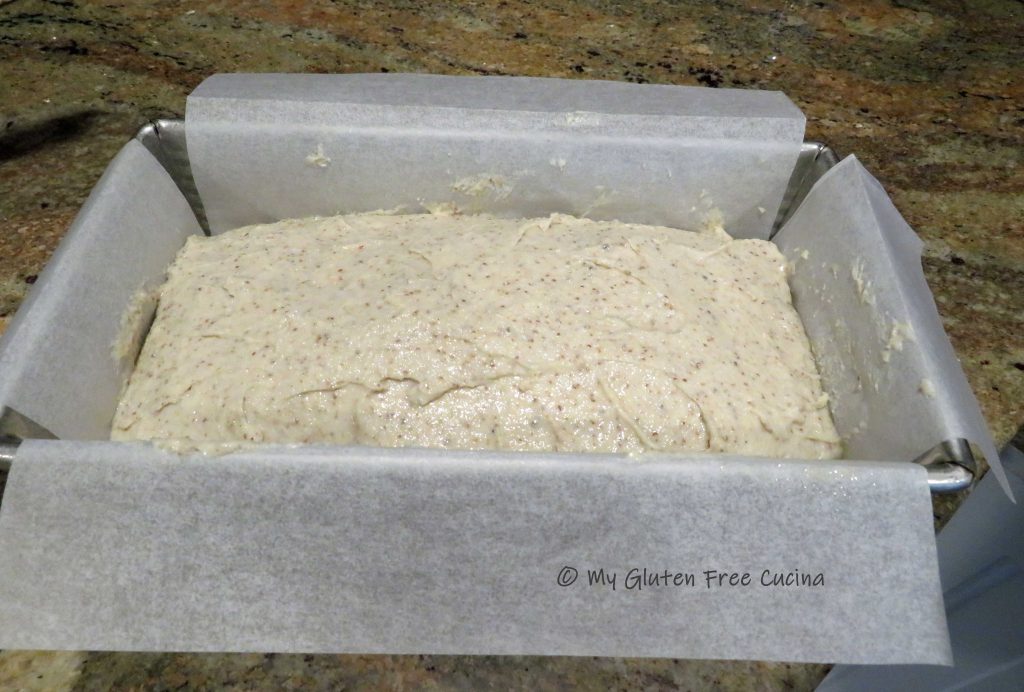
Covered with oiled plastic wrap and let it rise for 30 minutes while you preheat the oven to 400 degrees.

Brush the top of the loaf with milk, and sprinkle with sesame and poppy seeds.

Quickly make 2 diagonal slashes across the top of the loaf with a sharp knife.

Place the loaf on the middle rack of the oven, close the door and drop the temperature to 375º.  Bake 50-55 minutes, or until the internal temperature reaches 205º (use a thermometer).

Cool in the pan 15 minutes, then transfer to a rack.

Cool to room temperature, then bag it and let the loaf stand at room temperature overnight.  Resist the urge to cut into that loaf right away, and your patience will be rewarded with this amazing crumb!  It is truly worth the wait!

Notes ♪♫ You might be interested to know that I mill some of my flour from the whole grain.  In this recipe, I used my KitchenAid grain mill attachment to mill whole sorghum berries into flour.  For the teff flour, I ground whole teff grain in a coffee grinder.  Storing grain in its whole form will keep it fresh longer, great for those infrequently used ingredients.  If you would like to learn more about using a grain mill, check out this post.

Print This Post Print This Post

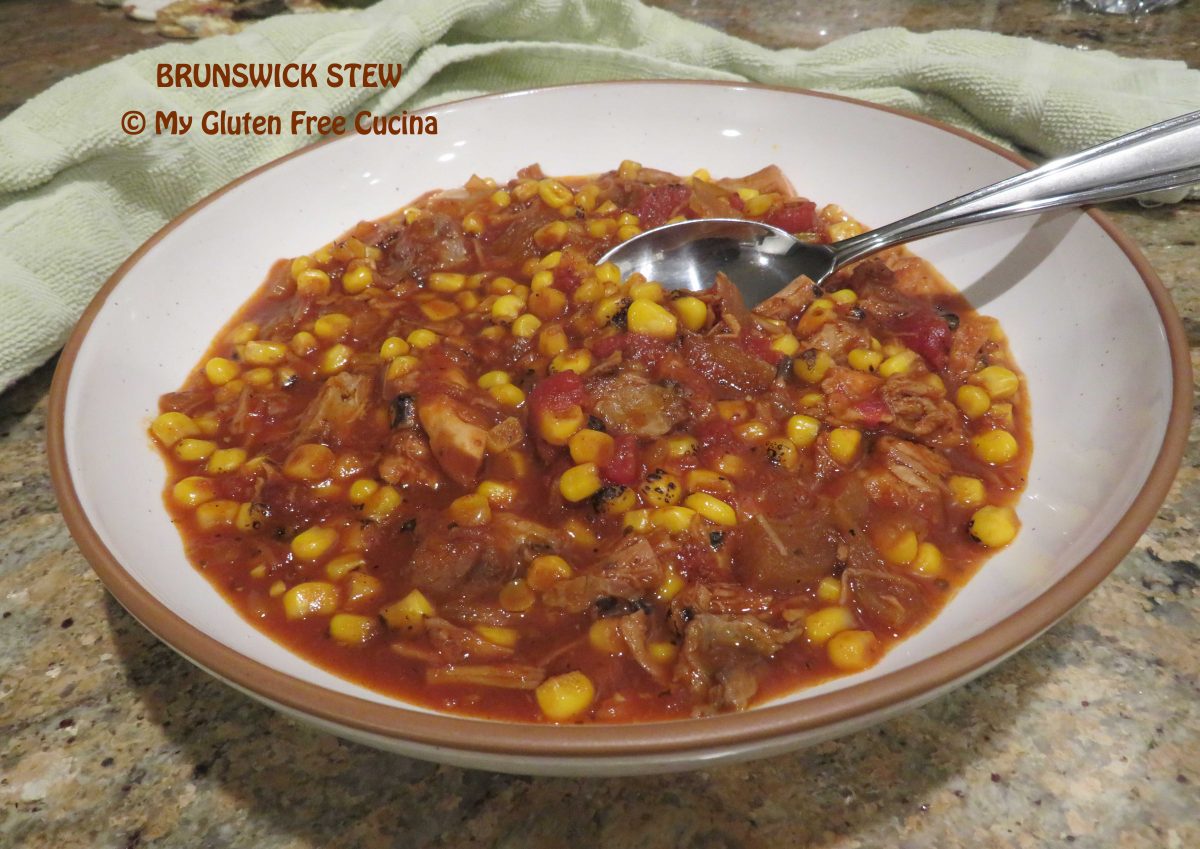
Gluten Free Brunswick Stew

Restaurants have long known the secret, that today’s leftovers can be reinvented into tomorrow’s soups and stews.  It eliminates waste and makes good economic sense too.  I try to follow this principle in my own kitchen by using every last bit of food so that nothing goes to waste.

Brunswick Stew was always a restaurant favorite of mine.  This thick, spicy stew is the ideal way to use up leftovers.  So, when I made pulled pork earlier this week, I put aside some of the meat to make this easy stew.  I added chicken as well, and the rest of the ingredients are pantry staples.

I’m excited to tell you that no oddball ingredients were needed to make Brunswick Stew gluten free.  Of course, when dining out always check with the kitchen to be sure it is safe to order.  At home, you know what to do.  Check labels when using canned products, condiments and seasonings.

 This post contains affiliate links.

Ingredients:

 Preparation:

Shred 3 cups total of leftover pulled pork and/or chicken.  I used 2 cups of leftover pulled pork and 1 cup cooked chicken (meat from one leg quarter).  Look it over carefully to be sure there are no bones.  I also removed most of the visible fat.

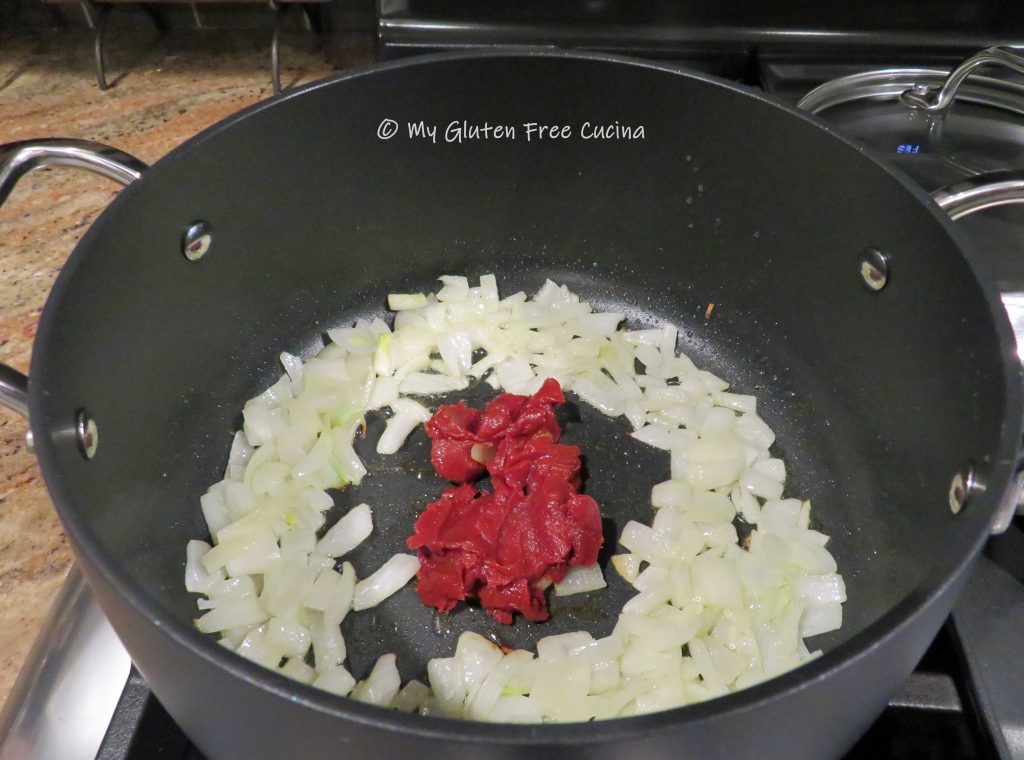
In a 4 qt. nonstick soup pot, heat olive oil and butter until melted.  Add the diced onion and cook until translucent.

Make a space in the center of the pan and add the tomato paste.

Let it toast for a minute then add the stock, tomatoes, BBQ Sauce, brown sugar, Worcestershire sauce and seasonings.
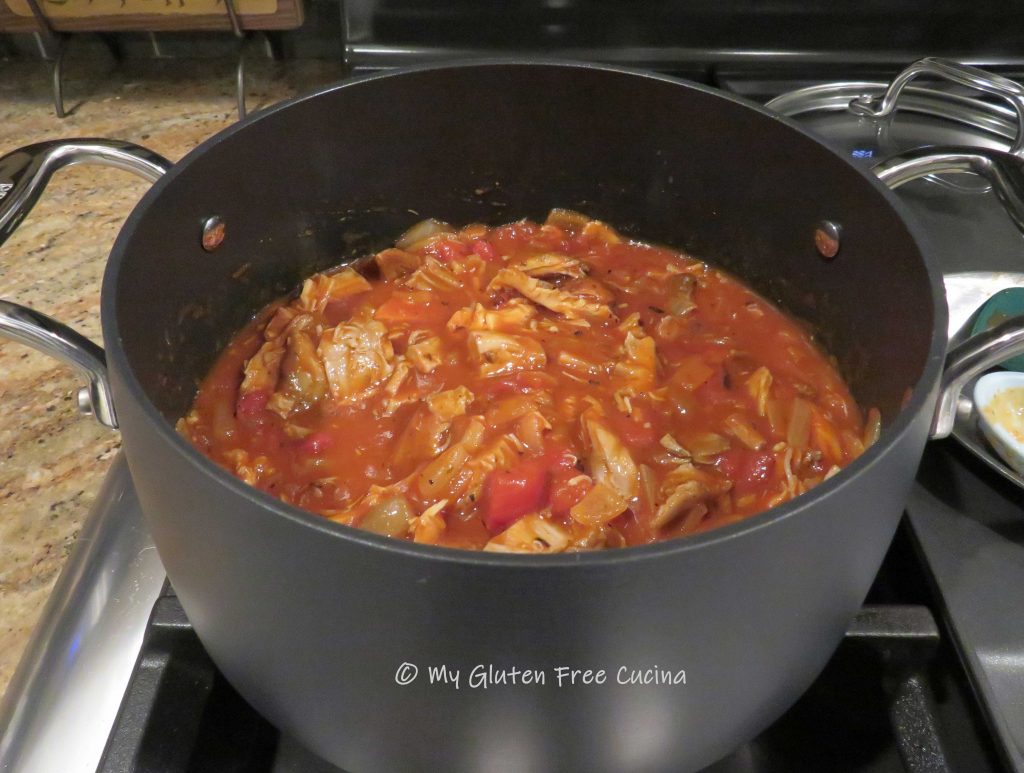
Finally add the fire roasted corn and stir everything together.
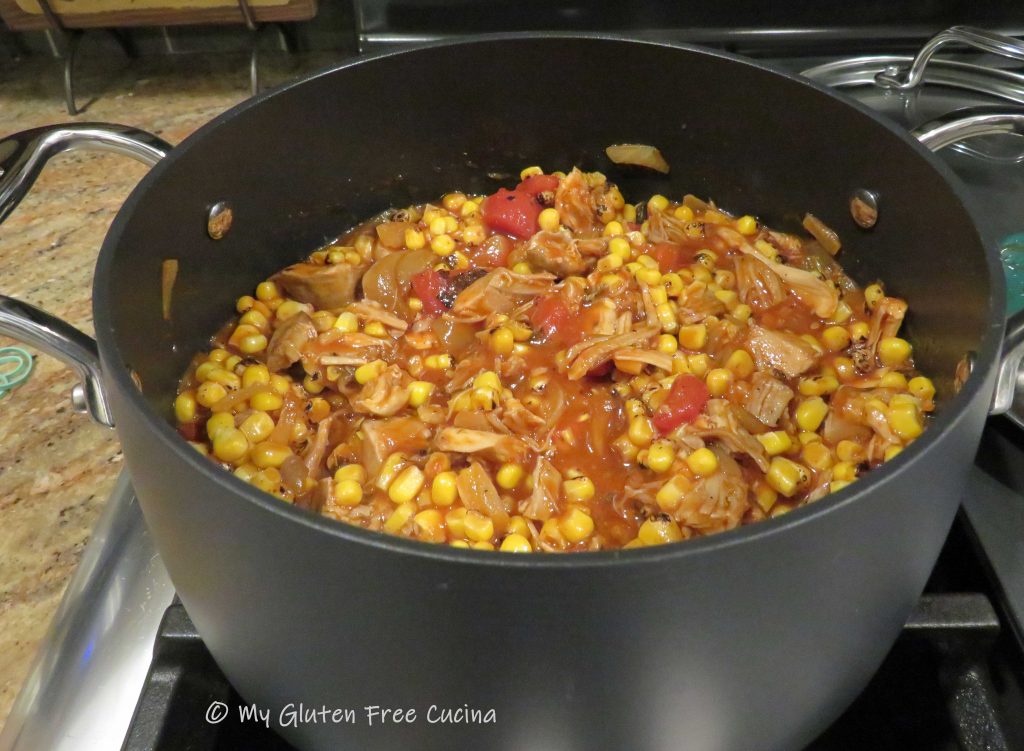
Keep it on a low simmer until all ingredients are heated through, about 20 minutes.  Remember, most of the ingredients are already cooked, so we are warming it up and giving the flavors a chance to meld together.  Like all soups and stews, this one is even better the next day!

Notes ♪♫ As you add the ingredients be sure to taste for seasoning.  If you held back on the pepper flakes and BBQ Seasoning, you could add a bit more for those who like it spicy.  If you prefer a sweeter taste add another tsp. of brown sugar.

Print This Post Print This Post

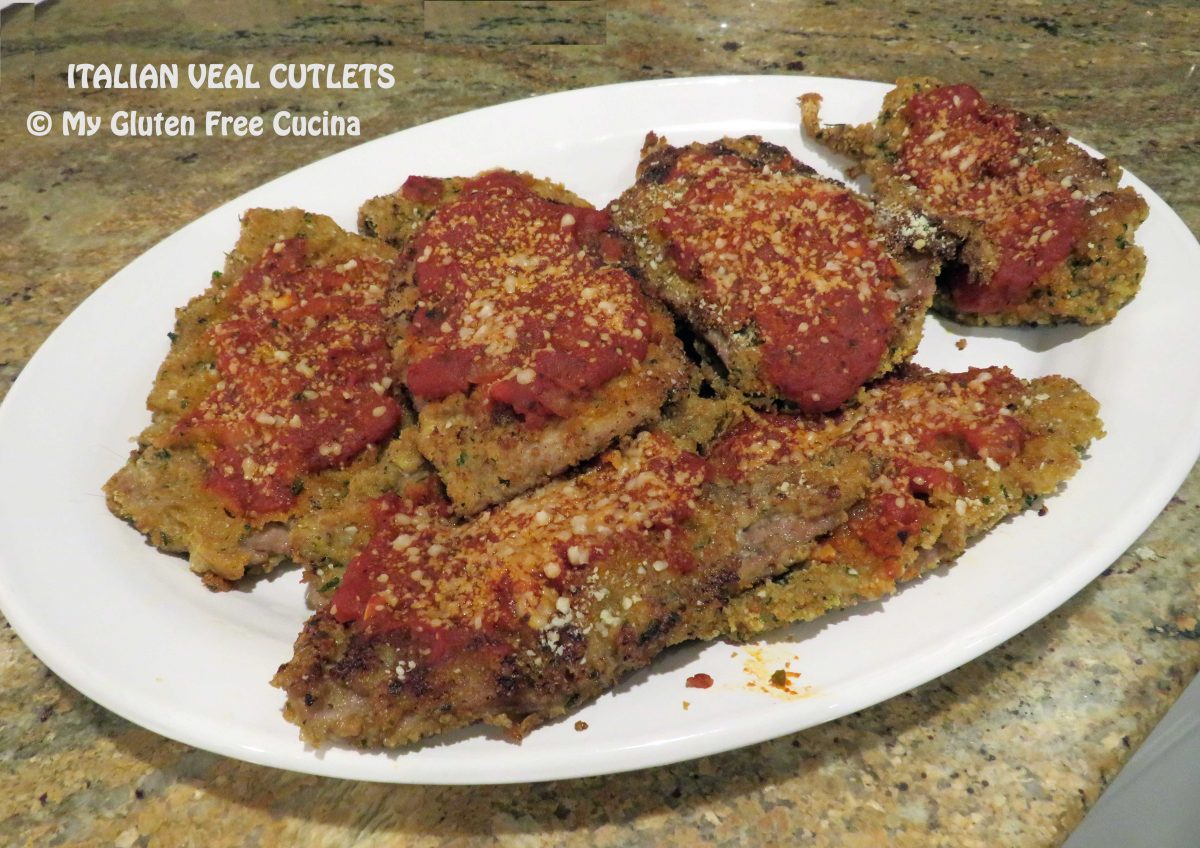
Gluten Free Italian Veal Cutlets

For a special Sunday Dinner, make your family a nice platter of Italian Veal Cutlets.  This was one of my dad’s favorite meals, I especially remember how he loved to order a veal cutlet sandwich at one of the local restaurants.  So be sure to make enough for dinner and leftovers for sandwiches the next day!

This post contains affiliate links.

I am fortunate to live in an Italian neighborhood where we can find thin sliced veal cutlets at the market.  At today’s prices, it’s a splurge but if you are making a nice dinner for two you can get away with less than a pound.  Serve with gluten free pasta and extra marinara sauce.

Ingredients:

Preparation:

Set up 3 breading trays (or use plates), one with rice flour, one with beaten egg and one with breadcrumbs.  Preheat the oven to 350º.

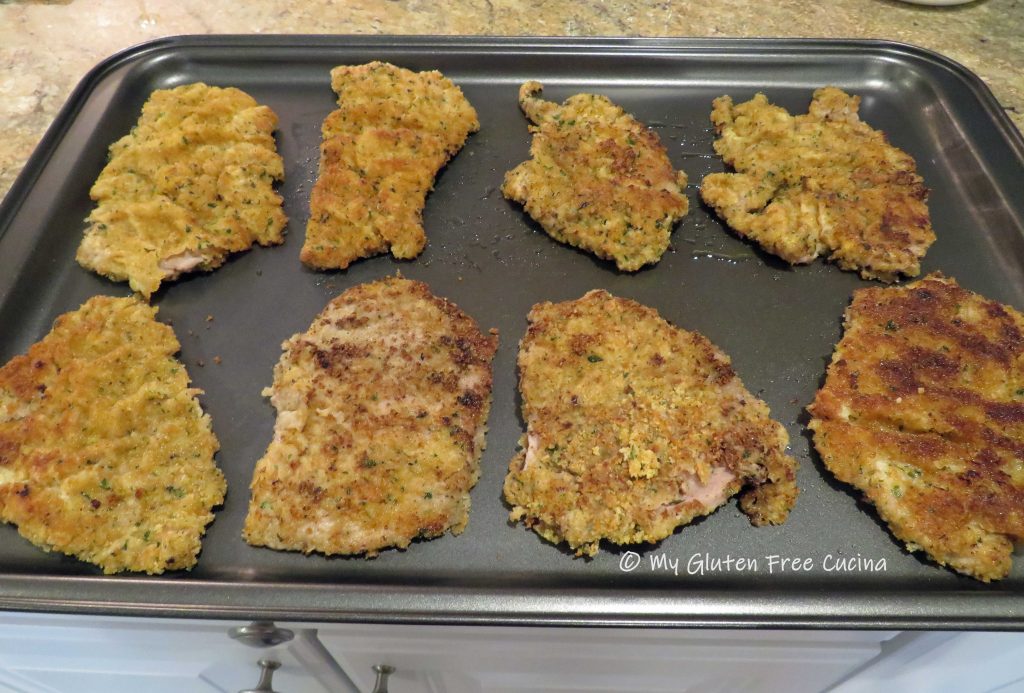
Heat a large nonstick skillet with several tablespoons of olive oil.  Keep the heat on medium low.  Working quickly, dredge each piece of veal in the flour, then dip in the egg mixture.  Shake off the excess egg and dredge in the breadcrumbs.  As you finish coating each piece add it to the skillet.  Cook 2 minutes per side until nicely browned, then transfer to a baking sheet.  Continue with the remaining slices, adding more olive oil to the pan as needed.  The cutlets do not have to be cooked through at this point, they will finish in the oven.

Ladle marinara over each slice and top with grated cheese, as much as you like.

Place in the oven for 15-20 minutes, just enough to melt the cheese.
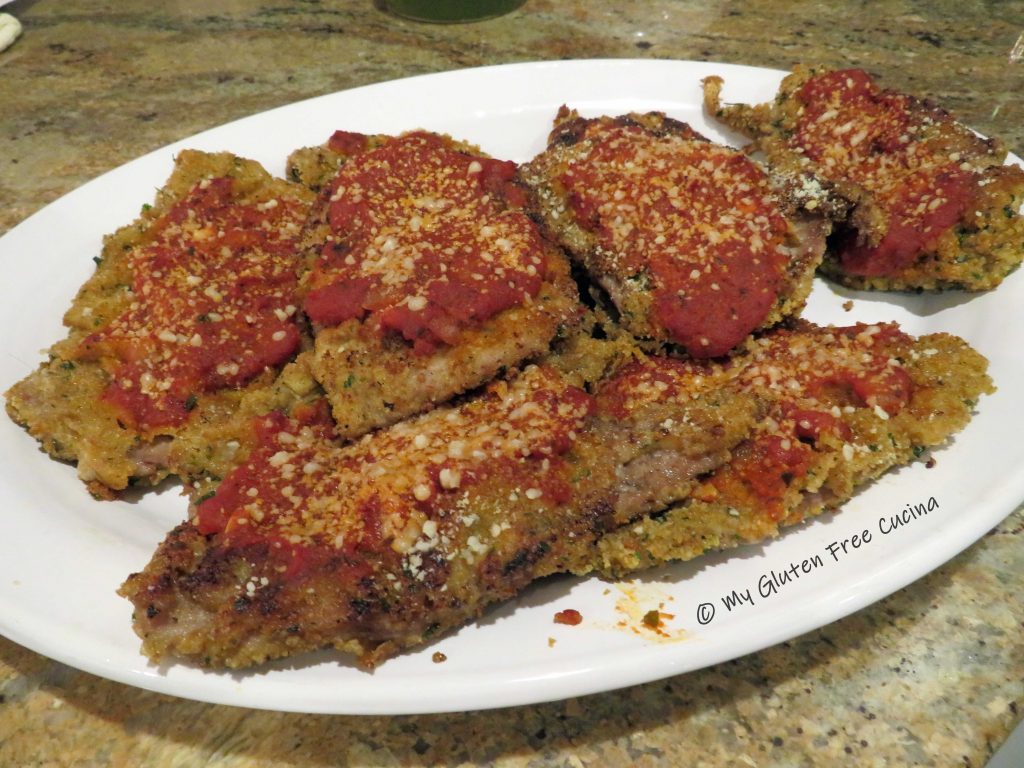
That’s it.  Not complicated at all.  Serve with a nice plate of pasta and some good gluten free bread to soak up the sauce and you’ve got a fine meal on the table in under an hour (they’ll think you’ve been cooking all day though).

Notes ♪♫ Veal cutlets need to be sliced very thin.  If you can’t get them this way at the store you will need to place the meat between 2 sheets of plastic wrap and pound to 1/4″ thickness with a meat mallet.  If veal is not in the budget, you will be happy to know you can also make this recipe with chicken.

Print This Post Print This Post