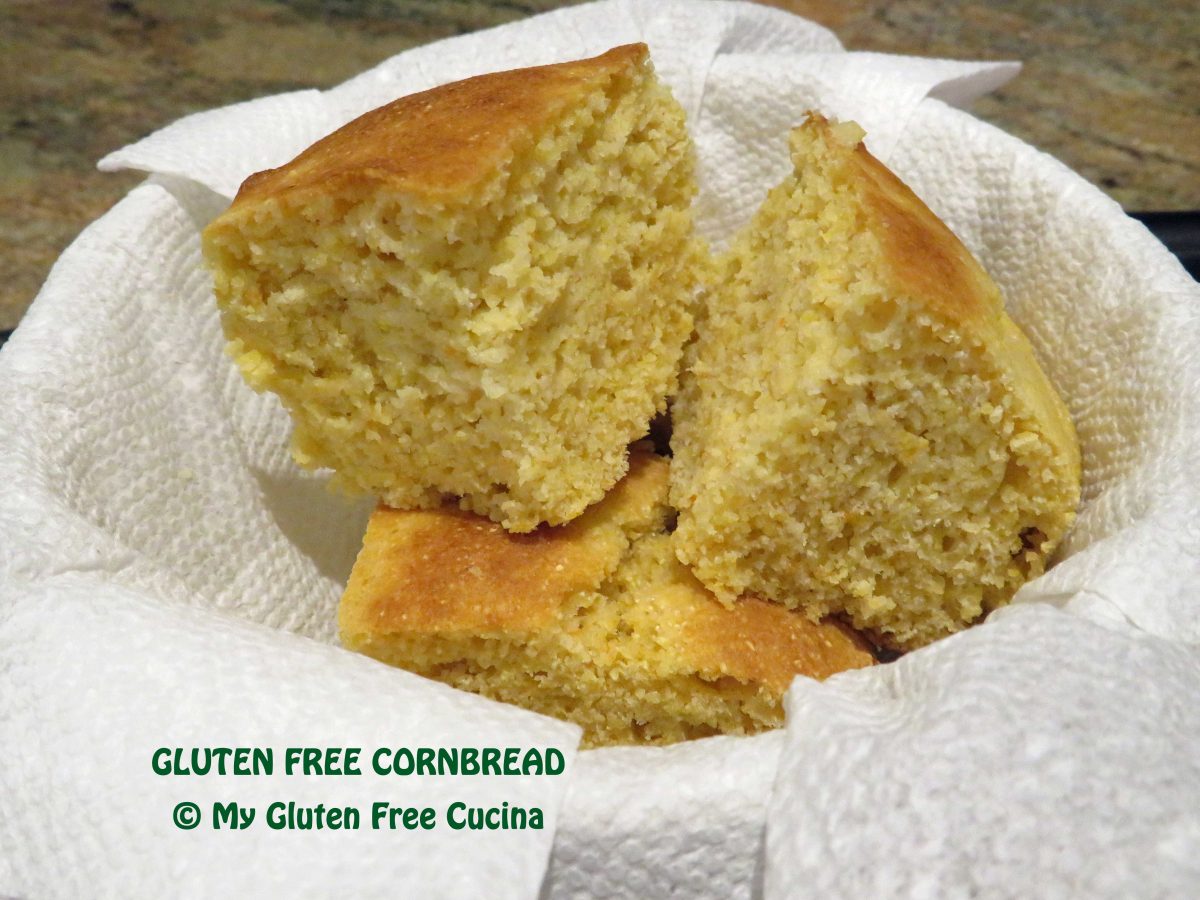
Every gluten free cook needs a good, basic cornbread recipe. Cornbread is the perfect accompaniment to winter soups, stews or your favorite barbecue dinner. Once you master this easy recipe, you can jazz it up with cranberries, dried fruits, herbs or whatever you please. With the holidays just around the corner, I’m dreaming of a yummy Gluten Free Cornbread Stuffing!
Friends, this tastes just like traditional cornbread, no one will ever guess that it’s gluten free!
Begin by lining a square baking dish with parchment paper, and mist with cooking spray. Whisk together the dry ingredients, through xanthan gum. In a separate bowl, whisk together the egg, sugar, milk and cider vinegar.
Combine the wet and dry ingredients and stir together until completely moistened. Let the batter stand for a few minutes, then scrape it into the prepared pan.
Place the pan on a baking sheet (this helps keep the bottom from burning) and bake for 15-18 minutes, until a toothpick inserted in the center comes out dry. The top should be nicely browned, and the cornbread will be pulling away from the sides of the pan.
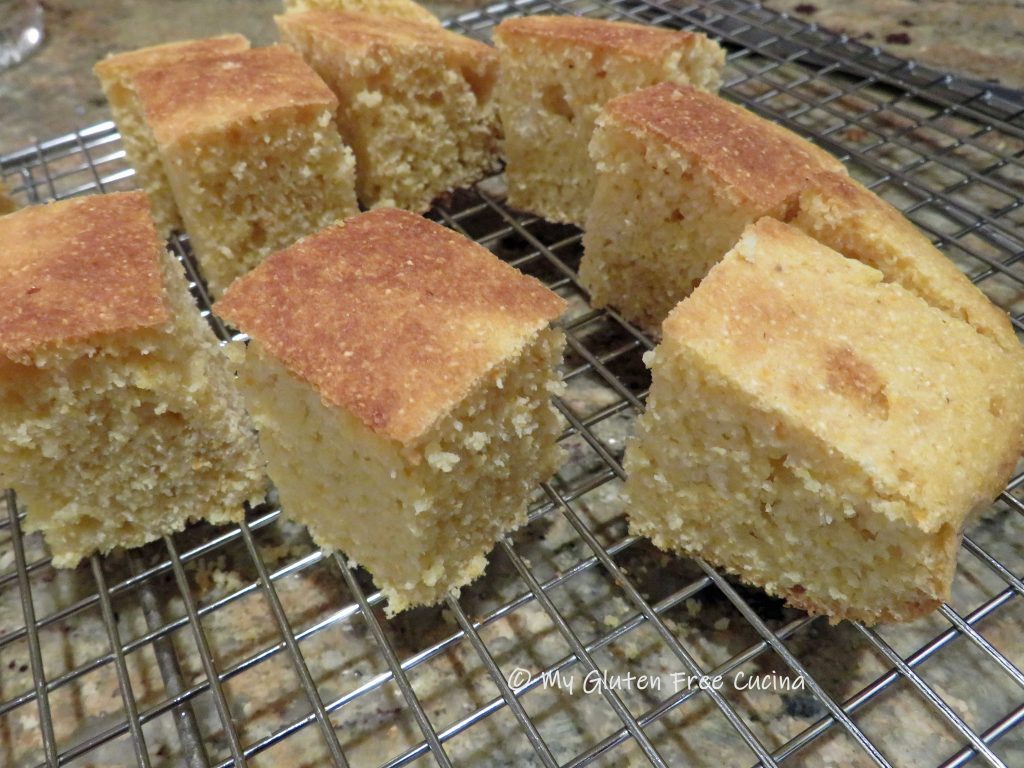
Cool in the pan for 3 minutes, then grab a corner of the parchment paper and slide the cornbread onto a cooling rack. Wait a few more minutes then remove the parchment.
Slice and serve warm or at room temperature.
This cornbread freezes well and can be made ahead of time for your holiday breadbasket or cornbread stuffing cubes. To freeze, cover tightly with plastic wrap then wrap again in foil. Place it in a freezer safe bag.
Notes: ♪♫ Although corn itself does not contain gluten; some brands of cornmeal may contain trace amounts if they are produced on shared equipment. To avoid cross contact, be sure to look for cornmeal that is labeled gluten free.
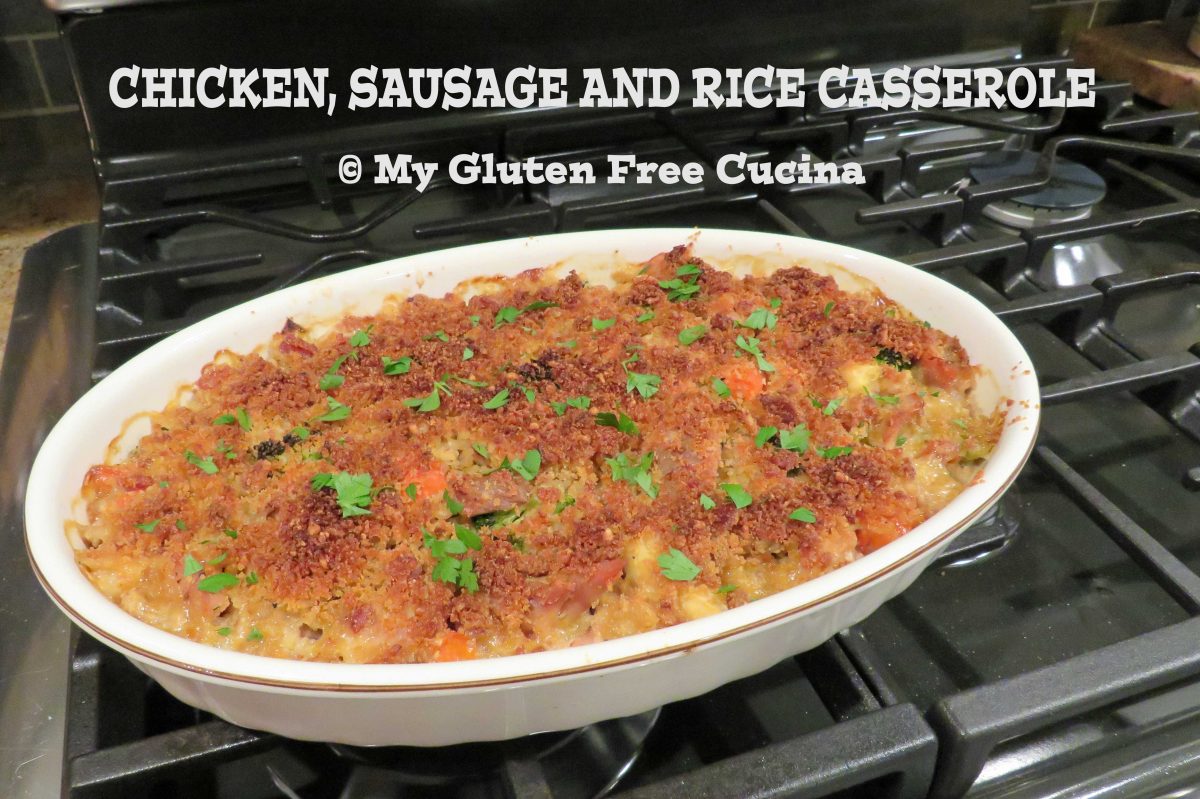
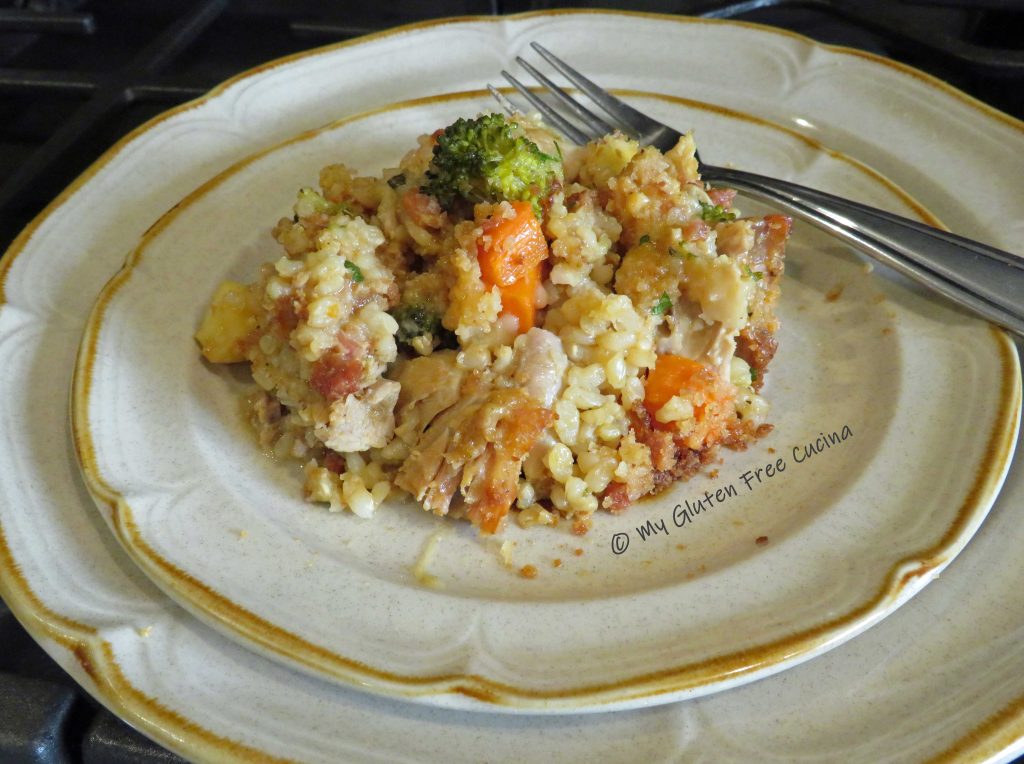
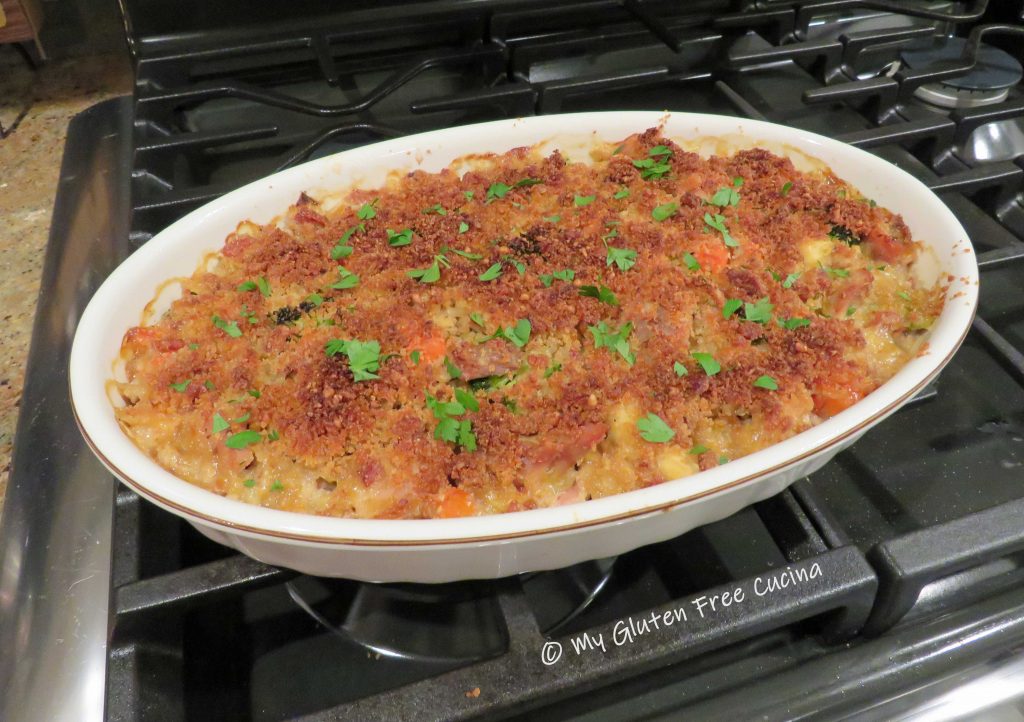
Whenever I make this flavorful casserole for a family dinner it gets rave reviews! Chicken drumsticks and Italian sausage come together with ingredients straight from the pantry, and you can use any veggies you have on hand! It’s easy and economical too. You can do most of the prep a day ahead and bake the next day. And that bacon breadcrumb topping- wow! It really gives this dish an extra punch of flavor, texture and crunch!
Brown rice takes about 50 minutes to cook, so start that first. Simmer 3/4 cup rice in 1-3/4 cups chicken broth and 1/4 tsp. seasoning of choice.
For the topping, coarsely chop the bacon, cook and drain on paper towels, reserving the fat in the pan.
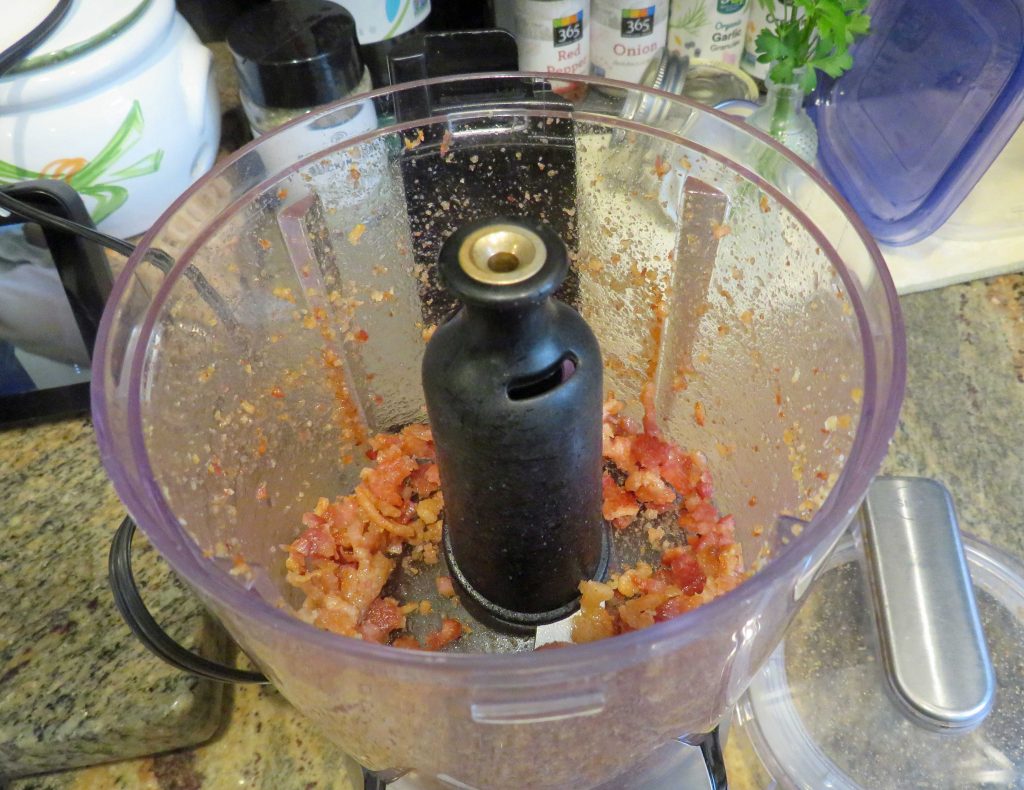
Crumble the bacon, or place in an electric chopper and pulse a few times to make bacon bits.
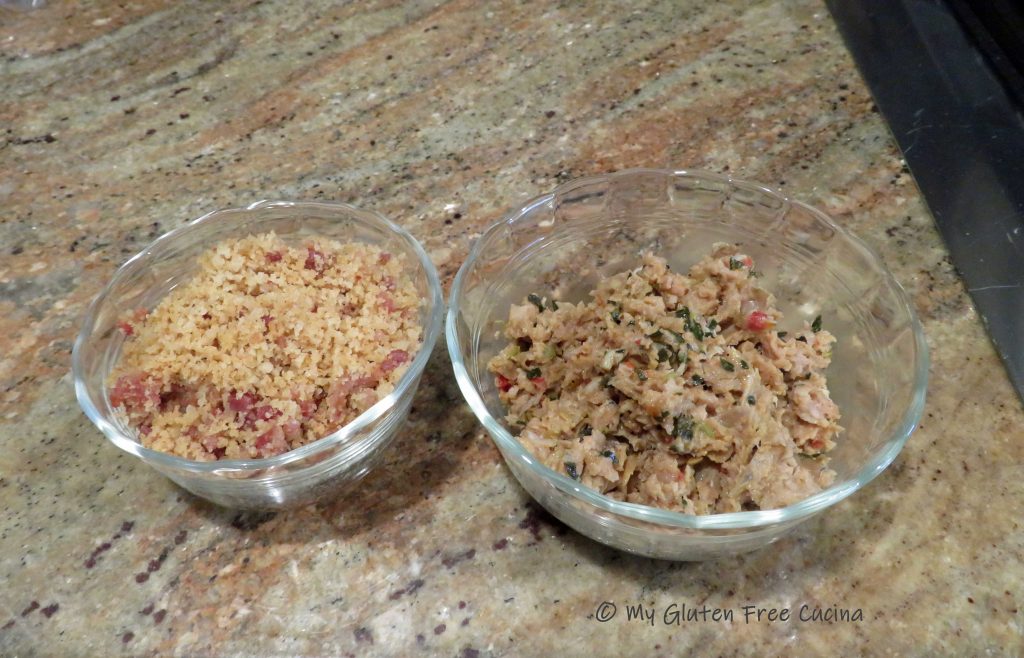
Add 1/3 cup of gluten free breadcrumbs to the skillet with the bacon fat and stir over low heat. Add back the crumbled bacon and stir well to combine. Set aside to cool, then mix with 1/4 cup grated parmesan cheese for topping.
I love Aleia’s Gluten Free Breadcrumbs, and I use this brand almost exclusively in my recipes. I promise, your family won’t even know they are gluten free!
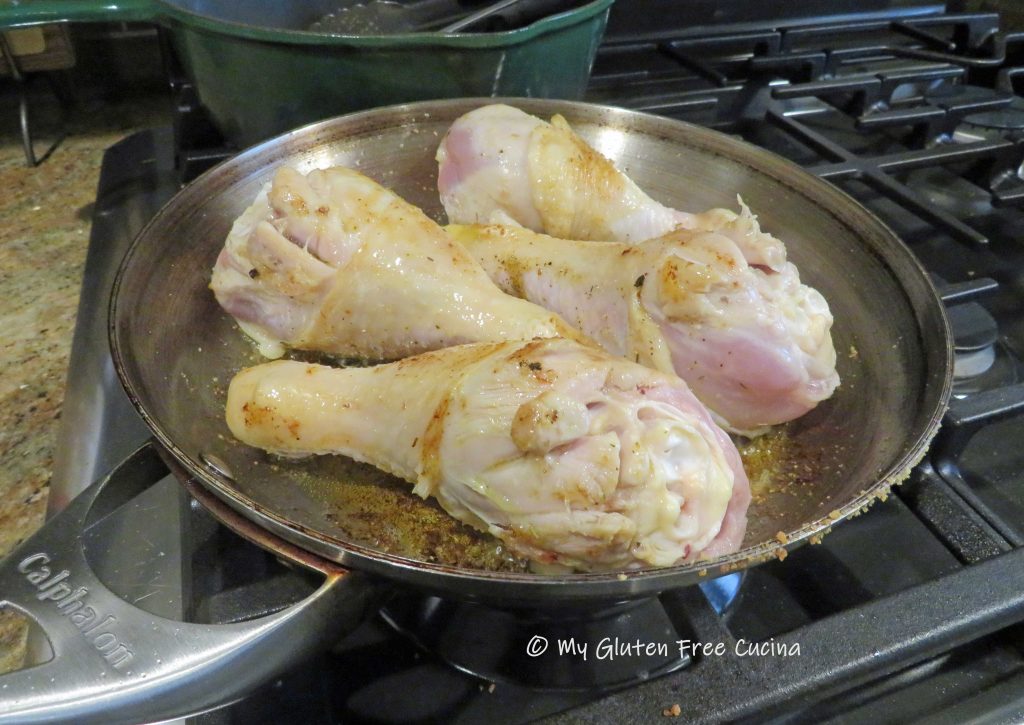
In the same skillet, brown the chicken on all sides in a little olive oil. Season both sides with salt and pepper.
Place browned chicken in a braising pan or Dutch oven, add ¼ cup white wine and 1/4 cup chicken broth. Cover and simmer 30 minutes.
Transfer the cooked chicken to a plate, remove meat from the bones and sprinkle with paprika. Strain the liquid from the pan and reserve for later.
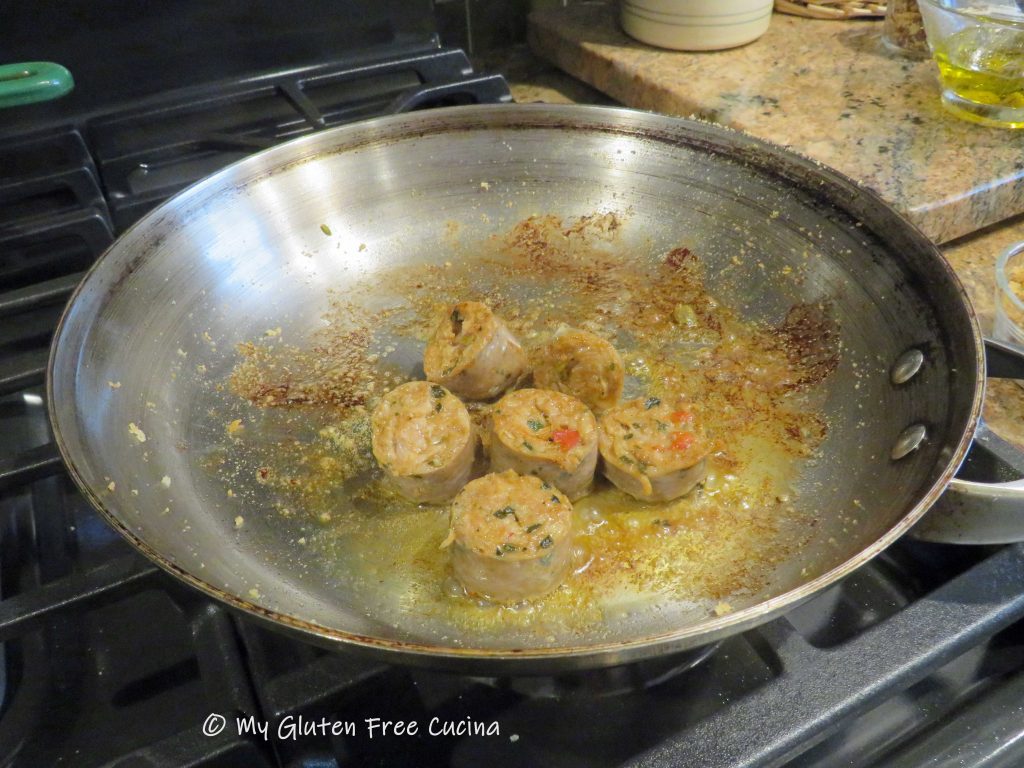
Slice the sausage and brown in olive oil. You can use store bought sausage or check out my recipe for homemade sausage patties! If using purchased sausage, always check labels for gluten containing ingredients.
Pulse the cooked sausage a few times in the chopper and set aside.
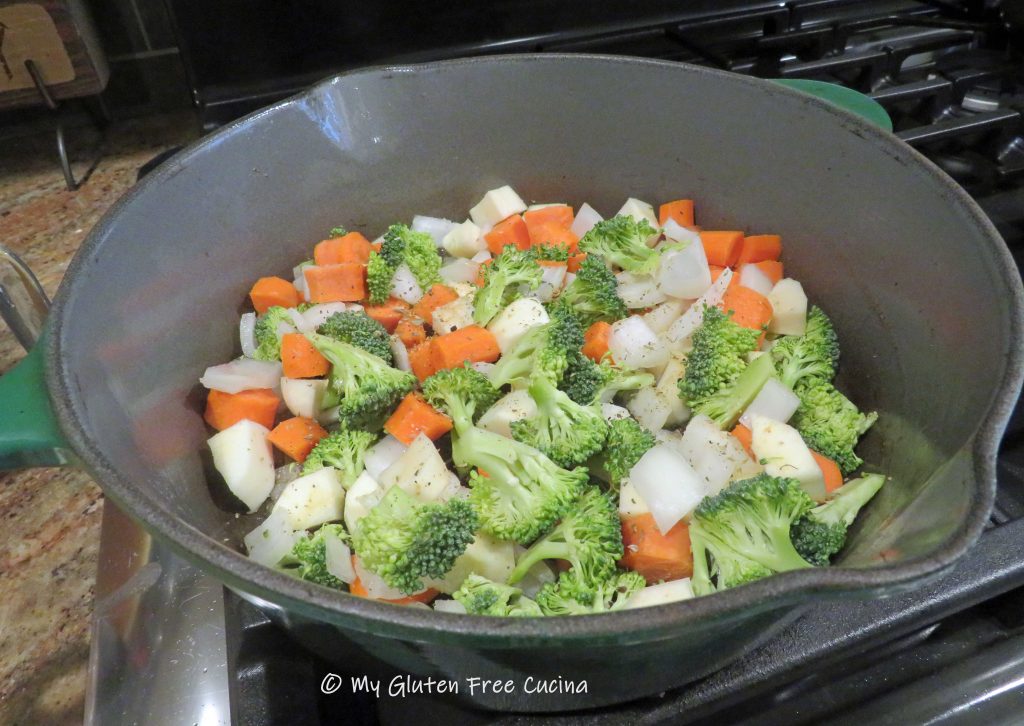
Wipe the braising pan or Dutch oven clean. Heat 1 tbsp. olive oil and add the veggies. Season and cook 10 minutes, stirring occasionally.
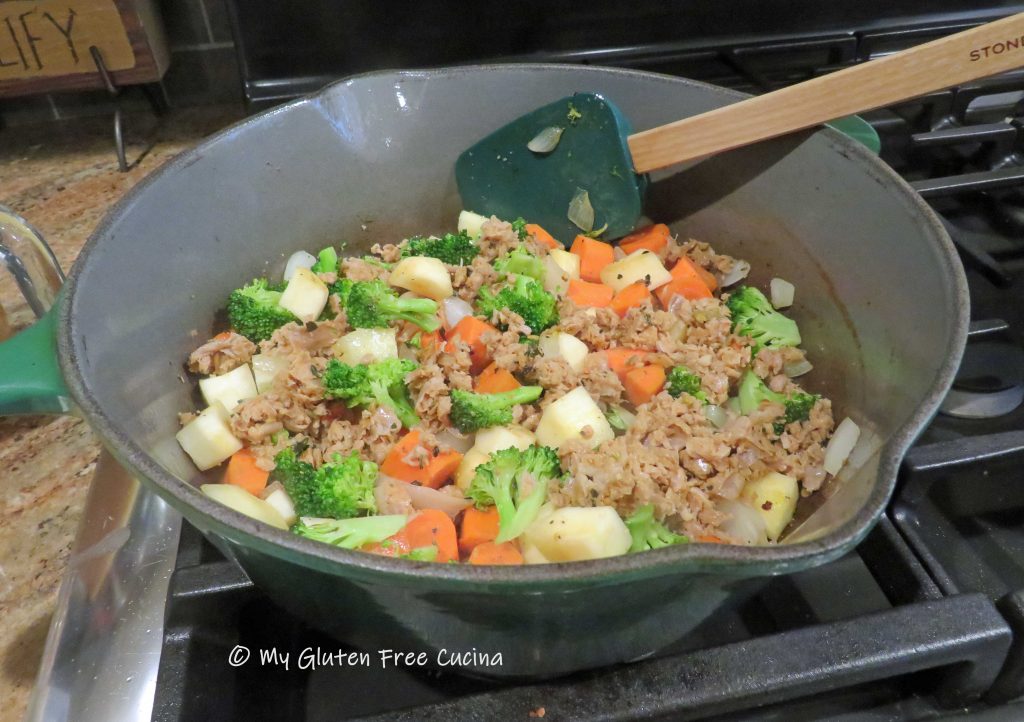
Add back the sausage and stir well.
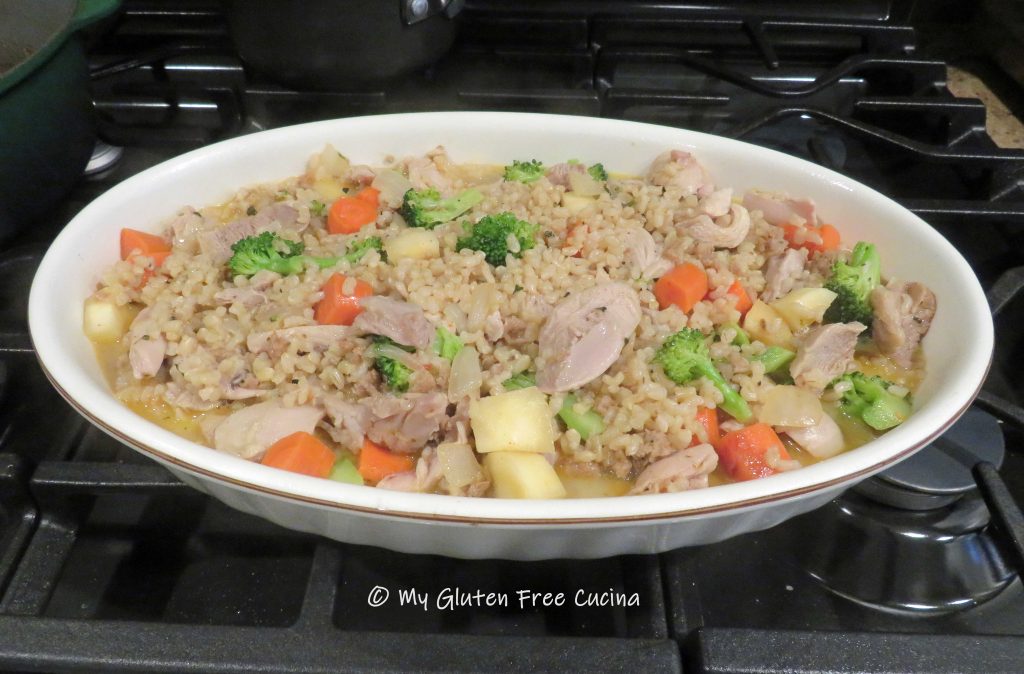
Now add the chicken and cooked rice. Measure the reserved liquid and add enough chicken broth to equal 1-1/4 cups. Combine with 1/4 cup milk and pour over the chicken and rice mixture.
Tip: Prepare the meal up to this point a day ahead. Cover and refrigerate.
Preheat the oven to 350º. You can bake the casserole in the same pan, or transfer to a pretty casserole dish for a nicer presentation. Note, if you made the casserole in the advance, take it out of the refrigerator and leave on the counter for at least 30 minutes (don’t place a refrigerated glass baking dish directly into a hot oven, it may shatter).
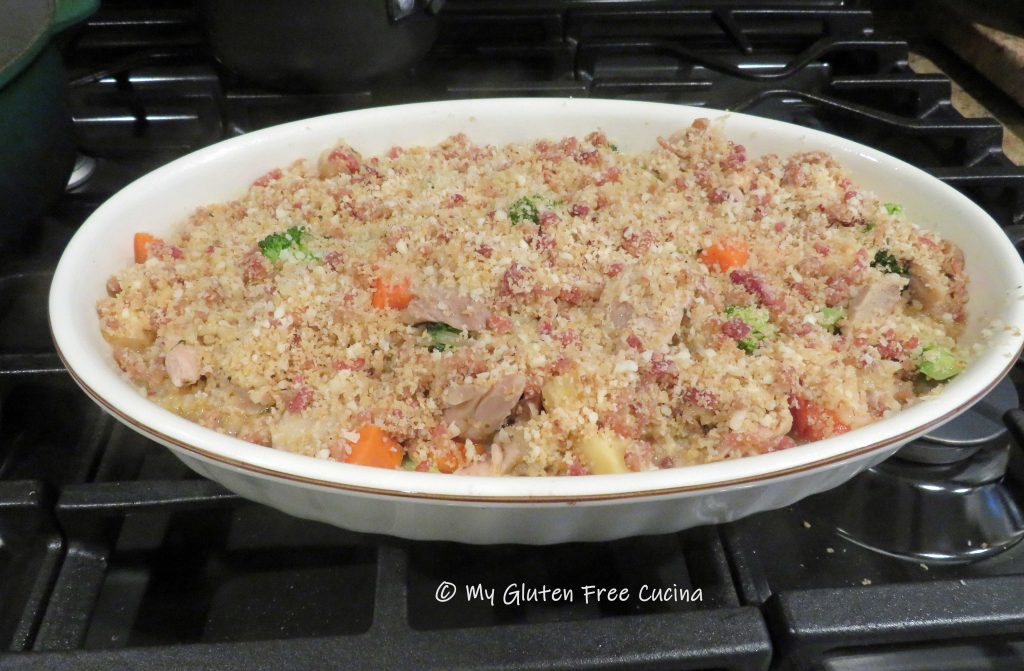
Spread the breadcrumb mixture over the casserole and bake uncovered for 45 minutes.
The liquid will bubble and thicken to create a nice sauce. I like to finish it off under the broiler, 3 minutes on low. Watch that it doesn’t burn!
Let it rest a few minutes to set up, then garnish with fresh herbs (or dried herbs) and bring it right to the table.
Notes ♪♫Remember, you can substitute any veggies you like in this recipe. Once I went out on a limb and used eggplant. Surprise, the reaction ranged from “I loved it” to “I didn’t even know it was in there”! Try broccoli, cauliflower, asparagus or zucchini. Use what you have on hand, use what you like!
Chicken and Italian sausage come together with ingredients straight from the pantry to make this flavorful casserole, and you can use any veggies you have on hand!
Brown rice takes about 50 minutes to cook, so start that first. Simmer 3/4 cup rice in 1-3/4 cups chicken broth and 1/4 tsp. seasoning of choice.
For the topping, coarsely chop the bacon, cook and drain on paper towels, reserving the fat in the pan.
Crumble the bacon, or place in an electric chopper and pulse a few times to make bacon bits.
Add 1/3 cup of gluten free breadcrumbs to the skillet with the bacon fat and stir over low heat. Add back the crumbled bacon and stir well to combine. Set aside to cool, then mix with 1/4 cup grated parmesan cheese for topping.
In the same skillet, brown the chicken on all sides in a little olive oil. Season both sides with salt and pepper.
Place browned chicken in a braising pan or Dutch oven, add ¼ cup white wine and 1/4 cup chicken broth. Cover and simmer 30 minutes.
Transfer the cooked chicken to a plate, remove meat from the bones and sprinkle with paprika. Strain the liquid from the pan and reserve for later.
Slice the sausage and brown in olive oil.
Pulse the cooked sausage a few times in the chopper and set aside.
Wipe the braising pan or Dutch oven clean. Heat 1 tbsp. olive oil and add the veggies. Season and cook 10 minutes, stirring occasionally.
Add back the sausage.
Now add the chicken and cooked rice. Measure the reserved liquid and add enough chicken broth to equal 1-1/4 cups. Combine with 1/4 cup milk and pour over the chicken and rice mixture.
Tip: Prepare the meal up to this point a day ahead. Cover and refrigerate.
Preheat the oven to 350º. You can bake it in the same pan, or transfer to a pretty casserole dish for a nicer presentation. Note, if you made the casserole in the advance, take it out of the refrigerator and leave on the counter for at least 30 minutes (don’t place a refrigerated glass baking dish directly into a hot oven, it may shatter).
Spread the breadcrumb mixture over the casserole and bake uncovered for 45 minutes.
The liquid will bubble and thicken to create a nice sauce. I like to finish it off under the broiler, 3 minutes on low. Watch that it doesn’t burn!
Let it rest a few minutes to set up, then garnish with fresh herbs (or dried herbs) and bring it right to the table.
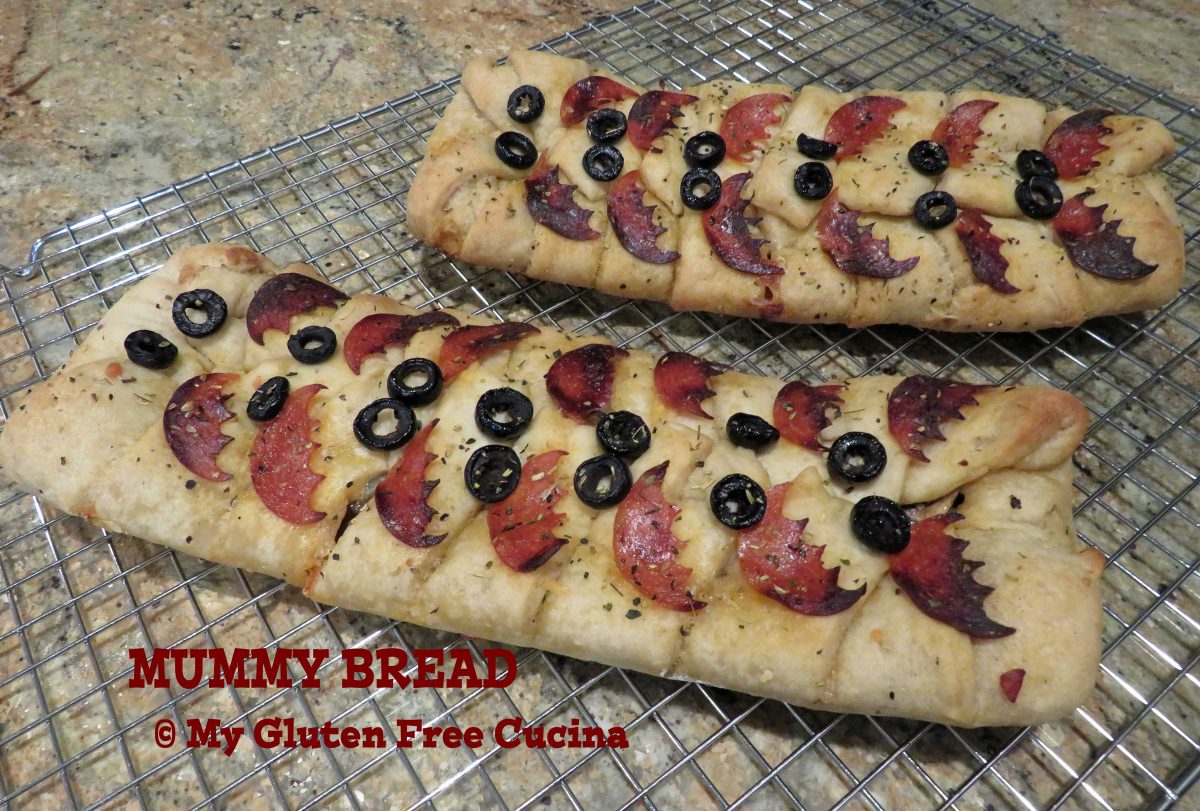
Mummy Bread has been a Halloween tradition in our family for years. It’s sure to be a hit at a Halloween party! This Stromboli style bread is fun to make with kids, and grownups will love it too.
Mix together all of the dough ingredients in the bowl of a stand mixer. Cover the dough and refrigerate for 1 hour.
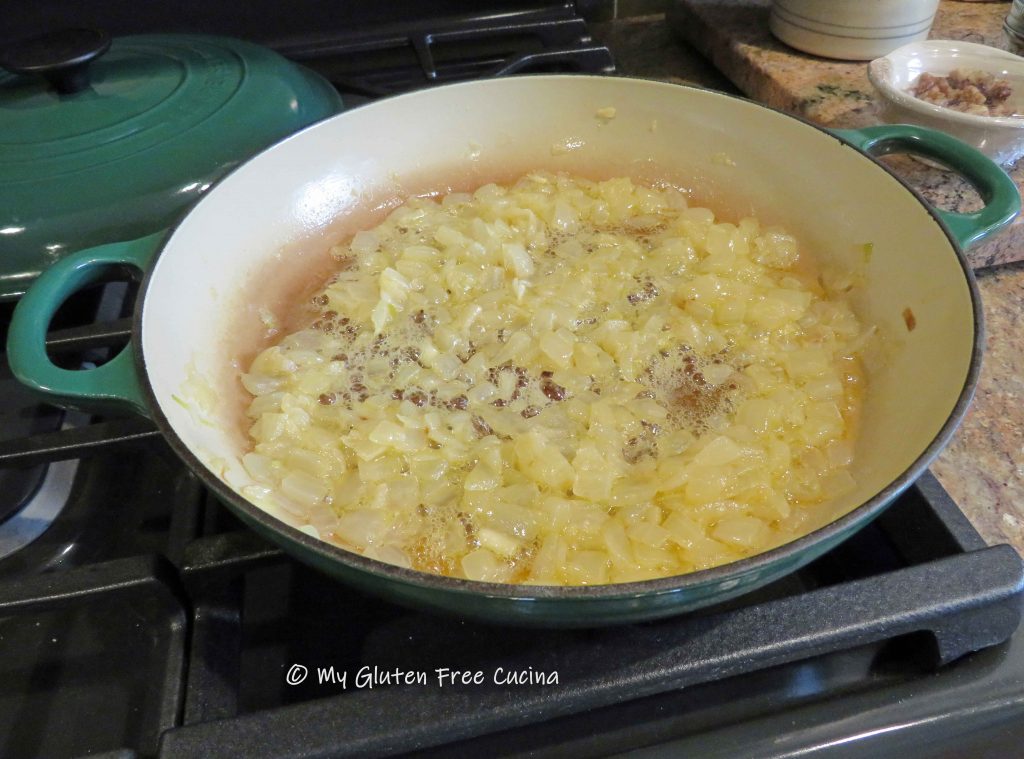
Add the onions to a heavy skillet with 2 tbsp. butter and 2 tbsp. oil. Cook covered, 20 minutes then uncover and cook for an additional 20 minutes, stirring frequently.
Cook the mushroom slices in 1 tbsp. butter and 1 tbsp. olive oil.
Drain the mushrooms and onions to remove as much liquid as possible.
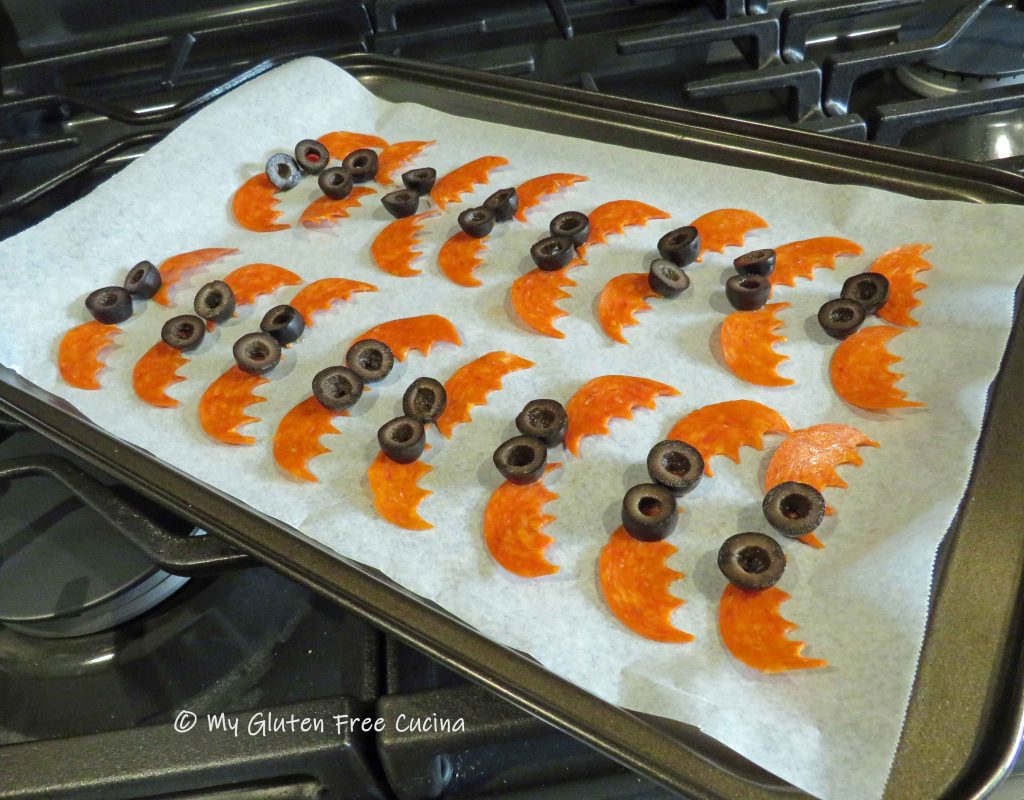
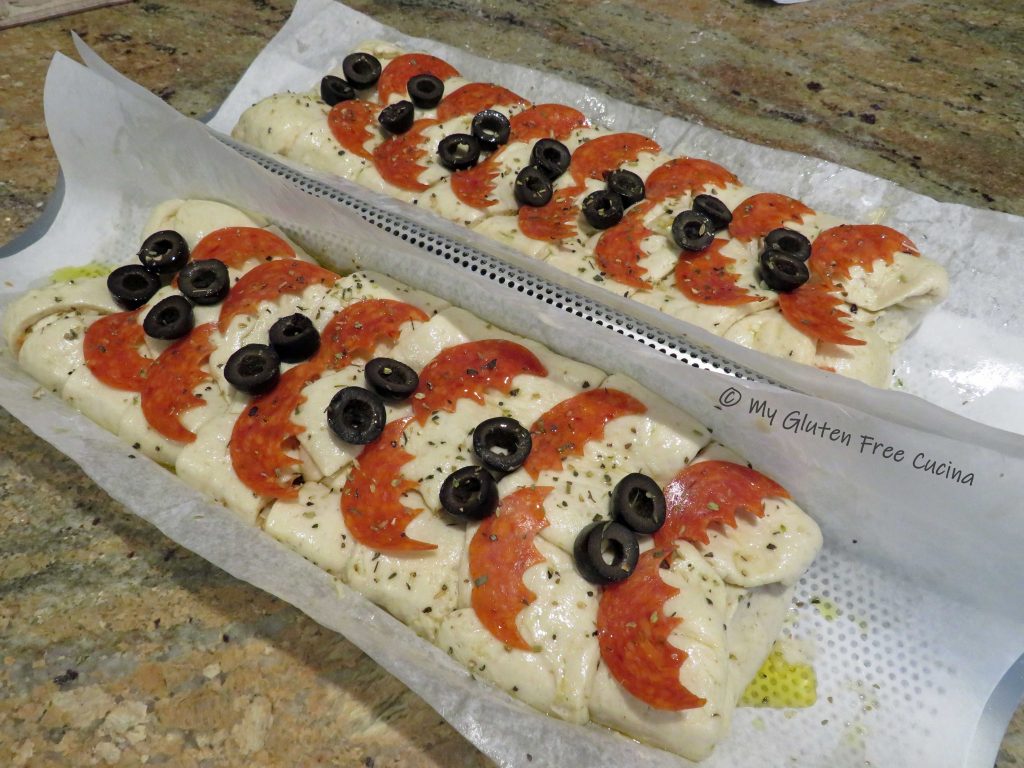
While the dough is rising, plan your decorative toppings. I made these pepperoni and olive bats!
After 1 hour in the fridge, turn the dough out onto floured parchment and use a bench knife to divide it in 2.
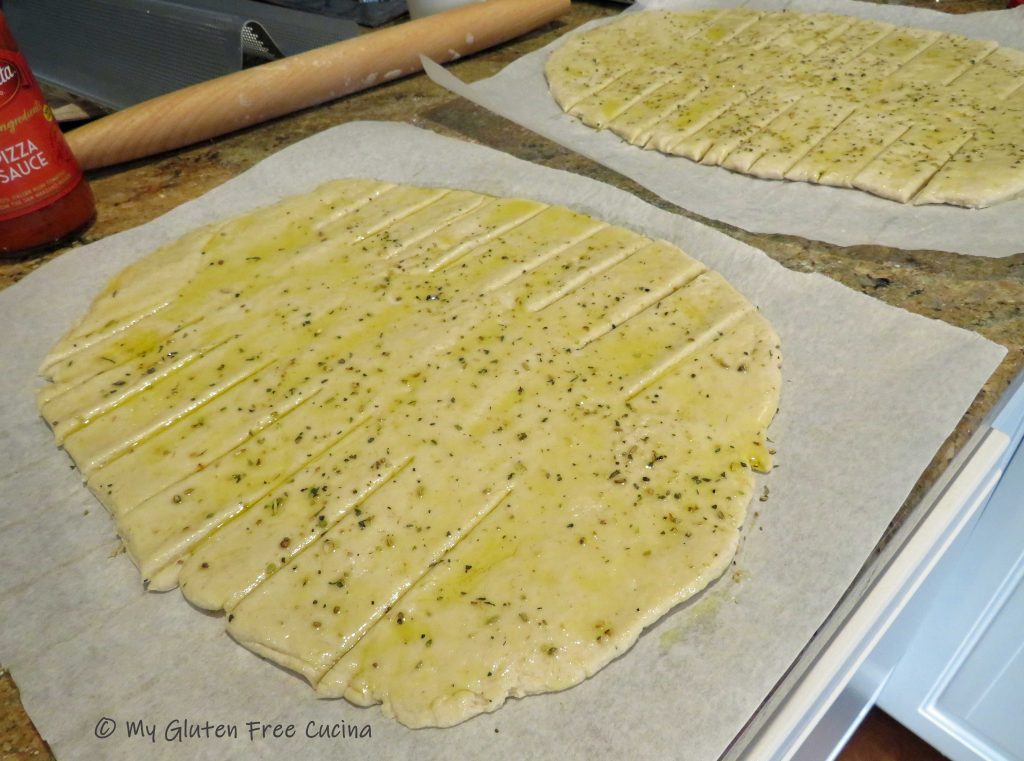
Roll out each piece into a thin rectangle, about 11 x 16″. Brush lightly with olive oil and sprinkle with seasoning. Use a bench knife to cut 1″ strips on either side of the dough.
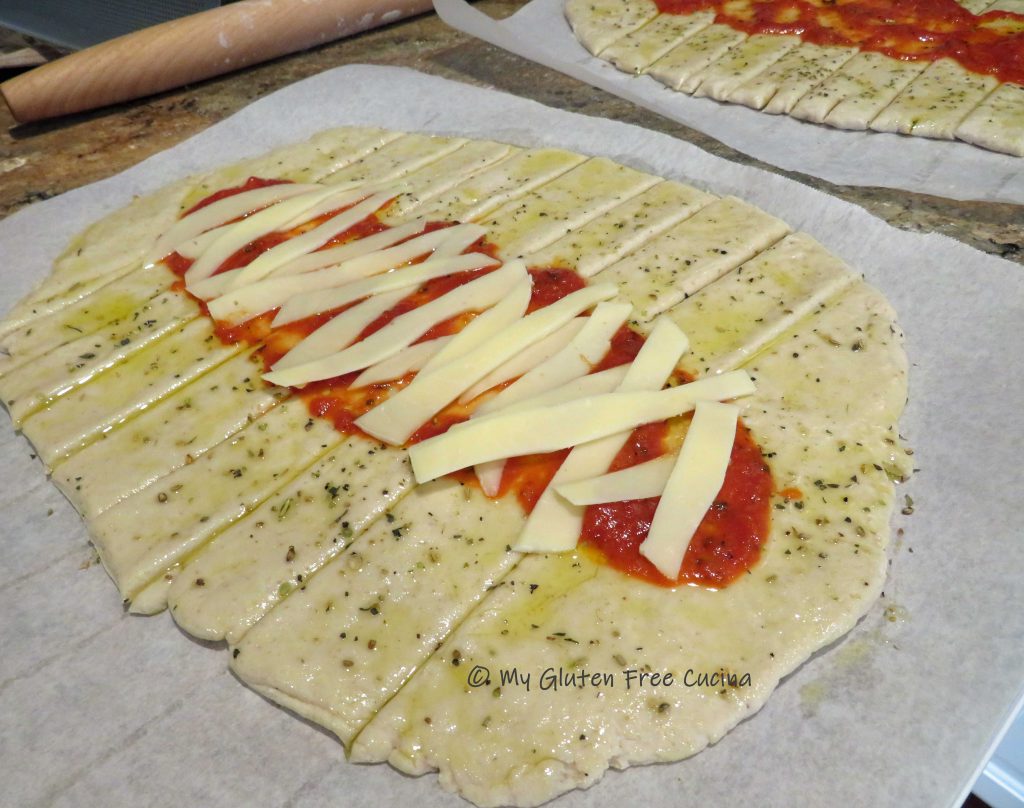
Brush the center of each mummy with 3-4 tbsp. of pizza sauce, then layer with strips of provolone cheese.
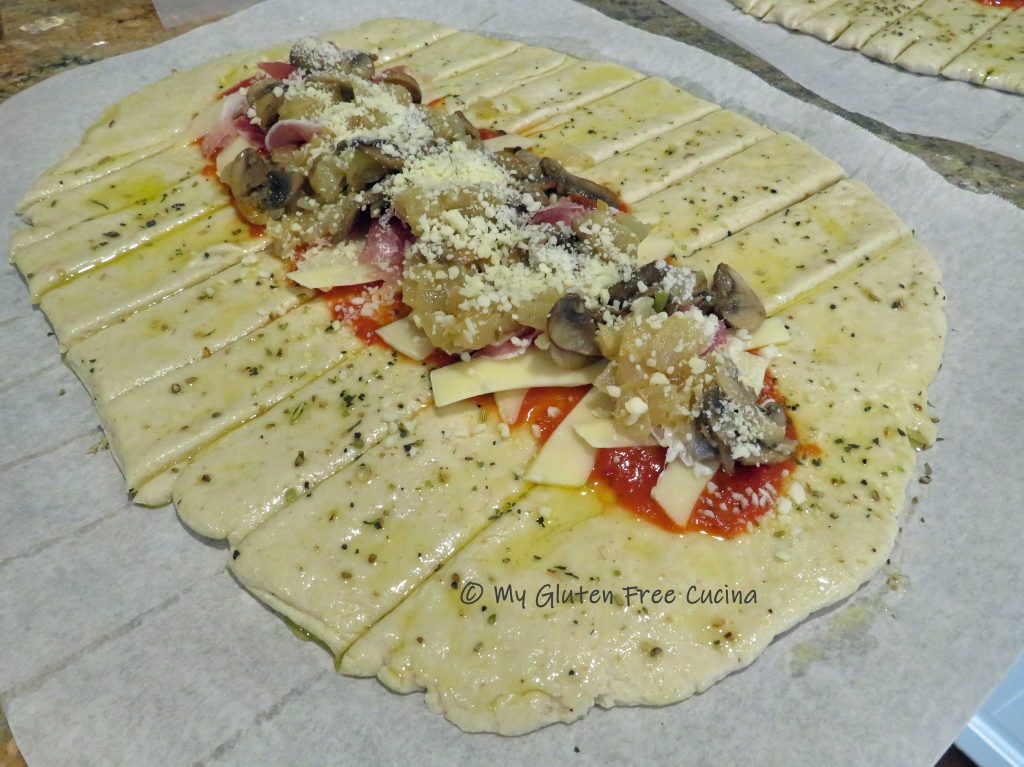
Top with torn pieces of cold cuts and divide the mushrooms and onions between the 2 mummies. Sprinkle with grated parmesan.
Hint: Don’t over fill the dough and make sure veggies are well drained so it won’t be soggy!
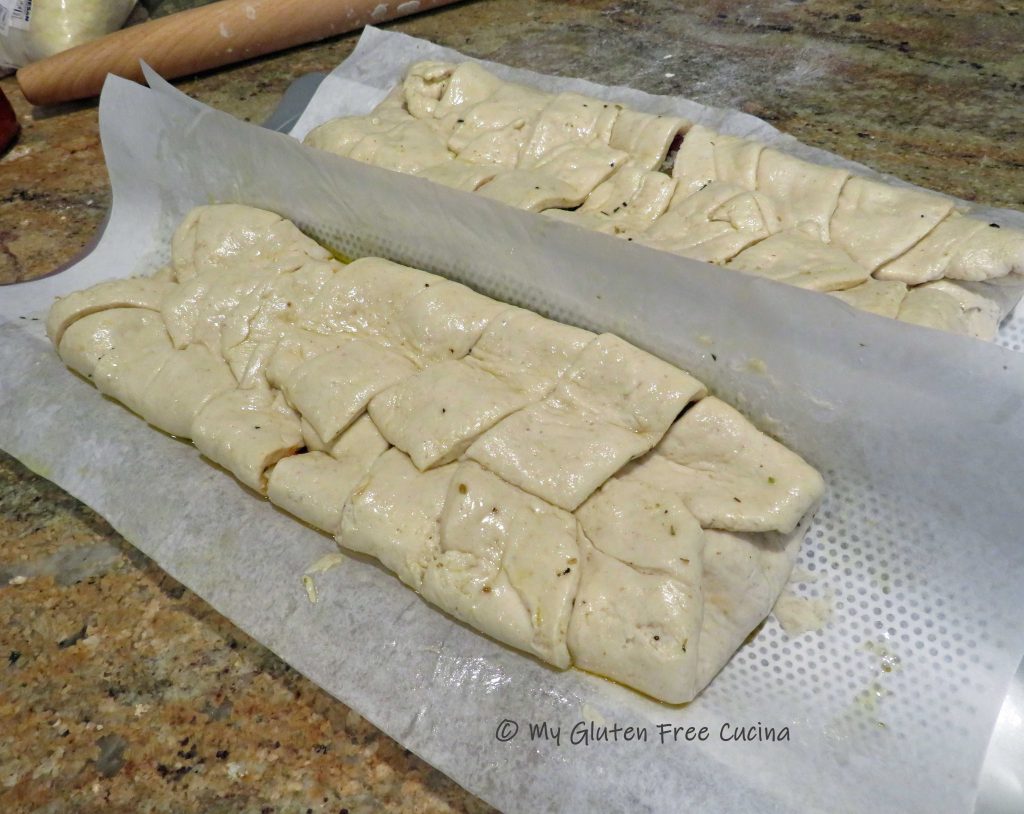
Starting at the bottom, fold the dough over the filling, then begin overlapping the strips from side to side. Continue folding to create the mummy. I transferred my mummies to a perforated loaf pan and trimmed the parchment to fit.
Preheat the oven to 500º. Decorate the mummies with olive and pepperoni slices. Be creative, you can use all sorts of veggies and herbs to dress up your mummy. Brush everything with olive oil and sprinkle with more Italian seasoning.
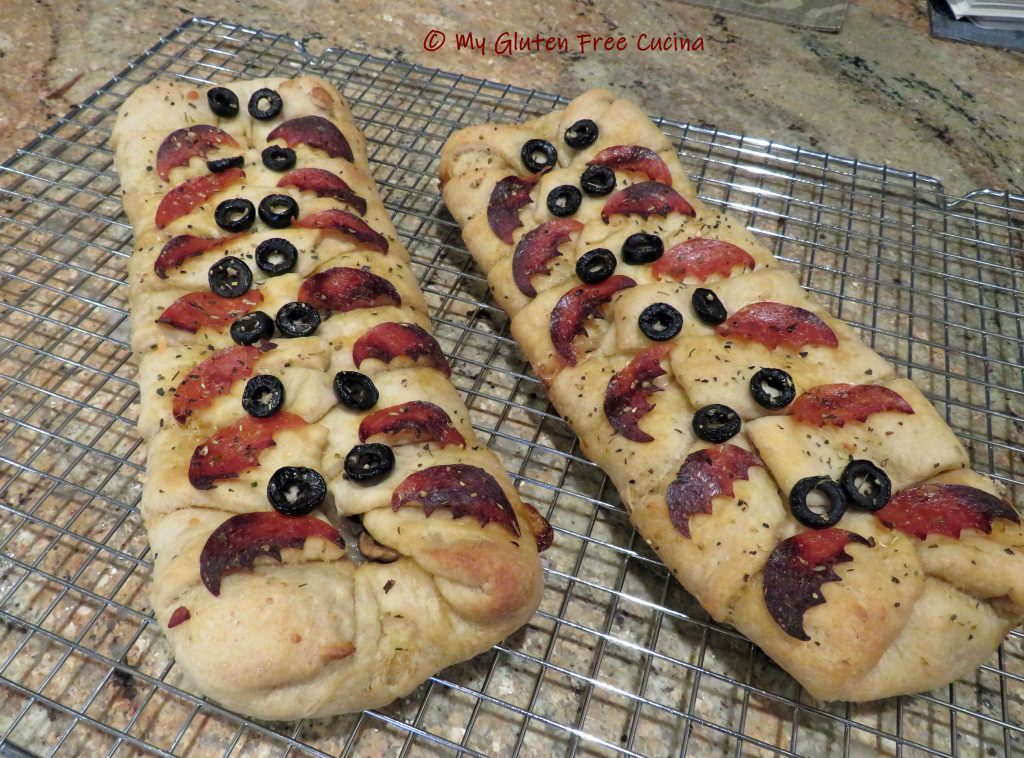
Place the loaf pan on a baking sheet for more stability and to prevent the bottom from burning. Bake for 20 minutes, and tent with foil if the mummies seem to be browning too quickly. Cool in the pan for 10 minutes before moving to a rack.
Mummy bread can be eaten warm or at room temperature. They will stay warm for several hours.
Leftovers (if you have any) can be reheated on a pizza stone.
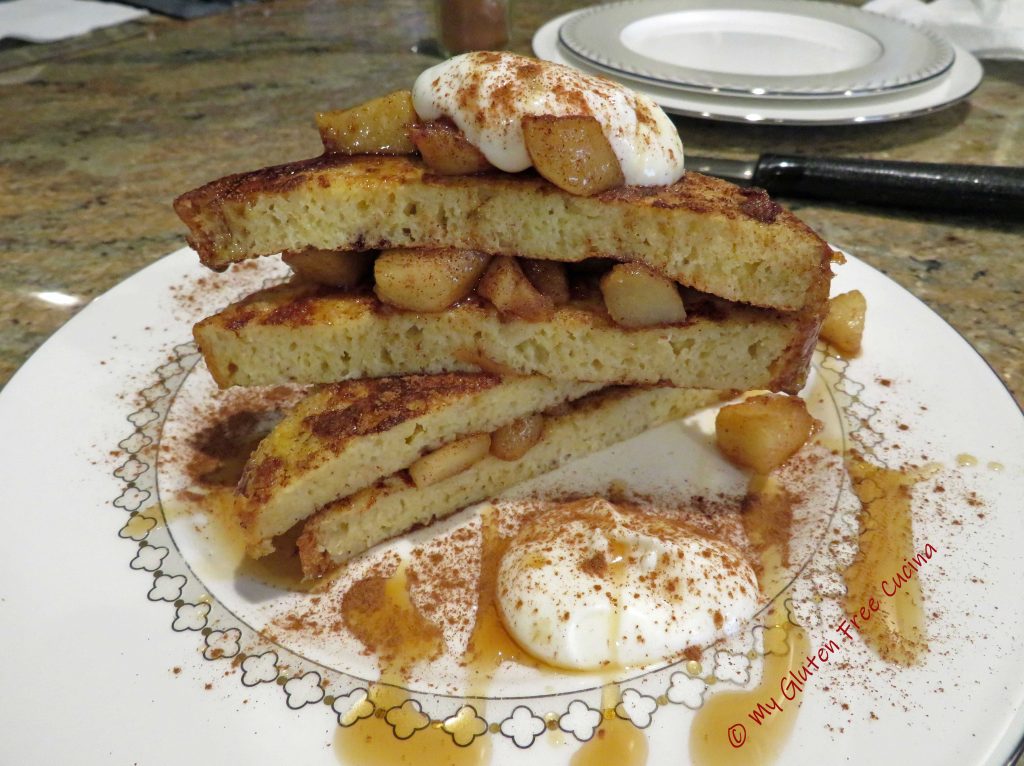
Warm spiced apples layered between slices of French Toast, topped with vanilla Greek yogurt, maple syrup and a dusting of cinnamon. Breakfast or dessert? You decide!
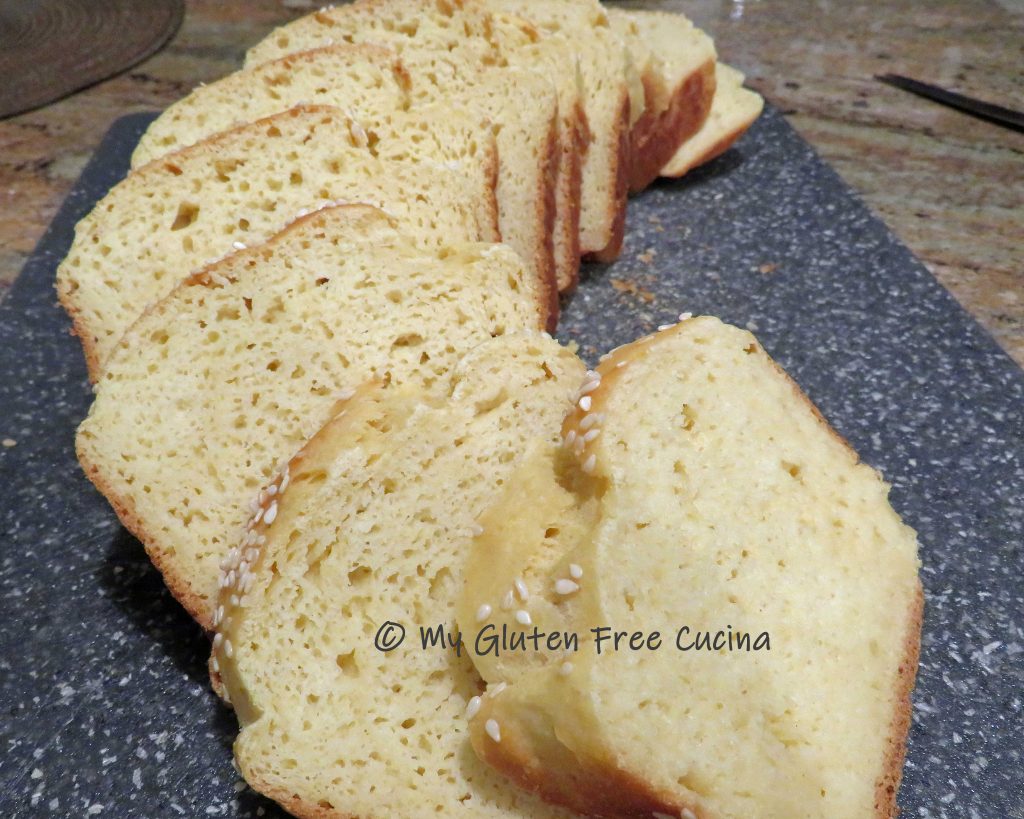
I used my Gluten Free Millet Bread in this recipe; it is an extra special cakelike bread that is perfect for making French Toast. Of course, you can use store bought gluten free bread (I won’t tell!).
This post contains affiliate links.
2 servings
Ingredients:
4 slices of gluten free bread
2 eggs
4 tbsp. milk
1 small apple
3 tbsp. butter, divided
1 tbsp. brown sugar
vanilla Greek yogurt
maple syrup
cinnamon
Preparation:
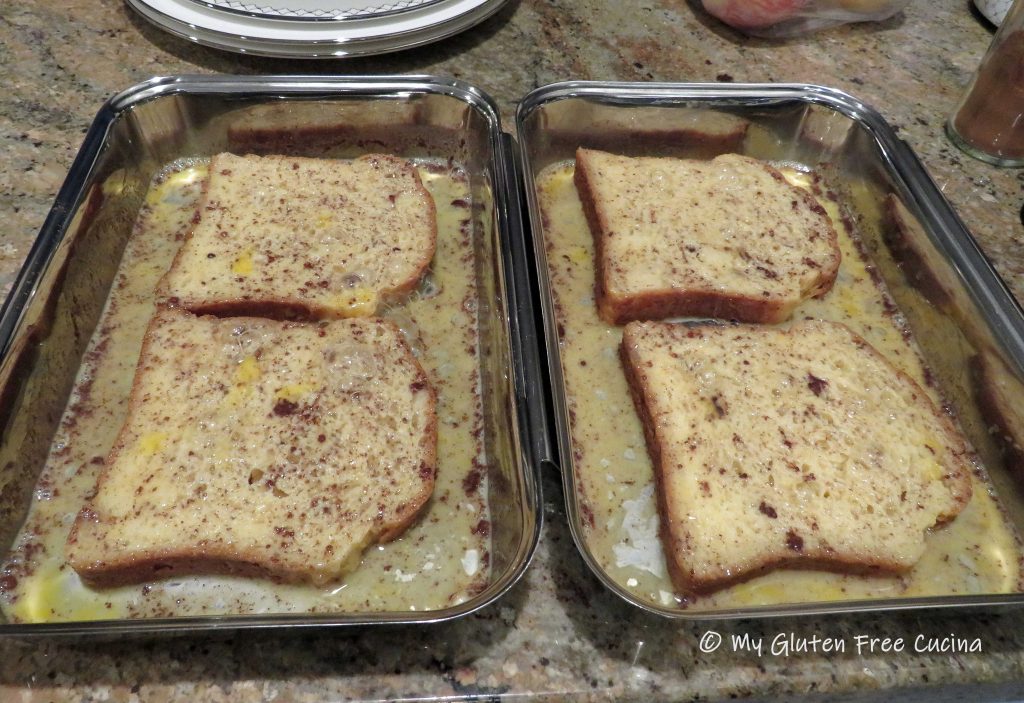
Whisk together the eggs and milk, and sprinkle with cinnamon. Soak the bread slices in the egg mixture for 15 minutes, turning occasionally. Use 2 pans if needed to fit all of the slices.
Peel and dice the apples. In a large nonstick skillet, melt one tbsp. butter. Add the apples and cook for several minutes, stirring frequently. Sprinkle with cinnamon and 1 tbsp. brown sugar. Continue cooking 2 more minutes, then keep warm.
In the same skillet or griddle, melt 2 tbsp. butter. Add the bread slices and cook 3 minutes per side.
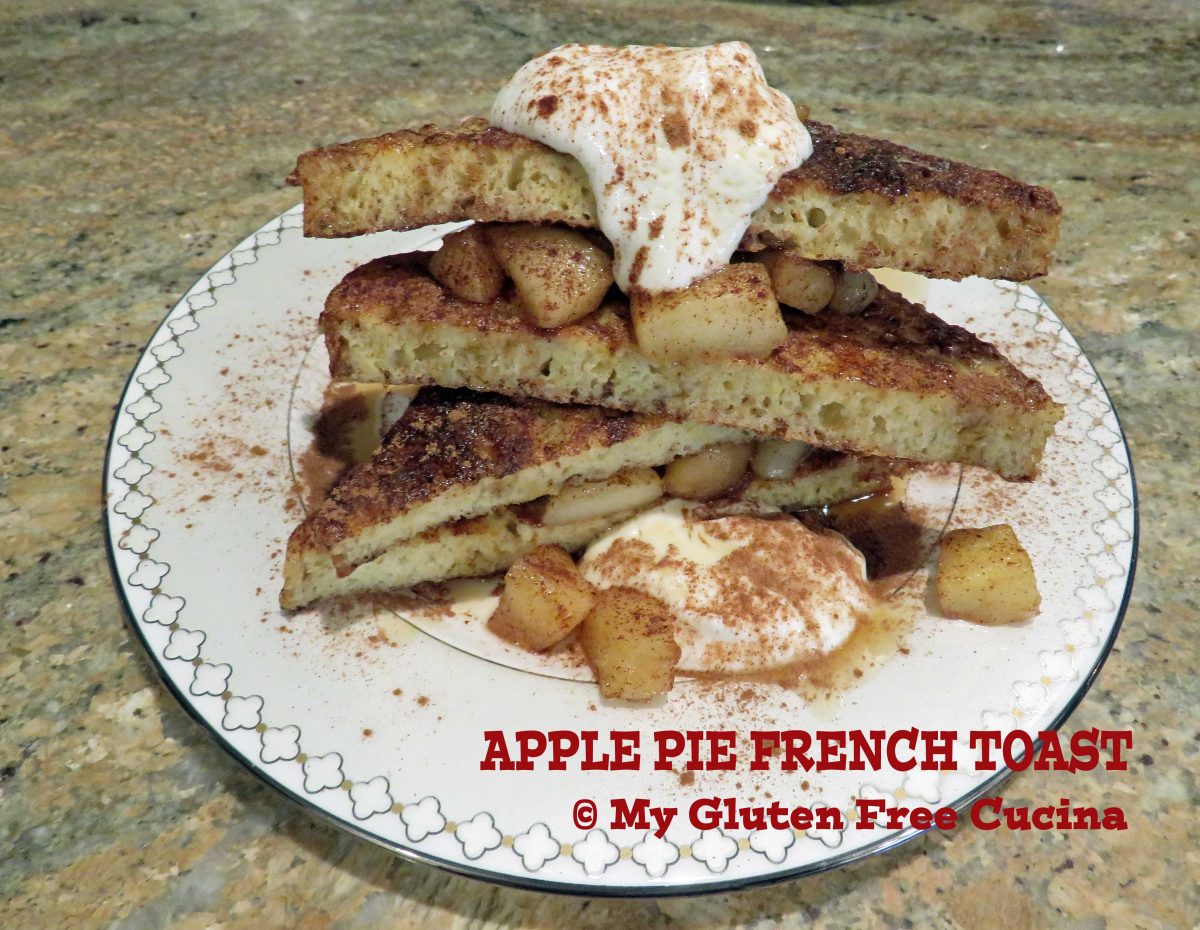
To plate, layer one slice of French toast with apples, then top with a second slice. Cut in half diagonally and stack one half over the other. Top with more apples, and a scoop of vanilla yogurt. Drizzle with real maple syrup and sprinkle with cinnamon.
Look at that plate, definitely a wonderful way to start your day!
Notes ♪♫ If you enjoyed this post, be sure to check out my Tiramisu Stuffed French Toast. And I hope you will try my Gluten Free Millet Bread! You will love the soft, mildly sweet texture of this loaf for French Toast and sandwiches!
Warm spiced apples layered between slices of French Toast, topped with vanilla Greek yogurt, maple syrup and a dusting of cinnamon. Breakfast or dessert? You decide!
Ingredients
Scale
4 slices of gluten free bread
2 eggs
4 tbsp. milk
1 small apple
3 tbsp. butter, divided
1 tbsp. brown sugar
vanilla Greek yogurt
maple syrup
cinnamon
Instructions
Whisk together the eggs and milk, and sprinkle with cinnamon. Soak the bread slices in the egg mixture for 15 minutes, turning occasionally. Use 2 pans if needed to fit all of the slices.
Peel and dice the apples. In a large nonstick skillet, melt one tbsp. butter. Add the apples and cook for several minutes, stirring frequently. Sprinkle with cinnamon and 1 tbsp. brown sugar. Continue cooking 2 more minutes, then keep warm.
In the same skillet or griddle, melt 2 tbsp. butter. Add the bread slices and cook 3 minutes per side.
To plate, layer one slice of French toast with apples, then top with a second slice. Cut in half diagonally and stack one half over the other. Top with more apples, and a scoop of vanilla yogurt. Drizzle with real maple syrup and sprinkle with cinnamon.
Notes
If you enjoyed this post, I hope you will try my Gluten Free Millet Bread! You will love the soft, mildly sweet texture of this loaf for French Toast and sandwiches!
Unauthorized use and/or duplication of this material without express and written permission from this blog’s author and/or owner is strictly prohibited.
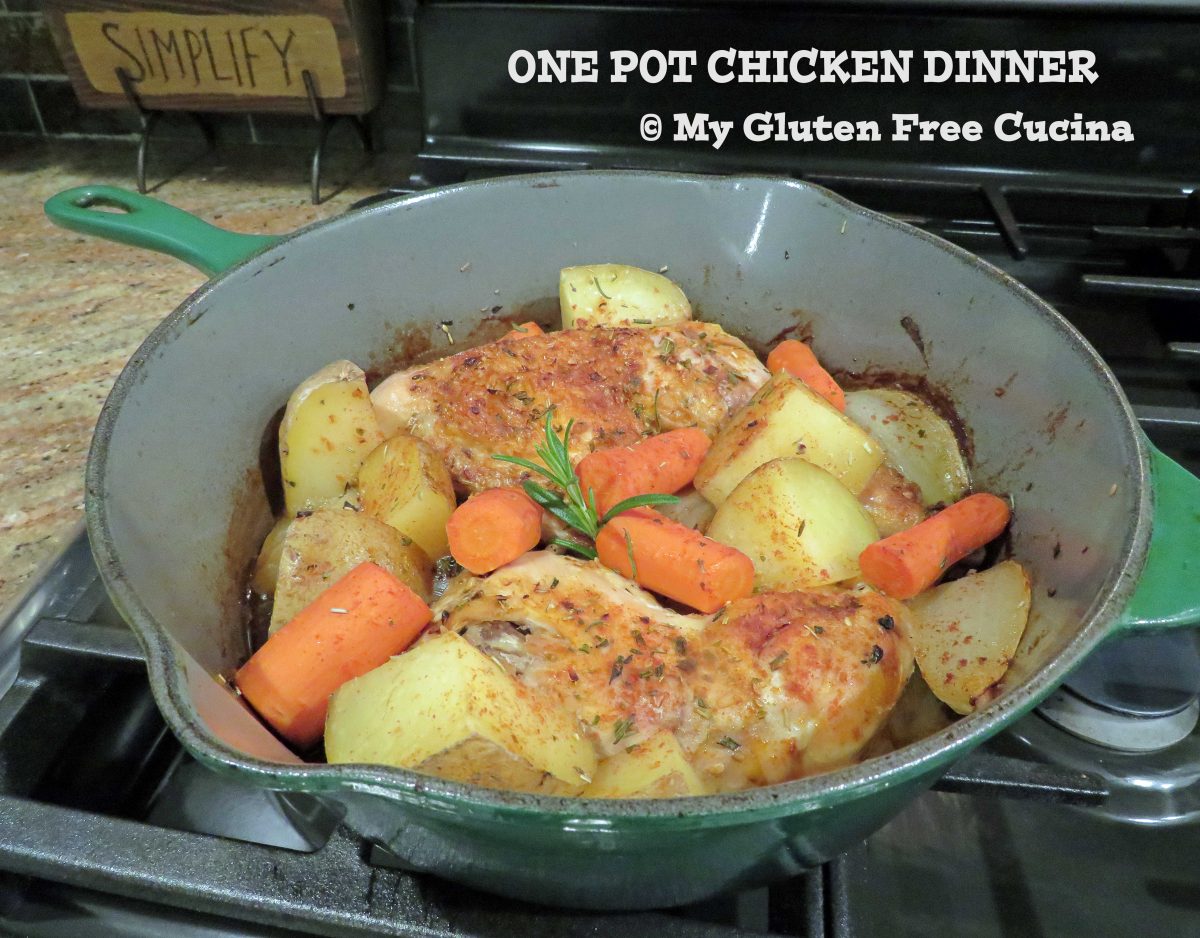
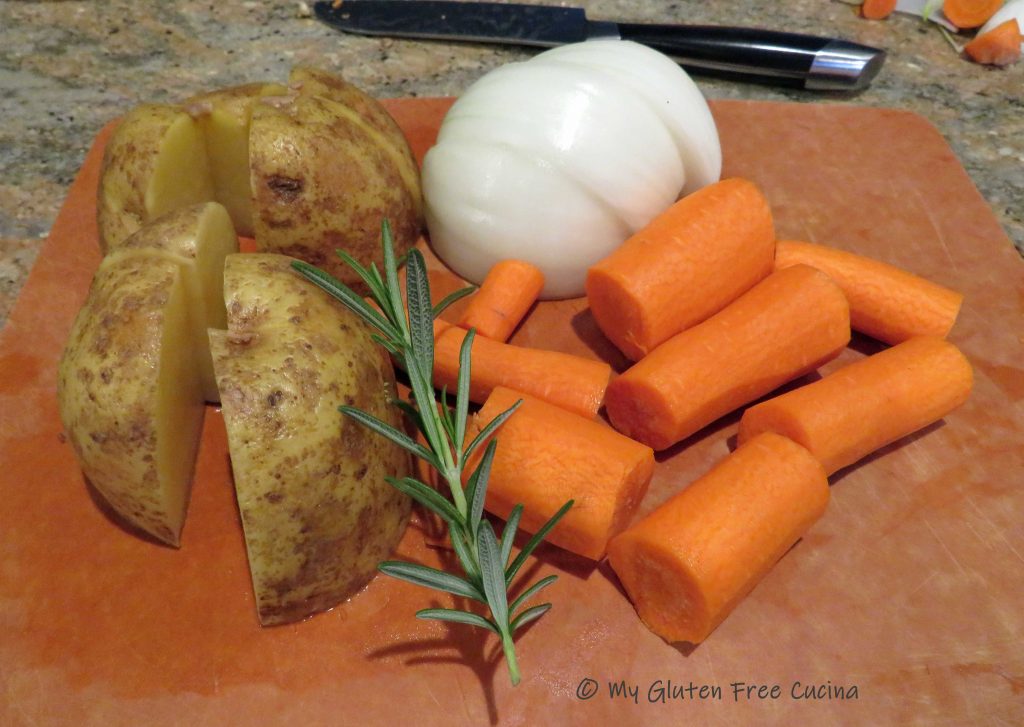
When casual comfort food is on your mind, keep the prep simple with this easy braised dinner. I used fresh, naturally gluten free ingredients like chicken, potato, carrots and onion. Slow braising ensures the chicken leg quarters are falling off the bone tender. As a bonus, this dish goes from oven to table in the same pan for easy cleanup.
Use a heavy, oven safe skillet with cover or a Dutch oven. With the heat on medium low, add 2 tbsp. olive oil and brown the chicken, skin side down for 10 minutes.
Turn the chicken skin side up. Add the onion, potato and carrot. Sprinkle with Italian Seasoning, paprika, and fresh rosemary.
Add a splash of white wine, cover and place in the oven for an hour and 45 minutes (1-3/4 hours) at 300º. Uncover, and cook for an additional 15 minutes to allow some liquid to evaporate. Broil on low for 3 minutes to finish. Garnish with a rosemary sprig and serve it right in the pan.
Notes ♪♫ Gluten free meals do not have to be fancy or difficult! This recipe, made with naturally gluten free ingredients is delicious and satisfying.
Use a heavy, oven safe skillet with cover or a Dutch oven. With the heat on medium low, add 2 tbsp. olive oil and brown the chicken, skin side down for 10 minutes.
Turn the chicken skin side up. Add the onion, potato and carrot. Sprinkle with Italian Seasoning, paprika, and fresh rosemary.
Add a splash of white wine, cover and place in the oven for an hour and 45 minutes (1-3/4 hours) at 300º. Uncover, and cook for an additional 15 minutes to allow some liquid to evaporate. Broil on low for 3 minutes to finish. Garnish with a rosemary sprig and serve it right in the pan.
Notes
Gluten free meals do not have to be fancy or difficult! This recipe, made with naturally gluten free ingredients is delicious and satisfying.
Unauthorized use and/or duplication of this material without express and written permission from this blog’s author and/or owner is strictly prohibited.
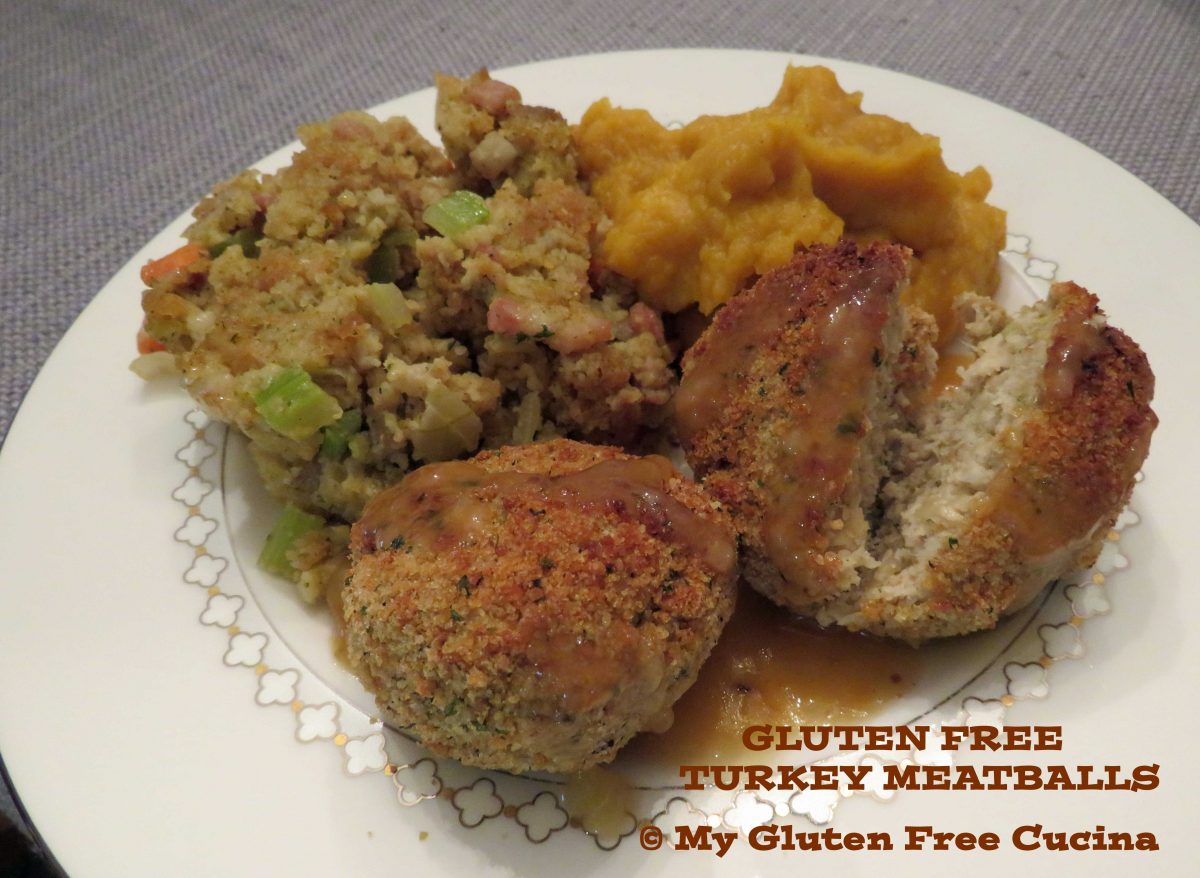
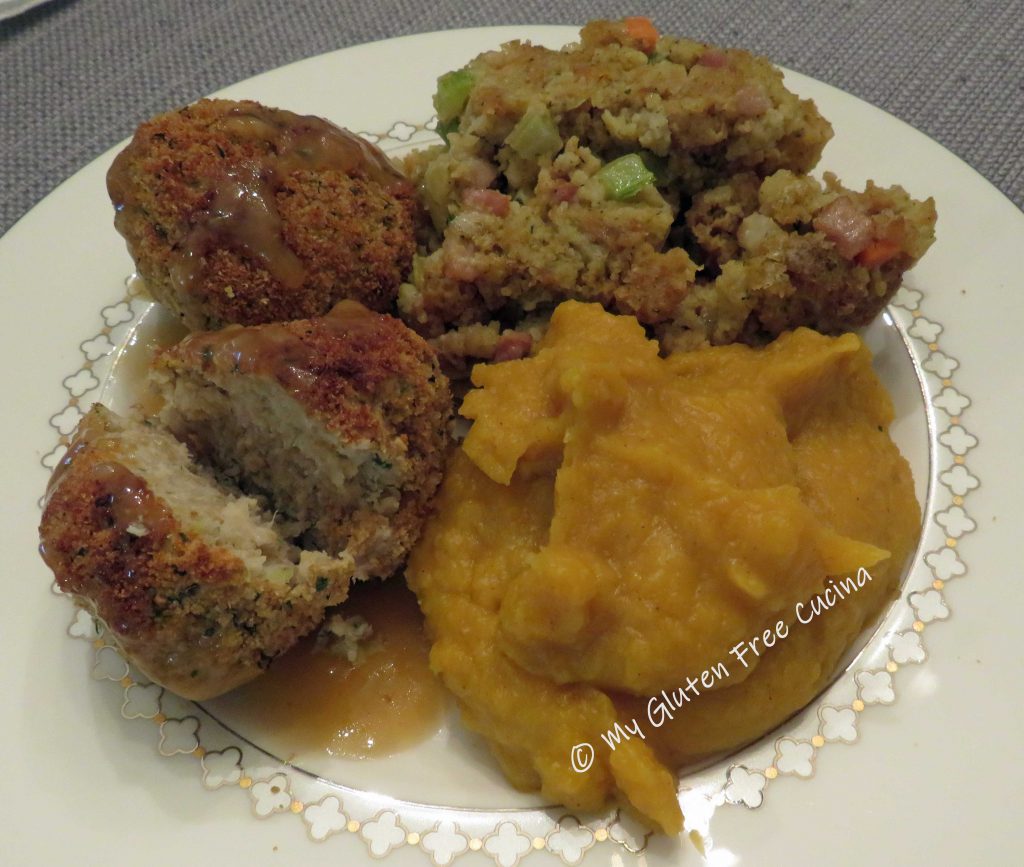
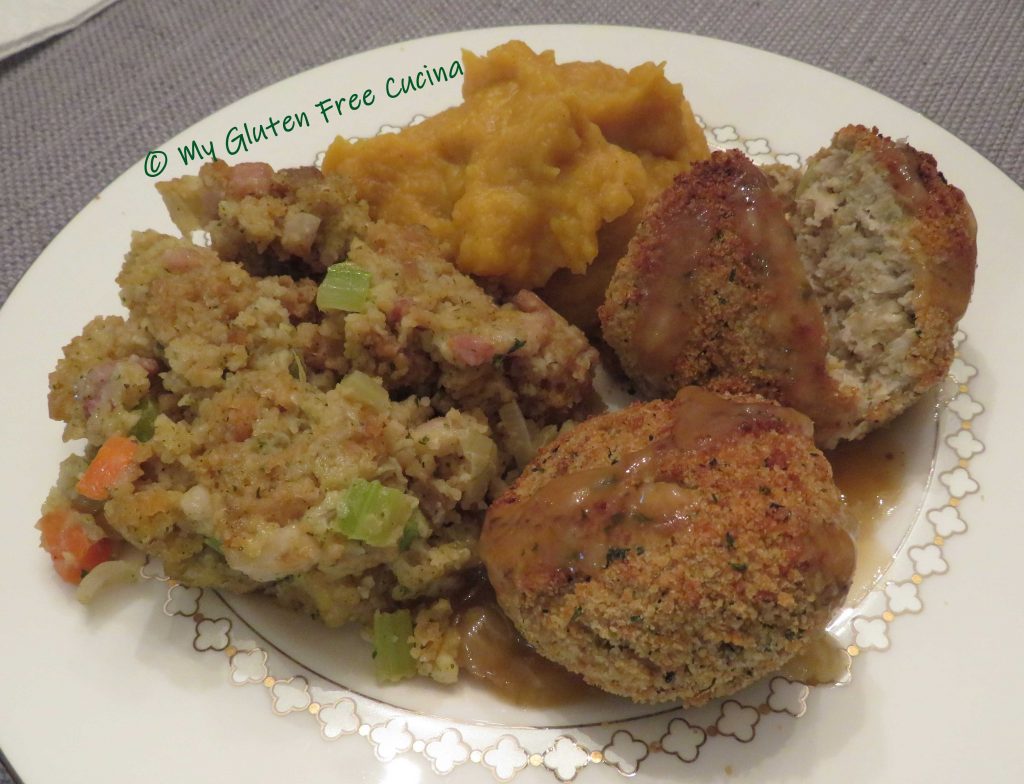
Foodie friends, you don’t have to wait for November! Try my Gluten Free Turkey Meatballs whenever you feel like having a little “Thanksgiving Lite”! The flavors of sage, thyme, onion and celery mirror the big Thanksgiving dinner in a fraction of the time.
A little ricotta in the mix keeps the meatballs nice and moist. Potato flakes and rolled oats are the magic that hold these gluten free meatballs together. You are going to love this easy entree! Complete the meal with a side of stuffing and drizzle of turkey gravy.
additional 1 cup of gluten free breadcrumbs, for rolling
Preparation:
Use an electric chopper to finely mince the onion and celery. Combine the first 8 ingredients in a bowl and mix thoroughly. Add the breadcrumbs, potato flakes and oatmeal to the wet ingredients a little at a time until well combined (use your hands).
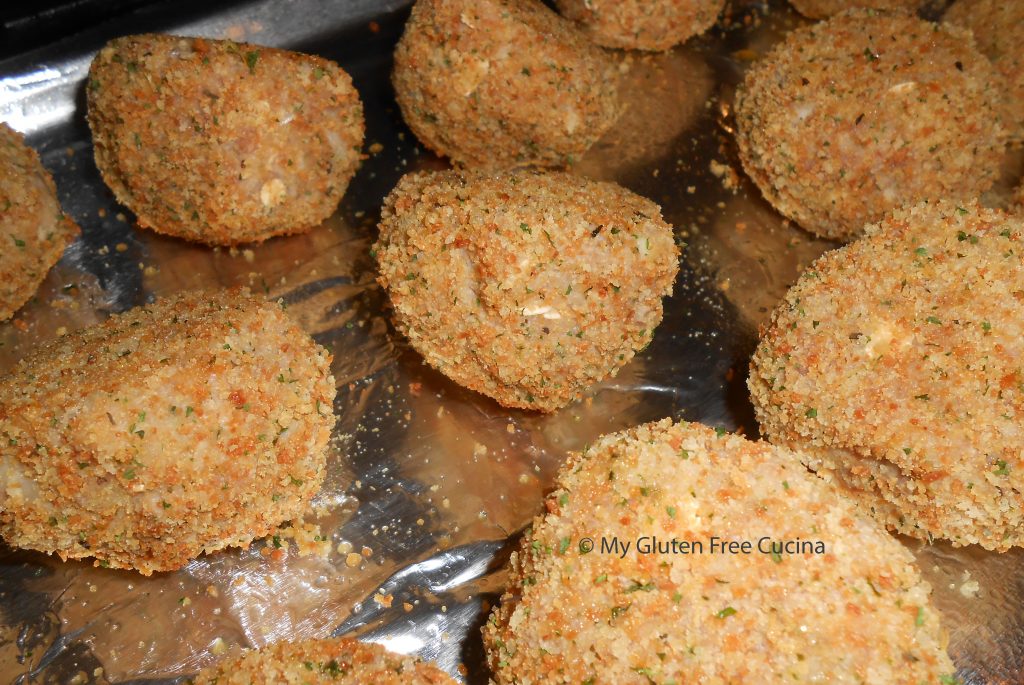
Line a baking sheet with foil and mist with cooking spray. Spread 1 cup of breadcrumbs in a bowl or plate. Form 12-14 meatballs, rolling each meatball in the breadcrumbs and arrange on the baking sheet at least 2″ apart.
Broil 5 minutes on high, turn and broil another 5 minutes.
With dinner on the table in under a half hour, you will want to add this to your weeknight rotation. Everyone will love it!
Notes ♪♫ Oh those breadcrumbs, don’t they look amazing? They are Aleia’s Italian Breadcrumbs, and yes, they are gluten free. A bit more expensive but so worth it to get that true breadcrumb taste!
Originally posted 11/10/2018 Updated post 8/12/2022
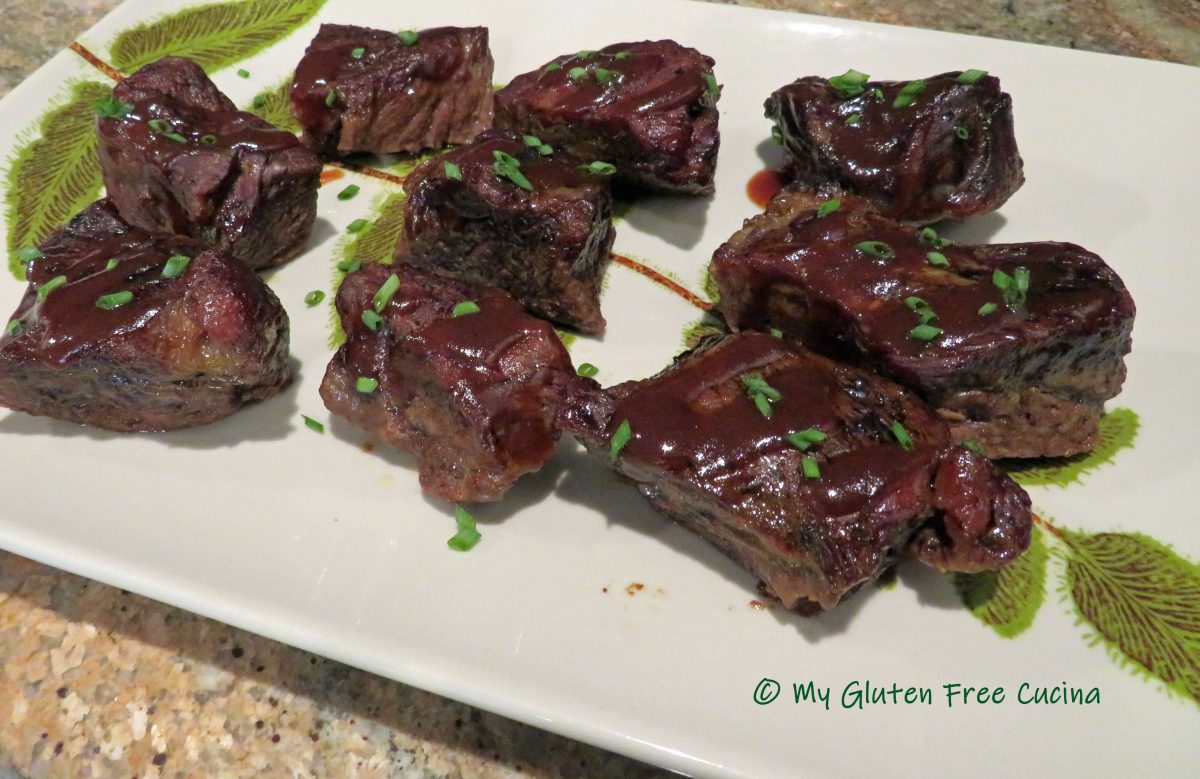
Who doesn’t love beef short ribs! Yes, they are pricey these days, but when they go on sale it’s time for a BBQ dinner. In this very easy recipe, boneless beef short ribs are baked slowly at a low temperature and basted with a simple homemade barbecue sauce that will rival your favorite store brand! It’s a meal that you can enjoy any time of year and with little effort.
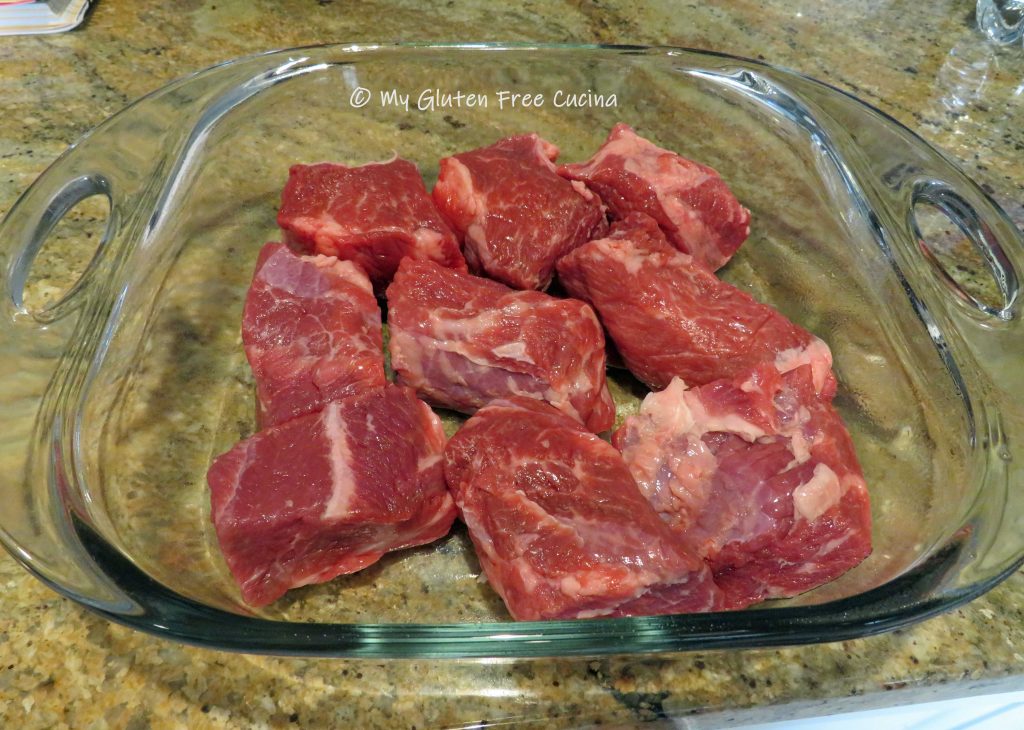
The beef will shrink considerably during cooking, so start with twice as much as you think you need. For two people I suggest 1.5 lbs. of boneless beef short ribs. It may look like a lot to begin with, but there will be no leftovers 😉
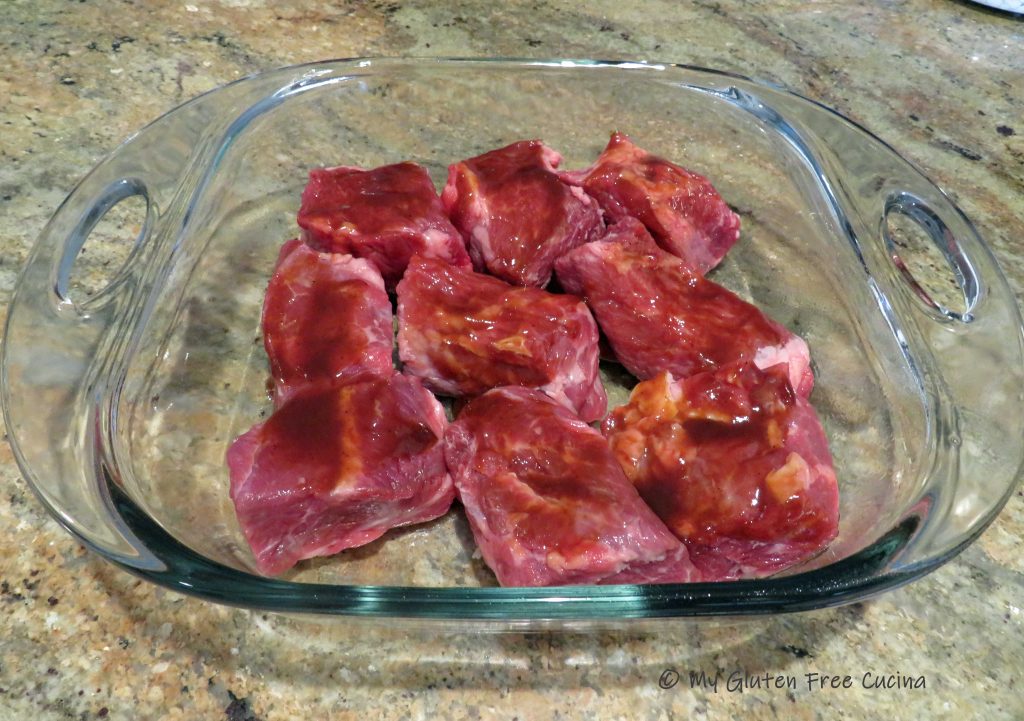
Preheat the oven to 300º. Cut each short rib into 3 pieces and place in a square baking dish coated with cooking spray. Season both sides with salt and pepper.
Whisk together the BBQ Sauce ingredients or use your favorite store brand (I won’t tell). Spoon 3 tbsp. of the sauce over the ribs.
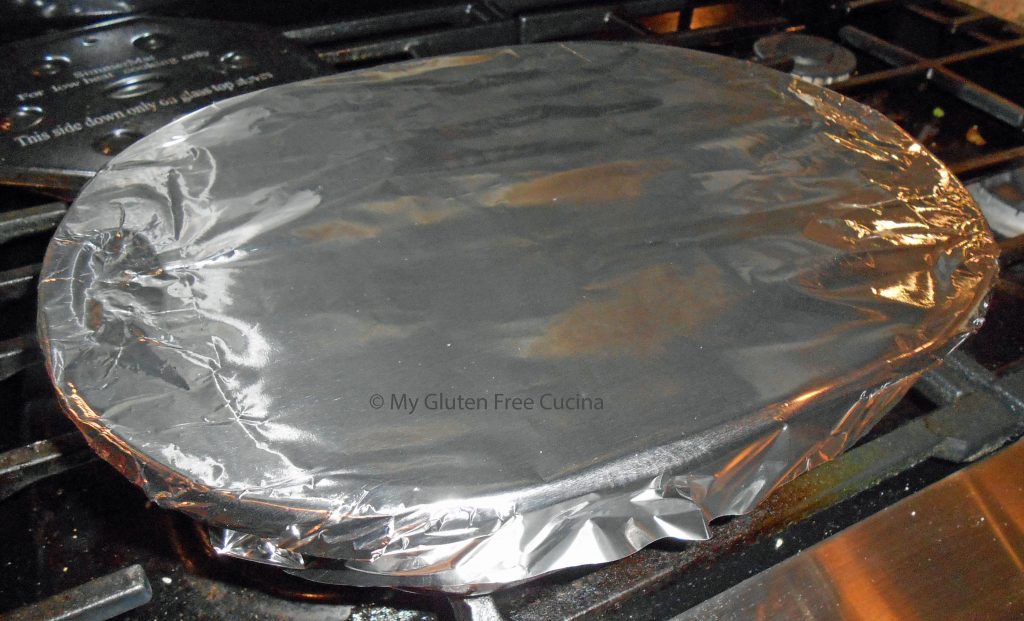
Turn them over and spoon another 3-tbsp. sauce to coat. Cover tightly with foil.
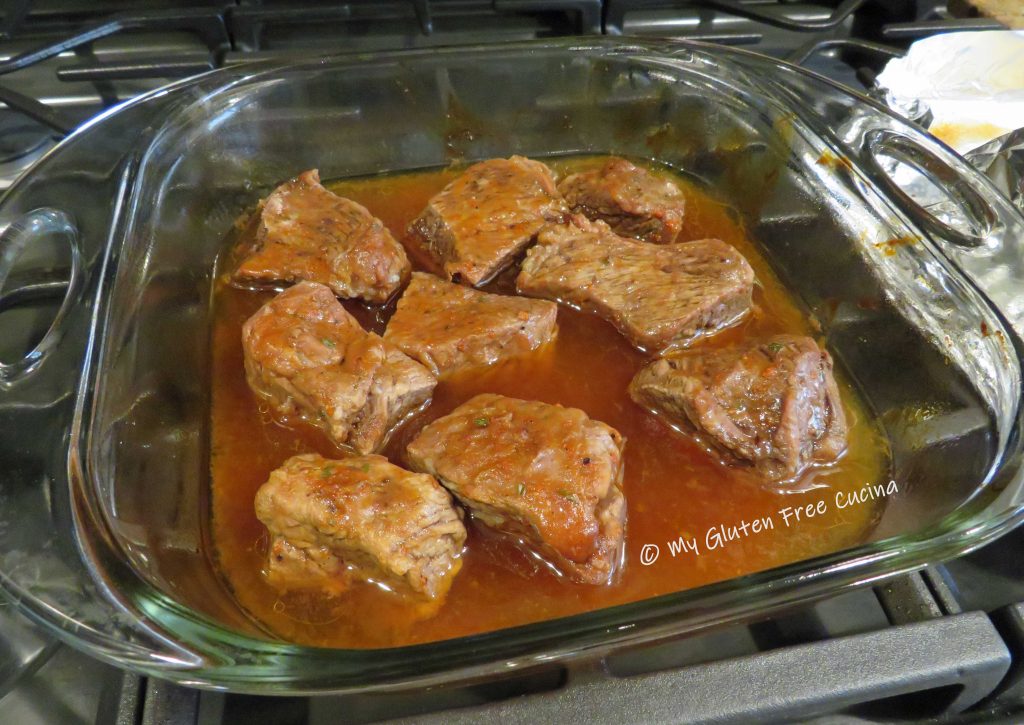
Roast for 2 hours at 300º, then use tongs to carefully remove the foil. If there is too much liquid, you can remove some of it with a ladle. Cook 30 minutes more, uncovered.
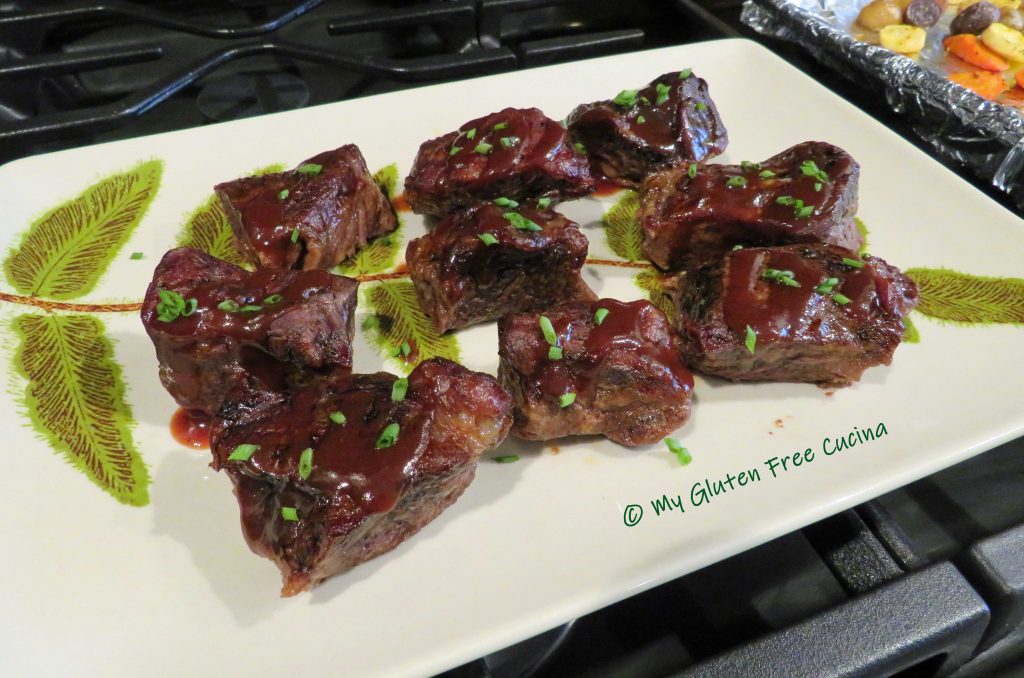
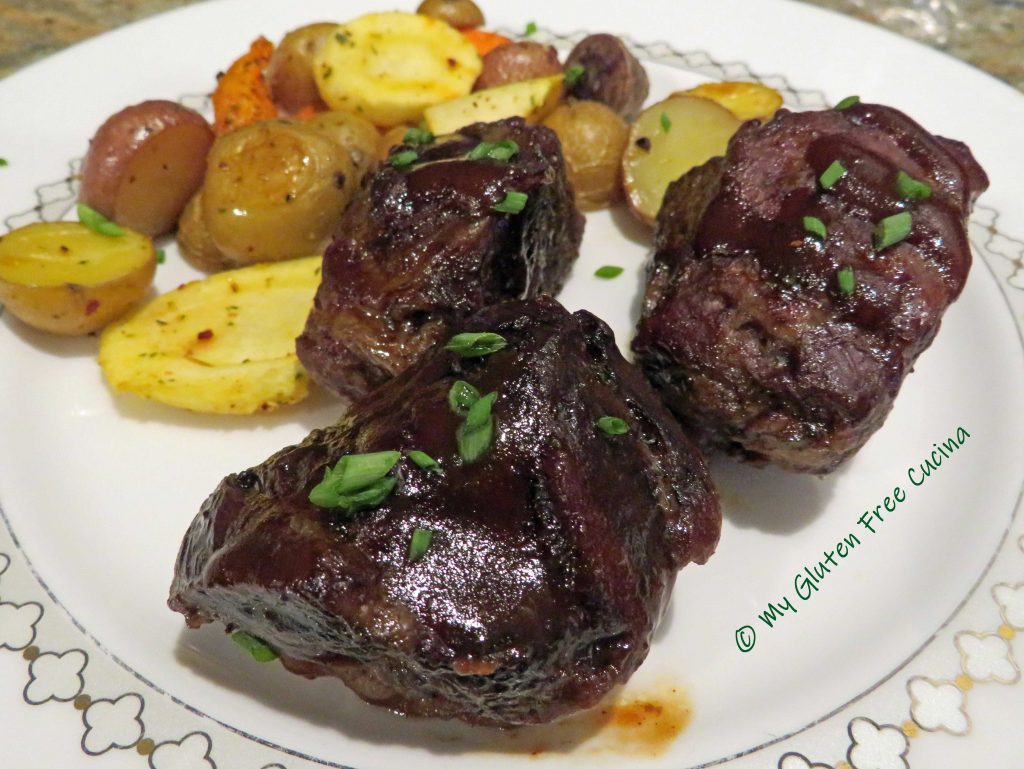
Warm the remaining sauce for serving. Remove the short ribs and arrange on a serving platter. Brush with the extra sauce and garnish with fresh chives.
This meal was so good! I served the ribs with roasted carrots, parsnips and baby potatoes. Use your favorite seasonal sides (sweet corn in summer for sure).
Notes ♪♫ If you prefer to buy the BBQ sauce, I recommend Stubbs. All of their BBQ sauce flavors are delicious and gluten free.
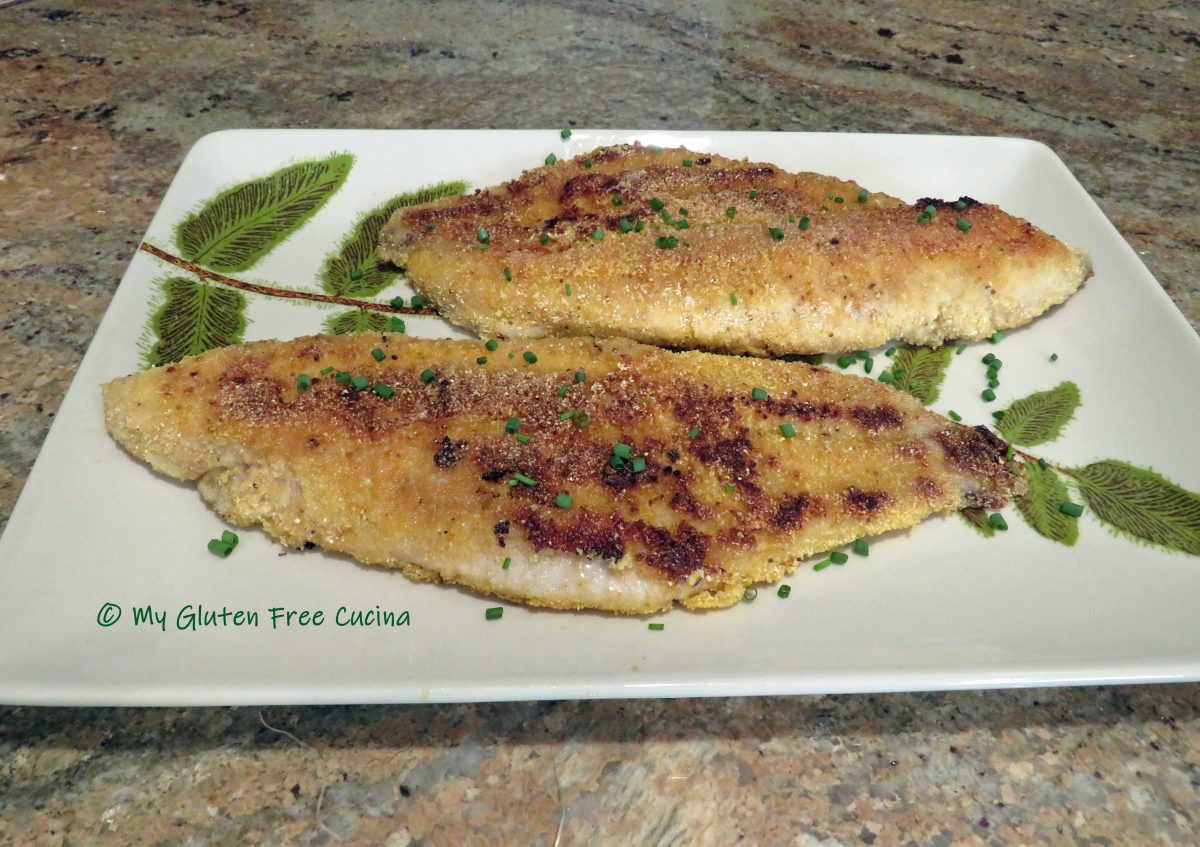
I love Catfish! We don’t often see it at the market, just a short time each year when in season. When it does become available, this is how I like to prepare it.
First, I soak the Catfish in milk for 30 minutes. Milk tenderizes the fish and gives it a milder flavor. Then, after dredging in a seasoned cornmeal breading, I pop it into the fridge for 15 minutes. Finally, the fish is cooked quickly on a buttered griddle. It is nice and crispy on the outside, moist and flaky on the inside.
Is Breaded Catfish gluten free?
To make this recipe gluten free, the only change needed was to substitute a gluten free flour for regular in the cornmeal breading.
Add 1/2 cup of milk to a 9 x 13″ glass baking dish and season with Old Bay. Soak the catfish in milk for 30 minutes, turning once.
In a large plate, combine the rice flour and cornmeal. Sprinkle with Old Bay.
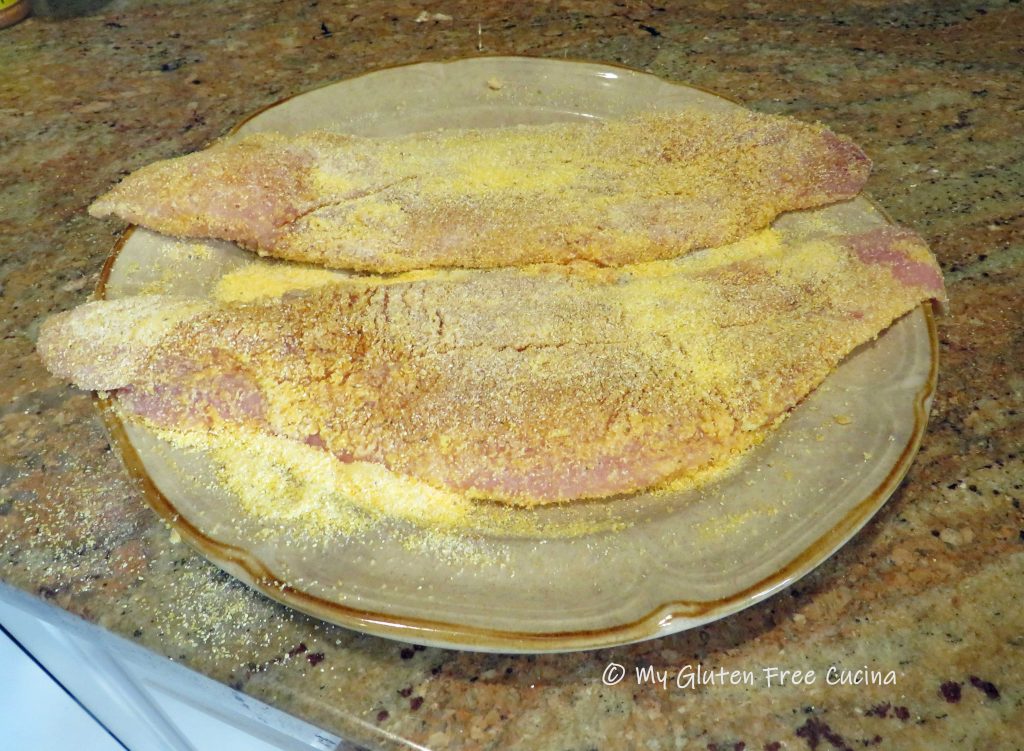
Dredge the catfish in the cornmeal mixture, pressing gently to coat both sides. Transfer to a clean plate and refrigerate for at least 15 minutes (this helps the breading to adhere).
Transfer to a serving dish and sprinkle with fresh chives.
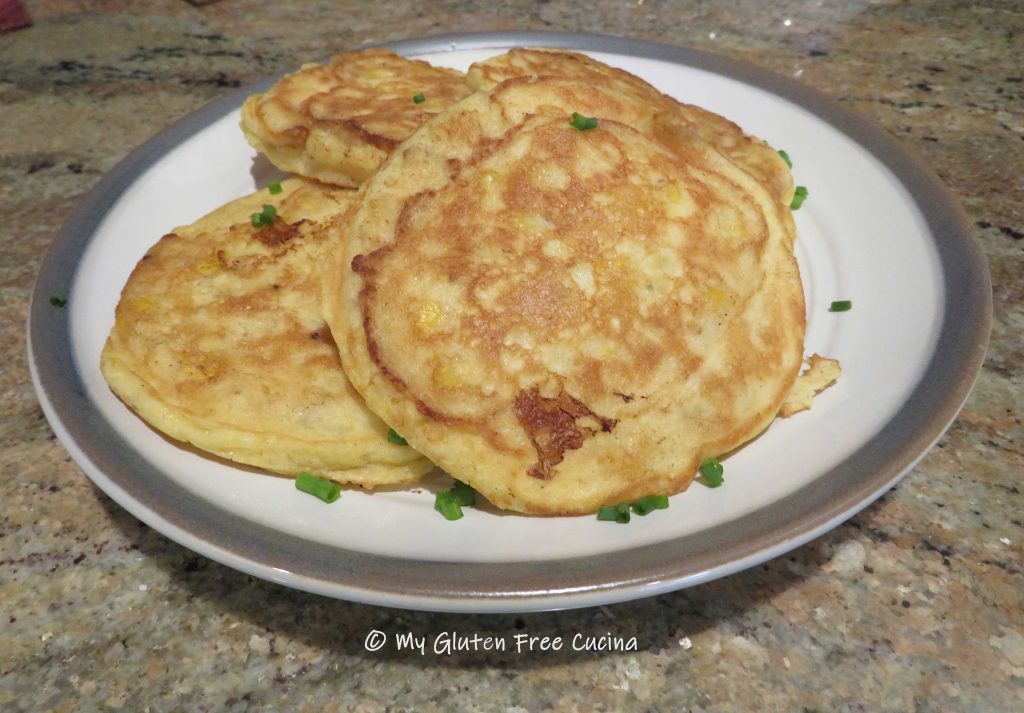
What goes well with Catfish? In keeping with the Southern vibe of this meal, I made a side of Gluten Free Corn Cakes. Check out the recipe here!
Notes: ♪♫ Be sure to choose cornmeal with the gluten free label (some are processed alongside wheat products and may not be safe for those with Celiac). I like to use whole grain, medium grind cornmeal. It’s great for breading and for baking.
Here is a simple, Italian inspired Gluten Free Pasta Salad to bring to the family BBQ, or to make ahead and enjoy with dinner after a busy workday. With no mayonnaise, it won’t go bad on those hot summer days. It’s a light refreshing side dish that won’t leave you feeling stuffed.
My biggest tip for this recipe is to assemble it no more than a few hours before serving. You can prep the veggies the night before, but don’t cook the gluten free pasta too far ahead, it won’t keep as well in the fridge as regular pasta. For best consistency, I like to drain and chill the pasta for 30 minutes before tossing it with the veggies and dressing.
8 servings (can be doubled)
This post contains affiliate links.
Ingredients:
3 slices of bacon, diced
8 oz. gluten free pasta
1 tbsp. olive oil
2 cups veggies cut into small dice –
frozen peas, thawed and drained
red onion, small dice
grated carrot
cucumber, small dice seeds removed
red bell pepper, small dice
green beans, blanched and diced
salt and pepper to taste
1/4 cup Italian cold cuts, chopped (optional but good)
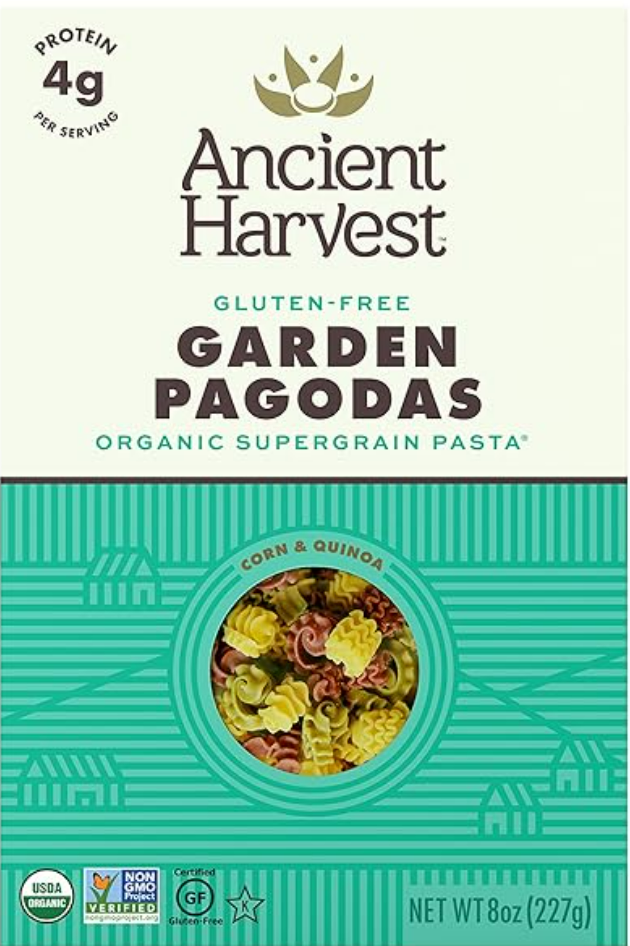
It’s been almost impossible to find these Garden Pagodas from Ancient Harvest since the pandemic. But they are just perfect in this pasta salad, so if you spot them be sure to grab a couple of boxes!
This year I used a gluten free bowtie pasta (365 Whole Foods Market brand), and it was excellent! The pasta held together beautifully and just the right texture. I made a double batch.
Preparation:
You will need about 2 cups total diced veggies. This is a great way to use up leftovers, use veggies you have on hand or use your favorites! Today I’m using red onion, cucumber, carrots, bell pepper, peas and green beans. You can do this step a day ahead to save time. Keep everything chilled until ready to assemble the pasta.
Cook the bacon and drain on paper towels.
As I mentioned above, I recommend that you wait until a few hours before serving to assemble the salad. Cook the pasta to al dente. This will likely be several minutes less than the package directions, so taste frequently. Drain the pasta and immediately rinse it under cold water to stop the cooking.
Place the colander over a large bowl, toss with 1 tbsp. olive oil and chill in the fridge for 30 minutes.
Combine the drained, chilled pasta with the veggies in a large bowl, toss with the bacon, cold cuts and cheese.
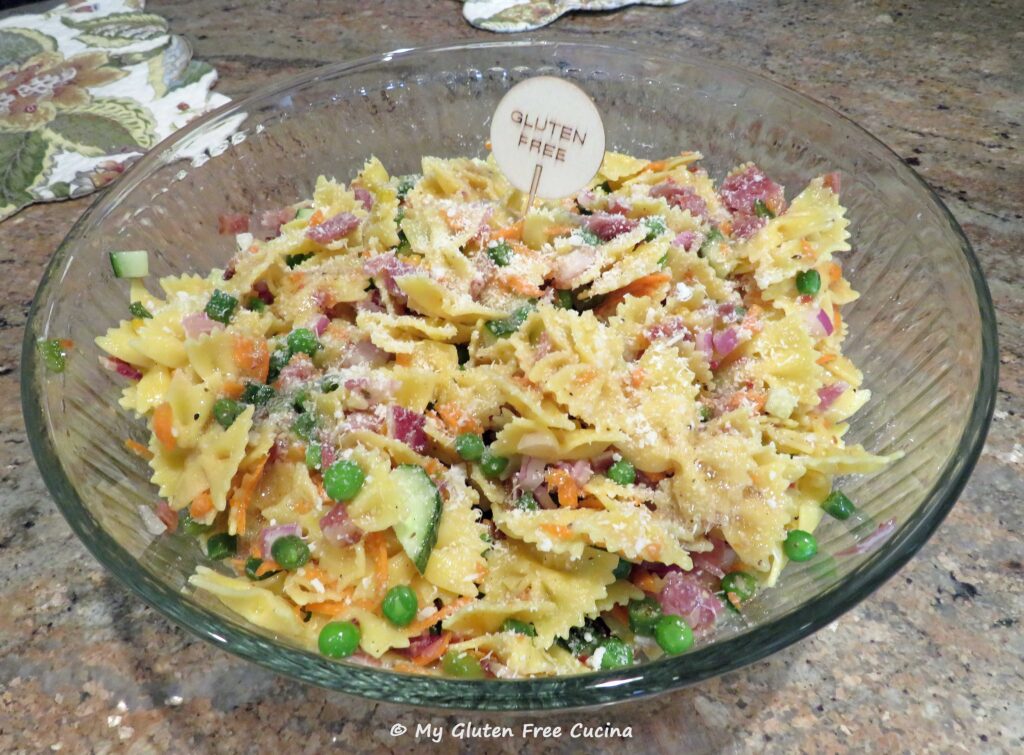
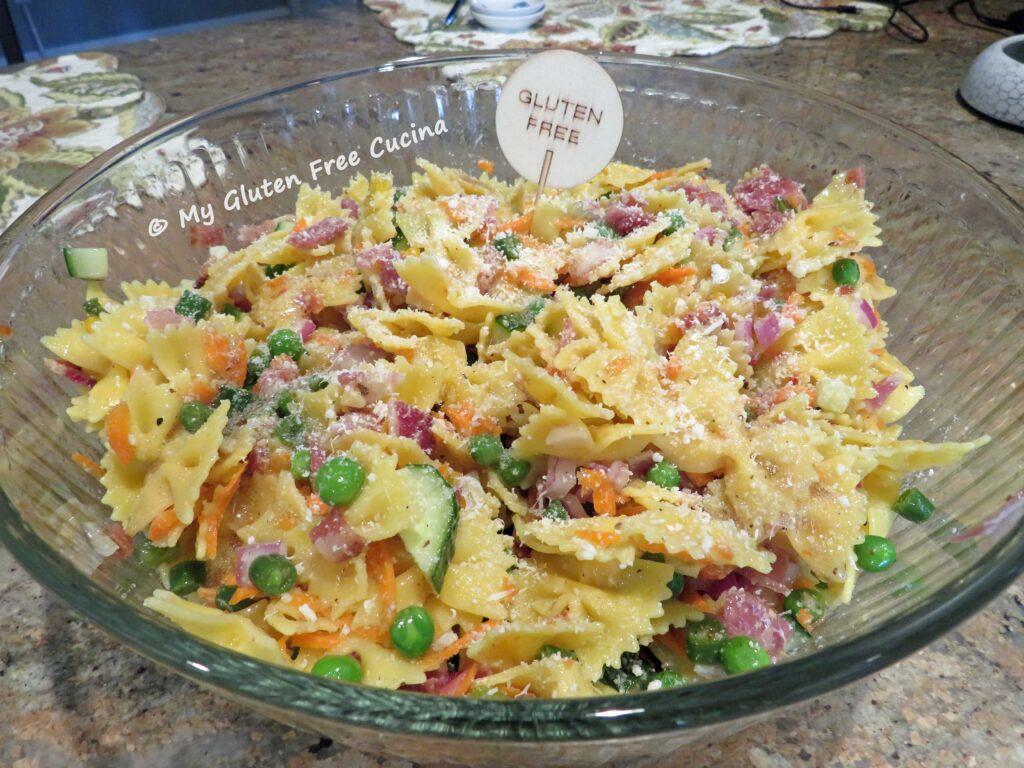
Add the Italian dressing and toss well. You can bring it to the table just like this, in your mixing bowl!
Or transfer it to a pretty serving bowl. Cover and refrigerate until ready to serve.
Notes ♪♫ I always add a gluten free marker to a dish that I bring to a cookout, in case there are other guests with the same dietary restrictions. I’ll bet that if I didn’t tell anyone it was gluten free no one would be the wiser! Make it for your next get together and watch it disappear 🙂
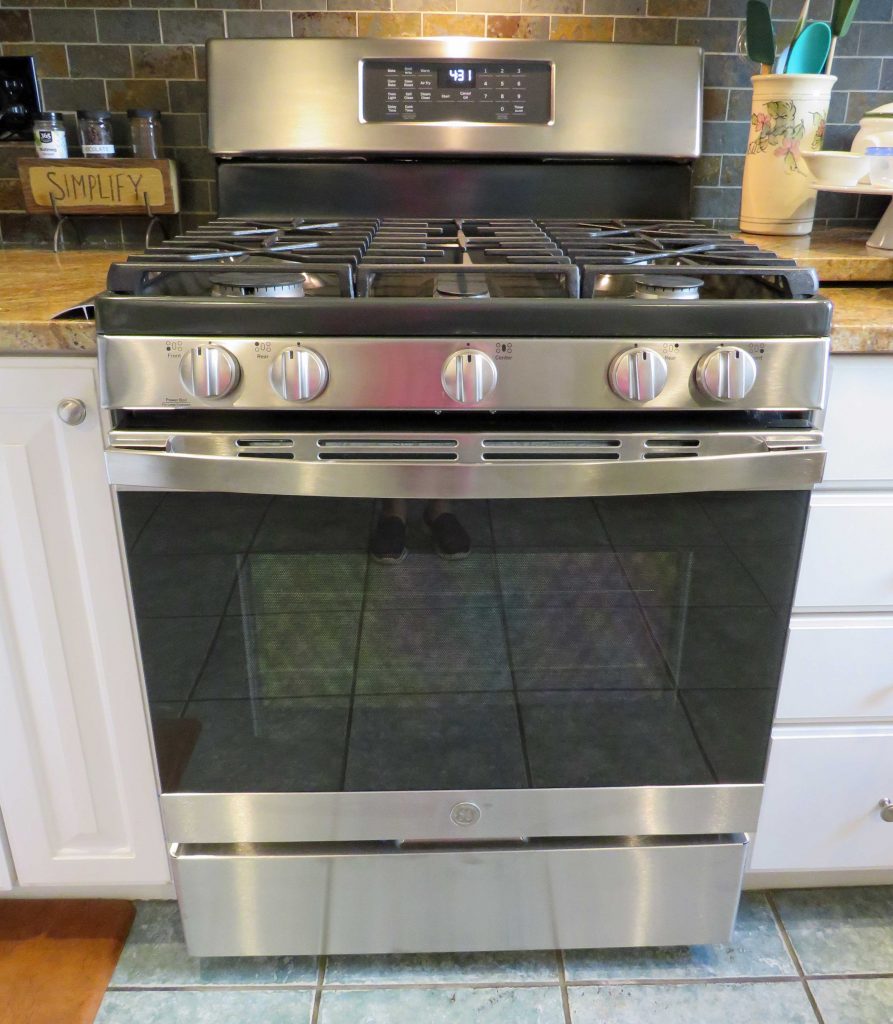
I got a new stove! Recently my beloved stove of 10 years had a major malfunction. Actually, I couldn’t turn the gas off and we had to call the fire department, oh my that was quite the night! A few days later our repairman pronounced the stove DOA, and we were off to shop for a new one. Fast forward one week, and this pretty new stove arrived.
Coincidentally we were also having our first heat wave of the summer. It was over 90 degrees in the shade, so what did I do? Yes, I cranked up the oven to 500º and made pizza! Just to be sure everything was working properly, right?
1/3 cup pizza sauce (use leftover from another meal or jar sauce)
1/3 cup shredded cheese
Preparation:
To make the dough, combine warm water, yeast and sugar. Proof for 10 minutes. Sift the flour and salt into the bowl of a stand mixer. Combine the yeast mixture, sifted flour and olive oil. Beat for 6-8 minutes. Bring the dough together in the bowl, cover and refrigerate for one hour.
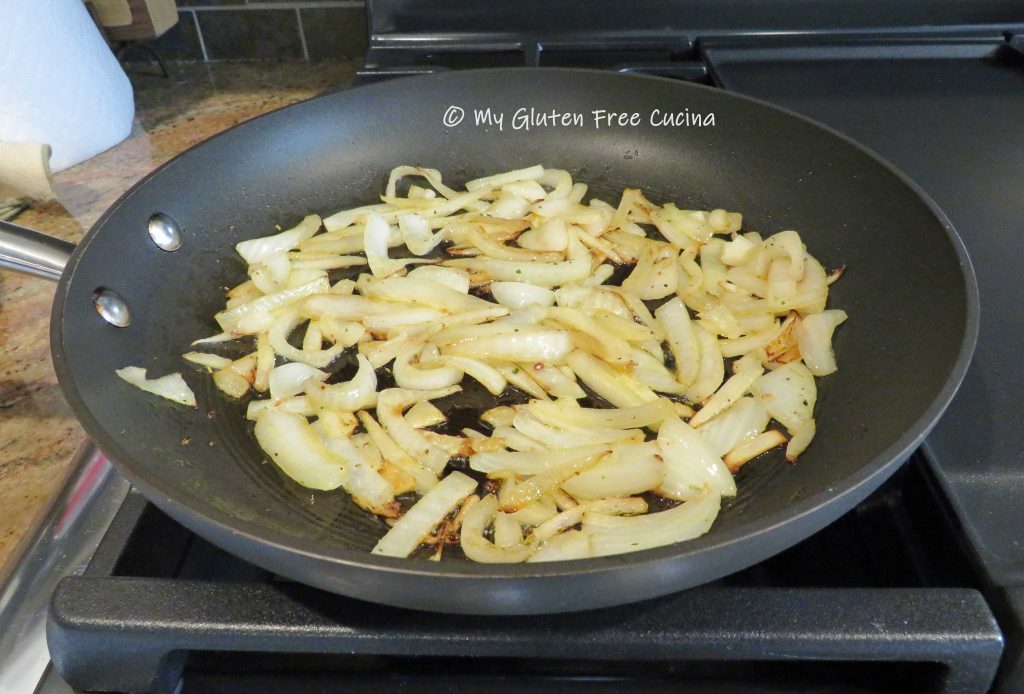
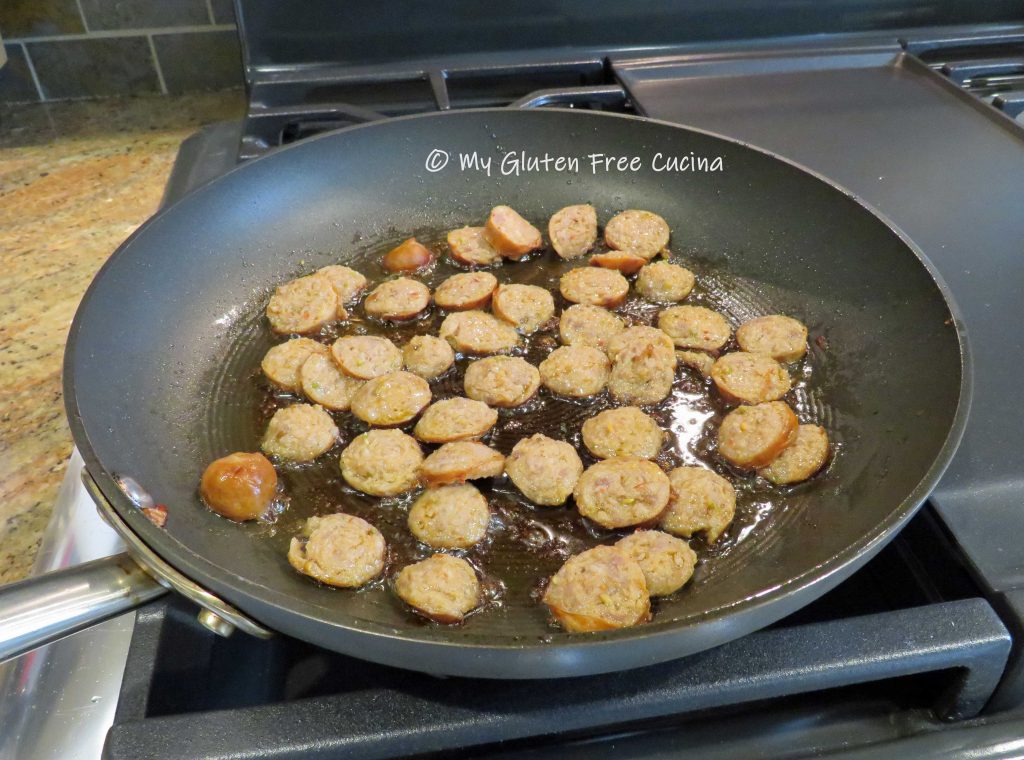
While the dough is resting, prepare the toppings. Cook the onions, mushrooms and sausage in olive oil.
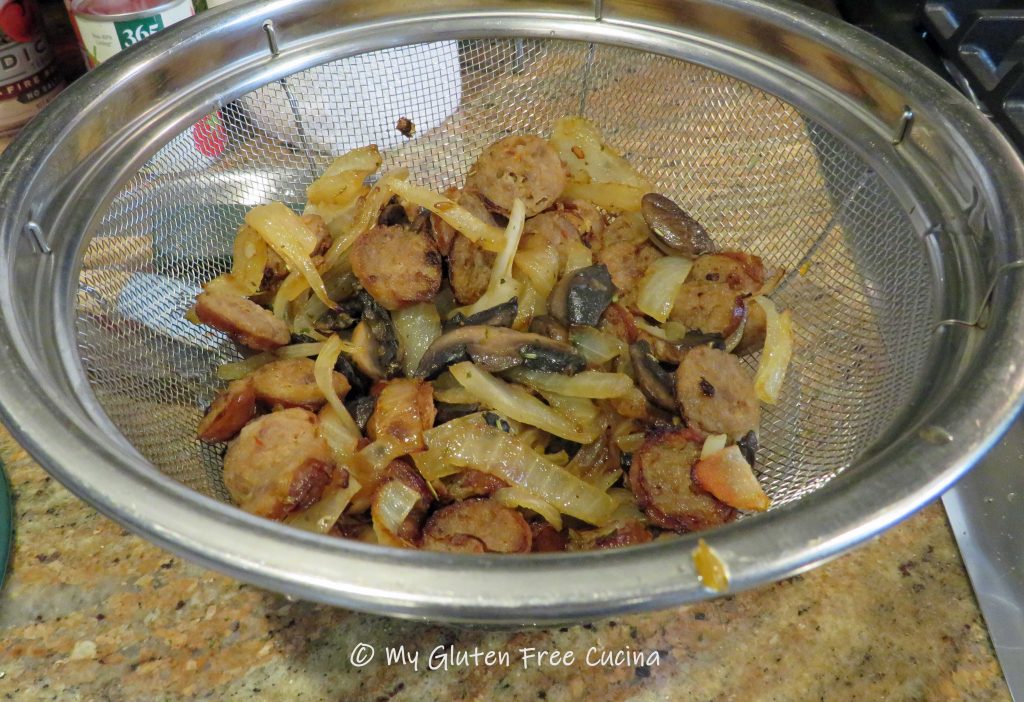
Transfer the sausage and veggies to a colander and let them drain.
Remove the proofed dough from the refrigerator, it will have doubled in size. Cut a sheet of parchment to fit your pizza stone. Place the dough on the prepared parchment, sprinkle with flour and roll it out into a circle less than 1/2″ thick.
Brush with olive oil and season. Let it rest at room temperature for an additional 30 minutes while you preheat the oven to 500º. Place your pizza stone in the oven to preheat.
Spoon prepared pizza sauce over the dough and spread the drained toppings evenly. Remember less is more when it comes to topping, just a few tablespoons of sauce so you don’t end up with a soggy crust.
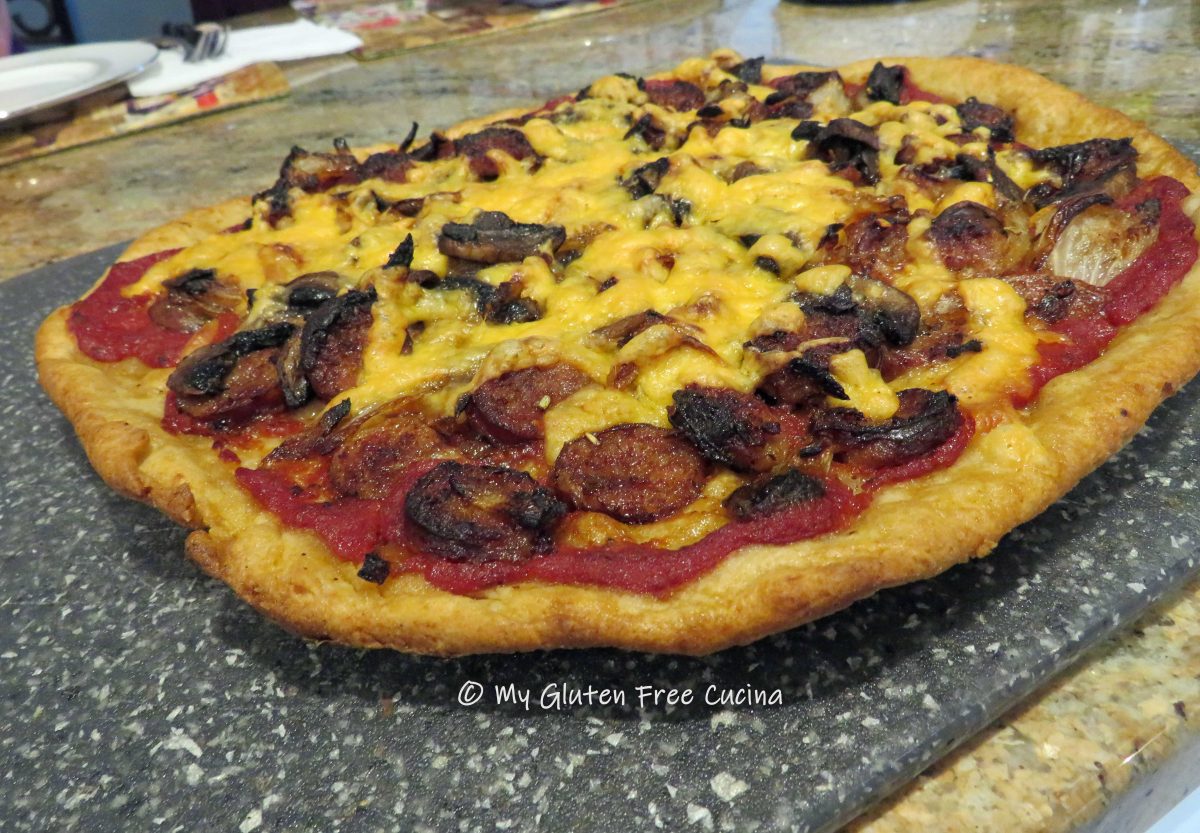
Top with grated cheese of your choice. I used cheddar, because we had some in the fridge left over from another recipe. Slide the pizza, with parchment onto your preheated pizza stone. After 5 minutes use gloves and tongs to carefully remove the parchment paper. Continue baking for 15 minutes.
Remove to a cutting board, slice and serve.
Look at that crispy crust! This was definitely a great way to christen my new stove. Just a single pizza is enough for small appetites but when I make this for company, I double the recipe.
Notes ♪ The gluten free pizza crust in this post was made with the Artisan Flour Blend from Better Batter. Back when this post was written in 2022, their new bread flour and pizza dough mix had not yet hit the market! Since then, I have added these new options to my pantry. They are all wonderful for making pizza, so be sure to try them all and use my Promo Code MGFC30 for 30% off!
Notes ♫ Of course I missed having an oven, but we did not go hungry during that week without a stove! Check out some of the air fryer meals that I made while we were waiting for our new stove to arrive in this post!



 Crumble the bacon, or place in an
  Add 1/3 cup of gluten free breadcrumbs to the skillet with the bacon fat and stir over low heat. Add back the crumbled bacon and stir well to combine. Set aside to cool, then mix with 1/4 cup grated parmesan cheese for topping.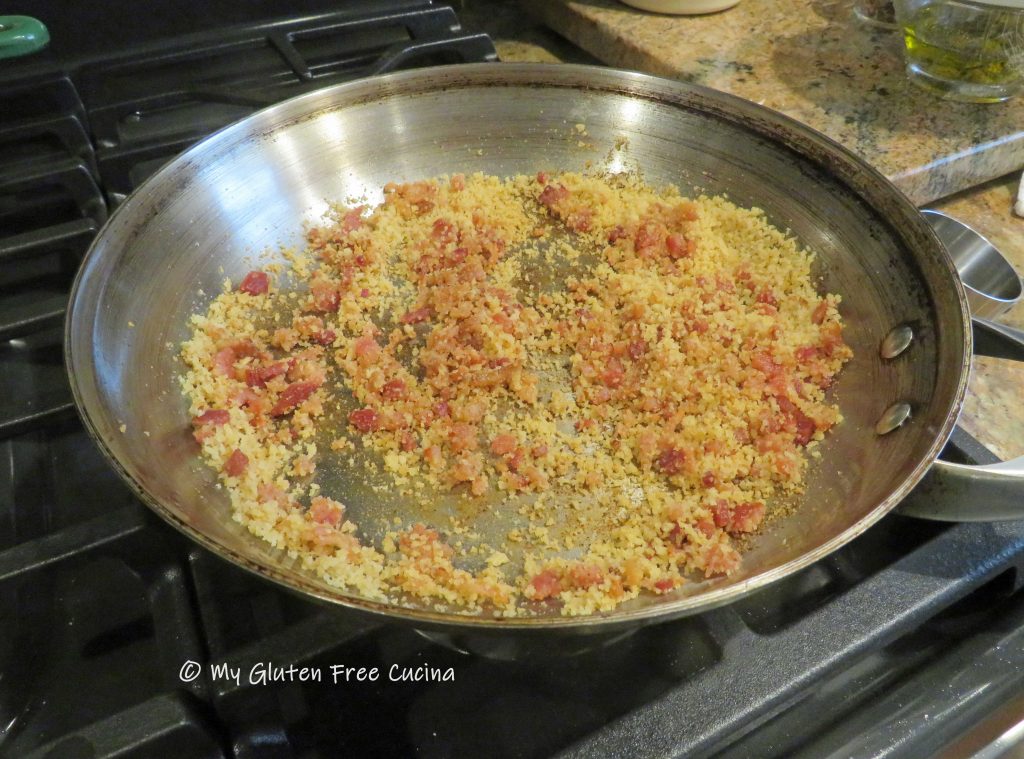

 Place browned chicken in a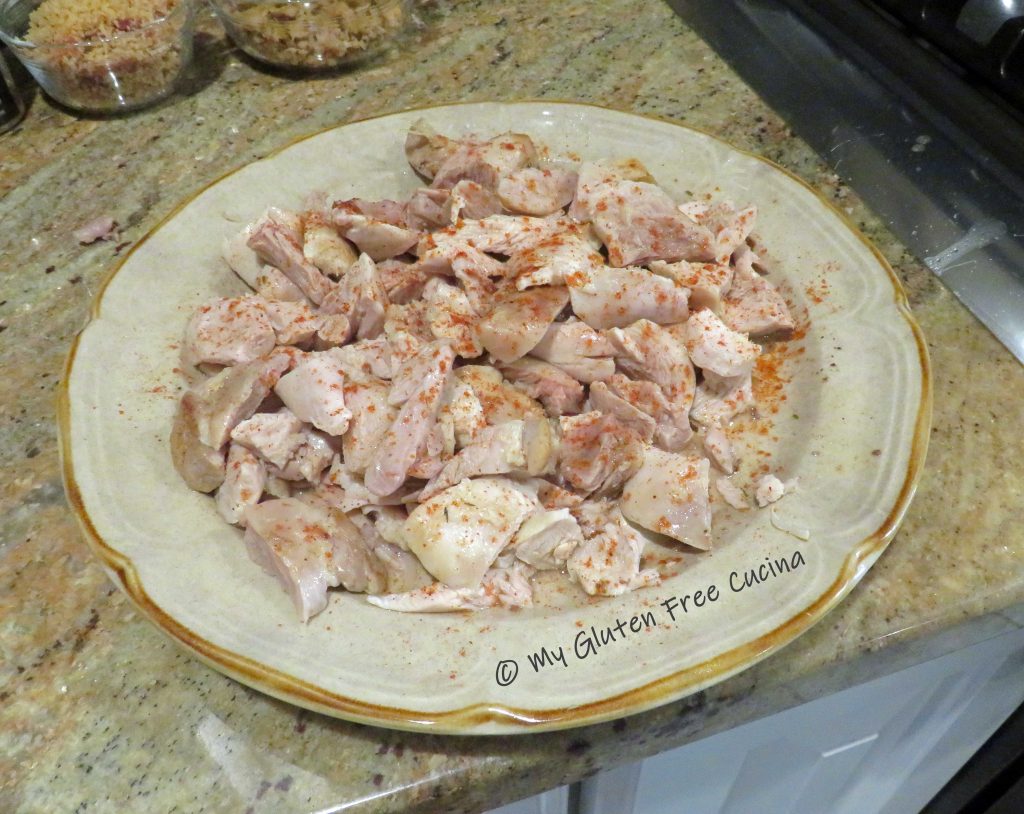


 Cook the mushroom slices in 1 tbsp. butter and 1 tbsp. olive oil.
 Drain the mushrooms and onions to remove as much liquid as possible.
 After 1 hour in the fridge, turn the dough out onto floured parchment and use a



 Peel and dice the apples. In a large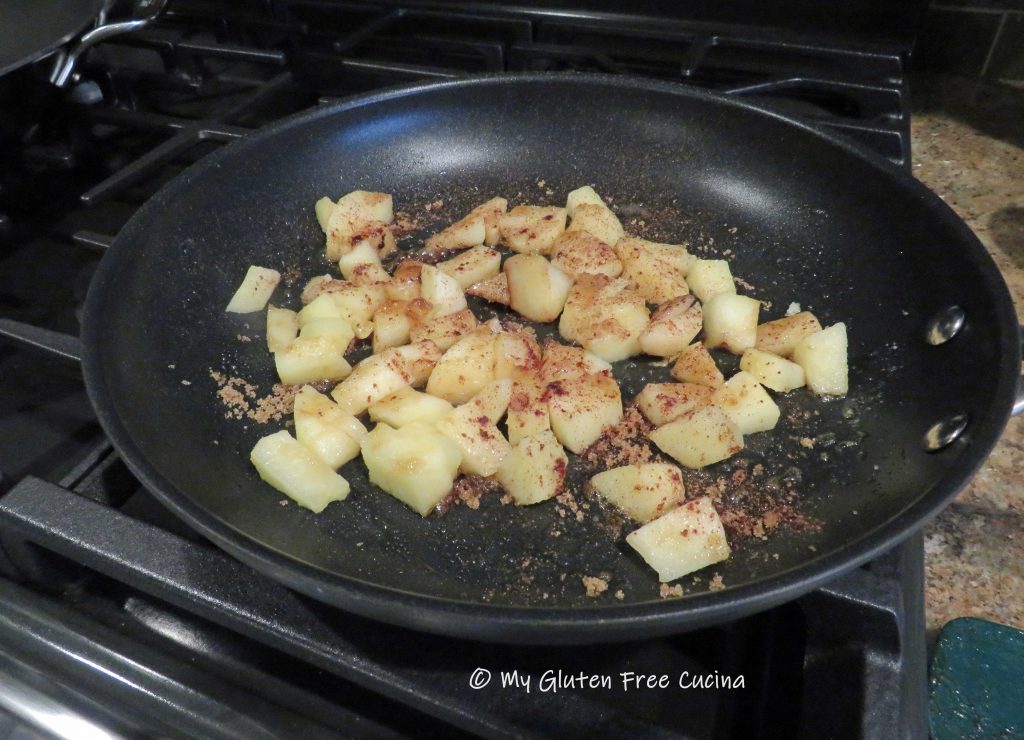

 Look at that plate, definitely a wonderful way to start your day!







 The beef will shrink considerably during cooking, so start with twice as much as you think you need. For two people I suggest 1.5 lbs. of boneless beef short ribs. It may look like a lot to begin with, but there will be no leftovers 😉
 Ingredients: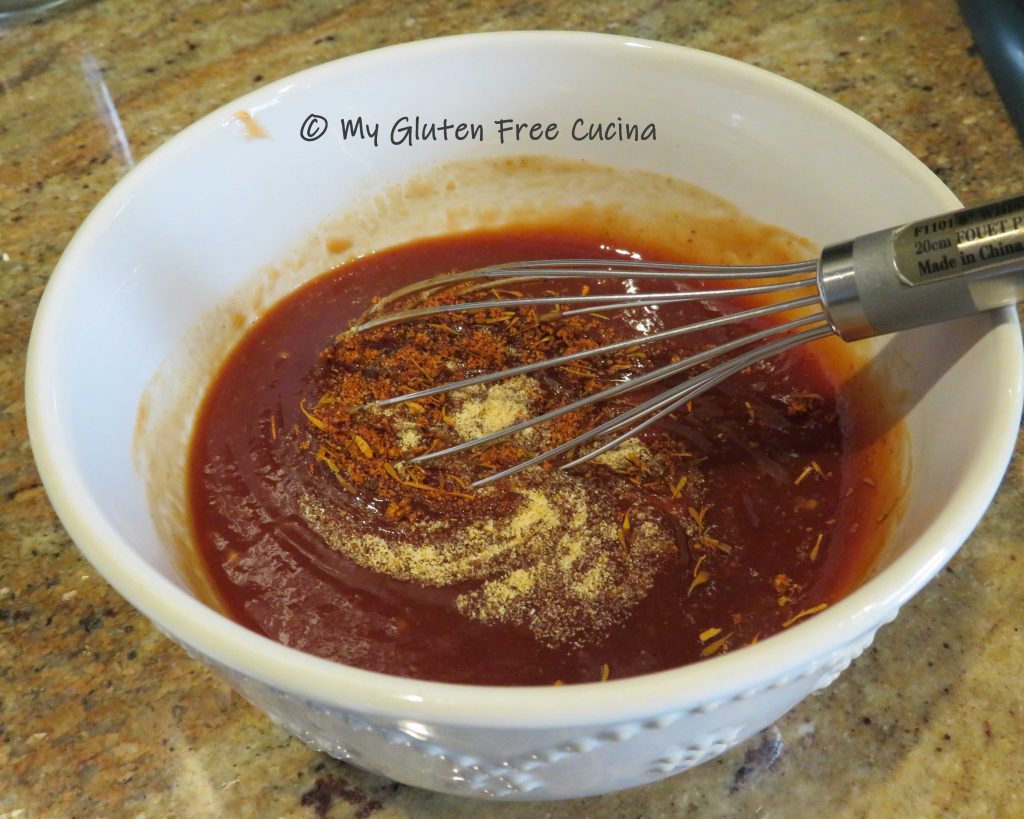







 As I mentioned above, I recommend that you wait until a few hours before serving to assemble the salad. Cook the pasta to al dente. This will likely be several minutes less than the package directions, so taste frequently. Drain the pasta and immediately rinse it under cold water to stop the cooking.
 Place the colander over a large bowl, toss with 1 tbsp. olive oil and chill in the fridge for 30 minutes.

 Coincidentally we were also having our first heat wave of the summer. It was over 90 degrees in the shade, so what did I do? Yes, I cranked up the oven to 500º and made pizza! Just to be sure everything was working properly, right?

 Remove the proofed dough from the refrigerator, it will have doubled in size. Cut a sheet of parchment to fit your
  Brush with olive oil and season. Let it rest at room temperature for an additional 30 minutes while you preheat the oven to 500º. Place your pizza stone in the oven to preheat.
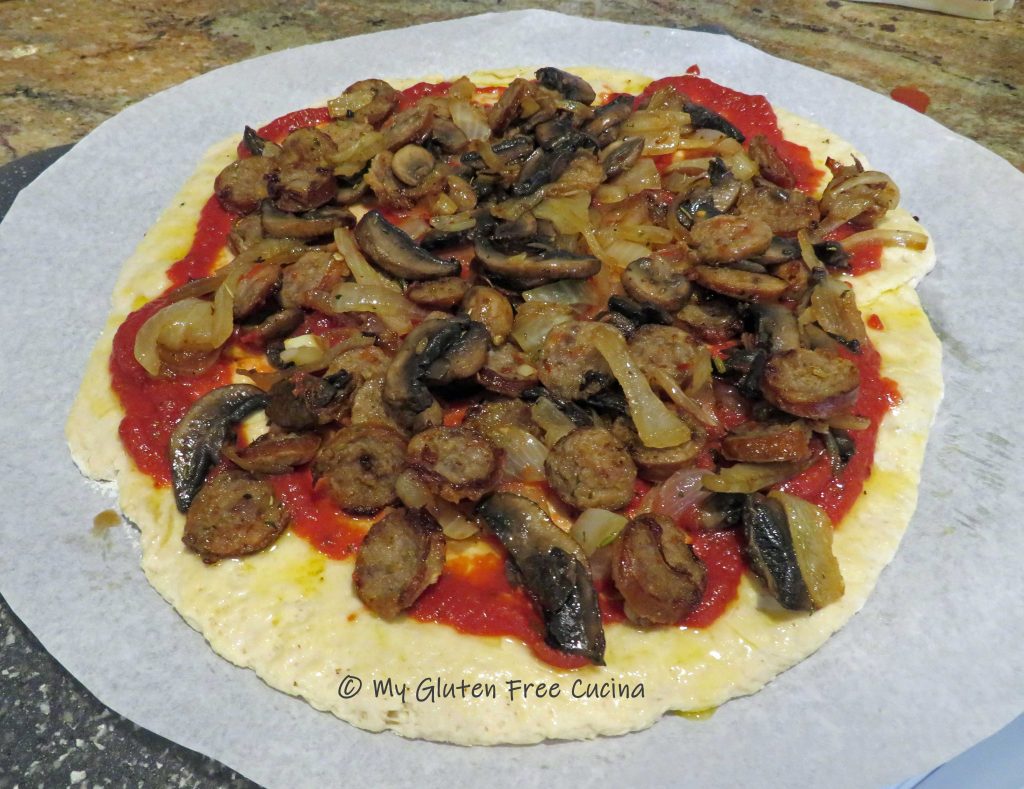 Top with grated cheese of your choice. I used cheddar, because we had some in the fridge left over from another recipe. Slide the pizza, with parchment onto your preheated pizza stone. After 5 minutes use
