Cilantro Lime Shrimp Bowls

Cilantro Lime Shrimp Bowls are bursting with vibrant color and flavor!  Rice bowls are turning up on restaurant menus everywhere, and many are gluten free.  I’ve been wanting to make something like this at home and today was my first attempt.  The ingredients are simple but flavorful.  A light and refreshing meal, perfect for summer evenings!

This post contains affiliate links.

2 Servings

Ingredients:

  • 1/2 cup white rice
  • 1/3 cup corn, fresh or frozen
  • 1/4 tsp. seasoned salt
  • 1/4 tsp. oregano
  • 1 lb. shrimp (about 14 large), peeled and deveined
  • 1 lime
  • 8 slices zucchini, cut into half moons
  • 8 slices summer squash, cut into half moons
  • olive oil
  • 1/4 tsp. chipotle chili
  • 1/4 tsp. cumin
  • 1/4 tsp. onion granules
  • 1/4 tsp. oregano
  • 1/4 cup chopped fresh cilantro

Preparation:

  1. Whisk together 1/4 tsp. chipotle chili, 1/4 tsp. cumin, 1/4 tsp. onion granules, 1/4 tsp. oregano.  This mixture will be used to season the shrimp and veggies.
  2. Cut the lime in half.  Slice one half for serving and reserve the other half for juicing.
  3. Combine the white rice, corn, and 1 cup water in a small saucepan.  Season with 1/4 tsp. oregano, 1/8 tsp. salt.  Cover and simmer 15 minutes.
  4. Slice the zucchini and summer squash and cut slices into half-moons.  Toss with olive oil and 1/4 tsp. of the seasoning mixture.
  5. Defrost the shrimp (if frozen) by running under cool water.  Peel and devein, then toss with olive oil and 1/4 tsp. of the spice blend.

6. Preheat a griddle or large nonstick skillet over medium flame and brush with oil.  Cook the squash and shrimp for 8 minutes, turning once.  Finish with a squeeze of lime juice.

7. Stir 1 tbsp. chopped cilantro into the rice.  To plate, divide the rice mixture between 2 serving bowls.  Arrange half the shrimp and squash beside the rice.

8. Sprinkle with more spice, and garnish with fresh cilantro and lime slices.

Notes ♪♫ This Mexican Spice Blend is my “go-to” for dishes like this one.  No need to buy more expensive blends when you can easily stir this together from individual ingredients that can be used in other recipes.

Print This Post Print This Post


Braised Lamb Shanks

Lamb shanks are slowly braised with aromatic veggies in this perfect dinner for two that can be enjoyed in any season.  The recipe fits right into my busy day.  After some initial prep, the meal is mostly hands off until dinner time.  It’s easy, and the entire dish can be cooked in one pan, so cleanup is a snap!

This post contains affiliate links.

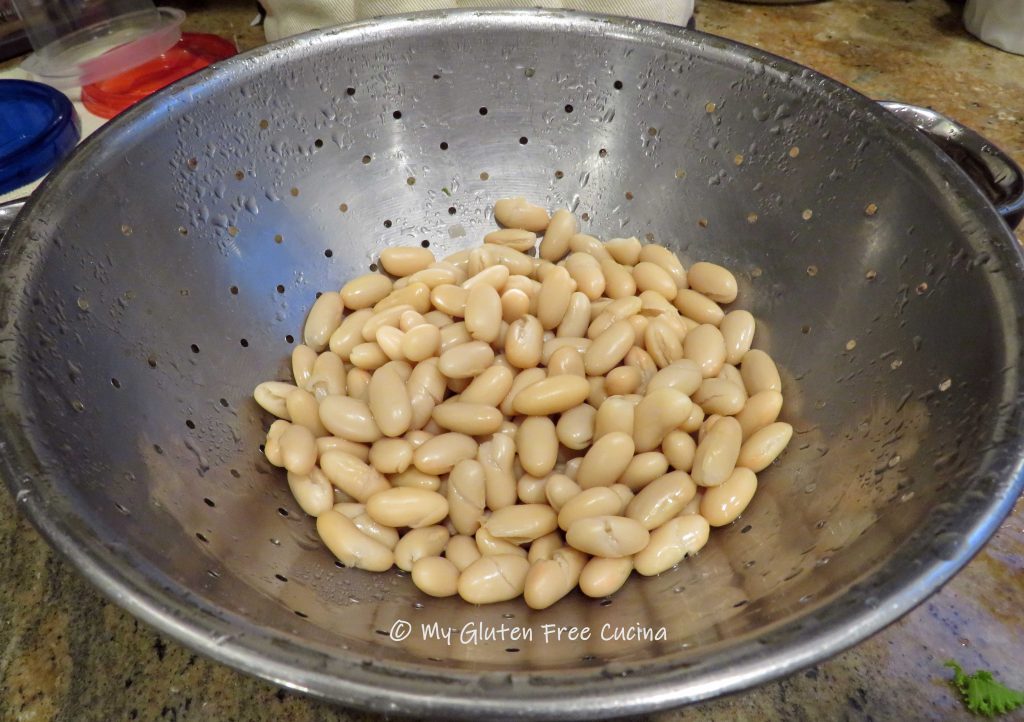
White beans are a traditional accompaniment to this dish.  I opted for canned beans to save time.

Choose lamb shanks weighing about 10-12 oz. each, they will shrink during cooking.  Use a deep, oven safe skillet or braising pan with a cover.  A Dutch oven would also work well.

2 Servings

Ingredients:

Preparation:

Place 1/4 cup rice flour in a food safe plastic bag, add the lamb shanks and shake to coat.  Discard any excess flour.

Heat a deep, oven safe skillet or braising pan with olive oil and brown the shanks on all sides.  Season with salt and pepper.

Add 1/4 cup white wine to the skillet.  Simmer on low heat until reduced by half.  Season again with salt, pepper and thyme.

Add 1/2 cup chicken broth, along with the onions and the carrots.

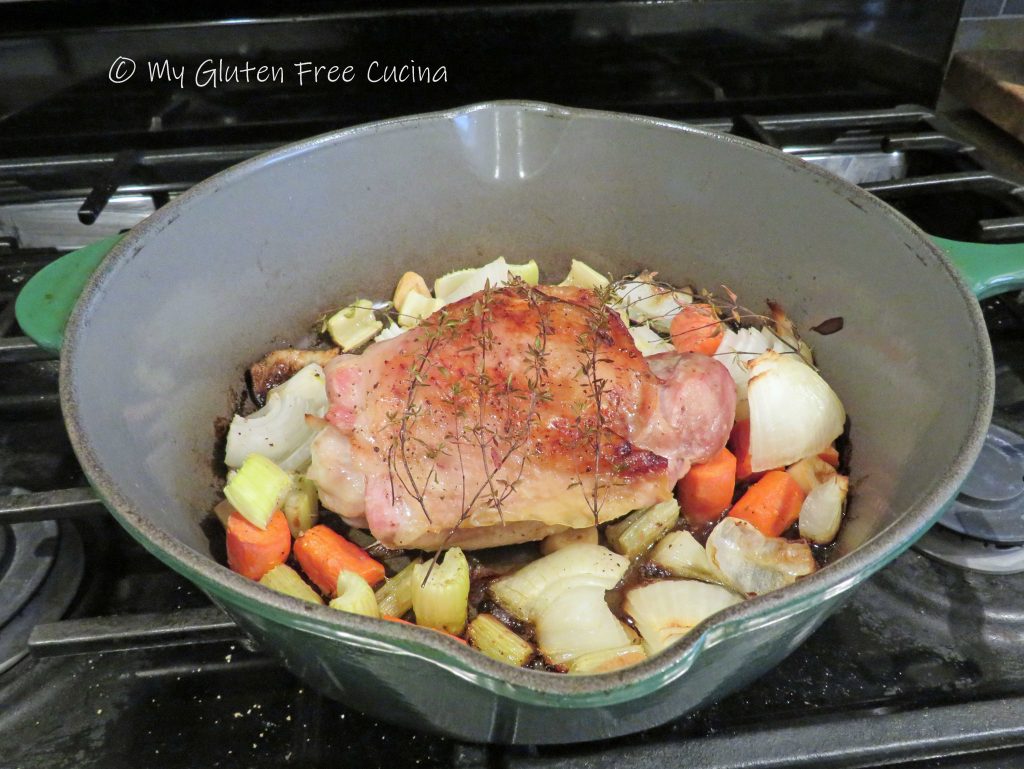
Cover and place in the oven for 2 hours at 300°, turning once.  See how the shanks have cooked down?

Drain and rinse the beans, and add them to the skillet with an additional 1/4 cup chicken broth.  Cover and return to the oven for an additional 30 minutes.

Doesn’t that look delicious?  The meat was so moist and tender, the beans full of flavor from the braising liquid.  This meal was SO good, I must make it more often!

Notes ♪♫ Use plain white rice flour to coat the lamb shanks, it works well for browning meat.  Save your expensive, gluten free all purpose blends for another recipe.

Originally posted 04/08/2019                                Updated 05/29/2022

Print This Post Print This Post

Beef Guazzetto – Italian Beef Stew

Would you believe that a recipe from an Italian cooking show could be gluten free?  You might be surprised to know, that other than the pasta, there was only one ingredient swap needed to make this meal completely gluten free!

Beef Guazzetto, or Italian Beef Stew was adapted from a recent episode of Lidia’s Italy, Lidia has long been one of my favorite TV chefs!

While it’s true that some recipes require major modifications, the vast majority of meals will only need a swap of one or two ingredients to be gluten free.  Today’s recipe is a great example.

If you are thinking that you cannot enjoy your favorite meals on the gluten free diet, think again.  Or better yet, let me inspire you!

This post contains affiliate links.

Ingredients:

  • 1 lb. stew beef (chuck), cut into cubes
  • 3 cups chicken stock
  • salt, to taste
  • 1/4 cup gluten free flour (you can use rice flour)
  • 3 tbsp. olive oil
  • 1/2 sweet onion, minced
  • 2 small carrots, minced or grated
  • 2 small celery stalks, minced
  • 1/4 cup tomato paste
  • 1/2 cup white wine
  • 2 bay leaves
  • gluten free pasta
  • grated cheese, for serving
  • fresh Italian parsley, for garnish

Preparation:

First, make a “soffritto” by pulsing the onion, carrot and celery in a food processor or electric chopper.

Dry the beef with paper towels, this helps with browning.

Place the beef cubes in a food safe plastic bag with 1/4 cup gluten free flour and shake to coat.

Heat olive oil in a Dutch oven and begin browning the beef.  Don’t crowd the pan, brown in batches if needed.

Leave those caramelized brown bits in the bottom of the pan, they are full of flavor!  Set the beef aside and keep warm.

Add more olive oil to the pan with the onion, carrot, and celery.  Cook for several minutes, stirring frequently, then clear a space in the center for the tomato paste.

Toast the tomato paste for a minute, then stir it into the vegetables.  Add the wine, using a spatula to scrape up those browned bits at the bottom of the pan.  Reduce heat to a simmer and continue cooking until the wine is reduced by half.

Add the beef cubes back to the pan, with the bay leaves.

Stir in the chicken stock, cover and simmer on lowest heat for 2 hours.  Add more stock if needed.

Stir the sauce frequently, be sure it isn’t sticking to the bottom of the pan.  A simmer mat is great for keeping sauces on a low simmer.  As it cooks, you will see the stew gradually thickening.

After 2 hours, this is what it will look like.  You will still have distinct chunks of beef, but some will partially break down and become one with the sauce.  It is incredible!

A meal like this deserves an extra special pasta.  I decided to get out my KitchenAid® and make some fresh rigatoni.  Read about how I made it here! Of course, you can use any gluten free pasta you have on hand.  One of my favorites is Jovial brown rice pasta.

To plate, spoon cooked pasta into serving bowls and ladle the Beef Guazzetto over the top.  Sprinkle with grated cheese and fresh Italian parsley.

Notes ♪♫ An economical cut like beef chuck becomes melt in your mouth tender using this slow cooked, braising method.  With today’s soaring food prices, it is a great way to stretch your grocery budget.


Print This Post Print This Post

Gluten Free Rigatoni Pasta

There is nothing like homemade pasta!  Just look at this beautiful Rigatoni!  Freshly made and ready to cook.  I made it with my KitchenAid® pasta press attachment, using the gluten free Artisan Flour Blend from Better Batter.

This post contains affiliate links. 

Don’t forget, when you shop Better Batter and use my (affiliate) code MGFC30 at checkout, you will receive 30% off any non-sale item! 

CLICK HERE to take advantage of this incredible opportunity to try the flour that I call my little miracle in a bag!

When making extruded pasta, the consistency of the dough is everything!  Too dry and the dough will not hold together, too much liquid, and you will have trouble extruding the pasta and the rigatoni will collapse with the weight.  I’ve made these before, but it took a few tries to get the hydration just right.  It’s a bit finicky, like pie dough.

Below I have provided the exact ingredient measures that I used for this 2-serving recipe, and it’s my “go-to” for extruded pasta.  Like any dough, it may vary a bit from batch to batch.  Once you know what the dough should look like, you can adjust by adding a bit more flour or water as needed.

Note that you can double or triple the recipe for a larger family.

2 Servings 

Ingredients:

Preparation:

Place all of the ingredients in the bowl of a stand mixer with the paddle attachment.  Mix on low speed to incorporate.  You should have a crumbly mixture, like this.  Do not add water.

To test the consistency, pinch a piece of the dough.  It should hold together, like this.

Use a stiff spatula to gather the dough together into a ball.

It’s important to give the dough time to hydrate.  Wrap it in plastic wrap and rest at room temperature for 20 minutes.

When ready, set up the pasta press attachment.  I used the rigatoni plate, one of six that comes with the pasta press.  It’s hard to find gluten free rigatoni, so this was a special treat!

Cut the dough into sections, you want to break off pieces about the size of a walnut.  Set up a tray lined with wax paper, and sprinkle with gluten free flour.  Turn on the mixer and begin feeding small pieces of dough into the press.

As the pasta extrudes, cut it to the length you prefer.  You can make mezzo rigatoni or full size.  Spread the rigatoni out on the floured tray in a single layer.

See how the rigatoni hold their shape, with nice defined ridges?

*Remember to follow food safety guidelines, pasta made with eggs should be refrigerated (or cooked) within one hour.

To cook, bring a large pot of salted water to a rolling boil.  Add the pasta and cover until it returns to a boil.  Fresh pasta cooks very quickly, no more than 3 minutes total!

Use a spider strainer to gently remove the pasta and place in serving bowls.

Aren’t they beautiful?  Top with your favorite sauce and serve it up!

Notes ♪♫ Curious about that meat sauce?  It’s actually a Beef Guazzetto, or Italian Beef Stew.  It is a perfect accompaniment to the hearty rigatoni pasta.  Get the recipe here.

Print This Post Print This Post

Gluten Free Shepherd’s Pie Ramekins

Gluten Free Shepherd’s Pie Ramekins

Individual serving ramekins take this ordinary comfort food to dinner party status!  The presentation will wow your guests, while still keeping it fun and casual!  I love using the ramekins for portion control, and one serving was plenty filling!

Most of the ingredients are straight from the pantry, like ground beef, frozen mixed veggies, and instant mashed potatoes!  Yes, I cheated and used these instant mashed potatoes from Idahoan, I always keep them on hand.  (Check out how I use them in my meatballs and meatloaf!)

4 Servings

This post contains affiliate links.

Ingredients:

  • 12 oz. lean ground beef
  • 1-2 tbsp. olive oil
  • 2 cloves garlic, minced
  • 1/2 cup diced sweet onion
  • 1-1/2 cups frozen mixed vegetables
  • 1/2 tsp. thyme
  • fresh ground pepper
  • seasoned salt
  • 2 tbsp. tomato paste
  • 1 tbsp. gluten free Worcestershire sauce
  • 1 cup beef or vegetable broth
  • 1 cup gluten free instant mashed potato flakes
  • cooking spray
  • 1/4 cup grated cheese
  • paprika
  • fresh chives for garnish
The Lazy Gastronome

Preparation:

Heat a braising pan or deep skillet with olive oil.  Brown the beef, breaking it up with a spatula.  Season with fresh ground pepper and seasoned salt.

Add the garlic and onion.  Continue cooking several minutes then add the mixed vegetables, and thyme.

Clear a spot in the center of the pan and add the tomato paste.  Let it toast for a minute then stir into the meat and veggies.  Stir in the broth and Worcestershire sauce, then bring to a boil.

Turn the heat down to a low simmer and cook for 30 minutes or until most of the liquid has evaporated.  Stir every 5 minutes.

Preheat the oven to 375º.  In a small sauce pot, prepare the instant mashed potatoes according to package directions.

Spray the ramekins with cooking spray and arrange them on a baking sheet (this will make it easy to transfer in and out of the oven).  Spoon the filling into the ramekins, leaving room for the mashed potatoes.

Spread mashed potatoes over the top and use a fork to smooth it out.  Top with grated cheese and sprinkle with paprika.   Bake for 15 minutes, then finish under the broiler on low for 2 more minutes.

Garnish with fresh chives and serve.

I hope you were inspired to try these Shepherd’s Pie Ramekins!  For another twist on this traditional comfort food, check out my Shepherd’s Pie with Rutabaga, it’s a long-time family favorite!

Notes ♪♫ Most of the ingredients in this recipe are naturally gluten free.  Always check labels on condiments, broth and seasoning.  Lea and Perrins Worcestershire sauce is gluten free in the US but not in Canada (make sure yours is made with distilled white vinegar, not malt vinegar).

Print This Post Print This Post

A Week of Gluten Free Air Fryer Recipes

Last weekend my stove broke down. ???? At first we looked into repairing it, but in the end it made more sense to buy a new one.  So, with a new range on order and delivery a week out, the Air Fryer became the star of my kitchen.  With supporting roles from the Rice Cooker and microwave, we were in no danger of going hungry!

These meals are so easy, that I decided to make a little collage of what we had for dinner each night.  Some require a bit of prep, while others need no more than a light brush of oil and sprinkle of seasoning.  All meals are for 2 servings.

This post contains affiliate links.

Night #1 Pork Tenderloin, rice and broccoli

First up, an easy pork tenderloin, done in the air fryer using the rotisserie spit.  I brushed a 12 oz. piece of pork tenderloin with olive oil and sprinkled with seasoning.  I air fried it for 20 minutes at 370º.  While the meat was cooking, I made a side of rice and steamed broccoli in my Rice Cooker.  If you like pork tenderloin check out some of these recipes!

Night #2 Chicken Thighs with green beans, and                              leftover rice

For night 2, I coated 2 chicken thighs with tapioca starch and seasoning, gave it a light spray of oil and air fried for 30 minutes at 400º.  I added green beans to the air fryer during the last 8 minutes.  The rice was left over from the previous meal.  If you liked this meal idea, check out this detailed post on how to make Air Fryer Chicken Thighs.

Night #3  Salmon with Red Potatoes and                                            Broccoli

For night 3, I tossed diced red bliss potatoes with olive oil and seasoning.  I started them in the air fryer at 400º for 20 minutes.  I brushed the salmon with olive and maple seasoning, and added it to the air fryer during the last 10 minutes of cooking.  The broccoli went in for the last 5 minutes.

Night #4  Ribeye Steak with Potatoes and Carrots

For this magnificent ribeye, I’ll admit I spent a bit more time on prep.  I started with a 2-hour marinade, then air fried it for 21 minutes at 400º.  I also cooked potato wedges and carrots in the air fryer at the same time.  Read more about it here.

Night #5  Breaded Pork Chops with Brown Rice and                      Mixed Veggies

For our final meal, I cooked 2 pork chops in a traditional flour-egg-breadcrumb combination (yes, they were big!).  I dredged the pork chops in rice flour, dipped them in egg then coated them with gluten free seasoned breadcrumbs.  I let them rest in the refrigerator for about 30 minutes, then air fried them for 20 minutes at 400º.  While the pork chops cooked, I made brown rice in the rice cooker and microwaved frozen mixed veggies.

I hope you got some meal ideas for your air fryer, in case your oven malfunctions like mine did.  Or for when it’s just too hot to light the oven!  These are easy weeknight meals that are perfect for two.  I’m excited to say my new range has since been delivered and I can’t wait to try it out!

Notes ♪♫ Air fryer best practices.  Always preheat the air fryer for 5 minutes before adding the food.  Don’t crowd the air fryer, the air needs to circulate around the food as it cooks.  Turn the food halfway through the cook time for even cooking.  For browning, a light brush or a few sprays of oil will give you that delicious crispy crust.

Print This Post Print This Post


Air Fryer Ribeye Steak

Can you really cook a steak in the air fryer?  This is a question I had never even considered, until the day my stove malfunctioned.

I love a good ribeye, and my cooking method of choice has always been the reverse sear, which produces a perfectly cooked steak every time.  Read about it here.

Now without a stove, I turned to my other appliances.  Microwave, crock-pot, or air fryer.  Yes, I was worried about ruining a perfectly good (and expensive) steak.  I did some research and decided to try the air fryer.

The verdict, excellent!  It turns out that yes, you can cook a steak in the air fryer, and it was delicious!

This post contains affiliate links.

Ingredients:

  • 1 lb. ribeye steak, about 1-1/2″ thick
  • gluten free steak marinade (recipe here)
  • cooking spray

Preparation:

Marinate the steak for 2 hours before cooking.  Whisk together the marinade ingredients in a non-reactive dish and add the steak, turning every 30 minutes.

Preheat the air fryer for 5 minutes at 400º.  Remove the steak from the marinade and place on a rack for a few minutes to drain off the excess liquid (if you have a basket style air fryer just pat your steak with paper towel before cooking).

Add 1 tbsp. of water to the bottom tray of the air fryer.  Add the steak and cook 8 minutes per side.

Continue cooking until your steak reaches the desired temperature.  I prefer medium (pink in the middle), and it took a total of 21 minutes for mine to reach 145º.

Time will vary from one air fryer to another, so be sure to check the temperature with a meat thermometer.

Also keep in mind that if you are cooking other things in the air fryer at the same time, it will extend the cook time.  I had carrots and potatoes in the air fryer, and it took 30 minutes for the potatoes (started 10 minutes before the steak), and 20 minutes for the carrots.

Important!  Always let the steak rest 5 minutes before slicing.  Place it on a warm plate and cover with foil.  This allows the juices to redistribute and keeps the steak moist and flavorful.

Doesn’t that look good?  No one went hungry while waiting for the new range to arrive.

Notes: ♪♫ This dinner serves two, and the fit was just right in my 3-shelf air fryer.  Potatoes on top, carrots in the middle and steak on the bottom.  You can rotate the shelves during cooking for even results.  Remember that items on the top shelf (closest to the fan) will cook faster, so watch that they don’t burn!

Print This Post Print This Post

Gluten Free Moo Shu Pork

Gluten Free Moo Shu Pork

Moo Shu Pork!  Today was my first time making this popular Chinese-American dish, and it’s a keeper!  The flavor and texture of the marinated pork and crisp veggies was just incredible.  And how about those little Mandarin pancakes?

What makes this dish gluten free?

There are a few ingredients you will need to be cautious about in this dish.  While the pork and veggies are naturally gluten free, you need to read the labels on those Asian condiments!  Hoisin Sauce, Plum Sauce, Soy Sauce, Oyster Sauce all may contain wheat.  You can find gluten free condiments, just read the labels carefully!

I thought I would be getting out of my comfort zone with the Mandarin pancakes, but they were really easy to make!  Surprisingly, they have just 3 ingredients and require no special equipment!  That’s right, no stand mixer, no food processor, just a rolling pin!

Mise en Place

As with all stir-fry recipes, you need to have your ingredients prepped and organized before you begin the cooking.  I was well into the process when I realized I did not have enough Hoisin sauce for the recipe.  Don’t be like me (spoiler alert, I was able to improvise, and it came out great)!!!

4 Servings

This post contains affiliate links.

Ingredients:

Marinade Ingredients:

Stir-Fry Ingredients:

  • 12 oz. pork tenderloin, cut into thin strips
  • 1 cup grated carrot (about 1 medium)
  • 1-1/2 cups sliced mushrooms
  • 2 cups red cabbage, shredded
  • 2 cups green cabbage, shredded
  • 2 scallions, bottoms and reserve greens sliced on diagonal for garnish
  • toasted sesame oil

Mandarin Pancake Ingredients:

  • 125 g. (about 3/4 cup) gluten free all-purpose flour (I used and recommend Better Batter Original Blend)
  • 1/4 tsp. salt
  • 1/2 cup boiling water
  • toasted sesame oil

Preparation:

The first thing I did was whisk together the marinade ingredients.  This allows the flavors to meld a bit before you begin cooking.  Divide the marinade into 2 portions, use one for the meat and reserve one to drizzle on the finished dish.   Remember I said that I didn’t have enough Hoisin sauce for this recipe?  Well, I used what I had and topped it off with a little Plum sauce, so delicious!

Next, I prepped the veggies.  I used a coarse grater for the carrots and a mandoline to shred the cabbage.

Now for the pancakes!  You are going to be surprised at how easy they come together.  First whisk together the flour and salt.

Add the water, stirring in a little at a time to form a dry, shaggy dough.  The dough should hold together when you give it a squeeze.  Shape the dough into a log.

Cover with plastic wrap or a damp towel, and let it rest for 10 minutes to hydrate.  While the dough is resting, cut the pork tenderloin into thin strips (I used kitchen shears).  Place the strips into a bowl with half of the marinade and stir to coat.

Use a bench knife to divide the dough log into 8 equal pieces.

I used 6″ wax paper squares to help roll out the dough.  Brush the paper with toasted sesame oil (so it doesn’t stick), place one section of dough between two sheets and roll it out to about 5″ diameter and 1/8″ thickness.

Continue with the remaining sections of dough and stack them between sheets of oiled wax paper.

Now we are ready to finish the dish.  Heat 2 nonstick skillets, a larger one for the stir fry and a smaller one for the pancakes.  In the large skillet, begin cooking the pork.  Discard any marinade remaining in the bowl.

Use tongs to turn each piece to quickly brown both sides.  The pork does not have to be cooked through at this point; it will finish cooking with the veggies.

Add all of the vegetables to the skillet.

Stir fry the veggies for several minutes, turning frequently to wilt the cabbage.

When the veggies are crisp tender, turn down the heat.  Brush the smaller skillet with sesame oil.  Remove 2 of the Mandarin pancakes from the wax paper, stack one over the other and place in the skillet.  Cook for 30 seconds, flip and cook another 30 seconds.  Then, carefully separate the 2 layers and transfer to a plate.

Note ♪ Cooking the pancakes two at a time allows them to heat through on the outside and steam in the middle.  As long as they are well oiled, you should have no problem peeling the layers apart.

Continue with the remaining pancakes and arrange on a serving platter or individual plates.  Spoon the Moo Shu Pork onto each pancake.  Drizzle the reserved marinade over each and garnish with scallion greens.

If you have leftovers, they will keep well for a few days in the fridge.  I stored the Mandarin pancakes in a zip lock bag, with a sheet of wax paper between each and they remained soft and pliable.  Reheat the Moo Shu Pork in the microwave and spoon over a pancake, no need to heat the pancakes as they will warm through from the heat of the pork.

Notes ♪♫ Mandarin pancakes are a thin, unleavened flatbread, similar to a tortilla.  They came out great and reminded me of the wheat wraps I used to buy.  I used (and recommend) Better Batter Original gluten free flour for this recipe.  I have not tested the recipe with other flour blends, so be aware that if you decide to use a different brand your results may vary.  In general, I find that Better Batter is superior to other gluten free flours for recipes that require rolling and shaping of dough.  CLICK HERE for 30% off any non-sale item with my Code MGFC30.

Print This Post Print This Post


Gluten Free BBQ Chicken Pizza

Ever since my Celiac diagnosis, I have slowly been recreating all of my favorite recipes to be gluten free.  Pizza has been one of “the last frontiers”!  Have I made gluten free pizza?  Sure, I’ve come up with a few acceptable recipes.  Here’s a Sausage and Mushroom Pizza with a Cauliflower Crust that was actually quite good.  I also made a Cauliflower Pizza with BBQ Chicken, a grain free version of today’s recipe.

Still, I was missing the real deal, the pizza that I used to make back in the day.  Then along came Better Batter with their gluten free Artisan Flour Blend, and everything changed.  This flour makes a gluten free pizza with the most amazing crust.  Just the right balance of crisp and chewy.  If you haven’t treated yourself to a bag of this extraordinary gluten free flour yet I hope this post will inspire you!

Today pizza is back in our dinner rotation.  BBQ Chicken Pizza is my favorite, and my “go-to” recipe.  It’s a crowd pleaser that both kids and adults love.  The sweet and savory toppings compliment the crispy gluten free crust.  It is the closest thing to the wheat pizza that I remember so fondly.

*** When you shop Better Batter and use my (affiliate) code MGFC30 at checkout, you will receive 30% off any non-sale item! 

CLICK HERE to take advantage of this incredible opportunity to try the flour that I call my little miracle in a bag!

Ingredients:

Dough Ingredients:

Topping Ingredients:

  • 12 oz. boneless chicken breast, cut into 1/4″ medallions
  • 4 strips of gluten free bacon, cut into 3/4″ dice
  • 1 medium sweet onion, sliced
  • 1 dozen mushrooms, sliced
  • olive oil
  • gluten free BBQ Sauce (I like Stubbs)
  • gluten free BBQ Seasoning
  • 1-1/2 cups grated cheese

This post contains affiliate links.

Preparation:

Combine warm water, yeast and sugar.  Proof for 10 minutes.

Sift the flour and salt into the bowl of a stand mixer.  Combine the yeast mixture, sifted flour and olive oil.  Beat for 6-8 minutes.

Bring the dough together in the bowl, cover and refrigerate for one hour.

While the dough is resting, prepare the toppings.  Heat a large nonstick skillet on medium low.  First cook the bacon and drain on paper towels.  Leave the bacon fat in the skillet.

Cook the onions in the bacon fat until browned and soft, adding more olive oil as needed.  Drain the onions in a colander then transfer to a bowl.

Tip: Drain all of the toppings in a colander so your pizza dough won’t be soggy!

Next, add the mushrooms to the skillet with more olive oil and seasoning.  Cook until they release their liquid, then drain in a colander and transfer to a bowl.

Finally, add the chicken medallions to the skillet with more olive oil and seasoning, turning to brown both sides.  Drain the chicken and transfer to a bowl, then toss with 2 tbsp. BBQ Sauce.

Trim 2 sheets of parchment paper to fit your pizza stone.  Place the pizza stone in the oven and preheat to 500º.  Remove the proofed dough from the refrigerator, it will have doubled in size.

Divide the dough into 2 equal pieces, place each one on a sheet of the prepared parchment and roll each out into a 1/2″ thick circle.  Proof for an additional 30 minutes while the oven preheats.

Brush each piece of dough with olive oil, sprinkle with seasoning then spread with 2-3 tbsp. of BBQ Sauce.

Divide the onions, mushrooms, chicken and bacon between the 2 pizzas.  Top with grated cheese and drizzle with more BBQ Sauce.

Use a large spatula or pizza peel to slide one pizza (including the parchment) onto the heated pizza stone.  After 5 minutes, carefully slide the spatula under the pizza and remove the parchment paper.  Continue baking for an additional 12-13 minutes.  When the first pizza is done, repeat with the second.  There it is!

Two pizzas will generously feed 3-4 people.  The crust was nice and crisp, even in the middle.

Notes ♪♫ This pizza crust was made with Better Batter Artisan Flour Blend which I absolutely love and recommend.  I have not tested the recipe with other brands, so if you do substitute be aware that results will be different.

Print This Post Print This Post

Easy Sheet Pan Chicken and Vegetables

Boneless chicken medallions, breaded and baked with sausage, carrots, onions, potatoes and cauliflower.  This easy sheet pan dinner proves that gluten free does not have to be complicated!  From oven to table, you don’t even need a serving dish.

I didn’t take step by step pictures of the preparation as I normally do, because honestly I never thought this meal would make it to the blog.  But it came out really delicious, so here we are.

The simple, fresh ingredients speak for themselves in this perfectly seasoned, one dish meal.

I was featured at the senior salon pit stop

4 Servings

This post contains affiliate links.

Ingredients:

Preparation:

  1. Heat a large nonstick skillet with 2 tbsp. olive oil.  Line a half sheet pan with foil and mist with cooking spray.  Preheat the oven to 400º.
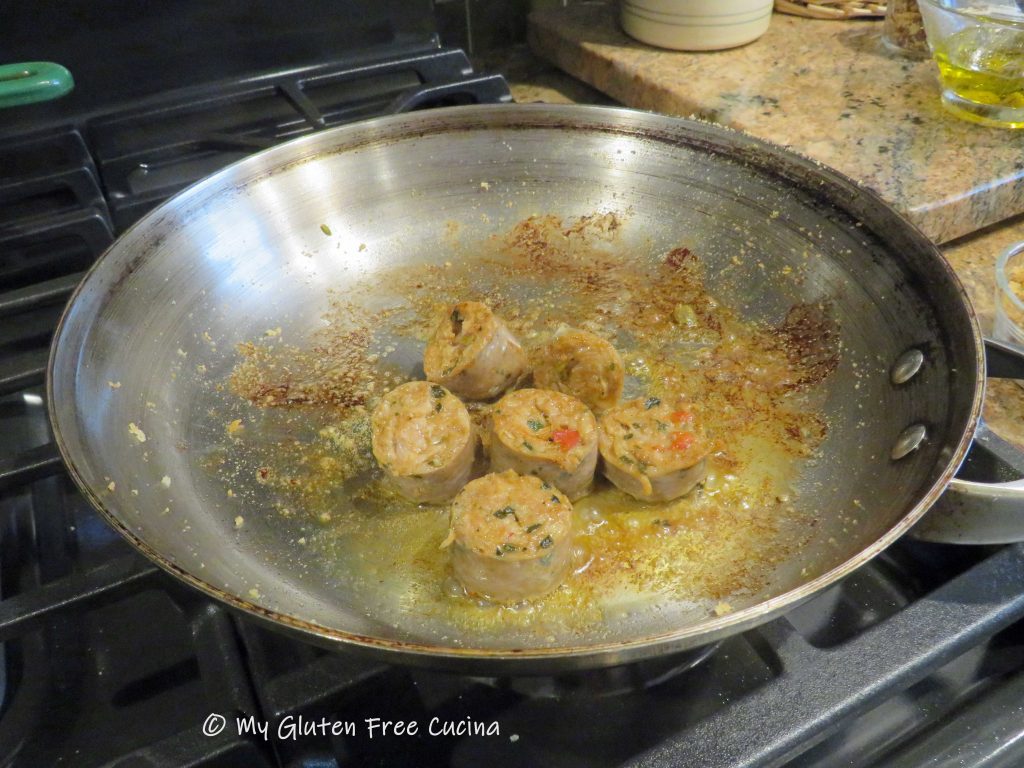
  2. Cook the sausage coins in the skillet until lightly browned, then use a slotted spoon to transfer them to the baking sheet.  Leave the oil behind in the skillet.
  3. Place the breadcrumbs in a food safe plastic bag, add the chicken medallions and shake to coat.
  4. Brown the chicken on both sides in the same skillet, about 1 minute per side.  Do not cook through, it will finish cooking in the oven.  Arrange the browned chicken on the baking sheet.
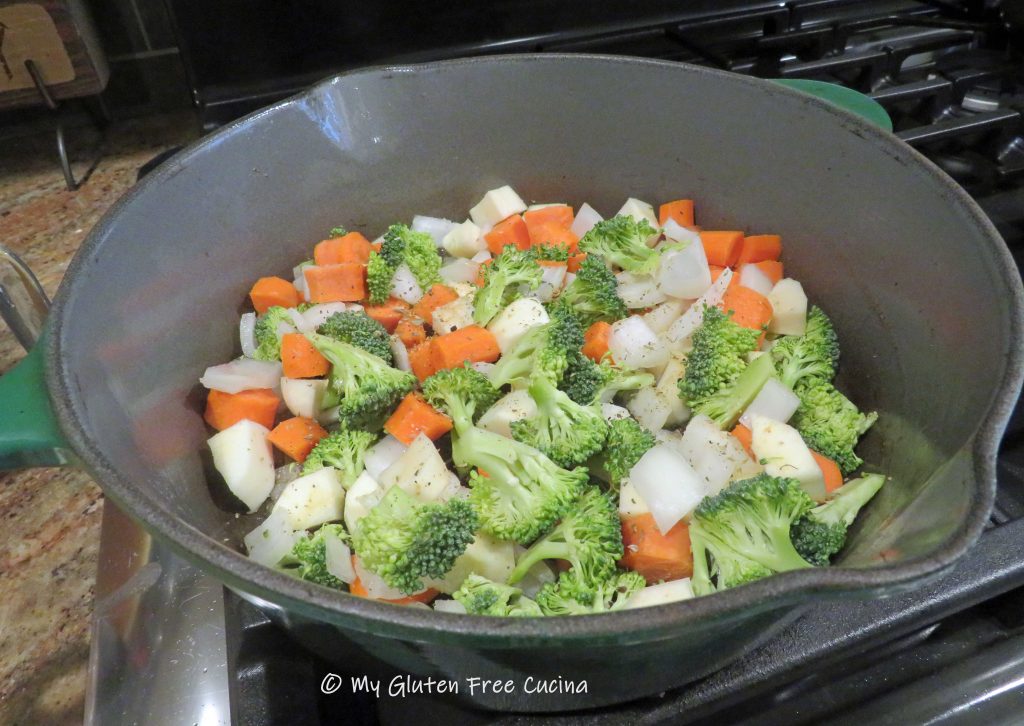
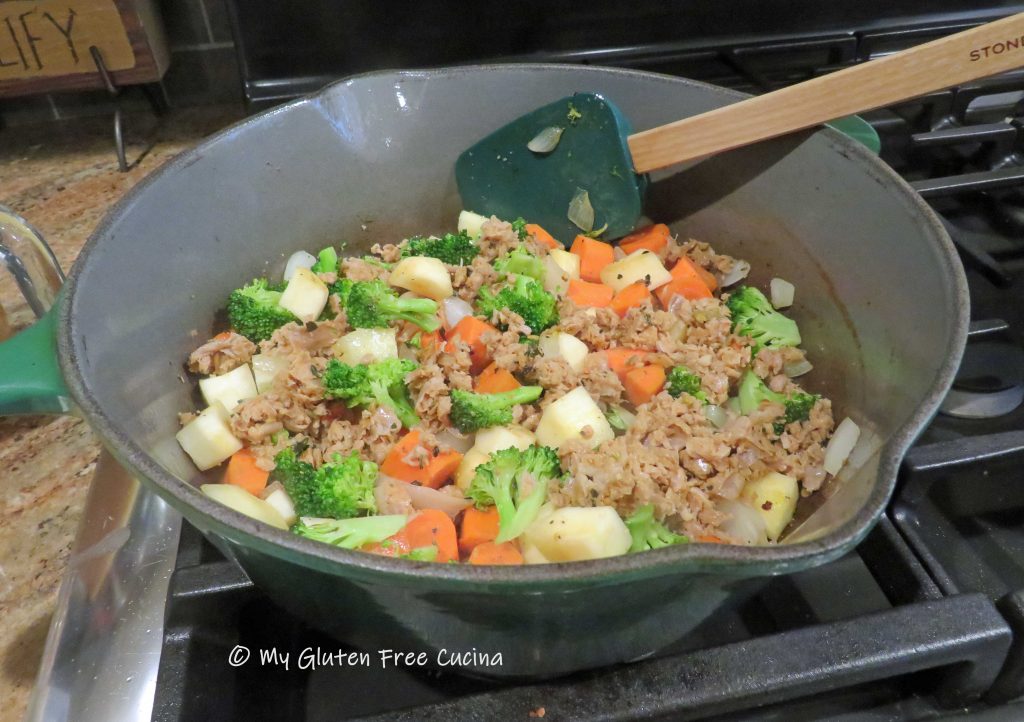
  5. Add several more tbsp. of olive oil to the skillet, with all of the vegetables.  Sprinkle liberally with Creole seasoning.  Par cook the vegetables in the skillet for about 10 minutes to give them a good head start, then arrange them on the baking sheet with the chicken and sausage in a single layer.
  6. Bake for 15-20 minutes at 400º and bring right to the table for a fun and casual meal.  If you like, serve with BBQ Sauce for dipping!

Notes ♪♫ While the chicken and sausage cooked very quickly, the veggies took quite a bit longer, especially the potatoes and carrots.  Giving the veggies a 10-minute head start in the skillet is the secret to having everything finish in the oven at the same time.

Print This Post Print This Post