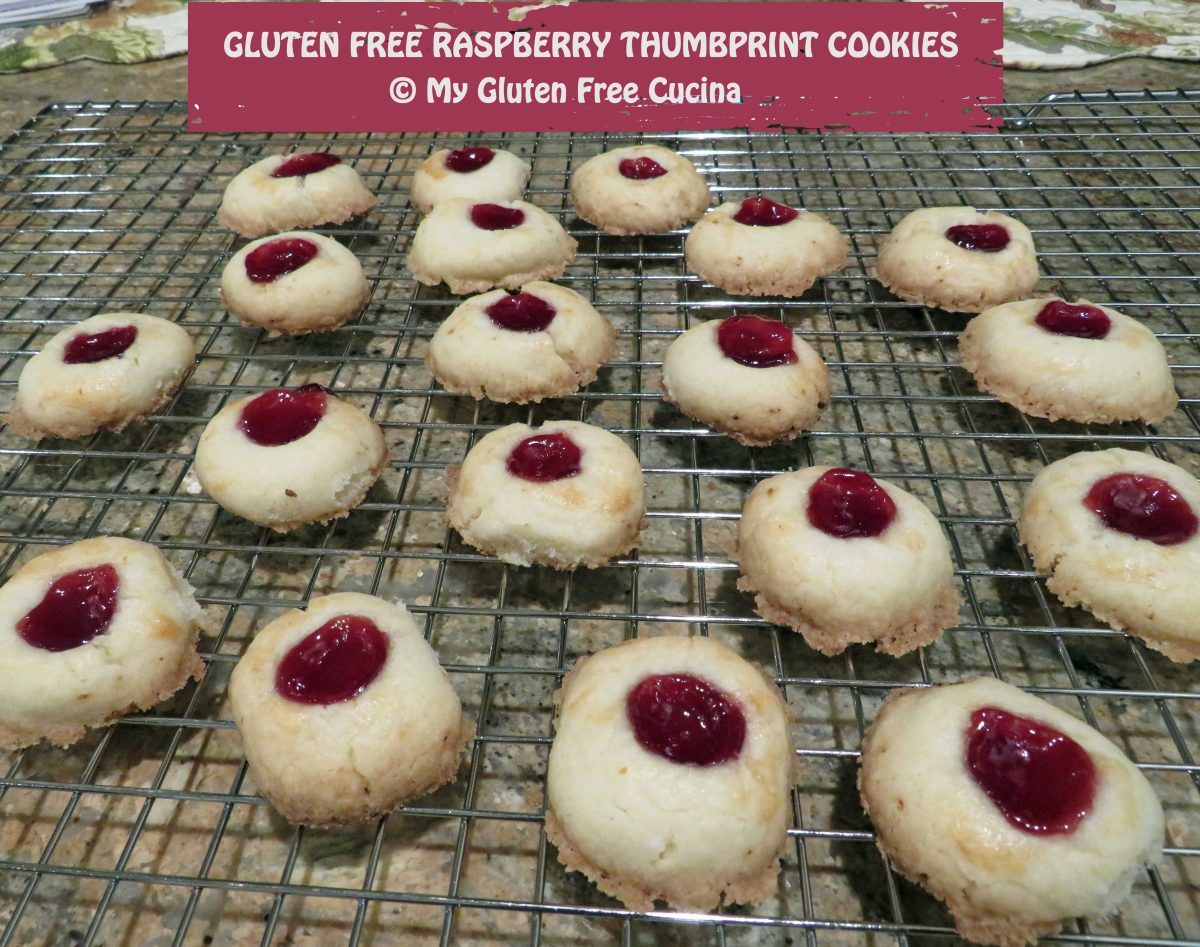
Gluten Free Raspberry Thumbprint Cookies

If you’ve been following my cookie adventures on Facebook, you know that I was determined to master the gluten free thumbprint.  I tried and tried to adapt a recipe to be gluten free, I made so many cookies!  And while they all tasted good, well….

I made a giant unicookie! ????????????

I made some really flat cookies!

Then I did what I should have done in the first place, I asked an expert.

Chef Patrick Auger, who I consider to be THE ORACLE of gluten free baking shared a bit of his expertise with me on how to achieve the perfect gluten free thumbprint (hint: if you don’t have a scale go and order one now!).  Thanks Patrick!  Now, without further ado, here you are ladies and gentlemen!  Gluten Free Raspberry Thumbprint Cookies!

This post contains affiliate links.

Yield: 24 cookies

Ingredients:  

  • 1 stick of unsalted butter, softened (see hint below)
  • 70 g. (1/3 cup) granulated sugar
  • 1/4 tsp. vanilla extract
  • 187 g. gluten free all-purpose flour (I used Better Batter Original)
  • 1/8 tsp. salt
  • 1 tbsp. water (may be needed to bring dough together)
  • egg whites for brushing (optional)
  • gluten free raspberry jam (I used Smucker’s)

Hint: Don’t have time to wait for butter to soften at room temperature?  Me either.  Here’s how to get the perfect consistency every time.  Stand your butter on a plate, cover with a glass and microwave 20-30 seconds.  Perfectly softened butter every time!

Preparation:

Cream together the softened butter and sugar in the bowl of a stand mixer with the paddle attachment.  Add the vanilla.

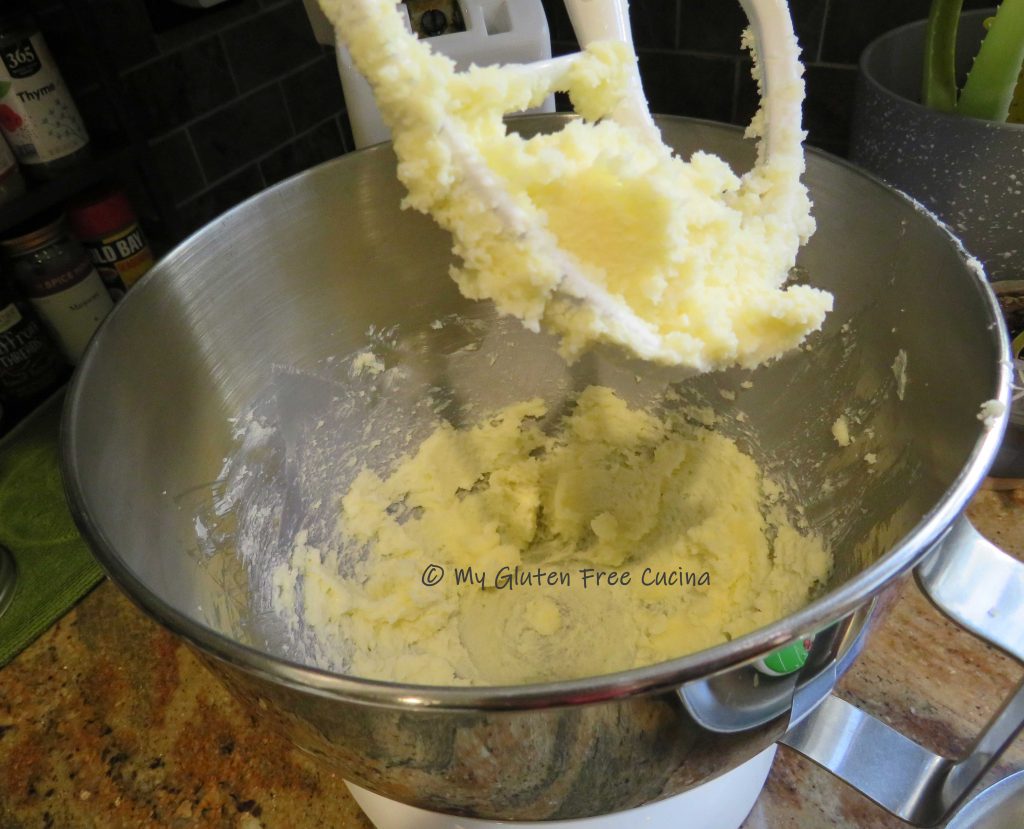
Weigh the flour, this is critical to achieving the right dough.

Add the flour and salt to the mixer bowl and continue beating until the dough comes together.  You may have to add up to 1 tbsp. water.

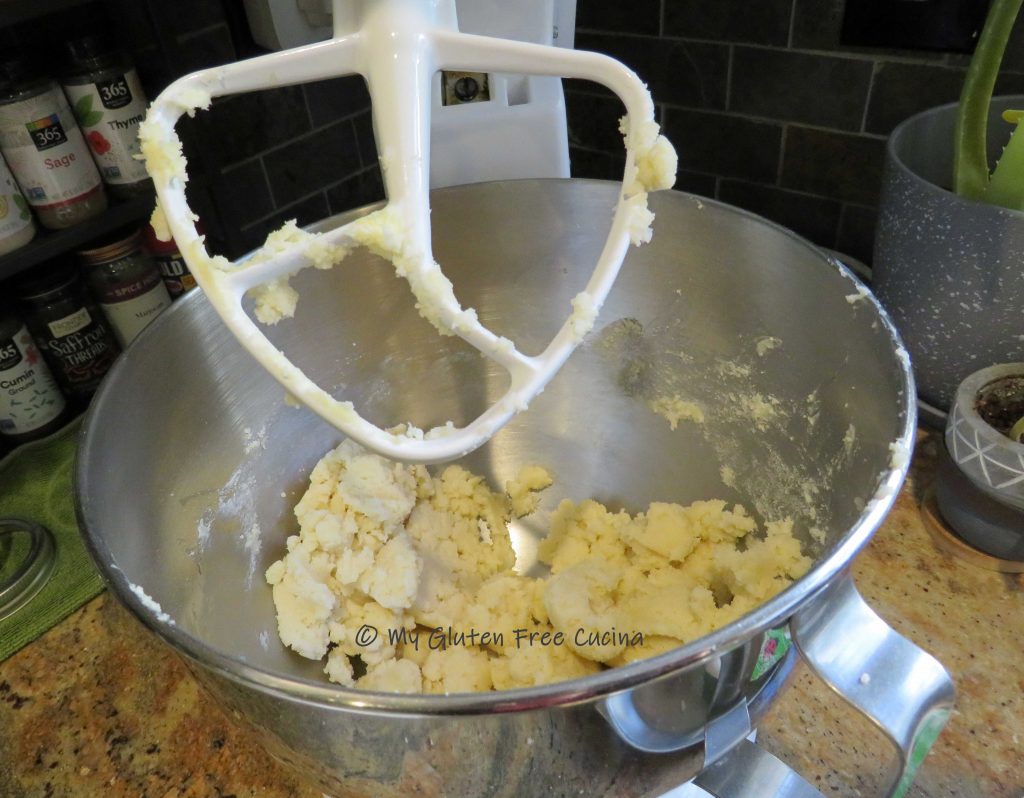
Turn the dough out onto a cutting board and press into a disc.

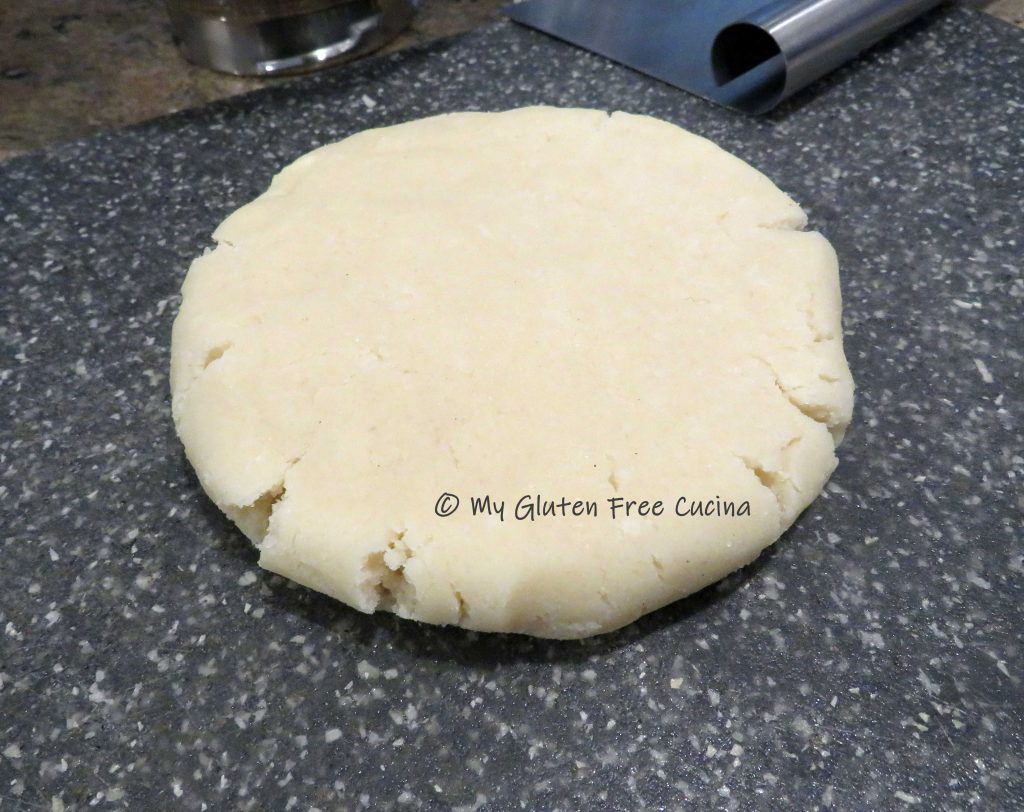
Wrap in plastic wrap and refrigerate 15 minutes.

Line one or two baking sheets with parchment or use a silicone baking mat.

I was determined to make perfectly uniform sized cookies, so I weighed the dough and divided by 24, it came to about 15 g. each.  If you’re a perfectionist like me, you can weigh them or if not just eyeball it!

Roll each piece of dough into a ball and flatten slightly.  Place them on the cookie sheet about 3 inches apart.

Instead of my big old thumbs, I used a 1/8 teaspoon to make the indentations.

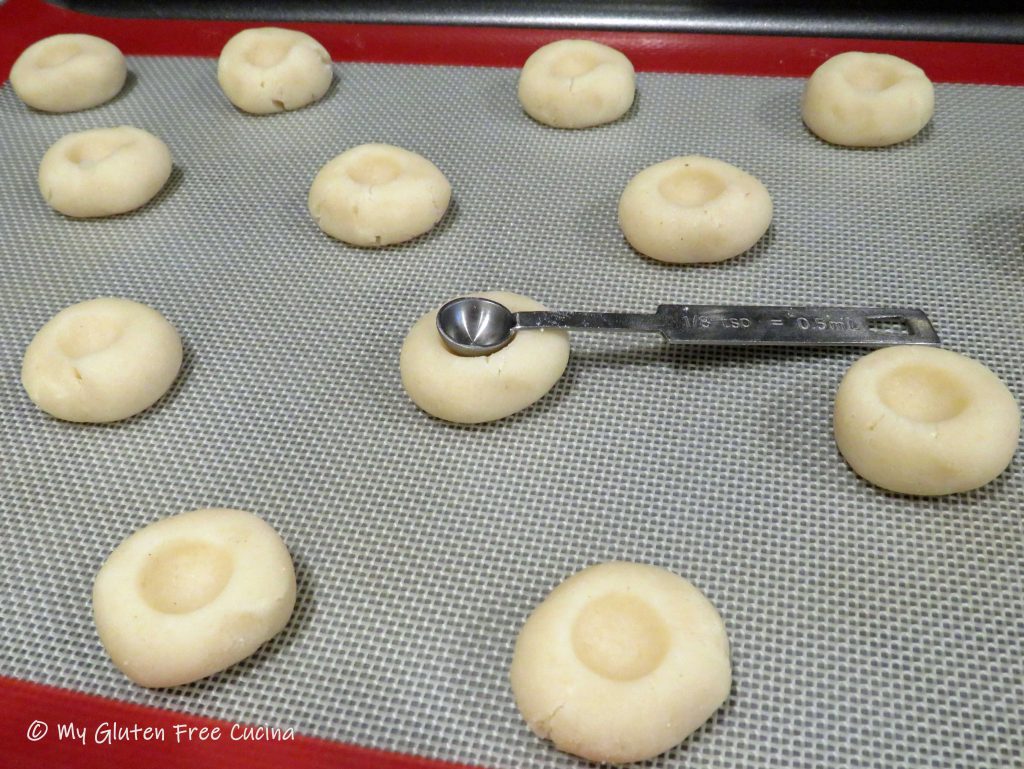
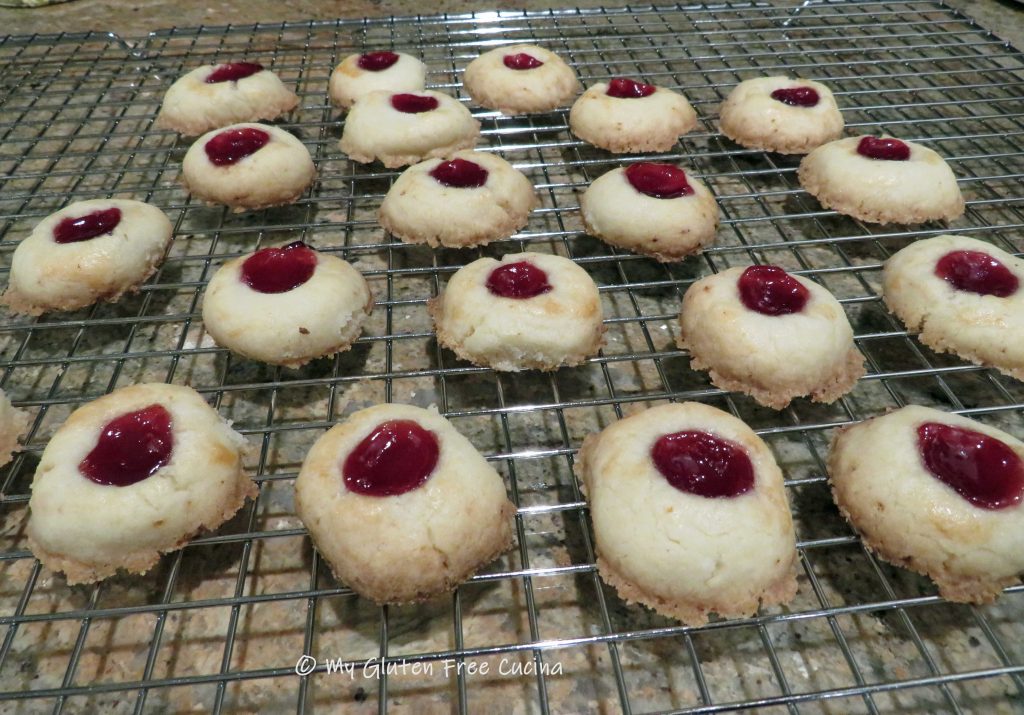
I brushed the cookies very lightly with egg white, but this step is optional.  I used the same 1/8 teaspoon to fill the indentations with jam, perfect fit!

Next, refrigerate the cookies again while you preheat the oven to 350º.

Bake for 20 minutes.  Remove from the oven and let the pan cool for 5 minutes before transferring the cookies to a cooling rack.  Try not to eat them all at once!

Notes for success:

Use Better Batter Original gluten free flour

Weigh your flour (use a scale)

♪♫ Follow Chef Patrick Auger on Facebook and Instagram

♫♫ Use my code MGFC30 for 30% off any full price purchase at Better Batter!


Print This Post Print This Post

Gluten Free Oatmeal Raisin Cookies

A word of Caution- This recipe contains oats.

A recent statement from Gluten Free Watchdog states that they cannot currently recommend ANY brand of gluten free oats.

Whether or not you continue to consume oats is a personal choice.  As we await more information, I will preface any recipes that include oats with a link to this important statement from Gluten Free Watchdog, an independent, subscriber-driven gluten-testing organization.  About | Gluten Free Watchdog

***

Mr. Cucina had been asking me to make his mother’s oatmeal cookies for quite some time.  Her vintage recipes are a part of her legacy and always bring back good memories.  The holidays were the perfect time to make my husband one of his favorites!

Of course, I wanted to enjoy the cookies too, so I scanned the ingredient list to see where a gluten free substitute was needed.  Suprise, there was really only one ingredient that I had to change!

This post contains affiliate links.

The original recipe called for 1 cup of Gold Medal Flour, and I substituted 120g. of Better Batter Original Blend.  That’s it!

Of course, oats are tricky on the gluten free diet.   ALWAYS choose gluten free oats and for additional peace of mind look for purity protocol oats.

About 6 dozen cookies.

Ingredients:

  • 120g. gluten free all-purpose flour (I used Better Batter Original)
  • 1 tsp. salt
  • 1 tsp. cinnamon
  • 1/2 tsp. baking soda
  • 1/2 tsp. cloves
  • 1 cup raisins (I used Sunmaid)
  • 1 cup chopped walnuts
  • 3 cups quick-cooking gluten free oats (I used Bobs Red Mill)
  • 3/4 cup shortening (Crisco is gluten free)
  • 1 cup brown sugar (packed)
  • 1/2 cup granulated sugar
  • 1 egg
  • 1 tsp. vanilla extract

Preparation:

Preheat the oven to 350º.  Combine the dry ingredients, flour through oats in a large bowl and mix well.

In the bowl of a stand mixer, add the shortening, sugars, egg and vanilla.  Beat on low speed with the paddle attachment until well combined.

Add the dry ingredients and beat on low speed, just until combined.  Gather the mixture together and rest 15 minutes.

Scoop the dough by rounded teaspoons and place at least one inch apart on a prepared baking sheet.  I used a silicone mat to prevent sticking.

Bake 17-20 minutes on the middle shelf.  Cookies are done when almost no imprint remains when touched with your finger.  Immediately remove from the baking sheet.

As the cookies were baking, Mr. Cucina said, “now you know what my mother’s kitchen smelled like”.  That alone was worth the effort. ????

Apologies if these cookies don’t make it to anyone’s house.  We were eating them right out of the oven!

For those with more restraint, cookies can be stored in an airtight container for several days or frozen, great to make ahead for your Christmas cookie trays!

Notes ♪♫ For best results, be sure to use quick cooking oats in this recipe (not thick cut or old fashioned).  I always keep a bag on hand for baking!


Print This Post Print This Post