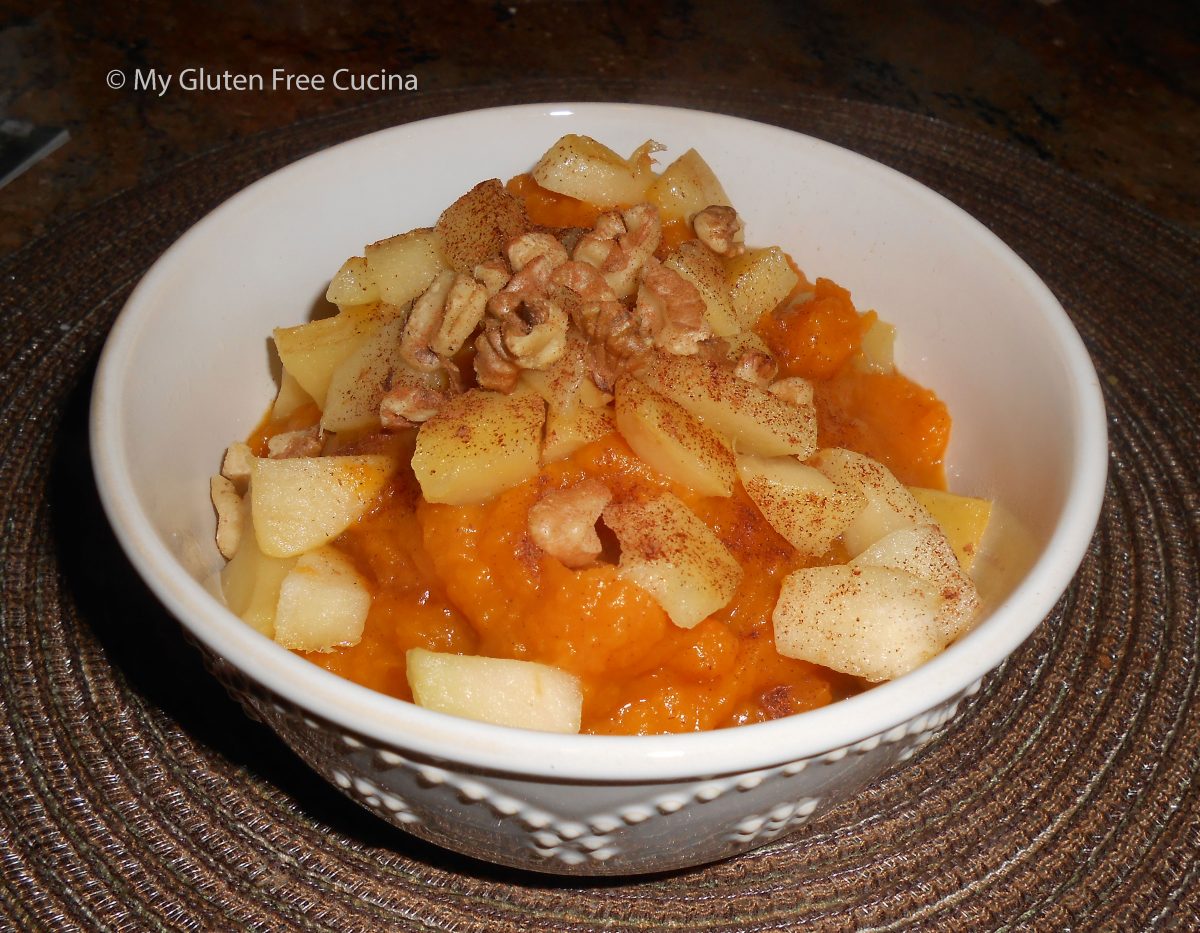
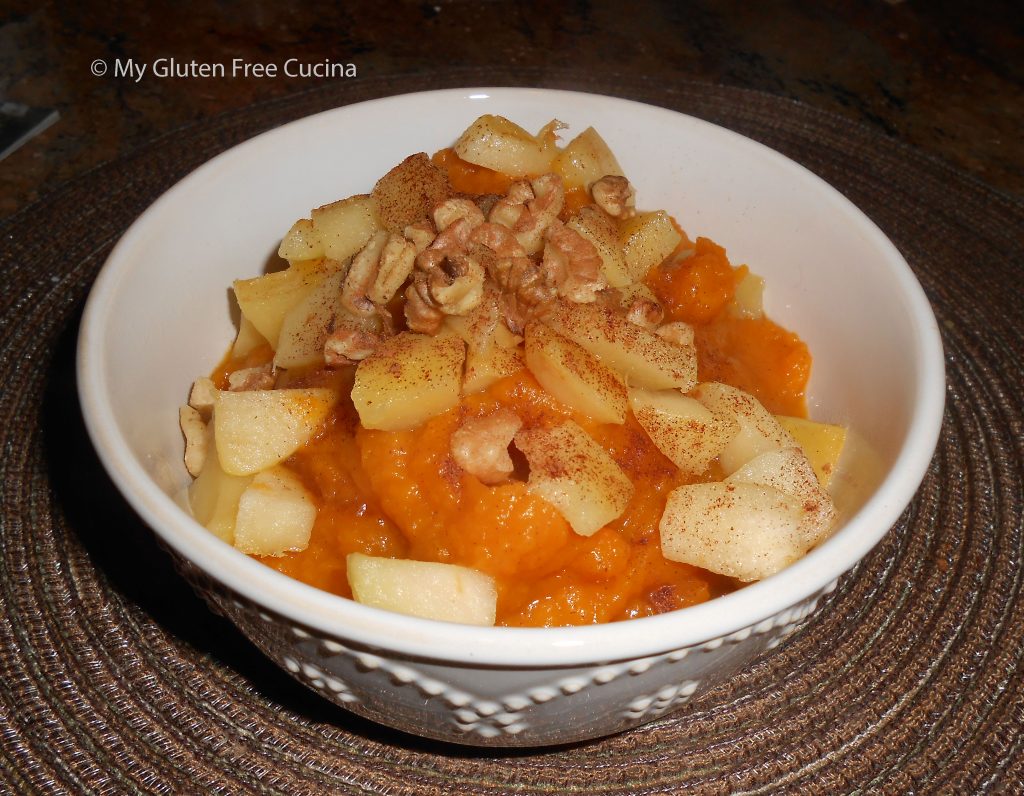
Apple Walnut Butternut Squash

Butternut squash and apple make the perfect pair in this easy autumn side dish.  If you are looking for a fast and easy side for your holiday table, this is it!  Everyone will enjoy it and dare I say it’s healthy?  Nuts are optional, but I think they really add to the flavor.

3-4 servings (double for larger gatherings)

Ingredients:

  • 1/2 butternut squash, peeled and cubed
  • 1 apple, peeled and diced
  • 2 tbsp. chopped walnuts or pecans, optional
  • 1 tbsp. brown sugar
  • 2 tbsp. butter, divided
  • salt, to taste
  • cinnamon

 This post contains affiliate links.

Preparation:

Toast the nuts in a dry nonstick skillet.  Be careful not to burn them, 2-3 minutes should do it.  Remove from the skillet and set aside.

Peel and dice the apple.  Add 1 tbsp. butter to the skillet and sauté the apples for 2-3 minutes.  Remove from heat.

Steam the butternut squash until tender, then puree with a stick blender.  Stir in the remaining tbsp. of butter and brown sugar.

Place the squash in a serving bowl.  Top with the diced apples and the toasted nuts.  Sprinkle with cinnamon and serve!

Notes ♪♫ Speed up prep time by purchasing peeled and cubed butternut squash, it’s usually available this time of year!

Print This Post Print This Post


Gluten Free Pipe Rigate with Brussels Sprouts

This simple side dish has it all, veggies, carbs, and a little protein happily blended together in every bite.  It’s a savory side, with an unexpected hint of sweetness from a drizzle of maple syrup at the end.

The pasta I used in this dish is called Pipe Rigate, an Italian pasta shape that translates to “ridged pipes”.  The short, curved shape with ridges resembles a smoking pipe or snail shell.  I found Gluten Free Pipe Rigate available locally, but you can also get it on Amazon from Le Veneziane.  It was the perfect size pasta to complement the Brussels sprouts in this recipe and I also like adding it to soups.

2 Servings, recipe can be doubled for larger families.

This post contains affiliate links.

Ingredients:

  • 1/2 bag (about a dozen) Brussels sprouts, cleaned and halved
  • 1 strip of bacon, diced
  • 1 tbsp. olive oil
  • salt and fresh ground pepper
  • 1 cup (2 oz.) Gluten Free Pipe Rigate or other small gluten free pasta
  • 1 tbsp. butter
  • 1 tbsp. maple syrup
  • 2 tbsp. shaved parmesan cheese (optional)

Preparation:

Rinse the Brussels sprouts and slice in half lengthwise.  Dice the bacon into 1/2″ pieces.  Arrange in an 8″ baking dish and toss with 1 tbsp. olive oil.  Season with salt and pepper to taste.

Bake at 375º for 30 minutes, stirring every 10 minutes.

While the Brussels are baking, cook the pasta according to package directions.  Drain and set aside until veggies are done.

Remove baking dish from the oven and stir in the cooked pasta.  Finish with 1 tbsp. butter, 1 tbsp. maple syrup and shaved parmesan.  Return to the oven and bake for 5 minutes longer.

Give it a good stir, a few more grinds of black pepper and serve right from the baking dish for easy cleanup.

Just add a protein of your choice and you’ll have dinner on the table in no time!

Notes ♪♫ This recipe was inspired by Savory and adapted to be gluten free by subbing gluten free pasta.

Print_Link

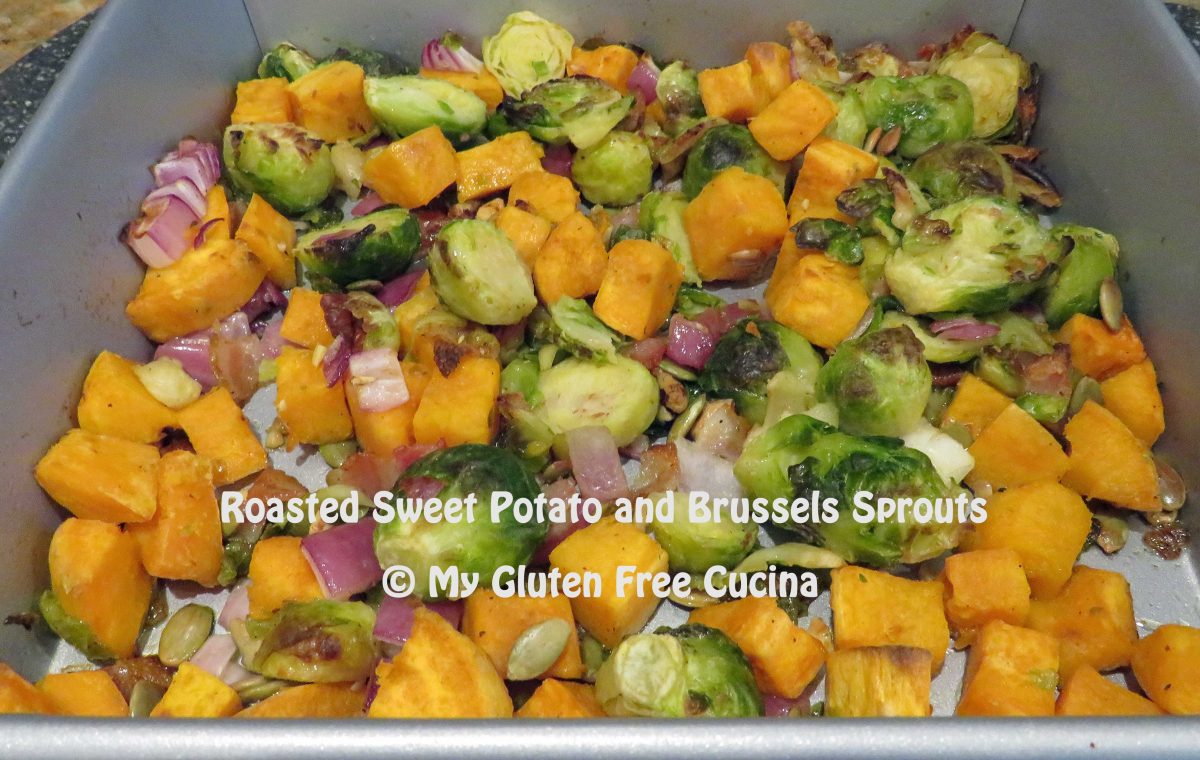
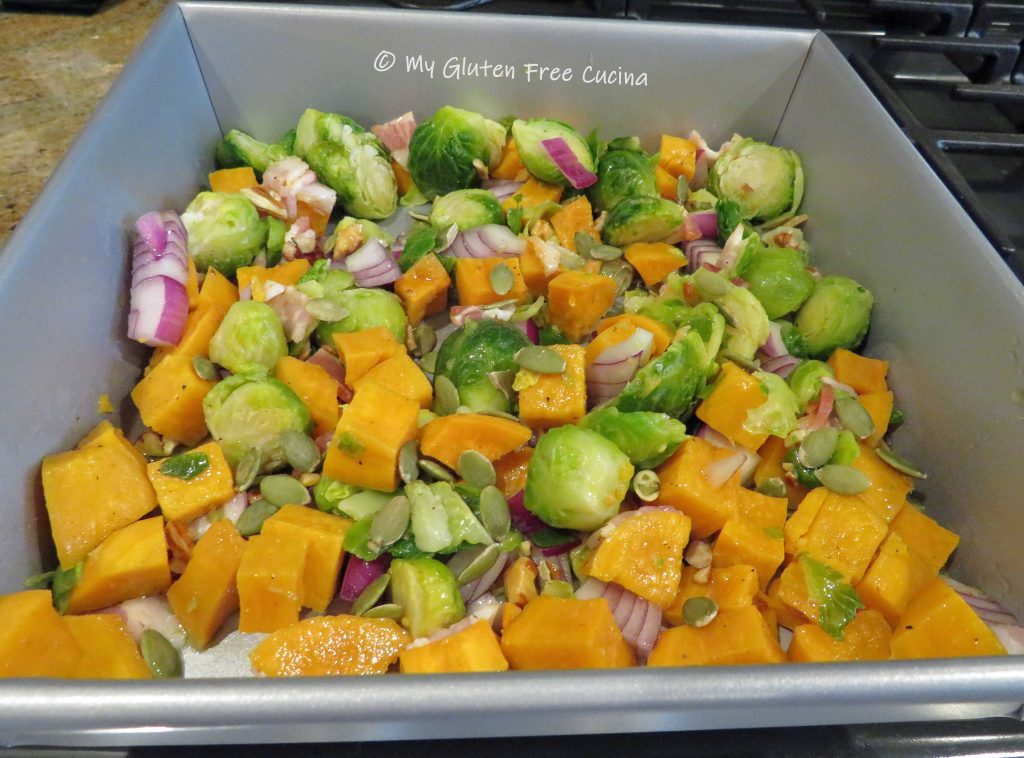
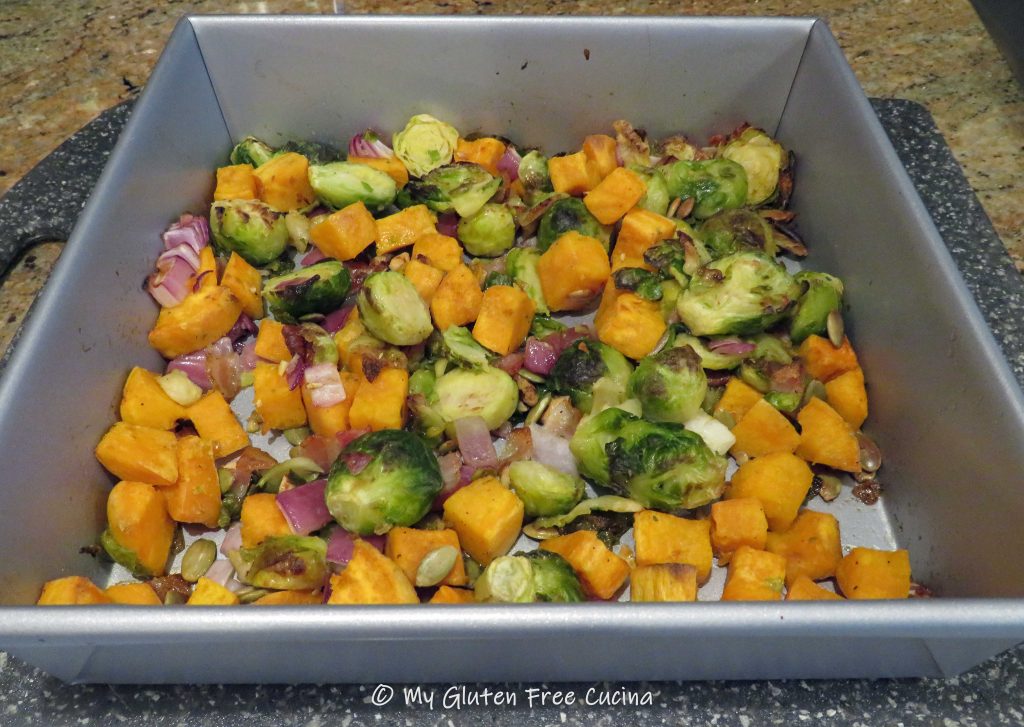
Roasted Sweet Potato and Brussels Sprouts

Eat your vegetables!  They are healthy, delicious and naturally gluten free.  Roasting is my favorite way to cook veggies, and a little bacon adds a pop of flavor to well, anything. 🙂  The nuts and seeds give it great texture and crunch.

This post contains affiliate links.

The Lazy Gastronome

Ingredients:

  • 1 large, sweet potato, peeled and diced
  • 1/2 bag frozen halved Brussels sprouts
  • 1/2 small red onion, peeled and diced
  • 3 tbsp. olive or canola oil (or oil of your choice)
  • salt and pepper to taste
  • 1 strip hickory smoked bacon, diced
  • 3 tbsp. chopped almonds, pecans, pumpkin seeds

Preparation:

Preheat the oven to 425º.

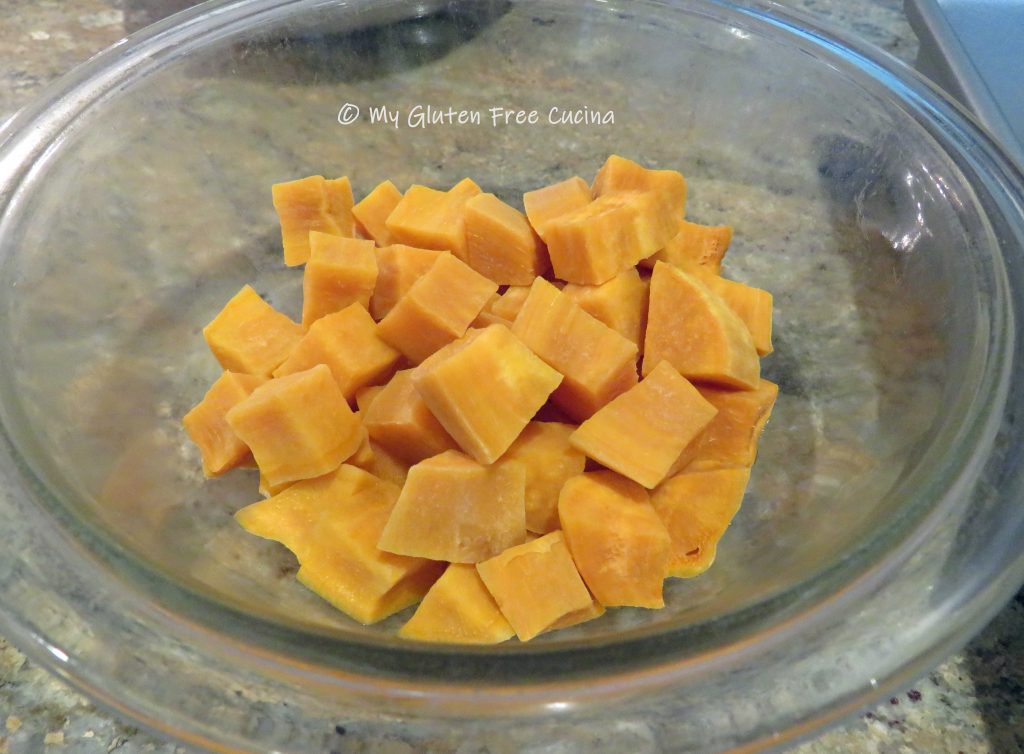
Peel and dice the sweet potato, place in a microwave safe bowl with 1 tbsp. water and microwave for 10 minutes.  Carefully remove the bowl (it will be hot) and set aside to cool.

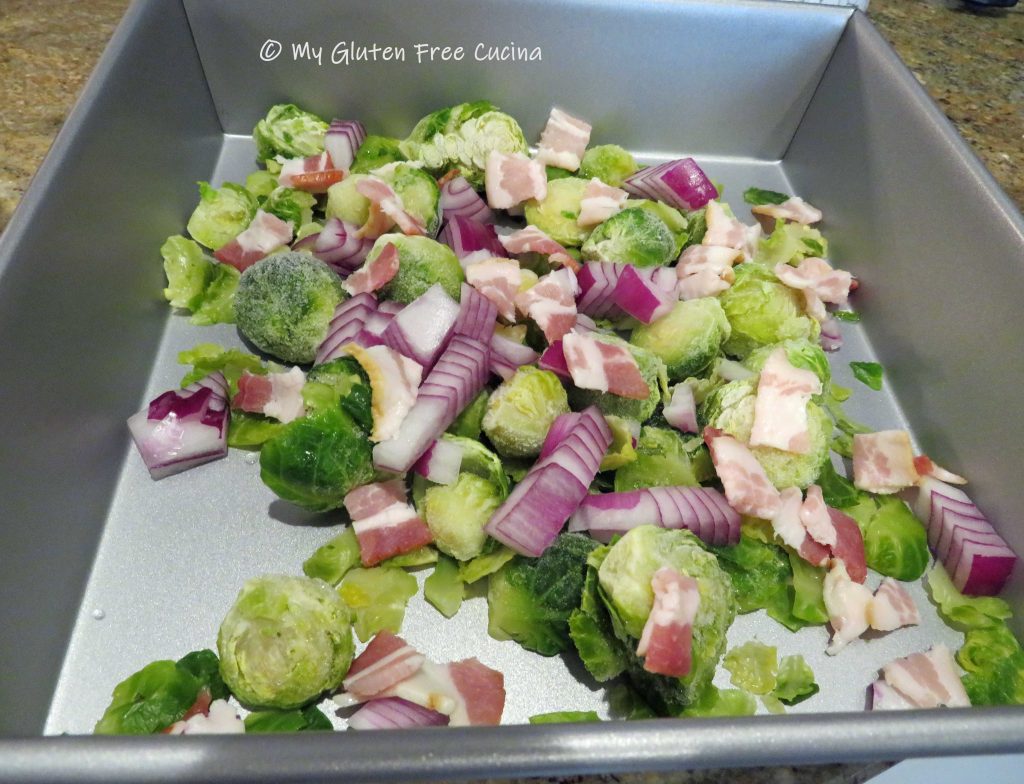
Combine the brussels sprouts, red onion, and bacon in a 9″ nonstick baking pan or parchment lined sheet pan.

Stir in the cooled potatoes and toss with oil, salt and pepper.  Top with the nuts and seeds and make sure everything is spread in an even layer.

Roast for 25-30 minutes, stirring every 10 minutes.  Finish under the broiler for 2-3 minutes to get a little color on the Brussels sprouts.

Notes ♪♫ For convenience and speed, I precooked the sweet potato in the microwave and used frozen brussels sprouts.  If using raw potato and fresh Brussels sprouts, allow 45 minutes for baking.

Originally published 09/28/2018            Updated 08/26/2023

Print This Post Print This Post

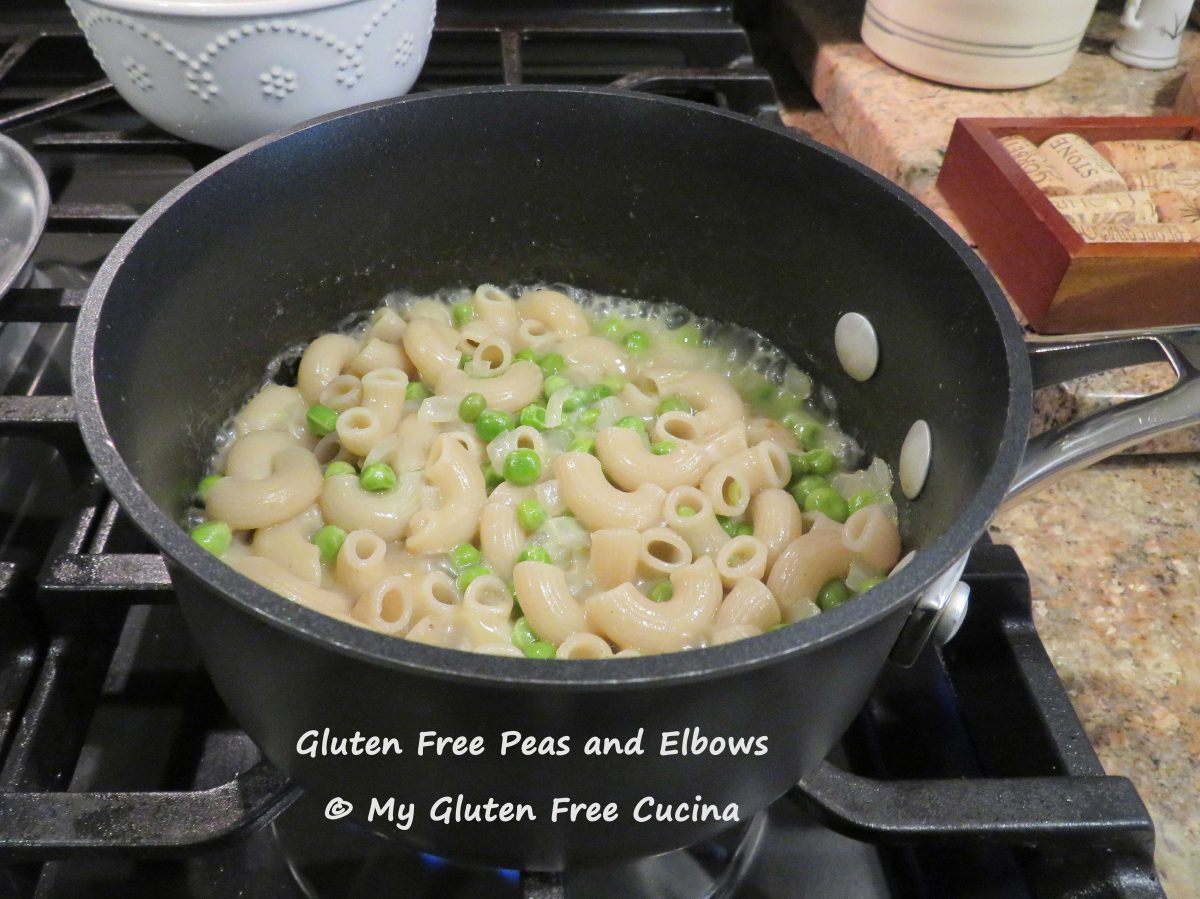
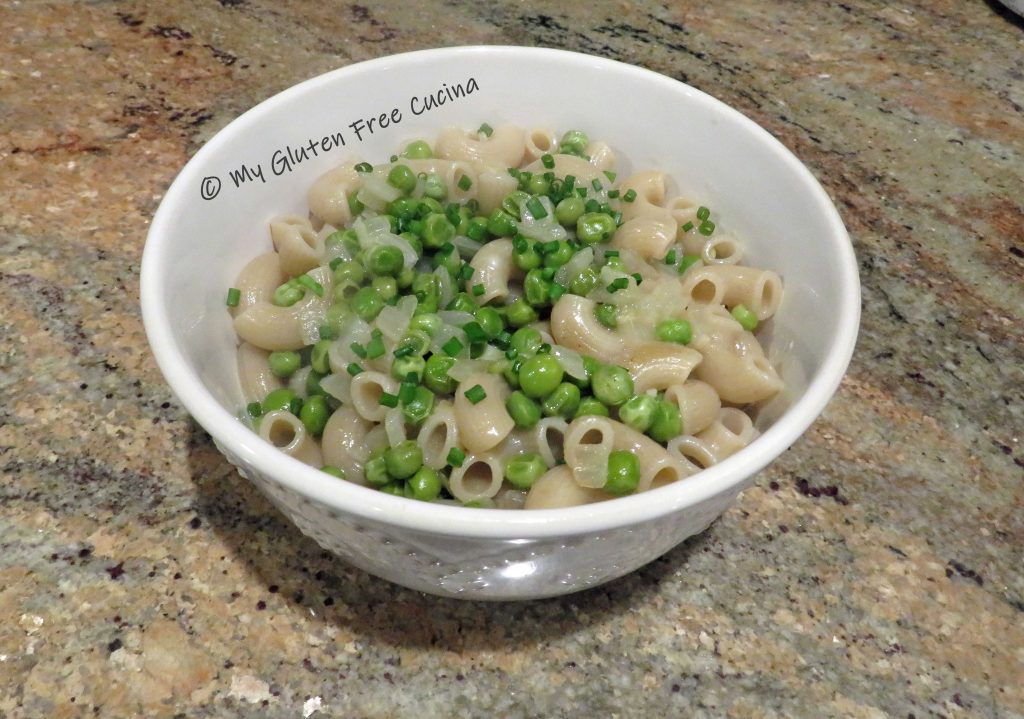
Gluten Free Peas and Elbows

Do you get bored with the same old side dishes?  I tend to always go with rice or potatoes for dinner, but it gets monotonous!  So, here’s a little something I made to change things up one weekend.  I served it with steak, but this nifty little side dish would go well with chicken or pork chops too!

This post contains affiliate links.

Ingredients:

  • 1 tbsp. olive oil
  • 1/4 cup minced onion
  • 1 cup gluten free chicken stock
  • 1 cup (3 oz.) gluten free elbow macaroni
  • 1/2 cup water
  • 1/2 cup frozen peas, defrosted
  • 1 tbsp. butter
  • 1 heaping tbsp. shredded parmesan
  • 1/2 tsp. seasoned salt
  • sea salt, to taste
  • fresh chives, for garnish

Preparation:

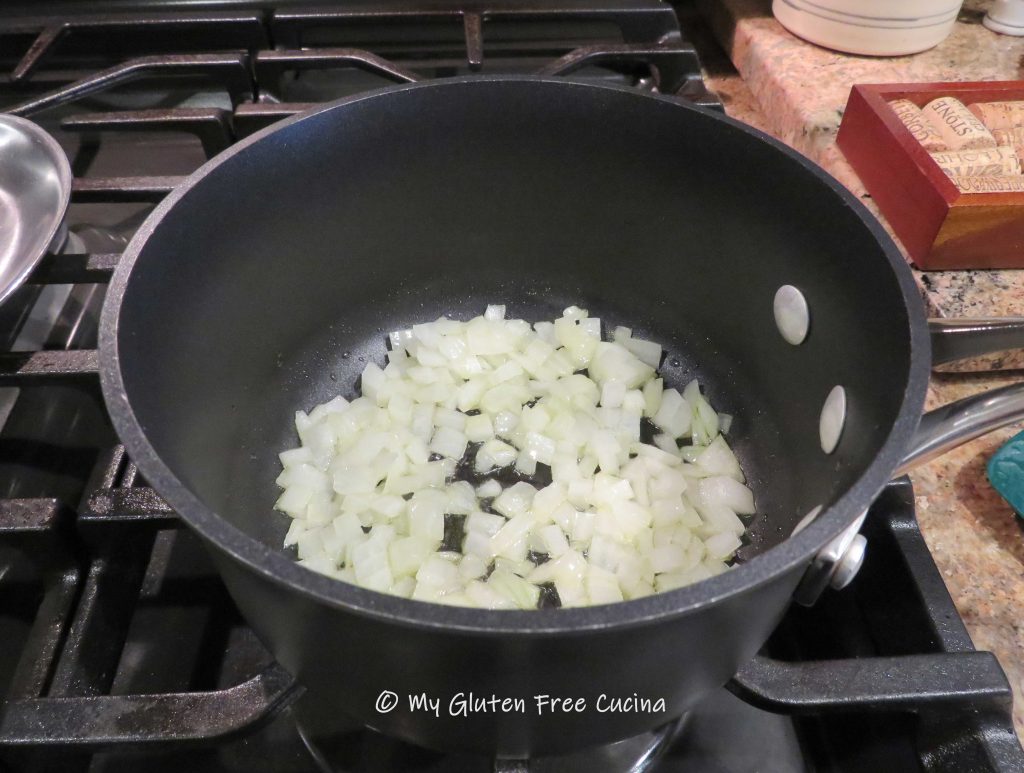
In a small nonstick saucepan, sauté the onion in 1 tbsp. olive oil until the onions are translucent.

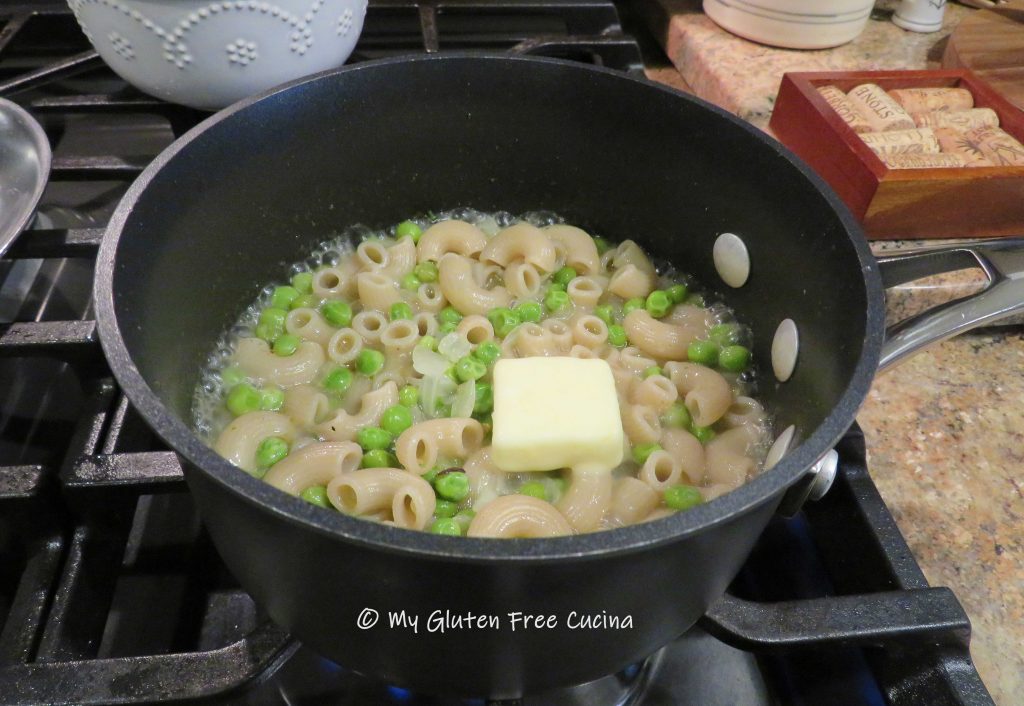
Add 1 cup gluten free chicken broth, 1 cup water, salt to taste and seasoning of choice.  Bring to a simmer and add the elbows, cook to package directions.  With 5 minutes left on cook time, add the peas and simmer 5 minutes longer.

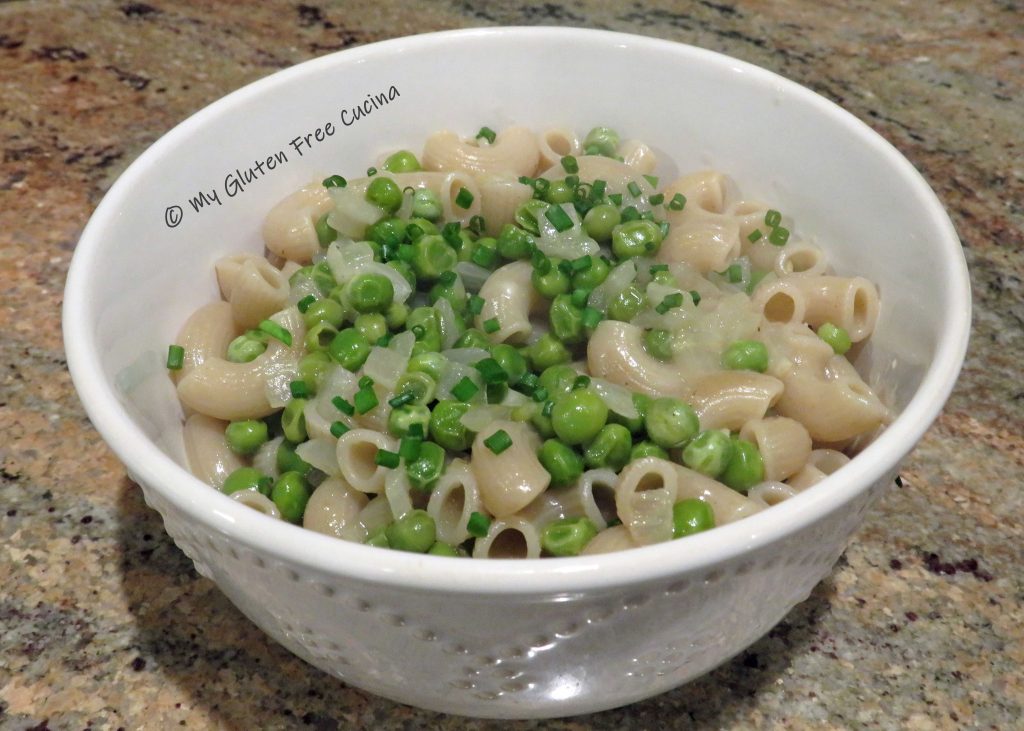
Stir in 1 tbsp. butter, a heaping tbsp. of cheese (or more if you like) and transfer to a serving bowl.

Garnish with fresh chives or parsley.  I love this easy side, so it will definitely be going into the dinner rotation!

Notes ♪♫ I used Jovial brown rice elbows in this recipe.  One of my favorite brands of gluten free pasta, I was thrilled to find elbows at the store.  If they aren’t available where you live, you can get them here on Amazon.

Print This Post Print This Post

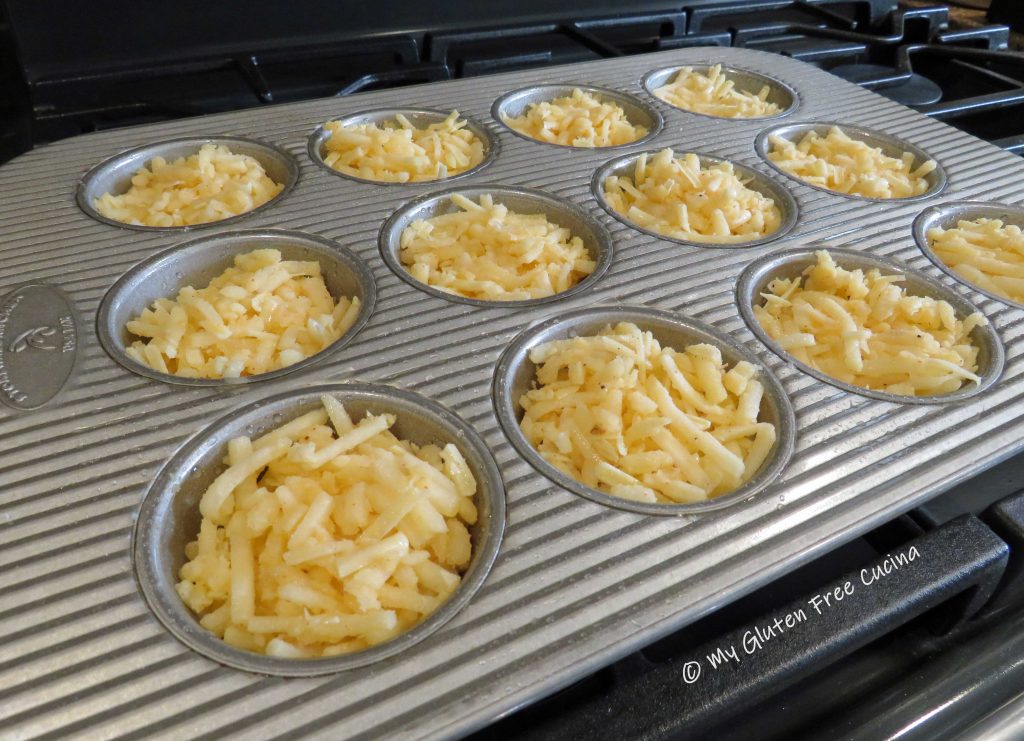
Hash Brown Muffin Cups

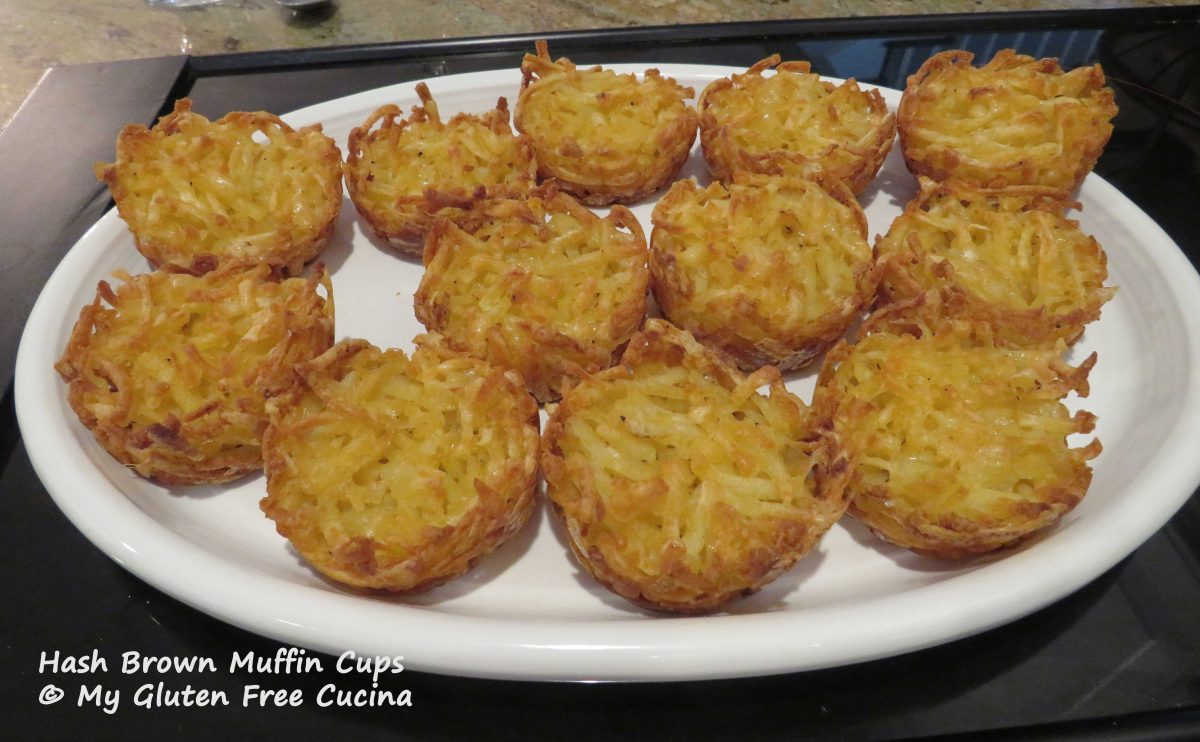
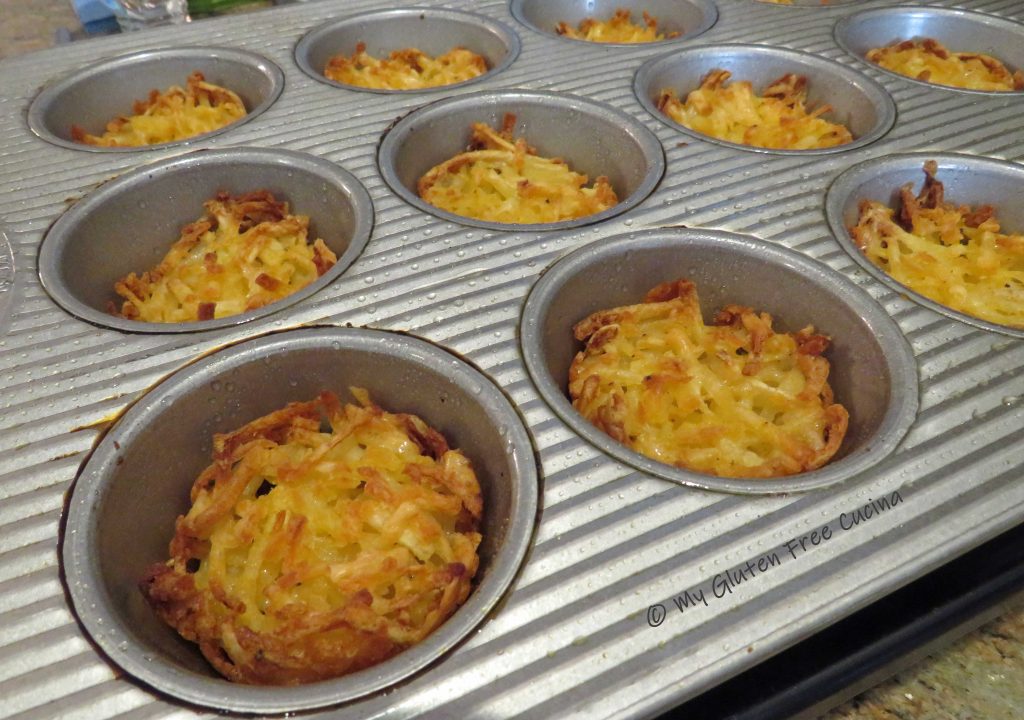
Aren’t these the cutest?  Hash Brown Muffin Cups are fun to make and eat, kid friendly and adult approved!  Using frozen hash browns really cuts down on the prep work.  This is a great brunch recipe because you can prepare it the night before and bake in the morning.

The Lazy Gastronome
Are hash browns gluten free?

As long as you are buying plain hash brown potatoes, they should be fine.  I always look for the gluten free label as an extra measure of security, but as long as the only ingredient is “Potatoes” you are good to go.  If the potatoes are seasoned or include other ingredients, then investigate further before buying.  I used Ore-Ida frozen shredded Hash Browns in this recipe.

This post contains affiliate links.

Ingredients:

  • 20 oz. frozen shredded hash browns (for a standard 12-cup muffin tin)
  • 1/2 cup shredded parmesan cheese
  • 1/2 tsp. salt
  • fresh ground pepper, to taste
  • 1/2 tsp. garlic granules
  • 1/8 tsp. paprika
  • 2 tbsp. olive oil
  • cooking spray

Preparation:

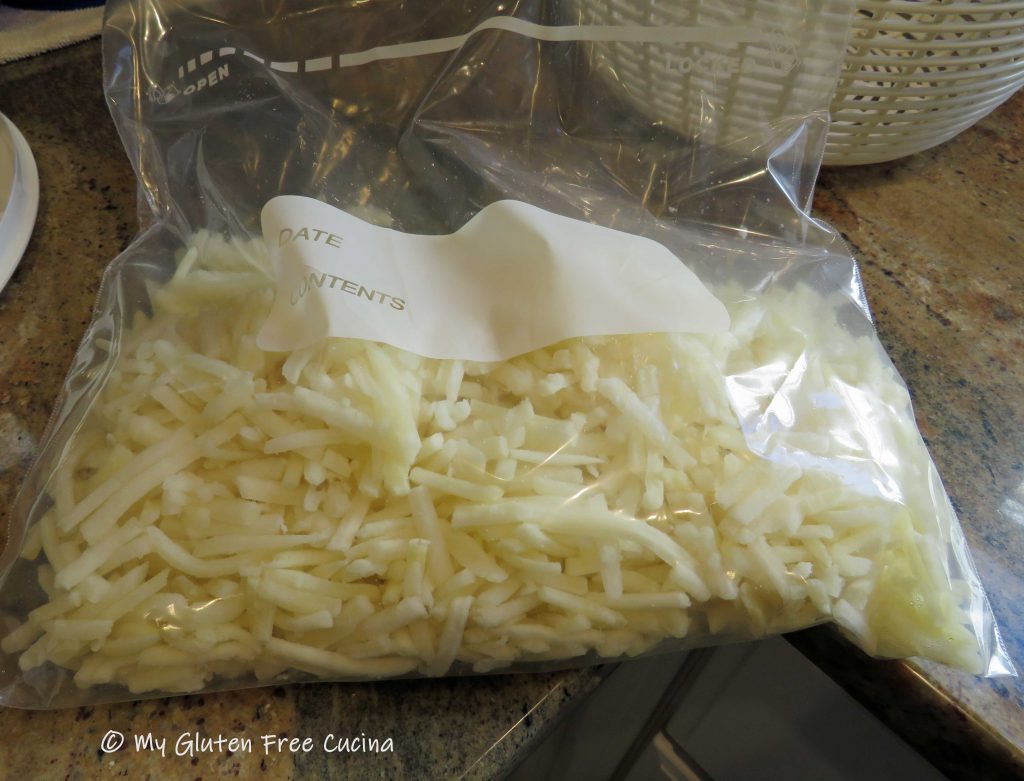
Weigh 20 oz. hash browns and place in a zip top bag.  Defrost in the refrigerator.

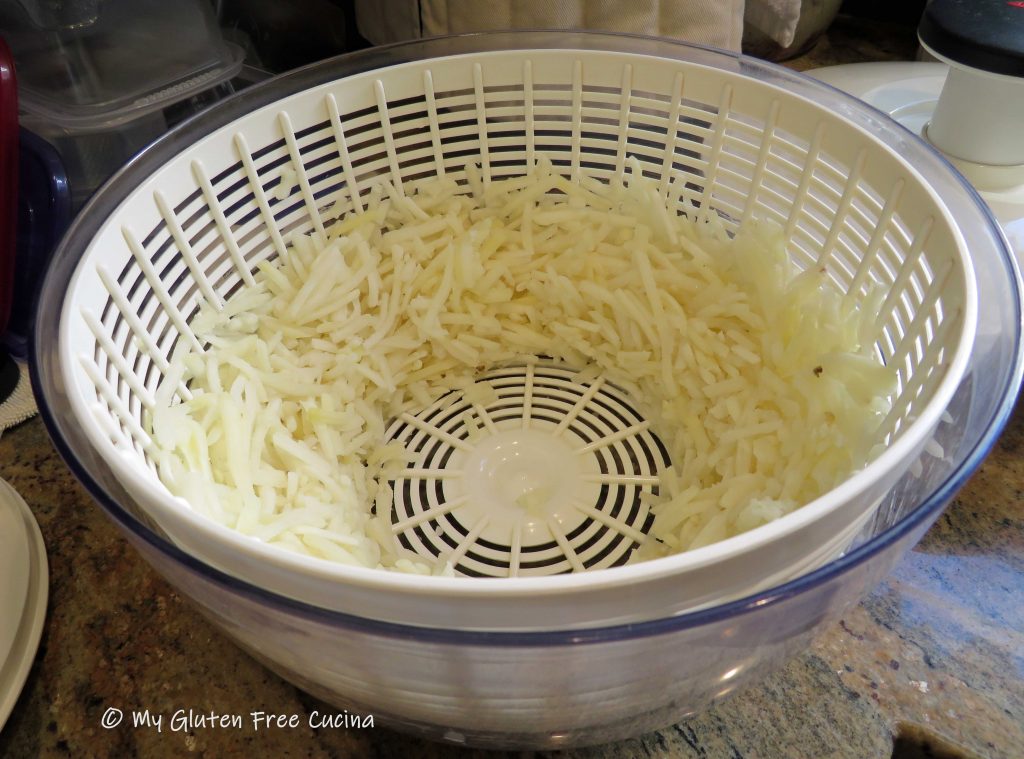
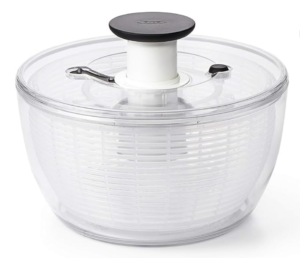
I used a salad spinner to be sure the potatoes were as dry as possible (see notes).   After spinning the potatoes (or pressing them dry with paper towels) transfer to a clean bowl.

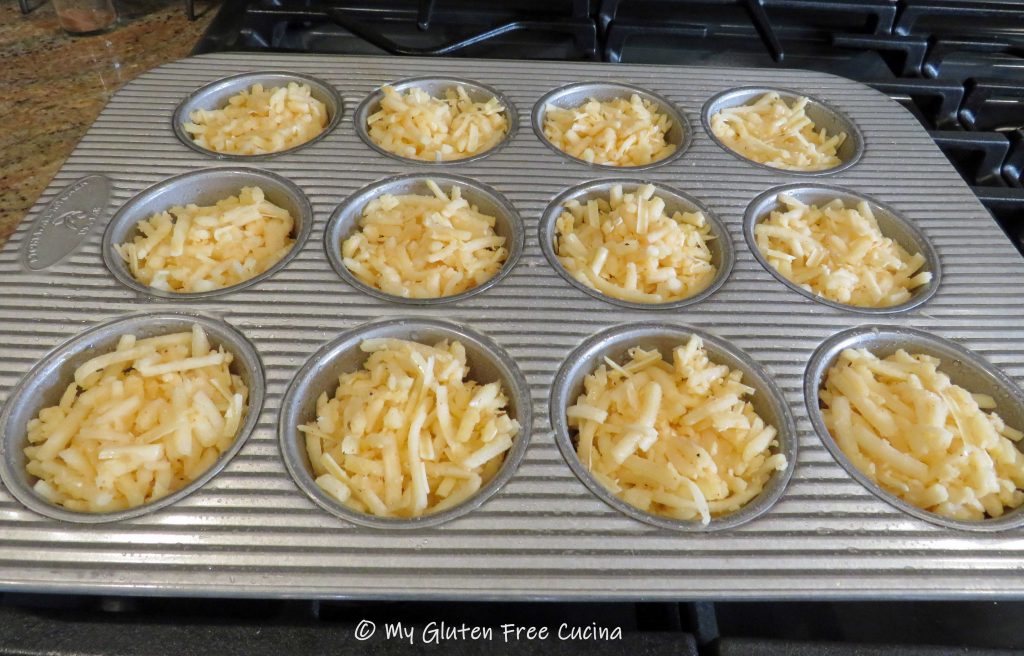
Toss the hash browns with the cheese and seasonings.  Drizzle with 2 tbsp. olive oil and toss again to coat thoroughly.

Mist the muffin tin with cooking spray and spoon the potatoes evenly into the 12 cups.

Cover with plastic wrap and refrigerate overnight.

The next morning, preheat the oven to 400º and spritz the tops of the muffin cups with olive oil spray.  Bake for 45 minutes.

The edges should be browned and crispy.  Use a spoon to slide them right out of the pan onto a serving dish!

Hash Brown Muffin Cups will be a great addition to your brunch menu, or a fun dinner side.  They reheat well, and ours stayed crispy even after microwaving.  You will want to keep a bag of hash browns in your freezer pantry, so you can make a batch any time you like!

Notes ♪♫ My salad spinner is over 20 years old.  We originally purchased ours when my husband used to plant a large garden and I needed an easy way to wash the veggies.  Today I still eat lots of salads and this is just a handy thing to have in your kitchen!  Here’s the current model.

Print This Post Print This Post

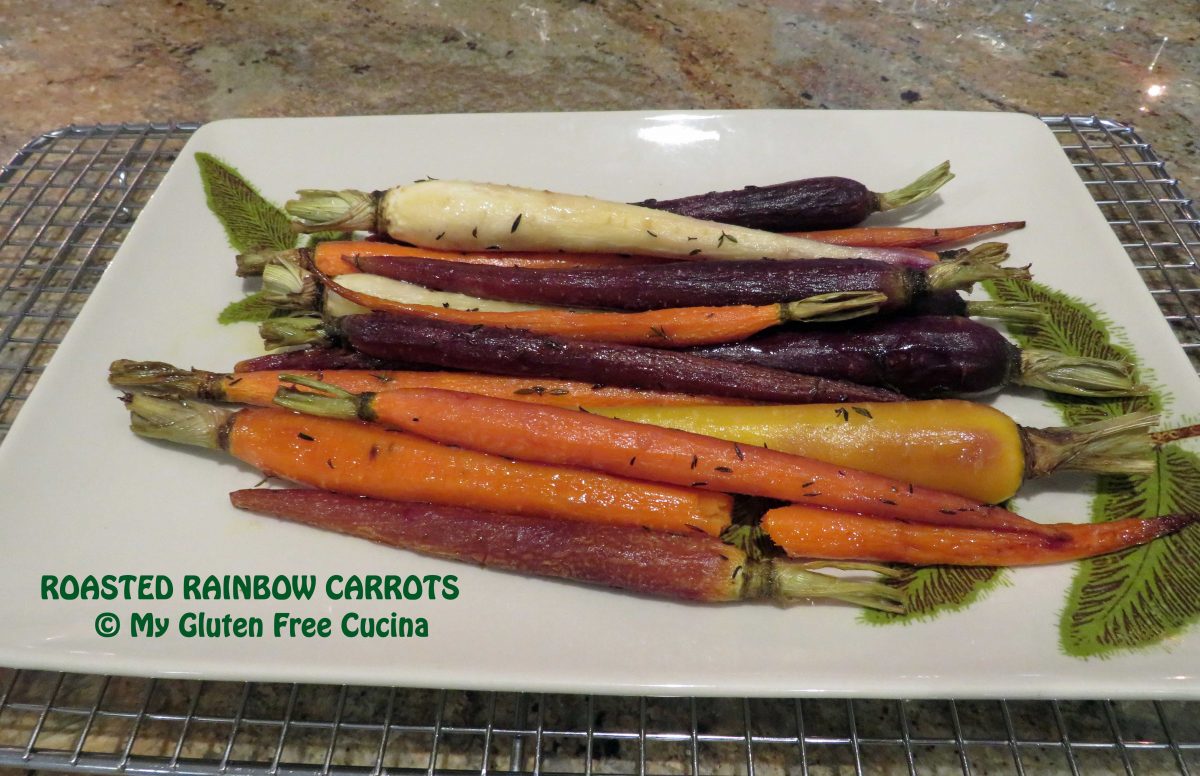
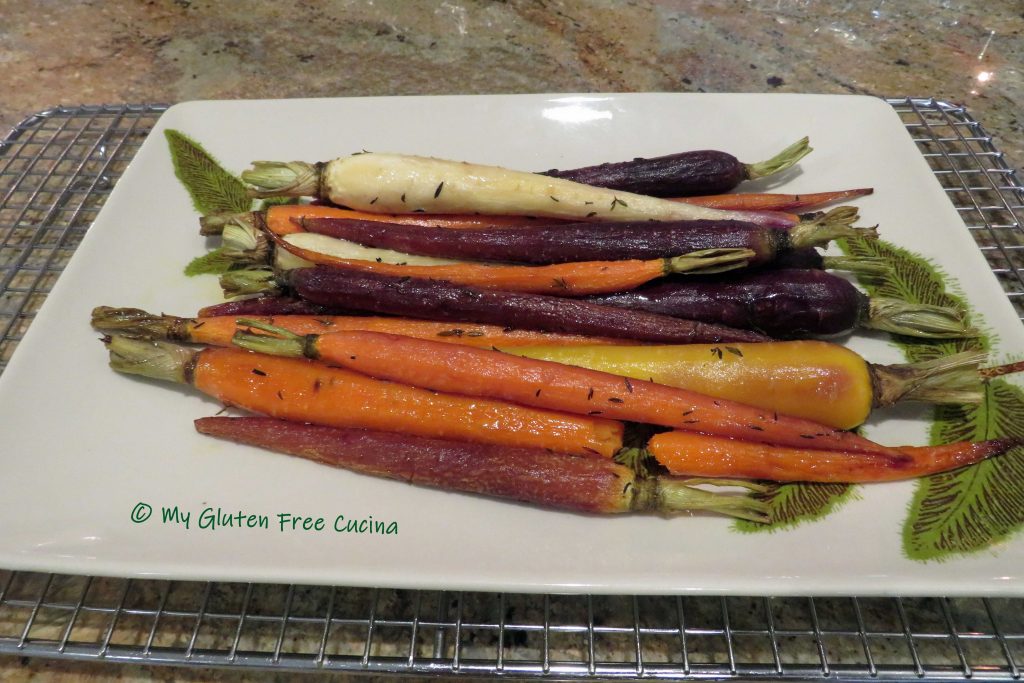
Roasted Rainbow Carrots

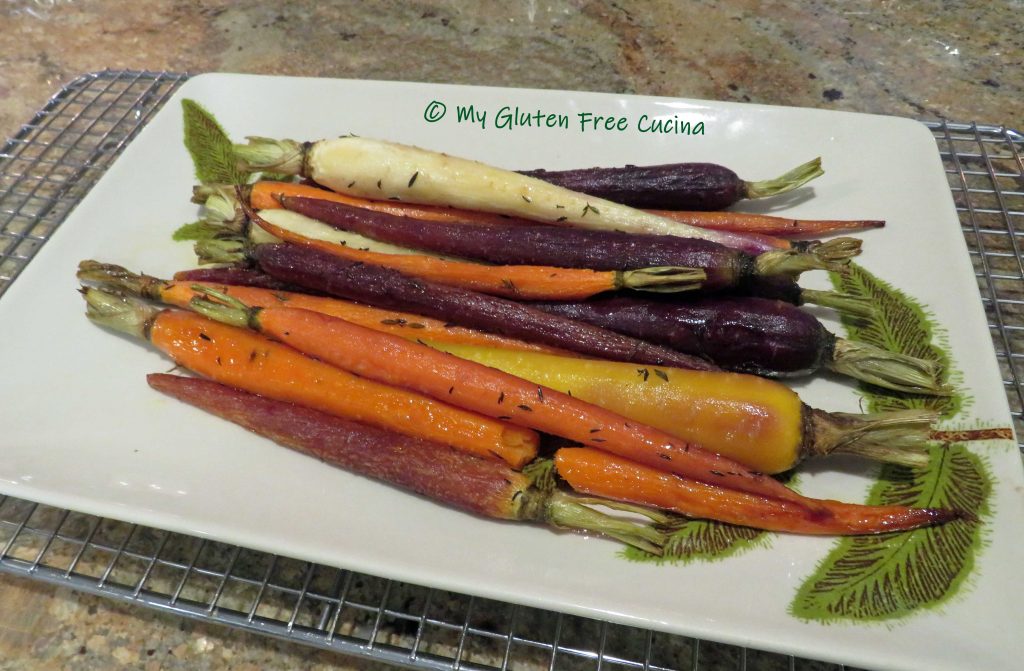
Are you looking for a beautiful and easy side dish for your holiday table?  Roasted Rainbow Carrots are so pretty and go well with a variety of roasts and main courses.  In this easy preparation, I roast them whole with butter and herbs then give them just a brush of maple syrup at the end for sweetness.  Of course, you can do this with regular carrots.  Just be sure to choose slender carrots that are about the same size, so they cook evenly.

This post contains affiliate links.

Ingredients:

Preparation:

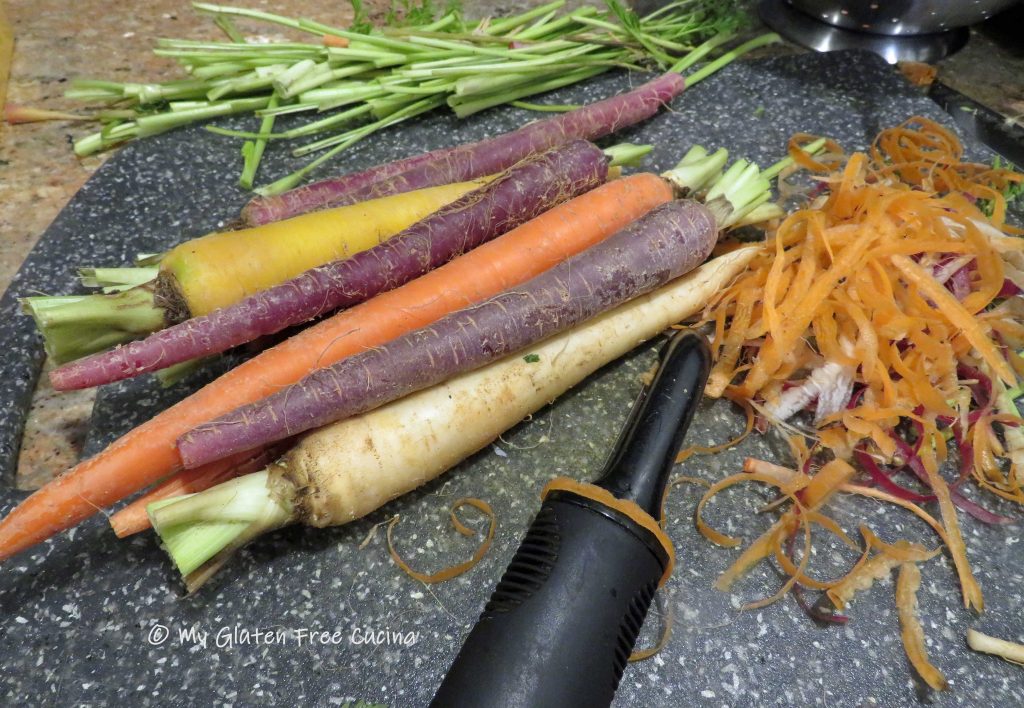
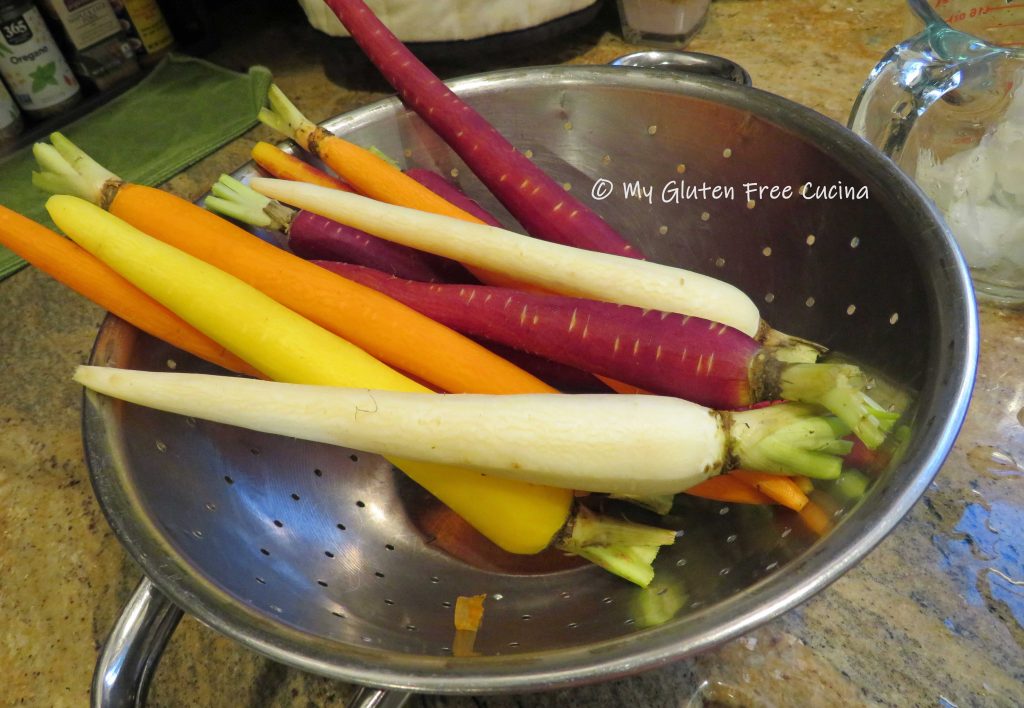
Peel and trim the carrots, leaving a little of the stem (for appearance, not to eat).

Rinse the carrots and pat dry.

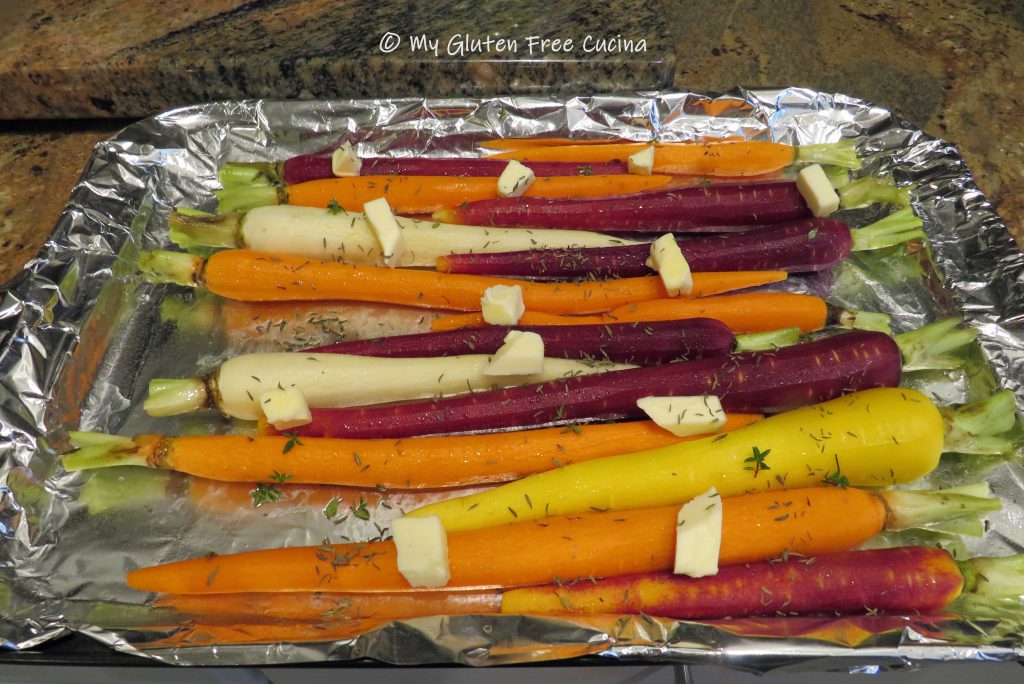
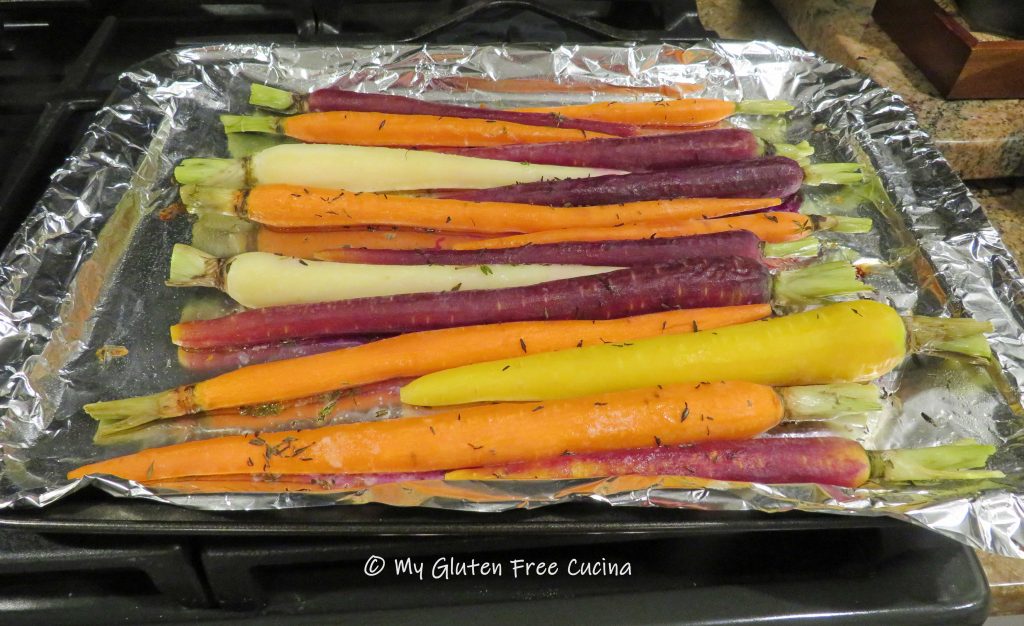
Line a sheet pan with foil and mist with cooking spray.  Arrange the carrots in a single layer, dot with butter and season with salt, pepper and thyme.

Roast at 400º for 20-25 minutes or until they reach the desired softness.

You can prepare to this point the night before and reheat in the morning.  Brush the carrots lightly with maple syrup and return to the oven for 15-20 minutes at 325º.  Transfer to a serving dish.

Notes ♪♫ Thyme pairs beautifully with carrots.  I was fortunate enough to still have fresh thyme from my herb garden when I made this for Thanksgiving.  Look for it in the supermarket, or if you can’t find it, use dried thyme.

Print This Post Print This Post


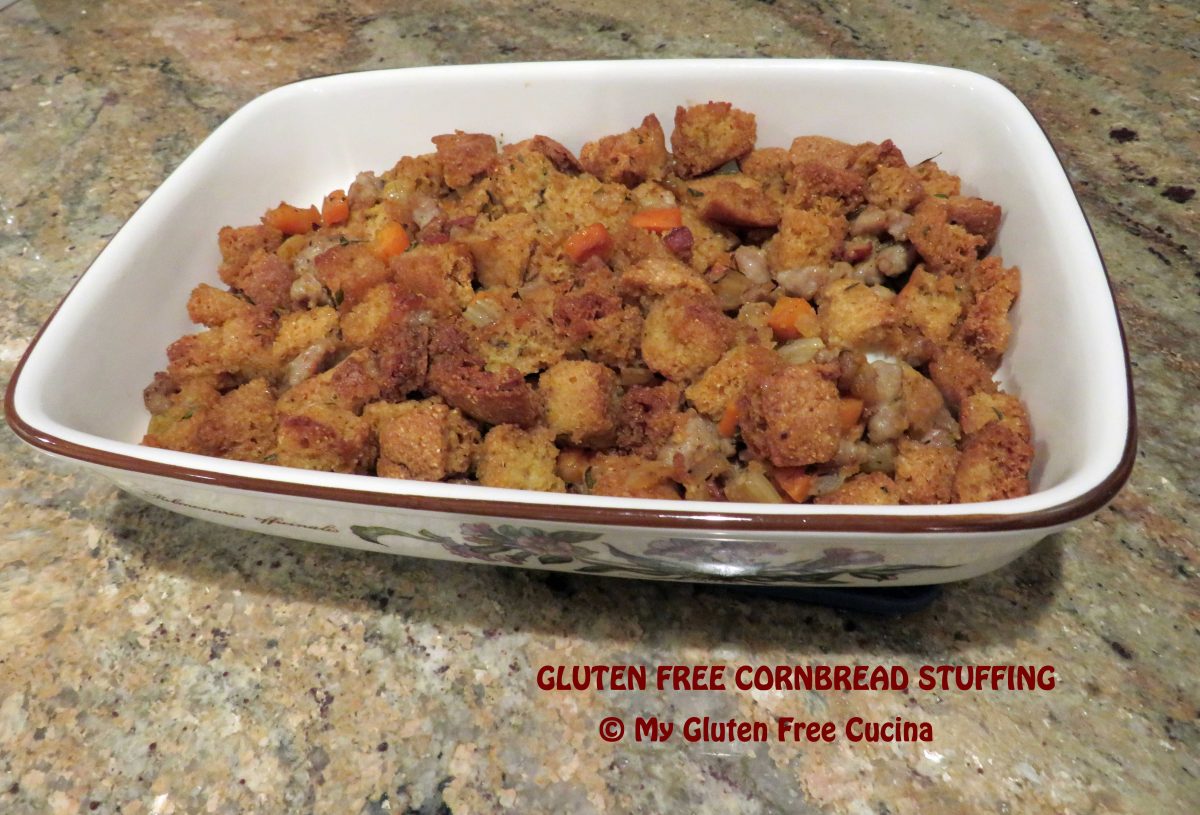
Gluten Free Cornbread Stuffing

For me, the best part of Thanksgiving dinner has always been the stuffing.  It’s so easy to make this delicious Gluten Free Cornbread Stuffing from scratch!

If you are hosting the holiday meal, this stuffing will please all of your guests, no one will know it’s gluten free!  If you are visiting family and need to bring your own gluten free food, this is the perfect dish.  Just be sure to make enough to share, everyone will want to sample it!

Gluten Free Cornbread Stuffing is moist and delicious “in or out of the bird”.  This recipe makes enough to stuff a small (10-12 lb.) turkey with extra for a 1.5-quart baking dish.  You can make half or double it for a large family.

This post contains affiliate links.

Ingredients:

  • 4 cups of cubed gluten free cornbread
  • 1/2 lb. gluten free sausage, casing removed (I used Premio)
  • 4 strips of gluten free bacon
  • 2 small carrots, peeled and cut into 1/4″ dice
  • 2 celery stalks, cut into 1/4″ dice
  • 1 medium sweet onion, chopped fine
  • 2 tbsp. minced fresh sage, thyme and rosemary (optional but very good)
  • 2 tbsp. butter
  • salt and pepper, to taste
  • 1 egg
  • 1/2 cup 1% milk
  • 3/4 cup gluten free low sodium chicken or beef broth
  • 1/4 tsp. each, dried sage and thyme
  • cooking spray

Preparation:

Most of the initial prep for this stuffing can be done ahead of time, so you will only have to assemble and bake it the morning of the holiday.  It all begins with this Gluten Free Corn Bread, that you can make ahead and freeze.  You will need half of the cornbread for this stuffing recipe, and the rest can be a nice addition to your breadbasket for the holiday table.

Once the Cornbread has cooled to room temperature, wrap tightly in plastic wrap then again in foil.  Place in a freezer safe bag until needed.

To make the stuffing, cut half of the cornbread into cubes, for a total of about 4 cups.  Spread the cornbread cubes on a parchment lined baking sheet in a single layer.  Bake at 250º until dried and slightly browned, 45 minutes to an hour.

Remove from the oven and set aside to cool in the pan.  If you are doing this step ahead of time, make sure the cornbread is completely dry, then store in an airtight container for up to 3 days.

Chop the bacon and sausage into 1/2″ pieces.

Cook them together in a large, nonstick skillet until completely browned, then remove and drain on paper towels.  Reserve the fat in the pan.

Next melt 2 tbsp. of butter in the same skillet and add the onion, celery and carrots.  Season with salt and pepper, and the minced fresh herbs.  Cook over low heat for 10-15 minutes, stirring frequently.

Add back the sausage and bacon to the skillet and toss well to combine.
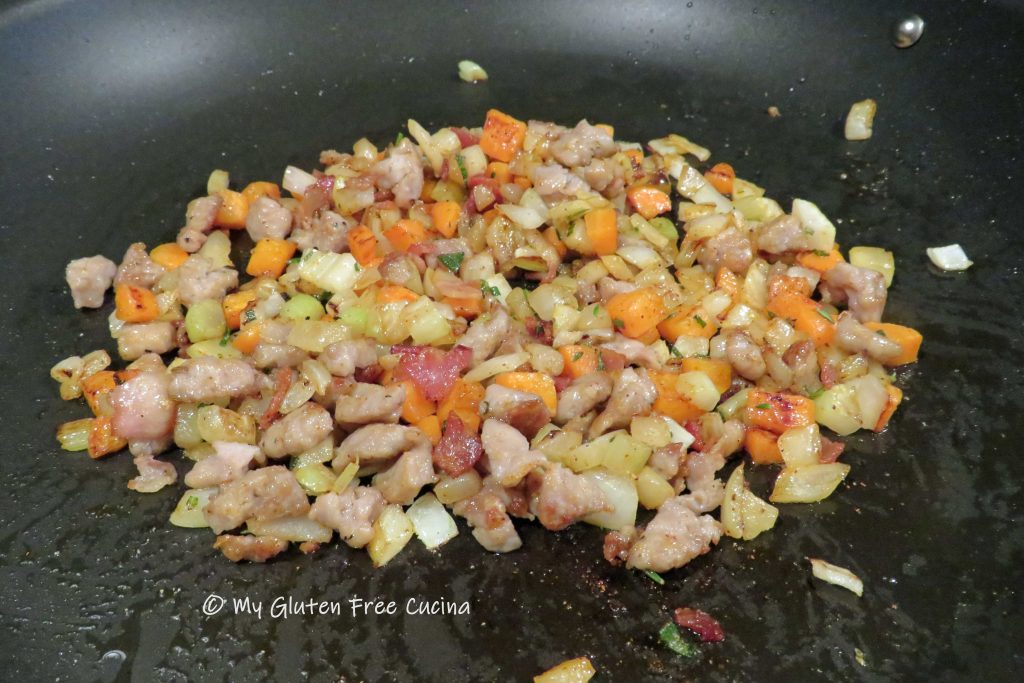
You can prepare the recipe up to this point the night before and refrigerate.  You can also make ahead and freeze it, just spoon the mixture into a freezer safe bag or container and defrost the night before.

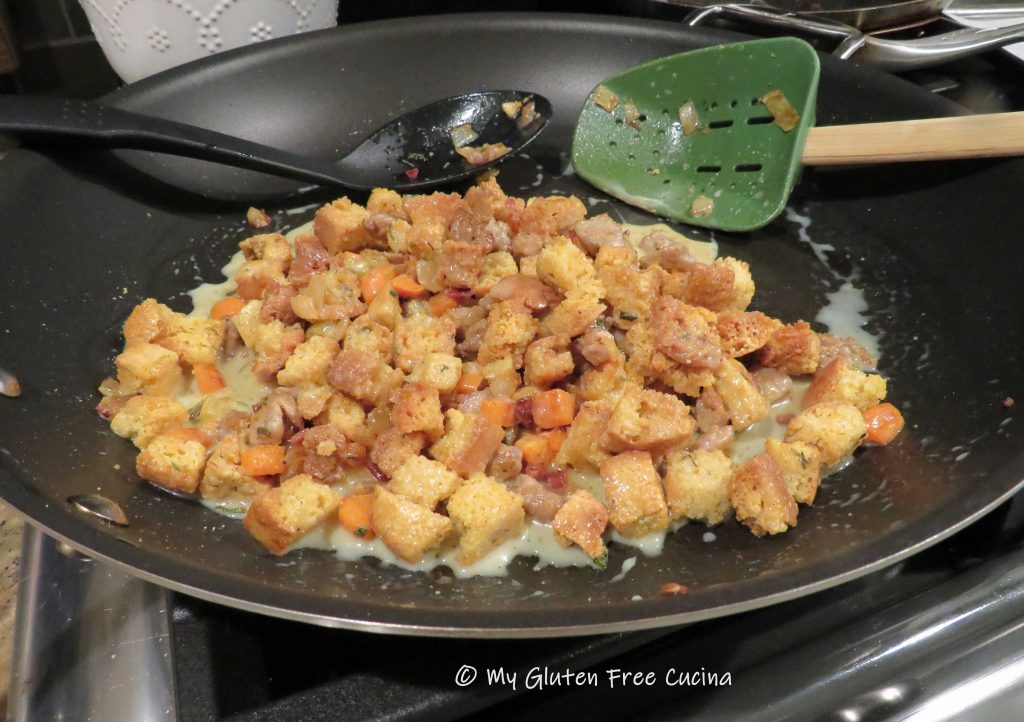
On the morning of the holiday, return the sausage and veggie mixture to the skillet over low heat and warm through.  Turn off the heat and stir in the cornbread cubes.
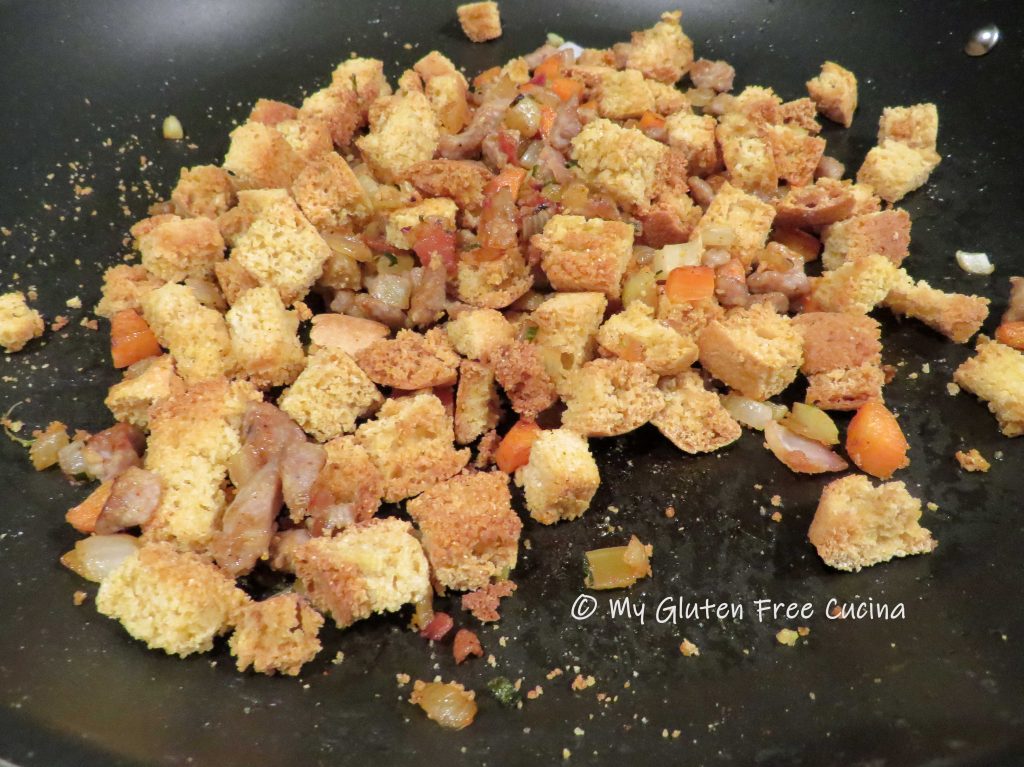
Whisk together the egg, milk, and broth with dried sage and thyme.  Pour it over the cooled cornbread mixture and toss well until everything is moistened.

To stuff or not to stuff?  You decide.  Always follow food safety guidelines.  If you stuff the turkey, do so just prior to roasting.

For those who prefer out of the bird, spray a baking dish with cooking spray and spread the stuffing evenly.  Cover with foil and bake 35 minutes.

With a few great recipes like this one, the stress of being gluten free during the holidays will melt away.  I hope it will become a tradition at your holiday table!

Notes ♪♫ Want to take a shortcut?  If you prefer to use storebought bread cubes there are some great ones to choose from, I’ll never tell!  Check out my Easy Gluten Free Ramekin Stuffing Cups, a recipe made with Aleia’s Gluten Free Stuffing Cubes.

Originally posted 11/04/2018         Updated 11/19/2022

Print This Post Print This Post
Gluten Free Cornbread

Every gluten free cook needs a good, basic cornbread recipe.  Cornbread is the perfect accompaniment to winter soups, stews or your favorite barbecue dinner.  Once you master this easy recipe, you can jazz it up with cranberries, dried fruits, herbs or whatever you please.  With the holidays just around the corner, I’m dreaming of a yummy Gluten Free Cornbread Stuffing!

Friends, this tastes just like traditional cornbread, no one will ever guess that it’s gluten free!

This post contains affiliate links.

Ingredients:

Preparation:

Preheat the oven to 425º.

Begin by lining a square baking dish with parchment paper, and mist with cooking spray.  Whisk together the dry ingredients, through xanthan gum.  In a separate bowl, whisk together the egg, sugar, milk and cider vinegar.

Combine the wet and dry ingredients and stir together until completely moistened.  Let the batter stand for a few minutes, then scrape it into the prepared pan.

Place the pan on a baking sheet (this helps keep the bottom from burning) and bake for 15-18 minutes, until a toothpick inserted in the center comes out dry.  The top should be nicely browned, and the cornbread will be pulling away from the sides of the pan.

Cool in the pan for 3 minutes, then grab a corner of the parchment paper and slide the cornbread onto a cooling rack.  Wait a few more minutes then remove the parchment.

Slice and serve warm or at room temperature.

This cornbread freezes well and can be made ahead of time for your holiday breadbasket or cornbread stuffing cubes.  To freeze, cover tightly with plastic wrap then wrap again in foil.  Place it in a freezer safe bag.

Notes: ♪♫ Although corn itself does not contain gluten; some brands of cornmeal may contain trace amounts if they are produced on shared equipment.  To avoid cross contact, be sure to look for cornmeal that is labeled gluten free.

Originally posted 11/03/2018                         Updated 11/18/2022

Print This Post Print This Post

Gluten Free Herb Focaccia

Focaccia Bread Art is something I have always wanted to try.  Encouraged by my recent success making a Caramelized Onion Focaccia, I decided to give it a go while I still had fresh herbs from my garden.  Here is my little masterpiece, a very simple first effort that I will definitely do more of!

I used chives for the stems, rosemary and oregano for the leaves, parsley and shallots for the flowers.  There is a bit of fresh thyme sprinkled throughout.  I wondered how the fresh herbs would taste in the finished product, and they were delicious!

This post contains affiliate links.

INGREDIENTS:

PREPARATION:

Combine water and yeast in the bowl of your stand mixer and give it about 10 minutes to activate.  Whisk together the flour and salt and add to the yeast mixture along with 2 tbsp. olive oil.  Mix with the paddle attachment for 8 minutes.  Transfer the dough to a greased bowl and refrigerate for one hour.

Cut parchment paper to fit a quarter sheet pan and mist with cooking spray.  Place chilled dough in the center of the parchment.

Roll the dough into a rectangle, slide it onto the sheet pan and cover with oiled plastic wrap.  Let it rest at room temperature for 30 minutes.

Place a pizza stone in the oven and preheat to 425º.

Create dimples in the dough by pushing down with your fingertips.  Brush the top with olive oil and sprinkle with Italian Seasoning.

Arrange the fresh herbs on your dough and brush them lightly with olive oil so they don’t burn.

Place the sheet pan in the oven on top of the baking stone.  Bake for 25 minutes total.  During the last 10 minutes carefully slide the pizza out of the pan, remove the parchment and finish baking directly on the pizza stone.

So pretty, I hated to cut it (at least not until I took pictures ????).  Use a pizza wheel to cut into squares.

Here’s the crumb shot!

Notes ♪♫ If you follow me, you know that I am a HUGE fan of Better Batter gluten free flour.  I used their Artisan Flour Blend in this recipe, it is a little miracle in a bag that I recommend for pizza and yeasted bread recipes.  Try it, you will not be disappointed (be sure to use my code MGFC30 at checkout for 30% off your non-sale purchase)!

Print This Post Print This Post

Gluten Free Caramelized Onion Focaccia

It seems like a lifetime ago.  In fact, it was over 20 years ago that I was a card-carrying member of the Cooking Club of America (anyone else?).  I had all the gadgets, the refrigerator magnets, and of course the magazine Cooking Pleasures.  I started making this focaccia bread, which appeared in the February-March 2000 issue for family get-togethers, and it quickly became my go-to for everything from dinners to parties to potlucks at the office.  Everyone loved it!

Today the club and the magazine are sadly, no more.  The recipe, long ago crumpled into a folder had been abandoned since my Celiac diagnosis.

Something made me think of it the other day, maybe the upcoming holidays or just reminiscing about things I used to bake.  So, I decided to dig out the recipe and try adapting it to be gluten free.  How did it come out?  Take a look!

Inspired by Cooking Pleasures Magazine, February-March 2000 issue

Note ♫ I used, and highly recommend Better Batter Artisan Flour Blend for this recipe.  This is my favorite gluten free flour blend for making breads and pizza, try it and I promise you will not be disappointed!

***** CLICK HERE — Be sure to use my code MGFC30 at checkout for 30% off your non-sale purchase of Better Batter *****

This post contains affiliate links.

Ingredients:

Preparation:

Combine water and yeast in the bowl of your stand mixer and give it about 10 minutes to activate.  Whisk together the flour and salt and add to the yeast mixture along with 2 tbsp. olive oil.  Mix with the paddle attachment for 8 minutes.

Transfer the dough to a greased bowl and refrigerate for one hour.

While the dough rests, make the caramelized onions.  Use a heavy skillet, covered braising pan or Dutch oven.  Over medium heat, add 2 tbsp. butter, 1 tbsp. olive oil and all of the onions.  As the butter melts, stir to coat the onions.  Cover and cook over medium low for 20 to 25 minutes or until the onions are translucent.  Then uncover, continue cooking over medium-low heat for 30 to 40 minutes or until onions are golden brown, stirring frequently.  Set aside to cool.

Place a pizza stone in the oven and preheat to 425º.  Cut a piece of parchment to fit a perforated 16″ pizza pan.

Hint: Trace your pan onto the parchment paper and cut for the perfect fit.

Mist the parchment with cooking spray and roll the dough into a round.  Slide it onto the pizza pan, cover with oiled plastic wrap and let it rest at room temperature for 30 minutes.

Create dimples by pushing down the dough with your fingertips.  Spread the caramelized onions evenly over the dough and brush the edges with olive oil.

Place the pizza pan in the oven on top of the baking stone.  Bake for 25 minutes total.  During the last 10 minutes carefully slide the pizza out of the pan, remove the parchment and finish baking directly on the pizza stone.

This is it, the minute you cut into the focaccia and hear that crunch!  Cut into wedges and serve.

Notes ♪♫ Caramelizing the onions is time consuming, but so worth it.  Take your time, and don’t rush the process.  Use a good heavy pan and stir, stir, stir- don’t walk away!  You will be rewarded with the most delicious decadent topping for this amazing focaccia.

Print This Post Print This Post