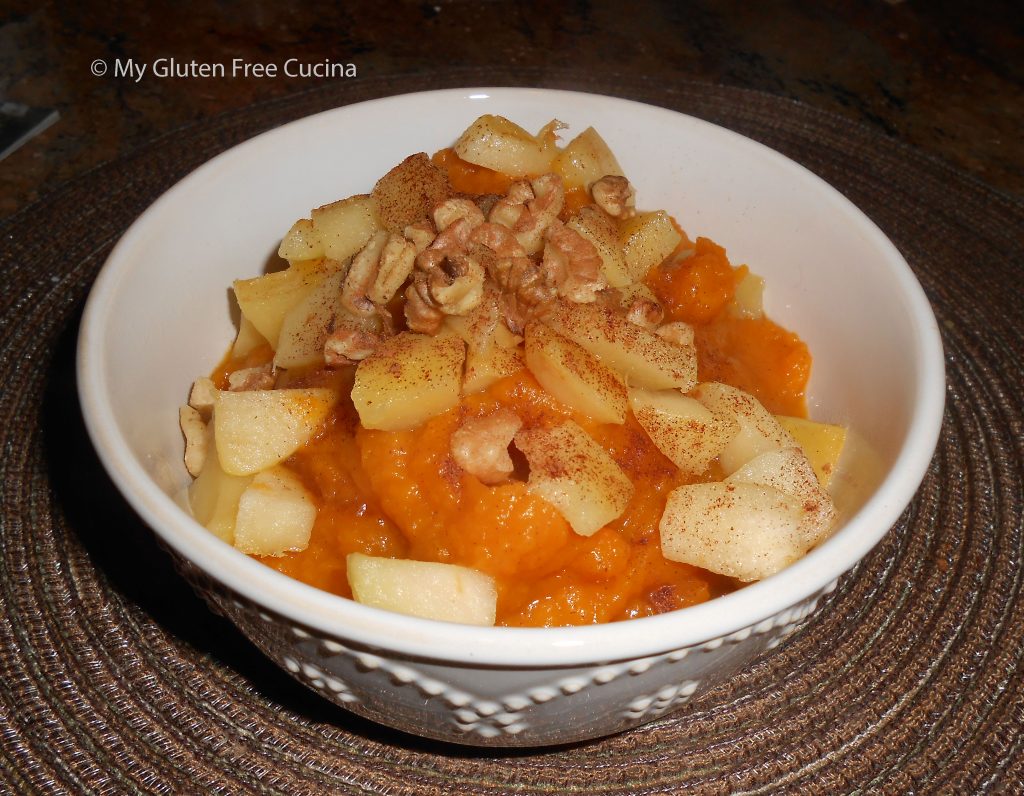
Easy Gluten Free Ramekin Stuffing Cups

As another year draws to a close and the holidays approach, many are planning a scaled down version of the usual Thanksgiving and Christmas celebrations.  Even with the pandemic behind us, I still hear from friends and neighbors that their family gatherings will be smaller this year.

This post contains affiliate links.

Micro gatherings mean smaller portions.  I will still be making soup and roasting a turkey breast.  Instead of stuffing the bird though, I’ll be making these cute Ramekin Stuffing Cups.

Since beginning my gluten free journey a few years ago, I have enjoyed making a delicious Gluten Free Cornbread Stuffing from scratch each Thanksgiving.  This year though, I’ll be taking a shortcut and using these Savory Gluten Free Stuffing cubes from Aleia’s.

If you follow my blog, you know that I use Aleia’s gluten free breadcrumbs in many of my recipes.  Since I love their breadcrumbs so much, I thought I would give their savory stuffing a try, and it was a win!

These stuffing cubes are delicious!  They remind me of the stuffing mix we all grew up with 😉  The 6 oz. ramekins are perfect for portion control.

4 Servings

Ingredients:

Preparation:

Chop the veggies into small dice.  Melt the butter and olive oil in a nonstick skillet and add the veggies.  Cook 2-3 minutes, stirring frequently.

Next chop the bacon into 1/4″ pieces and add it to the pan.  Continue cooking until the bacon is crisp and the veggies are just beginning to brown.  Remove from heat and cool slightly.  Note: You can make ahead to this point and refrigerate or freeze.

When ready, add the stuffing cubes.

Pour 1 cup chicken broth over the stuffing and stir to moisten.  Return to low heat.

Pour the beaten egg over the stuffing, while quickly stirring and turning to incorporate.

Arrange 4 ramekins on a rimmed baking sheet and coat with cooking spray.  Spoon the stuffing lightly into the ramekins, about 3/4 cup each.  Leave room for the stuffing to expand during baking, don’t overfill or pack it in.

Cover tightly with foil and bake at 325º for 35 minutes.

Serve hot out of the oven and don’t forget the gravy!

Notes ♪♫ Notice I didn’t add salt to the recipe?  The stuffing cubes and the bacon have plenty of salt, so I decided not to add more.  I also used unsalted chicken broth.  If you are not limiting sodium, then by all means salt away!
Print This Post Print This Post

Gluten Free Pumpkin Corn Bread

Traditional corn bread gets all dressed up for autumn with the addition of pumpkin and spice.  Wouldn’t this Gluten Free Pumpkin Corn Bread be a wonderful addition to your Thanksgiving bread basket?  Not only have I made it gluten free but it is also lower in fat, sugar and sodium so that most folks will be able to enjoy a small, diet friendly square with their meal.

16 Servings

This post contains affiliate links.

Ingredients:

Preparation:

Whisk together the dry ingredients, flour through ginger.  In a separate bowl, whisk together the wet ingredients, egg through sour cream.  Combine the wet and dry ingredients, stirring together just until moistened.

Line an 8″ x 8″ baking dish with parchment and scrape the batter into the pan, smoothing it with a spatula.  Bake for 30 minutes at 350º.

Lift the bread out of the pan and carefully remove the parchment.  Let it cool slightly before slicing.

Cut into 16 squares and serve warm or at room temperature.  Store at room temperature for up to 2 days (it won’t last that long!).

Notes ♪  I use a coffee grinder to grind flax and chia seeds into a meal for baking.  Typically 1 tbsp. of seed does not equal 1 tbsp. of meal.  For recipes, measure 1 tbsp. of meal after grinding.

Notes ♫  Did you know that both baking powder and baking soda contain sodium?  I reduced the sodium in this recipe by using a salt free baking powder.  Ener-G Baking Powder is both gluten free and salt free, I have been using it with great success in my bread recipes.  Check it out!

Notes ♪♫ Nutritional values are approximate and based on 16 servings.  May vary depending on ingredient brands used or changes to serving size.

Print This Post Print This Post

Apple Walnut Butternut Squash

Butternut squash and apple pair beautifully in this easy autumn side dish.  Pretty enough for your holiday table, it is delicious and dare I say healthy?

 3-4 servings

Ingredients:

  • 1/2 butternut squash, peeled and cubed
  • 1 apple, peeled and diced
  • 2 tbsp. chopped walnuts
  • 1 tbsp. brown sugar
  • 2 tbsp. butter, divided
  • cinnamon


Preparation:

Toast the walnuts in a dry skillet.  Be careful not to burn the nuts, 2-3 minutes should do it.  Remove from the skillet and set aside.

Peel and dice the apple.  Add 1 tbsp. butter to the skillet and sauté the apples for 2-3 minutes.  Remove from heat.

Steam the butternut squash until tender, then puree with a stick blender.  Stir in the remaining tbsp. of butter and brown sugar.

Place the squash in a serving bowl.  Top with the diced apples and the toasted walnuts.  Sprinkle with cinnamon and serve!

Notes: ♪♫ Speed up prep time by purchasing peeled and cubed butternut squash, it’s usually available this time of year.

Print This Post Print This Post