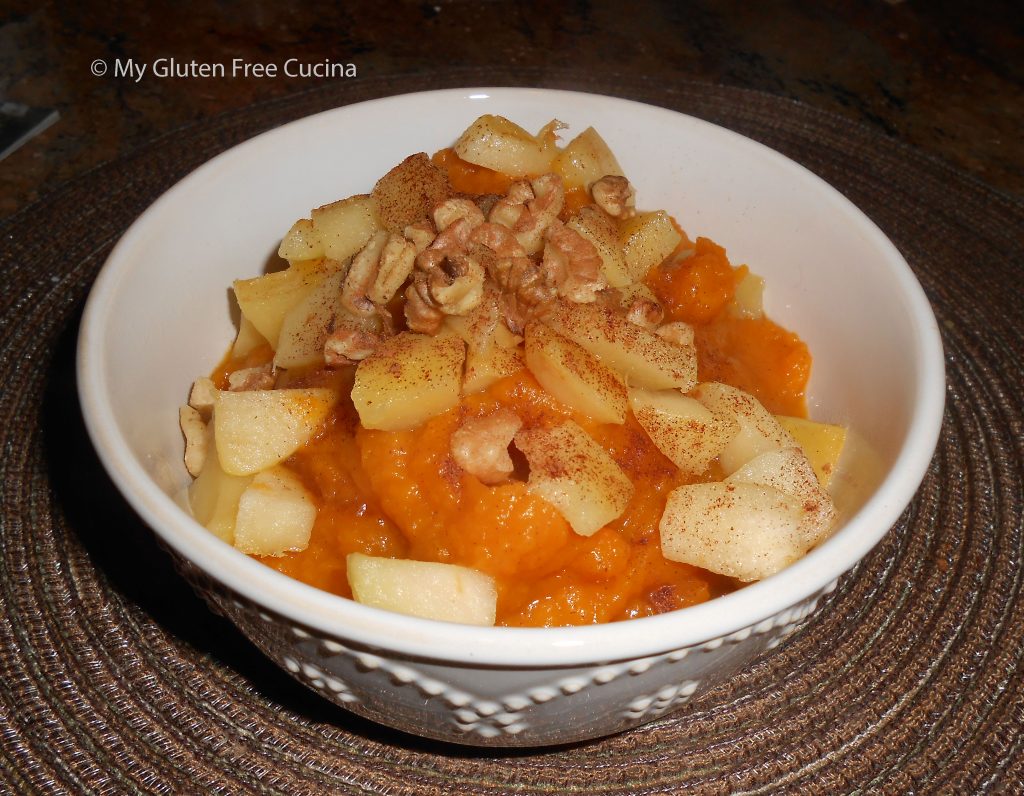
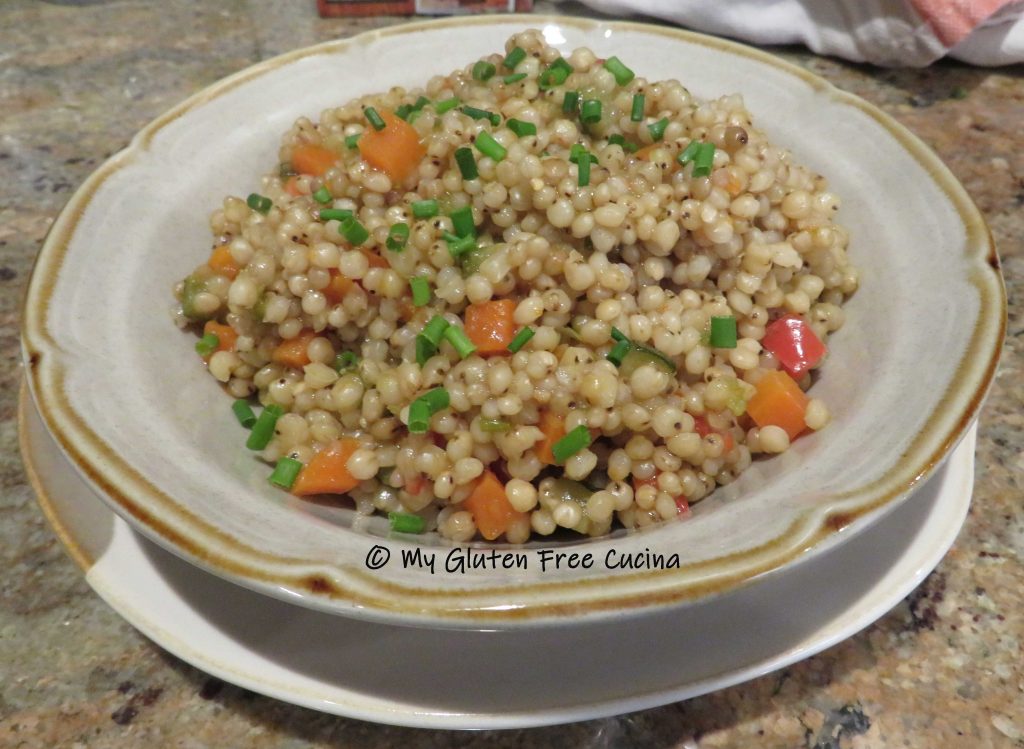
Gluten Free Corn Cakes

Are you tired of the usual rice and potato sides?  When you’re gluten free, it can really get monotonous.  So tonight I thought I’d try something different.  Popular in the South, I had (can you believe) never had corn cakes before.  I just made a small batch for the two of us to taste, and wow, we both loved them.  Corn Cakes would be a fun and easy side for a BBQ dinner or potluck.  You can easily double or triple the recipe, and add more or less spice to suit your family’s taste.  Making them gluten free was easy, just by swapping out the flours.

This post contains affiliate links.

4 Servings

Ingredients:

Preparation:

Whisk together the flour, corn meal, salt, baking powder and seasoning.  In another bowl, whisk the egg, milk and oil.

I took my corn kernels out to defrost about 30 minutes earlier.  Stir them into the egg mixture to finish thawing while you heat your griddle or skillet.

Stir the dry ingredients into the wet.  You will have about 1 of cup batter.

When I first made this recipe, I used a large nonstick skillet.  Today I made them on my new waffle maker because I wanted to try out the pancake plates.  I preheated it to 350° and brushed with butter.  I ladled the batter into the 4 pancake cups, about 1/4 cup each.

Cook them for about 4 minutes, until the bottoms are set and you can see a few bubbles in the batter.

Carefully turn them over with a spatula and cook 3-4 minutes longer.

Check the center with a toothpick, if it comes out dry, they are done.  Serve hot or at room temperature.

This is a fun side that goes with so many things, from your favorite BBQ fare to a casual steak dinner.

Notes: ♪♫ I used this Mexican Spice Blend to kick up the flavor of my corn cakes.  Made with Chipotle Chile, cumin, onion powder and oregano, it is a salt free blend with some heat!  Since the recipe already has salt and baking powder, I didn’t want to add more sodium.  If salt isn’t an issue for you, you can sub your favorite gluten free seasoned salt and make it as mild or spicy as you like!

Print This Post Print This Post

Gluten Free Sorghum Pilaf

Sorghum is an ancient grain that is enjoying renewed popularity.  Nutritious and gluten free, I like to keep it in my whole grain rotation for variety in our healthy diet.  It has a nutty flavor and chewy texture.

This post contains affiliate links.

The biggest drawback about making Sorghum is that it takes a long time to cook.  I usually make it when I plan to be in the kitchen for a nice long stretch.  The preparation begins with several hours of pre-soaking, followed by a long, slow simmer along with frequent additions of liquid.

Ingredients:

  • 1/2 cup sorghum grain
  • 1 cup water
  • 3/4 cup mixed vegetables diced very small (such as shallots, onion, scallion, garlic, mushroom, carrot, celery, red and green bell pepper, zucchini)
  • 1 tbsp. butter
  • 1/2 tsp. seasoned salt
  • pinch of red pepper flakes
  • 1 carton gluten free chicken or vegetable broth (use either or a combination, you will need 1-1/2 to 2 cups total broth)
  • fresh chives, for garnish

 Preparation:

In a small saucepan, bring 1 cup of water to a boil and add the sorghum.  Cover and remove from the heat, and let it soak for 3 hours.

After 3 hours, turn the heat to low and simmer until most of the water has evaporated.  Next add 1 tbsp. butter along with the minced vegetables.  Season with salt and pepper to taste.

Begin adding the broth, 1/3 to 1/2 cup at a time.  Cover and keep on a low simmer, stirring occasionally and add more liquid as it is absorbed.  Be careful not to let the bottom burn!  Continue until the sorghum has doubled in size, about 90 minutes total cook time.

Take a taste to be sure they are cooked through!  The grains will be plumped up but will still have a good chew, like “al dente” pasta.  Transfer to a serving bowl and garnish with fresh chives.

This is a nutritious and fiber rich side that will fill you up.  Try it, it’s delicious and a nice change of pace from the usual rice and potato sides!

Notes ♪♫ I used Bobs Red Mill whole grain sorghum in this recipe.  Did you know that Sorghum grain can also be milled into flour for baking?  Learn more in this post about Using a Grain Mill!

Print This Post Print This Post


Peas and Pearl Onions

Everyone has their favorite veggie side dish for the holidays.  Maybe it’s a childhood memory or a newfound treat.  For Mr. Cucina, Peas and Pearl Onions are a holiday must have.  Fortunately for me, they are easily adapted to be gluten free so I can enjoy them too.  Arrowroot flour makes a smooth, creamy roux and I kicked up the traditional recipe with bacon!

This post contains affiliate links.

Ingredients:

  • 1 bag pearl onions, fresh or frozen (14 oz.)
  • 1 bag frozen peas (16 oz.)
  • 1 strip of bacon, cut into 1/4″ mince
  • 2 tbsp. butter, divided
  • 1 tbsp. arrowroot flour
  • 1/2 cup gluten free chicken broth, more as needed
  • 2 tbsp. half and half or heavy cream (optional)
  • salt and pepper to taste
  • cooking spray

Preparation:

First let’s talk about prepping pearl onions.  It’s not as daunting as you might think.  Simply trim the ends, boil for 2 minutes, then plunge into ice water.  The skins will slide right off!

Boil 

Ice bath

Remove skins

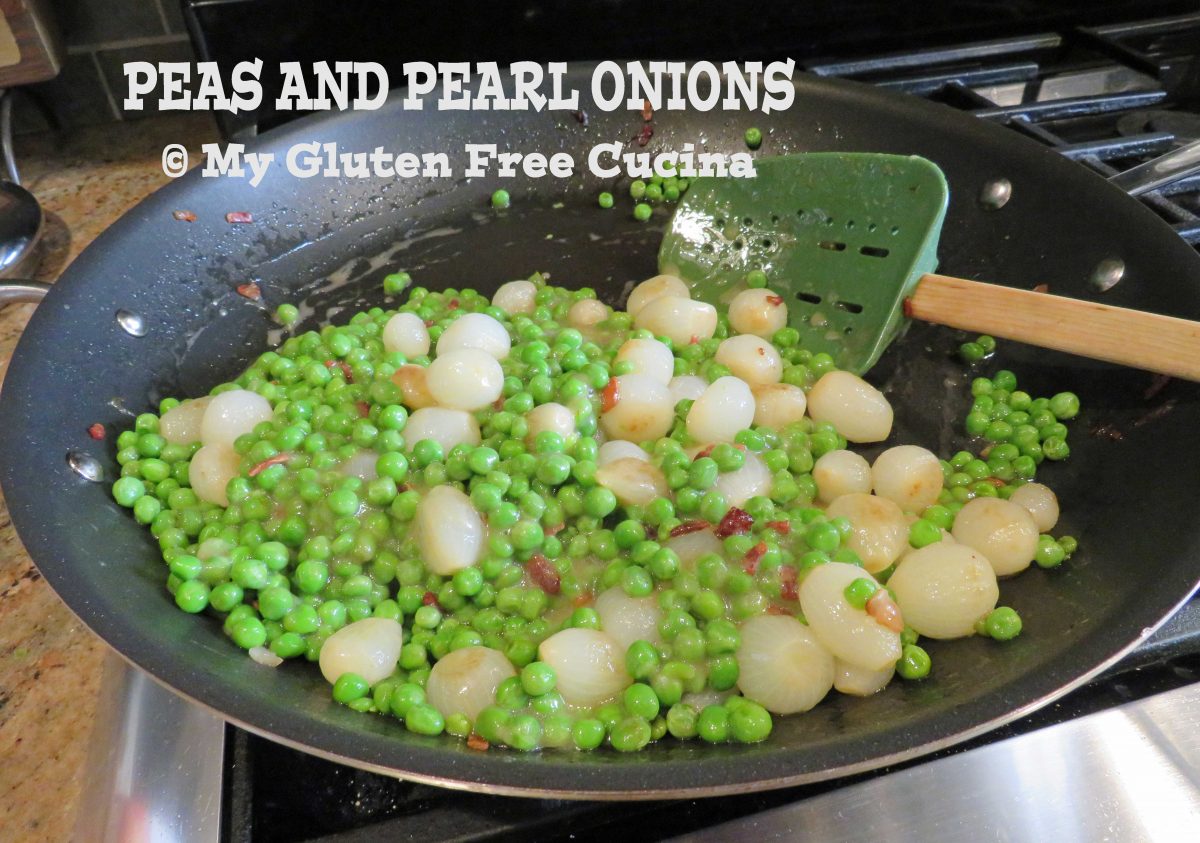
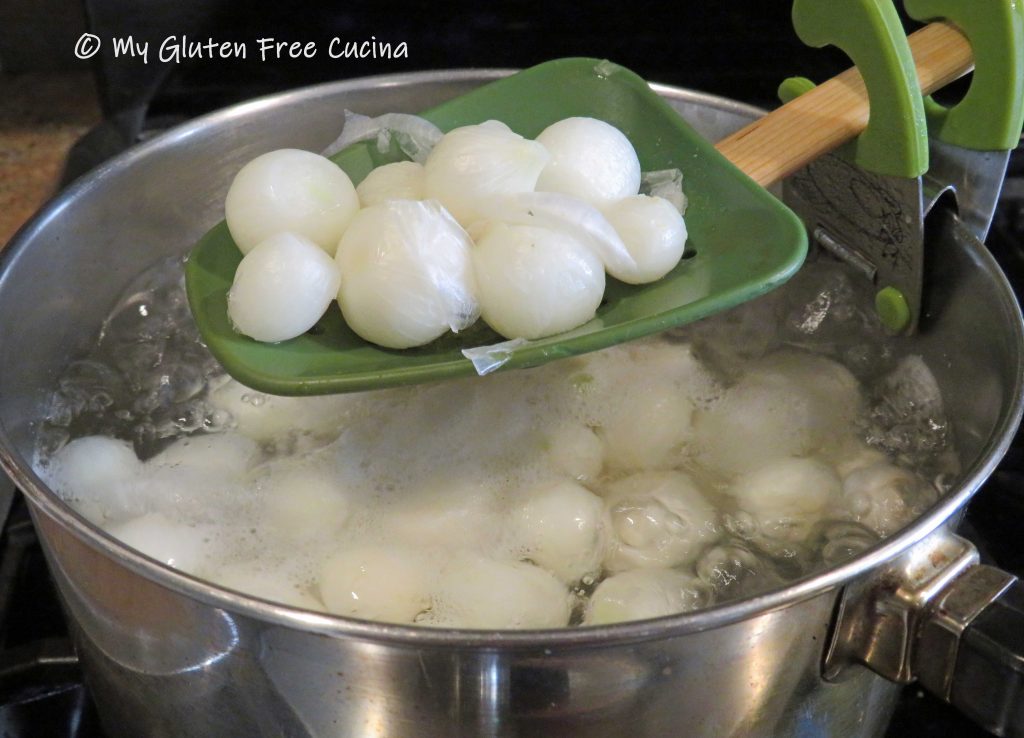
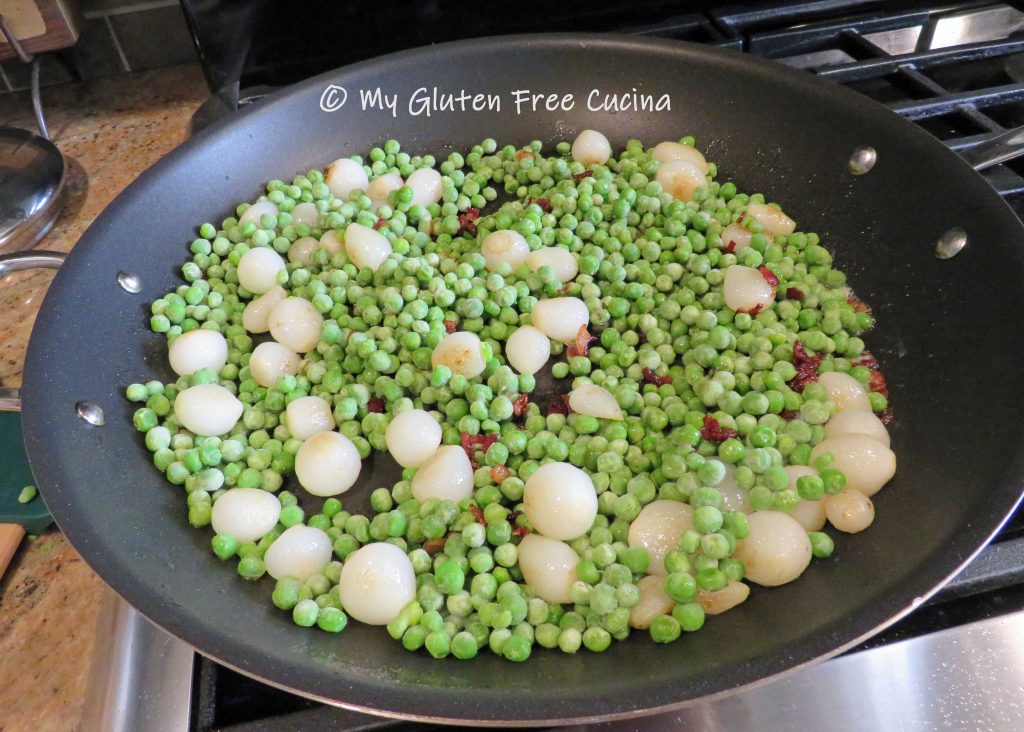
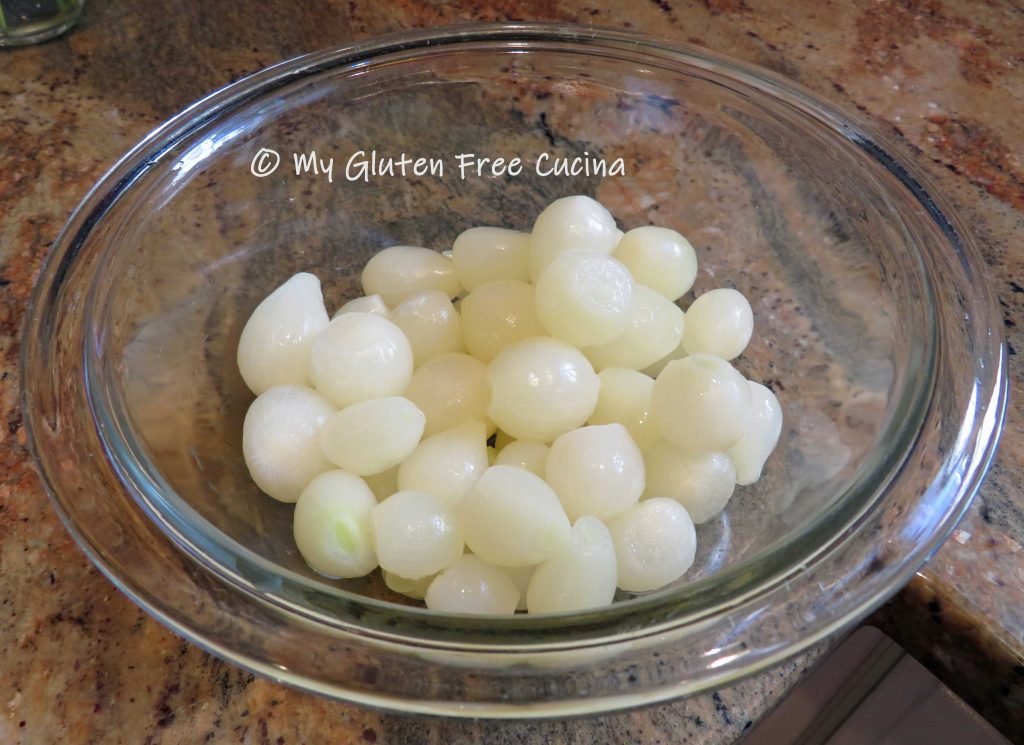
If you were lucky enough to find frozen pearl onions, thaw them on the counter for at least 30 minutes, along with the peas.  Frozen pearl onions have already been peeled and blanched, a real time saver!

Now let’s get started by melting 1 tbsp. butter in a large nonstick skillet and cook the minced bacon.

When the bacon starts to brown, add the onions and cook for 5 minutes over medium low heat.

Next add the peas and stir to heat through.  Season with salt and pepper.

Push the veggies to the sides of the pan to clear a space in the center.  Melt the remaining 1 tbsp. butter and whisk in the arrowroot flour to make a roux.  Keep whisking, just until the flour is completely incorporated and smooth.

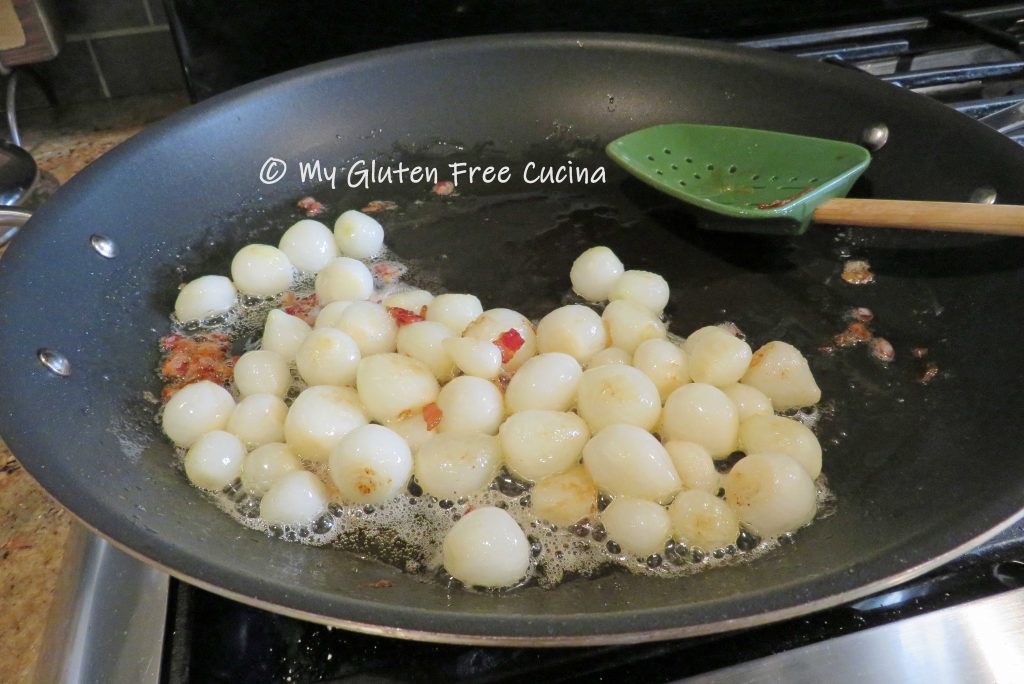
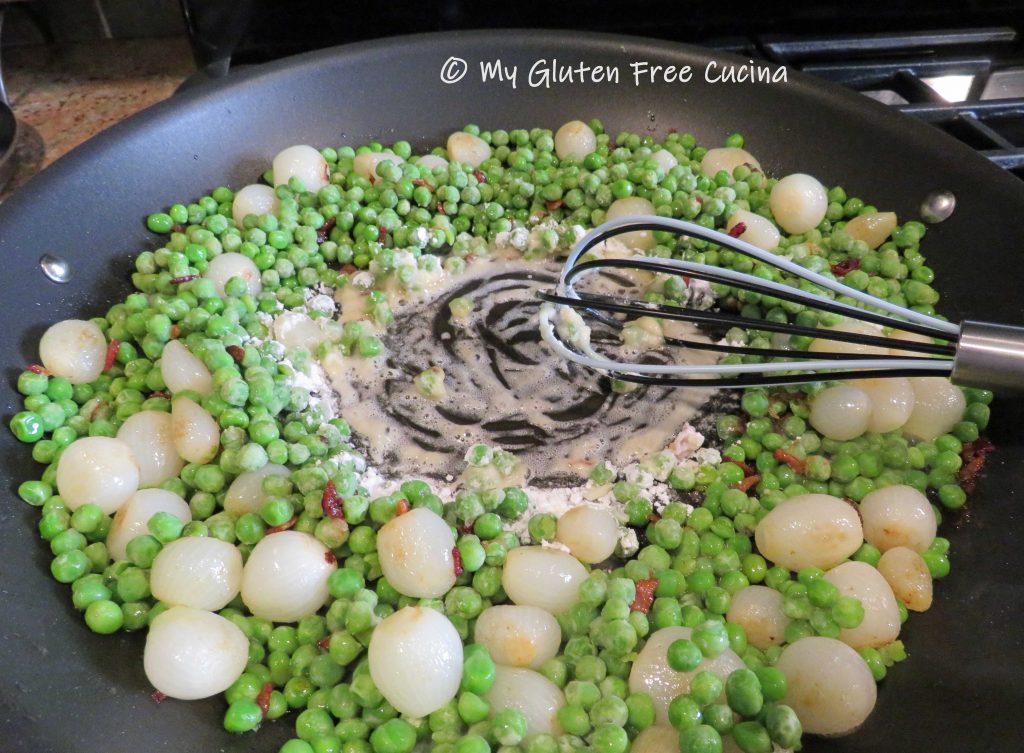
Stream in the chicken broth as you continue whisking.  Start with 1/2 cup and add more if needed.

Remove from the heat and stir in the cream or half and half if desired.

One of the things I love about this side is that you can prepare it a day ahead.  Mist an oven safe dish with cooking spray and spoon in the peas and onions.  When ready to serve, warm in the oven 30 minutes.

Notes: ♪♫ Wondering why I used such a large pan?  With all that extra surface area I was able to cook the vegetables and whisk in a roux, all in the same pan.  Fewer pans mean one happy dishwasher (that’s Mr. Cucina!) 🙂


Print This Post Print This Post 

Gluten Free Risotto Cakes

Risotto Cakes are a family favorite, impressive enough for guests or even a holiday appetizer or side dish.  Isn’t it great that we can still enjoy them on a gluten free diet?  This recipe is a great way to use up leftover risotto, but you may find yourself cooking up a fresh batch just to make these delectable Risotto Cakes!  Are you new to making risotto?  Check out my Basic Risotto Recipe for a step by step tutorial.

8 Servings


This post contains affiliate links.

Ingredients:

Preparation:

Always start with cold risotto, it makes the rice easier to handle and the cakes will hold together during cooking.  If you’re making it from scratch, be sure that the risotto has been cooled and refrigerated for several hours.

Set up 3 breading trays with white rice flour, beaten egg + water, and gluten free breadcrumbs.  Start with ½ cup flour and ½ cup breadcrumbs and add more if needed.

Scoop a ¼ cup portion of rice and press into a ball.  Continue to form a total of 8 rice balls.

Use a spatula to flatten each rice ball into a ½” thick cake.

Handle the cakes carefully using spatula and floured fingers.  Pat each cake in the flour, then dip in the egg, and finally coat with breadcrumbs.

Melt 2 tbsp. Butter and 2 tbsp. Olive oil in a large nonstick skillet.  Add the rice cakes and cook for 10 minutes on medium low heat, turning once.

They should be heated through and nicely browned on the outside.  Don’t they look great?

Garnish with fresh chives and serve immediately.

Hubby and I both loved this easy, gluten free side!  The crunchy breading is a nice contrast to the soft, sticky interior.  Thanks for stopping by today and I hope you will check out more of my favorite risotto recipes here!

Notes ♪♫  Carnaroli rice is widely regarded as the best for making risotto and it is worth seeking out if you can’t find it at the grocery store.  It is a high quality short grain rice with a wonderful texture that is perfect for making risotto that is creamy but firm.  If you cannot find Carnaroli rice then substitute Arborio.

Print This Post Print This Post

Cauliflower Cakes

Looking for a side dish that is suitable for both gluten free and low carb diets?  My Cauliflower Cakes are both gluten free and grain free!  So delicious and easy to prepare, with just a few ingredients.  Riced cauliflower is readily available in the produce and freezer section, making the prep quicker than ever.  Of course, you can make your own, using a coarse grater or food processor.  Leftovers keep well for about a week and can be reheated on a pizza stone.

This post contains affiliate links.

I am having so much fun with my new muffin top pan, it was just perfect for this recipe!  I love the non-stick finish for easy cleanup.

Ingredients:

  • 2 cups grated cauliflower
  • 1 tbsp. olive oil
  • salt and pepper to taste
  • 1/2 tsp. gluten free Italian seasoning or pizza seasoning
  • 1 egg
  • 1 cup grated Gruyere cheese

Preparation:

Heat a large nonstick skillet with a little olive oil on medium low.  Add the grated cauliflower and season with salt and pepper.  Stir and toss for 5 minutes then set aside to cool.

In a separate bowl, whisk the egg, cheese and Italian seasoning.

Stir in the cooled cauliflower and combine well.

Divide the mixture evenly into 6 wells and smooth with a spatula.

Bake at 400º for 35 minutes or until nicely browned.

Mmmm, don’t they look good?  The cakes are delicious as is and would also make a great base for mini pizzas.

You can serve them with marinara or BBQ sauce for dipping.

I have made the recipe several times now and it is going to be a regular at our table.

Notes ♪♫ I always buy block cheese and grate it myself to avoid additives in shredded cheese.  Always check seasoning labels for hidden gluten.  I love Rockin’ Rubs Tuscan Temptation seasoning in this recipe!

Were you eyeing that muffin top pan? It was the perfect choice for this recipe, and you can also use it to make my Gluten Free Sandwich Thins.

Print This Post Print This Post

Apple Walnut Butternut Squash

Butternut squash and apple pair beautifully in this easy autumn side dish.  Pretty enough for your holiday table, it is delicious and dare I say healthy?

 3-4 servings

Ingredients:

  • 1/2 butternut squash, peeled and cubed
  • 1 apple, peeled and diced
  • 2 tbsp. chopped walnuts
  • 1 tbsp. brown sugar
  • 2 tbsp. butter, divided
  • cinnamon


Preparation:

Toast the walnuts in a dry skillet.  Be careful not to burn the nuts, 2-3 minutes should do it.  Remove from the skillet and set aside.

Peel and dice the apple.  Add 1 tbsp. butter to the skillet and sauté the apples for 2-3 minutes.  Remove from heat.

Steam the butternut squash until tender, then puree with a stick blender.  Stir in the remaining tbsp. of butter and brown sugar.

Place the squash in a serving bowl.  Top with the diced apples and the toasted walnuts.  Sprinkle with cinnamon and serve!

Notes: ♪♫ Speed up prep time by purchasing peeled and cubed butternut squash, it’s usually available this time of year.

Print This Post Print This Post