Everyone has their favorite veggie side dish for the holidays. Maybe it’s a childhood memory or a newfound treat. If Peas and Pearl Onions are a holiday must have at your house, I have good news for you! They are easily adapted to be gluten free so everyone can enjoy them. Arrowroot flour makes a smooth, creamy roux and I kicked up the traditional recipe with bacon!
This post contains affiliate links.
Ingredients:
- 1 bag pearl onions, fresh or frozen (14 oz.)
- 1 bag frozen peas (16 oz.)
- 1 strip of bacon, cut into 1/4″ mince
- 2 tbsp. butter, divided
- 1 tbsp. arrowroot flour
- 1/2 cup gluten free chicken broth, more as needed
- 2 tbsp. half and half or heavy cream (optional)
- salt and pepper to taste
- cooking spray
Preparation:
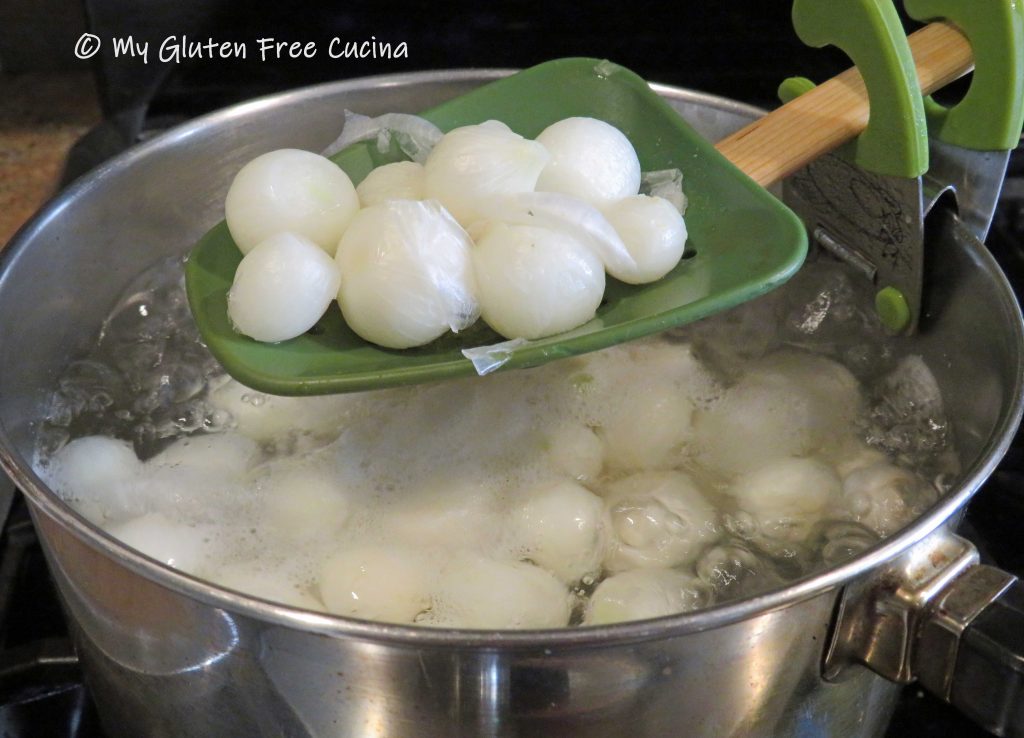
First let’s talk about prepping pearl onions. It’s not as daunting as you might think. Simply trim the ends, boil for 2 minutes, then plunge into ice water. The skins will slide right off!
Boil
Ice bath
 Remove skins
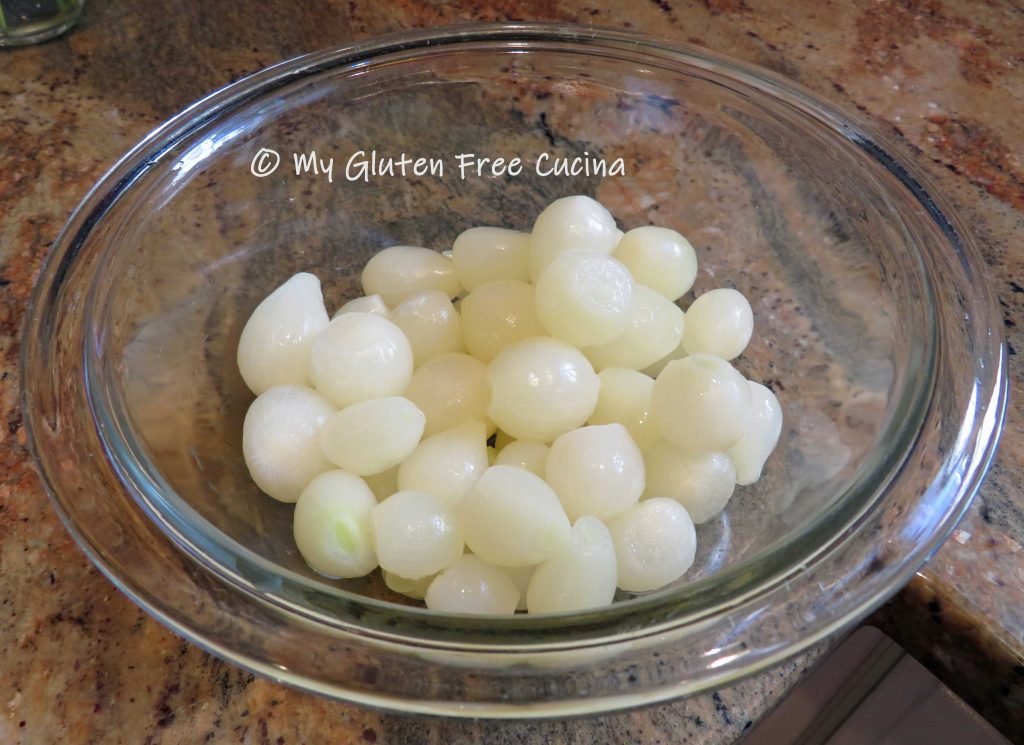 If you were lucky enough to find frozen pearl onions, thaw them on the counter for at least 30 minutes, along with the peas. Frozen pearl onions have already been peeled and blanched, a real time saver!
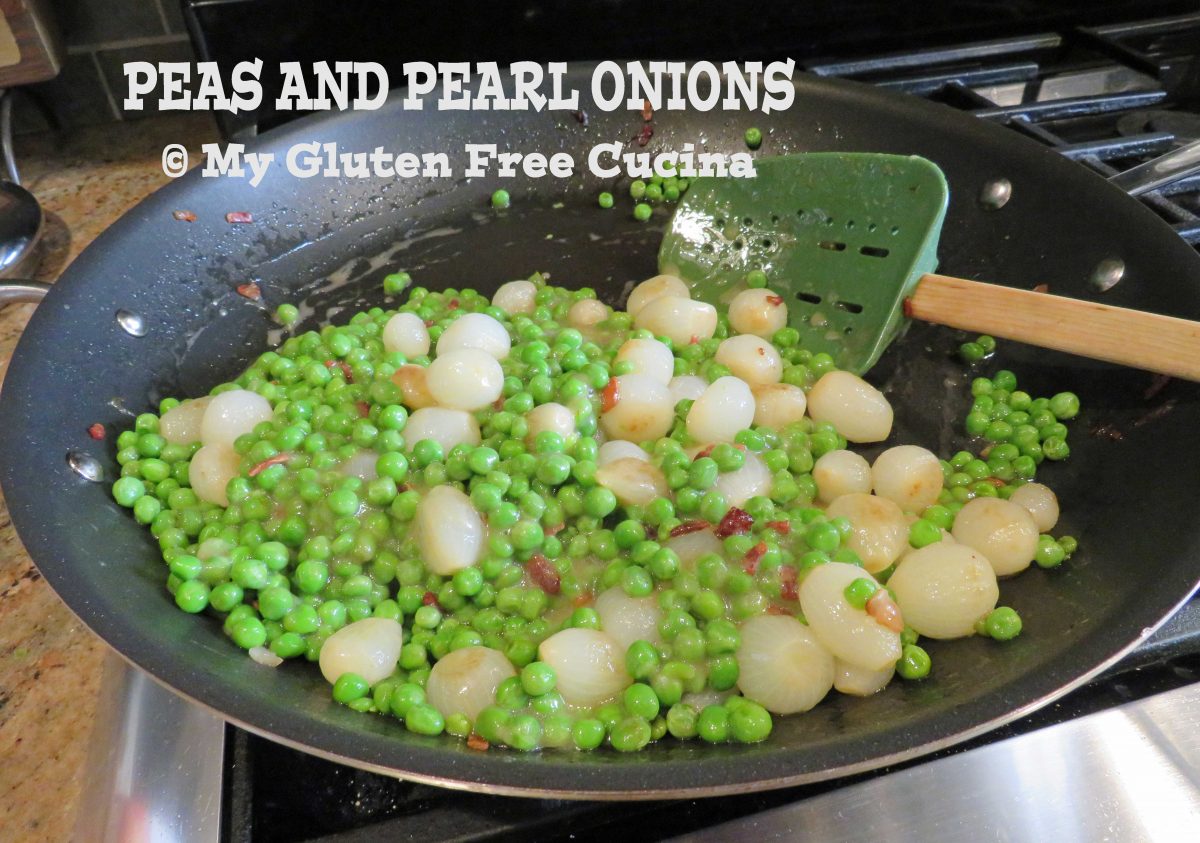
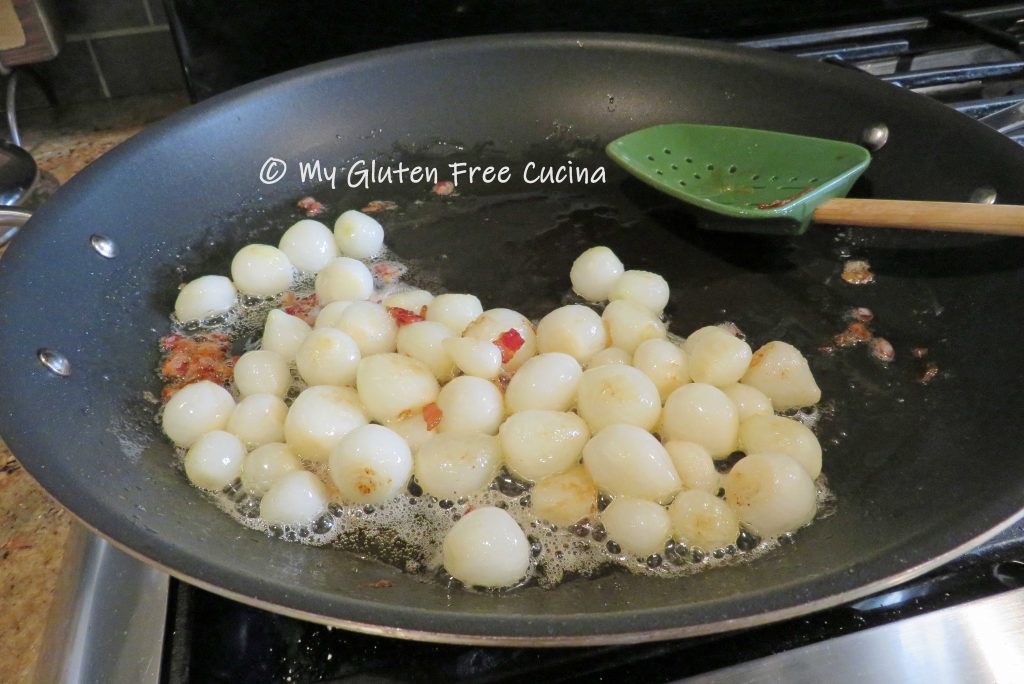
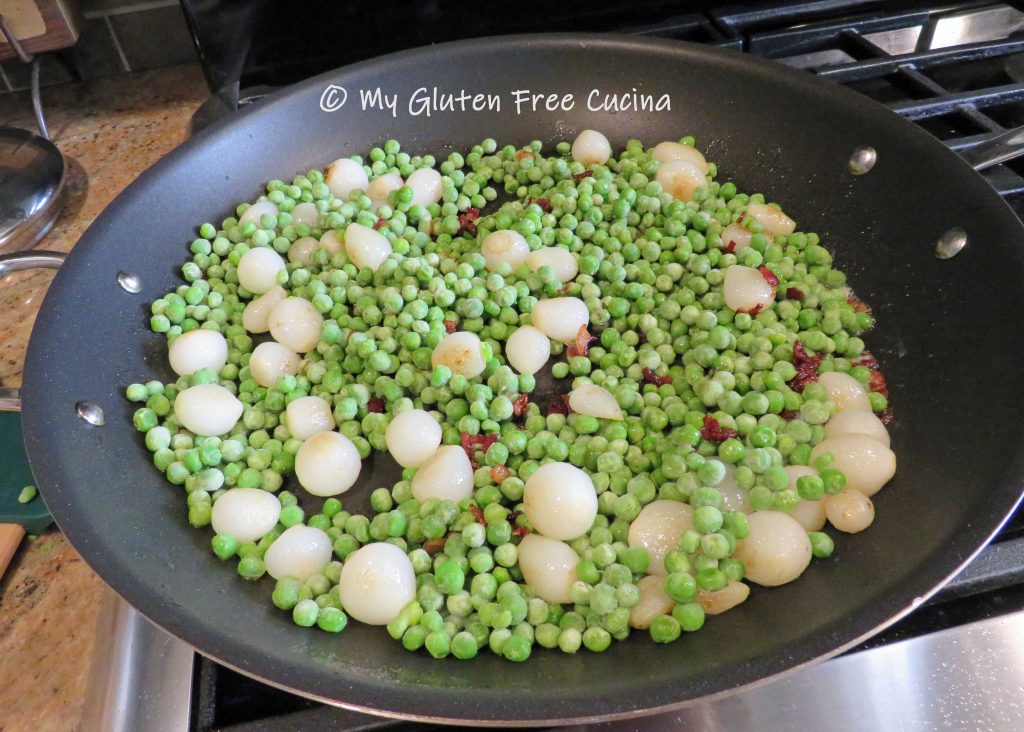
Now let’s get started by melting 1 tbsp. butter in a large nonstick skillet and cook the minced bacon.
 When the bacon starts to brown, add the onions and cook for 5 minutes over medium low heat.
Next add the peas and stir to heat through. Season with salt and pepper.
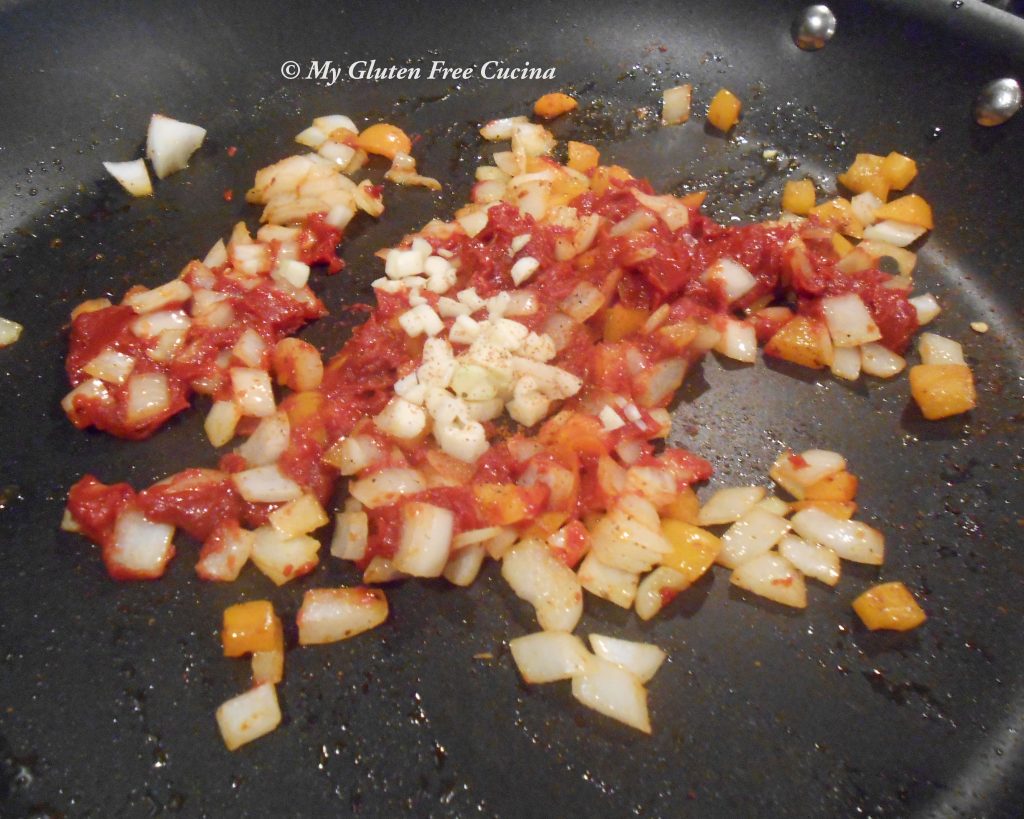
Push the veggies to the sides of the pan to clear a space in the center. Melt the remaining 1 tbsp. butter and whisk in the arrowroot flour to make a roux. Keep whisking, just until the flour is completely incorporated and smooth.
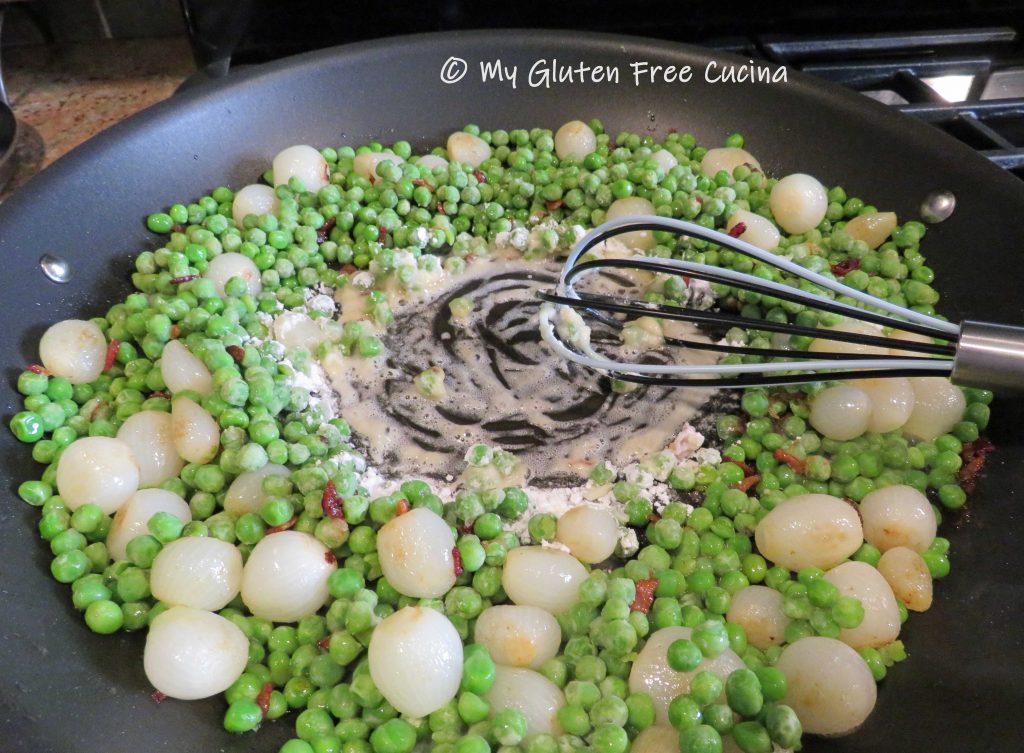 Stream in the chicken broth as you continue whisking. Start with 1/2 cup and add more if needed.
 Remove from the heat and stir in the cream or half and half if desired.
One of the things I love about this side is that you can prepare it a day ahead. Mist an oven safe dish with cooking spray and spoon in the peas and onions. When ready to serve, warm in the oven 30 minutes.

Notes ♪♫ Use a large, nonstick skillet for this recipe. The extra surface will allow you to cook the vegetables and whisk in a roux, all in the same pan.


 Blanch the peppers for 3 minutes in boiling water. Drain well and arrange in a baking dish that has been misted with cooking spray.