Cilantro Lime Shrimp Bowls

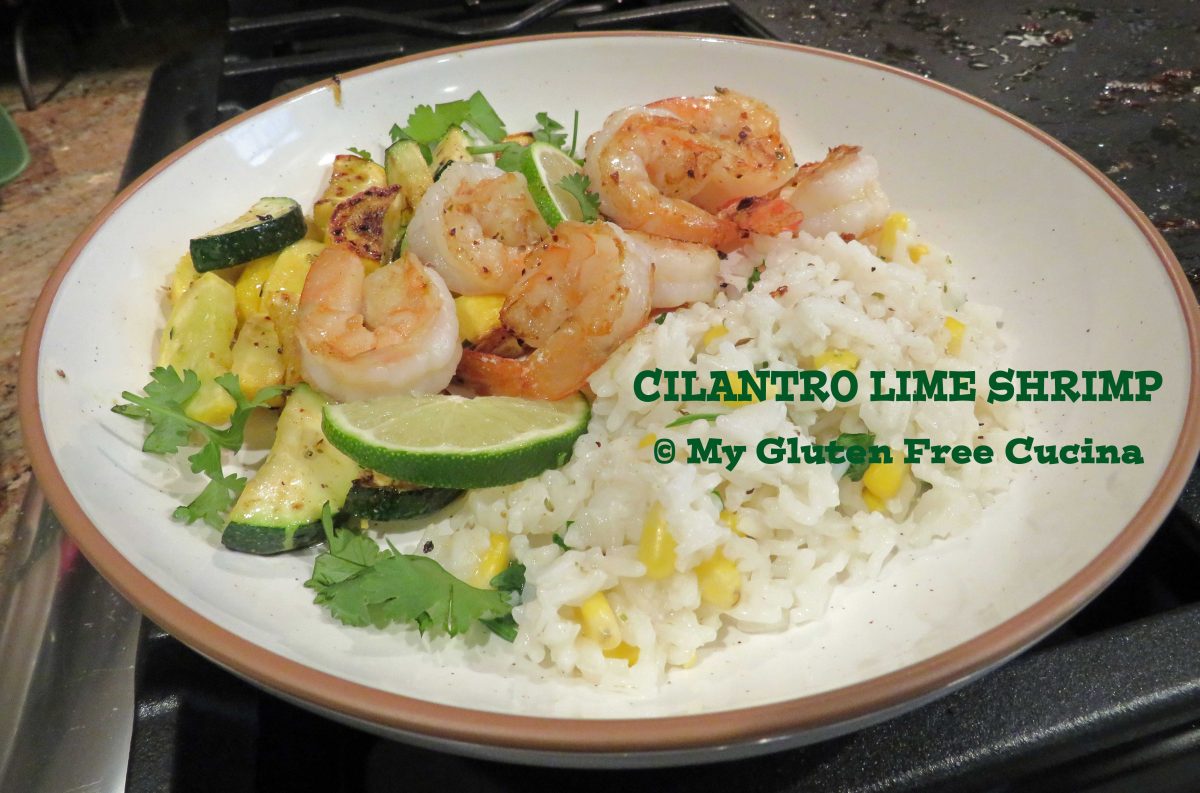
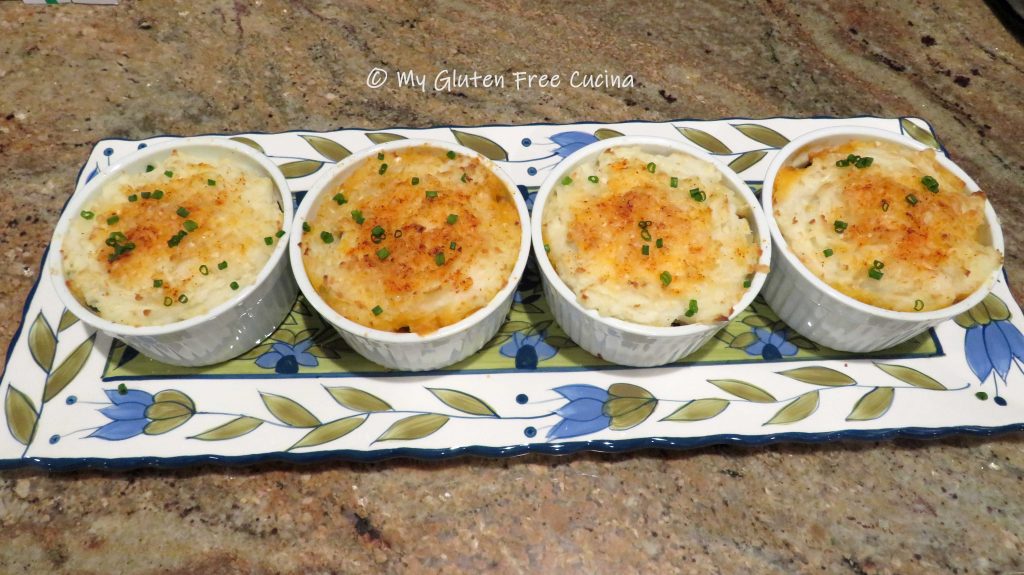
Cilantro Lime Shrimp Bowls are bursting with vibrant color and flavor!  The ingredients are simple but delicious.  A light and refreshing meal, perfect for summer evenings or when you don’t want to feel stuffed!

Rice bowls are turning up on restaurant menus everywhere, but not all are gluten free and cross contact is always a concern.  If you’ve been wanting to make something like this at home, check out the recipe!

This post contains affiliate links.

2 Servings

Ingredients:

  • 1/2 cup white rice
  • 1/3 cup corn, fresh or frozen
  • 1/4 tsp. seasoned salt
  • 1/4 tsp. oregano
  • 1 lb. shrimp (about 14 large), peeled and deveined
  • 1 lime
  • 8 slices zucchini, cut into half moons
  • 8 slices summer squash, cut into half moons
  • olive oil
  • 1/4 tsp. chipotle chili
  • 1/4 tsp. cumin
  • 1/4 tsp. onion granules
  • 1/4 tsp. oregano
  • 1/4 cup chopped fresh cilantro

Preparation:

  1. Whisk together 1/4 tsp. chipotle chili, 1/4 tsp. cumin, 1/4 tsp. onion granules, 1/4 tsp. oregano.  This mixture will be used to season the shrimp and veggies.
  2. Cut the lime in half.  Slice one half for serving and reserve the other half for juicing.
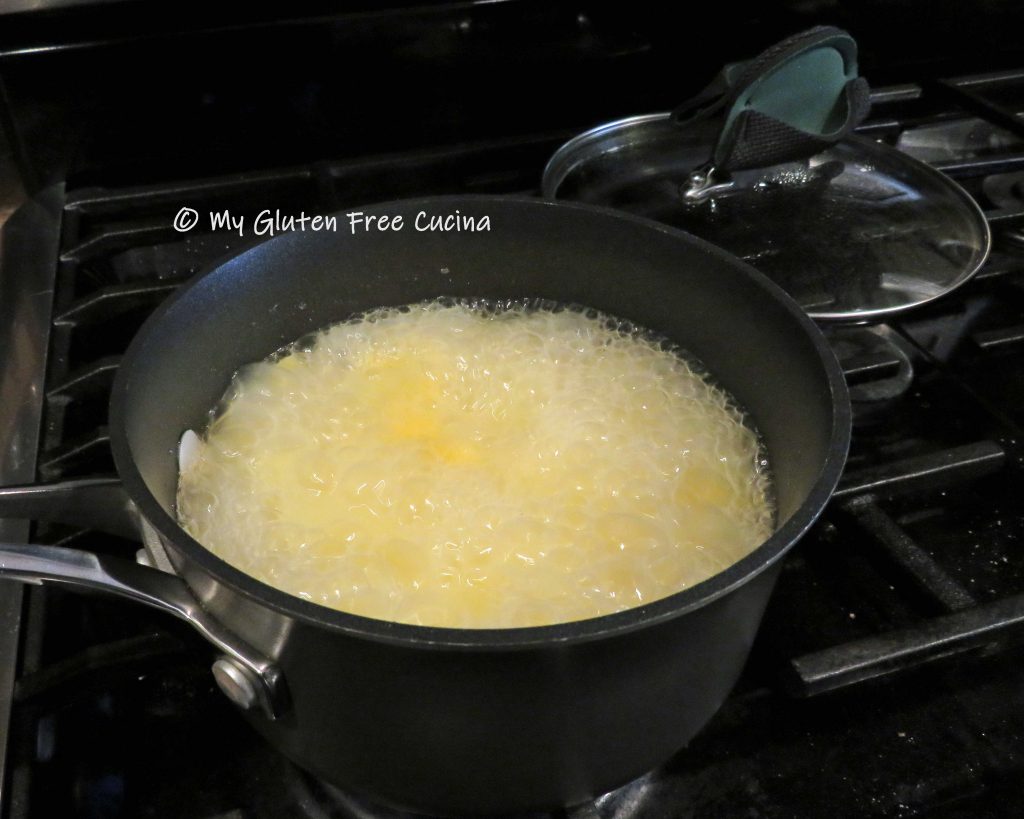
  3. Combine the white rice, corn, and 1 cup water in a small saucepan.  Season with 1/4 tsp. oregano, 1/8 tsp. salt.  Cover and simmer 15 minutes.
  4. Slice the zucchini and summer squash and cut slices into half-moons.  Toss with olive oil and 1/4 tsp. of the seasoning mixture.
  5. Defrost the shrimp (if frozen) by running under cool water.  Peel and devein, then toss with olive oil and 1/4 tsp. of the spice blend.

6. Preheat a griddle or large nonstick skillet over medium flame and brush with oil.  Cook the squash and shrimp for 8 minutes, turning once.  Finish with a squeeze of lime juice.

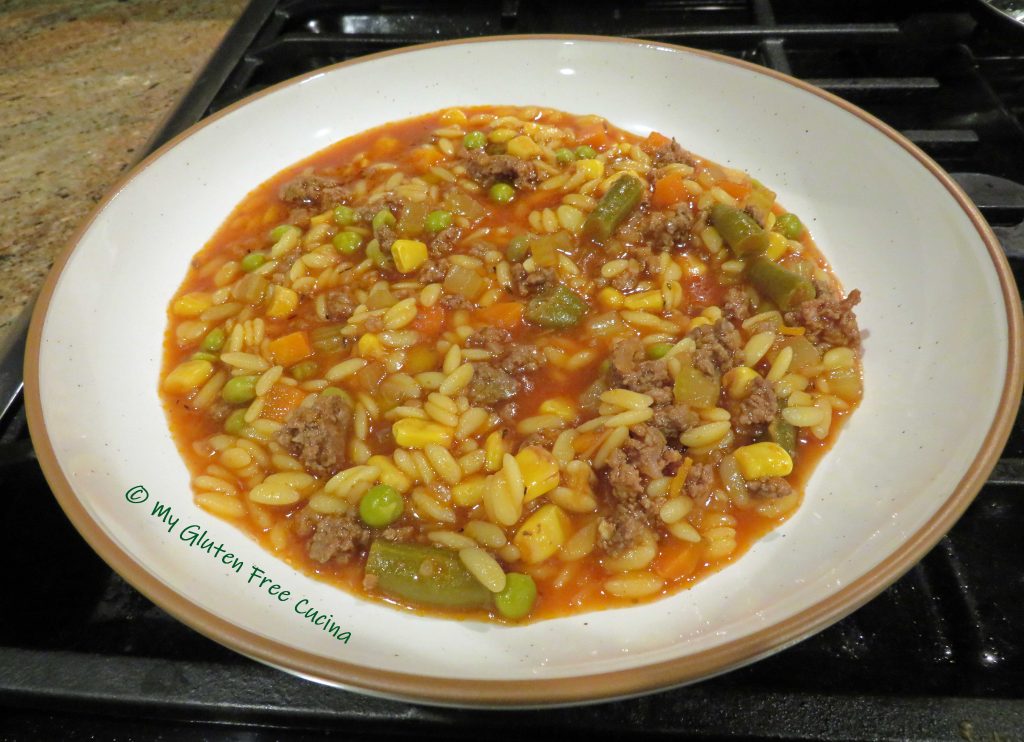
7. Stir 1 tbsp. chopped cilantro into the rice.  To plate, divide the rice mixture between 2 serving bowls.  Arrange half the shrimp and squash beside the rice.

8. Sprinkle with more spice, and garnish with fresh cilantro and lime slices.

Notes ♪♫ This Mexican Spice Blend is my “go-to” for dishes like this one.  No need to buy more expensive blends when you can easily stir this together from individual ingredients that can be used in other recipes.

Print This Post Print This Post


Braised Lamb Shanks

Lamb shanks are slowly braised with aromatic veggies in this perfect dinner for two that can be enjoyed in any season.  The recipe fits right into my busy day.  After some initial prep, the meal is mostly hands off until dinner time.  It’s easy, and the entire dish can be cooked in one pan, so cleanup is a snap!

This post contains affiliate links.

White beans are a traditional accompaniment to this dish.  I opted for canned beans to save time.

Choose lamb shanks weighing about 10-12 oz. each, they will shrink during cooking.  Use a deep, oven safe skillet or braising pan with a cover.  A Dutch oven would also work well.

2 Servings

Ingredients:

Preparation:

Place 1/4 cup rice flour in a food safe plastic bag, add the lamb shanks and shake to coat.  Discard any excess flour.

Heat a deep, oven safe skillet or braising pan with olive oil and brown the shanks on all sides.  Season with salt and pepper.

Add 1/4 cup white wine to the skillet.  Simmer on low heat until reduced by half.  Season again with salt, pepper and thyme.

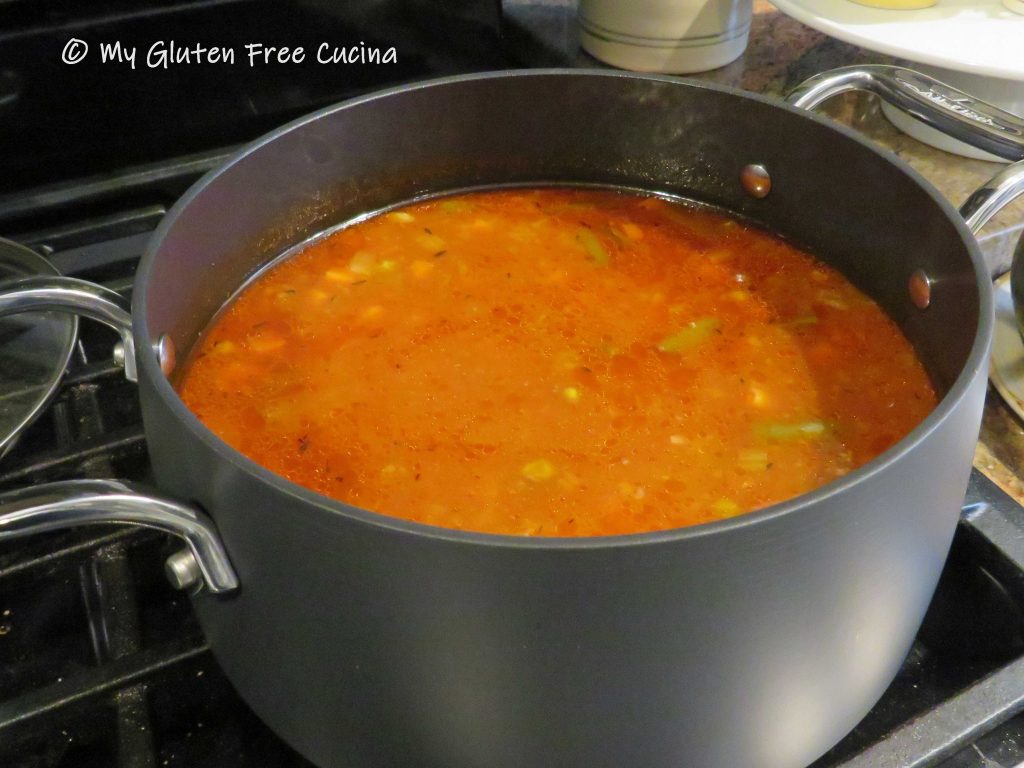
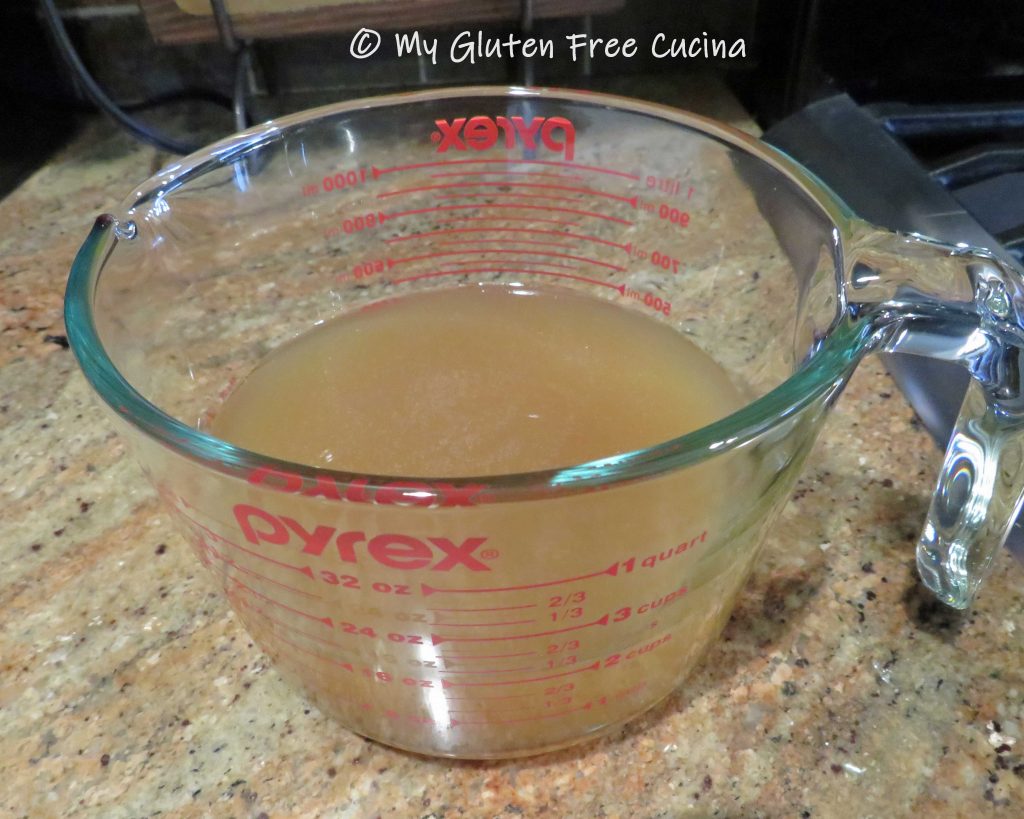
Add 1/2 cup chicken broth, along with the onions and the carrots.

Cover and place in the oven for 2 hours at 300°, turning once.  See how the shanks have cooked down?

Drain and rinse the beans, and add them to the skillet with an additional 1/4 cup chicken broth.  Cover and return to the oven for an additional 30 minutes.

Doesn’t that look delicious?  The meat was so moist and tender, the beans full of flavor from the braising liquid.  This meal was SO good, I must make it more often!

Notes ♪♫ Use plain white rice flour to coat the lamb shanks, it works well for browning meat.  Save your expensive, gluten free all purpose blends for another recipe.

Originally posted 04/08/2019                                Updated 05/29/2022

Print This Post Print This Post

Gluten Free Shepherd’s Pie Ramekins

Gluten Free Shepherd’s Pie Ramekins

Individual serving ramekins take this ordinary comfort food to dinner party status!  The presentation will wow your guests, while still keeping it fun and casual!  I love using the ramekins for portion control, and one serving was plenty filling!

Most of the ingredients are straight from the pantry, like ground beef, frozen mixed veggies, and instant mashed potatoes!  Yes, I cheated and used instant mashed potatoes from Idahoan, I always keep them on hand.  (Check out how I use them in my meatballs and meatloaf!)

4 Servings

This post contains affiliate links.

Ingredients:

  • 12 oz. lean ground beef
  • 1-2 tbsp. olive oil
  • 2 cloves garlic, minced
  • 1/2 cup diced sweet onion
  • 1-1/2 cups frozen mixed vegetables
  • 1/2 tsp. thyme
  • fresh ground pepper
  • seasoned salt
  • 2 tbsp. tomato paste
  • 1 tbsp. gluten free Worcestershire sauce
  • 1 cup beef or vegetable broth
  • 1 cup gluten free instant mashed potato flakes
  • cooking spray
  • 1/4 cup grated cheese
  • paprika
  • fresh chives for garnish

Preparation:

Heat a braising pan or deep skillet with olive oil.  Brown the beef, breaking it up with a spatula.  Season with fresh ground pepper and seasoned salt.

Add the garlic and onion.  Continue cooking several minutes then add the mixed vegetables, and thyme.

Clear a spot in the center of the pan and add the tomato paste.  Let it toast for a minute then stir into the meat and veggies.  Stir in the broth and Worcestershire sauce, then bring to a boil.

Turn the heat down to a low simmer and cook for 30 minutes or until most of the liquid has evaporated.  Stir every 5 minutes.

Preheat the oven to 375º.  In a small sauce pot, prepare the instant mashed potatoes according to package directions.

Spray the ramekins with cooking spray and arrange them on a baking sheet (this will make it easy to transfer in and out of the oven).  Spoon the filling into the ramekins, leaving room for the mashed potatoes.

Spread mashed potatoes over the top and use a fork to smooth it out.  Top with grated cheese and sprinkle with paprika.   Bake for 15 minutes, then finish under the broiler on low for 2 more minutes.

Garnish with fresh chives and serve.

I hope you were inspired to try these Shepherd’s Pie Ramekins!  For another twist on this traditional comfort food, check out my Shepherd’s Pie with Rutabaga, it’s a long-time family favorite!

Notes ♪♫ Most of the ingredients in this recipe are naturally gluten free.  Always check labels on condiments, broth and seasoning.  Lea and Perrins Worcestershire sauce is gluten free in the US but not in Canada (make sure yours is made with distilled white vinegar, not malt vinegar).

Print This Post Print This Post

Easy Sheet Pan Chicken and Vegetables

Boneless chicken medallions, breaded and baked with sausage, carrots, onions, potatoes and cauliflower.  This easy sheet pan dinner proves that gluten free does not have to be complicated!  From oven to table, you don’t even need a serving dish.

I didn’t take step by step pictures of the preparation as I normally do, because honestly I never thought this meal would make it to the blog.  But it came out really delicious, so here we are.

The simple, fresh ingredients speak for themselves in this perfectly seasoned, one dish meal.

I was featured at the senior salon pit stop

4 Servings

This post contains affiliate links.

Ingredients:

Preparation:

  1. Heat a large nonstick skillet with 2 tbsp. olive oil.  Line a half sheet pan with foil and mist with cooking spray.  Preheat the oven to 400º.
  2. Cook the sausage coins in the skillet until lightly browned, then use a slotted spoon to transfer them to the baking sheet.  Leave the oil behind in the skillet.
  3. Place the breadcrumbs in a food safe plastic bag, add the chicken medallions and shake to coat.
  4. Brown the chicken on both sides in the same skillet, about 1 minute per side.  Do not cook through, it will finish cooking in the oven.  Arrange the browned chicken on the baking sheet.
  5. Add several more tbsp. of olive oil to the skillet, with all of the vegetables.  Sprinkle liberally with Creole seasoning.  Par cook the vegetables in the skillet for about 10 minutes to give them a good head start, then arrange them on the baking sheet with the chicken and sausage in a single layer.
  6. Bake for 15-20 minutes at 400º and bring right to the table for a fun and casual meal.  If you like, serve with BBQ Sauce for dipping!

Notes ♪♫ While the chicken and sausage cooked very quickly, the veggies took quite a bit longer, especially the potatoes and carrots.  Giving the veggies a 10-minute head start in the skillet is the secret to having everything finish in the oven at the same time.

Print This Post Print This Post

Gluten Free Venus de Milo Soup

Founded in 1959, the Venus de Milo is an iconic restaurant and banquet facility located in Swansea, Massachusetts.  For decades, it has been a venue for countless weddings, Christmas parties and other celebrations.  My high school prom was held there, over 50 years ago! 😲

Venus de Milo Soup is a beloved New England tradition, and its popularity has endured over the decades.  Copycat recipes abound for this easy to prepare soup.  My mother had one in her recipe box, and today it is all over the internet.

This post contains affiliate links.

Although it is made with common pantry ingredients, a couple of challenges came up as I started with the original recipe.  Two of the ingredients contained gluten, and I needed to find substitutions.

First, a packet of Lipton Onion Soup Mix.  Back in the day, this was a go-to ingredient for so many recipes!  When I was first diagnosed with Celiac Disease, I could not find a gluten free replacement, so I made my own mix.  Now, just a few years later how things have changed!  A quick web search turns up more than a few alternatives.  Go ahead and add one to your shopping list or do what I did.  Stir together this easy blend that contains no flour or added salt!

Next, the original soup was made with Orzo pasta.  I wanted a gluten free soup pasta that looked like orzo, but again, when I first posted this recipe, I could not find a gluten free substitute.  Now, just a few years later I was able to order this gluten free orzo from Delallo made from corn and rice flour.  I also spotted this gluten free orzo from Jovial, made with cassava flour.

Once I had gathered my ingredients, this soup came together in about 45 minutes.  Like any soup, it is better and thicker the next day.  You will enjoy several meals from this pot of soup, and a few great memories if you have had the pleasure of dining at the Venus de Milo!

Ingredients:

———————————————-

  • 1 tbsp. olive oil
  • 1 lb. lean ground beef
  • 2 celery stalks, diced
  • salt and pepper to taste
  • 14.5 oz. canned tomatoes (whole, diced, crushed, sauce… use what you have)
  • 1 tsp. sugar
  • 16 oz. bag frozen mixed vegetables (peas, carrots, corn and green beans)
  • 12 oz. beef stock
  • 2 cups beef or chicken broth (or use water)
  • 1 cup (uncooked) gluten free orzo pasta
  • 1 ladle of reserved pasta water

Preparation:

Stir together the first 7 ingredients for the onion soup mix replacement (or use a purchased mix).

In a 4 qt. soup pot or Dutch oven, brown the meat in 1 tbsp. olive oil, breaking it up with a spatula.  Season with salt and pepper.  Continue until the meat is completely browned, then stir in the onion soup mixture.

Add the celery, tomatoes and the mixed vegetables (it’s ok to throw them in frozen).

Next add the stock and all of the broth.  This recipe is very forgiving.  You can use all broth, or all water if you wish for a total of 3-1/2 cups liquid.  Bring to a boil then reduce heat to a low simmer.  Cover and cook for 30 minutes.

Next cook the pasta in lightly salted water.  I do not recommend adding the dry pasta directly into the soup.  Here’s why.

Some gluten free pastas, especially those made with corn flour will release a huge amount of starch into the water when cooked, and it can be a gummy mess.  Don’t worry though, it’s delicious!  Just cook the pasta separately and rinse it under warm water before adding to the soup.

If the soup needs thickening, you can reserve a bit of that starchy water and add it to the pot.  Stir it up and do a final taste, adding more salt or pepper as needed.

Let it sit for 2 hours before mealtime (soup will thicken), then just warm it up before serving.

This hearty soup is a meal in itself.  Perfect for cold winter nights, serve with grated cheese and a few slices of crusty gluten free bread.

Notes: ♪Soups are notorious for containing high levels of salt.  If you are a low sodium household, always start your recipes with ingredients that have no added salt.  For example, choose unsalted broth, tomatoes, and bouillon.  It’s easy to add a little sea salt in at the end to bring out the flavor.

Original post 3/04/2019                                                           Updated 2/16/2022

Print This Post Print This Post

Butternut Squash Risotto with Shrimp and Roasted Vegetables

Did you ever have a restaurant meal that was so delicious you were inspired to recreate it at home?  This is one of those meals, after just one taste I knew that I had to make it myself!  An elegant dinner for two, it is both comfort food and fine dining rolled into one!  The steps are easy to follow and the results are impressive.  It’s a bit time consuming for a week night, but you can speed things up by making the risotto ahead of time.  I also used a bit of  butternut squash left over from another meal, and for a special garnish, I toasted a few pumpkin seeds.

Dinner for 2 

This post contains affiliate links.

Ingredients:

  • 1 dozen large raw shrimp, peeled and deveined
  • 1/4 cup frozen peas, thawed
  • 1/2 medium cauliflower, chopped into uniform pieces
  • 1/3 cup pureed butternut squash (reserved from another meal)
  • 1 cup cooked risotto, (see basic preparation here)
  • Old Bay® seasoning
  • 2 tbsp. butter, divided
  • 1 tbsp. olive oil
  • salt and pepper to taste
  • 1/3 cups gluten free chicken broth, or more as needed
  • 1 tbsp. pumpkin seeds for garnish

Preparation:

Chop the cauliflower into uniform size pieces, about 1-1/4″.  Rinse, toss with 1 tbsp. olive oil, and season with Old Bay.  Roast at 425º for 20 minutes.  You should see some browning around the edges.

Heat a cast iron braising pan or heavy skillet with 1 tbsp. butter.  Add the shrimp and peas, and sprinkle with Old Bay.

Cook the shrimp for several minutes, just until they turn pink.

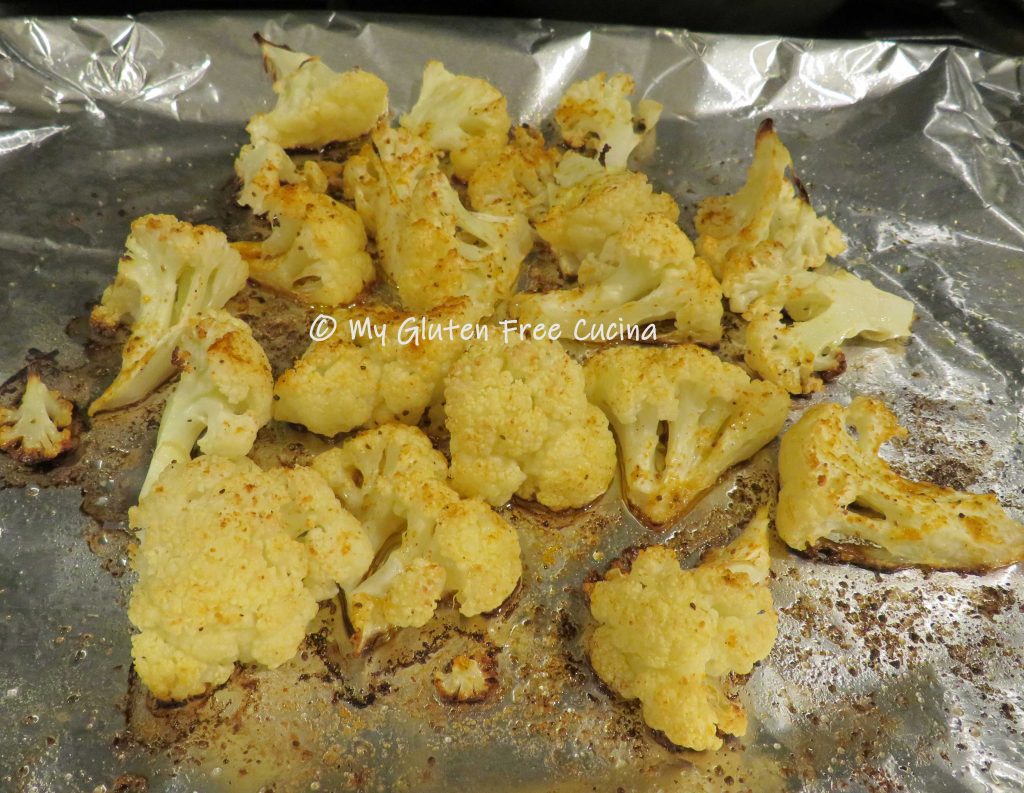
Add the roasted cauliflower to the skillet.

Warm the cooked risotto in a small saucepan with the remaining 1 tbsp. of butter, then stir in the butternut squash puree.  If it’s too thick add 1/3 cup chicken broth.

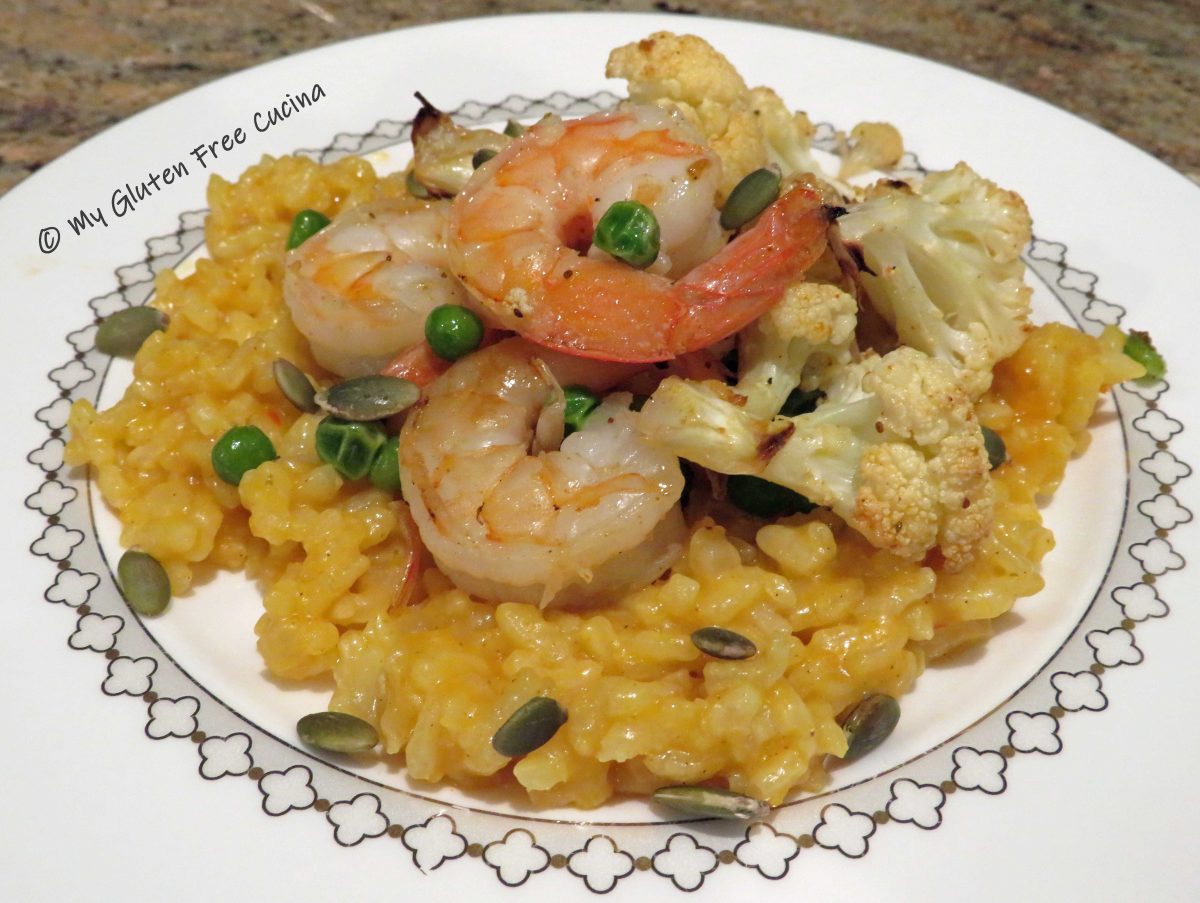
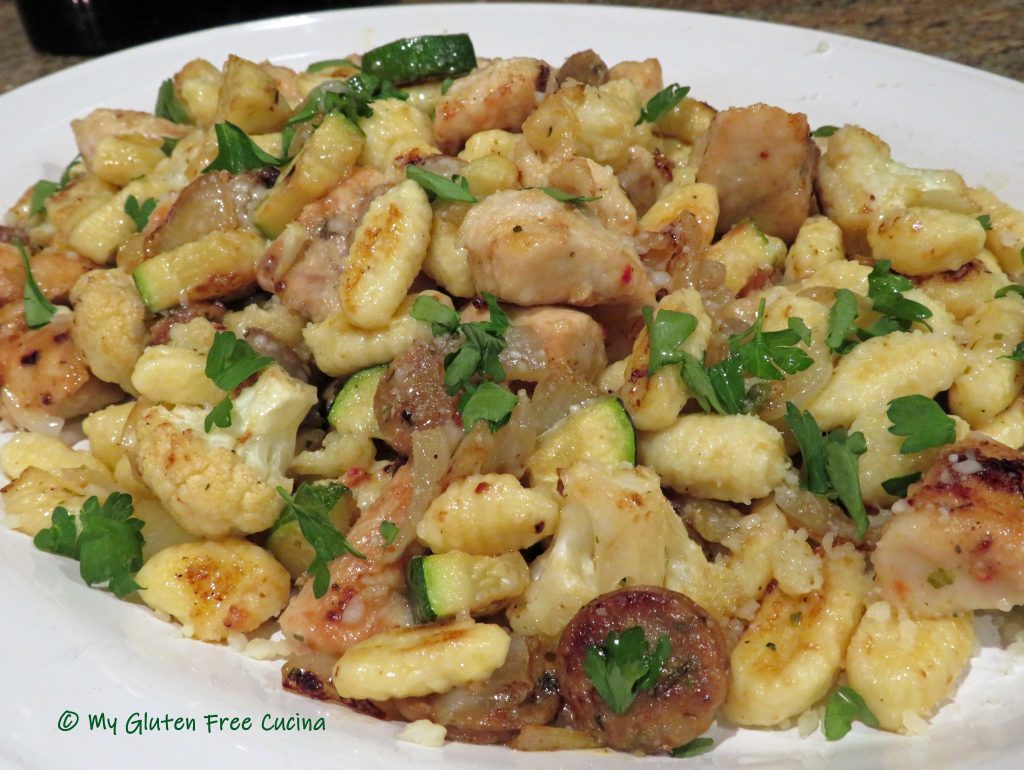
To plate, make a bed of risotto and top with the shrimp and veggies.  Garnish with a few pumpkin seeds.

Isn’t that beautiful?  What a great meal for date night.  I think it was even better than the restaurant version!  If you’re hesitant about making risotto, be sure to give my Basic Risotto recipe a quick read.  It’s easy and you’ll be an expert in no time!

Originally posted 9/08/2019                        Updated 2/03/2022

Print This Post Print This Post

Gluten Free Gnocchi with Chicken and Roasted Cauliflower

Look at this beautiful tray of gnocchi!  Would you believe it’s gluten free?  It is so good to know that we can still enjoy some of our favorite meals, minus the gluten!  This dish features fresh homemade gnocchi, one of my favorite pasta shapes, tossed in a flavorful skillet of chicken, sausage and cauliflower.

This post contains affiliate links.

4 servings

For the gnocchi:

When you shop Better Batter and use my Promo Code MGFC30 at checkout, you will receive 30% off any non-sale item! 

CLICK HERE to try the flour that I call my little miracle in a bag!

OR

For the skillet:

Preparation:

To make the pasta, whisk together the dry ingredients in the bowl of a stand mixer.  Beat together the eggs and olive oil and add to the flour mixture.  With the paddle attachment, mix on low speed until a soft dough forms (about 1 minute).

Press the dough into a ball and cover with plastic wrap.  Let it rest 10 minutes.

Lightly flour your work surface and gnocchi board.  Use a bench knife to divide the dough into 4 even pieces.  Work with one piece at a time and keep the rest covered so that it doesn’t dry out.  Roll each piece of dough into a long rope about 3/4″ wide.

Use the bench knife to cut the rope into 1/2″ pieces.

To form the ridges, roll each piece over the gnocchi board using your thumb, a butter knife or bench knife.  Keep the board and your fingers floured to prevent the gnocchi from sticking.

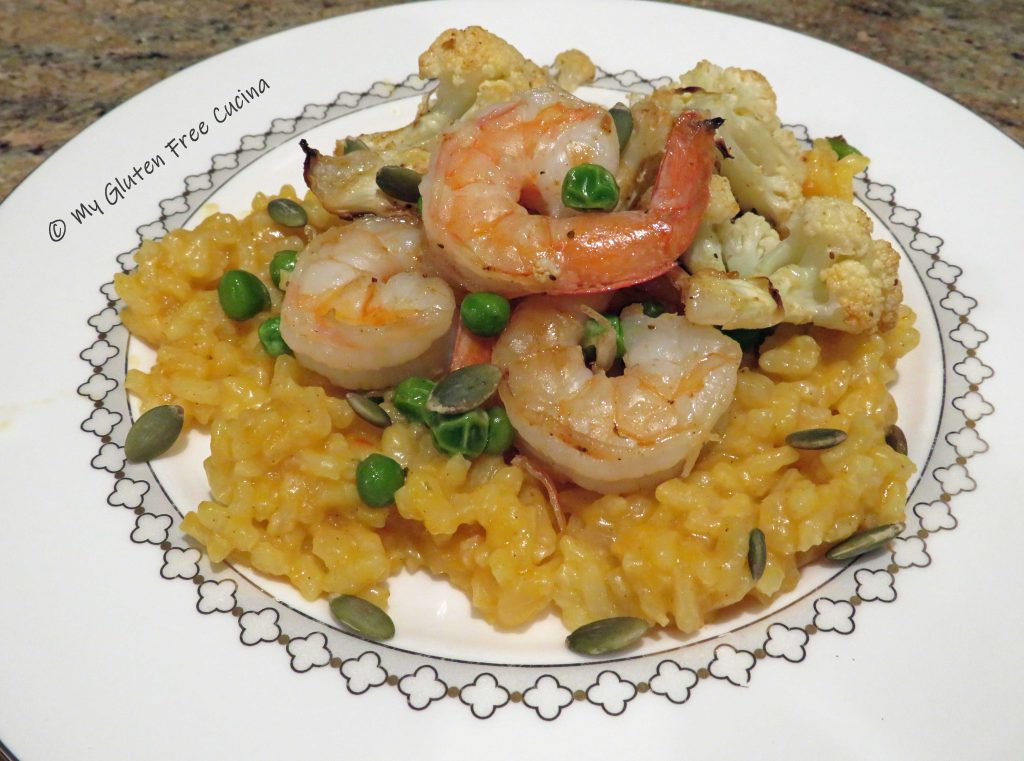
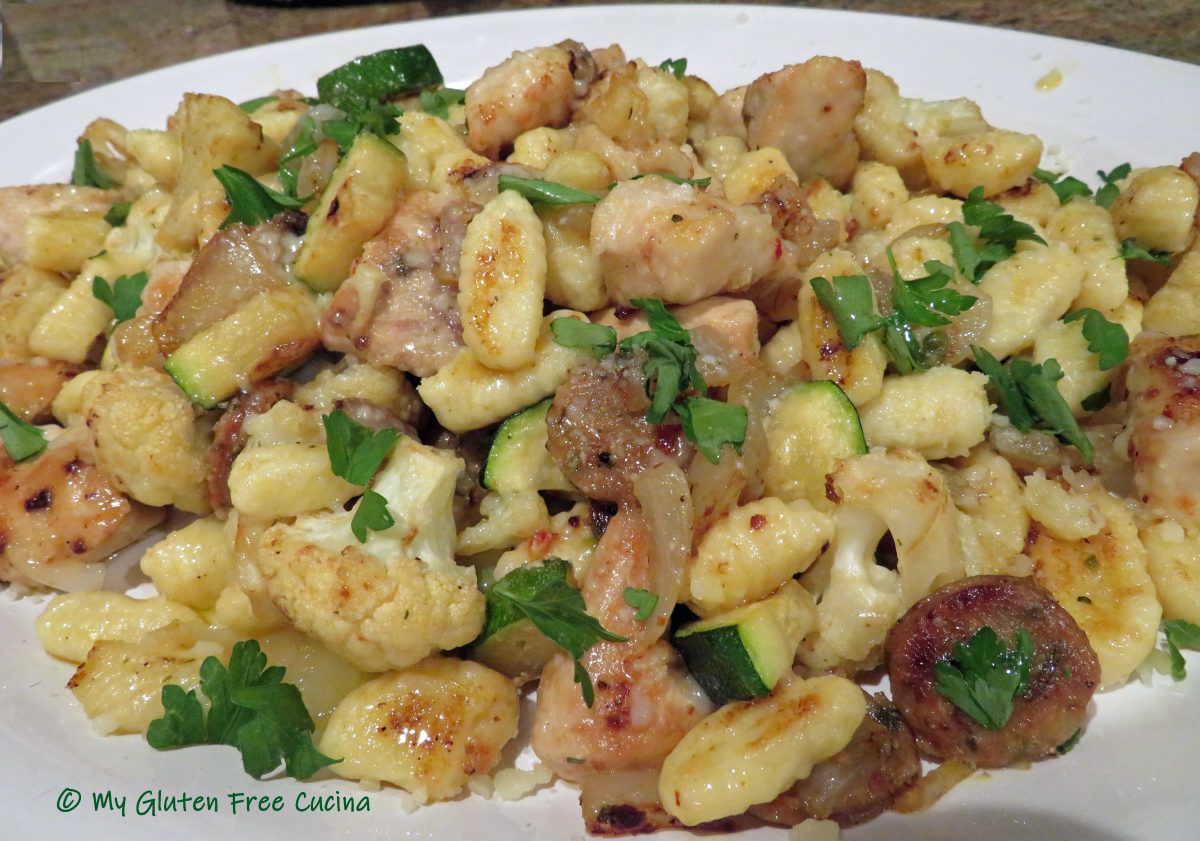
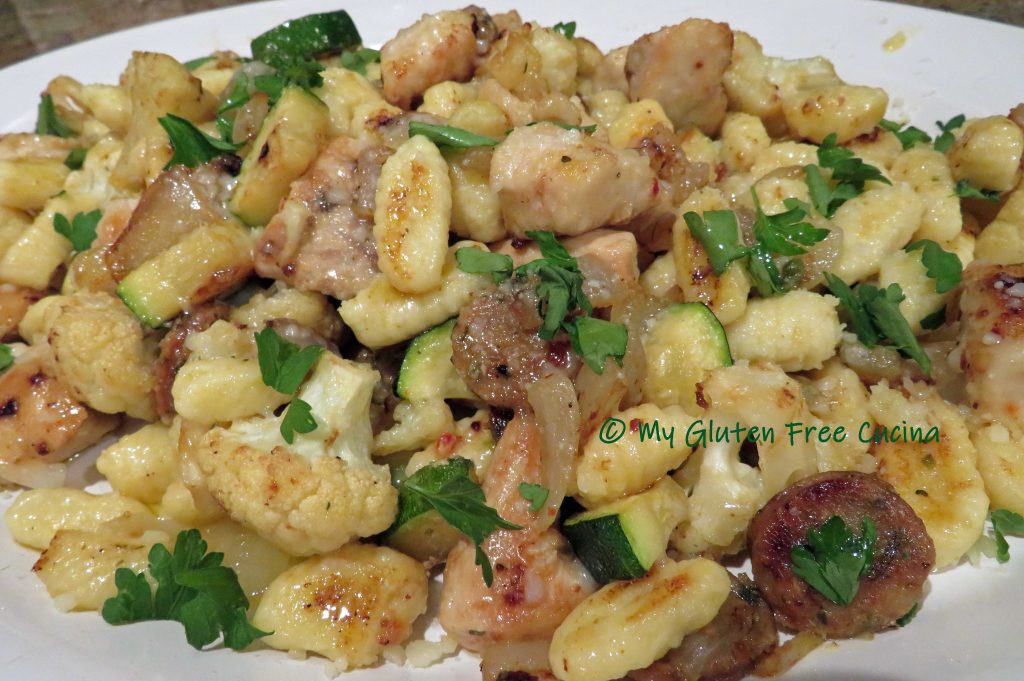
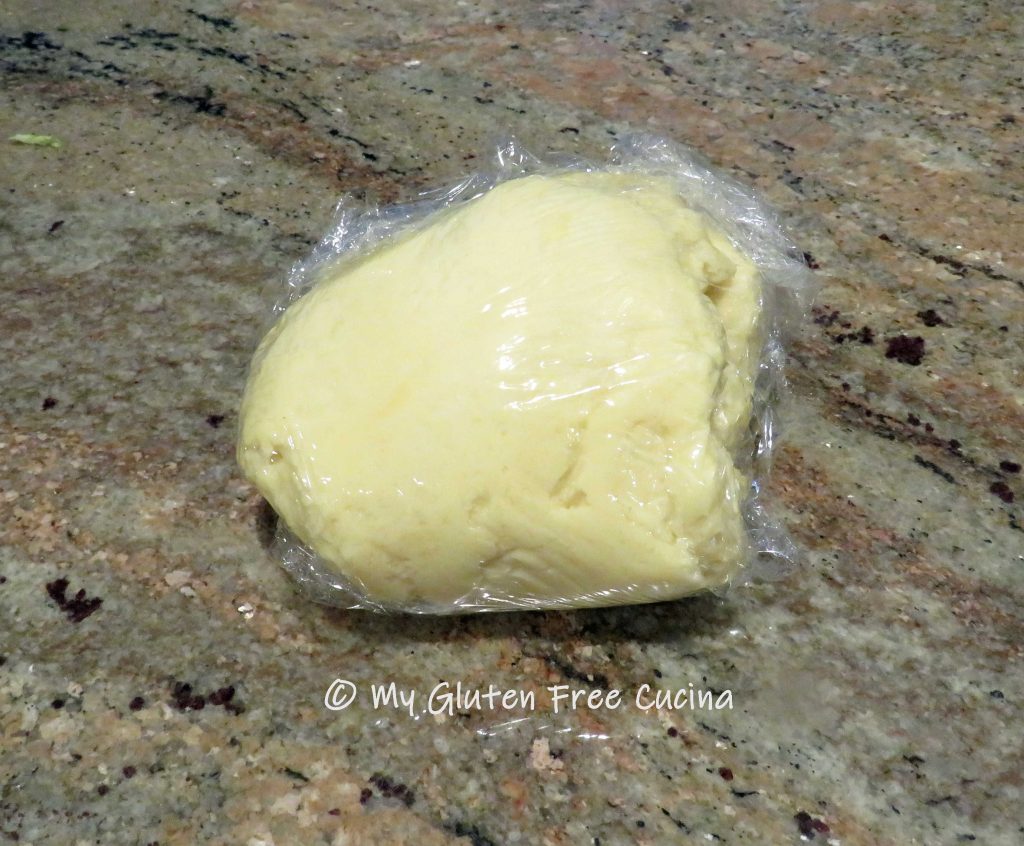
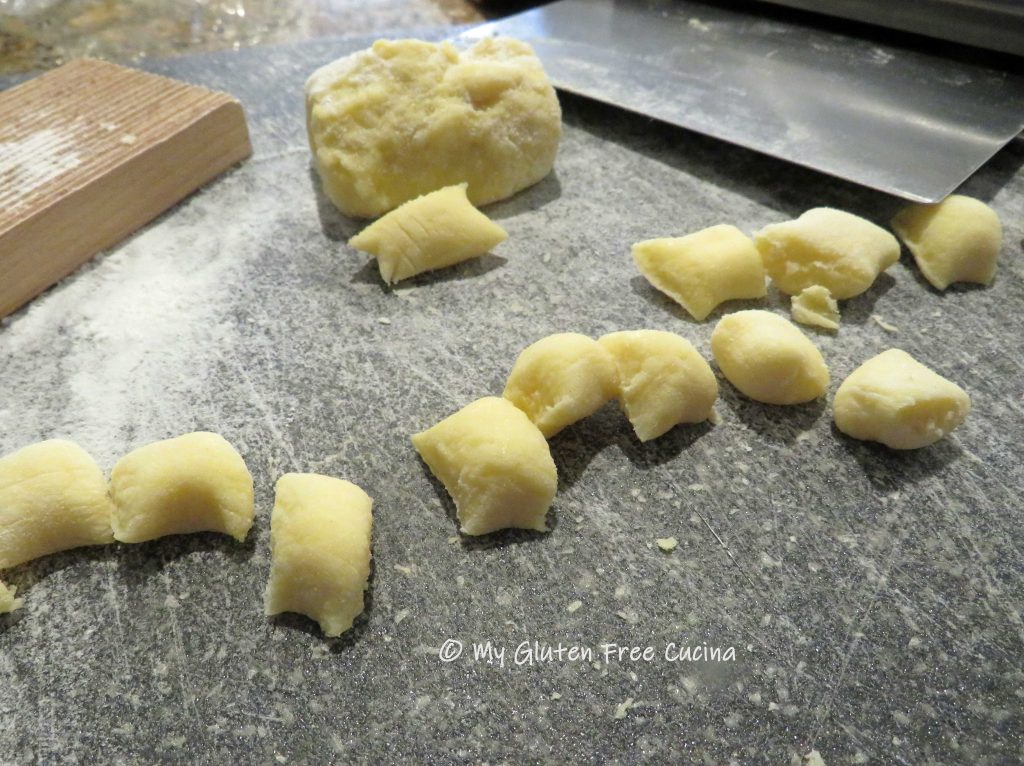
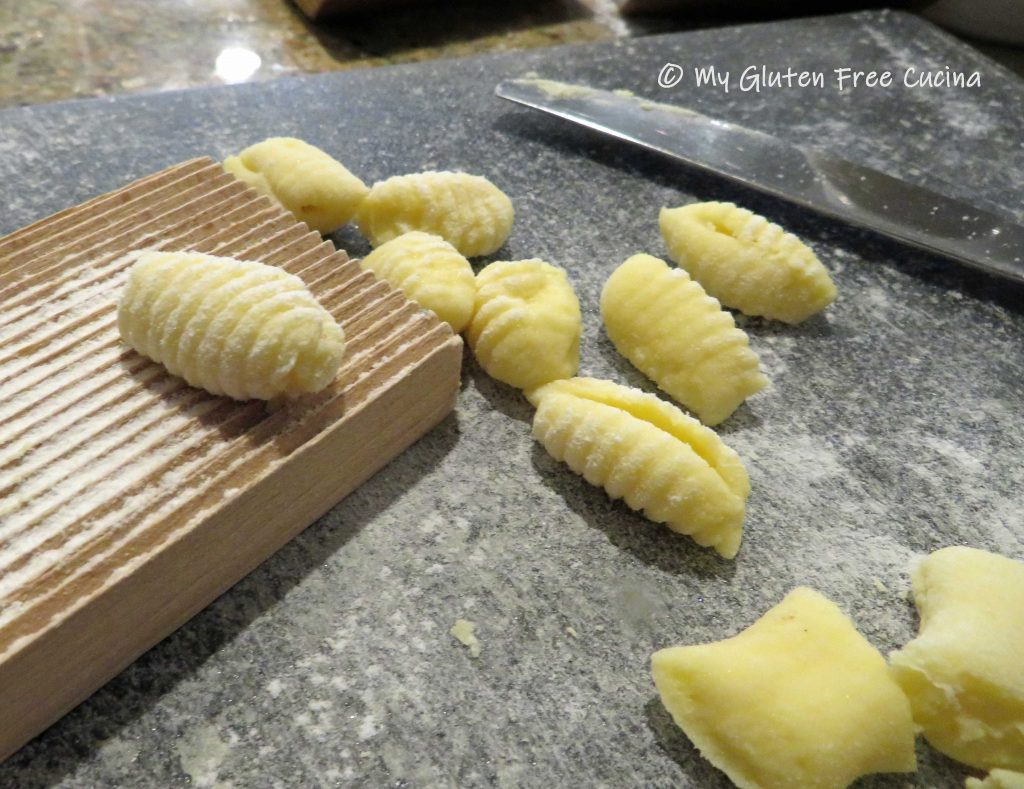
Line a baking sheet with parchment or waxed paper and flour lightly.  Place the finished gnocchi on the baking sheet.  If not using right away, cover with plastic wrap and refrigerate.
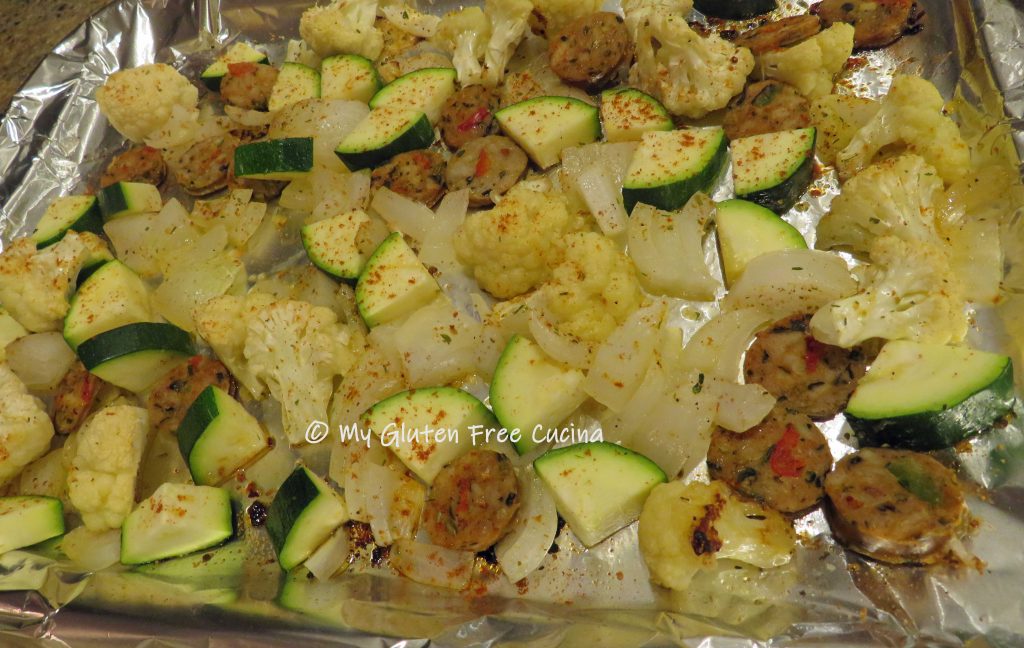
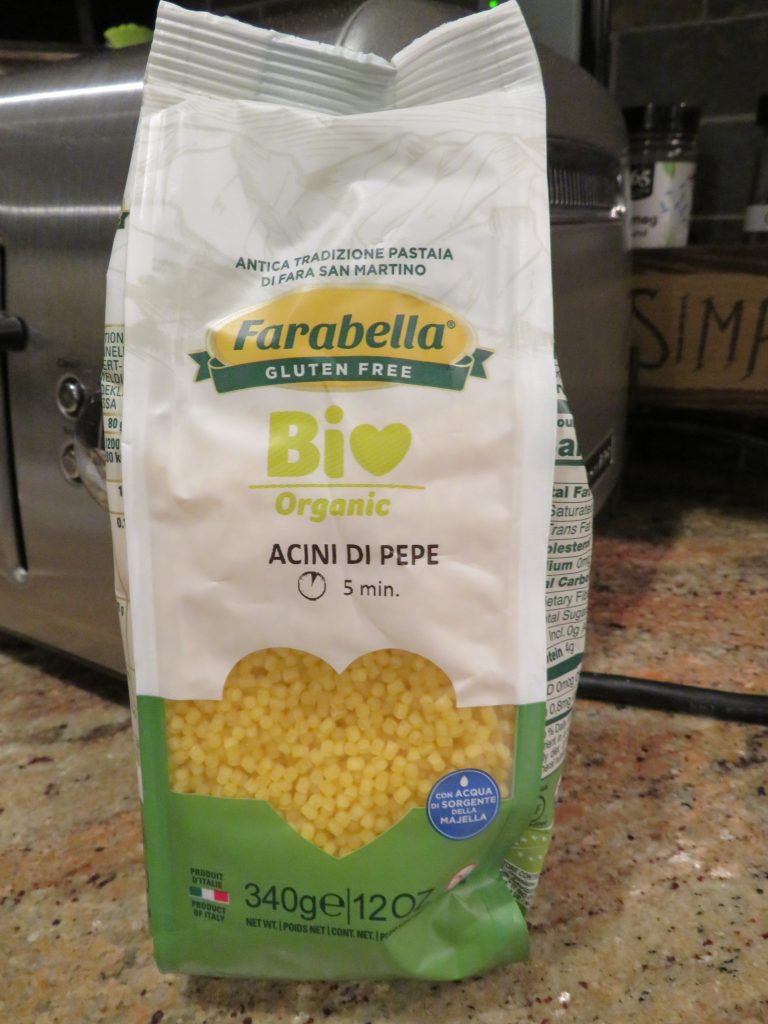
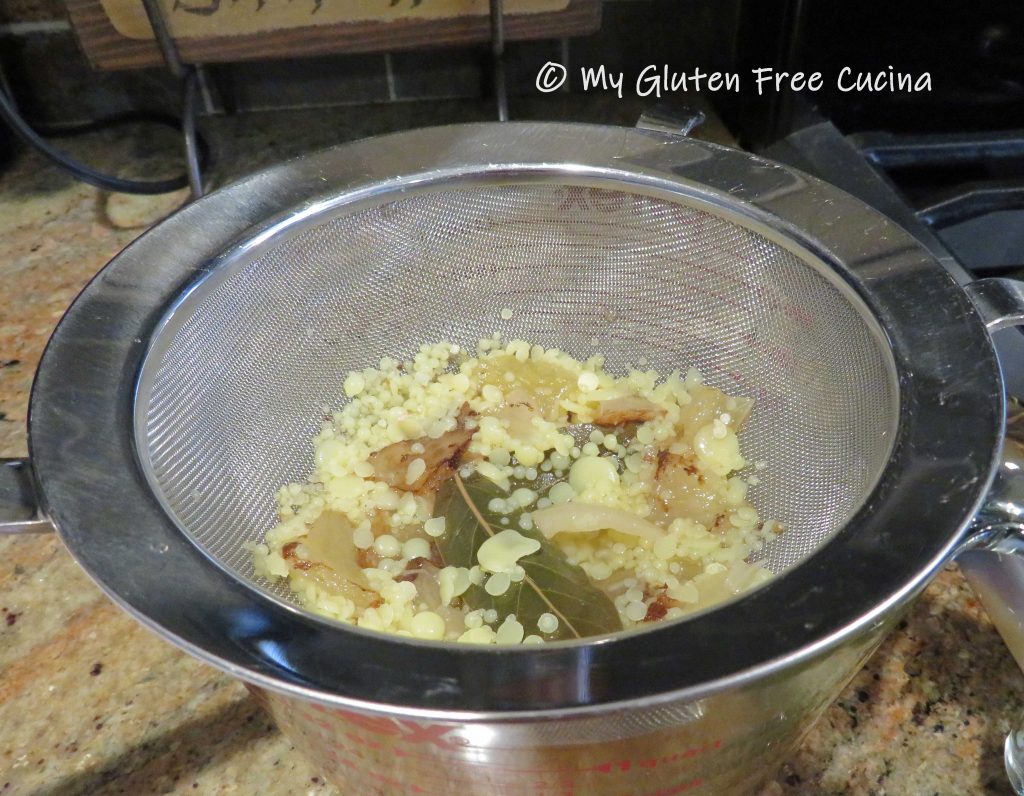
*Always follow food safety guidelines, pasta made with fresh eggs should be refrigerated within 1 hour.

Now it’s time to finish the dish!  Cut the chicken into 1.5″ cubes and toss with 3 tbsp. rice flour, Italian seasoning, salt and pepper to taste.  Let it sit at room temperature while you prepare the vegetables.

Dice the onion, zucchini and cauliflower.  Slice the sausage into coins.  Toss the veggies and sausage with olive oil and Italian seasoning.  Spread the mixture on a baking sheet in a single layer and roast for 20 minutes at 400º.  Roasting the veggies adds so much flavor to the dish, don’t skip this step!

Bring a large pot of salted water to a rolling boil for the pasta.  Heat a large non-stick skillet over medium low heat.  Begin browning the floured chicken in a little olive oil.  Cook for 3-4 minutes, turning several times to get good color on all sides.

When the chicken is almost done, cook the pasta.  Cover the pot if needed, to keep the water at a boil.  Remember fresh pasta cooks quickly, 3-4 minutes is all it takes!  It will float to the top when done.

Add the roasted sausage and veggies to the skillet with a little chicken broth, folding gently with a spatula as the liquid begins to thicken.

Use a spider strainer to gently lift the cooked pasta out of the water and add it to the skillet.  If too dry, add a bit more chicken broth or a ladle of the pasta water.  Toss gently and continue cooking 1-2 more minutes to get a little browning on the gnocchi.

Transfer to a serving platter and finish with a drizzle of olive oil, grated cheese and Italian parsley.

Just look at this amazing pasta dinner, all from scratch and its gluten free!  It is SO delicious and leftovers are just as good!

Notes ♪♫ This post, first published in 2018 was long overdue for an update.  My original pasta dough was made with brown rice flour and tapioca starch.  I’ve since found that a good all-purpose gluten free flour can work just as well.  I have made this recipe several times with Better Batter Original Blend.  If you use a different brand, be sure that your flour contains xanthan gum.  If not, you will need to add it to help your dough hold together without crumbling or tearing.

Original post 06/17/2018                                Updated 01/20/2022

Print This Post Print This Post

Organizing Your Gluten Free Pantry

Beginning the Year with Organization 

Some people begin the New Year with resolutions for dieting, exercise and other life goals.  For me, the New Year means it’s time to clean and organize.  The packing away of the Christmas tree, finishing the last of the holiday leftovers and tidying up the kitchen.  It’s time to make room for some new things that Santa brought me and donate anything that is gathering dust.

Along with that, it’s time to give the pantry an overhaul.  That means wiping down the shelves, getting rid of ingredients that are past the expiration date and putting everything in order for a New Year of baking!

What’s in my (gluten free) pantry?

At times my pantry areas are so full of stuff, that I often purchase something only to find that there was already a full box or bag in the cupboard that had gotten lost behind all the other ingredients!

The New Year is a great time to pull everything out for a good look at what I have on hand and reorganize how I store it.  For those who are just beginning the gluten free diet, I hope this post will be helpful in understanding where to get started.

My pantry organization is far from perfect, but it works for me.

This post contains affiliate links.

One of the first things that I did after my Celiac diagnosis was to designate pantry areas where no gluten is allowed.  Pull everything out and scrub the shelves clean.  Segregate all gluten containing ingredients to be donated or thrown away.  Give unopened items to the food pantry or to family members.  Discard opened items, or if your household is not 100% gluten free move all gluten containing ingredients to a separate area of the kitchen.

As you will see in the photos, I like to use ball jars to store my grains.  When I set up my gluten free pantry, I washed them in the dishwasher and got some new lids.  I also added a few new airtight containers and Lazy Susans to complete my gluten free storage space.  A label maker is nice, but sometimes I just make labels from the product packaging and tape them on.

If you are new to gluten free baking you might be overwhelmed by the array of flours, starches and other ingredients used to make breads and pastries.  Like many, I invested quite a bit of time and money stocking my pantry to get started.  Over time I learned which ingredients I would use most often and pared down my list accordingly.  Today, grains that I use frequently are purchased in bulk and those occasional ingredients are kept in small quantities.

Keeping a well-stocked pantry means that I can experiment with new recipes without having to run to the store.  But an organized storage area is essential to not getting overwhelmed.

So, what should you buy first?  My “Frequent use” list is a great place to start.  I also provide you with a full list of what’s in my pantry by category; Grain/Flour, Starch, Seeds, Nuts and Other/Misc.  I also made you a printable checklist to take along when you go shopping.  You’re welcome!

It takes a while to know what you like.  For me it was trial and error baking many loaves of bread and experimenting with different meals.  Some things ended up in the trash, and others I choked down but would never make again.  Today, after 8+ years gluten free I have my go to recipes, the ones that taste good not only to me but also my gluten eating family.  These are the ones that I make again and again, with consistent results.  The ingredients become part of my master list.

Frequent use list:

Master List:

All Purpose / 1-1 Flour Blends

Mixes

Grain/Flour

Check out my post on Using a Grain Mill to learn why I stock whole grains like millet and buckwheat that I can easily mill into flour for baking.

Starch

Seeds

Nuts

  • Almonds
  • Pecans
  • Walnuts

Other Baking Ingredients:

Misc:

Here is your printable Gluten Free Ingredient Shopping List!  What are some pantry items that you can’t be without?  Let me know in the comments!

Notes ♪♫ You may be unfamiliar with ingredients like xanthan gum and psyllium husk, but they are key in baking gluten free and will help with the structure and consistency of your gluten free breads.

Print This Post Print This Post

My Mother’s Chicken Escarole Soup

A family tradition, I have made this soup for Thanksgiving dinner for over 30 years.  It is inspired by the soup my mother always made for the holidays when we were growing up.  Over the years I’ve added a few extra touches that make it my own, and most recently it has been adapted to be gluten free.  This recipe serves a crowd so you will have plenty for your family dinner plus leftovers.  Of course, you can easily cut it in half (photos are for a half recipe) but I promise you are going to want leftovers!

Serves 20-25.

This post contains affiliate links.

Ingredients:

  • 4-5 Chicken Leg Quarters (or you can use drumsticks and/or thighs)
  • 2 Sweet Onions
  • 1 lb. bag of Carrots
  • 1 bag Celery 
  • 2 Tbsp Olive Oil, divided
  • Salt & Pepper
  • 2 Bay Leaves
  • 1 cup gluten free beef stock (optional but very good)
  • 2 cartons (32 oz.) gluten free chicken broth
  • 2 tbsp. cornstarch
  • 1 tsp. Sage
  • 1 tsp. Thyme
  • 4 Garlic cloves, minced
  • Generous pinch of Saffron
  • 1″ knob of fresh Ginger root, minced
  • 1 head Escarole, trimmed and washed
  • 12 oz. gluten free soup pasta
Get it here!

Preparation:

2 Days Before:

In a large stockpot brown the chicken in 1 tbsp. olive oil, about 5 minutes each side.  Do it in batches so that each piece gets evenly browned.  Remove chicken from the stockpot, pour out the fat and wipe clean.  Return chicken to the pot and add 2 carrots, 2 celery stalks, and 1 medium onion, quartered.  Add ½ tsp pepper and 2 bay leaves.  Cover with water, bring to a boil then lower the heat, cover and simmer for at least 3 hours.

Transfer the chicken to a cutting board or plate.  It should be falling off the bone tender.  Discard the bones and skin and chop the meat into bite size pieces.  Refrigerate the chicken in an airtight container until the day of serving.  Let the stock cool to room temperature then refrigerate overnight.

1 Day Before:

Remove the stock from the refrigerator and skim all fat from the top.  Discard the bay leaves and all of the vegetables.  Strain the chicken stock through a fine mesh sieve, or colander double-lined with cheesecloth into a clean bowl or measuring cup.

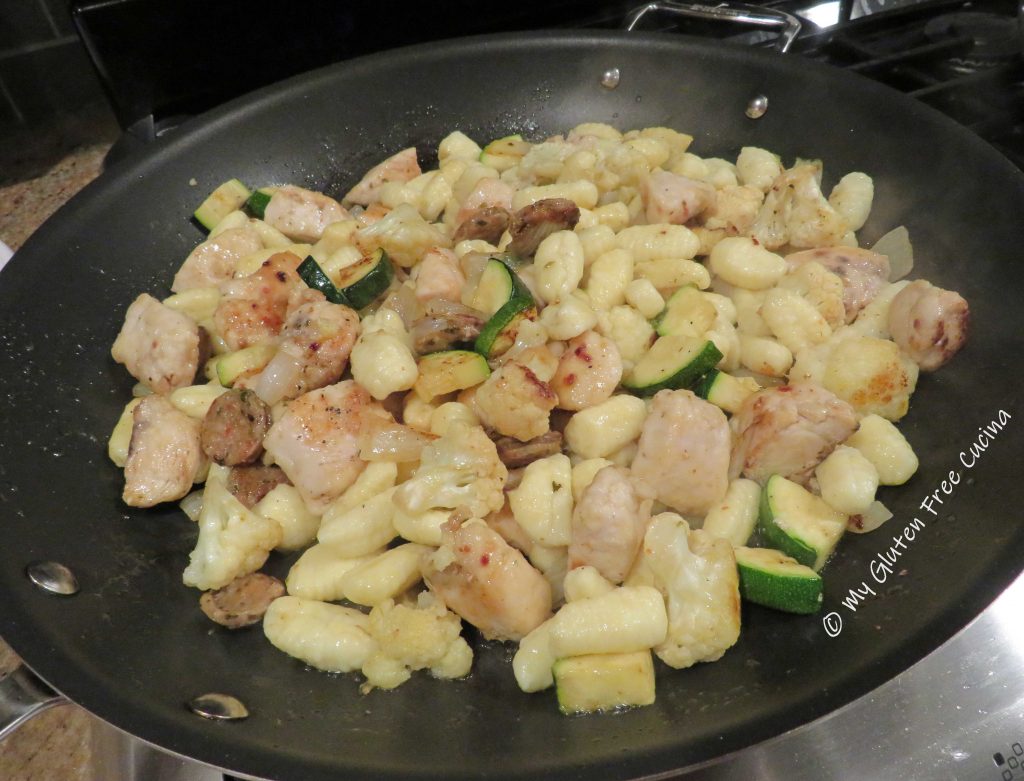
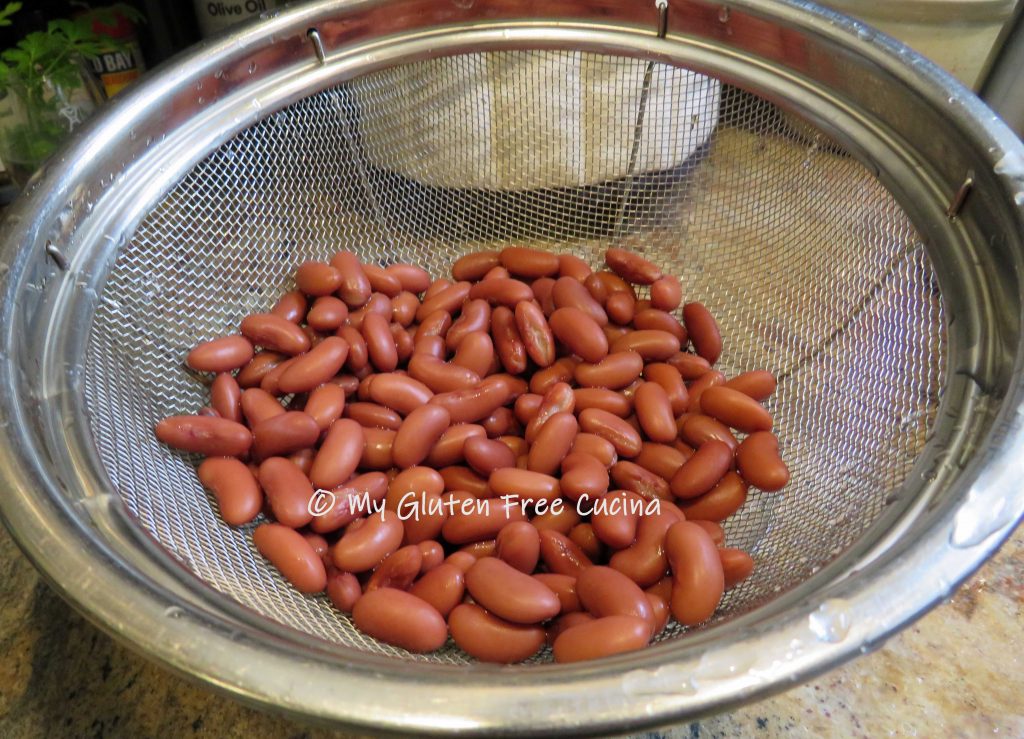
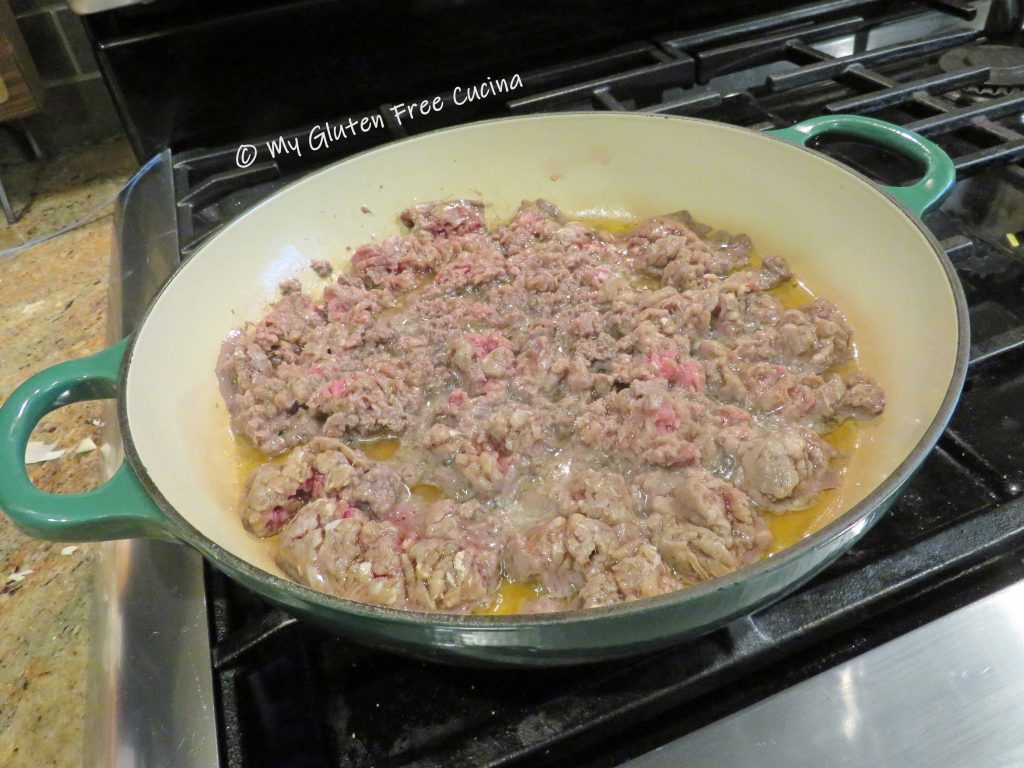
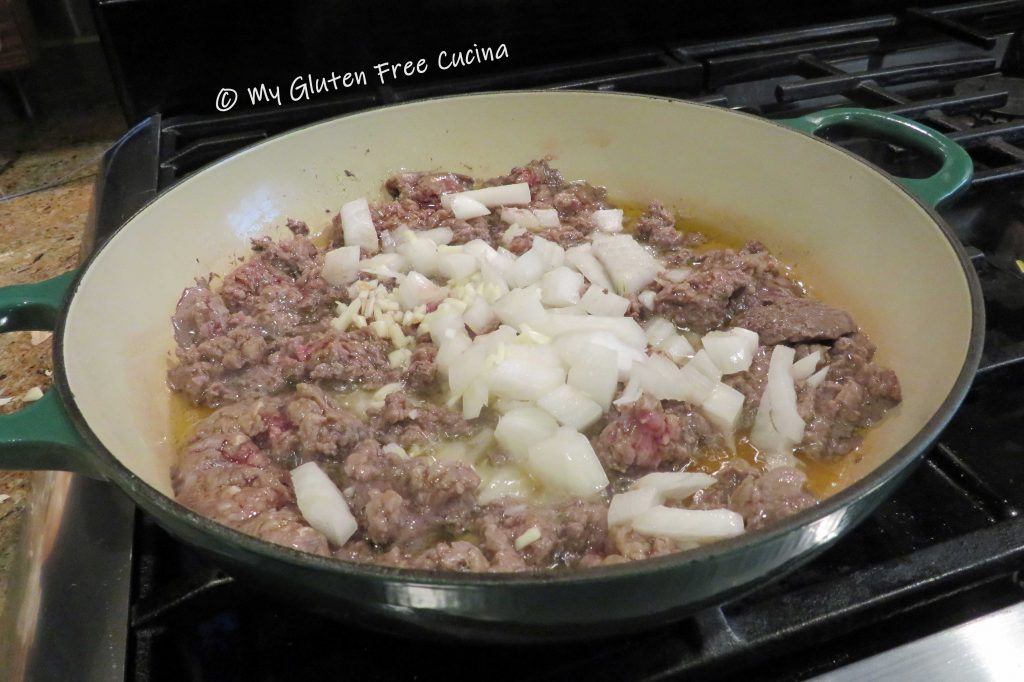
Dice 6-8 carrots, 6-8 celery stalks, and one large onion.  Try to cut the pieces to approximately the same size.

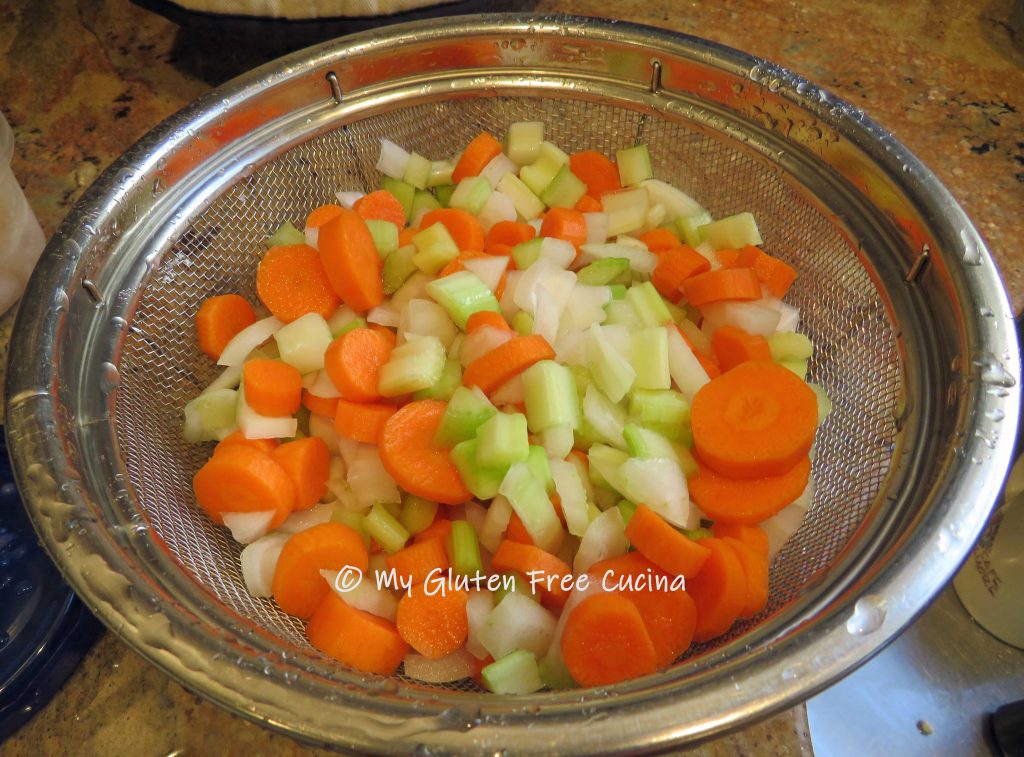
In a clean stockpot, sauté the vegetables in 1 tbsp. olive oil.  Season with salt and pepper.

Add the strained chicken broth, and the beef stock (you won’t taste the beef, but it really does add another level of flavor to chicken soup).  Top with more chicken broth as needed.

Mince 6-8 garlic cloves, and all of the ginger root (about 2 tbsp.).  Add to the pot with one large pinch of saffron threads, 1 tsp. each of ground sage and thyme, and salt to taste.

Cover and simmer on low 2 more hours.

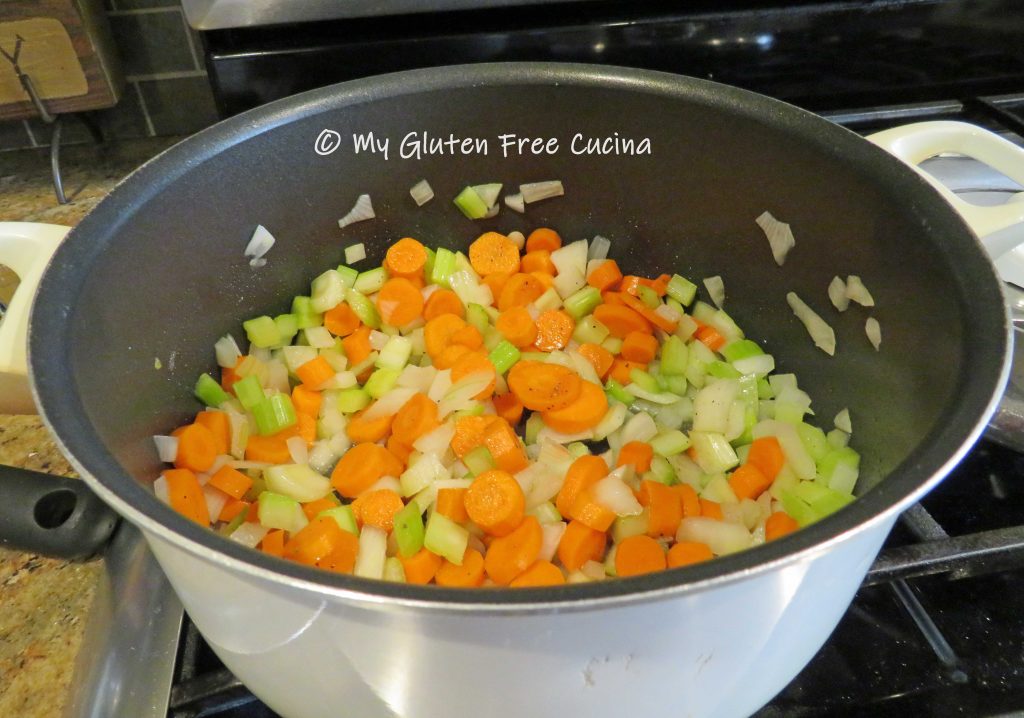
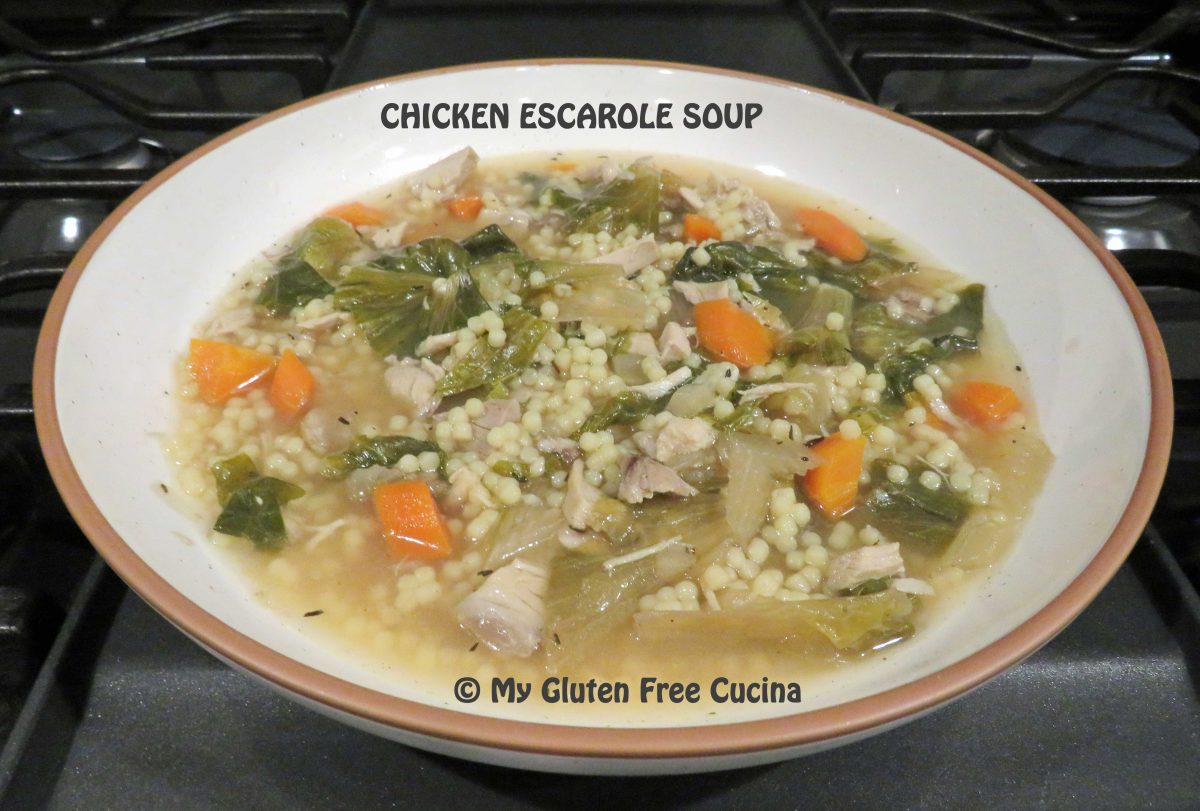
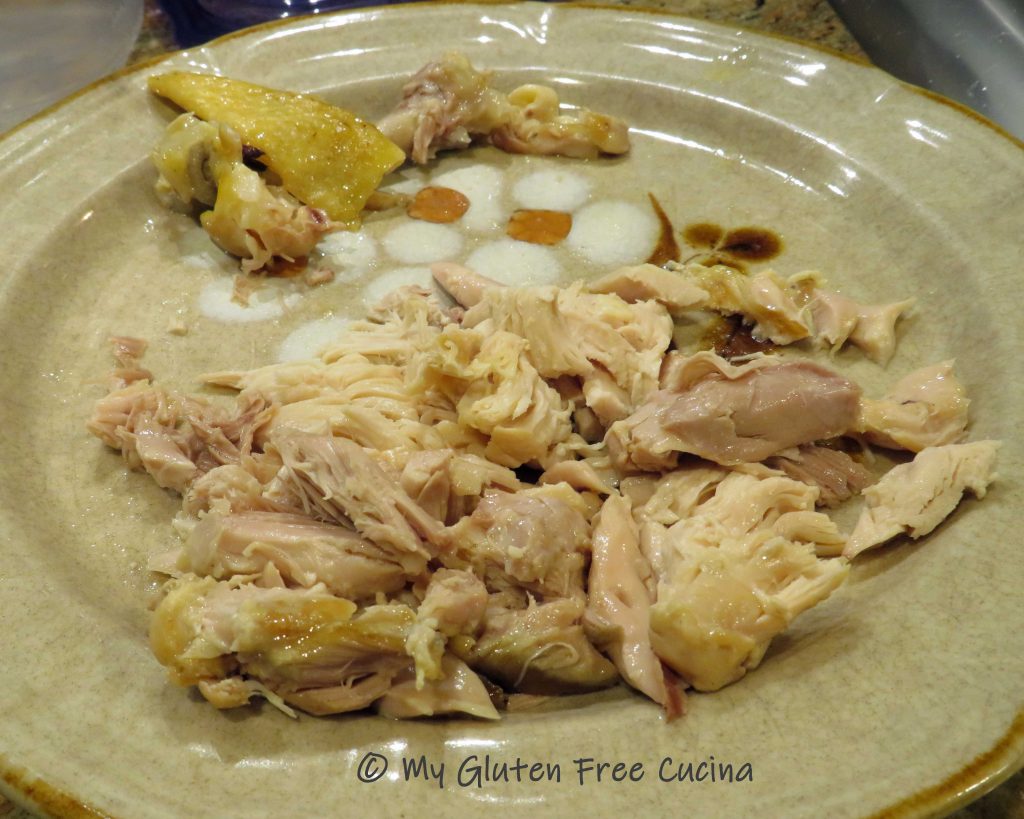
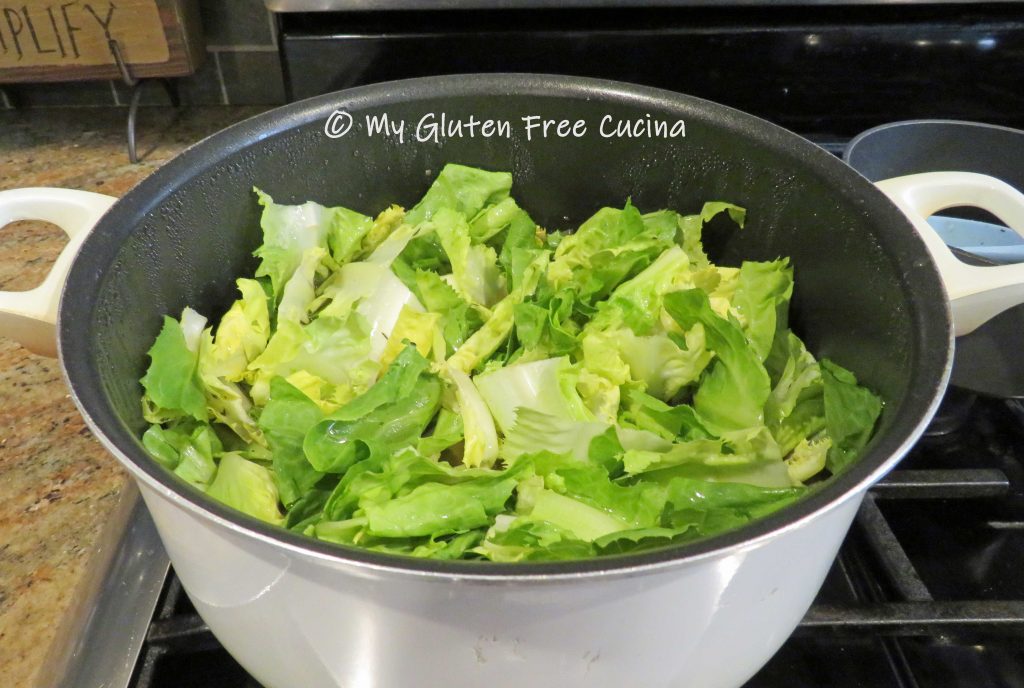
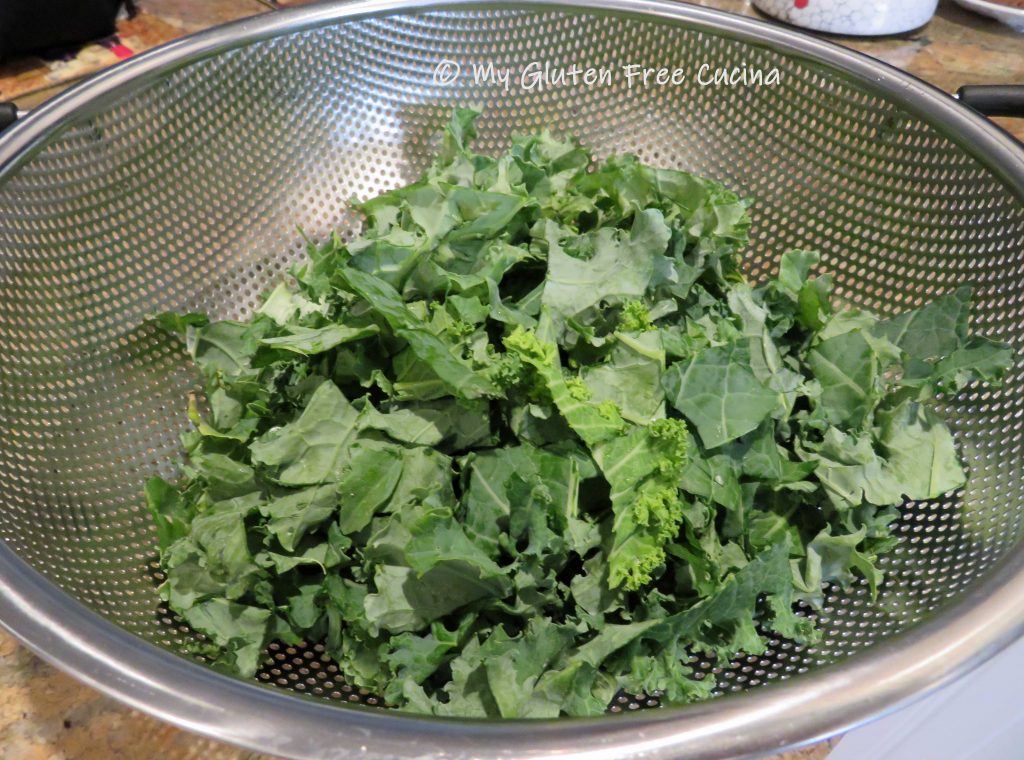
Remove and discard the outer leaves of the escarole, then tear the leaves into large pieces and rinse thoroughly.  To this day I can still hear my mother telling me to wash the escarole “leaf by leaf”.

When the soup is done, turn off the heat and add the escarole to the pot.

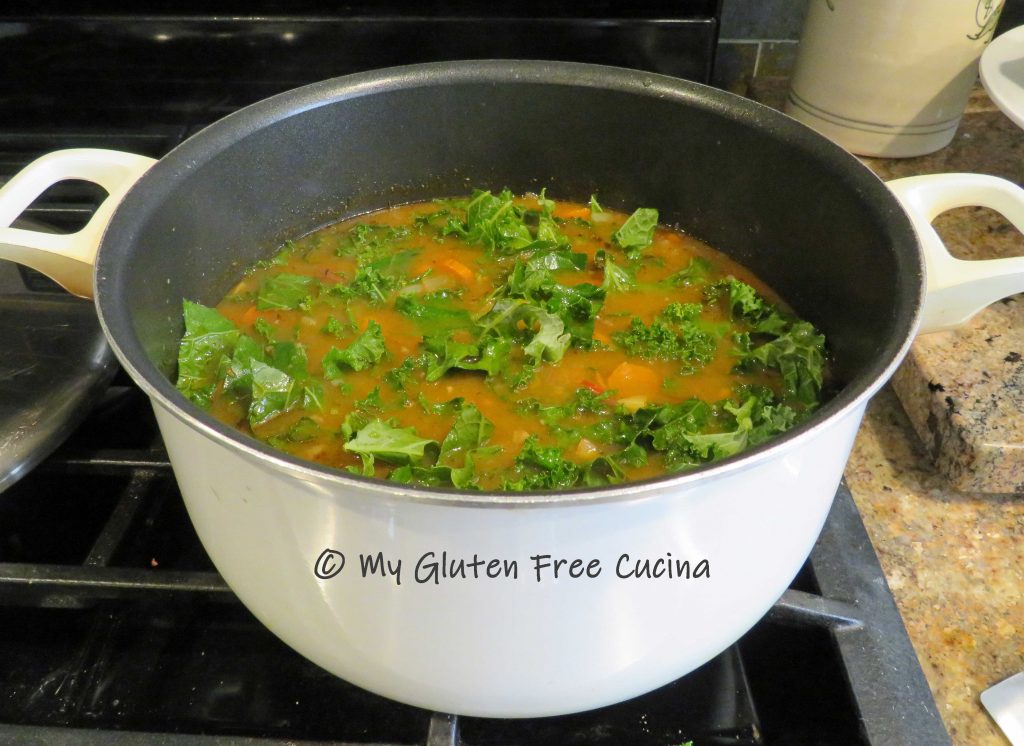
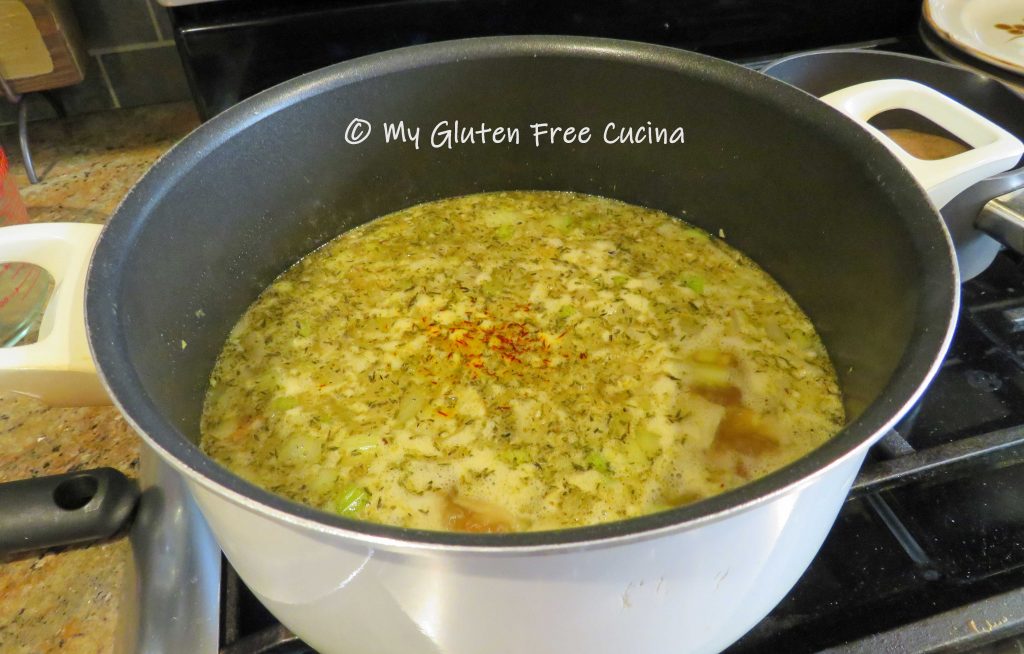
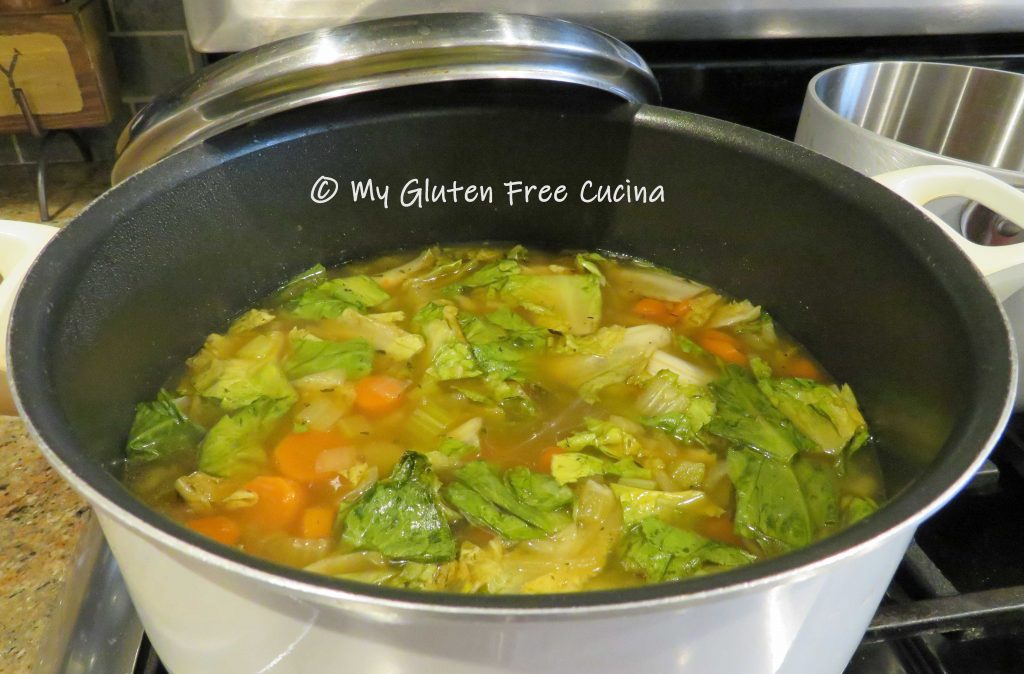
Escarole cooks quickly, and the residual heat is enough to wilt the leaves.  Stir well, cover the pot and let it cool to room temperature.  Refrigerate overnight.

Day of Serving:

Gradually warm the soup on low heat.  Ladle 1 cup of broth into a small saucepan and whisk with 2 tbsp. corn starch.  Once it has thickened, add the cornstarch mixture back into the soup and stir to combine.  Add back all of the reserved chicken meat to the pot.  Do not let it come to a boil or the chicken will shred into ribbons!  In a separate pan cook ¾ lb. of gluten free soup pasta such as orzo or ditalini according to package directions.  I was really lucky to find gluten free Acini de Pepe, the traditional pasta used in this soup.

Drain and rinse the cooked pasta and add it to the soup.  Taste to see if more salt or pepper is needed and keep warm until ready to serve.  Serve with grated cheese and a drizzle of extra virgin olive oil.

As I make this soup each year it brings back childhood memories of my Italian family gathered around the holiday table.  Start your own family tradition with this wonderful soup that is sure to become a favorite part of your special meal.

Notes: ♪♫ Gluten free soup pasta is not readily available where I live.  If you are struggling to find a gluten free pasta for your holiday soup, here are a few links that I hope you find helpful!  Use what you have and don’t be afraid to improvise.  Whenever I buy gluten free pasta, I save the little broken pieces in the bottom of the box and use them for soup!

Print This Post Print This Post

Kale Soup with Linguica

When temperatures are dropping, nothing hits the spot like a bowl of hot soup.  Chase away the chills with this hearty Portuguese inspired soup that is gluten free and delicious.  Kale of course is the star of this dish, along with Linguica, red beans and Yukon gold potatoes.

This post contains affiliate links.

Ingredients:

  • 2 tbsp. olive oil
  • 1 sweet onion, diced
  • 2 medium carrots, peeled and diced
  • 2 garlic cloves, minced
  • 3 tbsp. tomato paste
  • 8 oz. gluten free Linguica, sliced into coins
  • 1 cup gluten free chicken stock
  • 32 oz. carton gluten free chicken broth
  • 4 small Yukon gold potatoes, diced
  • 1 tsp. thyme
  • 1 tsp. sage
  • salt and ground pepper, to taste
  • 15.5 oz. can red kidney beans, drained and rinsed
  • 1 bunch kale, center stem removed and chopped

Preparation:

First organize your ingredients.  Chop the veggies into even dice and cut sausage into coins.  Rinse the kale and remove the tough center stems.  Chop and rinse again before adding to the pot.

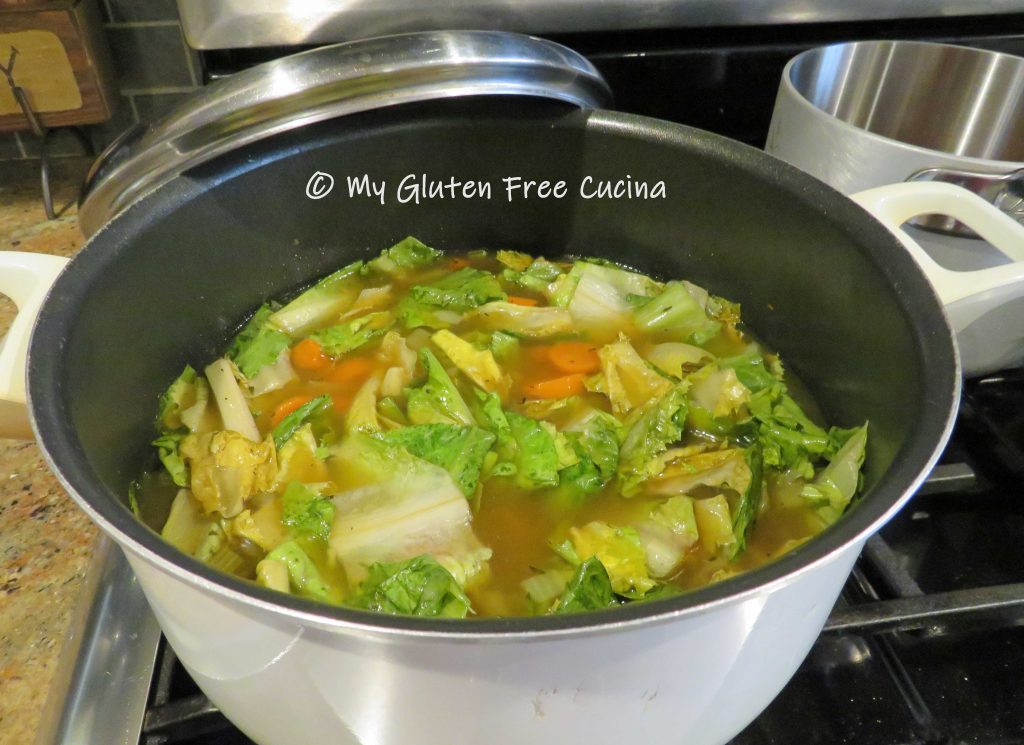
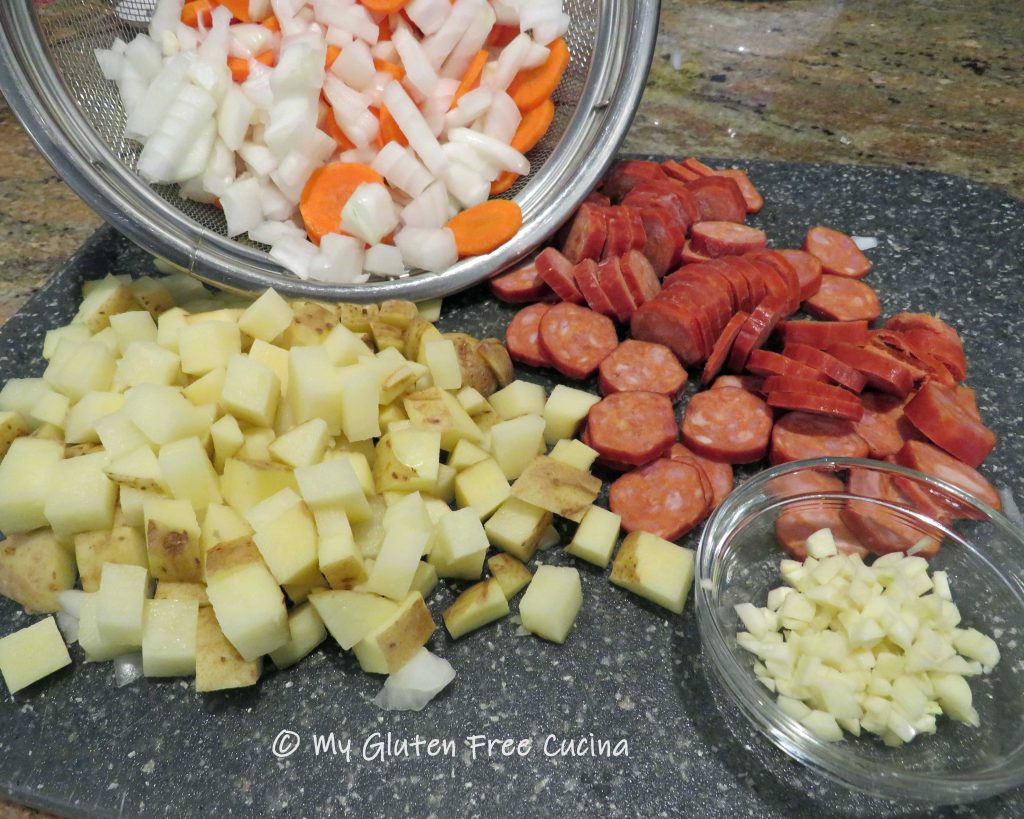
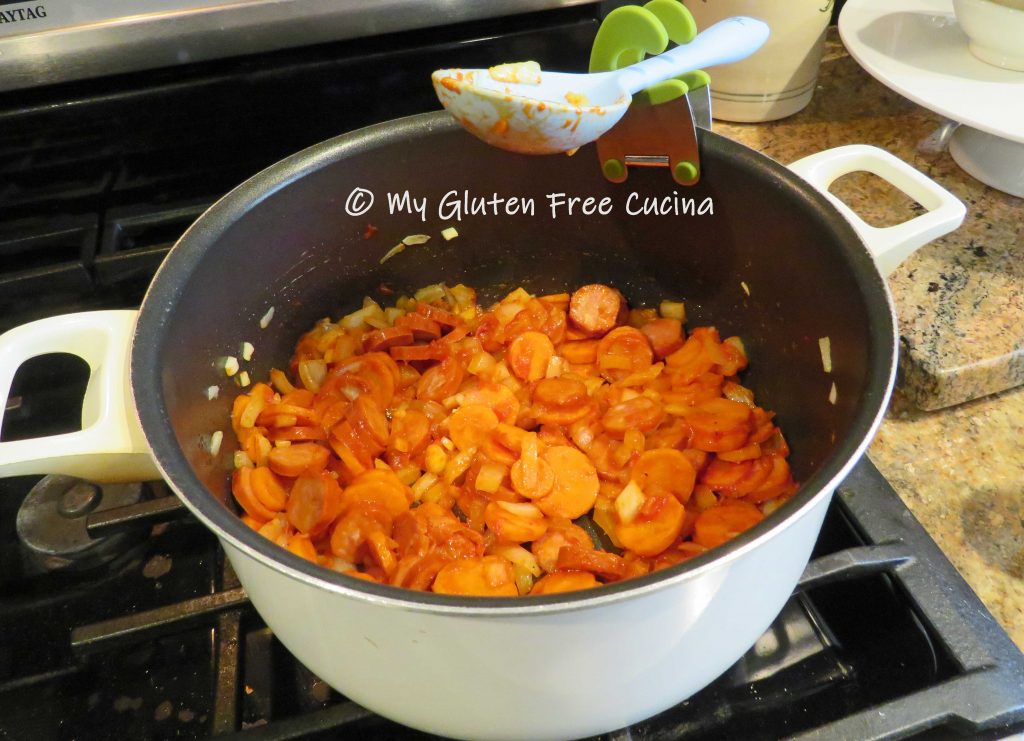
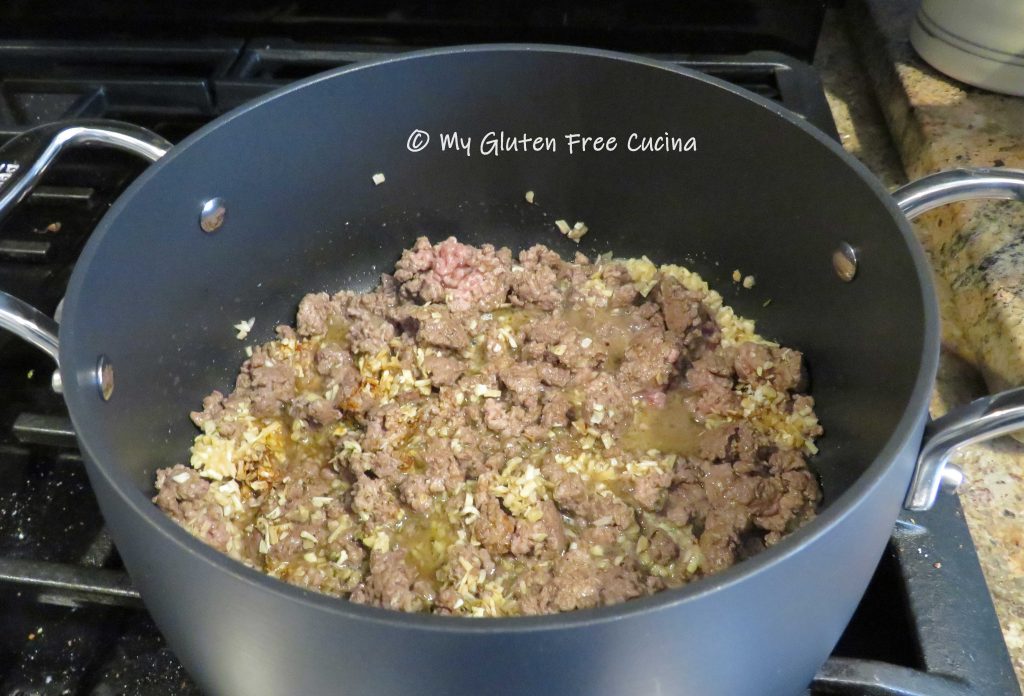
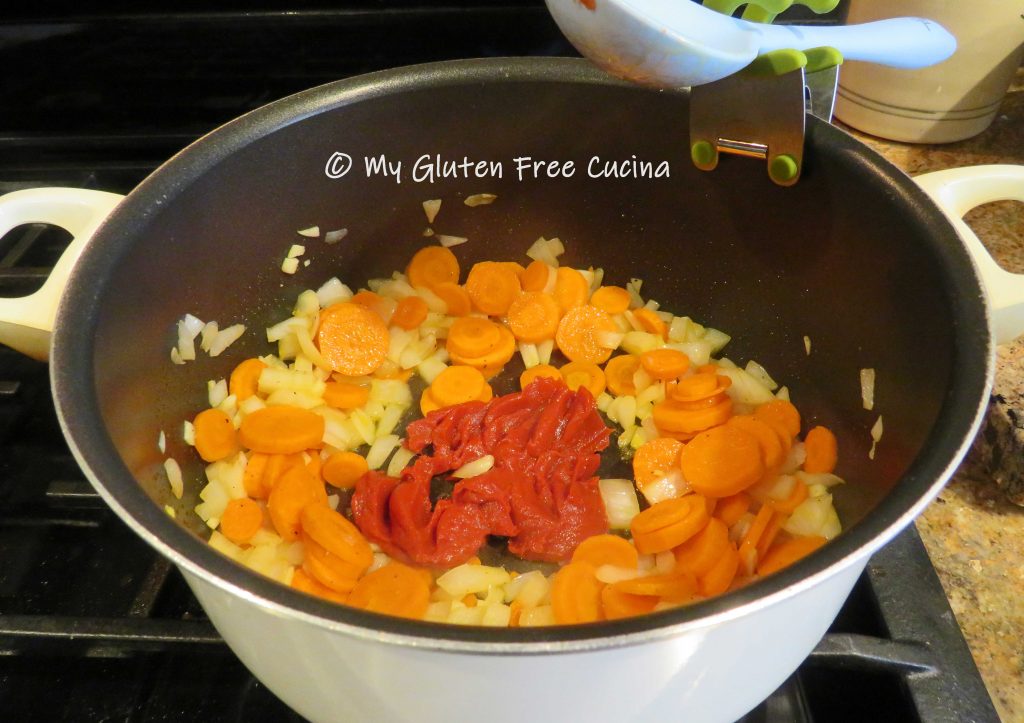
Heat olive oil in a stock pot, and stir in the onions, carrots and garlic.  Season with salt and pepper and cook 2 minutes.

Make a spot in the center of the pan and add the tomato paste.  Let it toast for a minute then stir it into the vegetables.

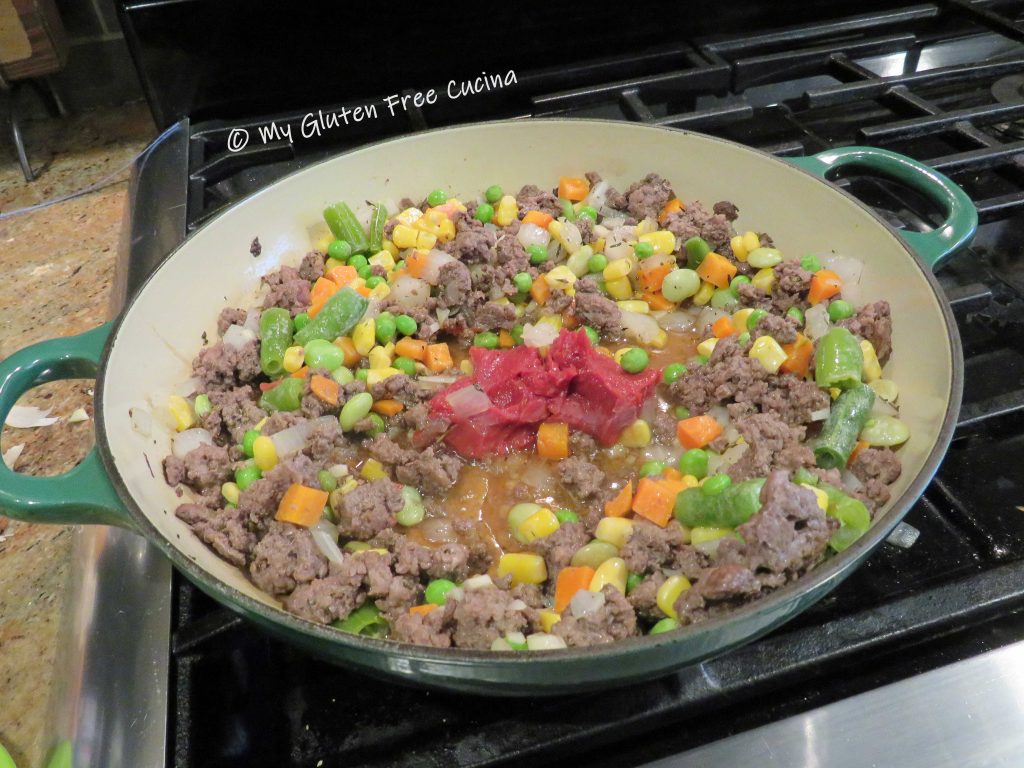
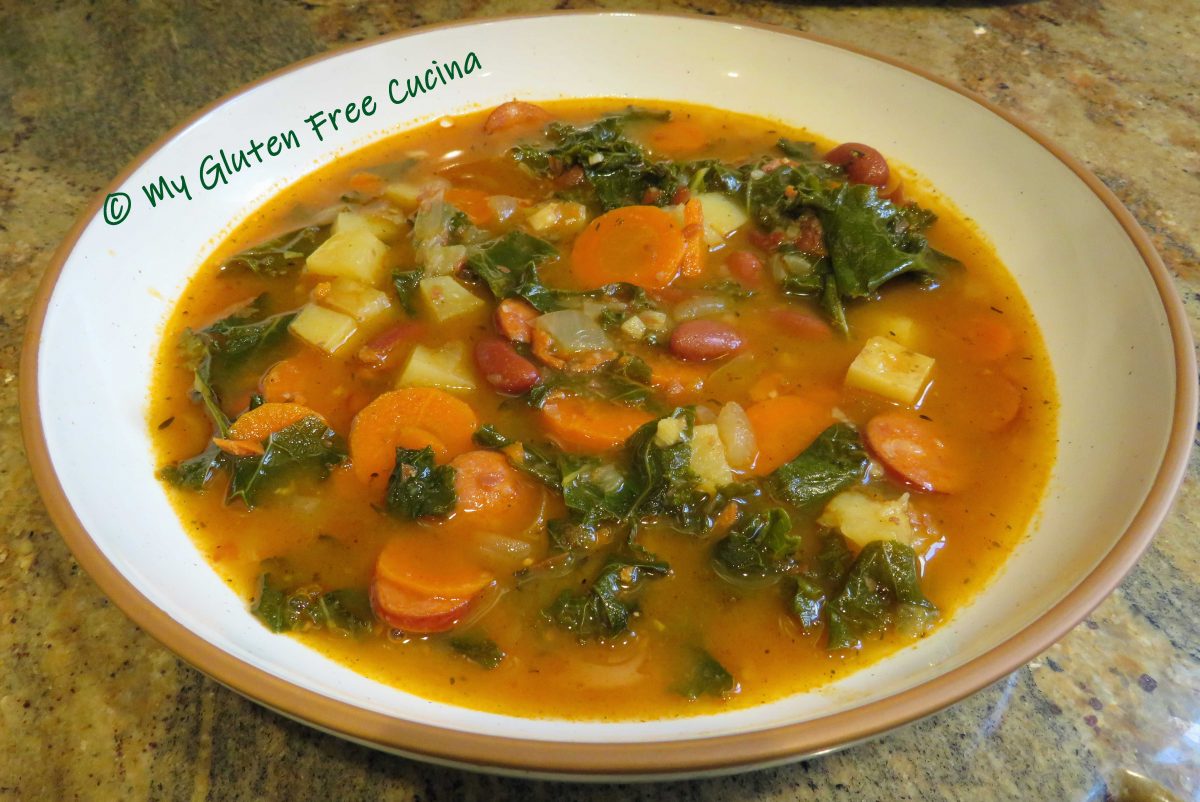
Add the Linguica, stir and cook for 5 minutes.

Add the potatoes, chicken stock, broth, sage, thyme and a few grinds of fresh ground pepper.  Simmer 20 minutes.

Drain and rinse the beans and add them to the pot.  Simmer 10 minutes, then partially puree the soup with a stick blender.  I like to see some chunks of veggies, meat and beans so I just gave it a few pulses.

Add all of the kale, it looks like a lot but it will cook down.

Stir well then cover and simmer 20 minutes longer.

This hearty soup is one of my favorites, and it is filling enough for lunch or a light dinner!

Notes ♪♫ Linguica is a lean Portuguese sausage that is milder than the Chourico typically used in Kale Soup.  Use either one, or a combination.  In this recipe I used Gaspar’s Linguica.  When shopping for prepared meats, chicken broth and stock, always check labels for gluten containing ingredients.

Print This Post Print This Post