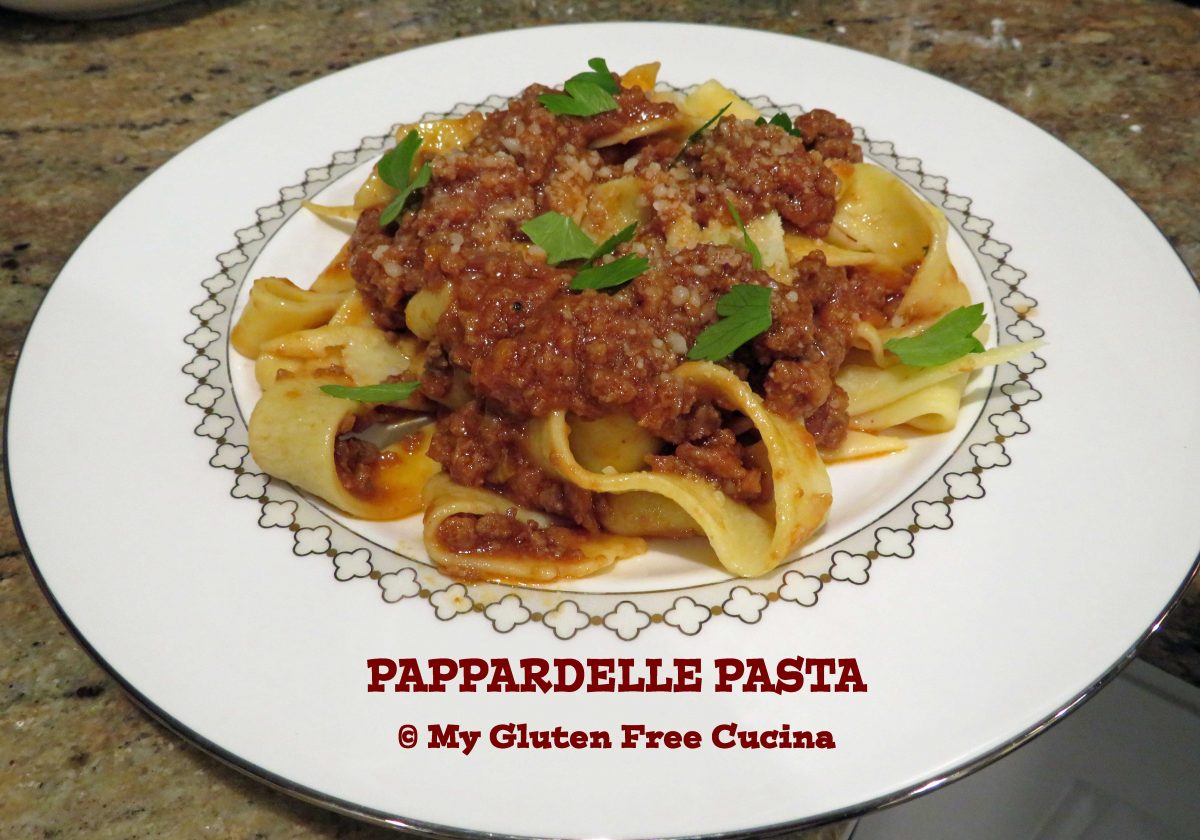
Gluten Free Pappardelle Pasta

Making pasta from scratch is a labor of love, and something I haven’t done in a very long time.  In fact, since my Celiac diagnosis in 2017, I have primarily used box pasta in my recipes.  Not that that’s a bad thing, as we have so many great options today.  But fresh pasta is such a treat!

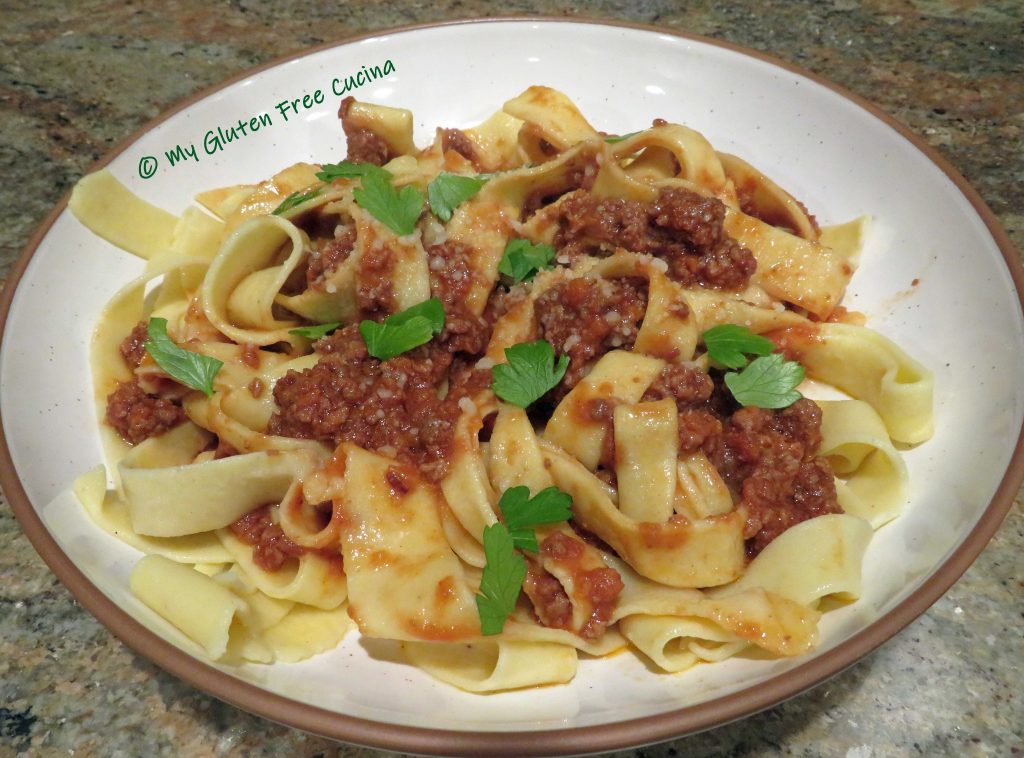
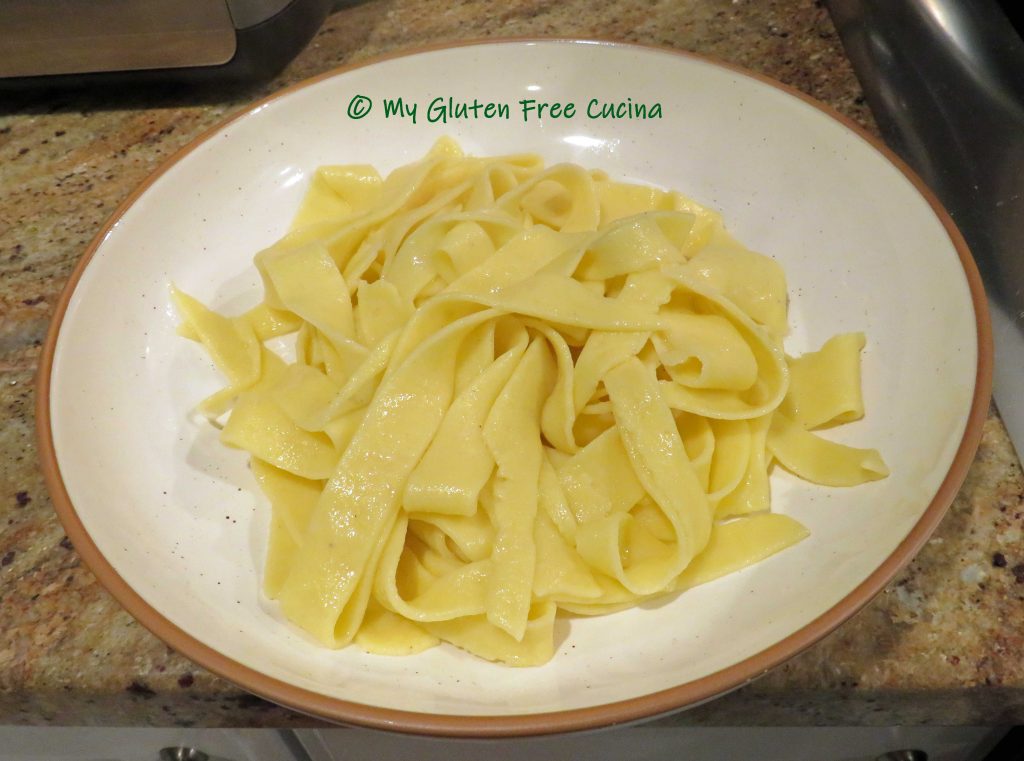
So, this past weekend, it felt really good to get out the KitchenAid and make these beautiful Pappardelle noodles.  If you are gluten free and missing fresh pasta, this recipe is one you must have in your collection!

This post contains affiliate links.

The Lazy Gastronome


Although you can make pasta entirely by hand, there are some helpful tools you can buy to make the job easier.  Here are a few that I used in this recipe.

It takes minutes to make dough in a stand mixer, and I used the pasta roller attachment to create sheets of pasta.

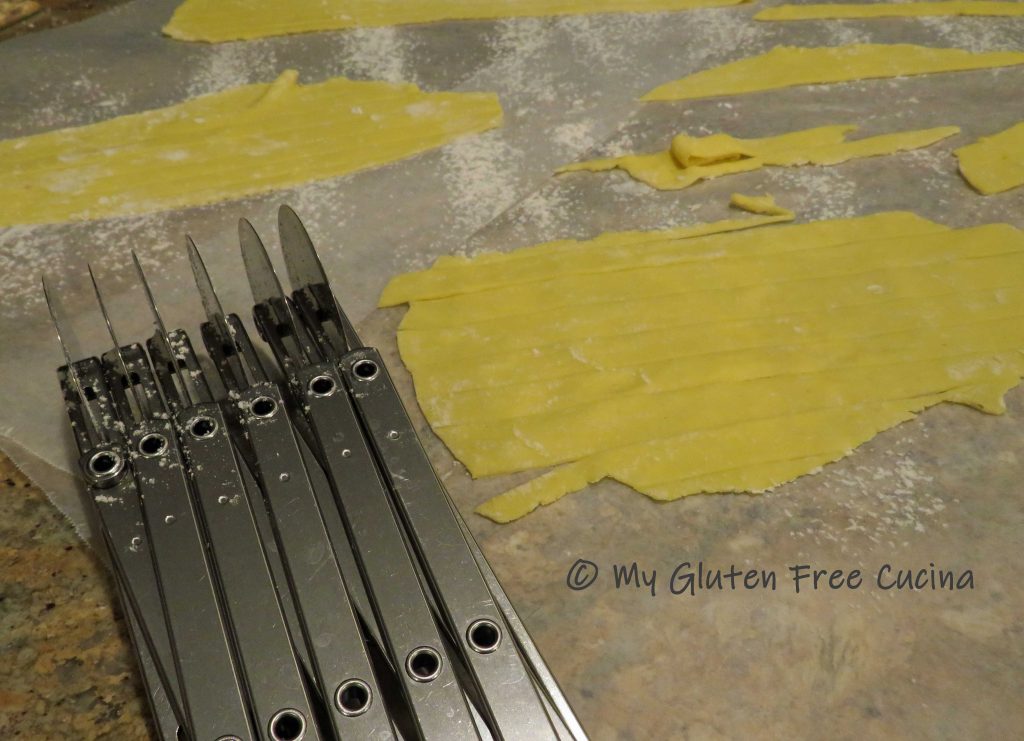
As KitchenAid has yet to make a cutter attachment for Pappardelle, I used a pastry cutter.  It can be adjusted to cut pasta sheets into perfectly even strips, especially helpful if you want to make a wider noodle like Pappardelle.

I used a pasta drying rack to hang my noodles.  This rack has been in my kitchen for many years BC (before Celiac).  So, I covered the wooden arms with plastic wrap to prevent any gluten contamination.  Looks like I will be ordering a new rack, or two!

I made a small batch of just 2 servings for this post.  Dinner was so delicious, next time I will make more!  The recipe can be scaled, to make a dinner for two or a family size platter.  I give you the measurements below for 2, 4, 6 and 8 servings.

Ingredients:

  • gluten free flour blend (I used, and recommend Better Batter)
  • olive oil
  • salt
  • eggs
  • egg yolks

*SHOP BETTER BATTER AND USE MY CODE MGFC30 FOR 30% OFF YOUR NON-SALE PURCHASE!

INGREDIENTS: 2 Servings 4 Servings 6 Servings 8 Servings
Better Batter Flour 70 G 140 G 210 G 280 G
Olive oil 3/4 tsp. 1-1/2 tsp. 2-1/4 tsp. 3 tsp.
Salt 1/8 tsp. 1/4 tsp. 3/8 tsp. 1/2 tsp.
Egg 1 large 2 large 3 large 4 large
Egg Yolk 1 2 3 4

Preparation:

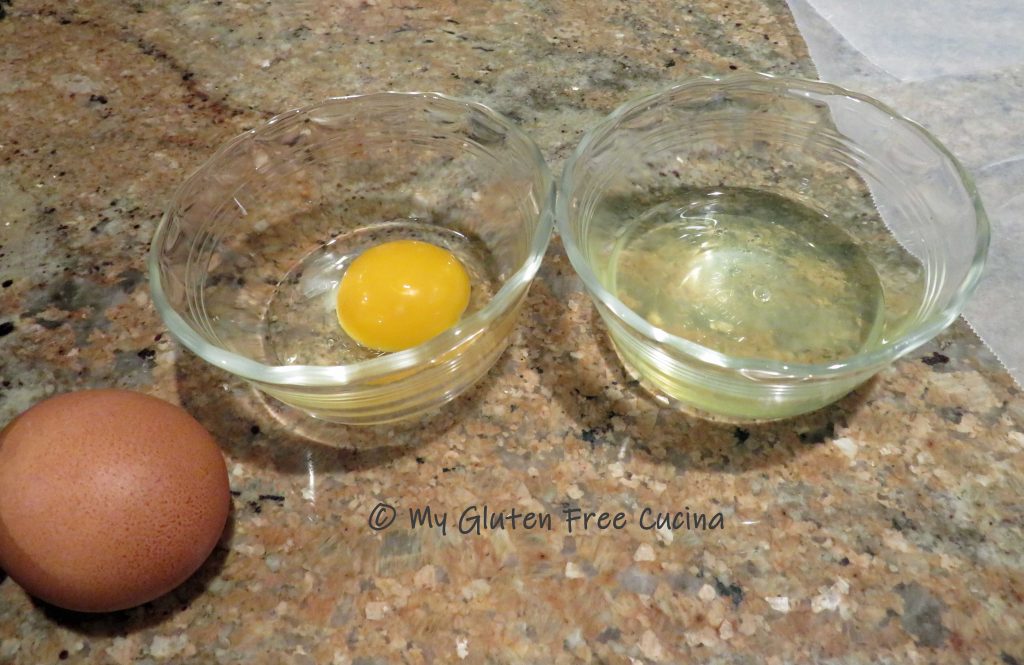
Egg yolks give the pasta a silky rich texture and beautiful color.  Begin by separating the eggs.  Reserve the whites for another use.

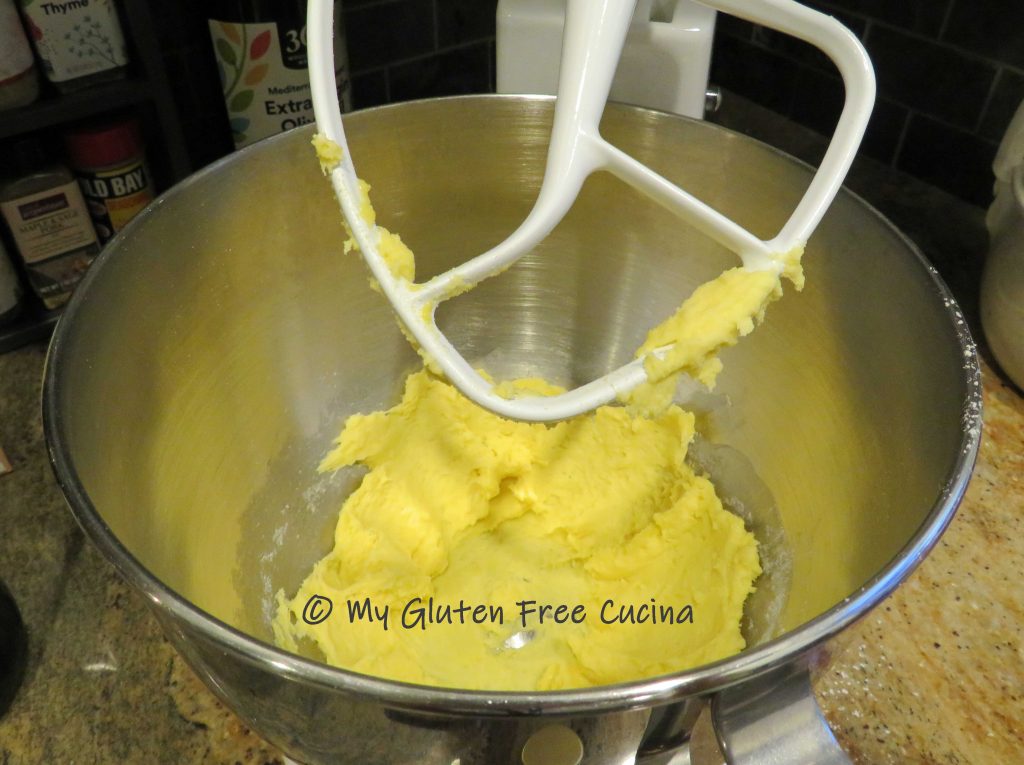
Combine all of the dough ingredients in the bowl of a stand mixer with the paddle attachment.  Weigh the flour, accuracy is important!  I used (and recommend) Better Batter Original Gluten Free Flour to make the pasta dough.  Results may differ if you use another brand, or you may need to adjust the measurements.

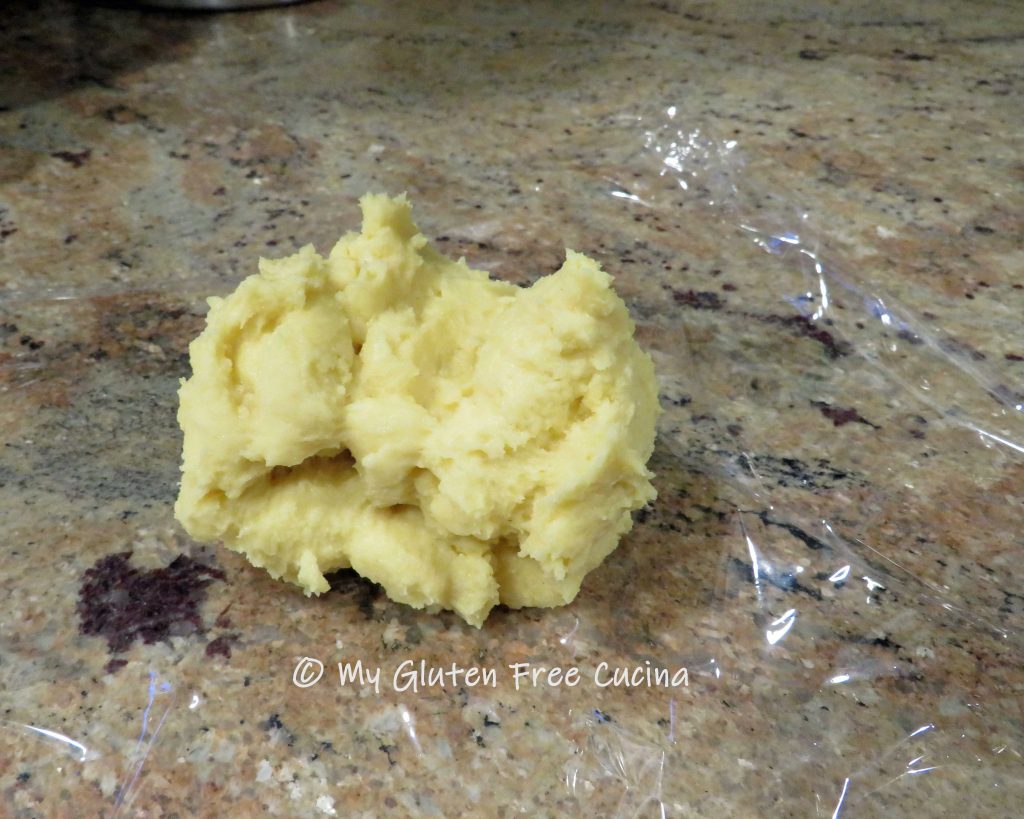
Pat the dough into a ball and sprinkle with flour.  Wrap in plastic wrap and let it rest for 15 minutes.

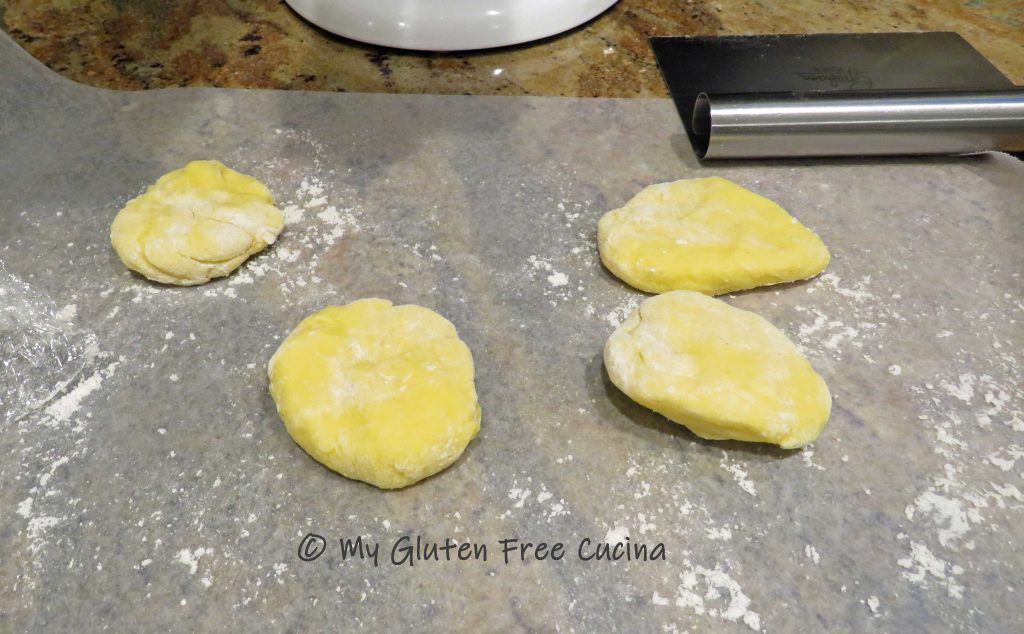
Divide the dough into sections.  For this 2 serving batch, I divided the dough into 4 pieces (adjust if you are making more).  Then take one section at a time and press into a disc.

Use a rolling pin or a pasta roller to roll each disc into a long thin sheet.  If using a pasta roller, remember that gluten free dough is more delicate and prone to tearing than wheat dough, so you will not be able to roll it as thin.  Sprinkle the dough with extra flour as you pass it through the roller to help avoid sticking and breakage.  I was able to roll mine out to the 3rd setting.

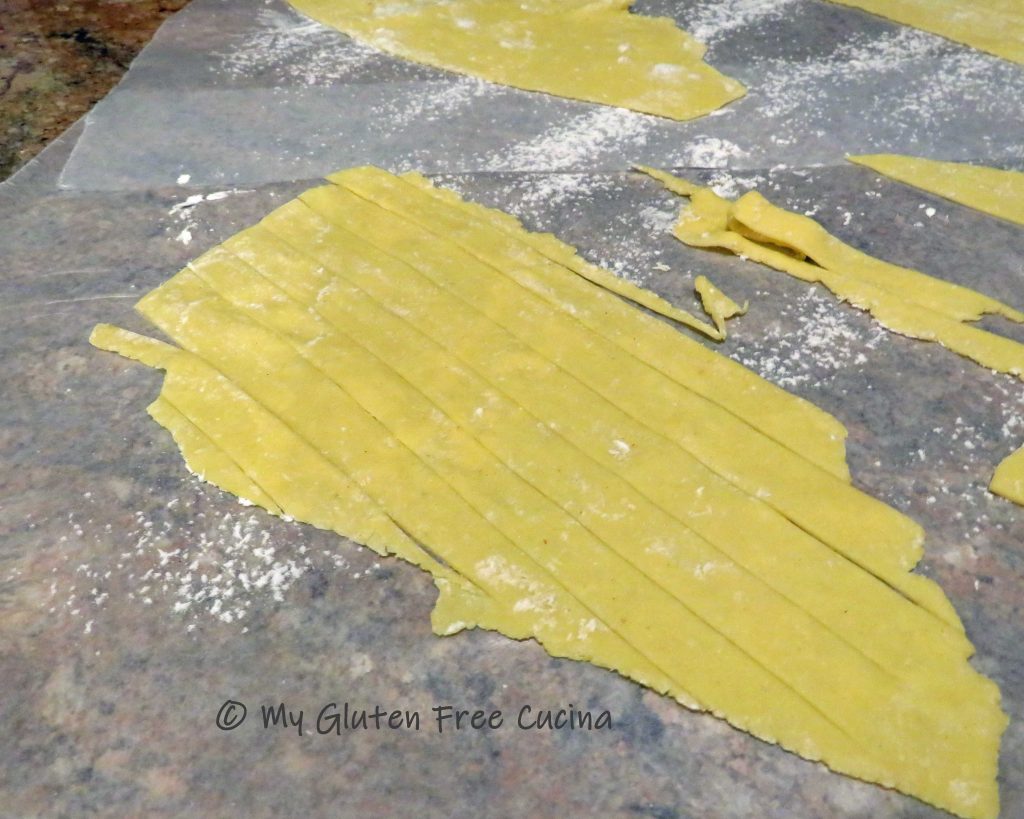
Lay the pasta sheets on lightly floured wax paper.  Use a knife or pizza wheel to cut the sheets into 3/4″ ribbons.  I used a pastry cutter to create perfectly even strips.

Separate the noodles and hang to dry for up to one hour.  They are best enjoyed immediately, but you can refrigerate if you are not ready to cook.

IMPORTANT:  Always follow food safety guidelines.  Egg pasta should be refrigerated within one hour and frozen if you need to store it for more than one day.

I always make my sauce first, so it’s ready when I finish making the pasta.

When it’s GO time, fill a large pot with water, salt generously and bring to a rolling boil.  Add the pappardelle with just a drop of olive oil, stir well and cover so that the water returns quickly to a full boil.  Cook for about 3 minutes, pasta will float to the top when it’s done.  Remember fresh pasta cooks quickly, be careful not to overcook!

Use a spider strainer to gently remove and drain the pappardelle and arrange on a serving dish.

Toss with sauce, and grated cheese.

Notes ♪♫ Pappardelle pairs perfectly with rich, meaty sauces like Bolognese.  Learn how to make a Traditional Bolognese Sauce in this post!

Print This Post Print This Post

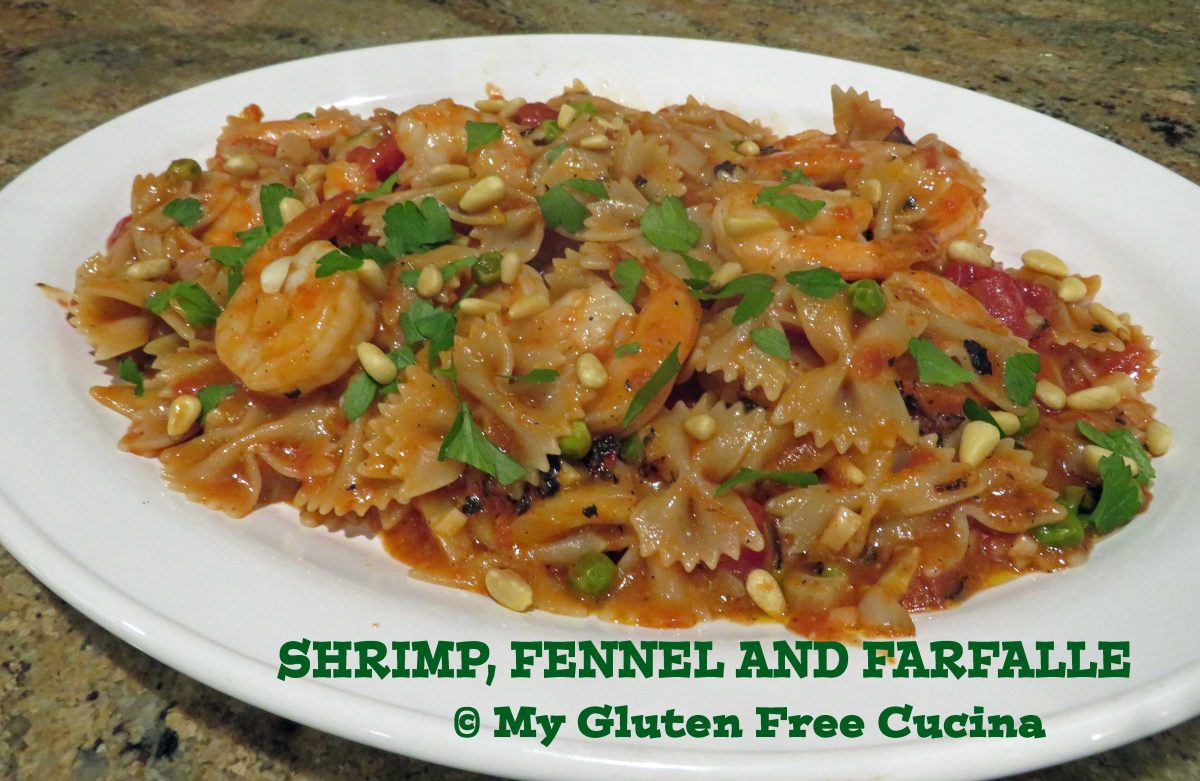
Gluten Free Shrimp, Fennel and Farfalle

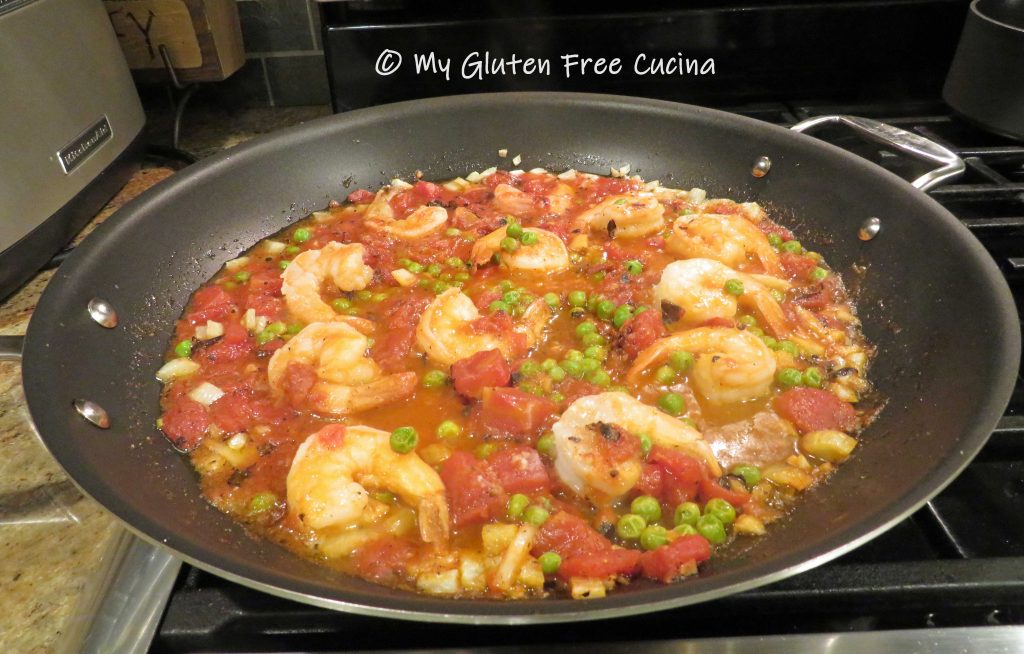
This skillet dinner has all the requirements of an easy weeknight meal.  With just a little prep, a few pantry ingredients and only 2 pans to clean, what’s not to love?

Have you tried fennel?  It’s a common ingredient in many Italian dishes, both in raw and cooked form.  Raw fennel has a pronounced flavor that becomes milder when cooked.

I used a small amount of fennel as an accent flavor in this dish, but you can adjust to your taste.  It is the perfect complement to the shrimp, garlic and tomatoes!

This post contains affiliate links.

Ingredients:

Preparation:

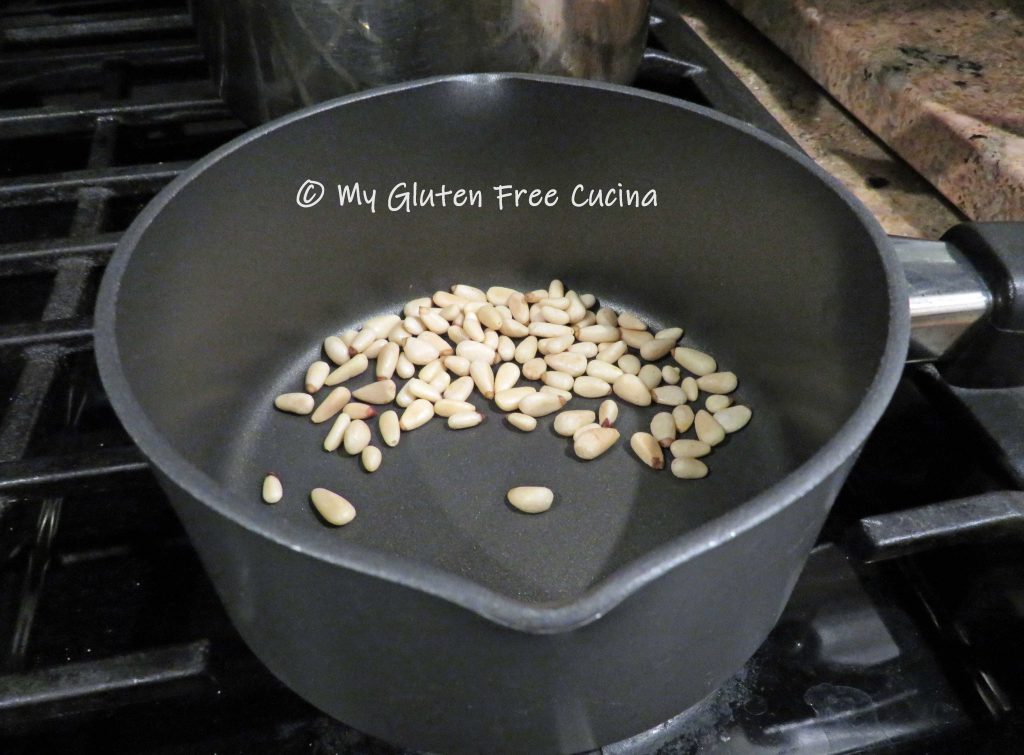
Before you get started, toast the pignoli in a dry skillet until lightly browned and fragrant.  Set aside for garnish.  Heat a pot of salted water for the pasta.

If your shrimp are frozen, rinse them under cool water to thaw.  Peel and devein the shrimp, pat dry and toss with 1 tbsp. white rice flour.

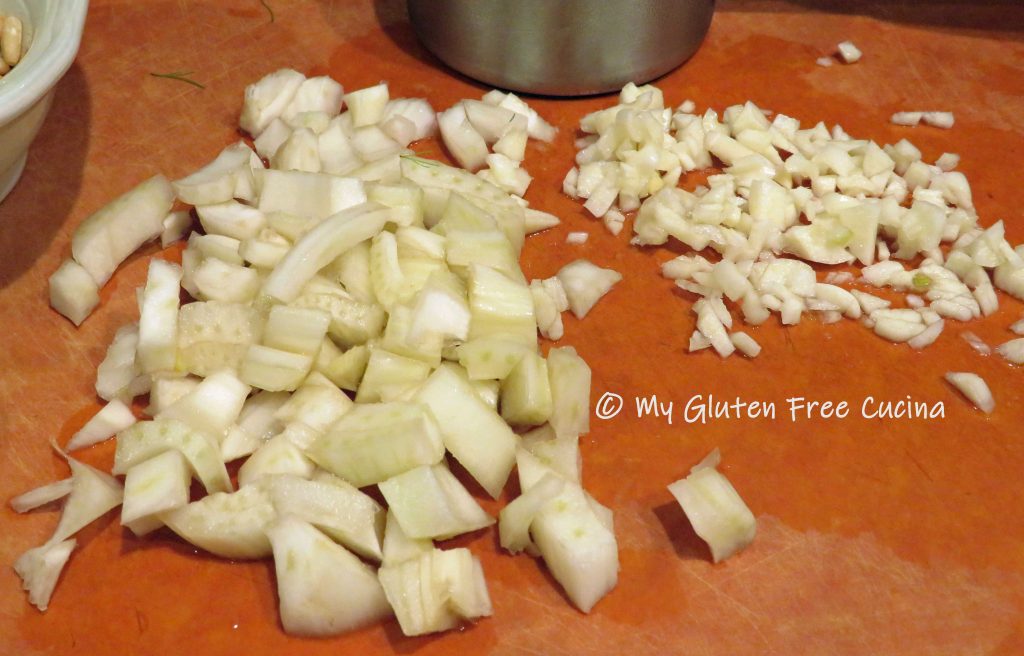
Mince the garlic and chop the fennel into 1/2″ dice.  Heat 2 tbsp. olive oil in a large nonstick skillet.

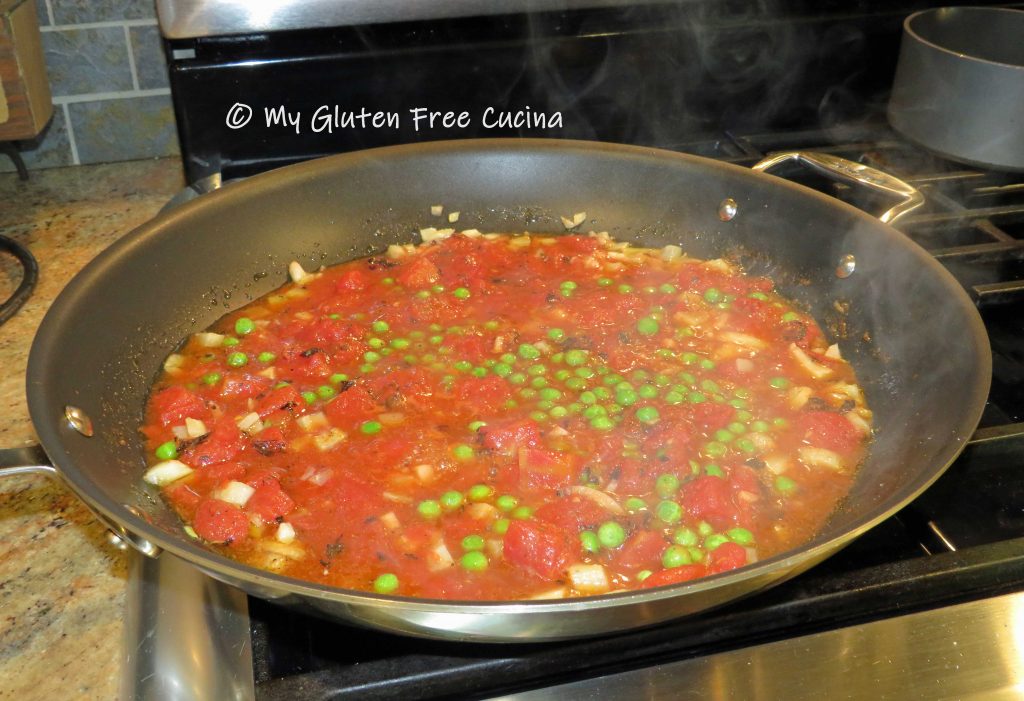
Add the diced fennel and cook for one minute, then add the garlic and cook for 30 seconds.  Stir in the diced tomatoes, peas, wine and seasoning.  Simmer for 10 minutes to reduce the liquid.
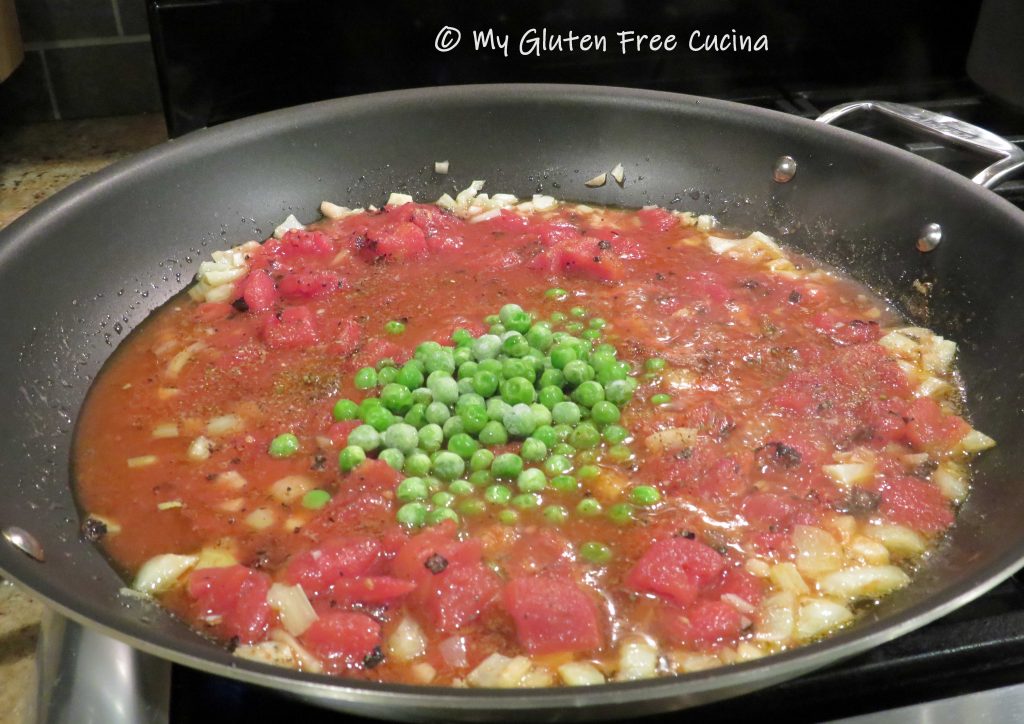
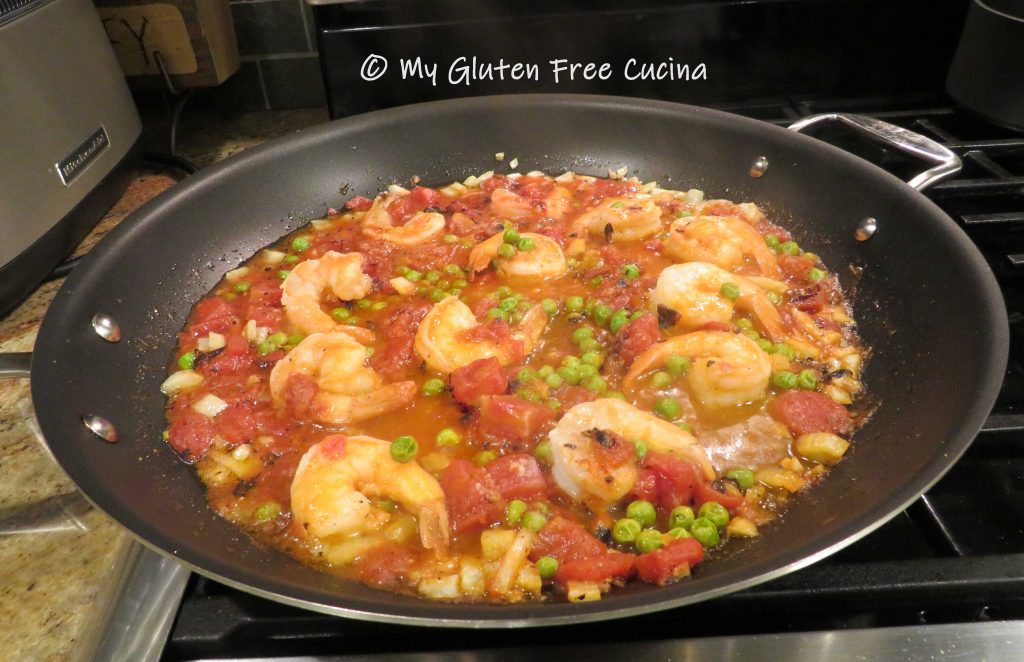
Cook the pasta for 2 minutes less than the package directions.  Add the shrimp to the skillet and cook for a few minutes more, just until the shrimp turn pink.  You can add a small amount of the pasta water if needed.

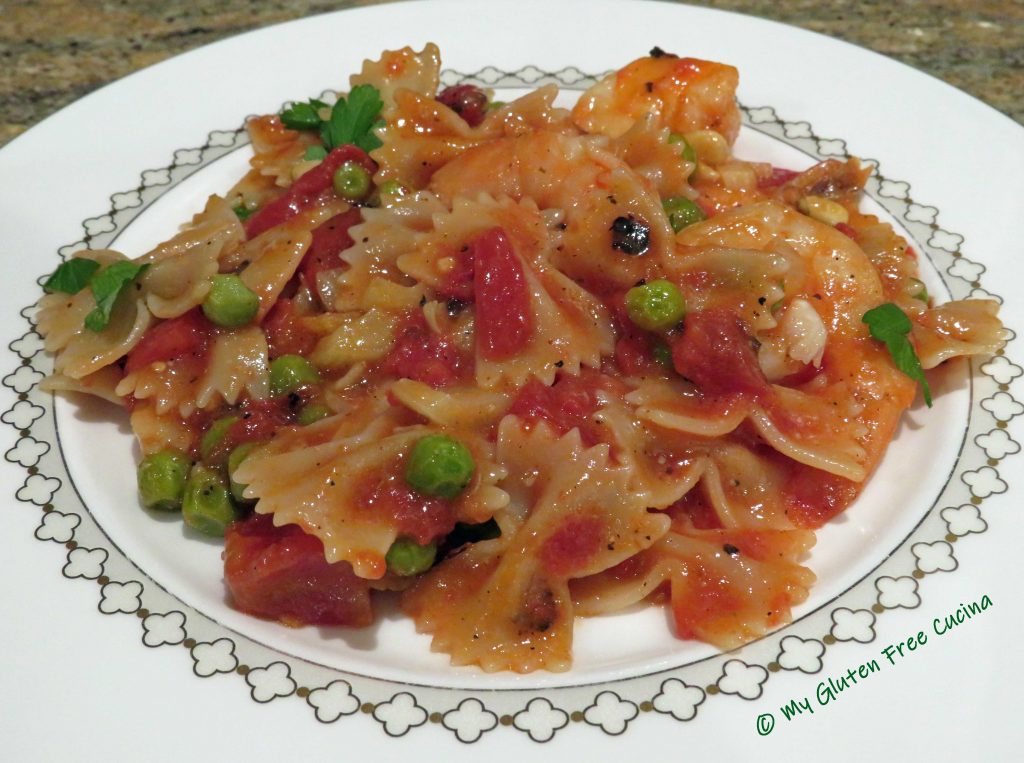
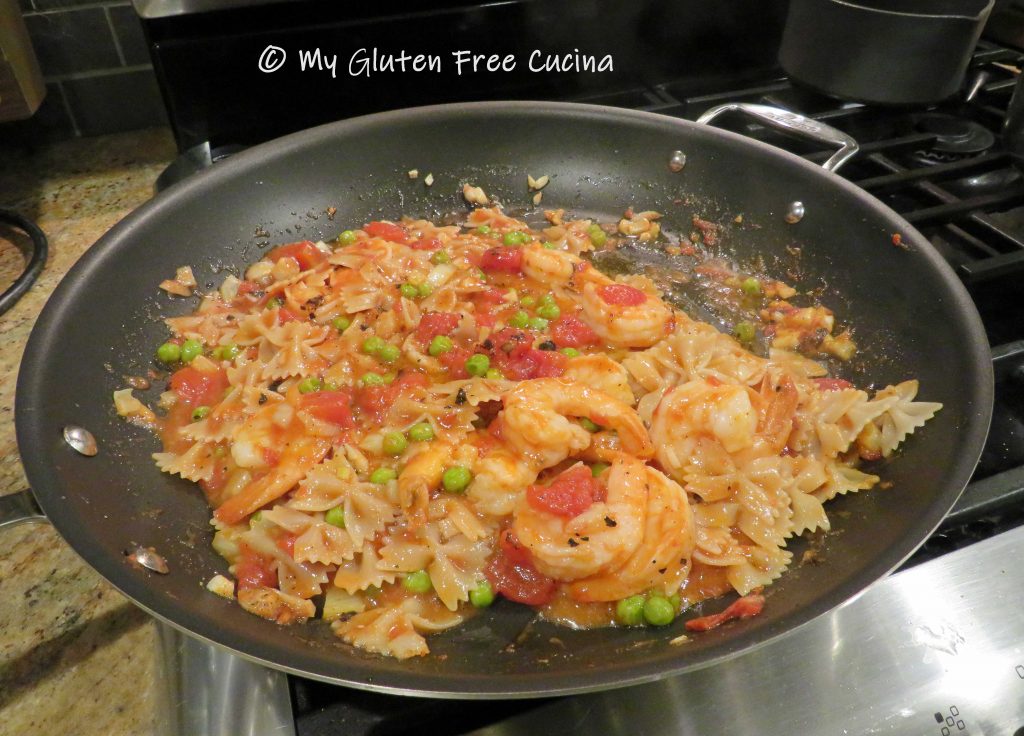
Drain the pasta, add to the skillet and toss well.

Transfer to a serving platter and finish with a drizzle of olive oil.  Garnish with fresh parsley and toasted pignoli.
Notes ♪♫  When you have a well stocked pantry you can always pull a meal together in a hurry.  I always have frozen shrimp, bags of frozen peas and canned tomatoes on hand.  I am Italian, so you know I have a six month supply of gluten free pasta!  Parsley and garlic are also pantry staples, so I really just had to buy the fennel to make this dish.  I hope you will try the recipe!

Print This Post Print This Post

Spinach and Ricotta Beef Rolls

I’m a little obsessed with bundled meat recipes!  I love making Bracciole, a family favorite that takes me back to my mother’s kitchen.  A few weeks ago I made these Italian Skirt Steak Rolls and wow, they were a hit!  For today’s entrée, thin slices of beef are rolled and stuffed with a spinach ricotta filling.  The rolls are then wrapped in prosciutto and baked.  The meat was so tender, this meal would be a wonderful choice for date night or a small dinner party.

Ingredients:

  • 5 oz. bag baby spinach
  • 1 clove of garlic
  • 2 tbsp. olive oil
  • 1 cup ricotta cheese
  • 1/2 lb. prosciutto, thin sliced
  • 1 lb. top round cut into 1/4″ thin slices.
  • 1 tbsp. honey
  • fresh ground pepper to taste

Preparation:

Heat olive oil in a nonstick skillet with a lid.  Cut the garlic clove in half and add to the oil, cut side down.  Cook for 2 minutes over low heat to infuse the oil with garlic flavor.

Add all of the spinach to the skillet.  It looks like a lot but it will cook down.  Cover and cook for 10 minutes total, stirring after 5 minutes.

What did I tell you? 😉

Cool the spinach slightly then stir it into the ricotta (discard the garlic).  Season with fresh ground pepper.

Cover your work surface with wax paper or plastic wrap.  Lay out the beef slices and spread the spinach ricotta mixture over each one.

Starting at the short end, roll the slices up into a bundle.

Next wrap up each meat bundle in 1-2 slices of prosciutto.

Place the bundles in a baking dish coated with cooking spray.

Preheat the oven to 400º.

Bake the meat rolls for 30 minutes, or to when the internal temperature reaches 145º for medium.  Check the internal temperature with a thermometer.

Brush the tops with honey during the last 5 minutes of baking.  Cover and cool slightly before slicing.

Of course, you can just dig right in 🙂

But if you can wait for the bundles to set for 10 minutes you will really see the beautiful spirals of meat when you slice it.  Leftovers were even better the next day!

Notes ♪♫  I hope you loved this recipe as much as we did!  Check out some of my other bundled meat recipes, not only for beef, but chicken and fish too!  Bracciole, Italian Skirt Steak Rolls, Chicken Cordon Bleu, Crab Stuffed Sole.

Print This Post Print This Post


Cheesy Potato Stacks

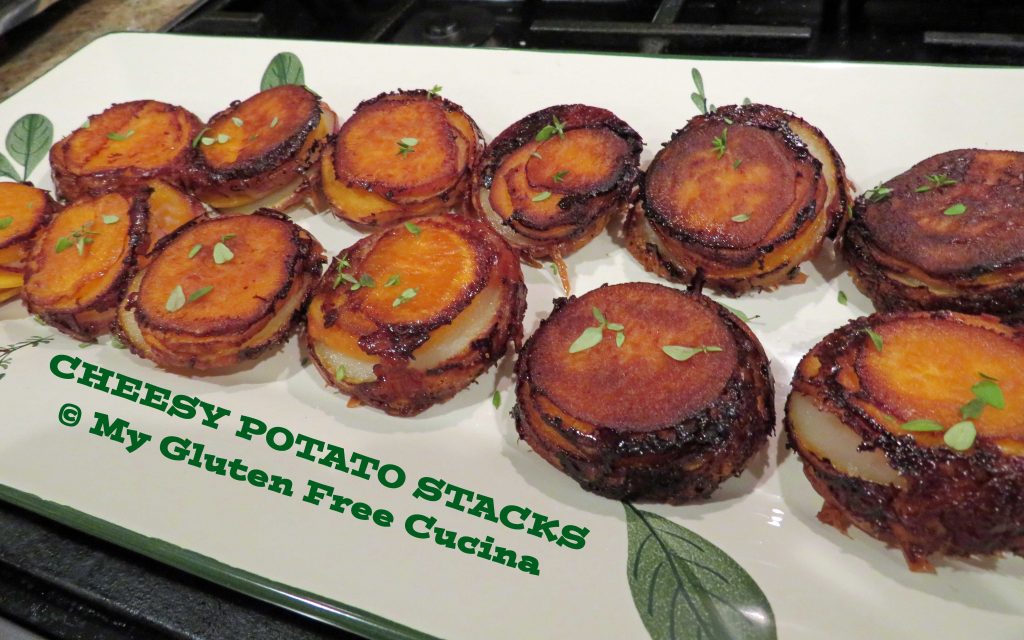
Here is a beautiful potato side for your Thanksgiving table with all the colors of fall.  A festive presentation of white and sweet potatoes, layered and baked gratin style in a muffin tin.  You will want to make a double batch, they are so good everyone will want seconds and thirds!

The Apple Smoked Gruyere that I used in this recipe was just amazing.  The unique flavor is a definitely a little bolder than plain Gruyere, but it was the perfect pairing to this fall inspired potato side.


This post contains affiliate links.

Ingredients:

  • 1 large, sweet potato, peeled
  • 4 small red potatoes, skin on
  • cooking spray
  • 4 tbsp. unsalted butter, melted
  • 1/3 cup 1% milk
  • seasoned salt, to taste (I used Lawry’s reduced sodium)
  • 2 cups shredded Gruyere cheese (I used Red Apple Smoked Gruyere)
  • fresh thyme for garnish

Preparation:

Grate the cheese.  Slice the potatoes very thin, using a mandoline or sharp knife.  Leave some of the skins on for more color and texture.

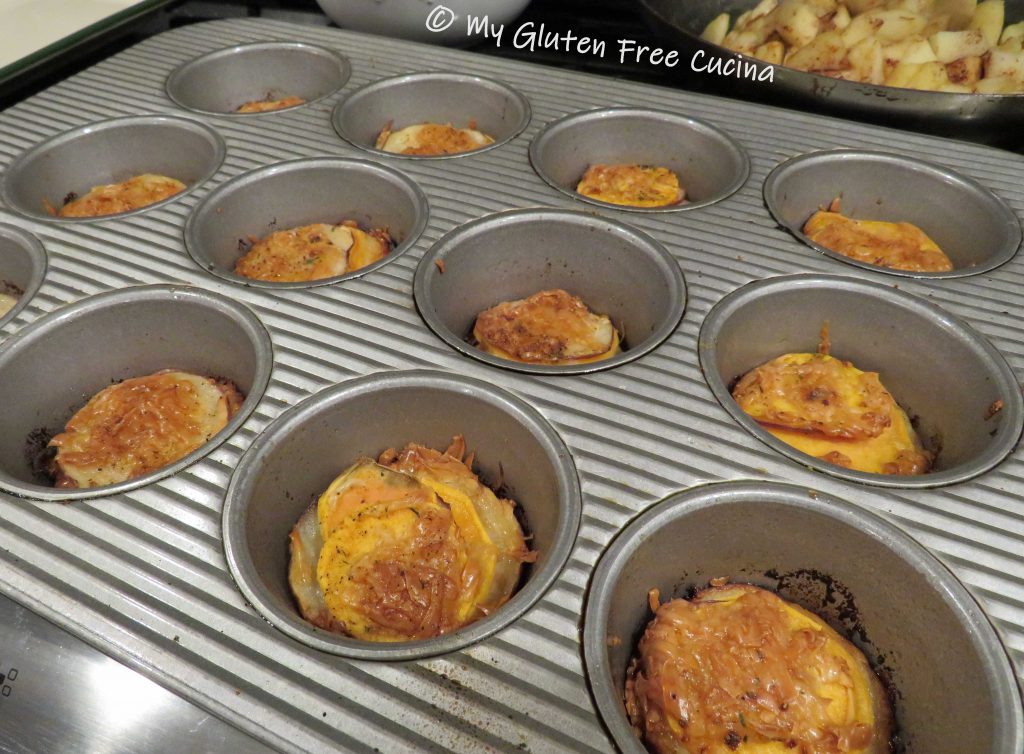
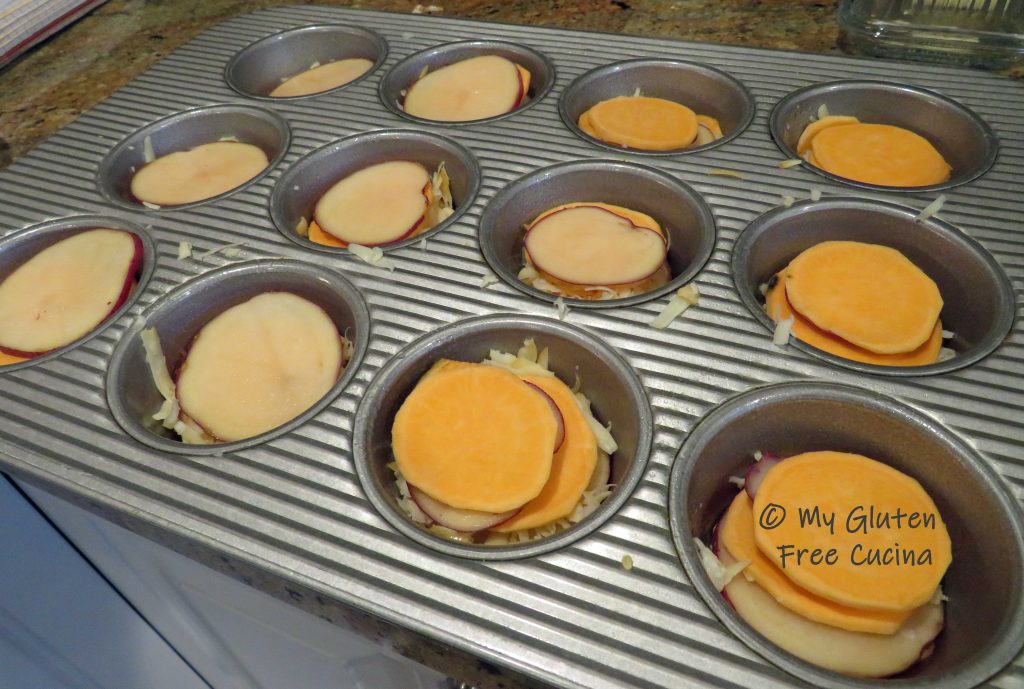
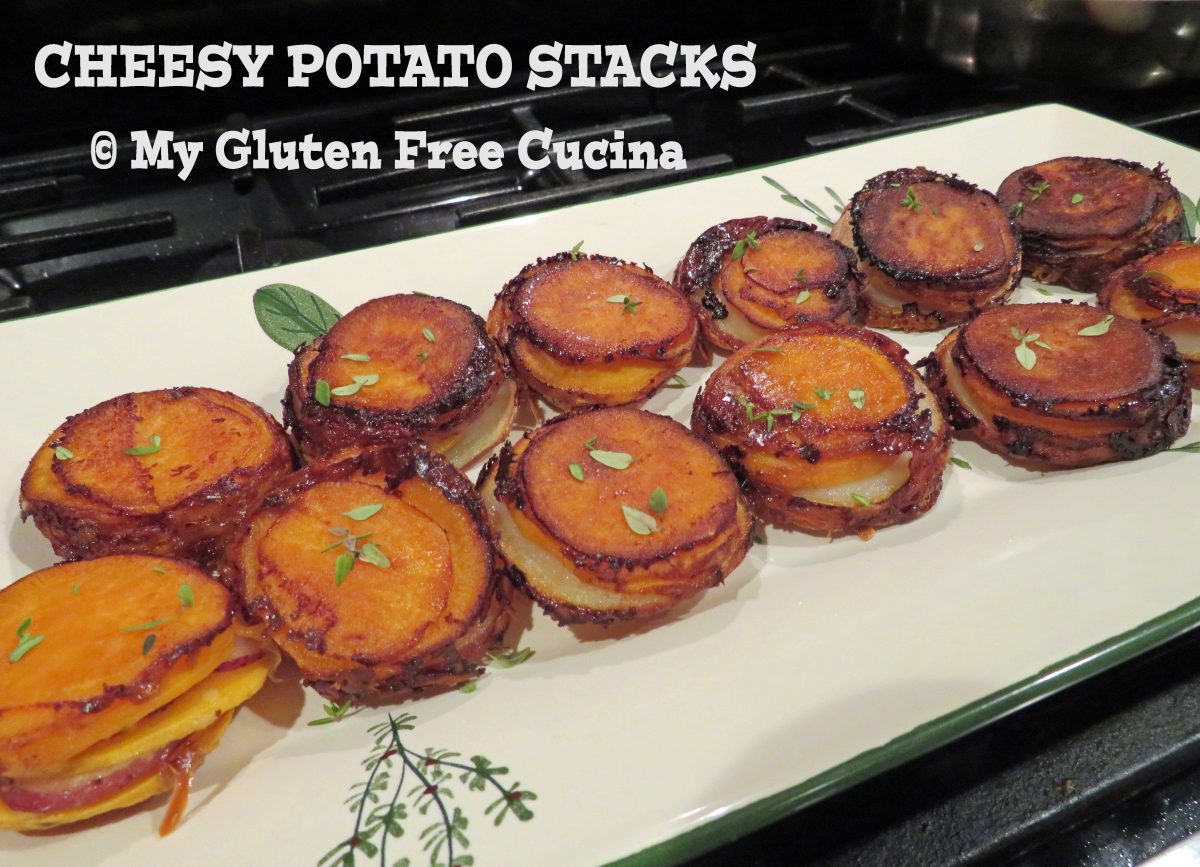
Heat the butter, milk and seasoned salt, whisk well.  Preheat the oven to 400º and coat a 12-cup muffin pan with cooking spray.  Begin layering the potatoes in the muffin cups, alternating white and sweet potato slices until the cups are half full.

 Use the smaller slices on the bottom for the best fit.  Drizzle one tsp. of the butter mixture over each stack and top with half of the grated cheese.
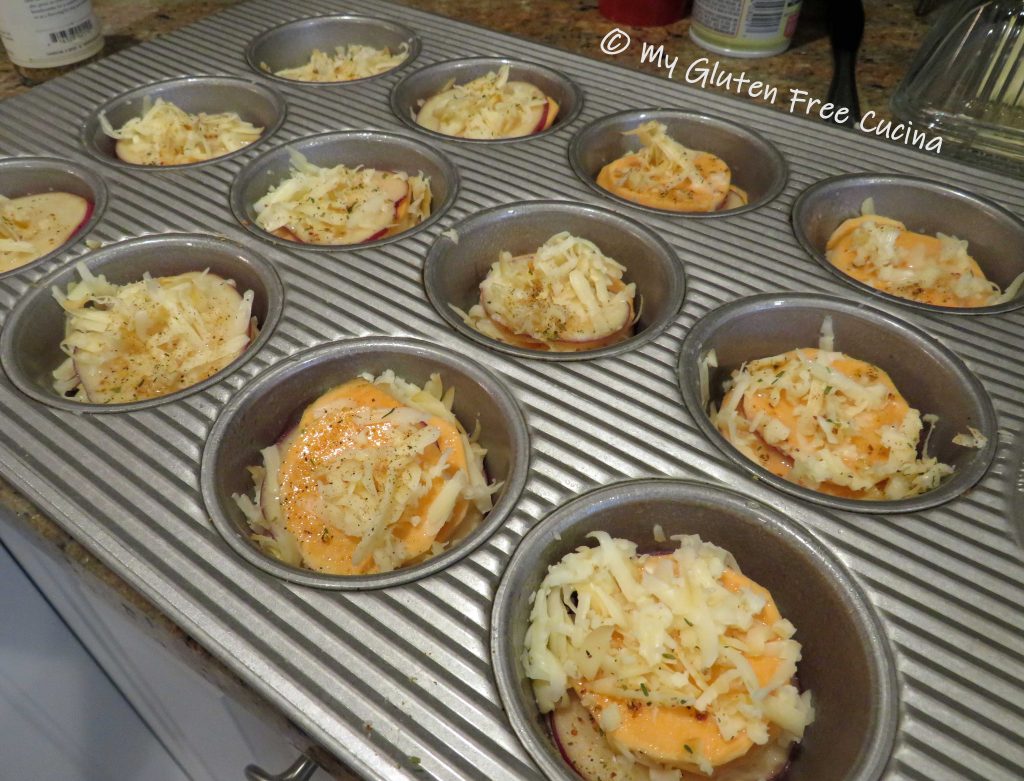
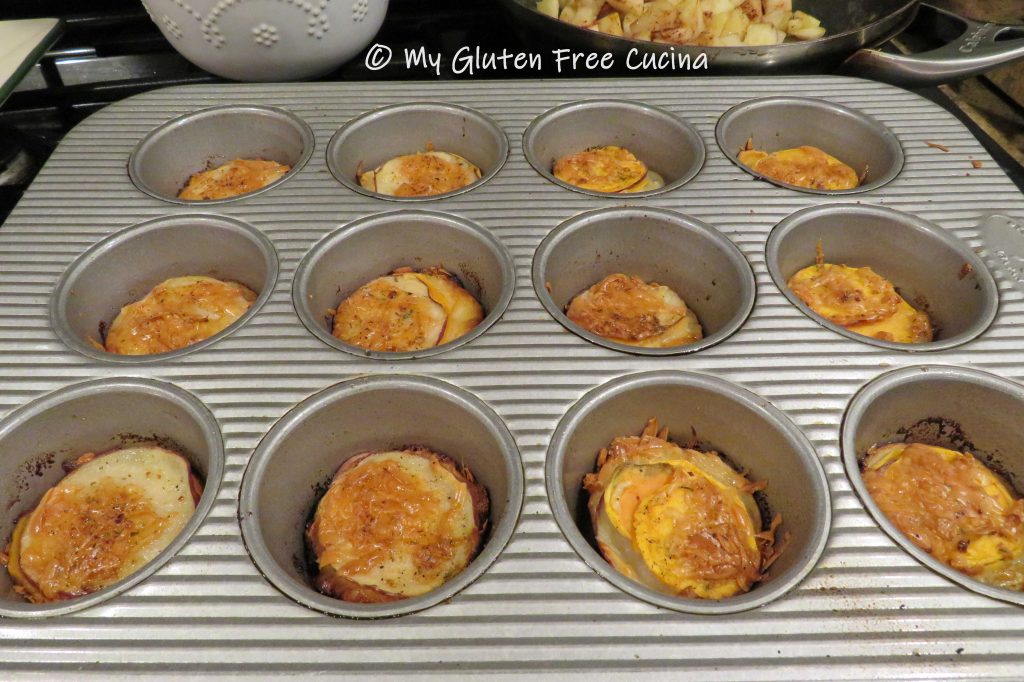
Continue layering the potatoes, mounding them to just a little higher than the top of the muffin cups (they will cook down) and finish with the remaining butter and cheese.  Sprinkle more seasoning over the top.

Bake for 40-45 minutes, until the edges are nicely browned, and the cheese has melted.

To serve, use a spoon to carefully remove each stack and invert onto a serving platter.  Garnish with fresh thyme.

Notes: ♪I entered this recipe in the 2021 Beyond Celiac Gluten-Free Holiday Recipe Contest.  Well guess what, my Cheesy Potato Stacks recipe earned an honorable mention!  You can view it on the Beyond Celiac website where it has been featured, and the recipe was also linked to their November newsletter.  Pretty exciting stuff for this home cook!

Print This Post Print This Post

Harvest Pasta Sauce

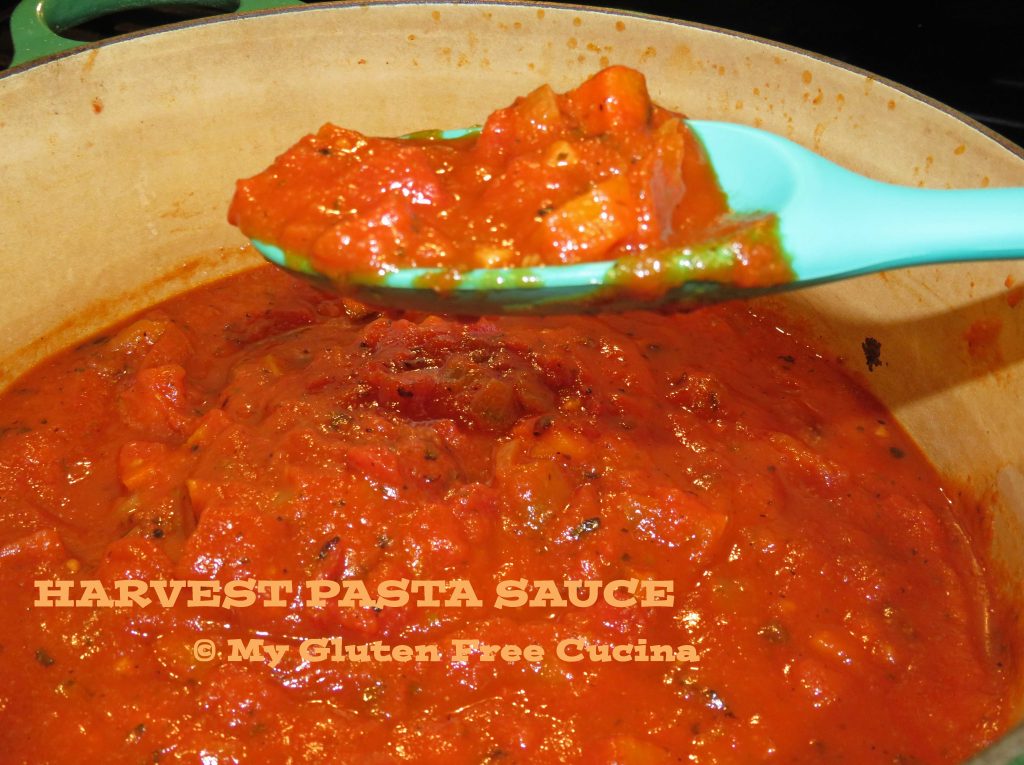
This pasta sauce captures all the colors and flavors of the autumn harvest.  It’s thick and chunky, loaded with veggies!  Roasting the vegetables first is the secret to the amazing flavor.  Make it this weekend for your gluten free Italian Sunday Dinner!

This post contains affiliate links. 

Ingredients:

  • 1/2 medium butternut squash
  • 1 large carrot
  • 1/2 large sweet onion, divided
  • 2 tbsp. olive oil
  • salt and pepper to taste
  • 2 cans (14.5 oz.) fire roasted diced tomatoes
  • 2 garlic cloves, minced
  • 1 tsp. dried basil
  • 1/2 tsp. dried oregano
  • 1/2 tsp. garlic granules
  • 1/2 tsp. onion granules
  • 1/2 tsp. fresh ground pepper
  • 1 can tomato sauce (14.5 oz.)
  • 1/4 cup pumpkin puree
  • 1 tbsp. brown sugar
  • fresh Italian parsley, optional for garnish

Preparation:

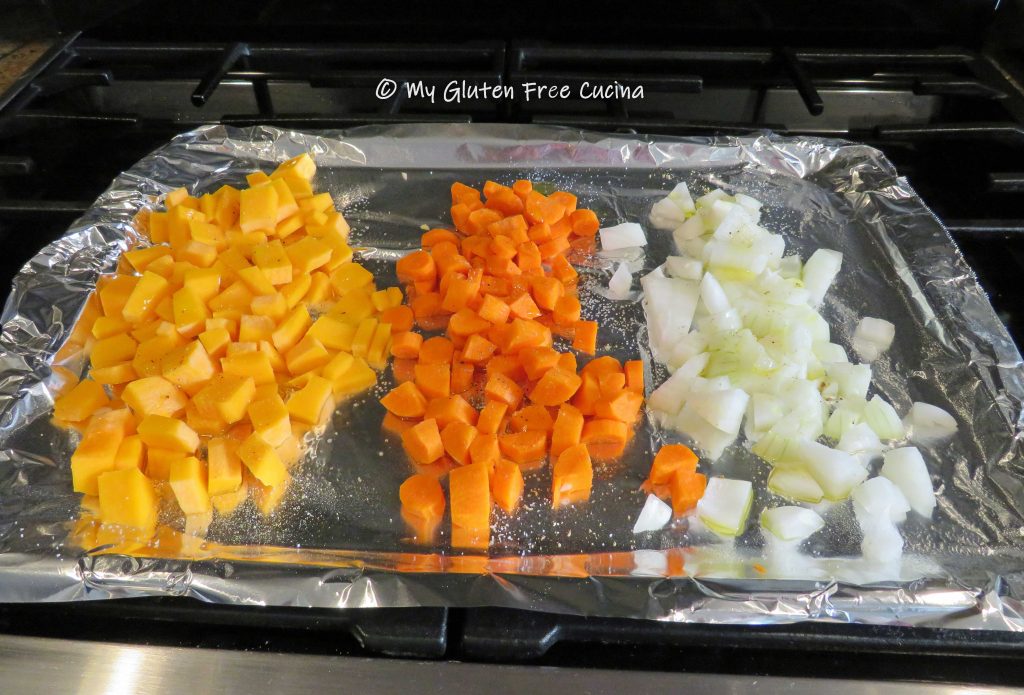
Peel and chop the vegetables into 1/2″ dice.  Spread the squash, carrots and half of the onions on a foil lined baking sheet.  Drizzle lightly with olive oil, and season with salt and pepper.  Roast for 30 minutes at 425º.

While the veggies are roasting, heat 2 tbsp. olive oil in a Dutch oven over medium low.  Add the remaining half of the onions and the garlic.  Stir for about 30 seconds or until fragrant, then add the diced tomatoes with their liquid.  Season with basil, oregano, garlic granules, onion granules and fresh ground pepper.  Simmer 15 minutes uncovered, to concentrate the sauce.
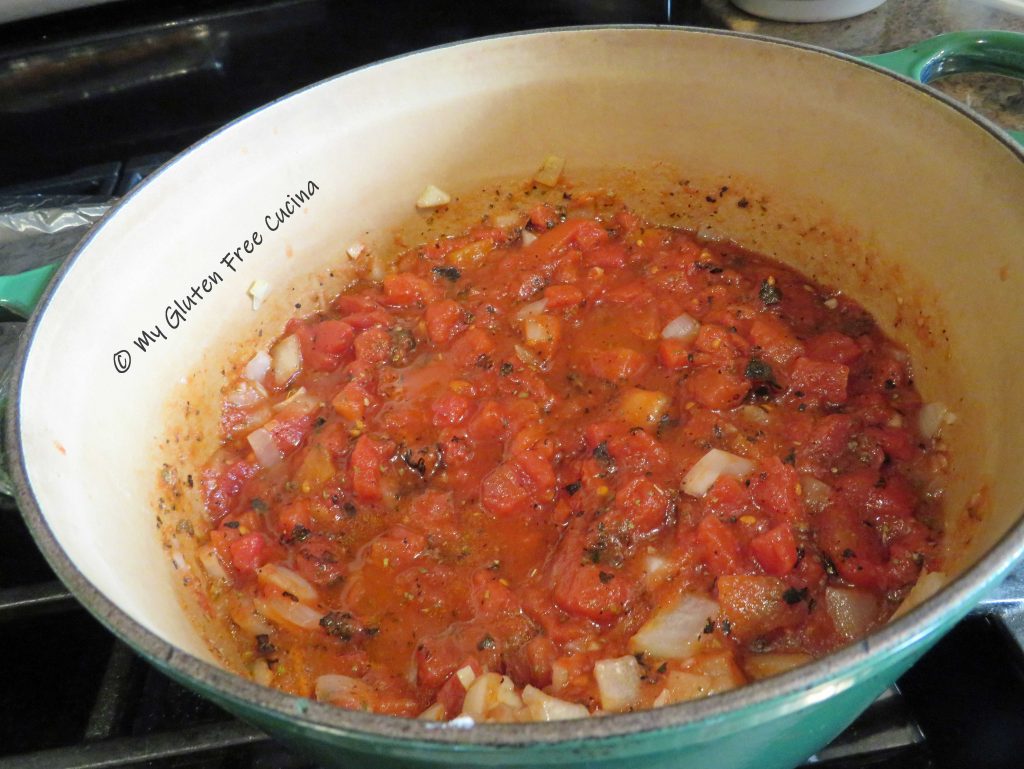
Next add the tomato sauce, roasted vegetables, pumpkin puree and 1 tbsp. brown sugar.  Stir well, cover and turn the heat down to low.

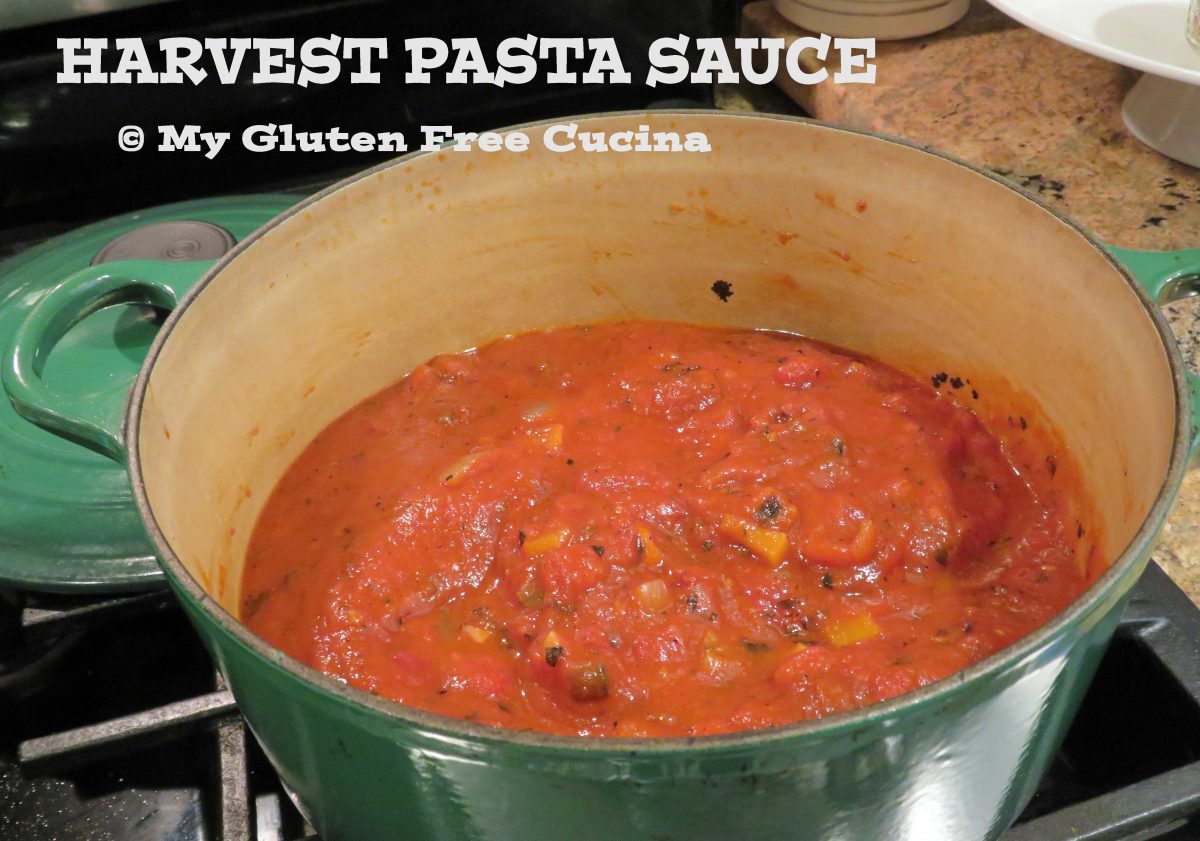
Cover and simmer 2 hours.  I used a simmer mat to keep the sauce on the lowest possible heat and prevent the bottom from burning.
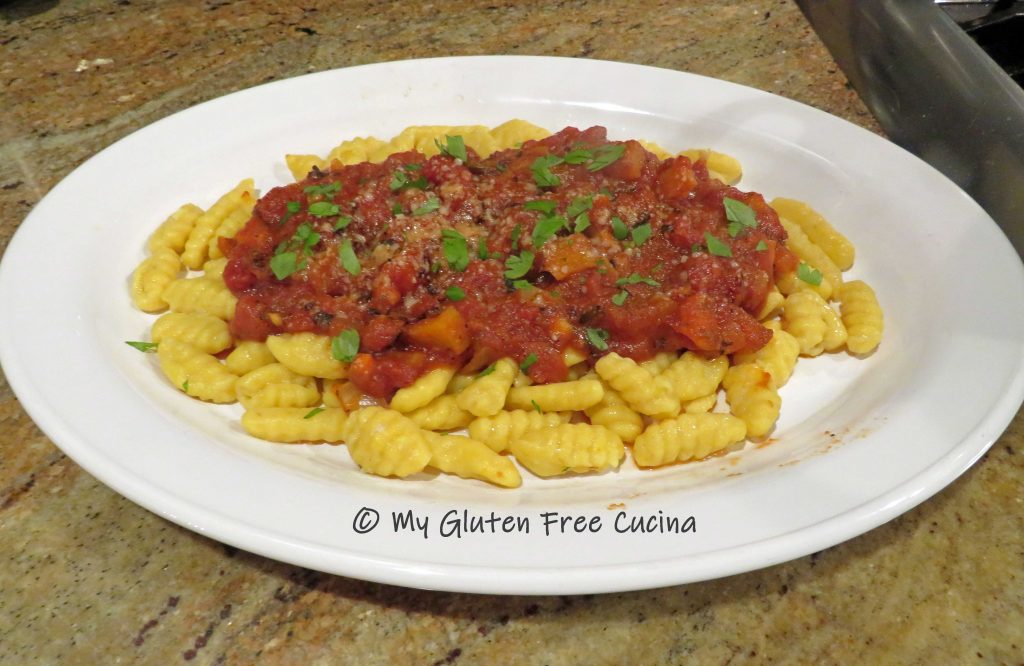
Look at that hearty sauce!  The carrots, pumpkin and butternut squash give it so much natural sweetness.  Serve over your favorite gluten free pasta, with grated cheese and fresh parsley.

Friends, what a meal!  I would not hesitate to serve this to company, or even as a holiday first course.  Oh, and did I catch you eyeing that pasta?  It’s a special one, that I made just for pairing with this sauce.  Check out the recipe here!

Notes ♪♫  In addition to being gluten free we are also a low sodium household.  I used unsalted tomatoes in this sauce, as I do with most recipes to have better control over the salt content.


Print This Post Print This Post

Sheet Pan Breaded Pork Chops, Sweet Potato and Delicata Squash

It’s sheet pan dinner night, and Mr. Cucina (our official dishwasher) is going to be happy!  With just one baking sheet that I lined with foil, he is going to be finished with cleanup in minutes.  Of course I took care of the prep bowls before we had dinner, he deserves a night off!

Dinner for two

This post contains affiliate links.

Ingredients:

Preparation:

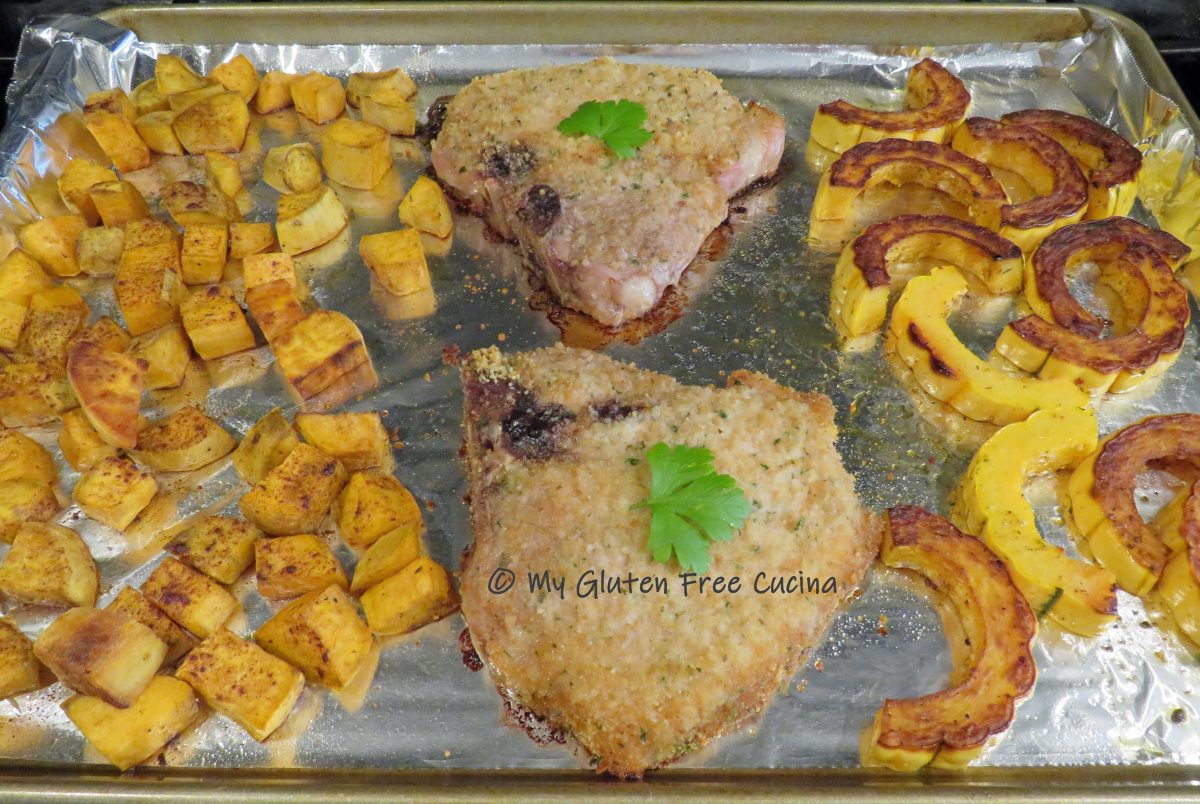
Ready?  Start by preheating your oven to 375º.  Line a half sheet pan with foil and mist with cooking spray.  The cook time is 40 minutes total, with the potatoes going in for a 10 minute head start, followed by the pork chops and squash cooking for the remaining 30 minutes.

For the potatoes

Peel and cut the sweet potato into cubes, toss with canola oil and sprinkle with maple seasoning and cinnamon.  Arrange the potatoes on one side of the pan in an even layer.  Give them a 10 minute head start in the oven while you prepare the pork chops and Delicata squash.

For the pork chops

This is how my mother made pork chops when I was young.  At that time she belonged to weight watchers, and this was her lightened up version of traditional breaded and fried pork chops.  Now I make mine the same way, with a simple substitution of gluten free seasoned breadcrumbs for regular.  Set up two breading trays or bowls with the skim milk and the breadcrumbs.  Dip each pork chop in the skim milk, then in the breadcrumbs.  Add them to the center of the sheet pan.

For the Delicata squash

Wash the squash (you can eat the skin).  Remove the ends, cut it in half lengthwise and scrape out the seeds.  Slice into half moons, toss with olive oil and Italian seasoning.  Spread the squash out on the other side of the sheet pan in a single layer.

Once the pork chops and squash are in the pan, continue baking for another 30 minutes.  Use tongs to toss the potatoes and turn the squash halfway through.

Garnish with parsley leaves and bring it to the table right in the pan!

Notes ♪♫  I love sheet pan meals like this!  The variations are endless, here is another spin on the 3 course pork chop dinner, check it out here!  Or, when you need a veggie side to feed a crowd check out my beautiful sheet pan roasted veggies!

Print This Post Print This Post

Hash Brown Waffles

Check out these fun, easy to make Hash Brown Waffles.  We have potatoes fairly frequently at our house so I am always trying to keep things interesting!

What makes this recipe so easy?  I used frozen, shredded hash brown potatoes.  Not only do you avoid having to shred them yourself, but you can skip the step of wringing out all the moisture.

I love using hash browns in breakfast casseroles.  Check out my Gluten Free Sausage and Hash Brown Casserole.  I made it for Easter brunch this year and it was delicious!  But that big bag of hash browns was way too much for the recipe.  So when I noticed the half empty bag sitting in back of the freezer I thought I’d try something different to use them up.

When shopping, look for plain, unseasoned shredded hash browns.  Not all hash browns are gluten free, so check for the gluten free label or verify that there are no gluten containing ingredients.

4 Servings, Serving size = 1 waffle

This post contains affiliate links.

Ingredients:

  • 1/2 lb. (8 oz.) frozen gluten free shredded hash brown potatoes
  • 1 tbsp. canola oil
  • 1/4 tsp. garlic granules
  • 2 tsp. dried onion flakes
  • 1/4 tsp. seasoned salt
  • salt and fresh ground pepper, to taste
  • 1/8 tsp. paprika
  • 1 egg
  • cooking spray

Preparation:

Take the hash browns out to thaw about 30 minutes ahead of time, they do not have to be completely defrosted.

Whisk together the egg, oil and seasonings.

Add the hash browns and stir together with a spatula until evenly coated.

Heat the waffle iron to 350º and mist with cooking spray.  Scoop the hash brown mixture onto the waffle plate and spread them out in an even layer with a spatula.  Use all of the hash browns, they will cook down quite a bit as the potatoes release their liquid.

Cook for 10 minutes, then check every few minutes to see how they’re doing.  Mine took about 20 minutes total to get nicely browned with crispy edges.

Gently lift one corner and slide a spatula underneath to move the waffles to a cutting board.

Use a knife or pizza wheel to break waffles into 4 sections.

The waffles are best eaten immediately.  They will lose some of their crispiness as they cool off.

If you have leftovers, they can be reheated on a pizza stone, in an air fryer, or in the toaster (toaster bags are recommended!).

Notes ♪♫ Who knew that you could make something other than waffles on a waffle iron?  Since I got my new waffle maker, I’ve had such fun experimenting.  Check out my Gluten Free Crab Cake Waffles, and of course my favorite Gluten Free Banana Waffles!

Print This Post Print This Post

Gluten Free Veal Piccata

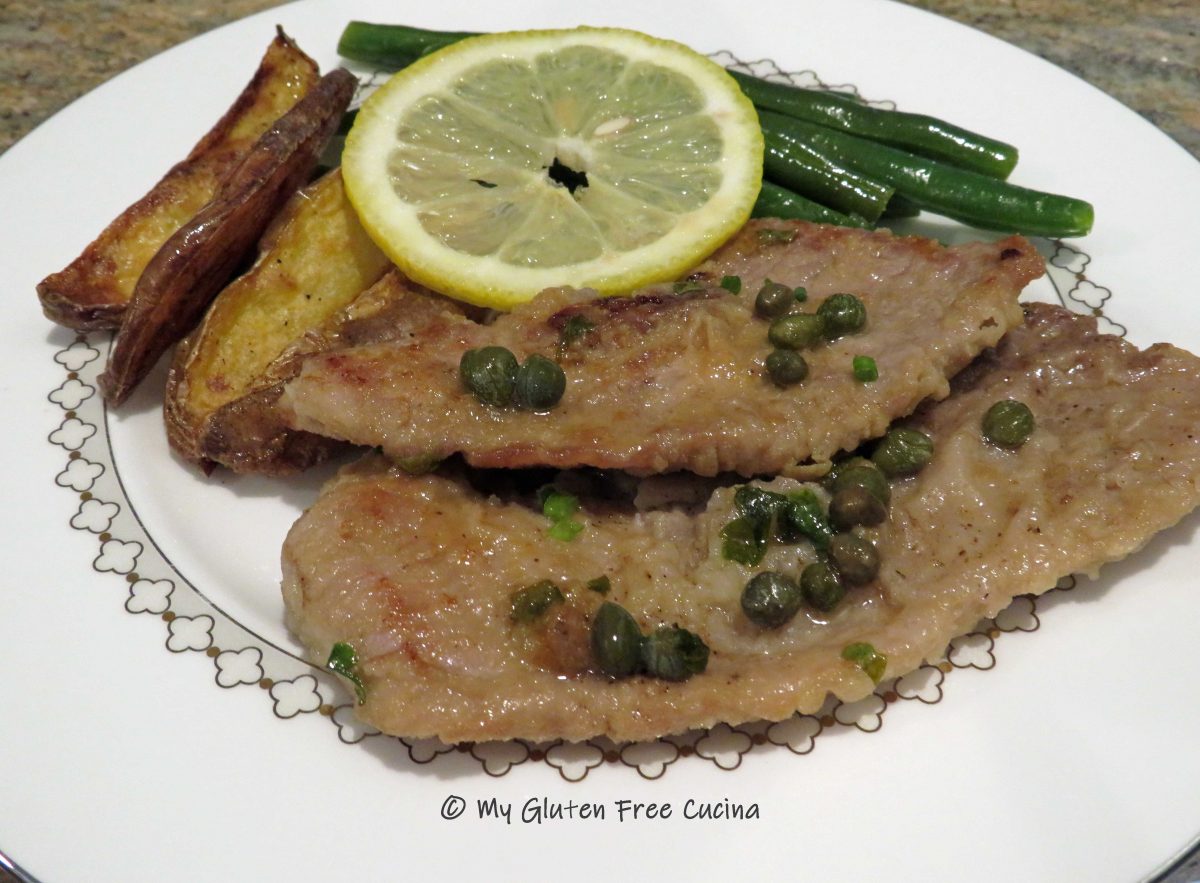
I wrote this post a few years ago, when we finally went out to dinner after many long months of staying home during the Covid pandemic.  Of course I chose a restaurant with gluten free options, in fact most of the menu could be made gluten free upon request.  I ordered the Veal Piccata, and it was SO good!  I enjoyed every single bite, so much in fact that I decided to recreate that meal at home.  Here is my version and I dare say it was just as good as the restaurant!

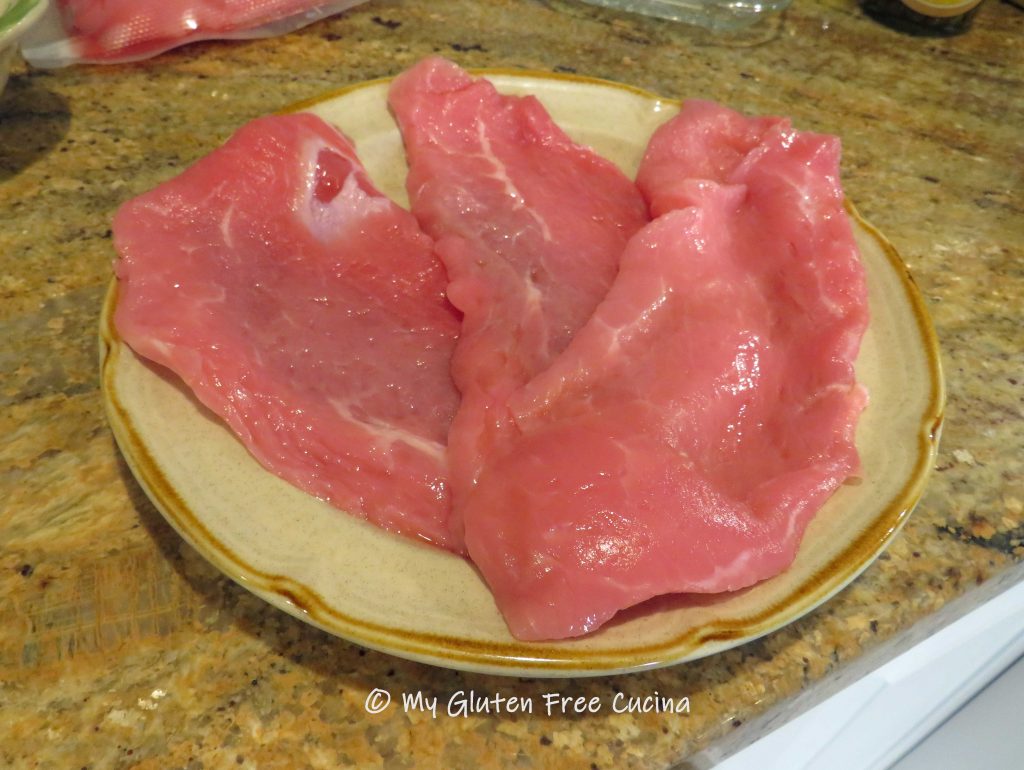
I am fortunate to live in an Italian neighborhood, where thin sliced veal cutlets are readily available at local markets.  This is a huge time saver, since I did not have to pound the cutlets to the right thickness.  Look for veal cutlets that are 1/4″ thick, or you can place them between 2 sheets of plastic wrap and pound them with a meat mallet.  If veal is not available where you live or just not in your budget, you can make this recipe with chicken.

4 Servings

This post contains affiliate links.

Ingredients:

  • 16 oz. thin sliced veal cutlets
  • 1/4 cup white rice flour
  • fresh ground pepper
  • 2 tbsp. olive oil + more as needed
  • 1/2 cup gluten free chicken stock
  • 1/4 cup white wine (I used pinot grigio)
  • 1 lemon, divided use
  • 4 tsp. capers
  • 1 tbsp. butter
  • 1 tbsp. fresh Italian parsley

Preparation:

Divide the lemon in half, cut one half into slices for serving and reserve the other half for its juice.

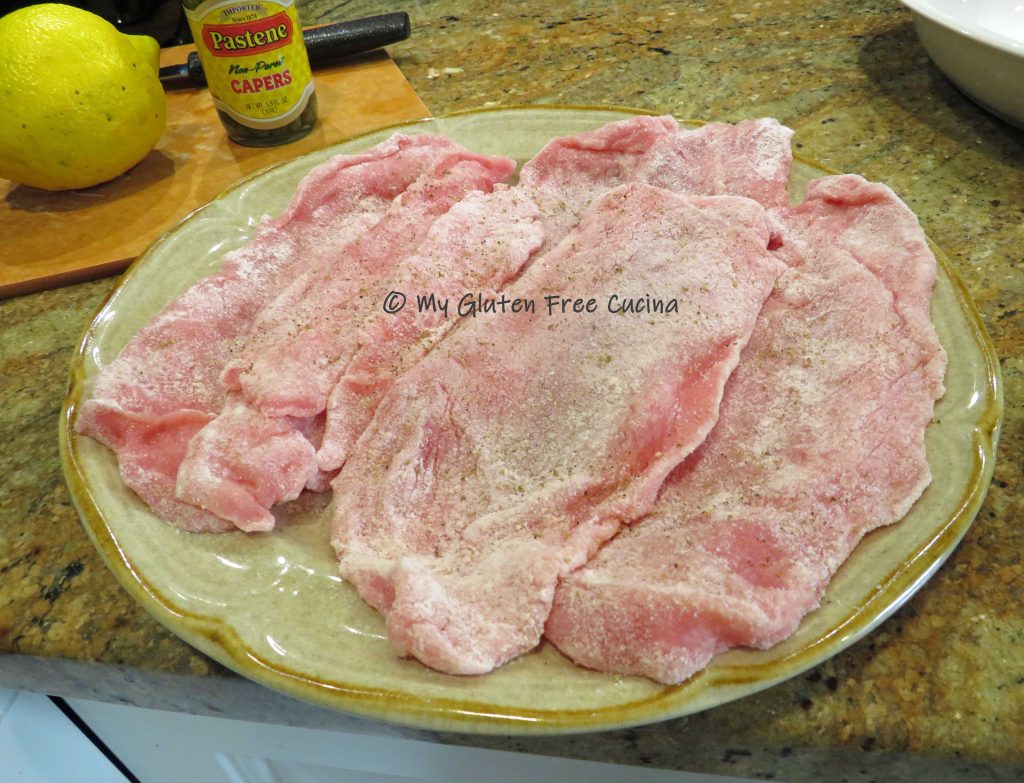
Pat the cutlets dry.  Dredge them in rice flour, shaking off the excess.  Season with fresh ground pepper.

Heat olive oil in a large nonstick skillet.  Cook the cutlets 2 minutes per side in a single layer.  Cook in 2 batches if needed.

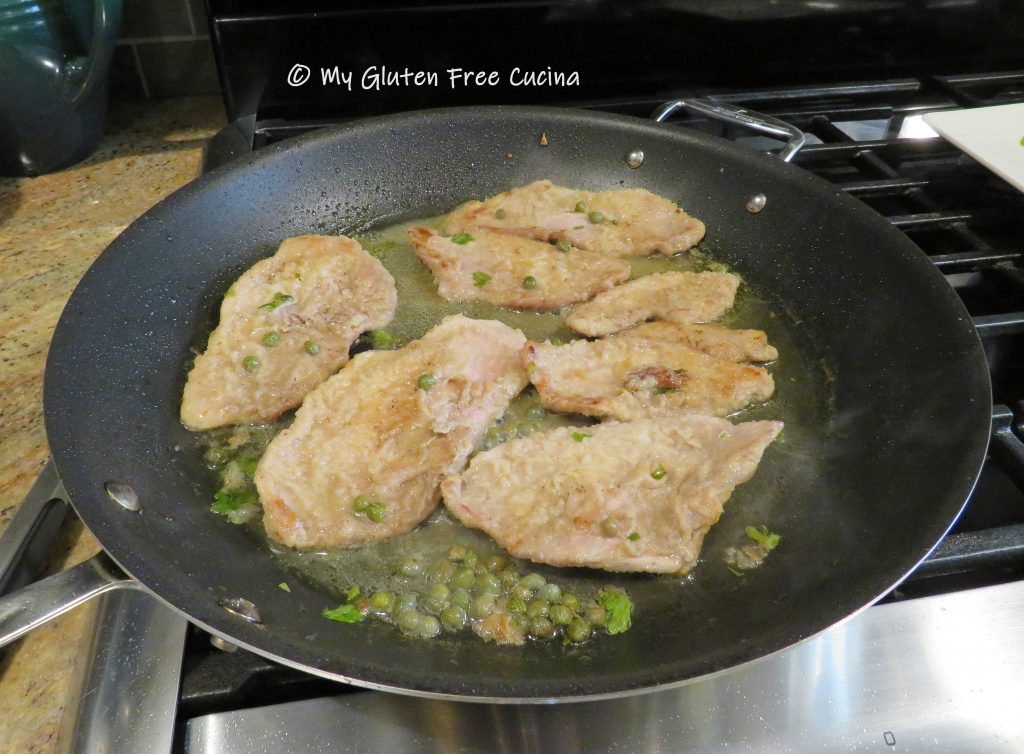
Set the cutlets aside on a serving platter while you make the sauce.  Add the stock, wine and lemon juice to the skillet and bring to a boil.  Simmer 1 minute, then add the capers, parsley and butter.

Stir to cook 1 minute longer, then return the veal to the pan and heat through, turning once.

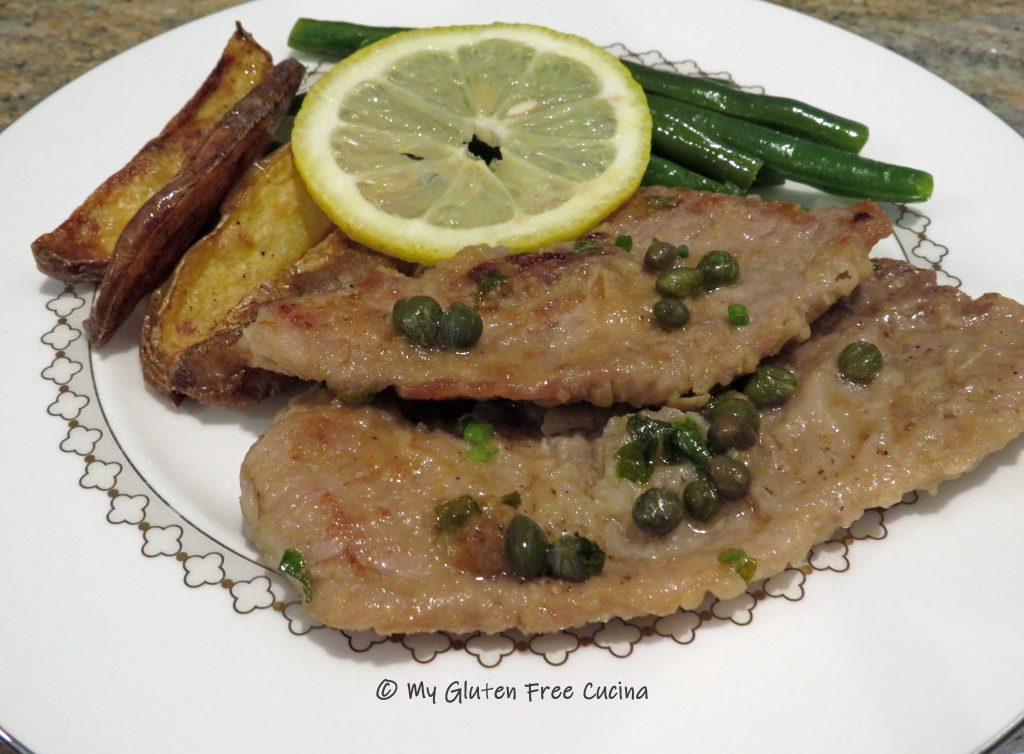
Plate the cutlets and spoon some of the pan juices over the top.

Serve with lemon slices.

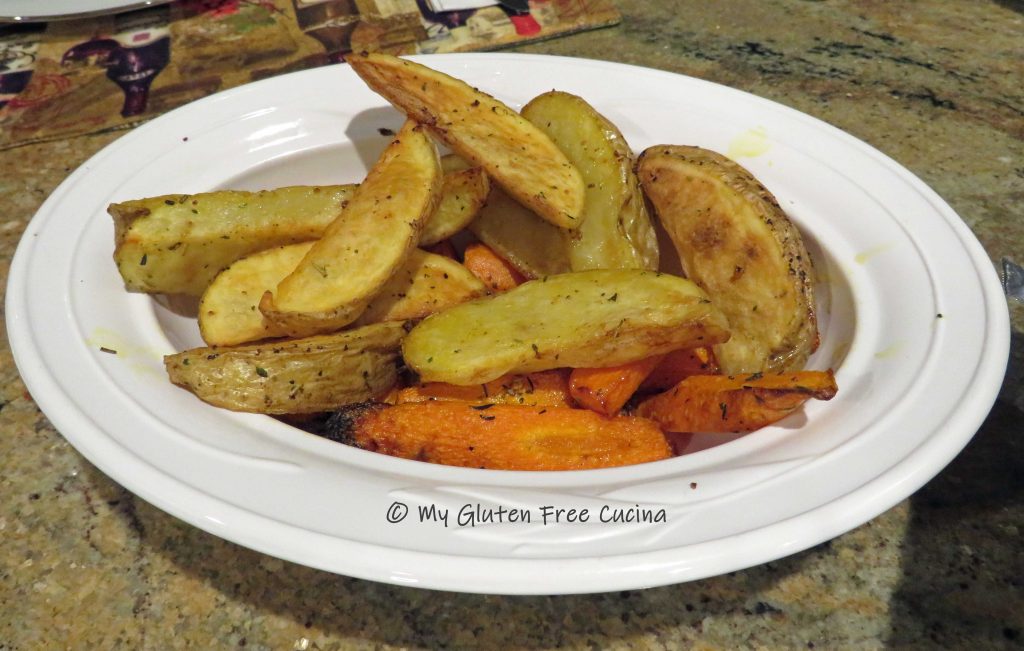
Notes ♪♫ I copied my restaurant meal right down to the sides.  We had roasted potato wedges and garlic green beans.  I’m so glad I did!  This recipe is perfect for date night or when you want to treat yourself to something special.

Print This Post Print This Post

Gluten Free Sole Francaise

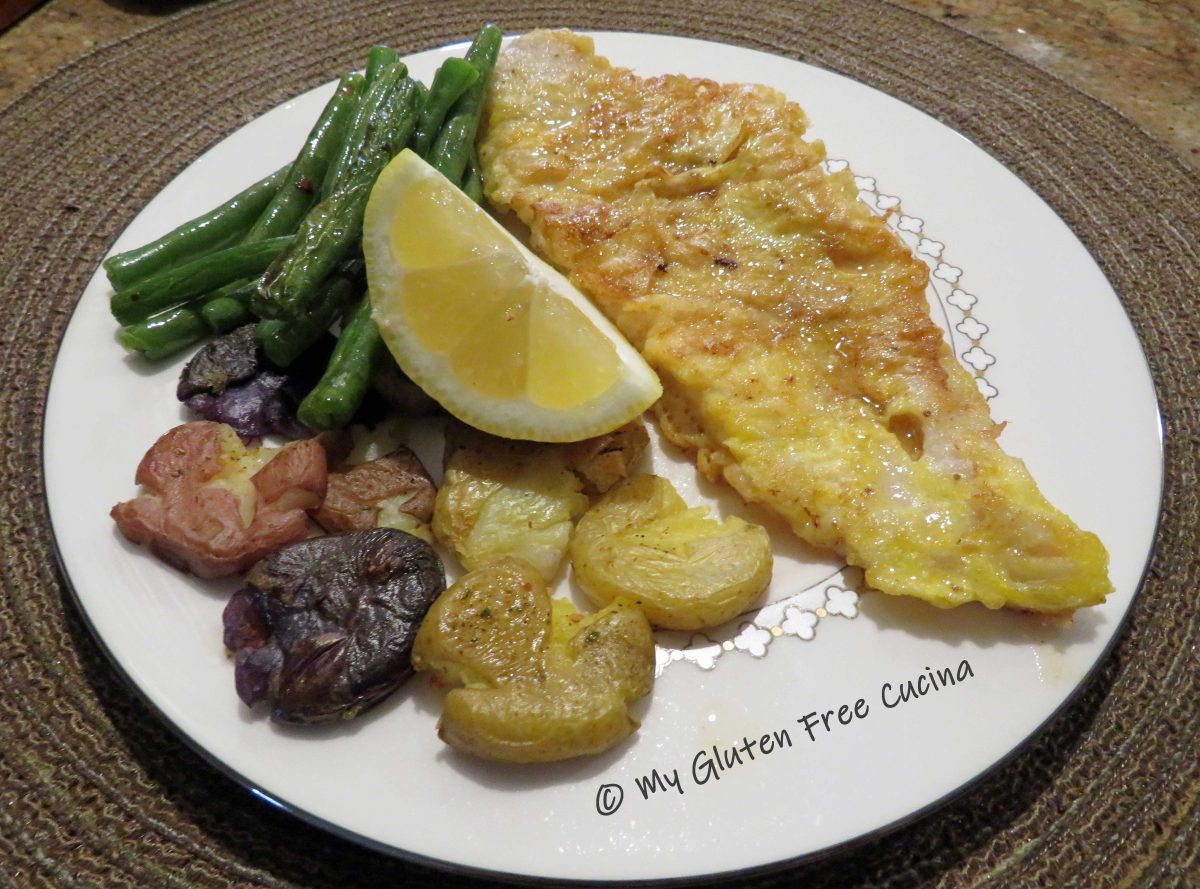
Sole Francaise is an old restaurant favorite of mine, but you don’t often see it on the menu anymore.  Of course, if you are gluten free this dish is off limits.  So today with just one simple substitution I’ll show you how to prepare this five-star entrée right at home.  White rice flour is a pantry staple at My Gluten Free Cucina, and I promise your gluten eating friends and family will not be able to tell the difference.

This post contains affiliate links.

Ingredients:

  • 1 lb. sole fillets
  • 3/4 cup white rice flour
  • 2 eggs, beaten
  • Old Bay seasoning, to taste
  • salt, to taste
  • 2 tbsp. olive oil
  • 2 tbsp. butter
  • 1/2 cup white wine
  • 2 tbsp. lemon juice

Preparation:

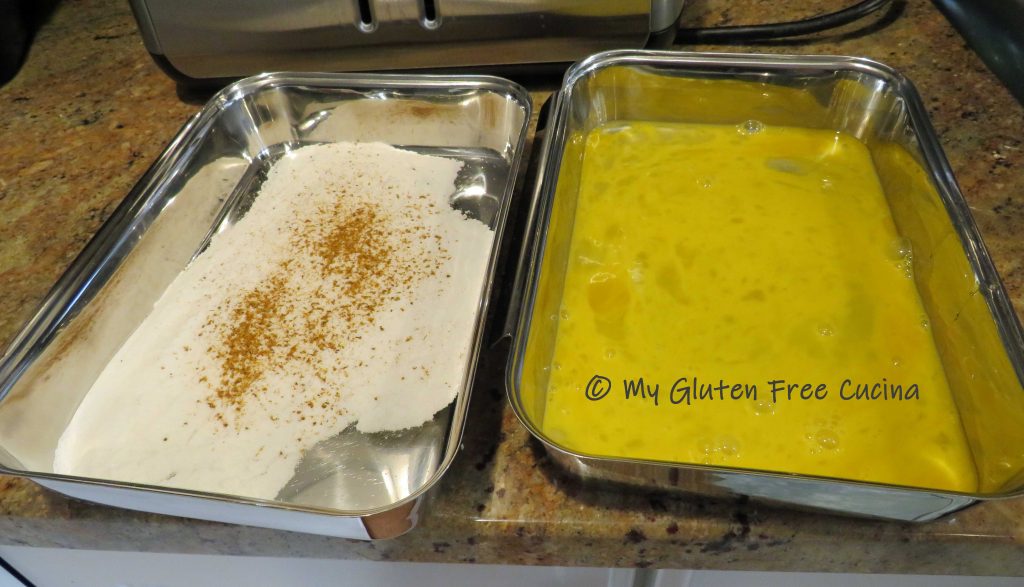
Use a superfine white rice flour in place of traditional all purpose.  It works just as well in this recipe, so don’t waste your even pricier gluten free all-purpose flour.  Set up 2 breading trays or plates, one with the flour and the other with the beaten egg.  Sprinkle the flour with Old Bay.

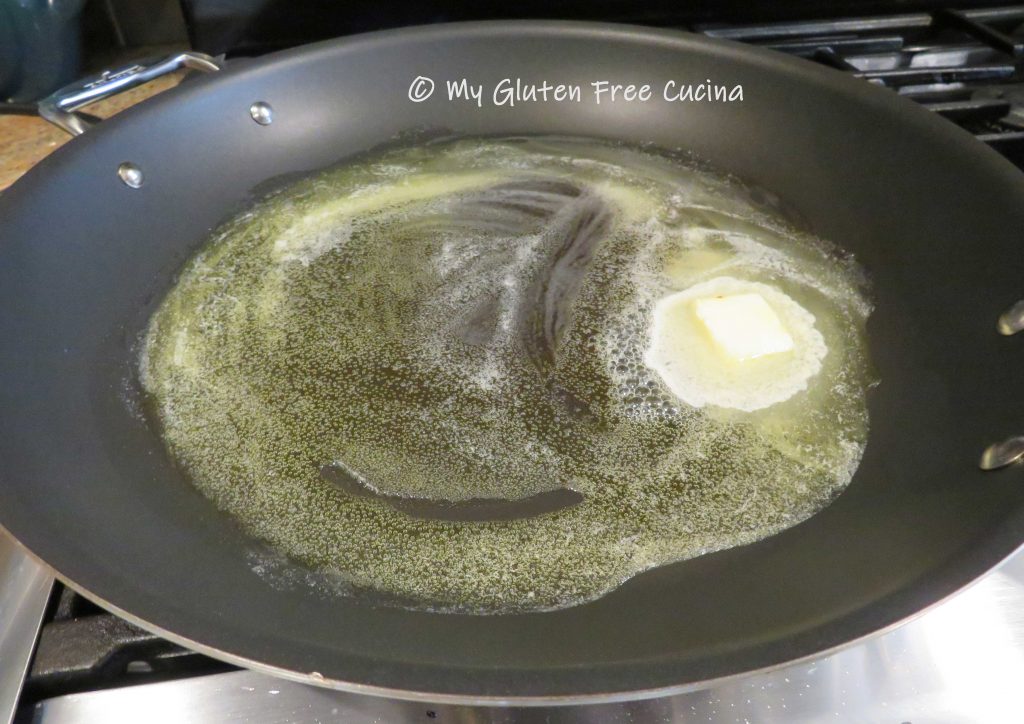
Heat a large nonstick skillet with 2 tbsp. butter and 2 tbsp. oil.

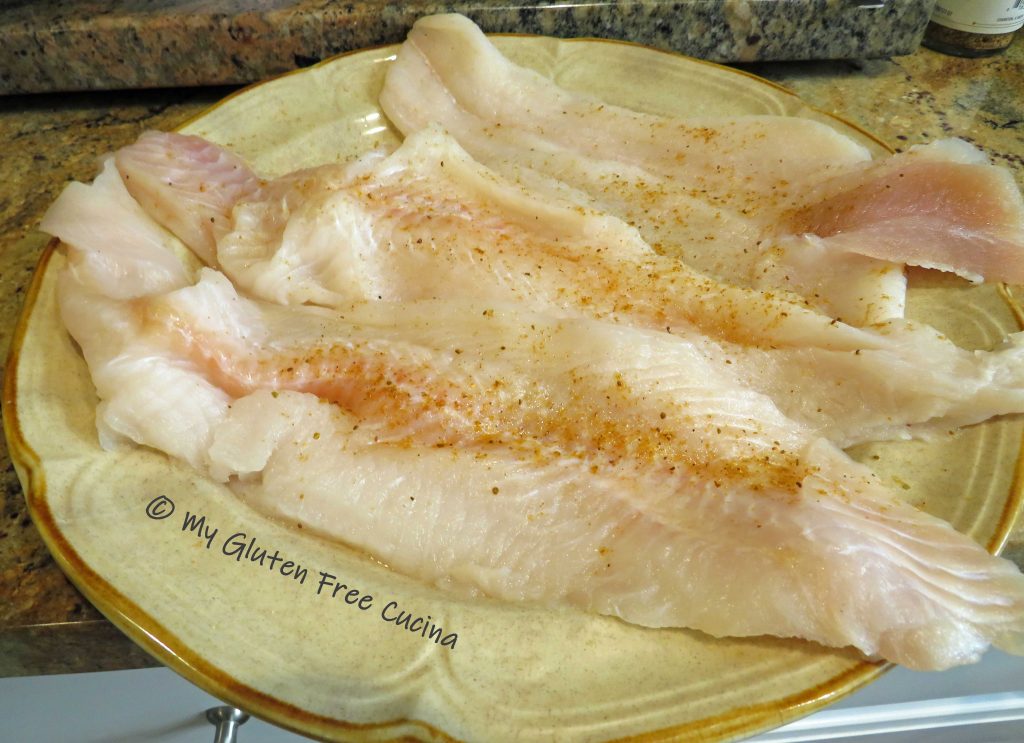
Sprinkle the sole fillets with Old Bay, then dredge each piece in flour.  Dip in egg, shaking off the excess.
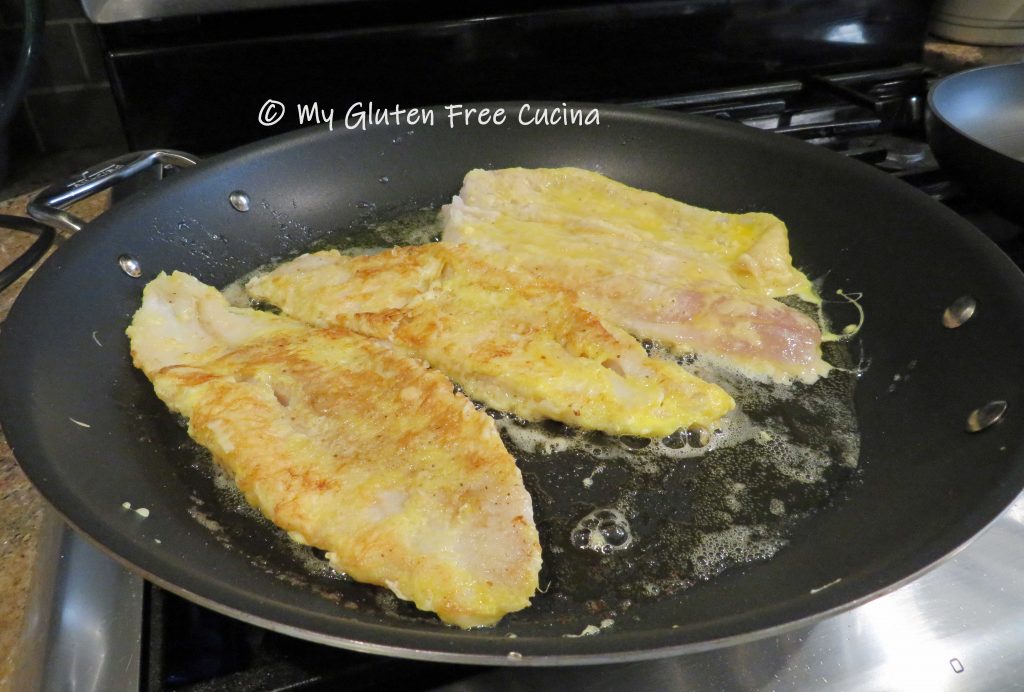
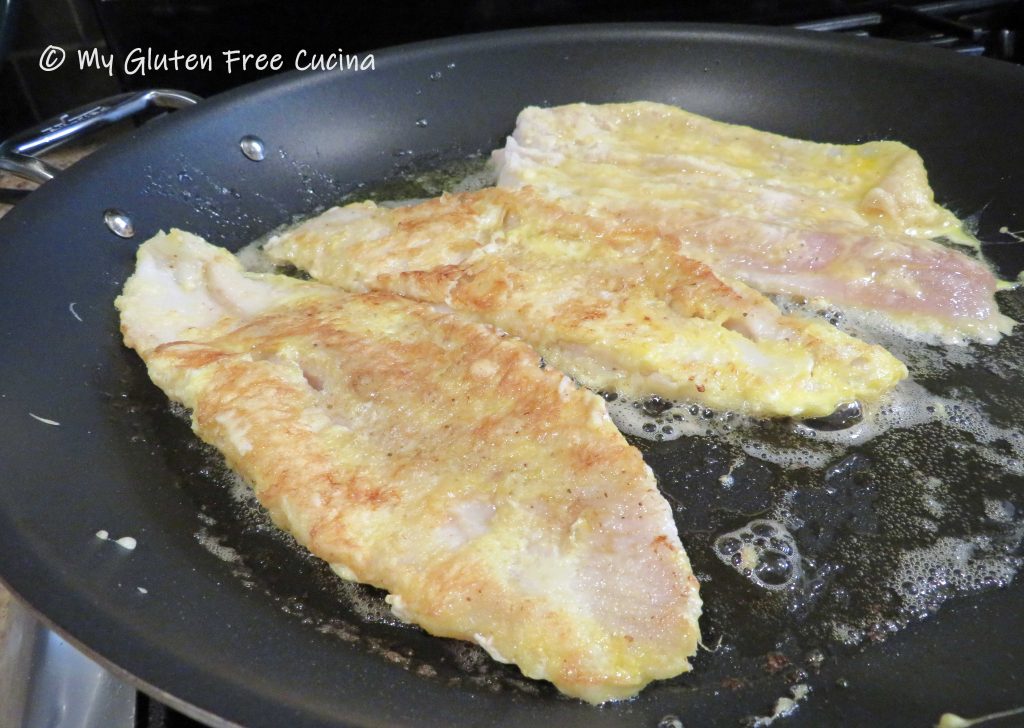
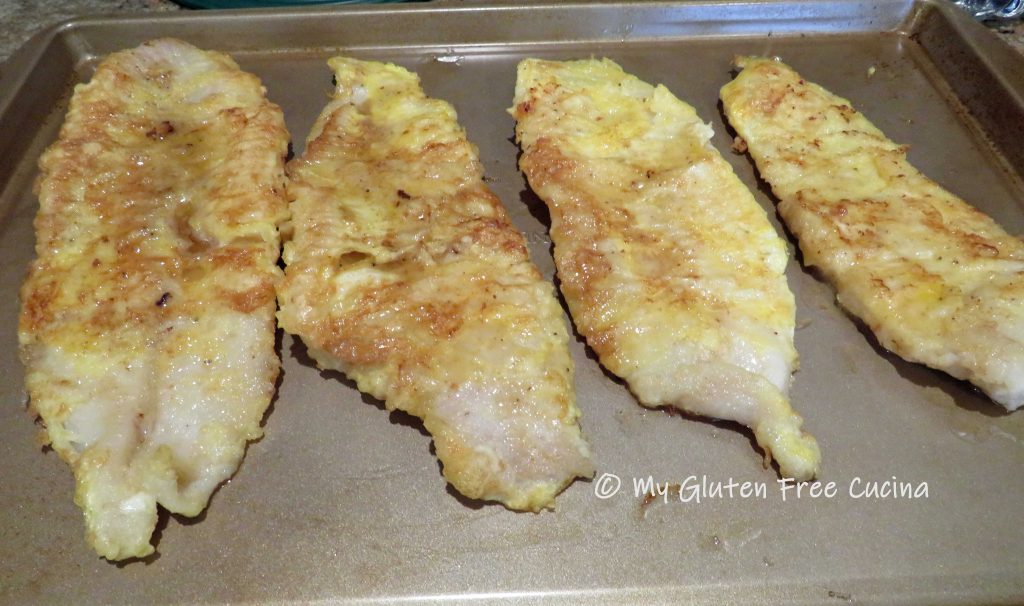
Cook the fish 3 minutes per side.  Try not to tear the delicate egg batter when you flip them over (use 2 spatulas for better control).  Cook in batches if needed, do not crowd the pan.

Transfer the fillets to a baking sheet and keep warm in the oven (especially if cooking in batches).

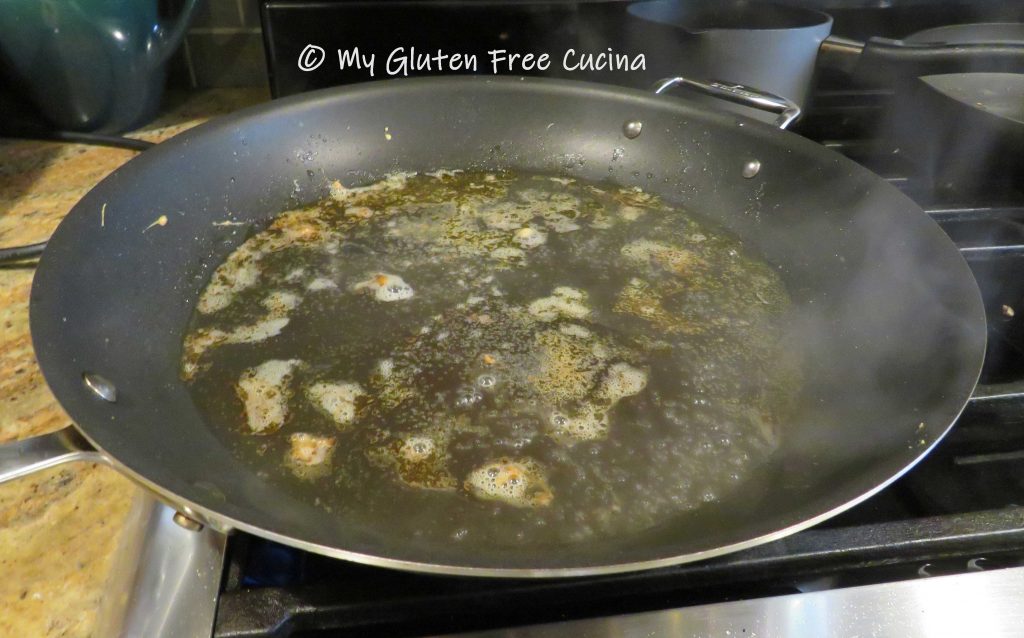
Add the wine and lemon juice to the skillet, swirl around and cook until reduced by half.

Drizzle the reduction over the fish and serve with a lemon wedge.  Smashed Potatoes and garlic green beans round out the plate.

Notes ♪♫ When cooking with wine, always choose something that you can drink with the meal.  I had a bottle of Pinot Grigio that was just perfect with this dish.  I never use cooking wine, as it is loaded with sodium and additives.

Print this recipe


Gluten Free Asian Beef and Broccoli

Asian Beef and Broccoli is a restaurant favorite that can be made right at home with just a handful of ingredients.  Adapting the recipe to be gluten free was easy, so why haven’t I made it in a while?  The short answer, sodium.

These days I try to make meals that are not only gluten free, but also lower in salt.  That means some of my Asian inspired meals have gone on the back burner because they are made with a salt bomb of condiments!  With that in mind, I am on a mission this year to makeover some of my favorite gluten free recipes and this meal was definitely a success.

Would you believe my original recipe used 1/4 cup of gluten free soy sauce and 1/4 cup of hoisin sauce?  Whew, that’s a lot of sodium!

This post contains affiliate links.

In this recipe remake, I’m using Coconut Aminos, a pantry staple in my kitchen that is much lower in sodium than gluten free soy sauce or tamari.  I have substituted Coconut Aminos in many of my recipes that call for soy sauce.  And a little Hoisin Sauce goes a long way, I cut the original 1/4 cup down to 2 tbsp. and it was still delicious.

4 Servings

Ingredients:

  • 1 lb. sirloin tips or petite sirloin (top sirloin), cubed
  • 1 tbsp. coconut aminos
  • 1 tsp. dark brown sugar
  • 3 garlic cloves, sliced thin
  • 1-1/2 tsp. sesame oil, divided
  • 2 tbsp. olive oil, divided
  • 1/4 tsp. powdered ginger
  • 2 tsp. fresh chives
  • pinch red pepper flakes
  • 1 large broccoli crown (about 2 cups)
  • 2 tbsp. gluten free Hoisin sauce
  • 1 tsp. sesame seeds, toasted
  • rice or gluten free rice noodles for serving

Preparation:

Once you start cooking this dish comes together very quickly, so measure and prep all of the ingredients ahead of time.

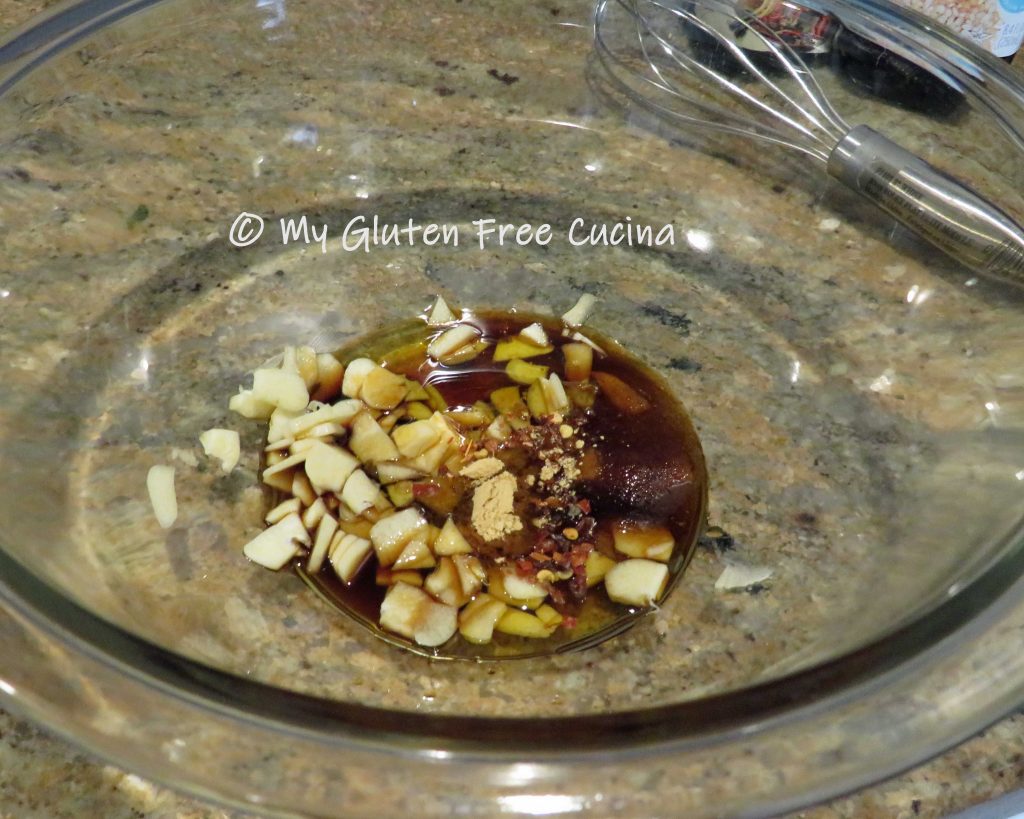
For the marinade, whisk together 1 tbsp. coconut aminos, 1 tsp. brown sugar, the garlic slices, 1 tbsp. of olive oil, 1/2 tsp. of sesame oil, 1/4 tsp. powdered ginger, chives and pinch of red pepper flakes.

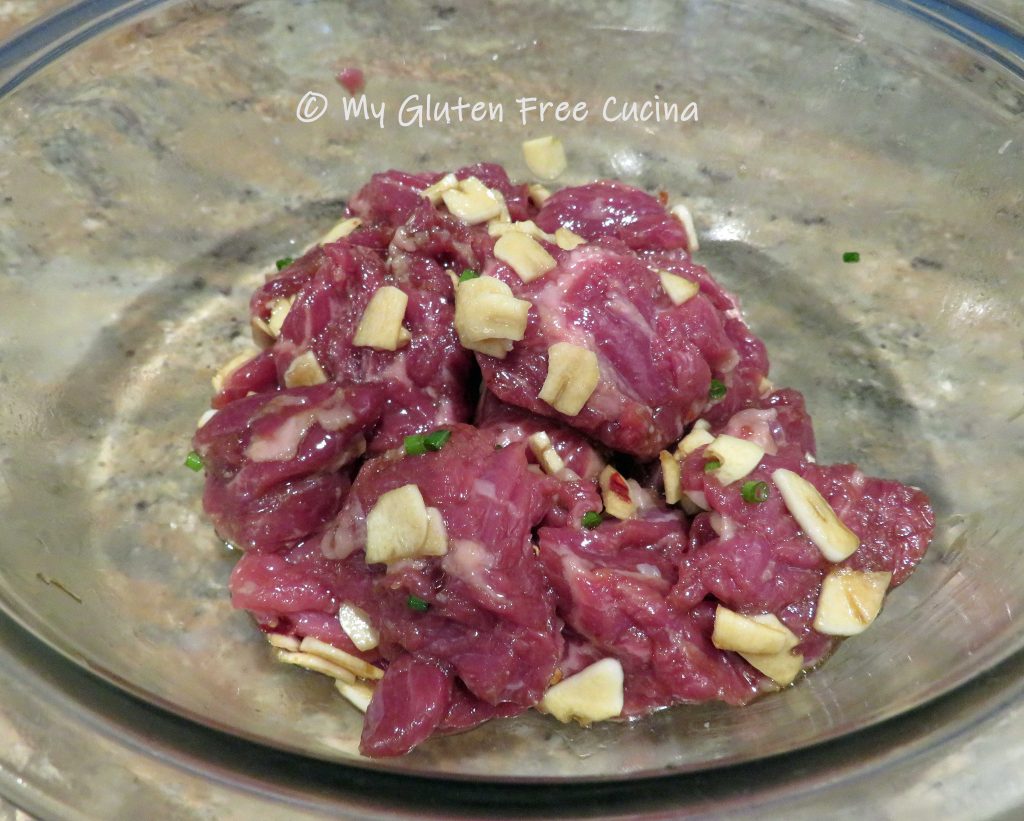
Cut the sirloin (uncooked) into 1″ cubes and add to the marinade.  Cover and let it stand at room temperature for 30 minutes.

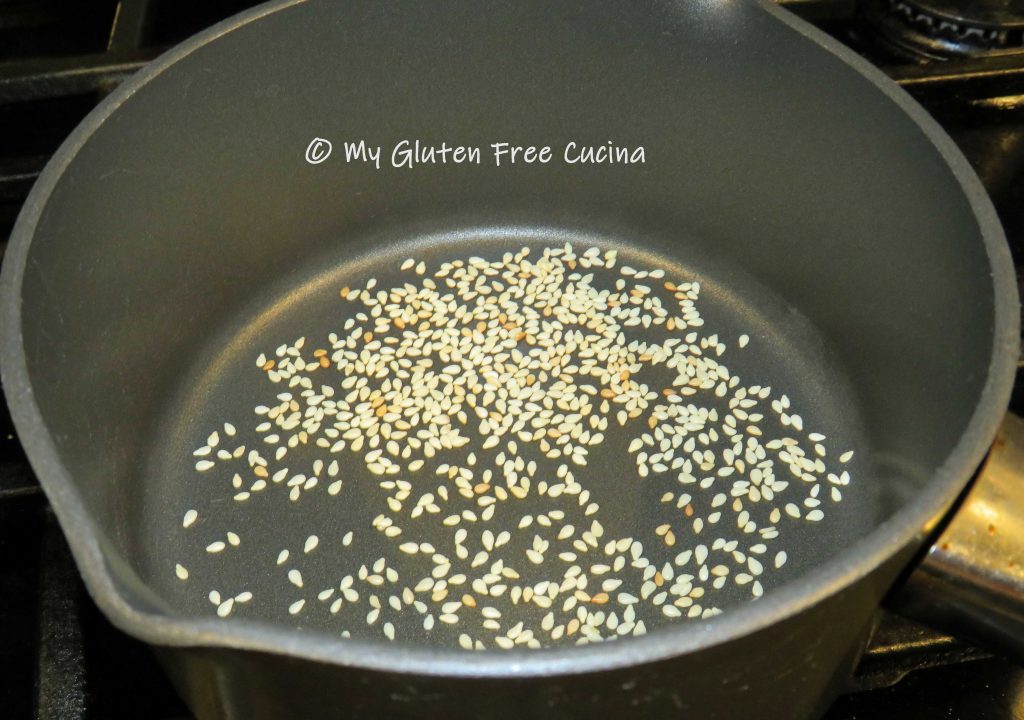
Toast the sesame seeds in a dry skillet, watching closely that they don’t burn.  Set aside for garnish.

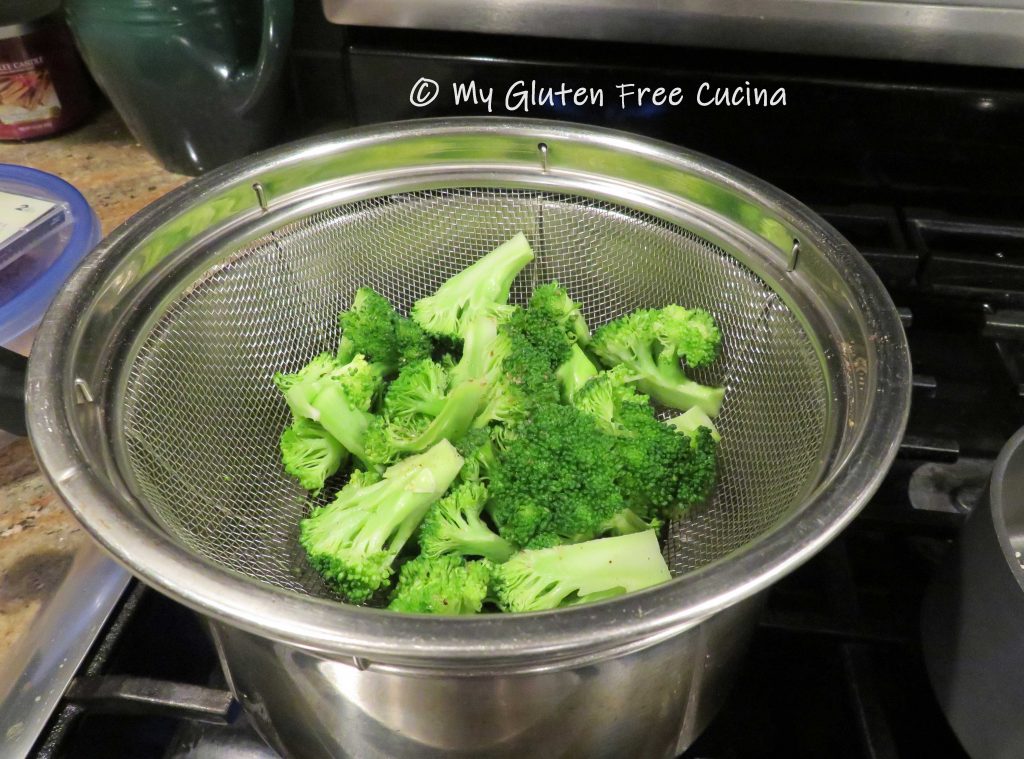
Next, cut the broccoli into uniform pieces.  Steam 5 minutes.  Remove the steamer basket from the heat and set aside while you finish the dish.

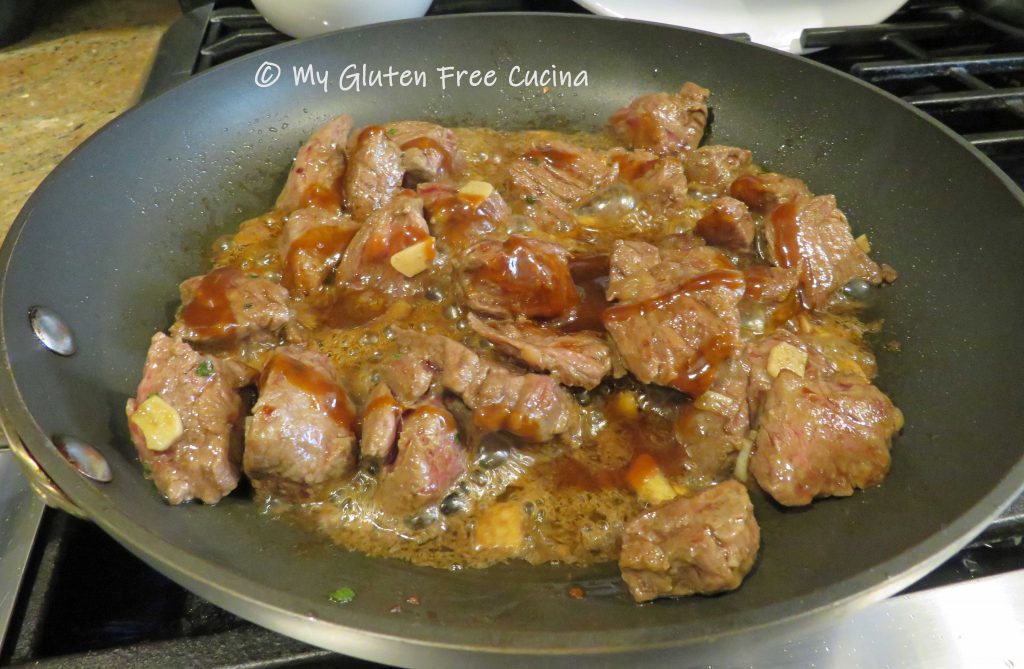
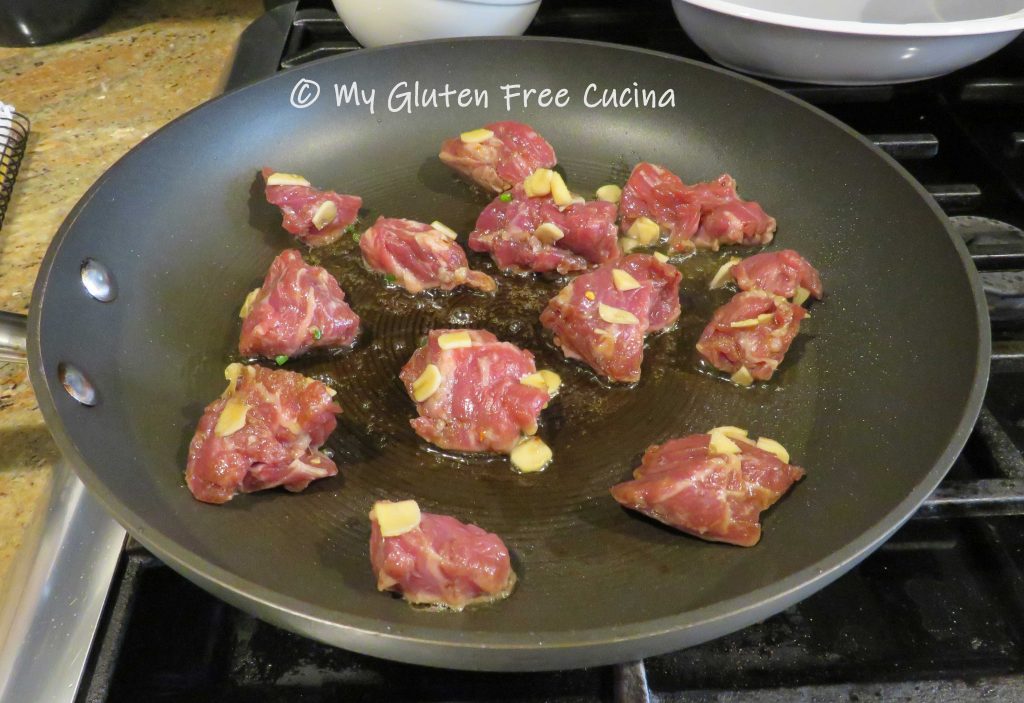
Add the remaining tbsp. olive oil and 1 tsp. sesame oil to the skillet and begin browning the beef.  Don’t crowd the pan, do it in 2 batches if needed.  Discard any marinade left in the bowl.

Stir in 2 tbsp. hoisin sauce.

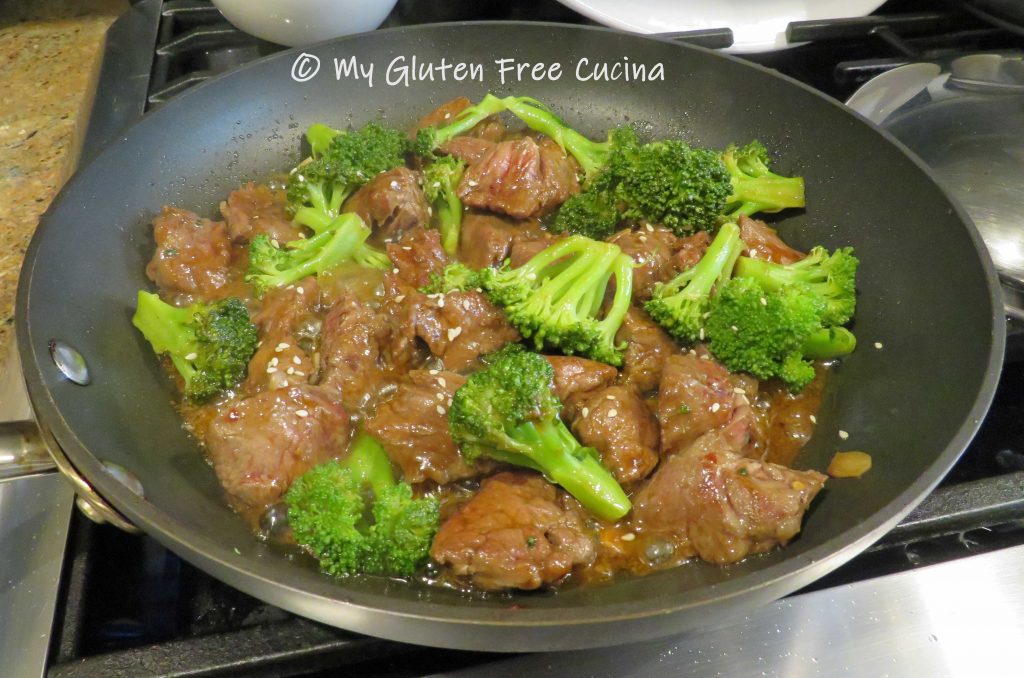
Finally, add the broccoli to the skillet and toss with the beef.

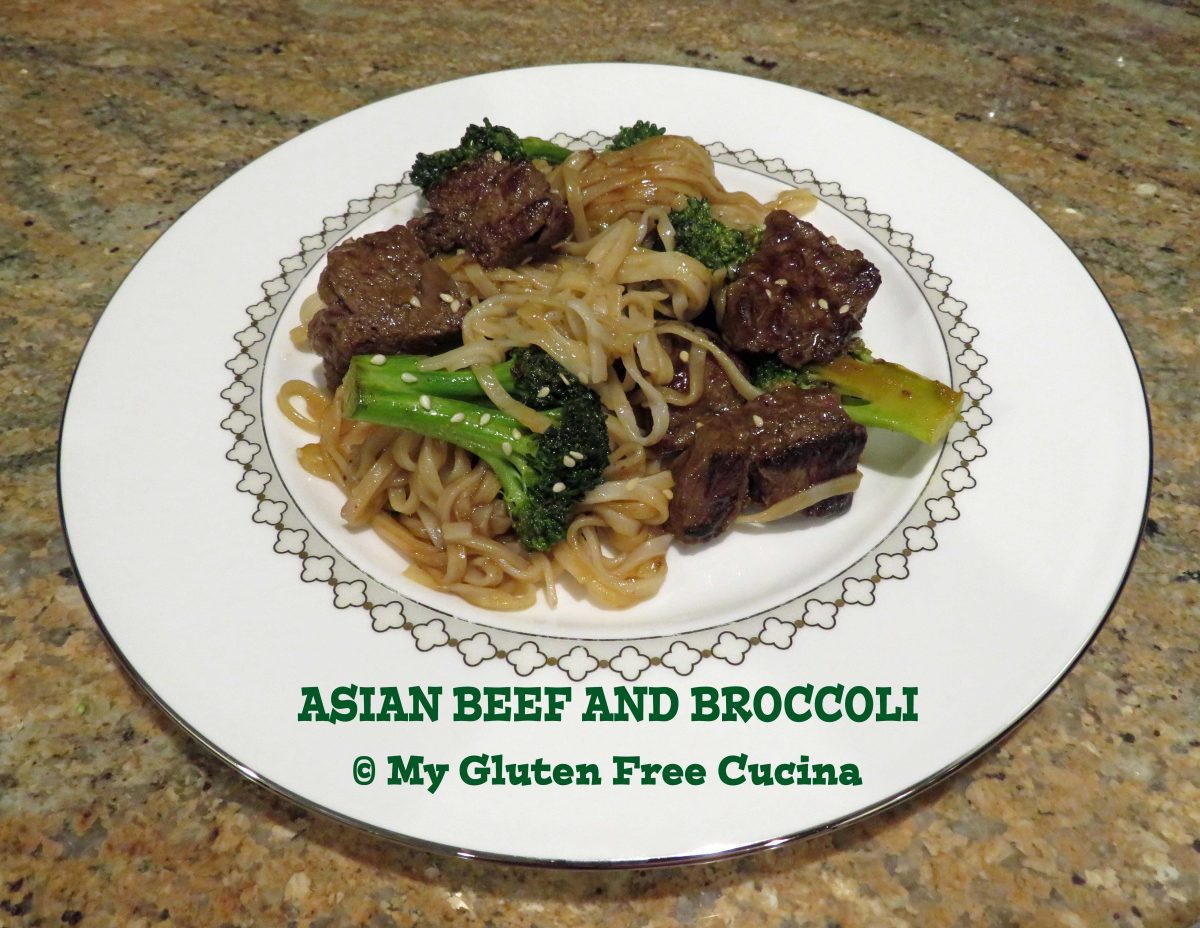
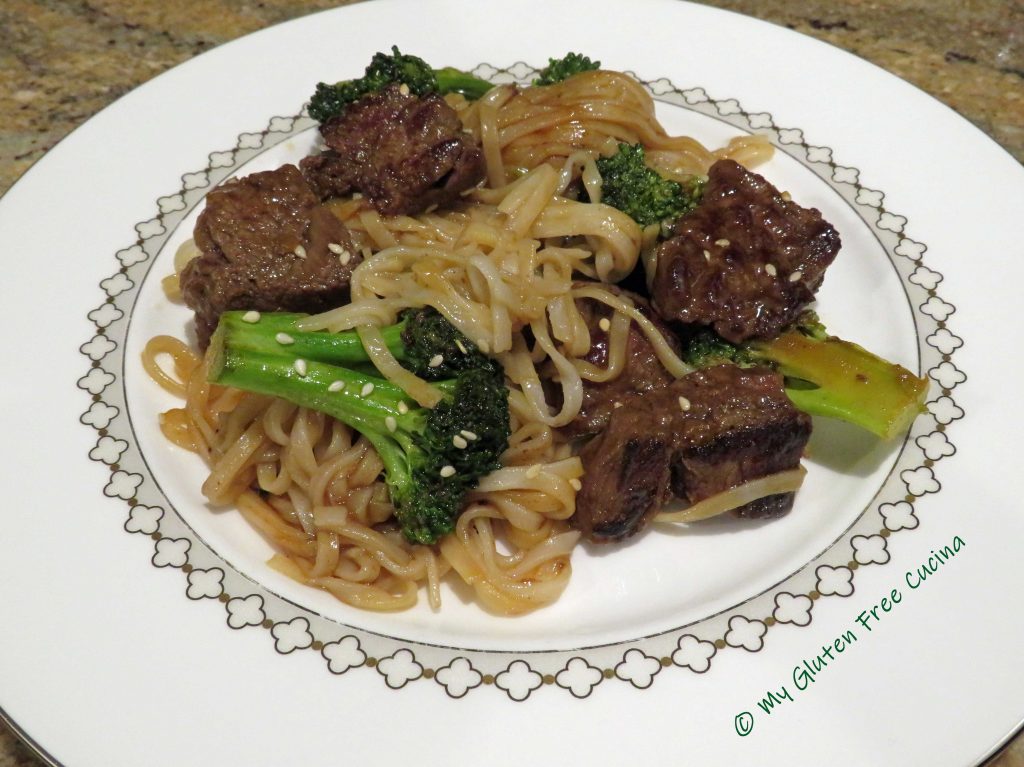
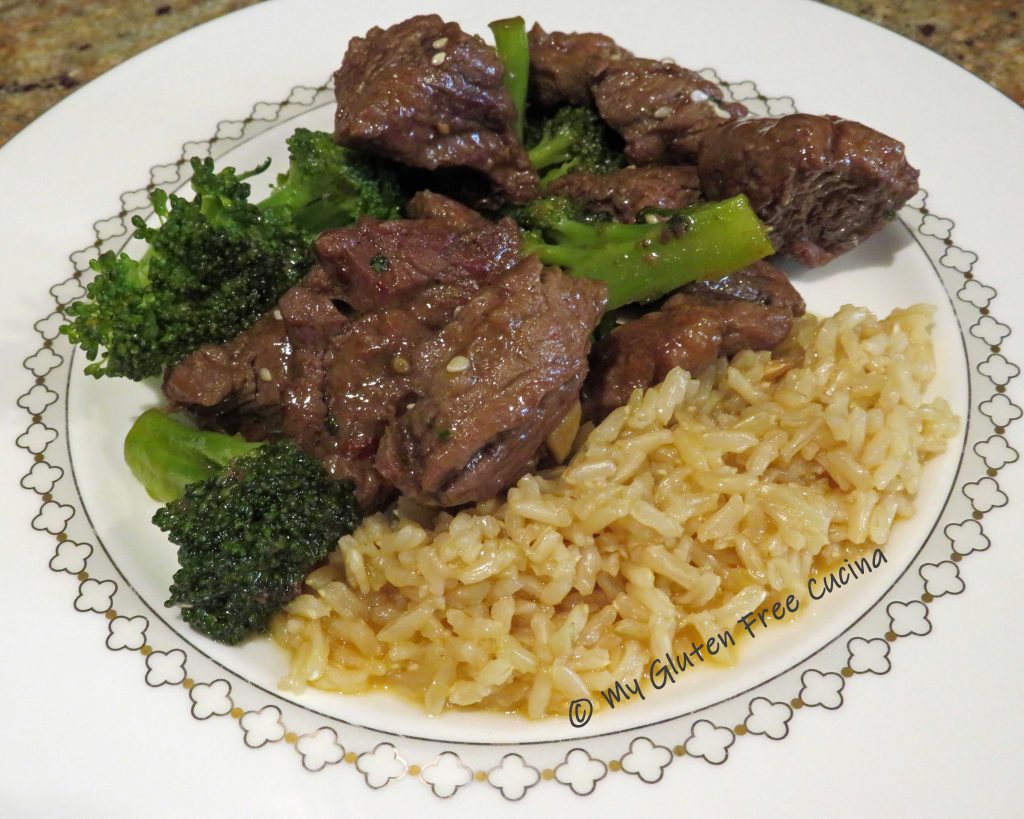
Let it cook for another minute or so, then transfer to a platter.  Garnish with toasted sesame seeds and either toss with rice noodles or serve with rice.

Here I served with Annie Chun’s Pad Thai rice noodles.

Shown here, served with rice.

So, were you thinking of ordering takeout?  Try this instead, you will love it!

Notes ♪♫ Coconut Aminos contain about 1/10th the sodium of gluten free soy sauce.  If you aren’t worried about sodium, try a gluten free soy sauce or tamari.  I like San-J Tamari, which also comes in a lower sodium version that is completely gluten free.

Print This Post Print This Post