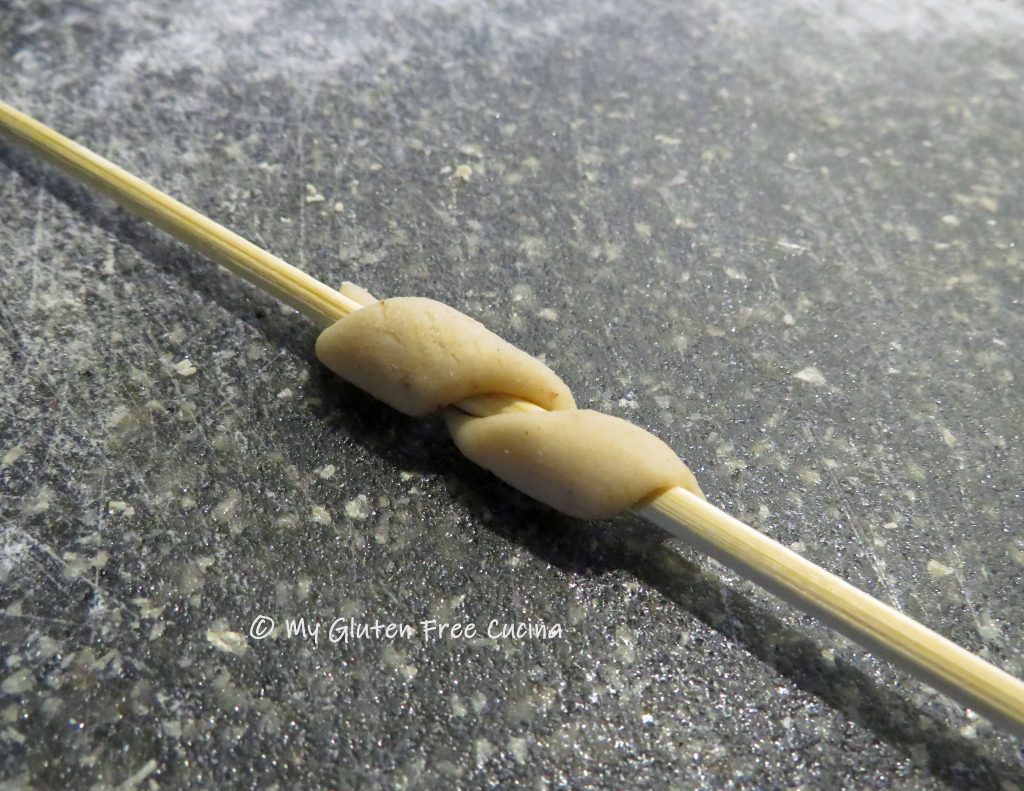
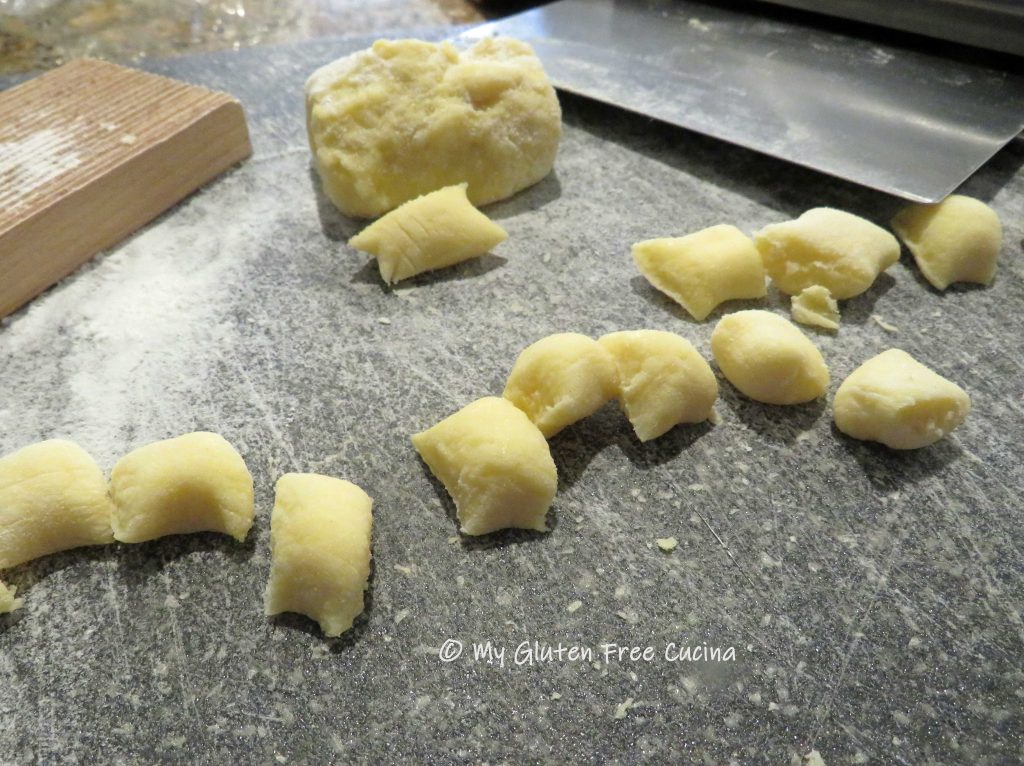
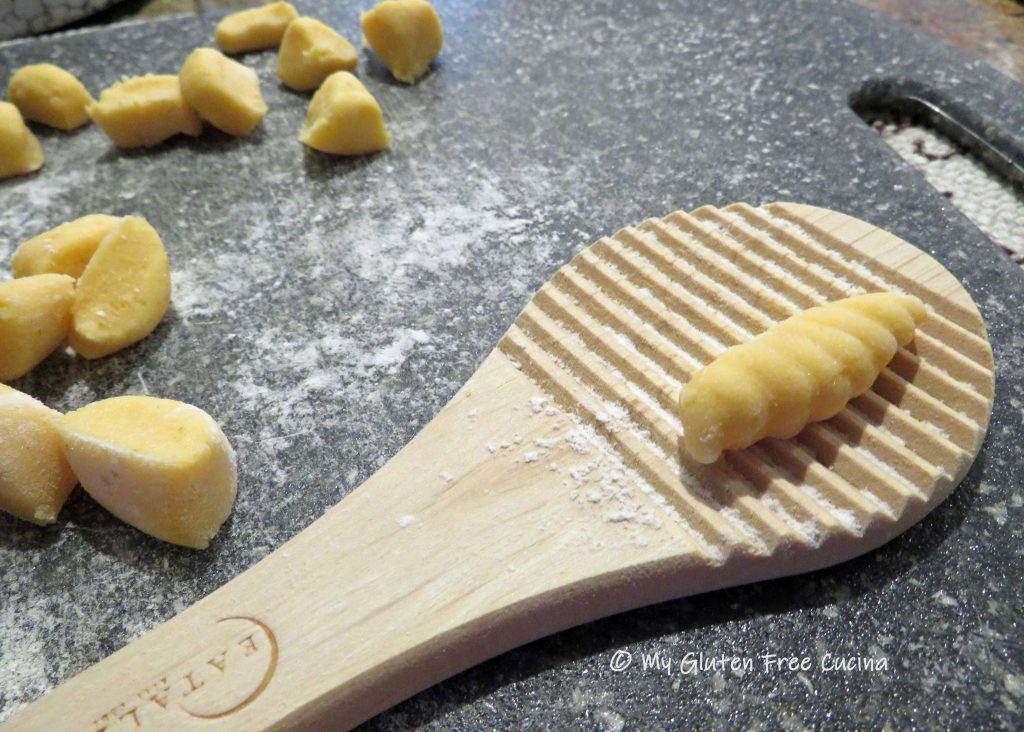
Trofie are a thin, twisted pasta shape popular in Liguria, Italy. They are formed by rolling small pieces of dough on a flat surface, or between the palms of your hands. Twisting into the final shape can be done using a wooden skewer, or a bench knife.
To make the Trofie Pasta, it was important that the dough be smooth and supple, easy to roll and shape. A tall order for gluten free! I created this gluten free Trofie with the Artisan Flour Blend from Better Batter.
The pasta was delicious! The color and texture of the dough are reminiscent of whole wheat pasta. Look closely and you can see flecks of grain in the dough.
The ingredients for this recipe will make a small batch, more than enough for 2 people. We had it for dinner and there were leftovers. You can double or triple the recipe for a large family.
Ingredients:
- 120 g. Better Batter Artisan Flour Blend gluten free flour
- 1/2 tsp. salt
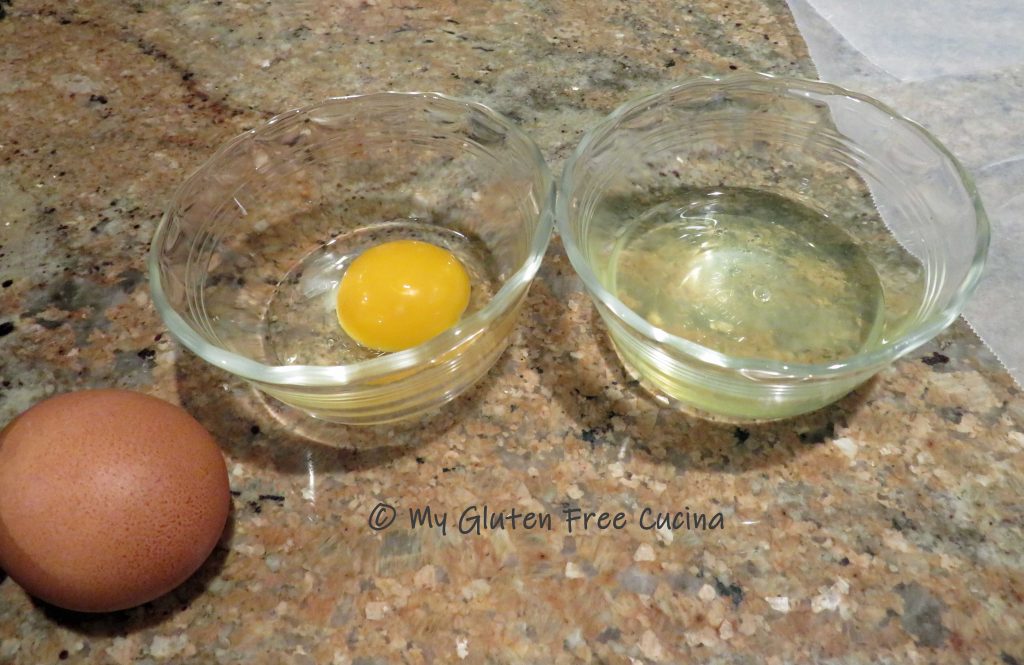
- 1 large egg
- 2 tbsp. egg whites
- 1-1/2 tsp. olive oil
- 2 tbsp. warm water
This post contains affiliate links.
Preparation:
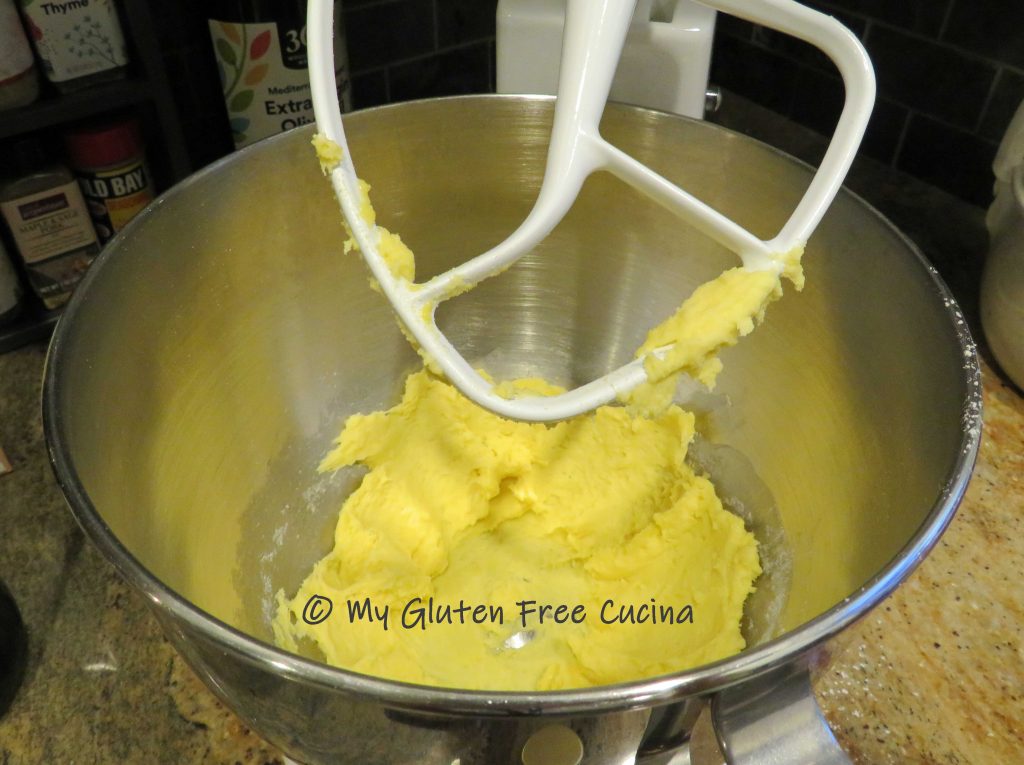
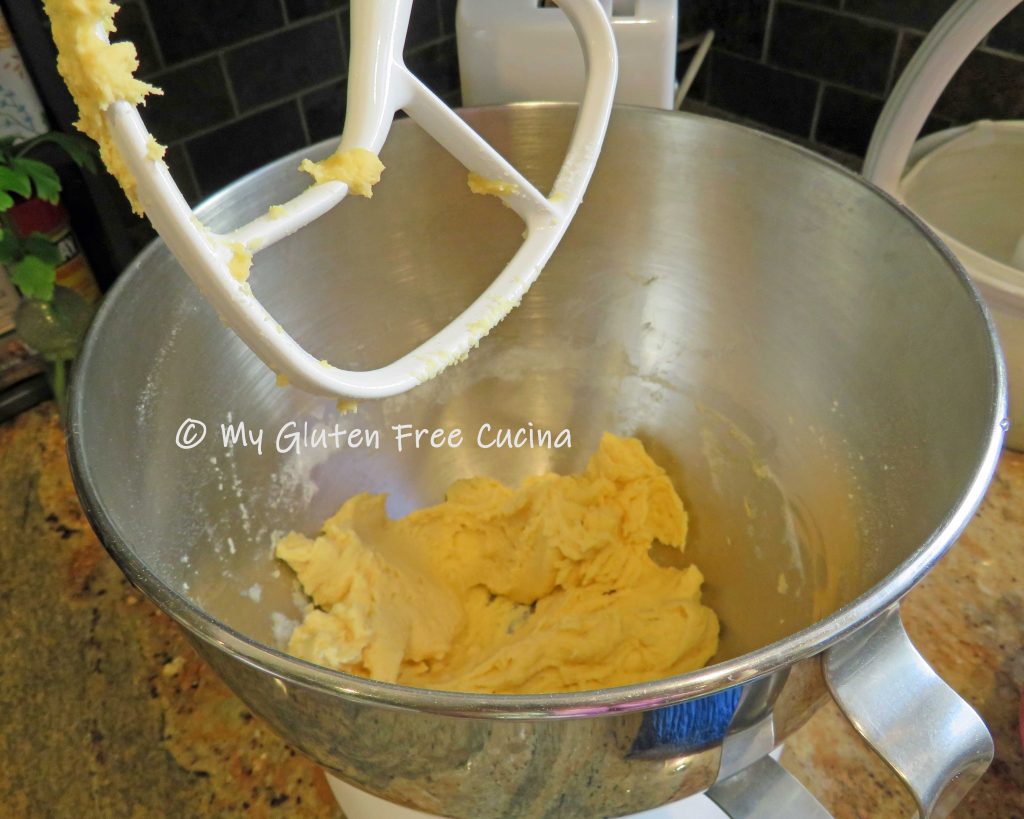
Whisk together the flour and the salt. Add the wet ingredients to the bowl of a stand mixer and whisk thoroughly. Then add the dry ingredients to the wet and mix with the paddle attachment on low until the dough comes together.
 Increase the speed and mix for 6-8 minutes until a smooth dough forms.
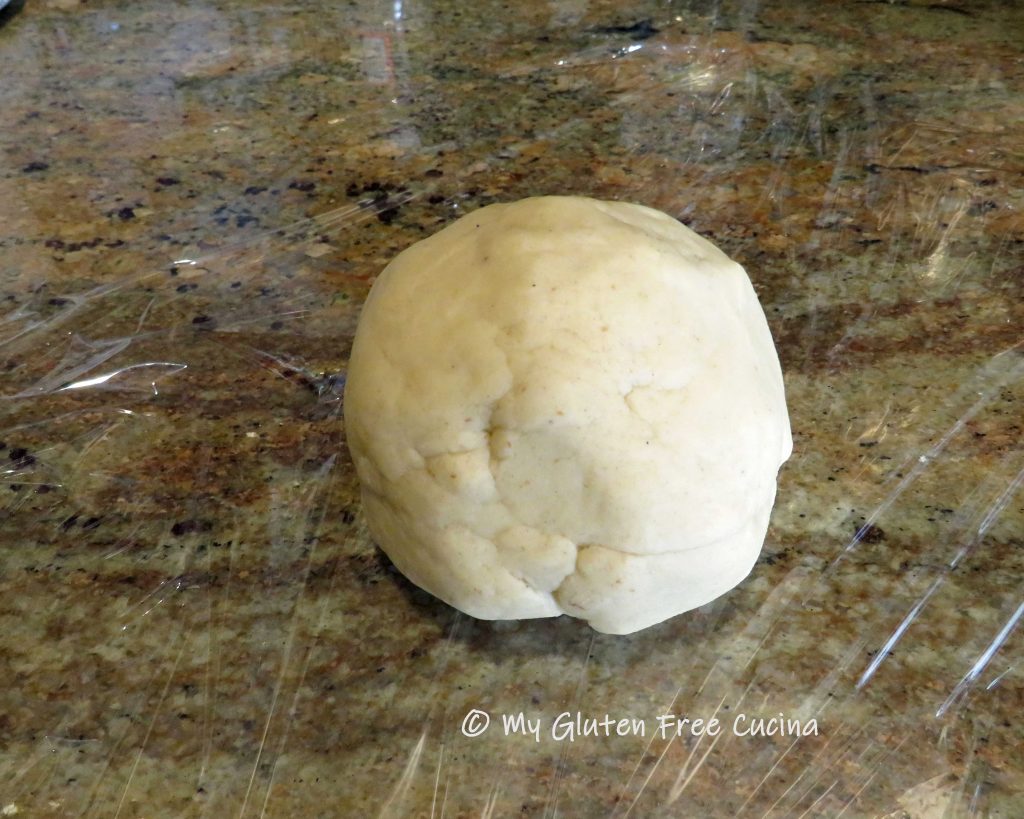
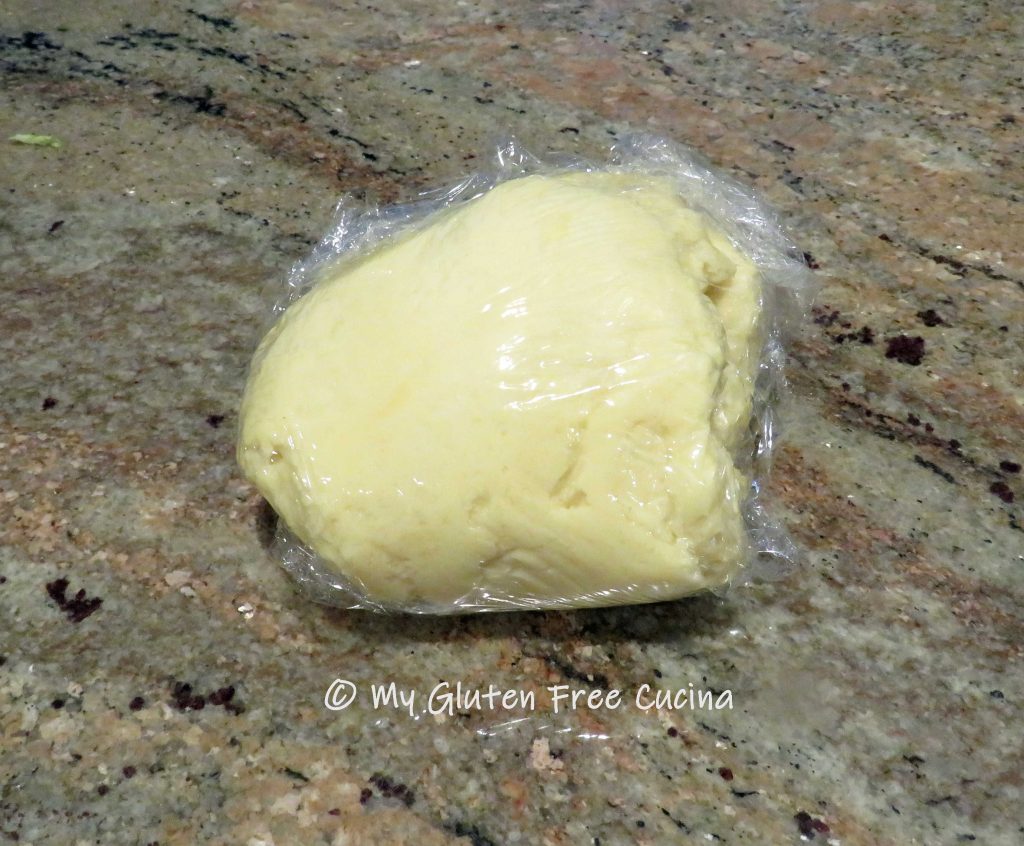
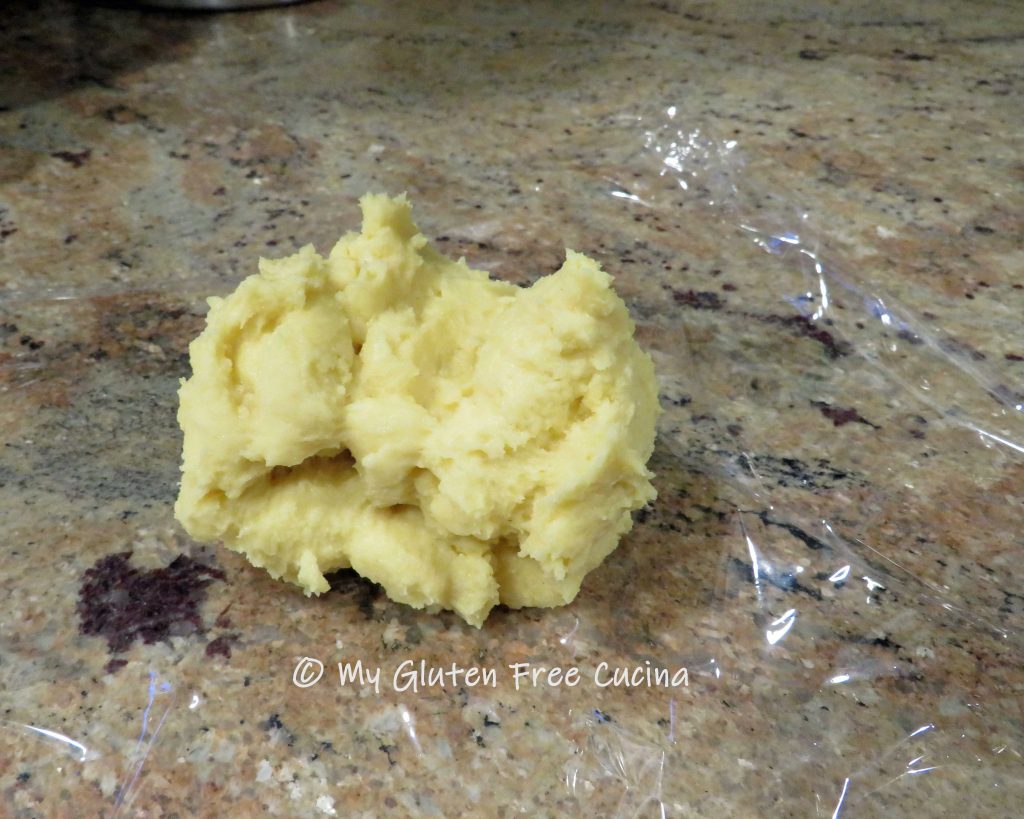
 Press the dough into a ball, cover with plastic wrap and rest for 1 hour.
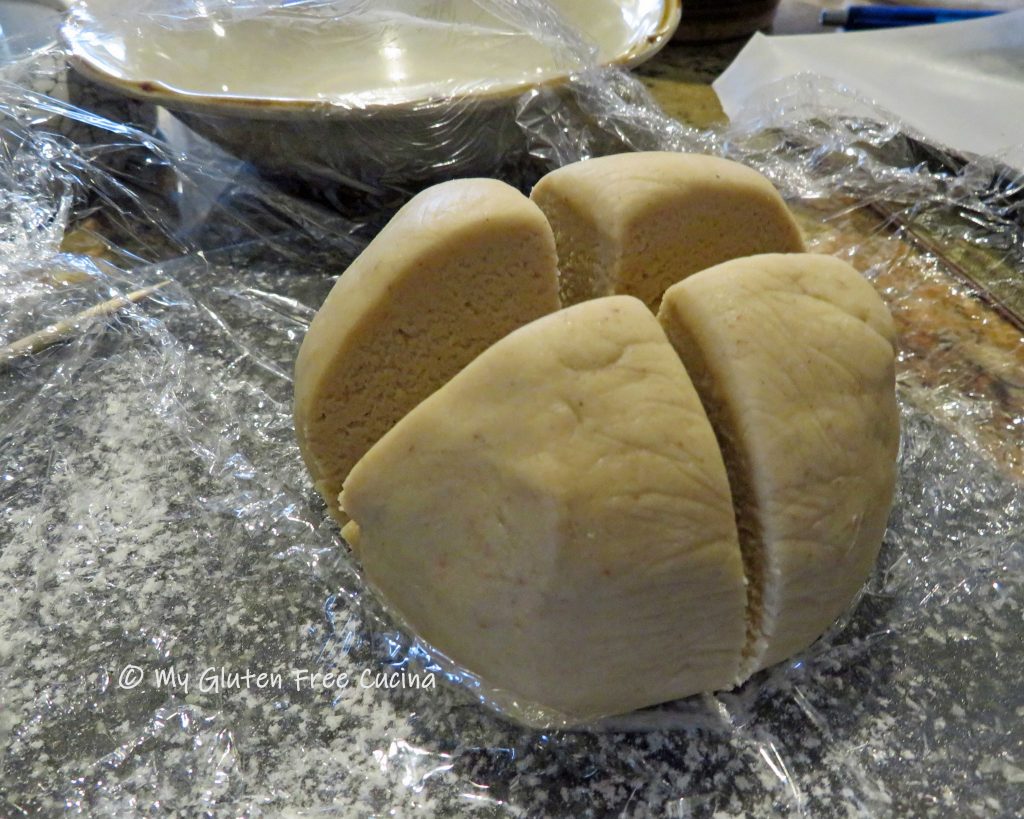
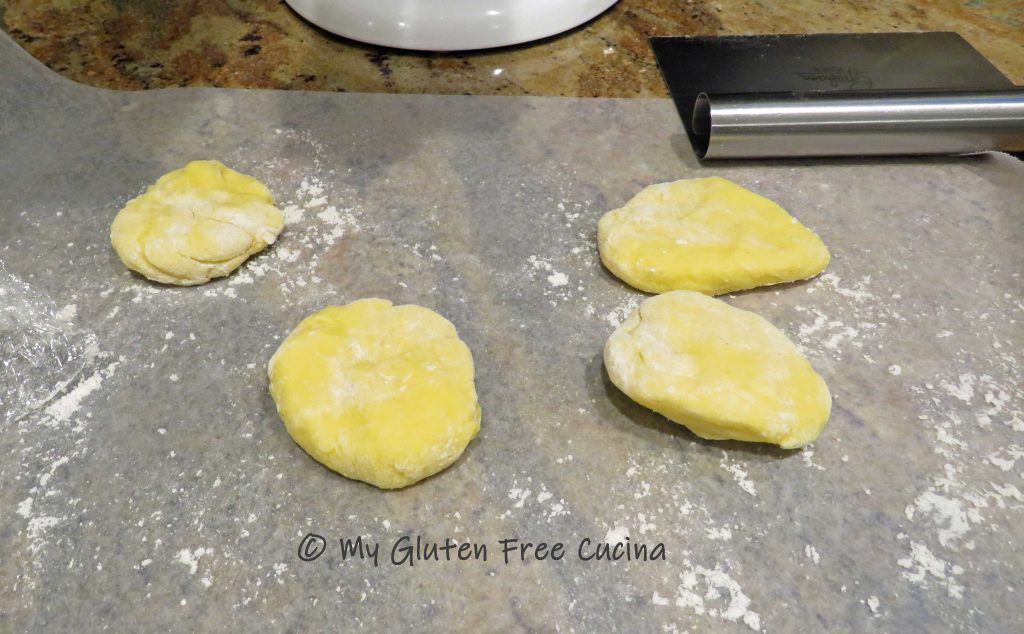
Divide the dough into 4 pieces. Work with one section at a time, and keep the rest covered to prevent it from drying out.
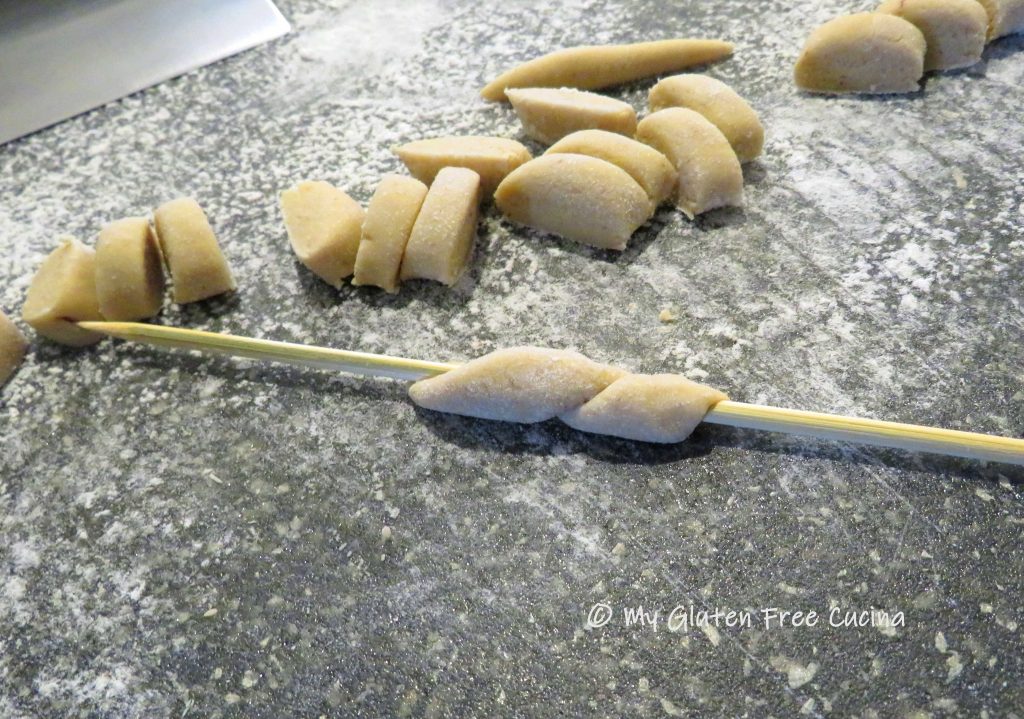
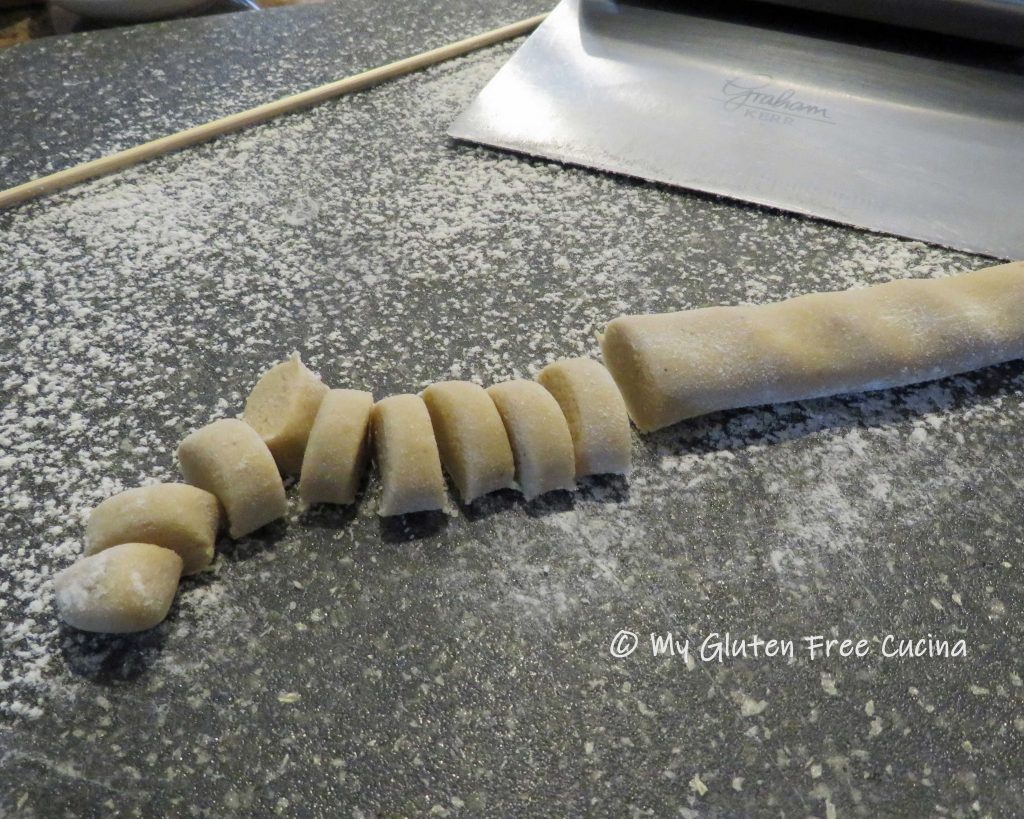
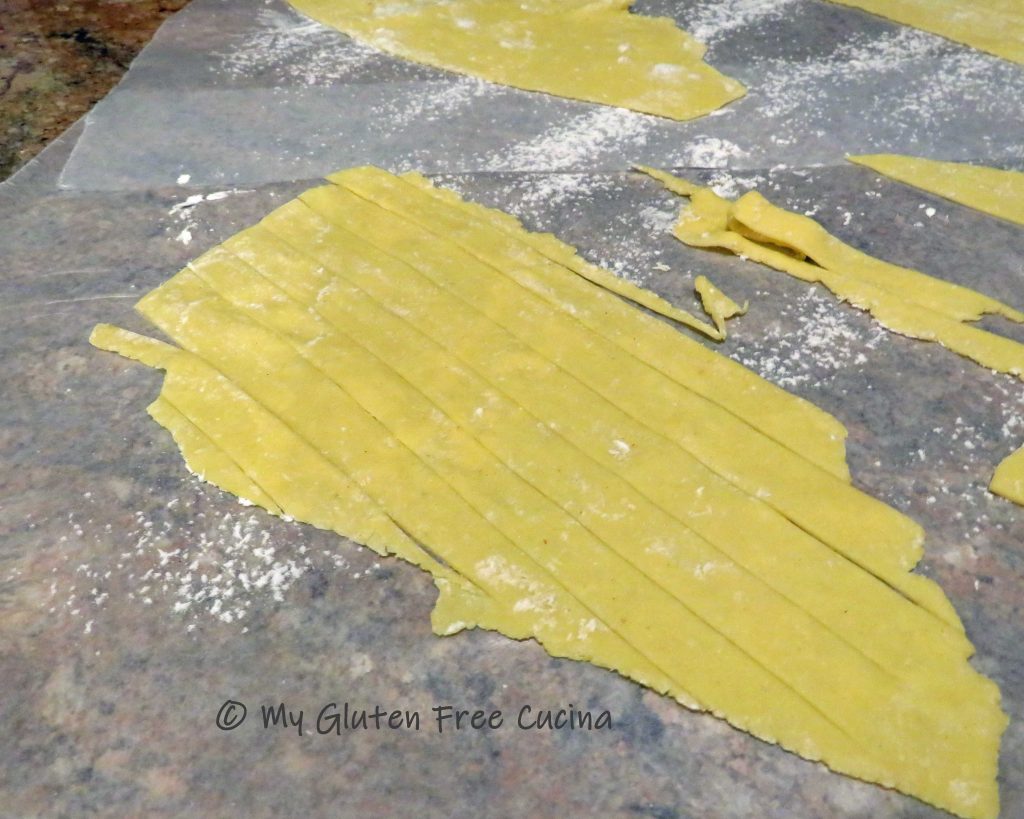
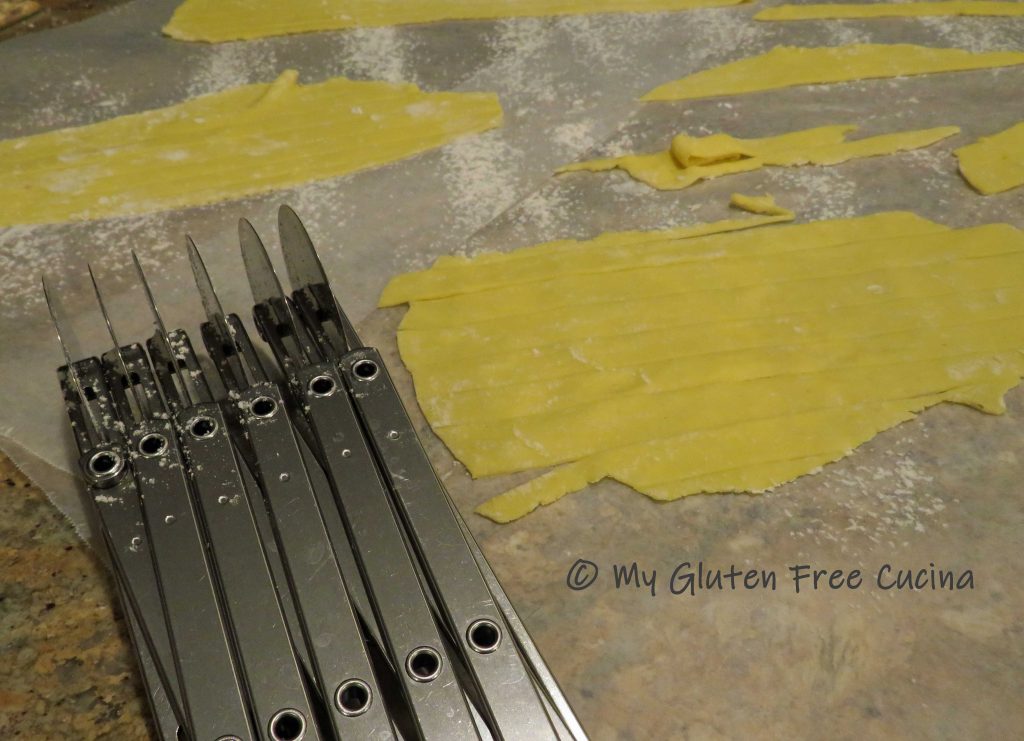
On a floured cutting board, roll each section of dough into a long rope 1/2″ thick. Cut the rope into 1/2″ pieces. Be sure to keep the pieces small and uniform, so they will all cook at the same time.
Roll each piece between the palms of your hands into a long thin shape, tapering the ends. Flour your hands as needed to keep the dough from sticking.
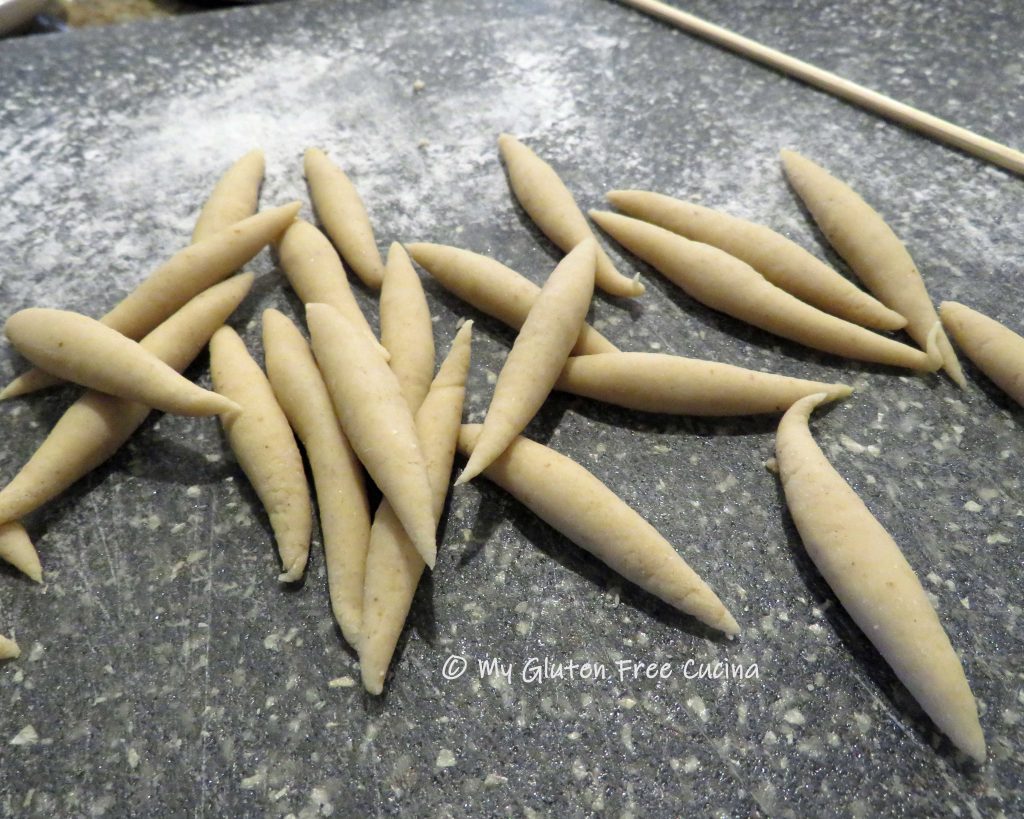
Working with one piece at a time, hold a wooden skewer or bench knife at a 90-degree angle, pressing lightly as you roll it over the dough to twist it into the final shape.
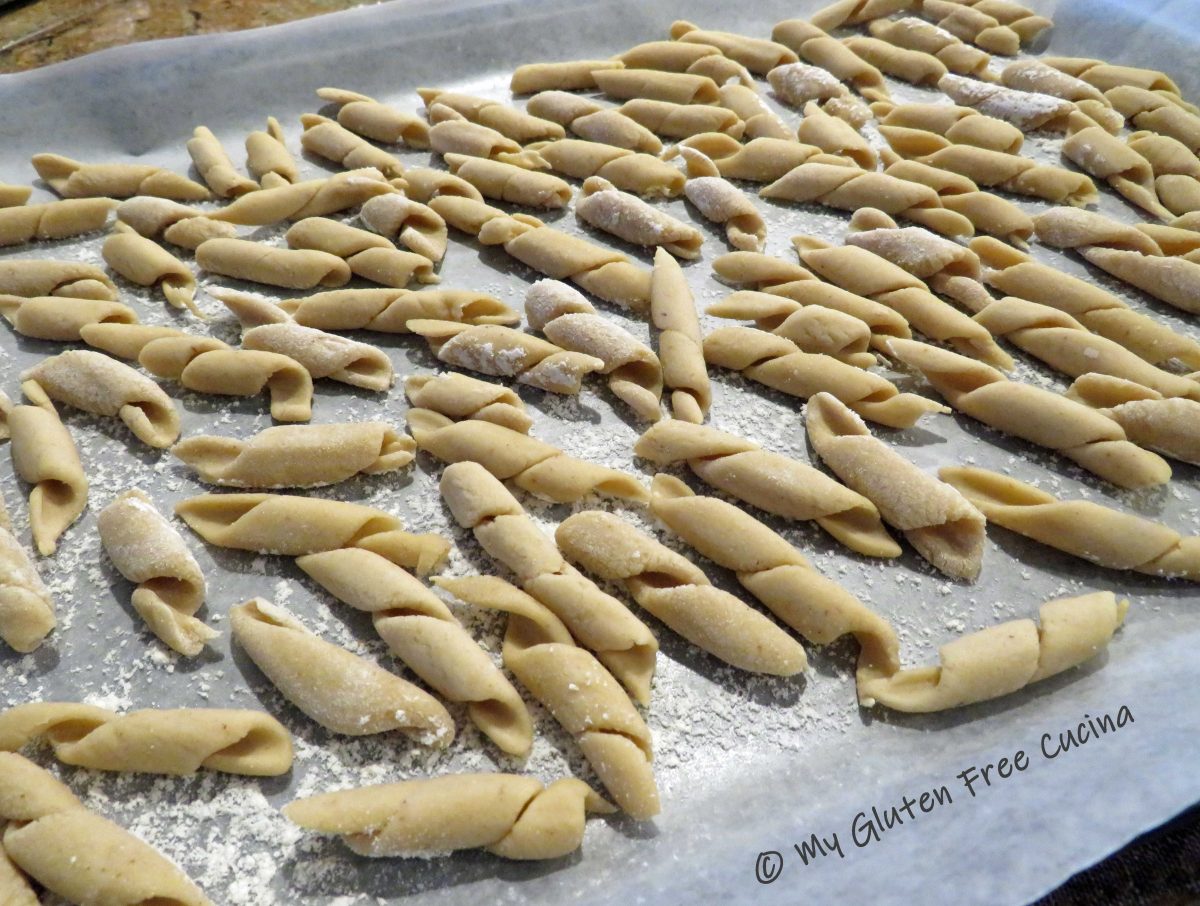
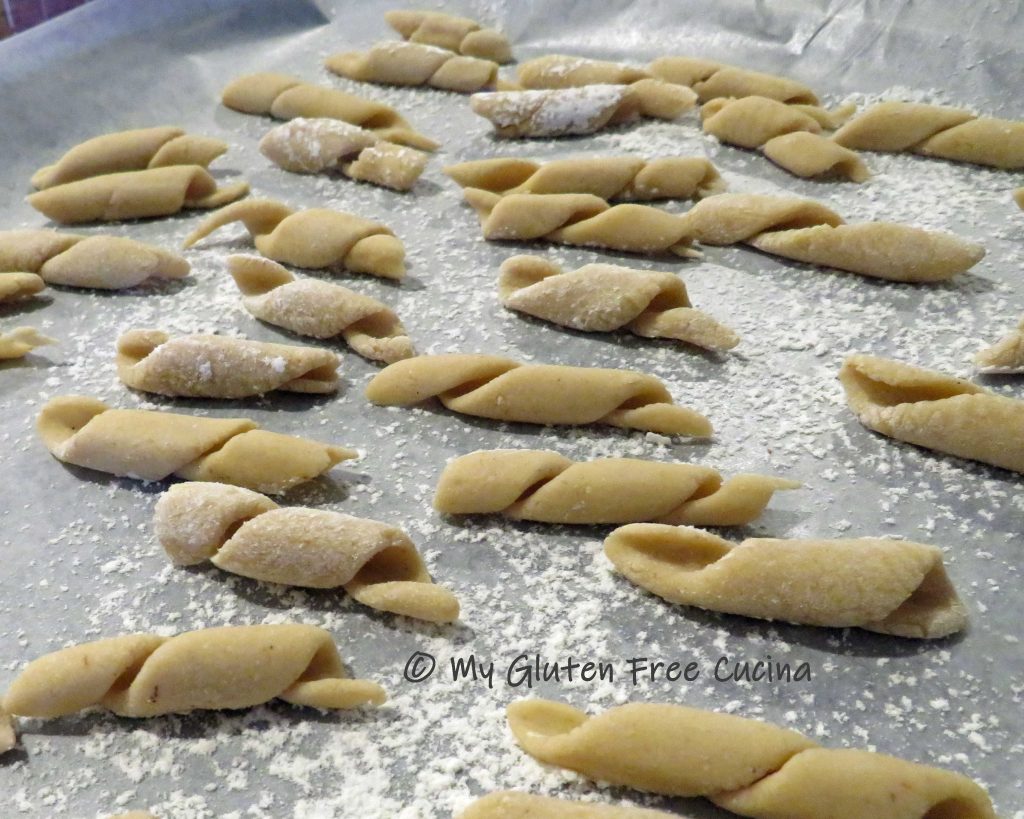
As you form each piece, slide it onto a baking sheet lined with floured wax paper. Can you believe that little ball of dough made all this pasta?

Don’t overcrowd the tray and try to space out the pasta so it doesn’t stick together. Cover with plastic wrap and refrigerate until ready to cook.
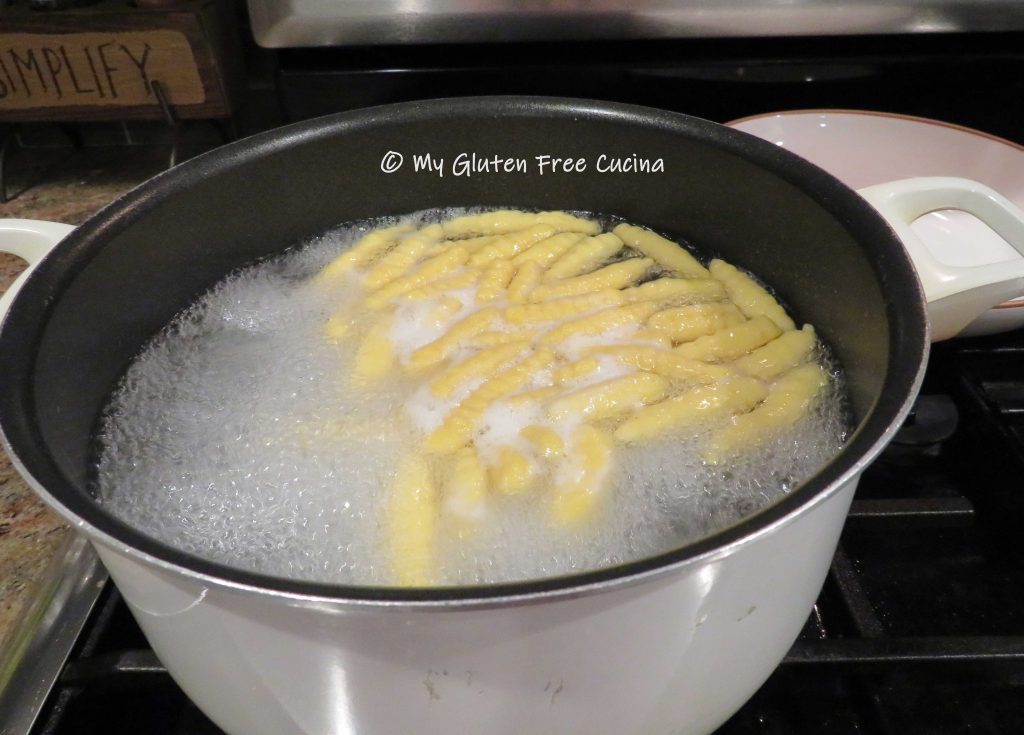
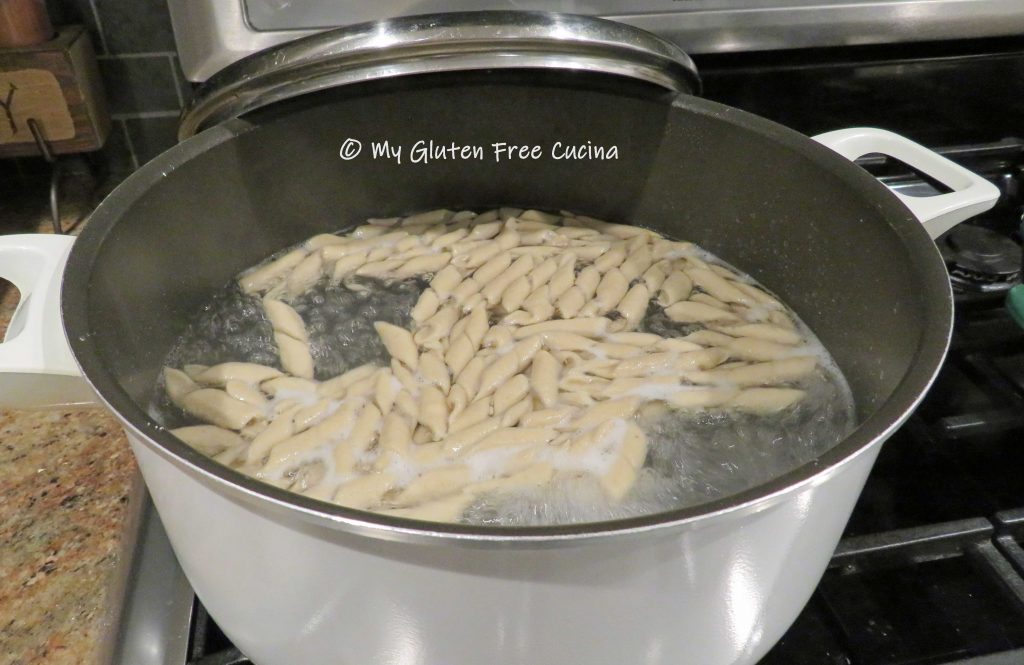
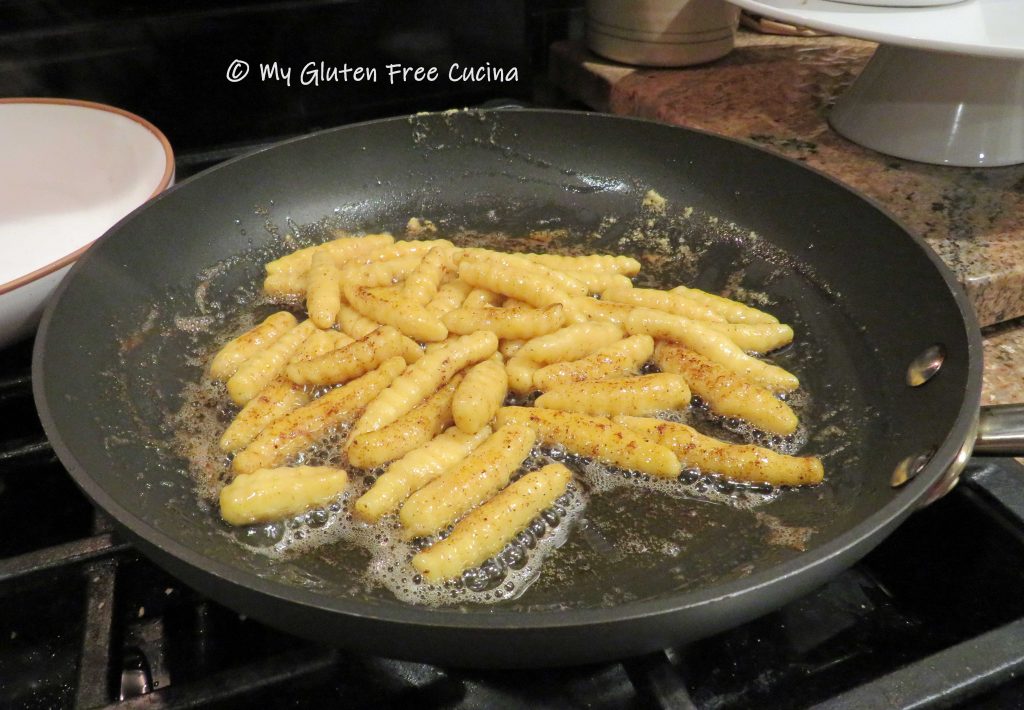
Bring a large pot of salted water to a rolling boil. Add the pasta, stir and cover until the water returns to a boil. Fresh pasta cooks quickly. When it floats to the top it’s done, about 3 minutes for al dente. Don’t overcook it!
To help the pasta keep its spiral shape, use a spider strainer (instead of a colander) to gently remove it from the pot and transfer to a serving bowl. Doesn’t that look wonderful?

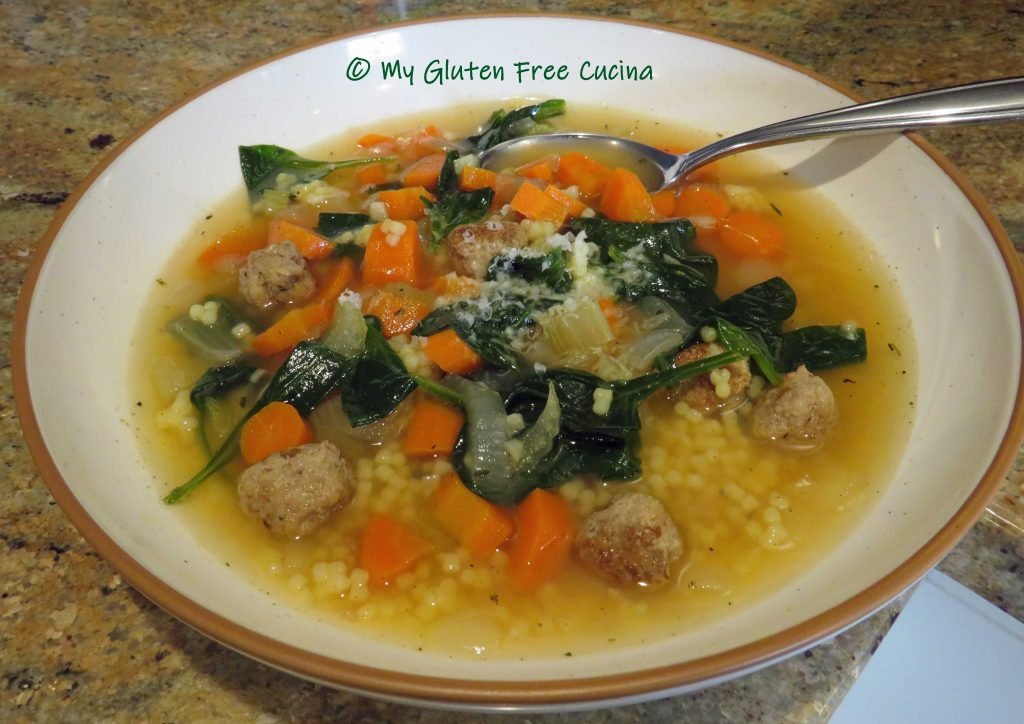
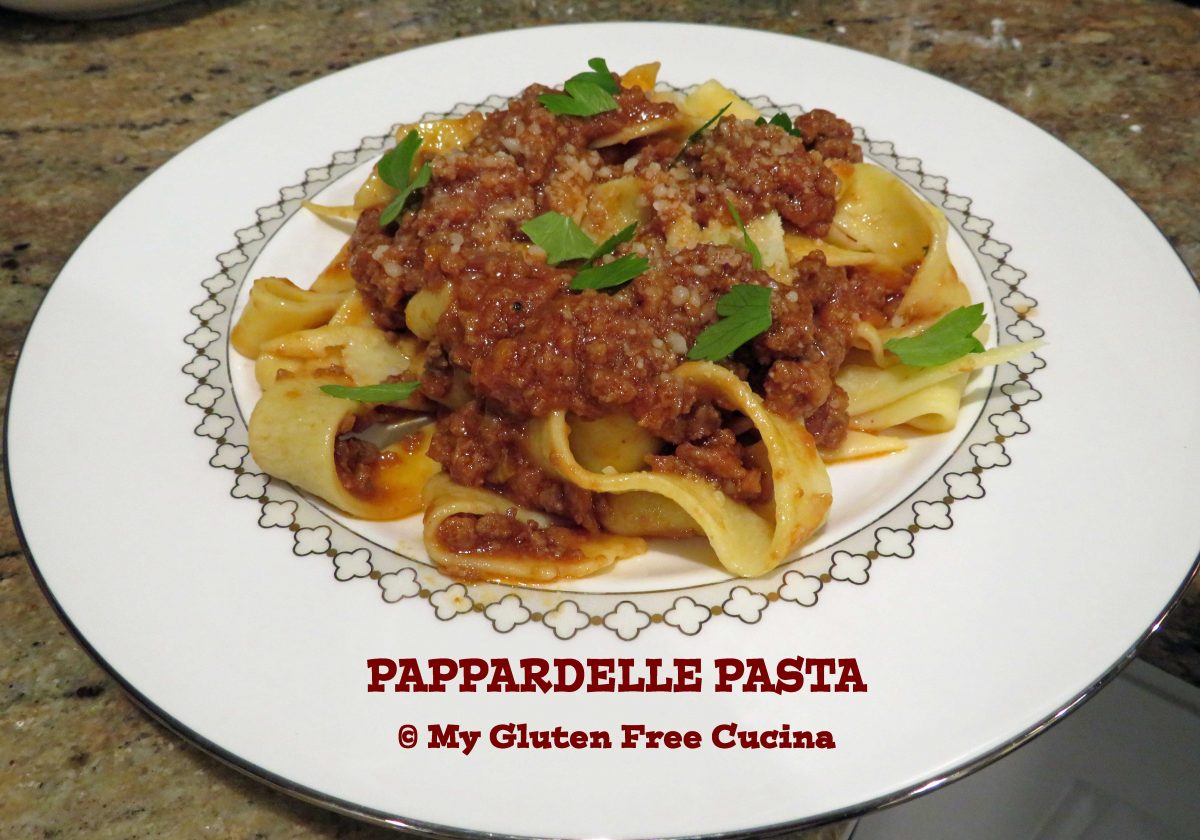
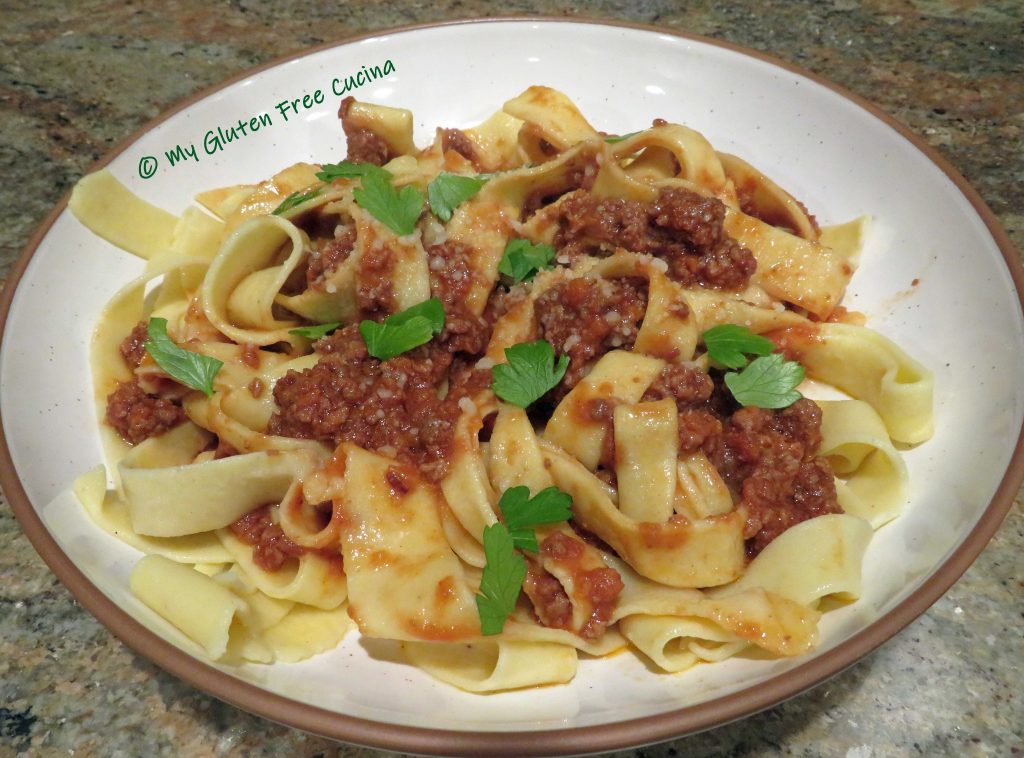
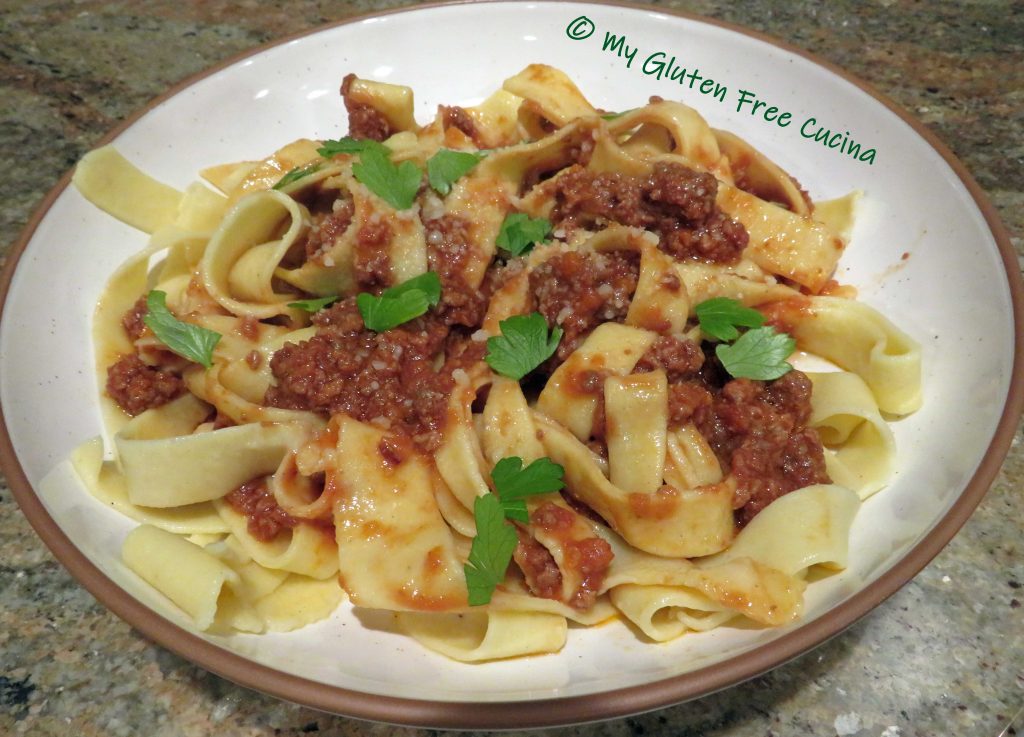
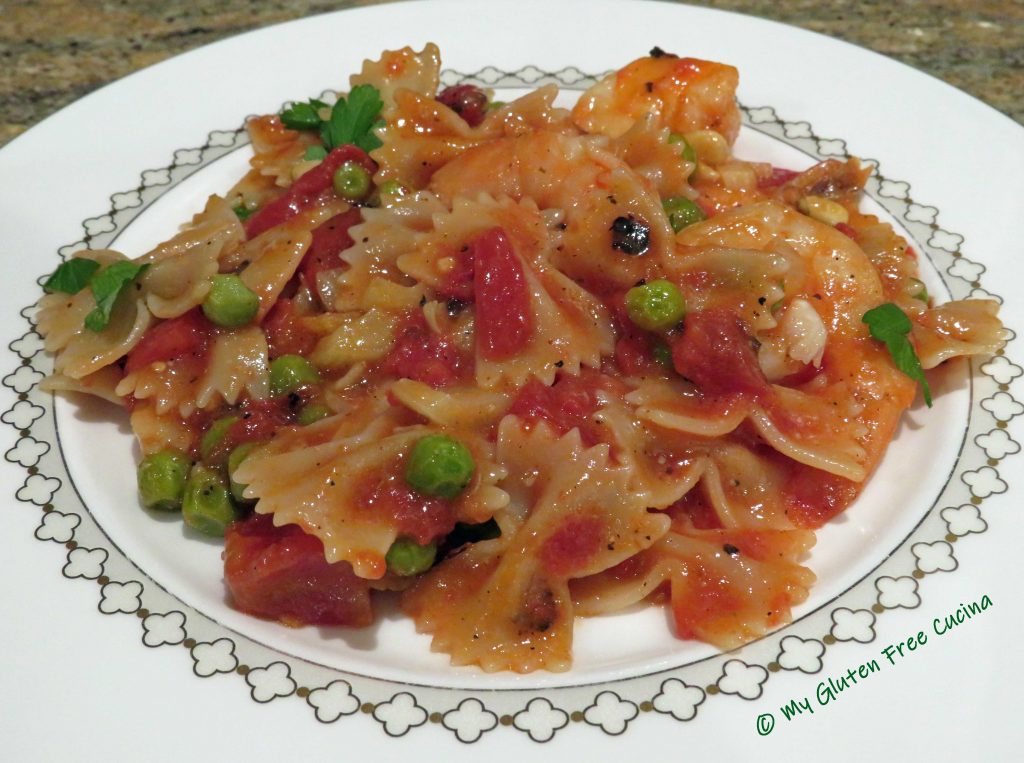
Top with your favorite sauce and finish with grated cheese and parsley.
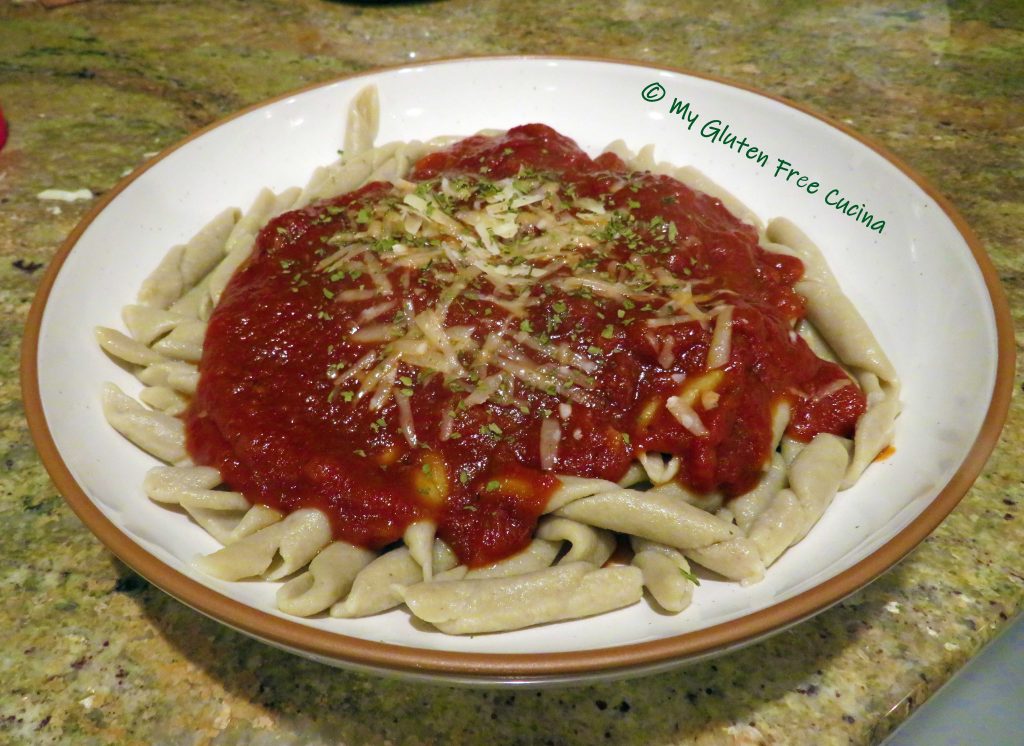
The twisted shape holds onto sauce beautifully. Leftovers the next day had excellent texture when reheated in the microwave. I had so much fun making these!
Notes ♪♫ If you are missing whole wheat pasta on the gluten free diet (I know I was) the taste and texture of this pasta will make you smile. Always follow food safety guidelines for fresh pasta made with eggs, if you are not going to cook the pasta immediately it should be refrigerated!
Originally posted 05/2019 Updated 03/2022

[print_link]


 Serve with finely grated cheese, use the good stuff!


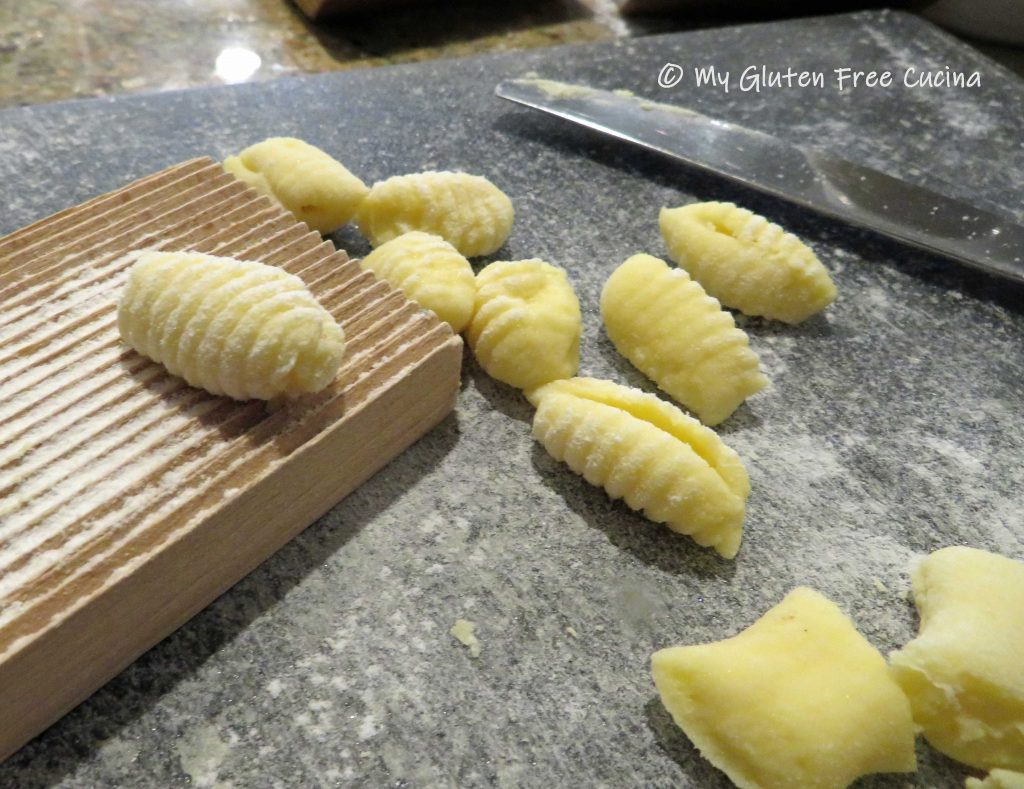 Line a baking sheet with parchment or waxed paper and flour lightly. Place the finished gnocchi on the baking sheet. If not using right away, cover with plastic wrap and refrigerate.

 Use a
Use a 


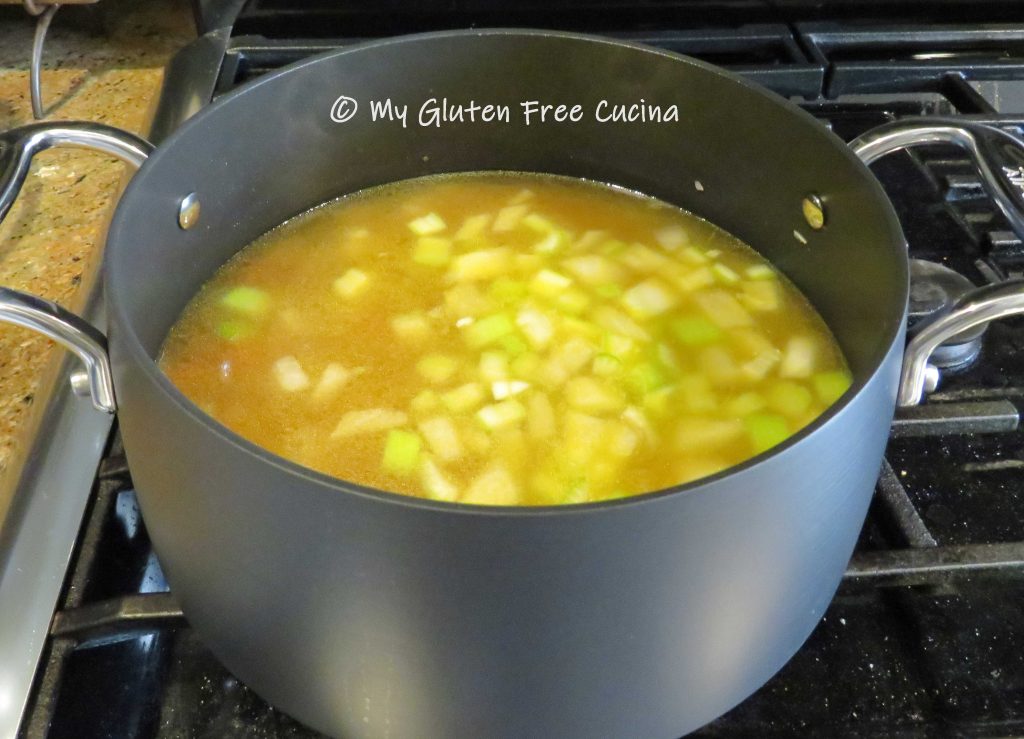
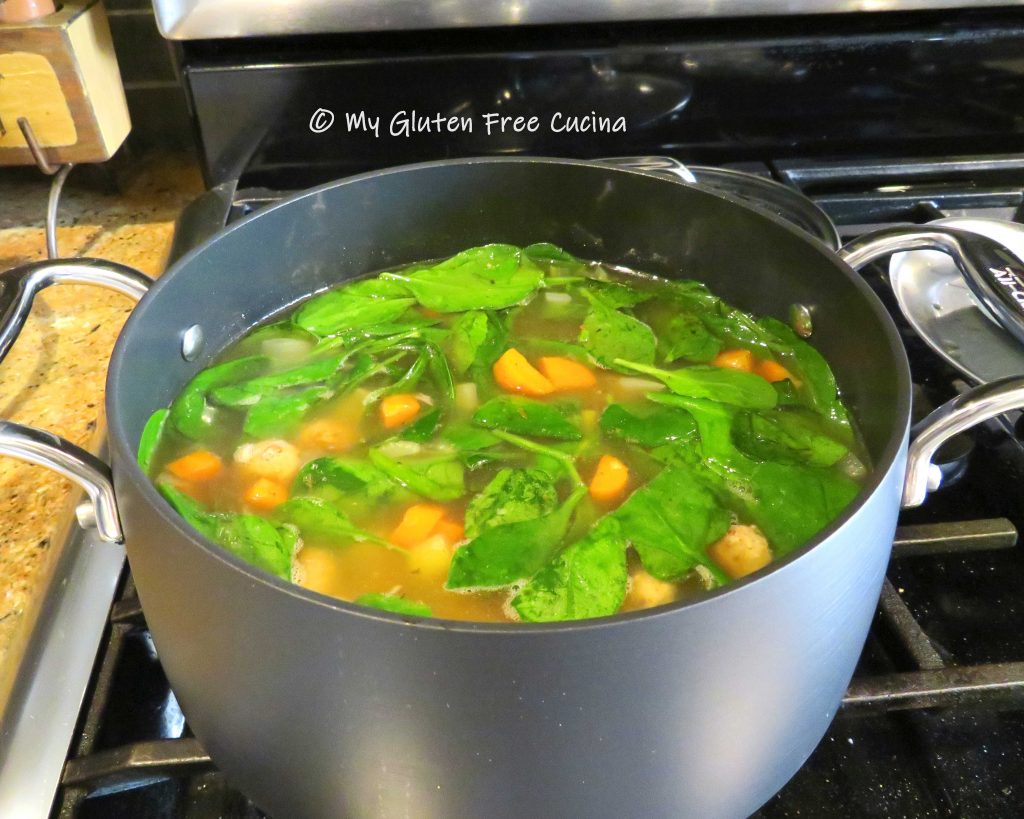
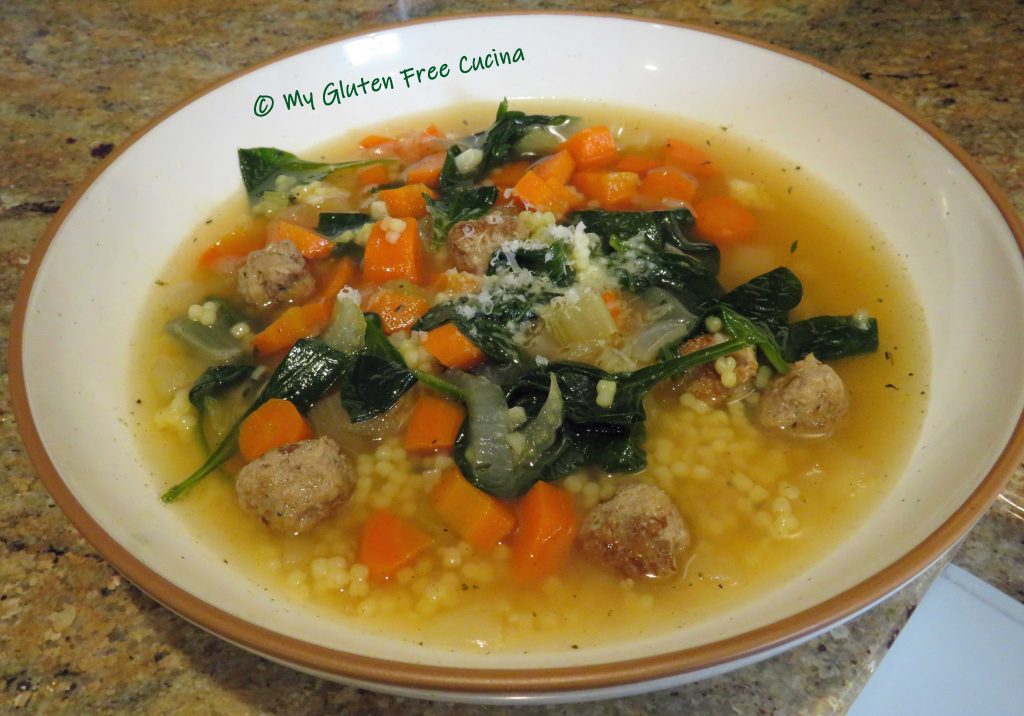
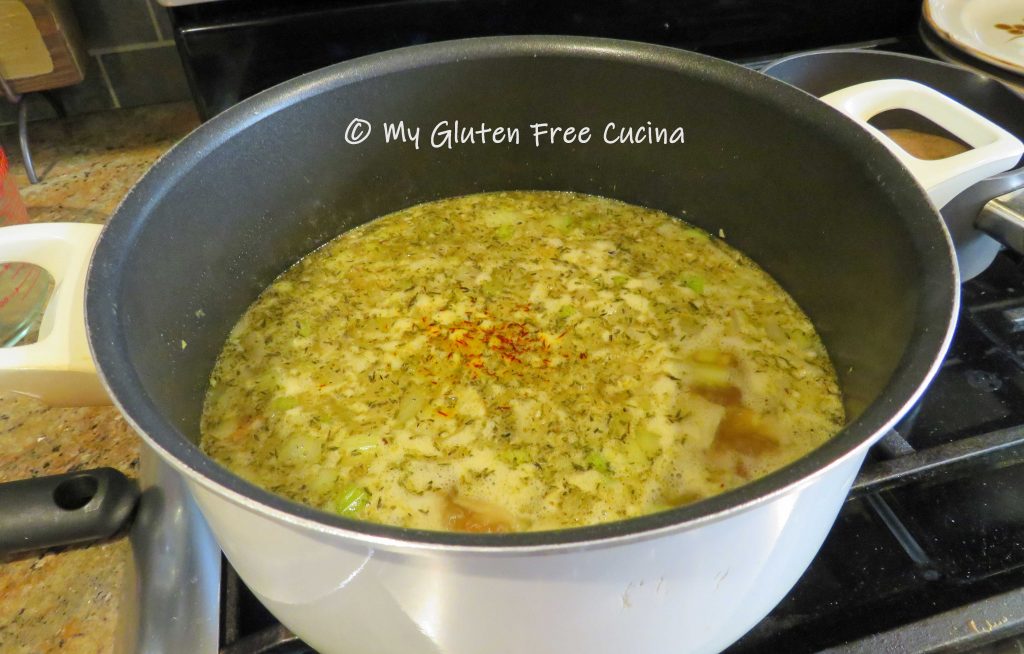
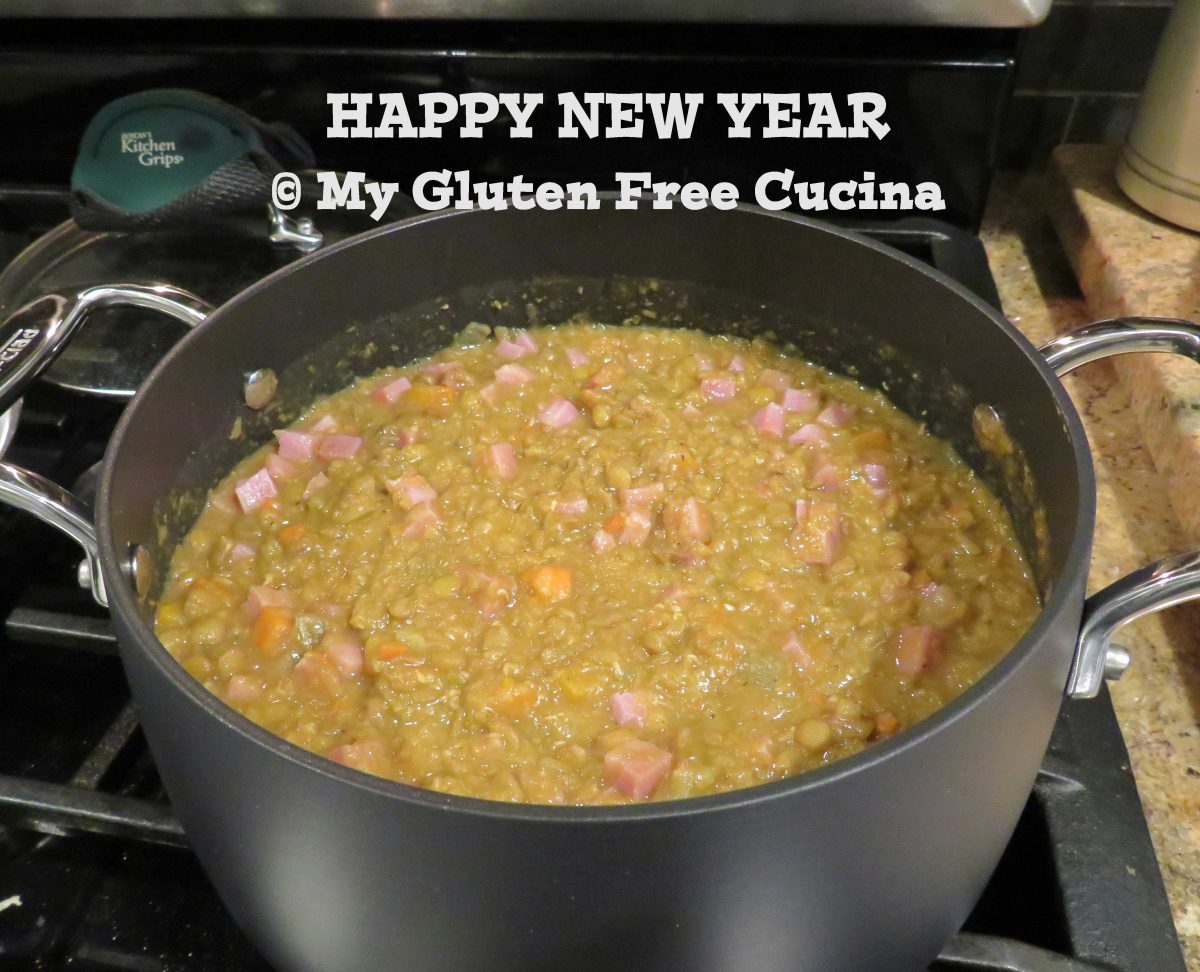
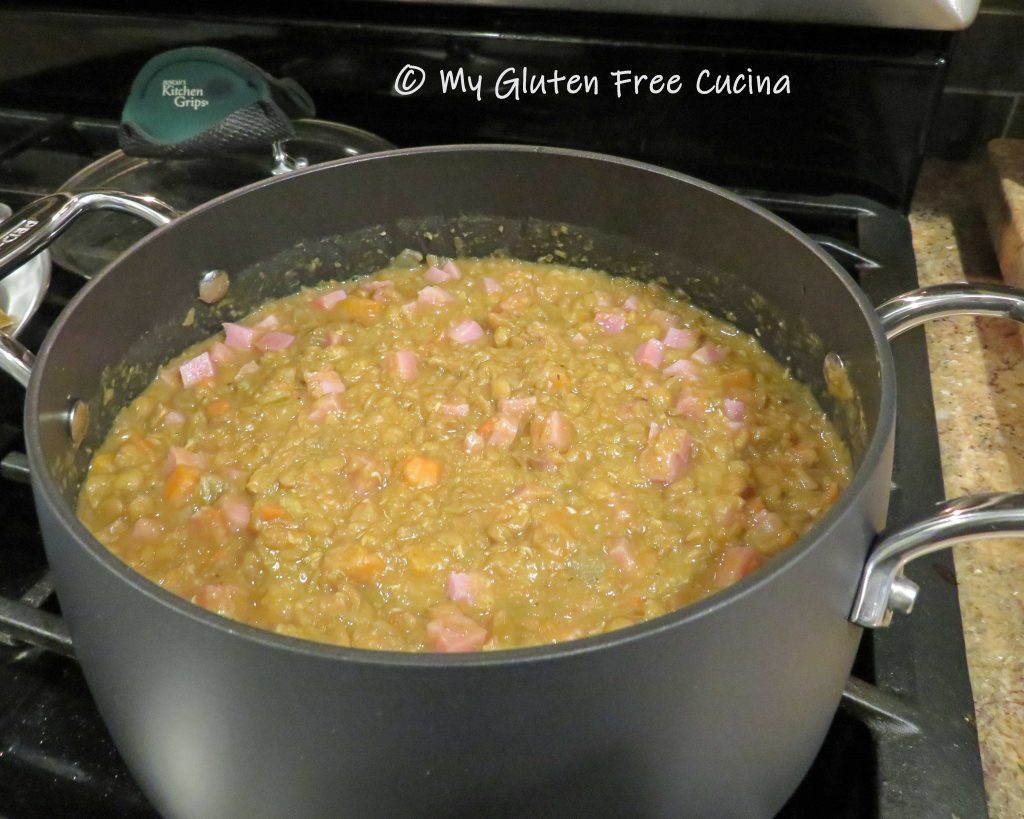
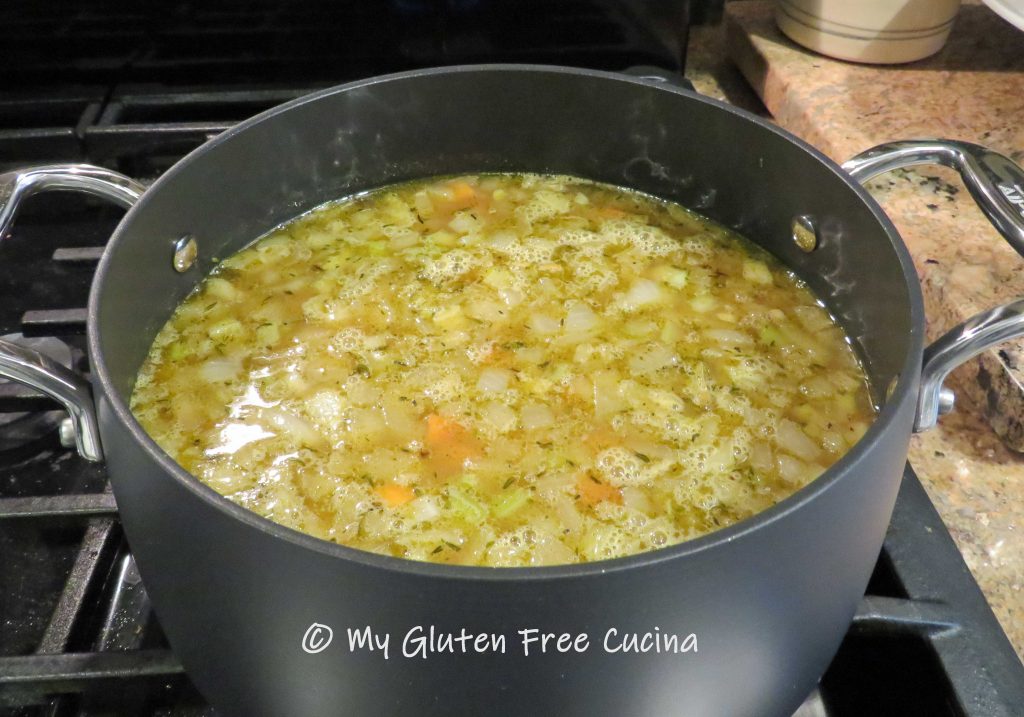
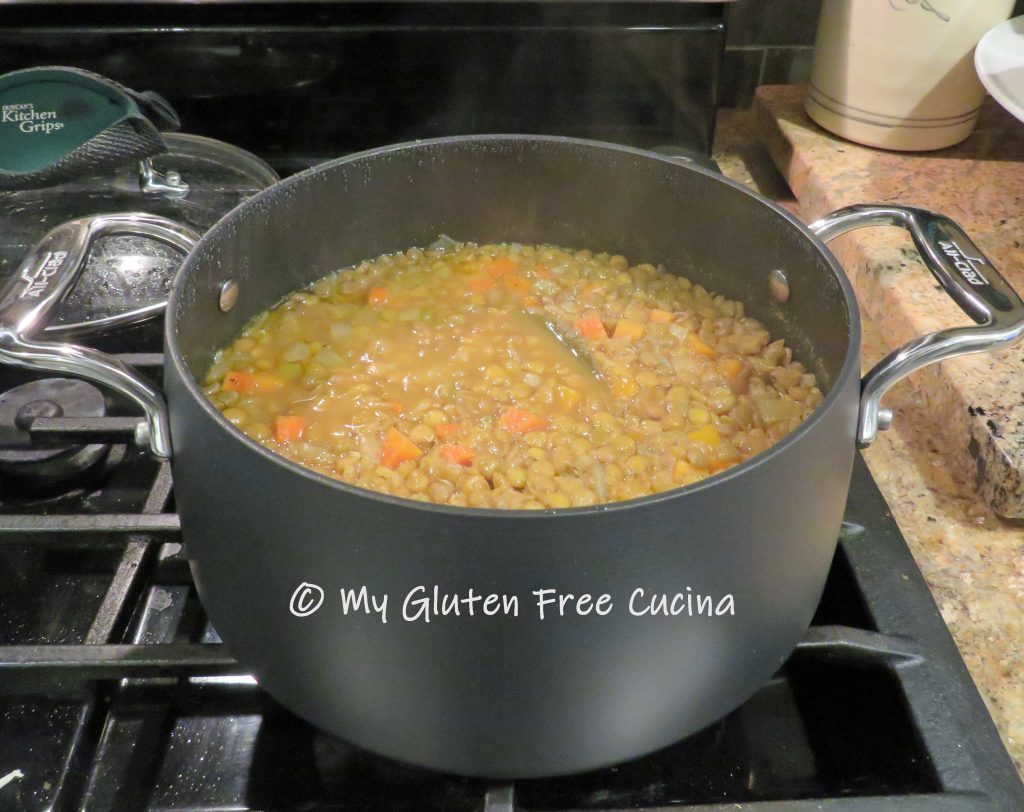
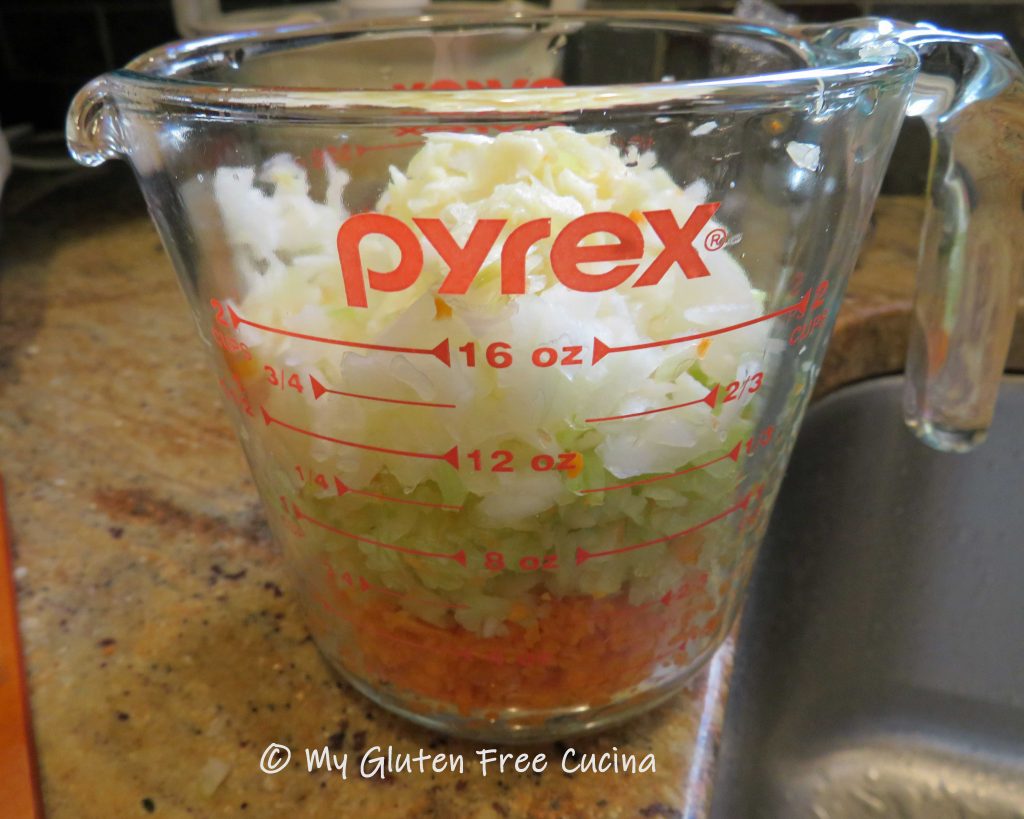
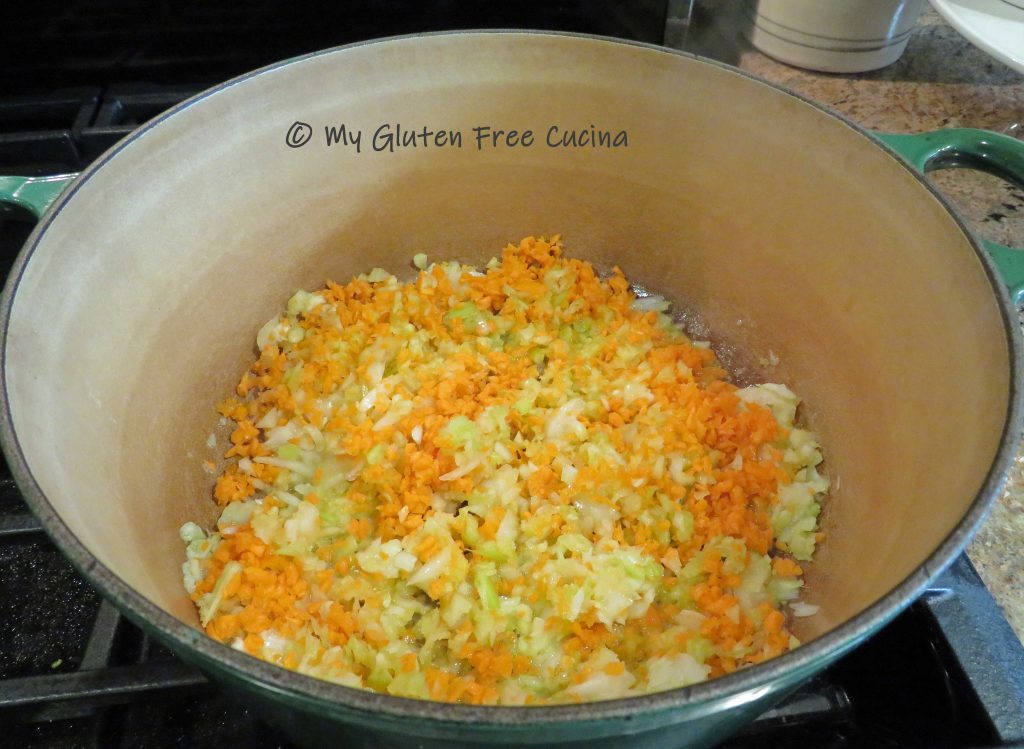
 Dice 6-8 carrots, 6-8 celery stalks, and one large onion. Try to cut the pieces to approximately the same size.
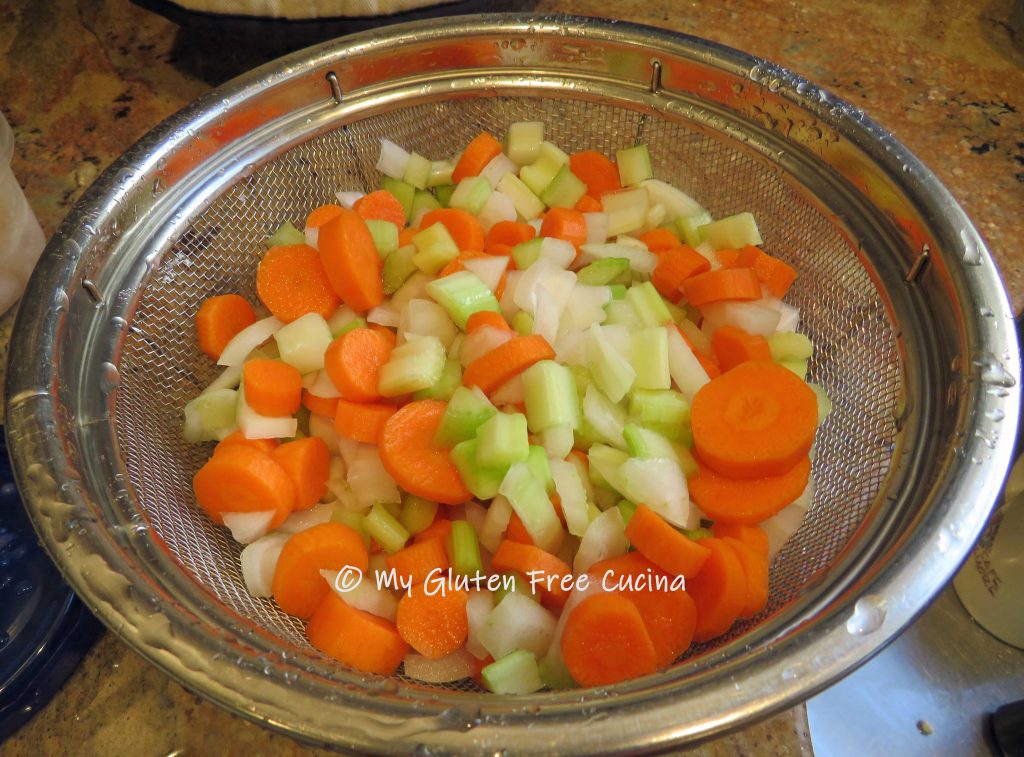 In a clean stockpot, sauté the vegetables in 1 tbsp. olive oil. Season with salt and pepper.
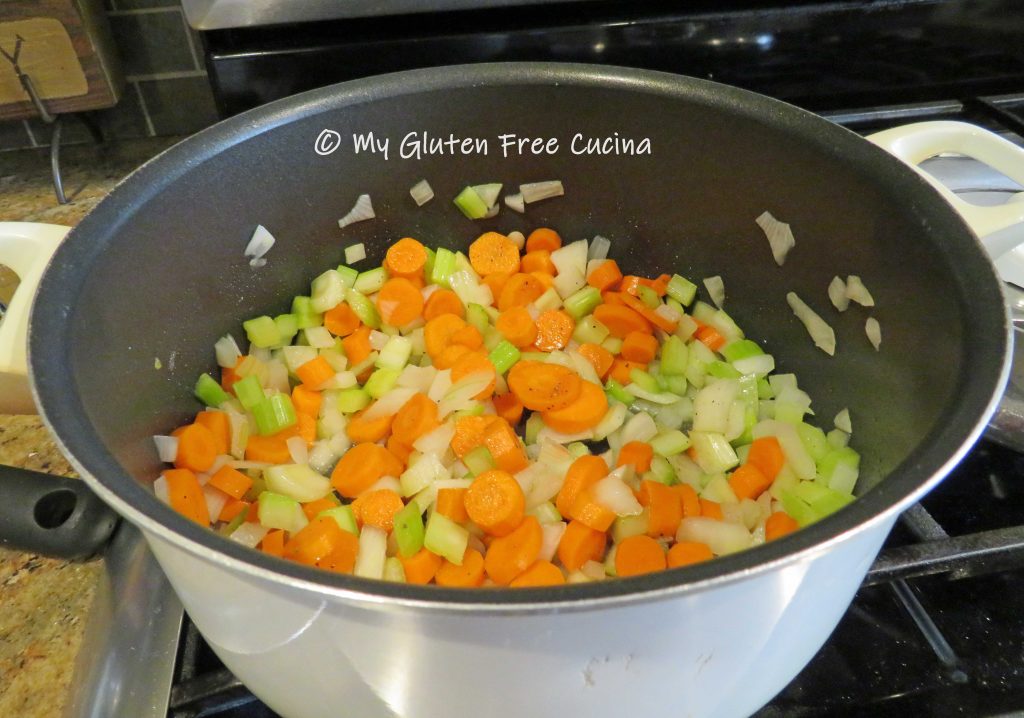

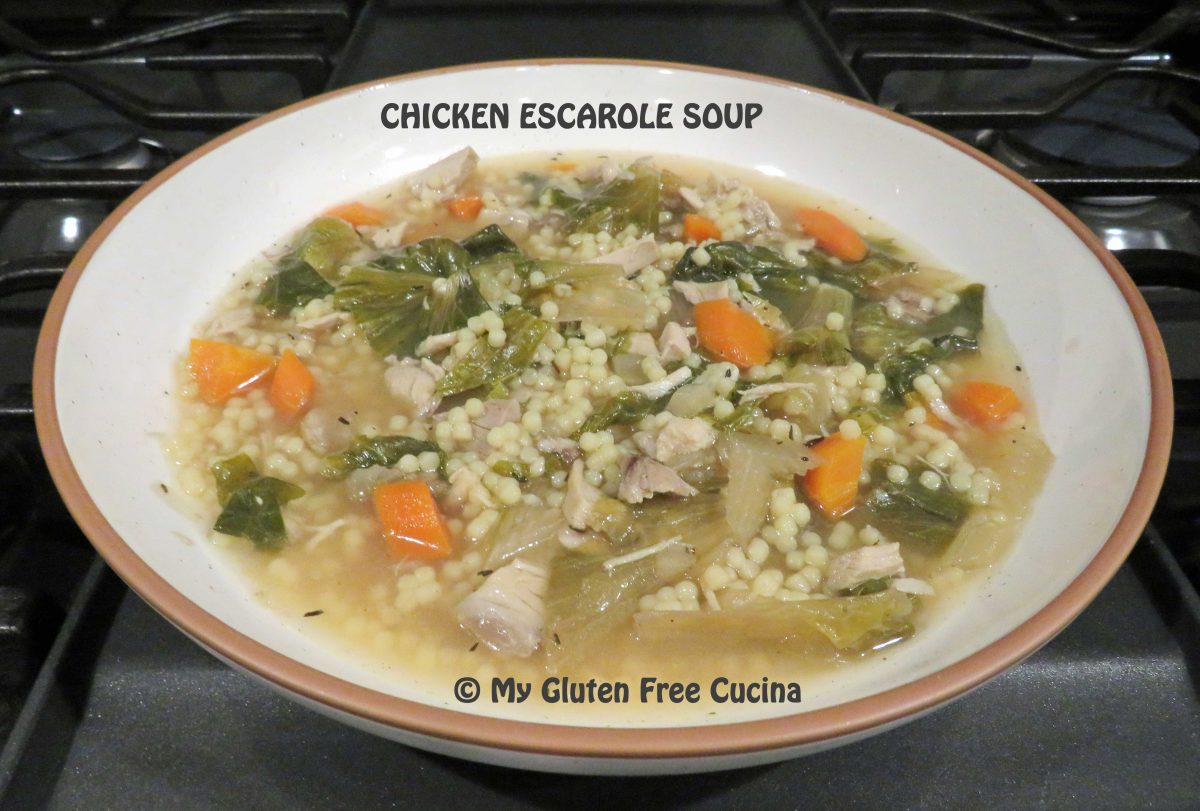
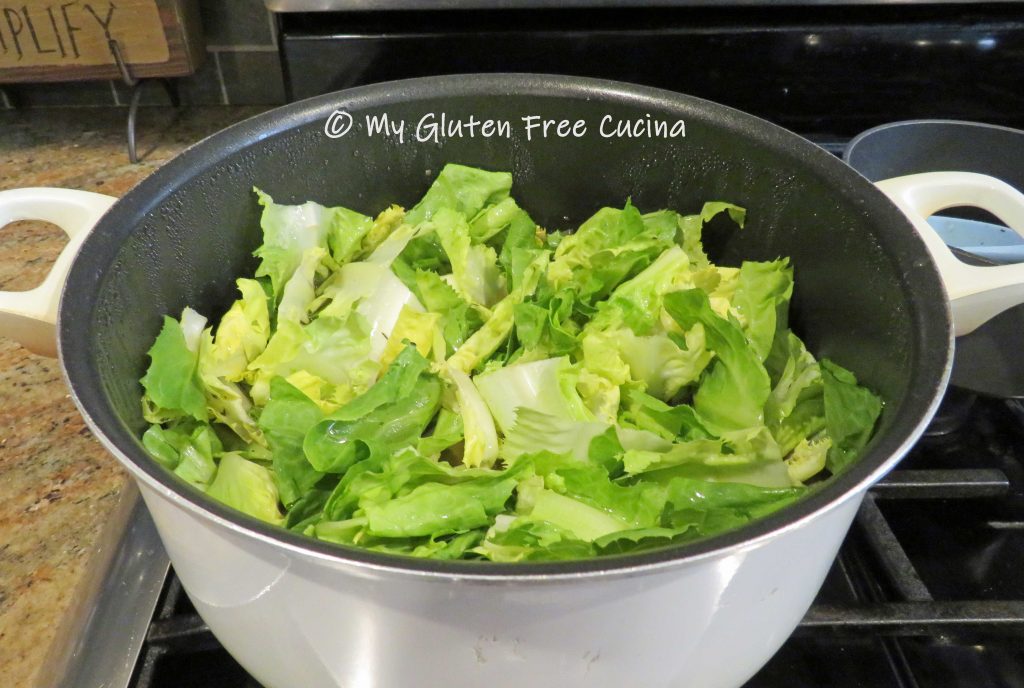
 Remove and discard the outer leaves of the escarole, then tear the leaves into large pieces and rinse thoroughly. To this day I can still hear my mother telling me to wash the escarole “leaf by leaf”.
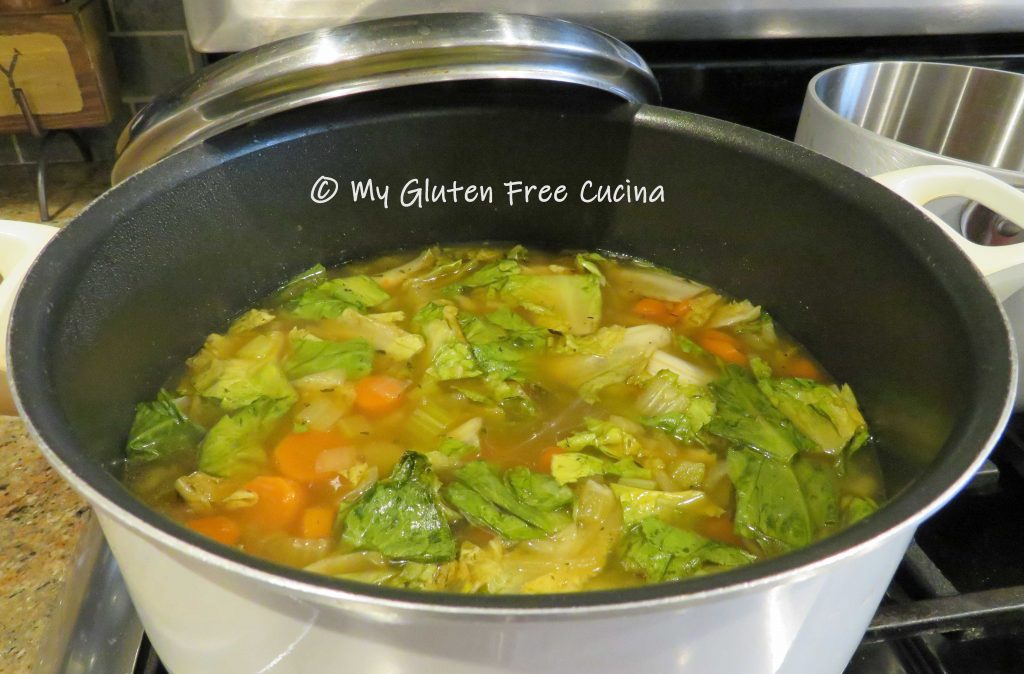
 Escarole cooks quickly, and the residual heat is enough to wilt the leaves. Stir well, cover the pot and let it cool to room temperature. Refrigerate overnight.
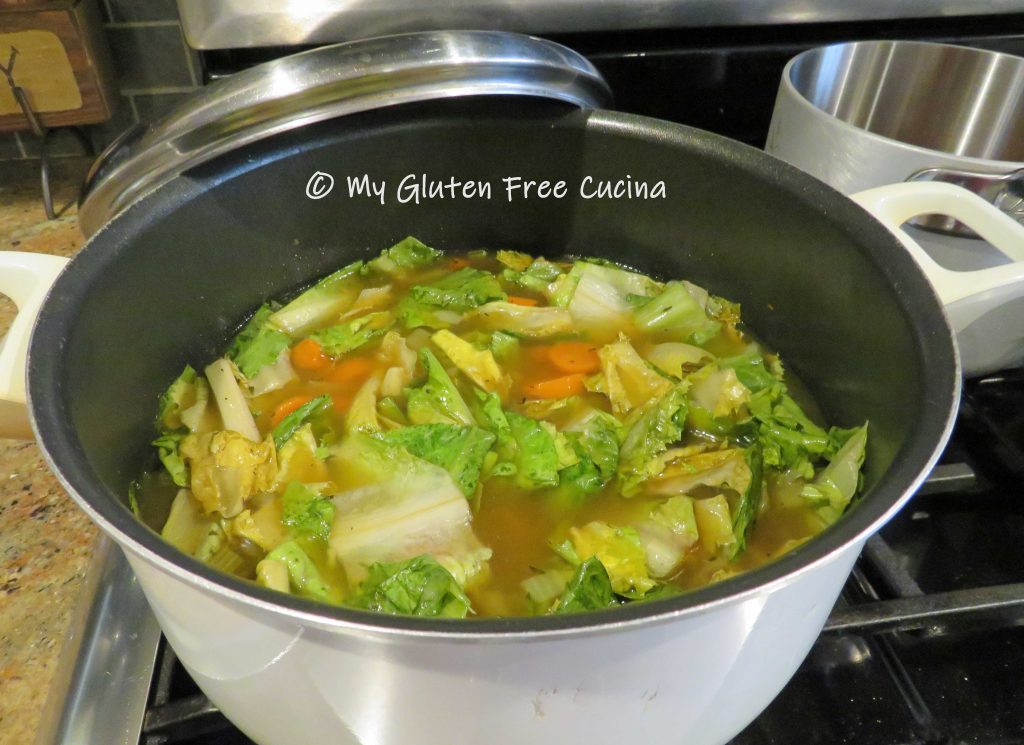


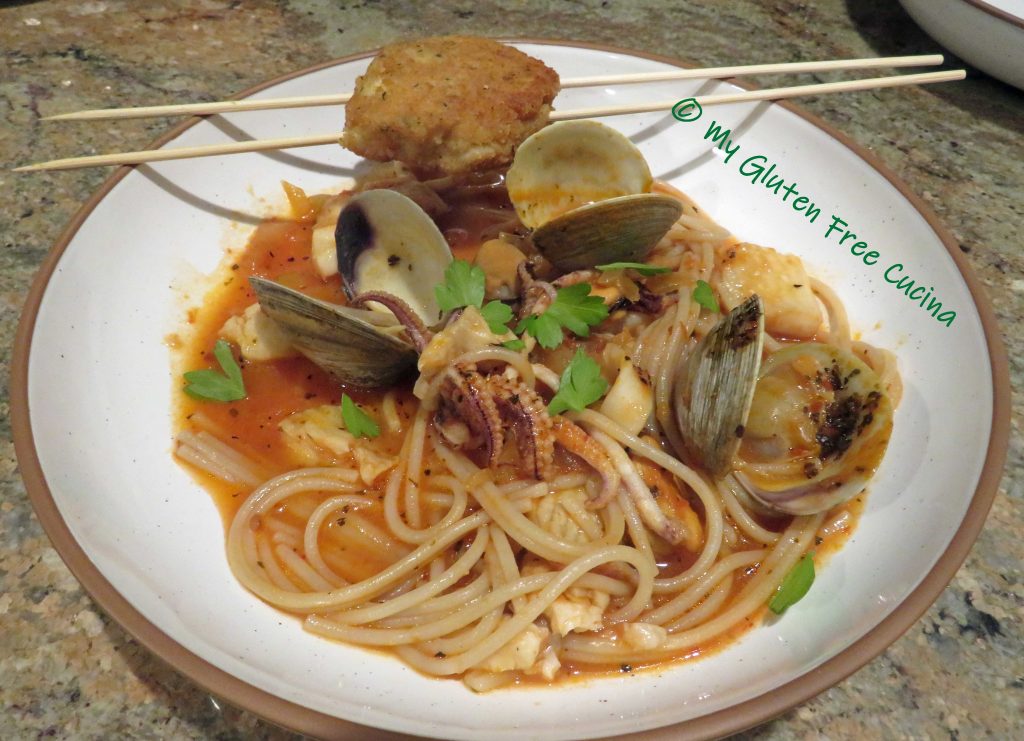
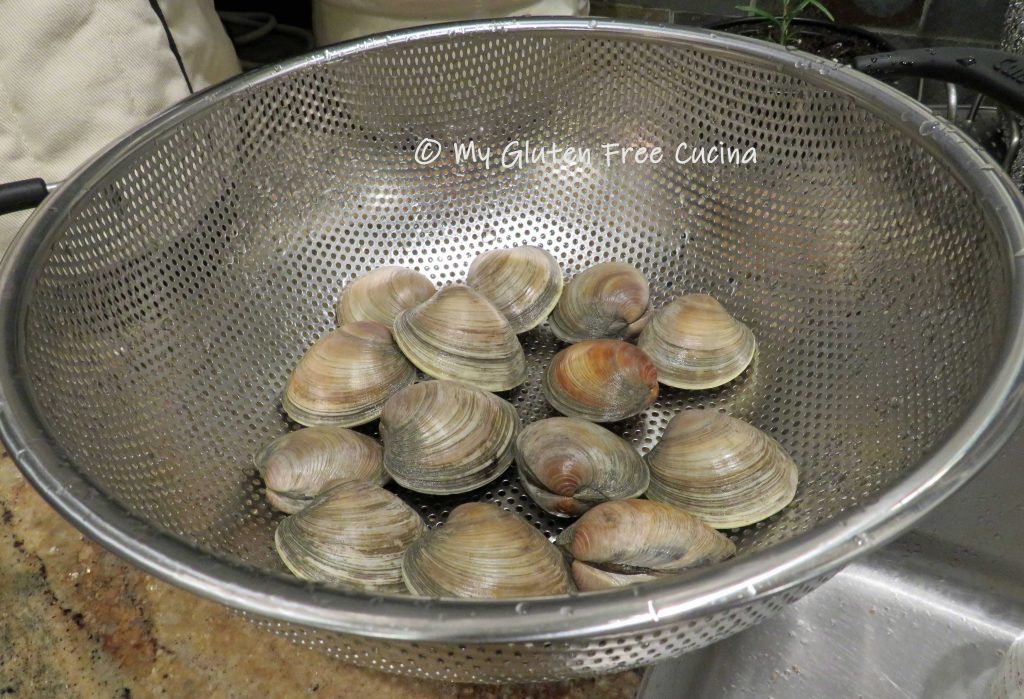
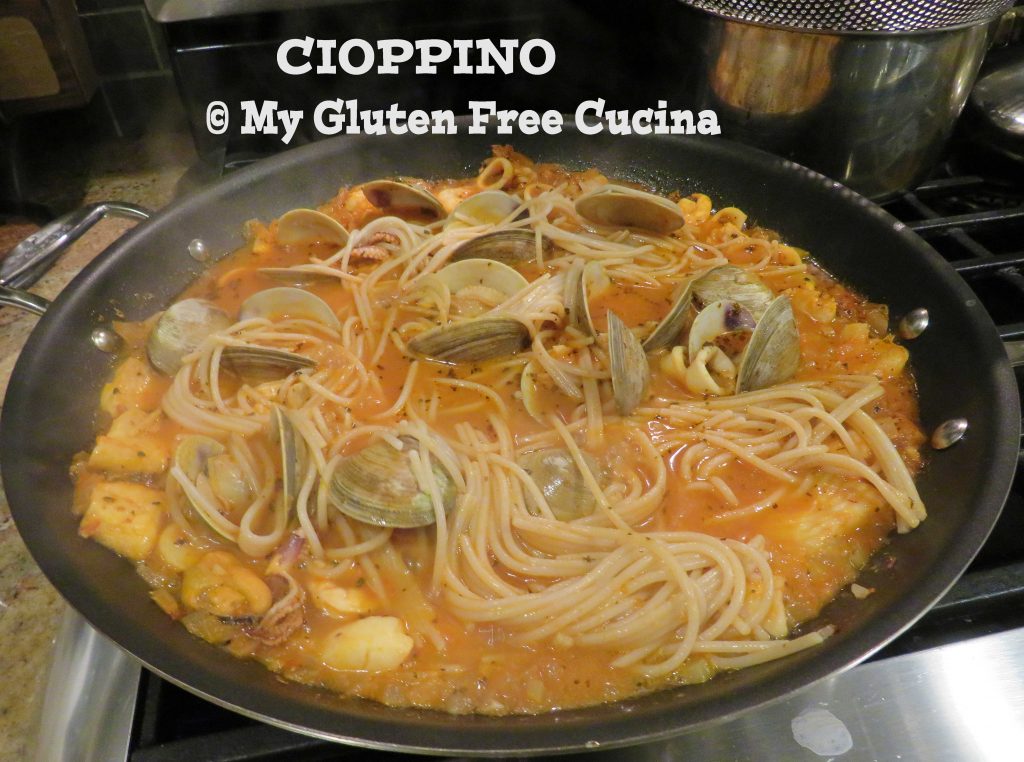
 To complete my seven fishes, I bought a dozen fresh littlenecks and flounder from the frozen aisle. I topped it all off with a crab cake made with

 If using frozen fish, thaw before cooking. You can improve the texture by soaking it in milk.
 Sauté 2 minutes then add the tomatoes, lemon juice, Worcestershire sauce, stock, white wine and the spices. Cover and simmer on low for 30 minutes.
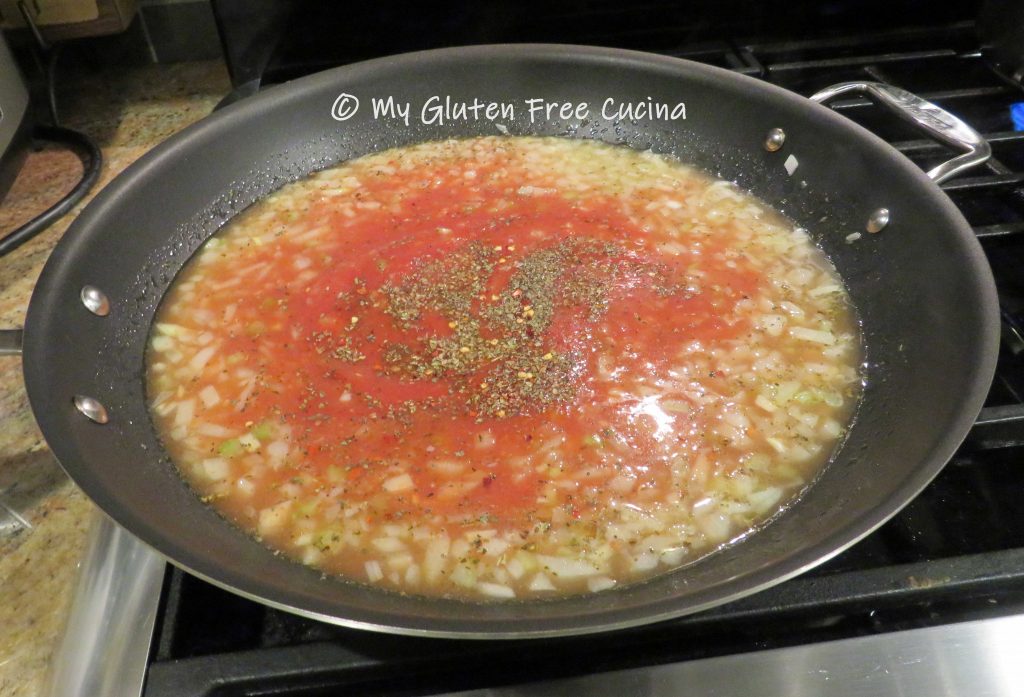


 Use a
Use a 


 Chop the pancetta into fine dice or pulse a few times in the processor.
 Add it to the pot and continue cooking slowly for 10 more minutes.
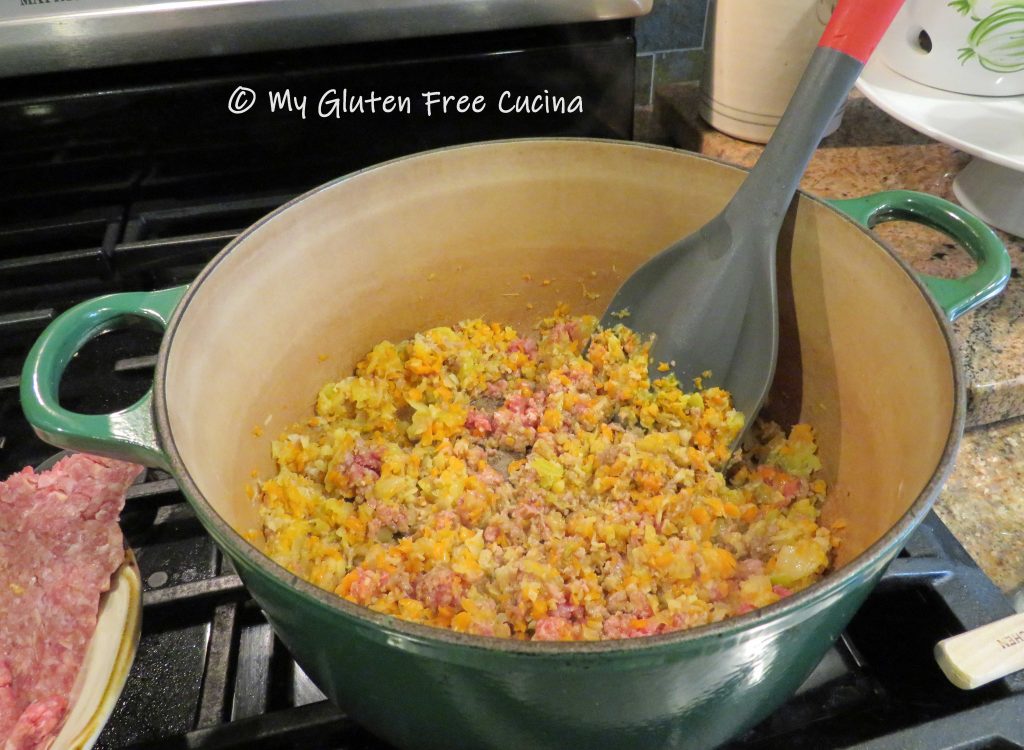 Allow some of the liquid to evaporate before adding more meat, you want it to brown, not steam. Add more salt and pepper to taste.
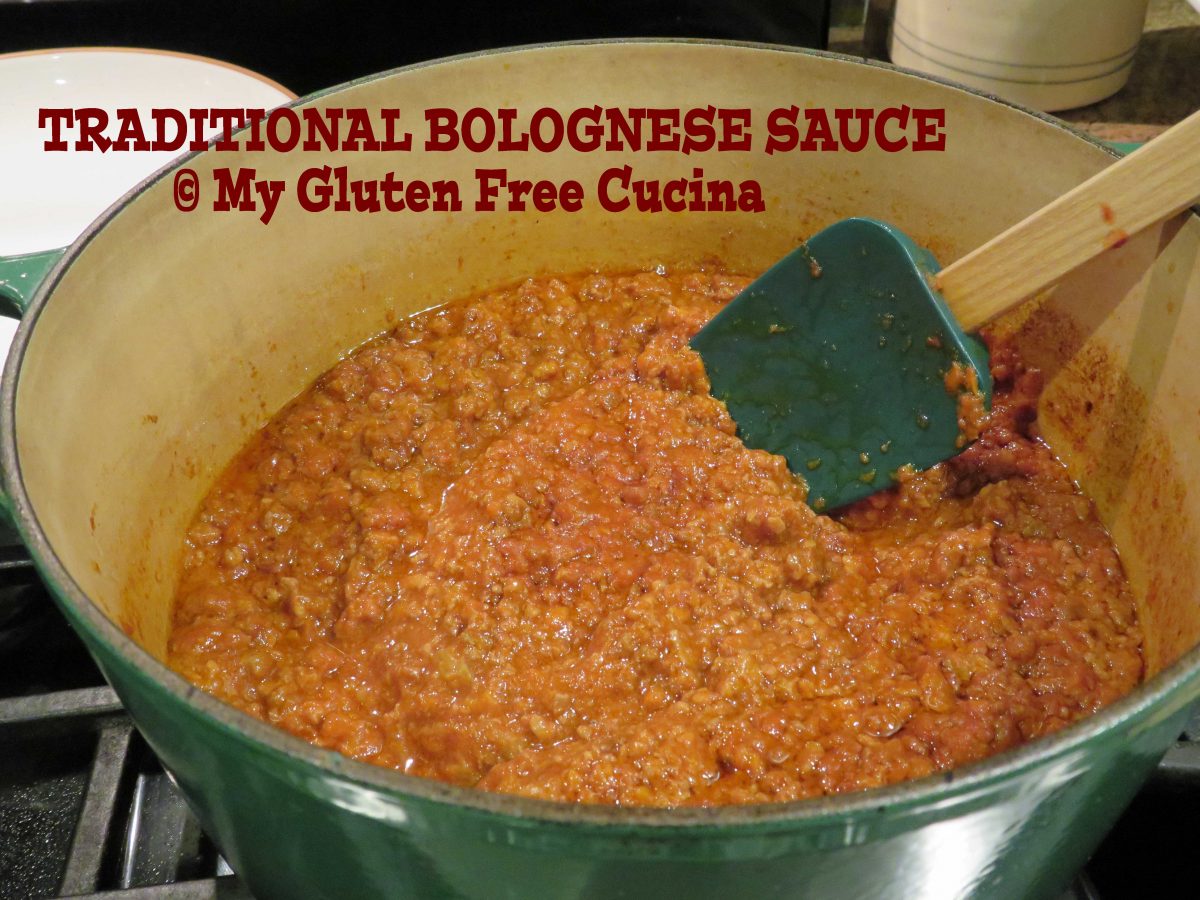
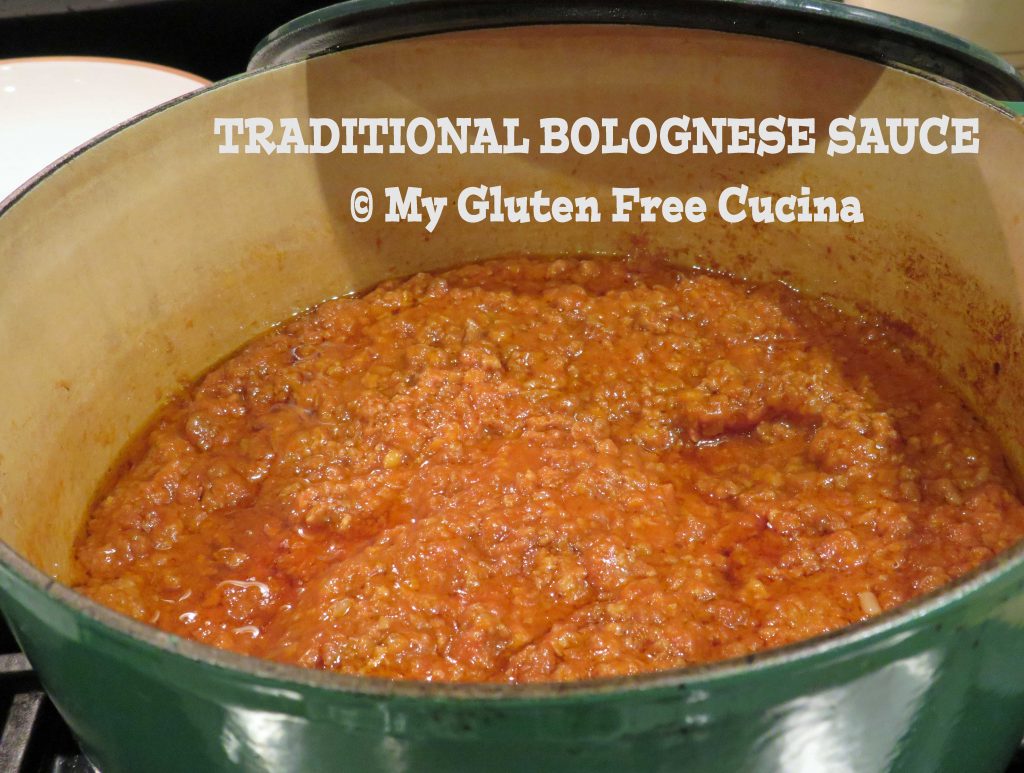
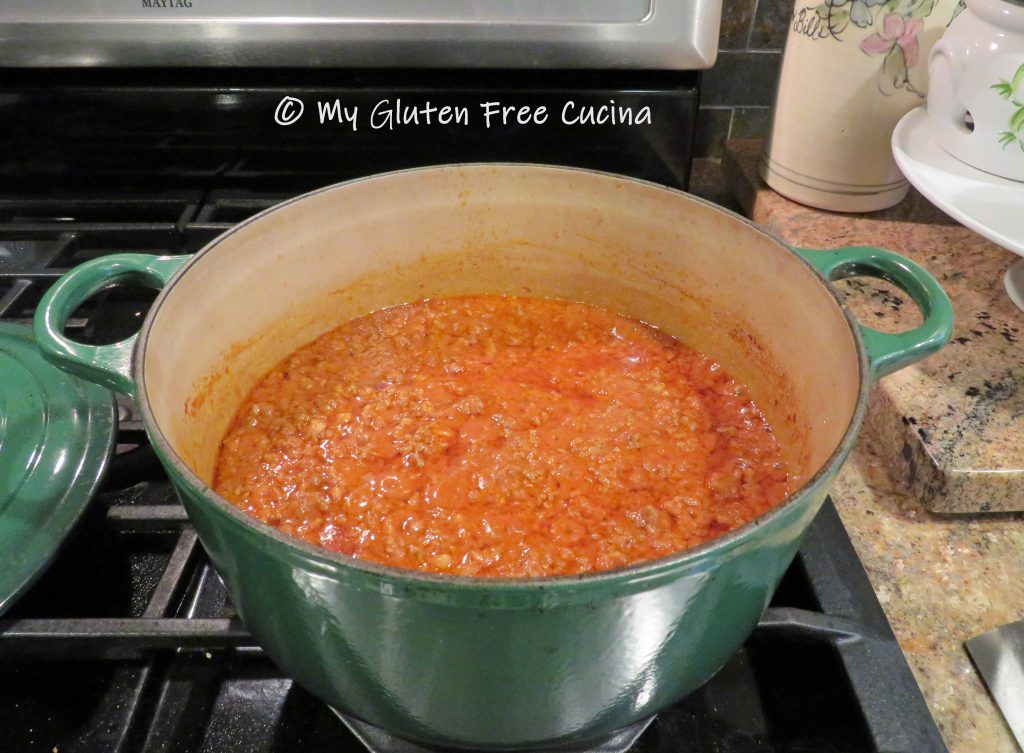
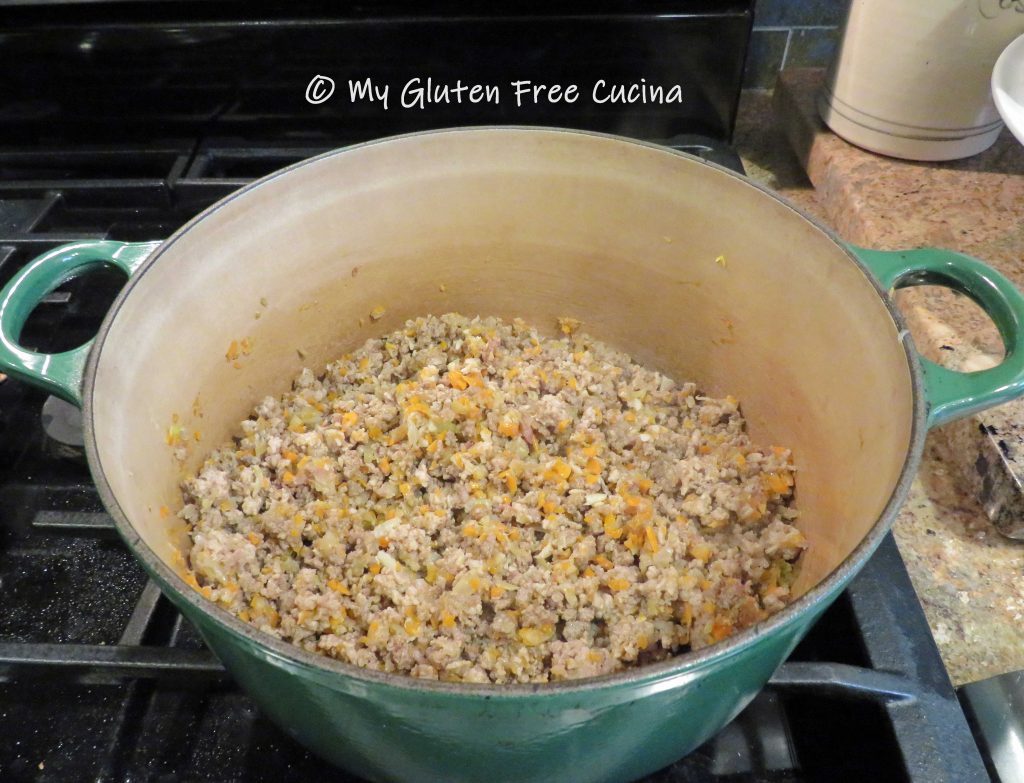 After about 20 minutes the meat should be well browned and starting to caramelize on the bottom of the pan. Clear a spot in the middle of the pan and add the tomato paste. Cook for 2 minutes, then stir the tomato paste into the meat.
 Add the red wine, and use a spatula to loosen up any browned bits on the bottom of the pan and stir them into the sauce.
 Simmer 3 minutes to allow some of the wine to cook off, then add the milk (or cream), tomatoes and stock.
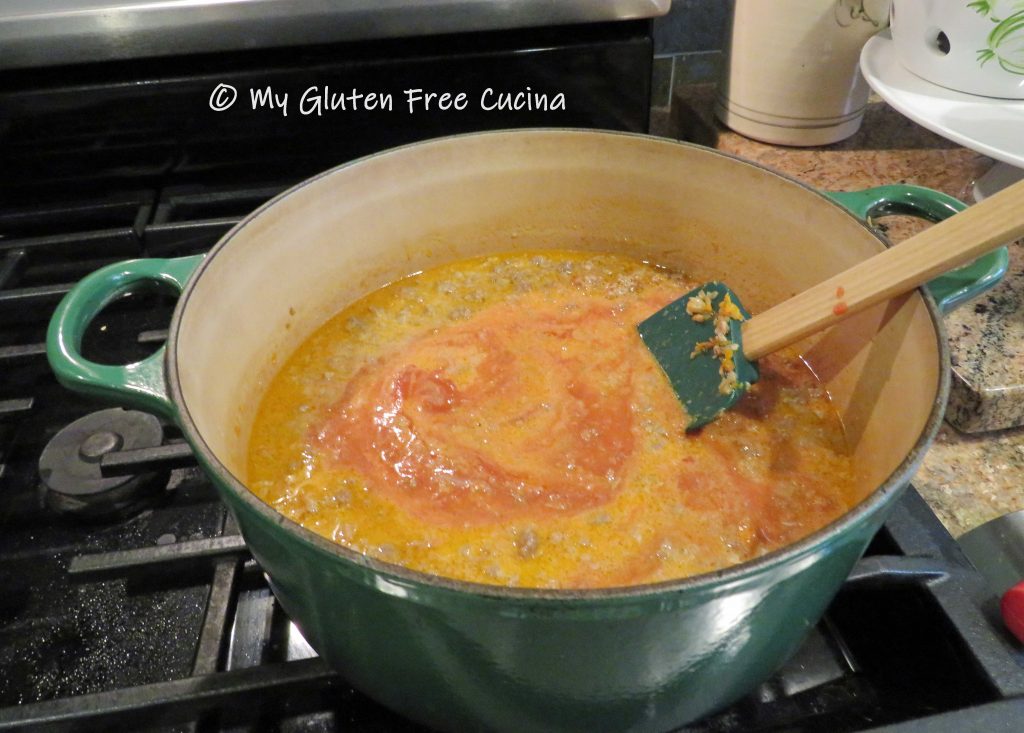

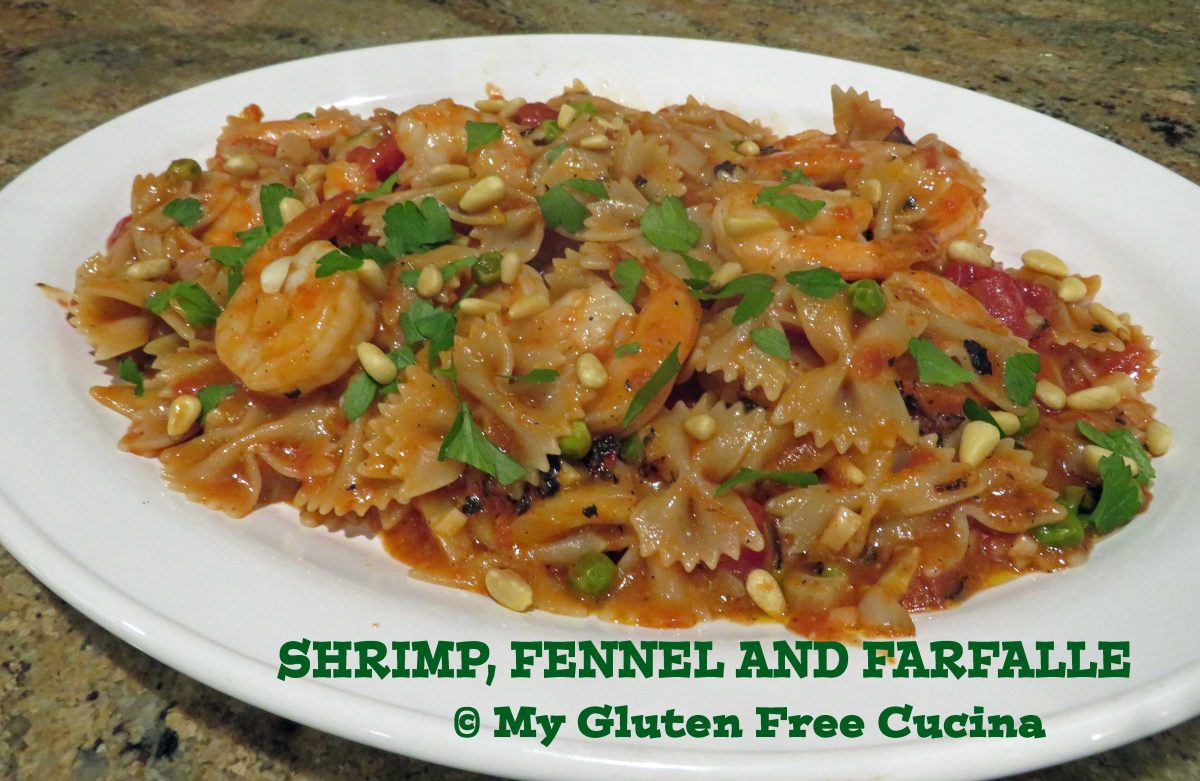
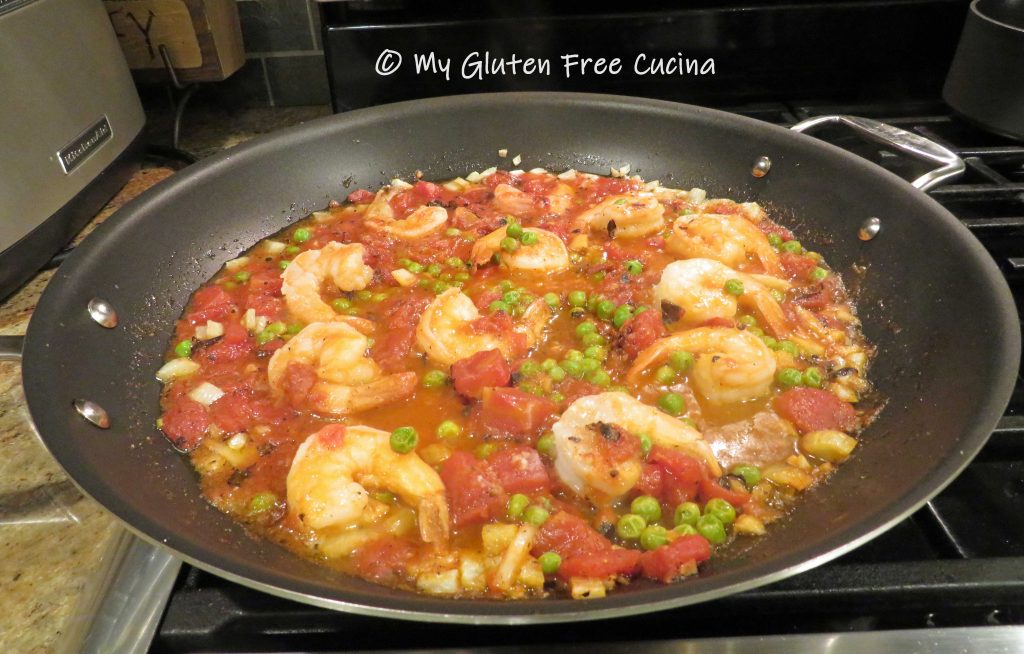


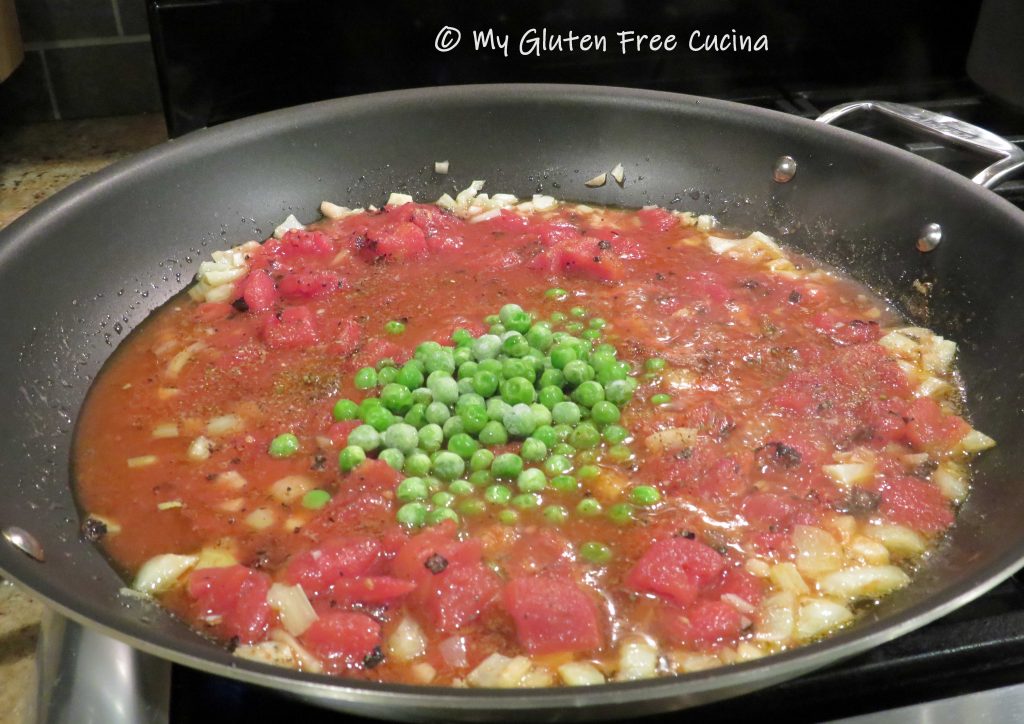
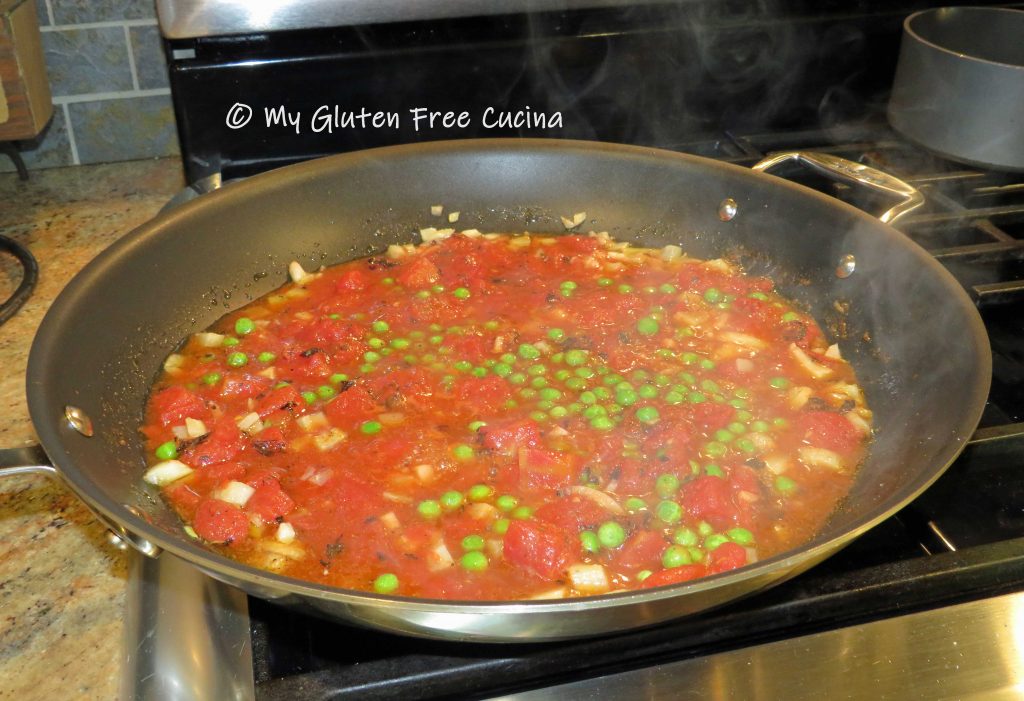
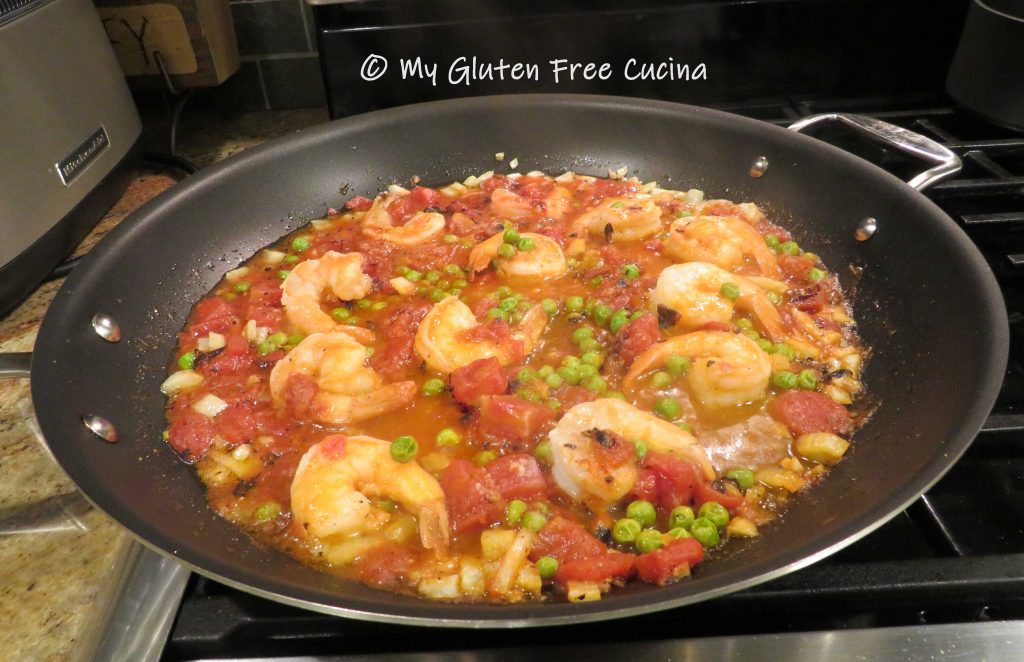
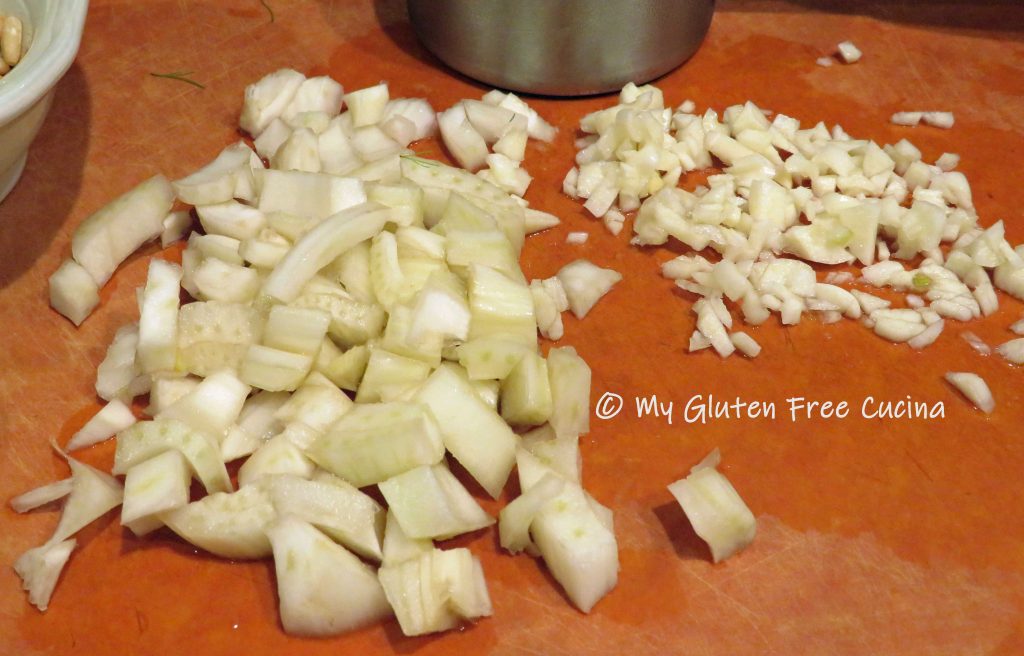 Add the diced fennel and cook for one minute, then add the garlic and cook for 30 seconds. Stir in the diced tomatoes, peas, wine and seasoning. Simmer for 10 minutes to reduce the liquid.
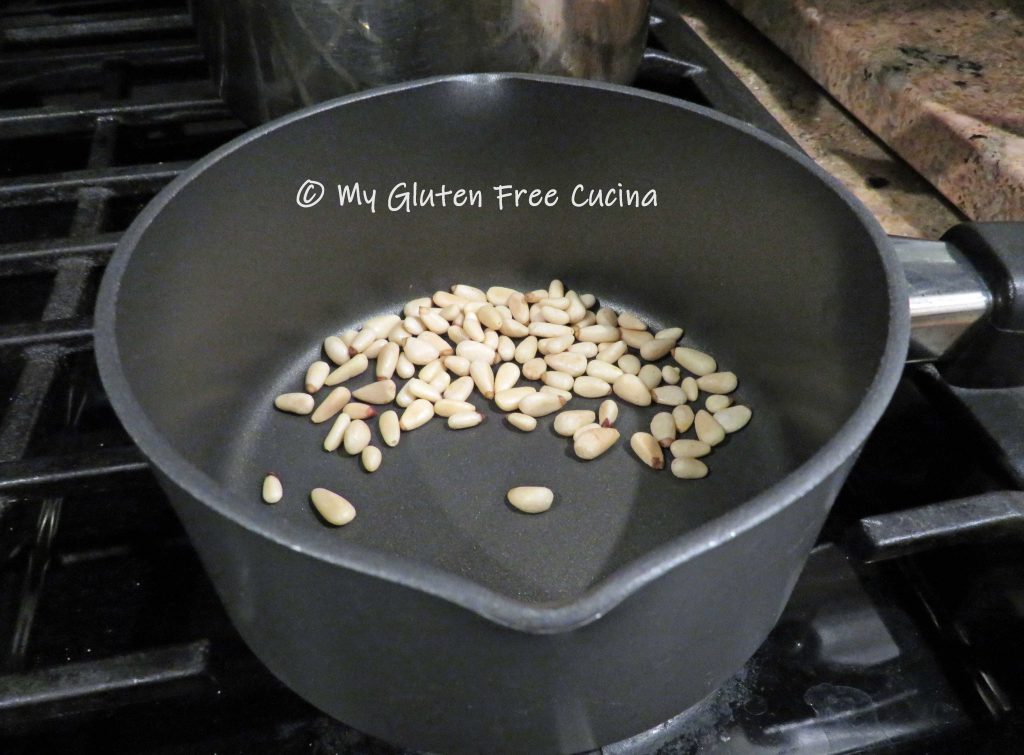
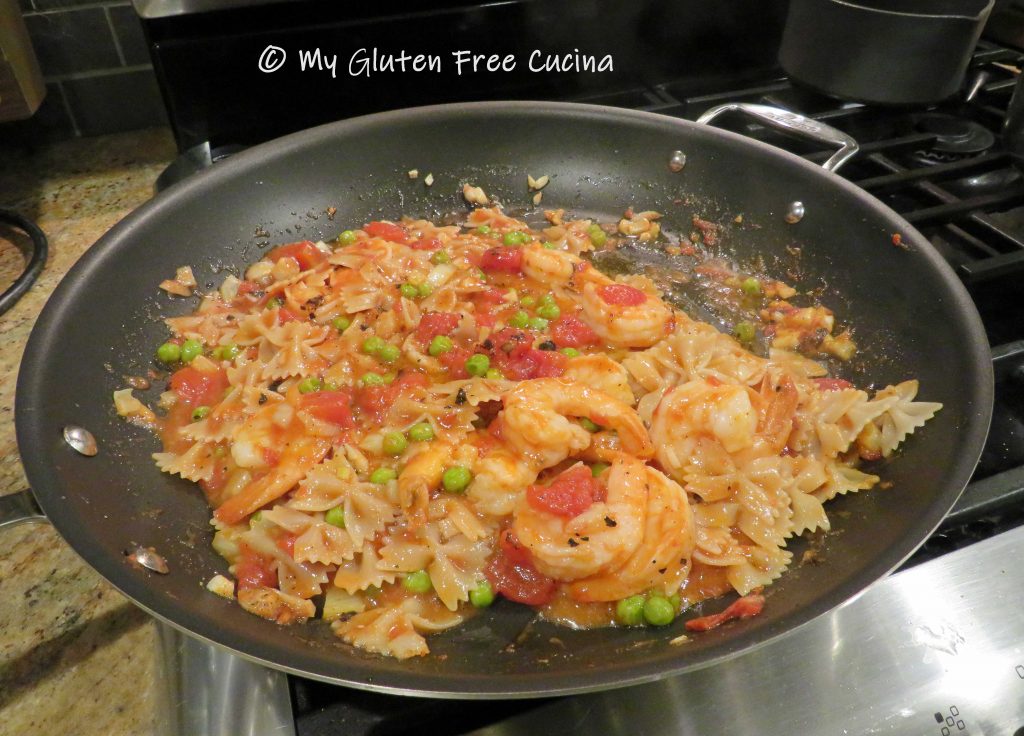 Transfer to a serving platter and finish with a drizzle of olive oil. Garnish with fresh parsley and toasted pignoli.


 When ready, set up a large pot of salted water for the pasta. Bring the water to a boil while you make the sauce. Melt the butter in a