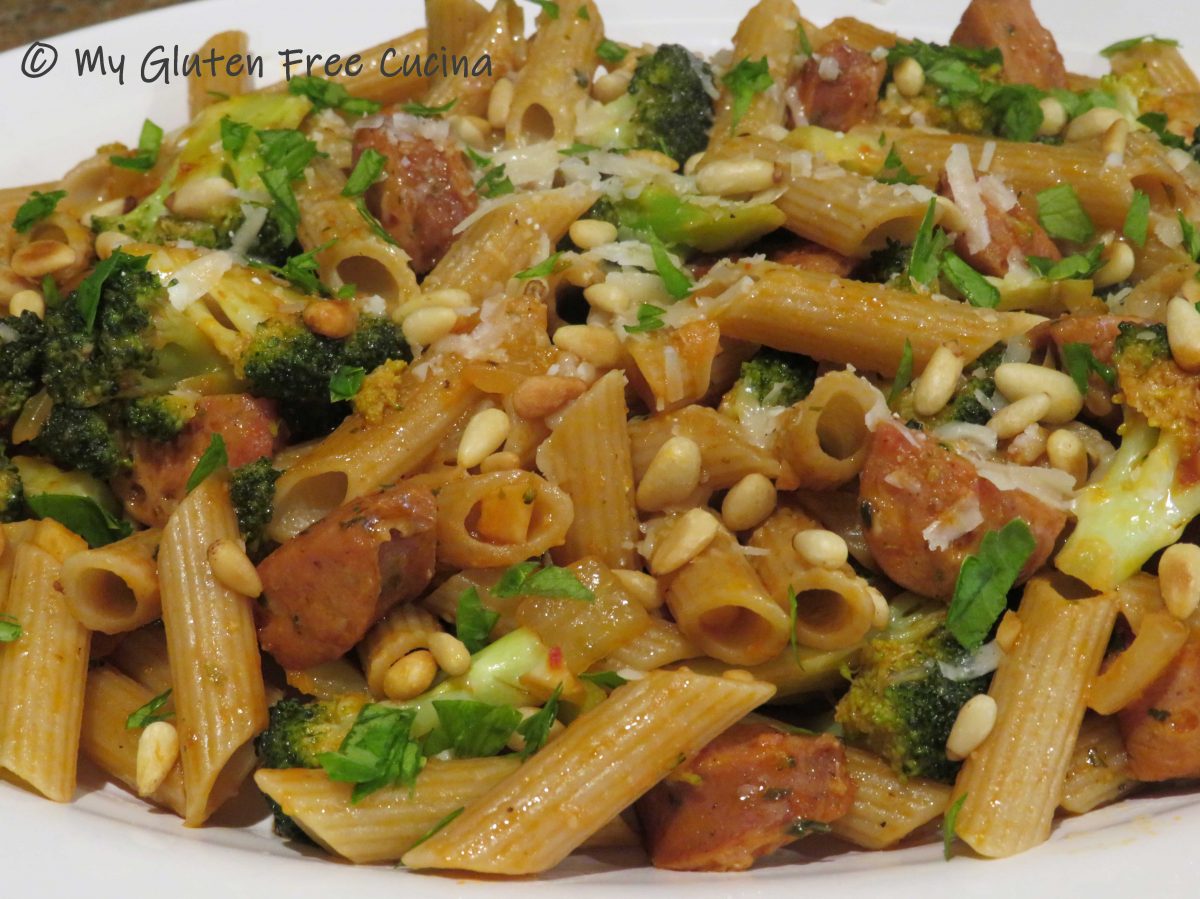
Here is another of my many “quickie skillet dinners”. So easy to pull together after a long day at work, or when you just don’t want to fuss. The dish gets a big boost of flavor from boldly seasoned Italian chicken sausage. You can substitute whatever veggies you have on hand, and of course you can use any kind of sausage. It’s all tossed together with a generous amount of olive oil, a dab of tomato paste and a ladle of starchy pasta water. If you time it just right, the pasta will be done at the same time as the sausage and veggies.
This post contains affiliate links.
Ingredients:
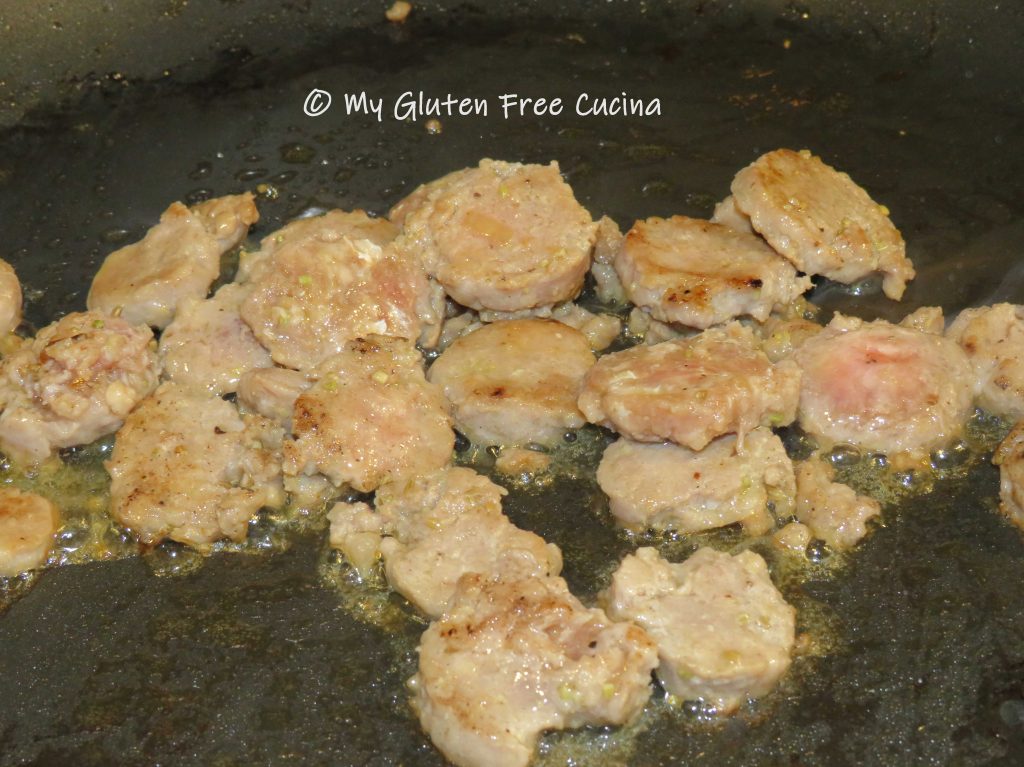
- 6 oz. gluten free Italian Chicken Sausage, diced
- 6 oz. gluten free penne pasta (I used Jovial)
- 1 tbsp. toasted pignoli (pine nuts)
- 1 tbsp. minced garlic
- 1/2 sweet onion, diced
- 2 cups broccoli florets
- 2 tbsp. tomato paste
- gluten free Italian seasoning
- olive oil
- fresh Italian parsley
- grated cheese

Preparation:
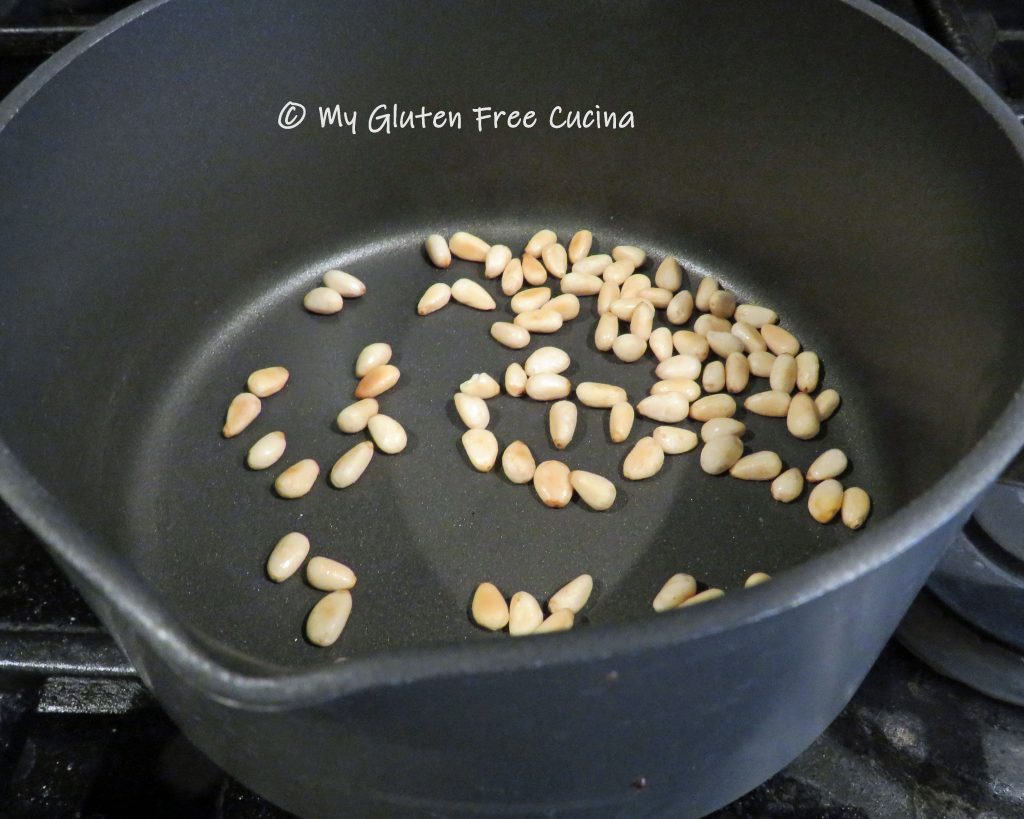
I am obsessed with pignoli (pine nuts) as a garnish for my pasta dishes. A tablespoon is all you need! To bring out their flavor, the pine nuts need to be toasted until they release their oil. I do mine over low heat in a small, nonstick saucepan, until lightly browned and fragrant.
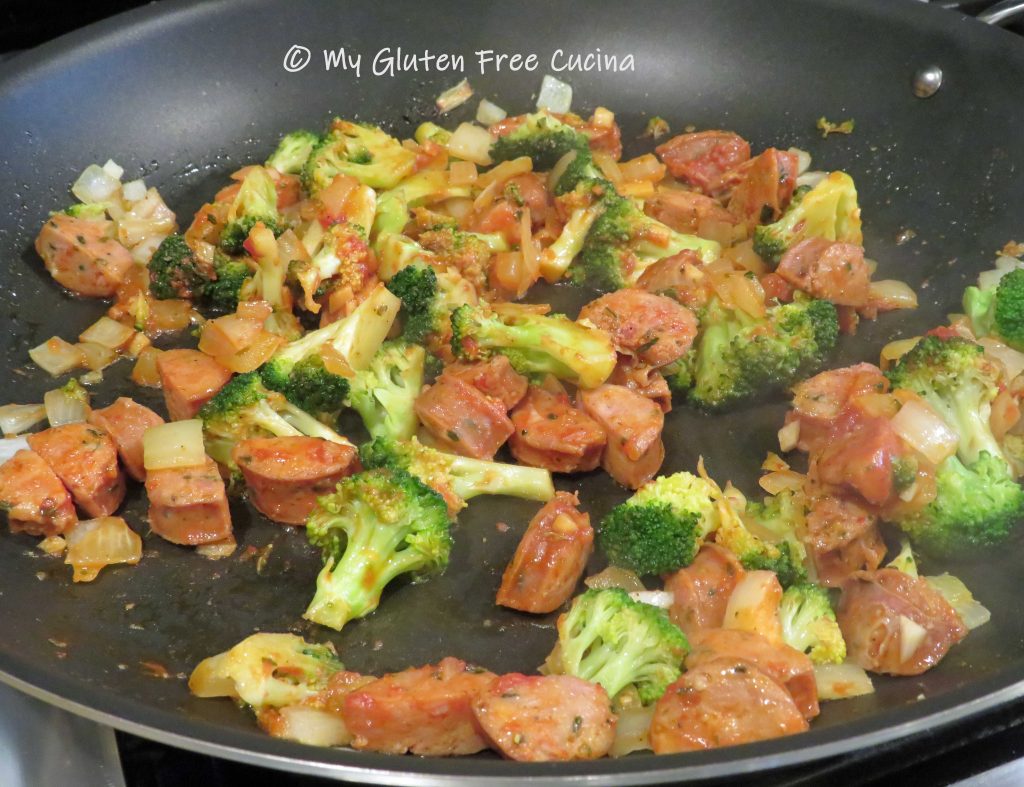
Cook the pasta to 2 minutes less than the package directions. Don’t forget to reserve some pasta water to add to the skillet. Heat a large, nonstick skillet with 2 tbsp. olive oil. First add the garlic, followed by the onions, sausage and broccoli. Sprinkle with Italian seasoning and cook until the onions are translucent. Cover and cook 3 minutes longer.
Clear a spot in the center of the pan and add the tomato paste. Let it toast for 1-2 minutes then stir it into the veggies and sausage with a ladle of the pasta water to loosen it up. Add more olive oil and pasta water as needed.
Drain the cooked pasta and add to the skillet. A little more olive oil and toss well to finish cooking the pasta.


Transfer to a serving dish. Finish with more olive oil, grated cheese, toasted pignoli and chopped parsley.

Serve with more grated cheese.

Notes ♪♫ When choosing sausage always look for the gluten free label. If not sure, you can check the manufacturer’s website or email them for more information. The gluten free penne I used is from Jovial.