Baby Back Ribs

I have been making Country Style Pork Ribs for years, and they are a family favorite.  While I love Baby Back Ribs, I’d never made them at home.  For some reason I thought that really good Baby Back Ribs would require expensive BBQ equipment and complicated cooking techniques.  I couldn’t have been more wrong!  In fact, I would say this was one of the easiest meals that I have made.  Since the preparation was mostly hands off, I had plenty of time to whip up a batch of my Homemade Gluten Free BBQ Sauce.  Of course that is optional, but when I make it, I always get rave reviews.

The verdict on the ribs, amazing!  I now make these year-round.

This post contains affiliate links.

Ingredients:

Preparation:

Preheat the oven to 275º.  That may sound low, but the secret to tender ribs is to cook them slowly on very low heat.

Remove the packaging and pat the ribs dry.  Turn the ribs meat side down and use a sharp paring knife to loosen the white membrane.  Once you have it started, use a paper towel to grasp the membrane and pull it off.  While not absolutely necessary, removing the tough membrane will result in the most tender ribs.  If you would rather not do this, be sure to pierce the membrane all over with a knife.

Season the rack with salt, pepper and creole seasoning.

Wrap the ribs in foil and place on a large baking sheet (to catch any drips).  Bake at 275º for at least 3 hours and up to 4 hours.

When the ribs are done, use tongs to carefully open the foil.

Brush with your favorite BBQ sauce and serve.  For other serving suggestions see my homemade Potato Chips and Gluten Free Corn Bread!

Notes ♪♫ Always watch for hidden gluten in sauces and seasonings.  The BBQ sauce is my own from scratch recipe which I make for special occasions.  If using store bought, I recommend Stubbs’s brand which is gluten free.

Print This Post Print This Post

Chicken Thighs with Andouille Sausage

Sometimes the addition of one or two ingredients can take a simple dish from ordinary to WOW!  In this recipe, the most basic of chicken dinners gets a spicy kick from Andouille sausage.  Made with smoked pork and cajun spices, just one link of Andouille sausage is enough to flavor the cooking oil that we use to brown the chicken and veggies.

Ingredients:

  • 6 skinless chicken thighs
  • 1 link Andouille sausage
  • 1/4 cup cornstarch
  • creole seasoning
  • 2 carrots
  • 1/2 sweet onion
  • 1 potato
  • olive oil
  • fresh chives, for garnish

Preparation:

Remove skin from chicken thighs (optional).  Place the thighs in a plastic bag with 1/4 cup cornstarch and shake to coat.  Heat an oven proof skillet over medium and add about 3 tbsp. olive oil.  Add the sausage and cook 1 minute to flavor the oil, then begin browning the chicken on all sides and sprinkle with creole seasoning.  Don’t crowd the pan.  If necessary, brown the chicken and sausage in 2 batches as I did.

Preheat the oven to 375º and mist a 9″ x 13″ baking dish with cooking spray.  Transfer the browned chicken and sausage to the baking dish and place in the oven.  Reserve the fat in the skillet.

Add the carrots, onion and potato to the skillet with the reserved fat.  Stir and toss to coat then sprinkle with creole seasoning.  Place the skillet in the oven.

Bake the chicken and veggies for 1 hour at 375º.  About half way through, remove any excess liquid from the chicken and reserve it for another dish (it makes a wonderful soup stock).  To serve, arrange the chicken and veggies on a platter and garnish with fresh chives.

What a meal!  The chicken was moist and delicious with an unexpected pop of flavor from the Andouille!
Notes ♪♫ Look for sausage made with all natural ingredients, no preservatives, and no nitrites.  Today many brands carry a gluten free label.  If not, always check the ingredients and if you’re not sure, go to the manufacturer’s website and don’t hesitate to call or email them for more information.

Print This Post Print This Post

Gluten Free Spring Onion Soup

Spring Onions have arrived at the market, and with them the promise of warm weather and sun filled days ahead.  Once a year, I will indulge and purchase a few to make my last soup of the season, before we head into summer.

Spring Onions are sold in bundles like this one with the greens attached.  You can see that the young bulbs have not yet developed their dry, papery skins.  When you get home, you might be inclined to chop off the greens and discard them.  Don’t!  They are incredibly aromatic and will add a nice, savory kick to your soup stock.

This recipe is vegetarian, but you could add meat if you like.  Beans would also be a great addition!

Ingredients:

  • 3 spring onions sliced and quartered, greens reserved
  • 4 carrots, sliced into half moons
  • 4 celery stalks, sliced
  • 3 garlic cloves, minced
  • 14 oz. can diced tomatoes
  • salt and pepper to taste
  • 1 tsp. thyme
  • 1/2 tsp. sage
  • 1/2 tsp. turmeric
  • 8 oz. gluten free pasta

Preparation:

Remove the greens from the onions, wash them and place in a stock pot. Add water to cover.  You can also throw in the tops of your celery stalks if you like, they too are aromatic and will add more flavor to the base of the soup.

After a 45 minute simmer, the greens have given up all of their goodness and can be removed and discarded.

Next slice and quarter the onion bulbs and add them to the pot along with the carrots, celery and garlic.  You should have about 6 cups total veggies.

Season with salt and pepper to taste and add the sage, thyme and turmeric.  Stir in the canned tomatoes with their juices.  Simmer 1 hour.

When the soup is ready, add the uncooked gluten free pasta directly into the pot.  It will absorb liquid as it cooks and thicken the broth nicely.  Simmer 5 more minutes or until the pasta is cooked through.  A garnish of chives and it’s ready to serve.

Simple ingredients, with a vibrant burst of spring flavor.

Notes ♪♫ I used Veneziane gluten free Ditalini in this recipe.  Finding gluten free soup pasta is always a challenge, but luckily this brand is available to me locally.  If you can’t find it, don’t hesitate to improvise with larger gluten free pasta shapes like elbows or shells.  You can even use broken lasagna noodles in a pinch!

Print This Post Print This Post


Crock-Pot Asian Chicken

Crock-Pot meets Stir-Fry

Hello friends!  Meal delivery services have become so commonplace these days, that you can order takeout from just about anywhere.  Except when you have dietary restrictions- that is.  There are no dedicated gluten free restaurants where I live, and I am not comfortable ordering over the phone where I cannot speak to staff face to face about their allergen protocols.

So today it’s off to the kitchen to satisfy my craving!  I’m using the Crock-Pot along with my skillet to create an absolutely amazing dish that rivals any restaurant!

This post contains affiliate links.

Crock-Pot Ingredients:

  • 1 lb. boneless chicken breast
  • 1/4 cup honey
  • 2 tbsp. tamari (gluten free soy sauce)
  • 1 tbsp. dry minced onion flakes
  • 1 tbsp. ketchup
  • 2 tsp. canola oil
  • 1/4 tsp. garlic powder
  • 1/4 tsp. powdered ginger
  • cooking spray
  • 2 tsp. cornstarch + 2 tbsp. water
  • 1 tsp. toasted sesame seeds

Stir-Fry Ingredients:

  • 1 cup brown rice
  • 1 cup water
  • 1 cup chicken broth
  • pinch of garlic granules or garlic powder
  • salt, to taste
  • 1 large egg + 1 tbsp. water
  • 1/2 cup slivered carrots
  • 1/2 cup diced onions
  • 1/3 cup mushrooms
  • 1/2 cup frozen peas
  • 1/4 cup scallions
  • 1 cup baby bok choy
  • sesame oil
  • gluten free tamari
  • 1/3 to 1/2 cup more chicken broth

Preparation:

Coat the crock-pot with cooking spray and add the whole chicken breast.  Whisk together the honey, tamari, dried onion flakes, ketchup, canola oil, garlic and ginger.  Pour it over the chicken, cover and cook on high for one hour, then reduce heat to low and cook 2 more hours.

While the chicken cooks, make the rice.  Cook 1 cup of brown rice in 1 cup chicken broth, 1 cup water, seasoned with salt and garlic powder.  When the rice is finished, let it cool to room temperature and set aside until the chicken is ready.

After 3 hours the chicken should be cooked through and very tender.  Remove to a cutting board and cut into 1″ pieces.

Skim fat from the crock-pot and whisk in 2 tsp. cornstarch.

Return the diced chicken and increase heat to high, stirring frequently to thicken the sauce.  Alternately you can transfer to a small sauce pot as I’ve done here.  Keep warm while you finish the dish.

Heat a large nonstick skillet over medium low heat.  Whisk the egg with 1 tbsp. water, scramble and chop into small pieces.  Transfer to a bowl and keep warm.  Wipe the skillet clean and begin cooking the veggies in a little sesame oil.  I started with the carrots and onions as they take longest.

After a few minutes, add the peas, mushrooms and scallions with a little more oil and cook 2 minutes more.  Finally, add the bok choy with a few shakes of tamari and stir well to blend.

To finish, add back the rice and the scrambled egg with a few more shakes of tamari, along with 1/3 to 1/2 cup chicken broth.  Quickly toss and stir to incorporate the rice and veggies until the liquid has been absorbed and the rice is heated through.  Transfer to a serving platter.

Spoon the chicken over the fried rice and garnish with toasted sesame seeds.

Notes: ♪♫ Were you surprised to learn that soy sauce is not gluten free? I was!  The soy is fermented in wheat, making it unsafe for those of us with Celiac disease.  In this recipe I used San J brand gluten free Tamari in place of soy sauce.  It is a great addition to any Asian inspired recipe and also great for marinades.

Print This Post Print This Post

Cilantro Lime Rice

I love this easy Cilantro Lime Rice that you can enjoy at home with all your Mexican favorites.  A restaurant classic, making it at home means no chance of cross contact with gluten!

Just about everyone will love this mild flavored rice and it pairs nicely with spicier foods.  The ingredients are naturally gluten free and it’s ready in 20 minutes.

4 Servings

Ingredients:

  • 1/2 cup white rice
  • 1-1/4 cups water
  • 1/4 tsp. salt
  • 1 tsp. butter
  • 1/4 cup frozen corn, defrosted
  • juice of 1/2 lime
  • 1/4 cup chopped fresh cilantro
The Lazy Gastronome

Preparation:

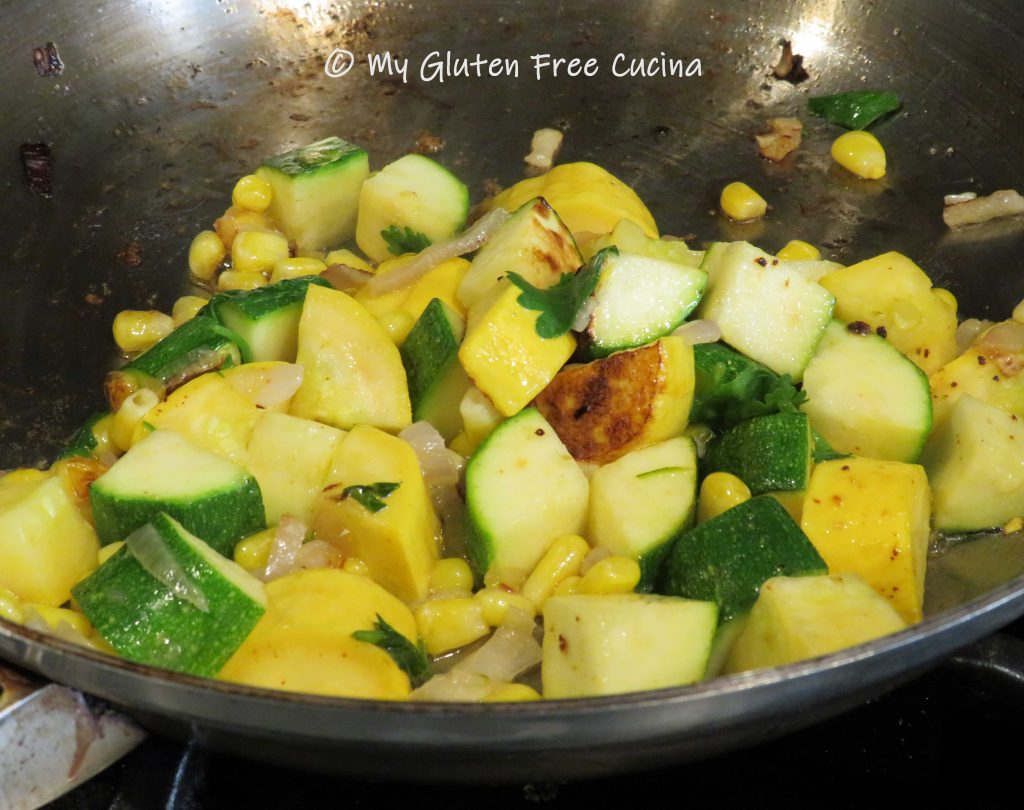
Cook 1/2 cup of white rice in 1 cup water, with salt and butter, 15 minutes.  Stir in an additional 1/4 cup of water along with the corn, half of the cilantro and the lime juice, cook 5 minutes longer.

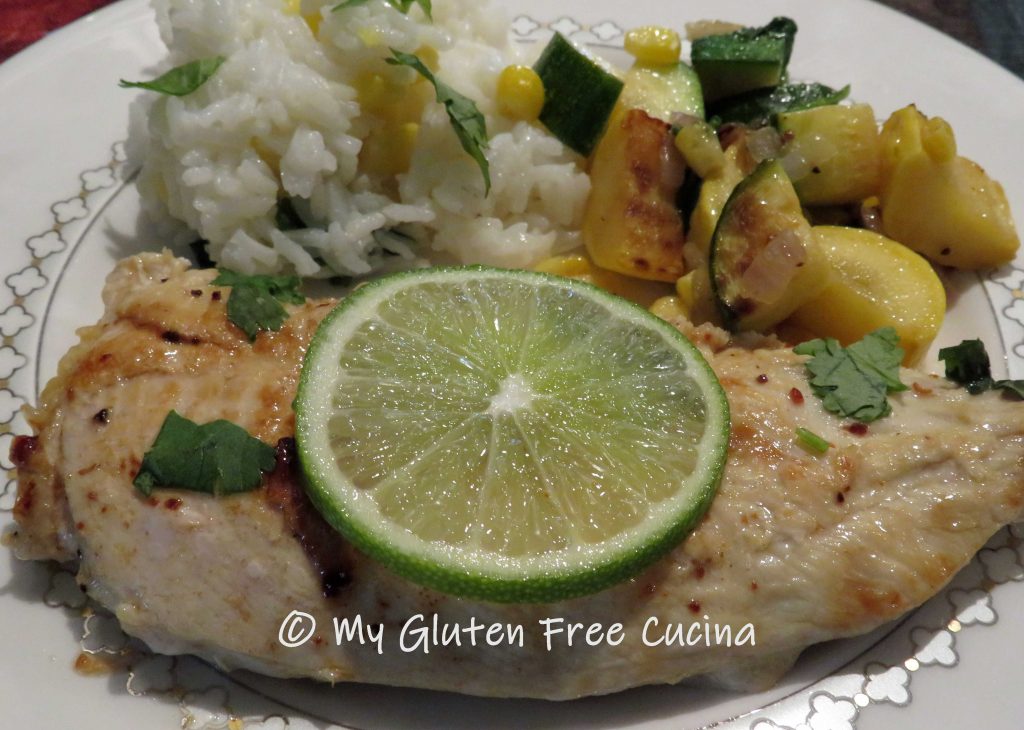
Finish with the rest of the cilantro and a slice of lime.

Here I’ve paired it with a simple meal of grilled chicken and veggies.  Absolutely delicious!

Print This Post Print This Post


Gluten Free Eggplant Tortilla Casserole

This easy casserole dish is great for a family dinner.  If you are invited to a party or cookout and need to bring a gluten free dish, this would be a great choice.  Using canned beans and tomatoes makes it easy to put together.

This post contains affiliate links.

Ingredients:

  • 1 medium eggplant, peeled and diced (about 3 cups)
  • 1/2 sweet onion, diced (1-1/2 cups)
  • 2 cloves garlic, minced
  • canola oil (or other neutral oil)
  • salt, to taste
  • 1 can (15 oz.) black beans, drained and rinsed
  • 2 cans (10 oz.) diced tomatoes with mild green chiles
  • 1/2 tsp. Mexican Spice Blend or more to taste
  • 1/4 cup chopped fresh cilantro
  • 1/2 cup shredded cheese (cheddar, gruyere)
  • 4 gluten free corn tortillas, cut into eighths
  • cooking spray

Preparation:

Peel and dice the eggplant.  Add 3 tbsp. canola oil to a large nonstick skillet over medium heat.  When the oil is hot, add the eggplant cubes and toss to coat.  Cook the eggplant until it is browned on all sides.  The eggplant absorbs oil like a sponge, so add more if needed.

Season with salt and set aside to cool.

Next, add a little more oil to the skillet and cook the onions until lightly browned.  Add the garlic and cook 30 seconds more.

Add the tomatoes with their juice and the drained beans.  Top with chopped cilantro and season to taste with Mexican Spice Blend, I used 1/2 tsp.

Toss well to combine and continue cooking until most of the liquid has evaporated.

To assemble the casserole, coat a 9″ x 9″ baking dish with cooking spray.  Line the baking dish with half of the tortillas.

Spoon half of the tomato mixture and eggplant cubes over the tortillas and top with 1/4 cup of cheese.

Repeat with another layer of tortillas.

Top with the remaining tomatoes and eggplant and 1/4 cup cheese.

Cover with foil and bake 30 minutes at 375º.  After 30 minutes remove the foil and bake for an additional 10 minutes.

Your family and friends will love this dish!  It would be a nice accompaniment to a Cinco de Mayo dinner.  You could also serve it as an appetizer with tortilla chips.  This makes quite a few servings, and leftovers can be frozen.

Notes ♪♫ I used Mission brand Yellow Corn Tortillas in this recipe, they are certified gluten free.  The spice mix is my own, a blend of chipotle Chile flakes, oregano, onion granules and cumin.  if you are using a purchased blend, always check for gluten containing ingredients.

Print This Post Print This Post


Gluten Free Rhubarb Crumble

A word of Caution- This recipe contains oats.

A recent statement from Gluten Free Watchdog states that they cannot currently recommend ANY brand of gluten free oats.

Whether or not you continue to consume oats is a personal choice.  As we await more information, I will preface any recipes that include oats with a link to this important statement from Gluten Free Watchdog, an independent, subscriber-driven gluten-testing organization.  About | Gluten Free Watchdog

***

To me, rhubarb says spring!  This Rhubarb Crumble has been a family favorite for so many years.  Way back when, my husband would pick the rhubarb fresh from our backyard garden and it was just wonderful!  These days, our harvesting is done at the grocery store, but it always brings back those memories.

In this recipe, I threw an apple into the usual mix of rhubarb and strawberry, and it worked so well, I think you could add just about any fruit you like, and it would be delicious.

The Lazy Gastronome


When shopping for rhubarb, be sure to choose stalks that are firm and vibrantly colored.  If the outer skin of the rhubarb is tough and stringy, you can easily peel some of it off.  Young, slender stalks are less likely to need peeling, but you may need to buy a few extra.

6 Servings

This post contains affiliate links.

Ingredients:

For the filling:

For the topping: 

Preparation:

In a large bowl, combine 2/3 cup granulated sugar and 2 tbsp. cornstarch.  Peel and dice the apple and chop the rhubarb into 1/4″ slices.  Toss the rhubarb and apples with the sugar and cornstarch mixture.  Refrigerate while you prepare the crumble topping.

In a small bowl, combine the flour, oats and sugars.  Chop the butter into cubes.

Working quickly, cut the butter into the topping mixture using a pastry cutter, firm spatula, or 2 butter knives.  You can even use your fingers to incorporate the butter into pea size pieces.

Preheat the oven to 375° and coat a square baking dish with cooking spray.  Add the apples and rhubarb then use a teaspoon to dot the strawberry preserves over the fruit.

Spread the topping evenly.

Bake for 45 minutes.  When done, the top should be lightly browned and bubbly.

Allow to cool slightly before serving.  Honestly, it’s delicious warm, room temperature or chilled!  Store in the refrigerator and it will be good for several days, but I don’t expect it to last that long…

Notes: ♪♫ For the preserves, I used Polaner All Fruit Strawberry, it is gluten free and sweetened only with fruit juice.

Print This Post Print This Post

Gluten Free Sorghum Pilaf

Sorghum is an ancient grain that is enjoying renewed popularity.  Nutritious and gluten free, I like to keep it in my whole grain rotation for variety in a healthy diet.  It has a nutty flavor and chewy texture.

This post contains affiliate links.

The biggest drawback about making Sorghum is that it takes a long time to cook.  I usually make it when I plan to be in the kitchen for a nice long stretch.  The preparation begins with several hours of pre-soaking, followed by a long, slow simmer along with frequent additions of liquid.

Ingredients:

  • 1/2 cup sorghum grain
  • 1 cup water
  • 3/4 cup mixed vegetables diced very small (such as shallots, onion, scallion, garlic, mushroom, carrot, celery, red and green bell pepper, zucchini)
  • 1 tbsp. butter
  • 1/2 tsp. seasoned salt
  • pinch of red pepper flakes
  • 1 carton gluten free chicken or vegetable broth (use either or a combination, you will need 1-1/2 to 2 cups total broth)
  • fresh chives, for garnish

 Preparation:

In a small saucepan, bring 1 cup of water to a boil and add the sorghum.  Cover and remove from the heat, and let it soak for 3 hours.

After 3 hours, turn the heat to low and simmer until most of the water has evaporated.  Next add 1 tbsp. butter along with the minced vegetables.  Season with salt and pepper to taste.

Begin adding the broth, 1/3 to 1/2 cup at a time.  Cover and keep on a low simmer, stirring occasionally and add more liquid as it is absorbed.  Be careful not to let the bottom burn!  Continue until the sorghum has doubled in size, about 90 minutes total cook time.

Take a taste to be sure they are cooked through!  The grains will be plumped up but will still have a good chew, like “al dente” pasta.  Transfer to a serving bowl and garnish with fresh chives.

This is a nutritious and fiber rich side that will fill you up.  Try it, it’s delicious and a nice change of pace from the usual rice and potato sides!

Notes ♪♫ I used Bobs Red Mill whole grain sorghum in this recipe.  Did you know that Sorghum grain can also be milled into flour for baking?  Learn more in this post about Using a Grain Mill!

Print This Post Print This Post


Skillet Chicken and Penne

Before I was diagnosed with Celiac disease, easy skillet meals like this were my go-to for busy weeknights.  There was a time when I thought I would never enjoy meals like this again, but little did I know!  Delicious gluten free pasta and breadcrumbs are widely available so today I can still enjoy some of my old favorites.  I love that this dinner can be pulled together in a hurry.  It’s such a versatile recipe, you can substitute whatever veggies you have on hand, even leftover or frozen veggies will work.

This post contains affiliate links.

Ingredients:

Preparation:

Boil a pot of salted water for the pasta.  Cut the chicken into cubes.  Place in a bowl and toss with breadcrumbs to coat evenly.  Cook the chicken in a large, nonstick skillet with olive oil.  Turn to brown all sides.  When cooked through, remove and keep warm.

Keep the veggies separated.  The carrots will take longest to cook, while the zucchini will only need a few minutes.  Toss the veggies with olive oil, salt and pepper before adding to the skillet.  Add the carrots in first.

Cook the pasta to 1 minute less than package directions.  While the pasta cooks, finish the veggies.  Add the onions and bell peppers next.  With 5 minutes left for the pasta to finish, add the zucchini.

Add the chicken back to the skillet with the veggies, toss well and add a splash of white wine.  Let it reduce, then add 1/4 cup of chicken broth.

Drain the pasta and add it to the skillet with a little reserved pasta water if needed.  Finish cooking 1 minute longer, tossing together to blend the flavors.

Transfer to a serving platter, finish with grated cheese and garnish with Italian parsley.  Serve with more grated cheese.

Notes ♪♫ I used Rummo gluten free penne in this recipe, it’s a rice and corn blend with great taste and texture.  If you’re missing the “chew” of wheat pasta, give it a try!

Print This Post Print This Post

Gluten Free Cornish Hens

Update: I wrote this post in April of 2020, at the height of the pandemic.  I am so thankful that those days are behind us, and we can celebrate the holidays with family again.  I debated rewriting the introduction, to remove references to this point in time, but decided to leave it as is for now, as a reminder to cherish our family gatherings and take nothing for granted.

Like so many this year, we will be spending the holidays at home and practicing social distancing.  Plans to invite family over, go visiting or eat at a restaurant are all on hold.  I hope that everyone is staying healthy and keeping their spirits up while we wait for this virus to recede.

I have been passing the time doing some deep cleaning and home reorganization.  But my happy place is and always will be the kitchen.  So, I’m taking advantage of the extra hours to create some delicious quarantine cuisine that I wouldn’t normally have time to make!  Today’s post is a special dinner that you can make at home for one, two or more.  Your holiday gatherings may be smaller, but they can still be delicious!

A single Cornish Hen (2 lb.) should yield 2 servings, or for hearty appetites plan on one hen each.  For this meal I borrowed some inspiration from my Whole Roast Chicken recipe as well as my Thanksgiving Turkey Stuffing.  The result, a delicious, flavorful and very moist chicken dinner, completely gluten free.

This post contains affiliate links.

Ingredients:

  • 2 Cornish hens (about 2 lbs. each)
  • 1/2 stick of butter, softened
  • 1 tsp. each, rosemary and thyme
  • salt and pepper to taste

For the stuffing:

Preparation:

Cook the bacon and drain on paper towel, reserving the fat in the skillet.

Add 1 tbsp. butter to the skillet with the bacon fat and begin cooking the onion, celery and apple.  Sprinkle with sausage seasoning.  Chop the bacon and add it back to the pan, and let it cool slightly while you prep the hens.

Place the hens in an empty sink.  Remove the gizzards from the cavity, rinse the hens inside and out with cold water and place in a baking dish coated with cooking spray.  I used a 9″ x 13″ Pyrex dish.

Wash the sink thoroughly and now we’ll finish the stuffing.  Stir in 1/4 cup breadcrumbs and about 2 tbsp. chicken broth, just enough to bring the stuffing together.  Gently spoon the stuffing into each hen.

Mash together the softened butter, rosemary and thyme.  Rub the hens all over with the herb butter, be sure to get under the legs and wings and place a pat under the skin.  Season with salt and pepper.

Use twine to tie the legs together and wrap another strand around the center of the bird to secure the wings close to the body.  Add 1/2 large onion, 1 carrot and 1 potato to the pan.

Roast for 70 minutes at 350º or until the internal temperature reaches 165º.

Broil on low for 5 minutes to get more color on the skin.

Aren’t they beautiful?  Whether you are dining solo or with those you love most, I hope you find some gluten free meal inspiration for your holiday table!  May your home be filled with blessings of the season and all the delicious food.

Print This Post Print This Post