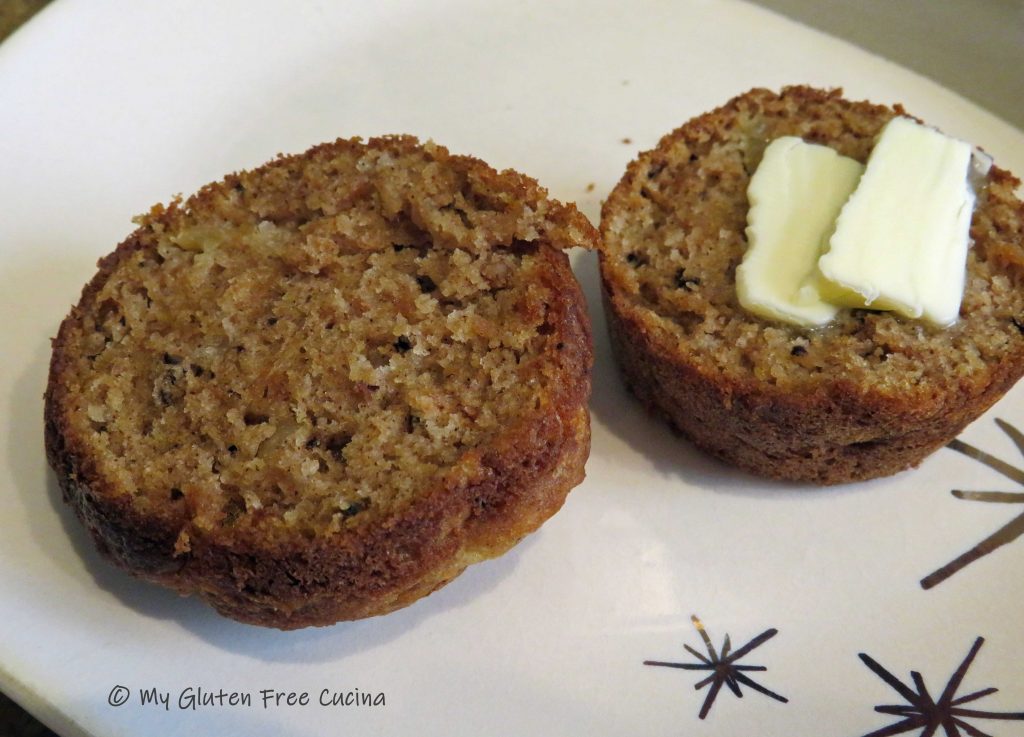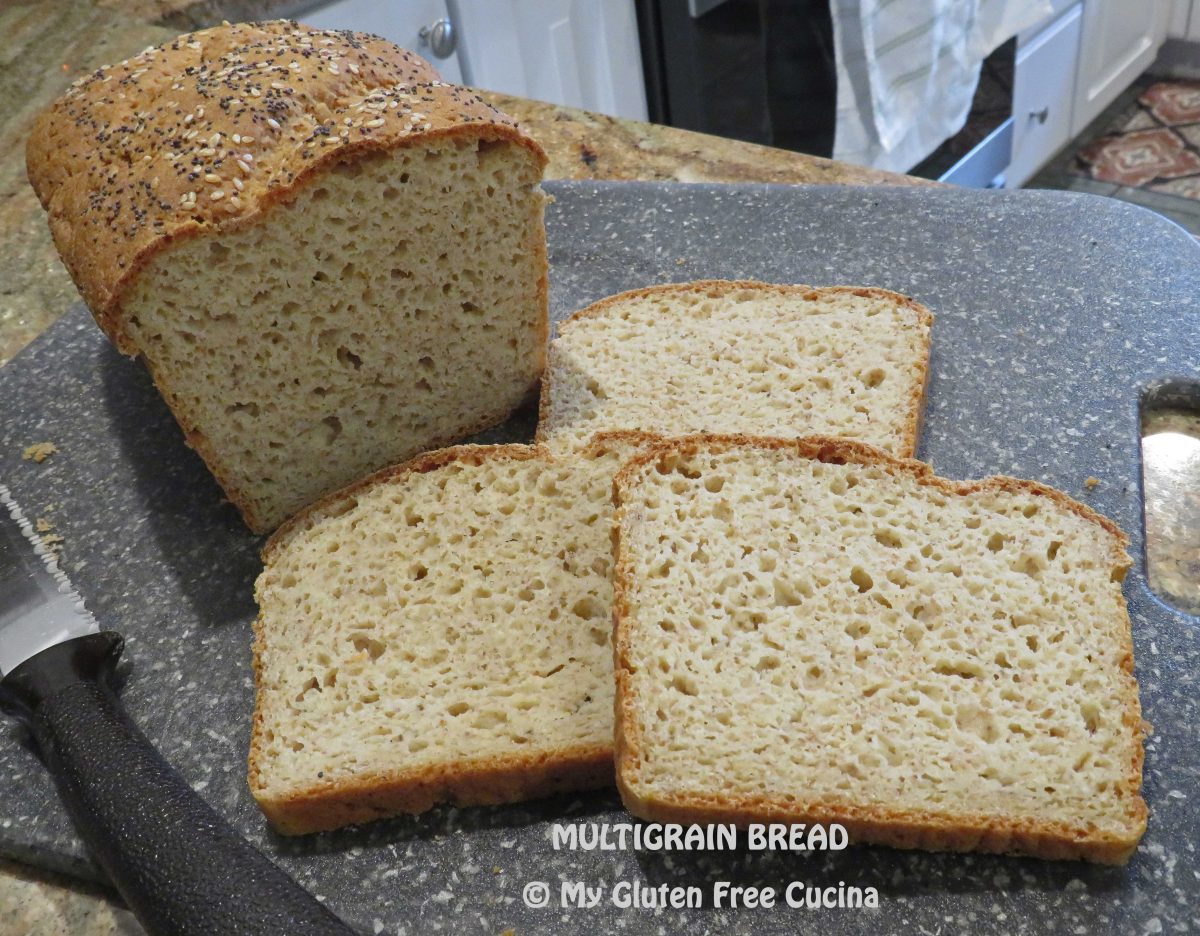
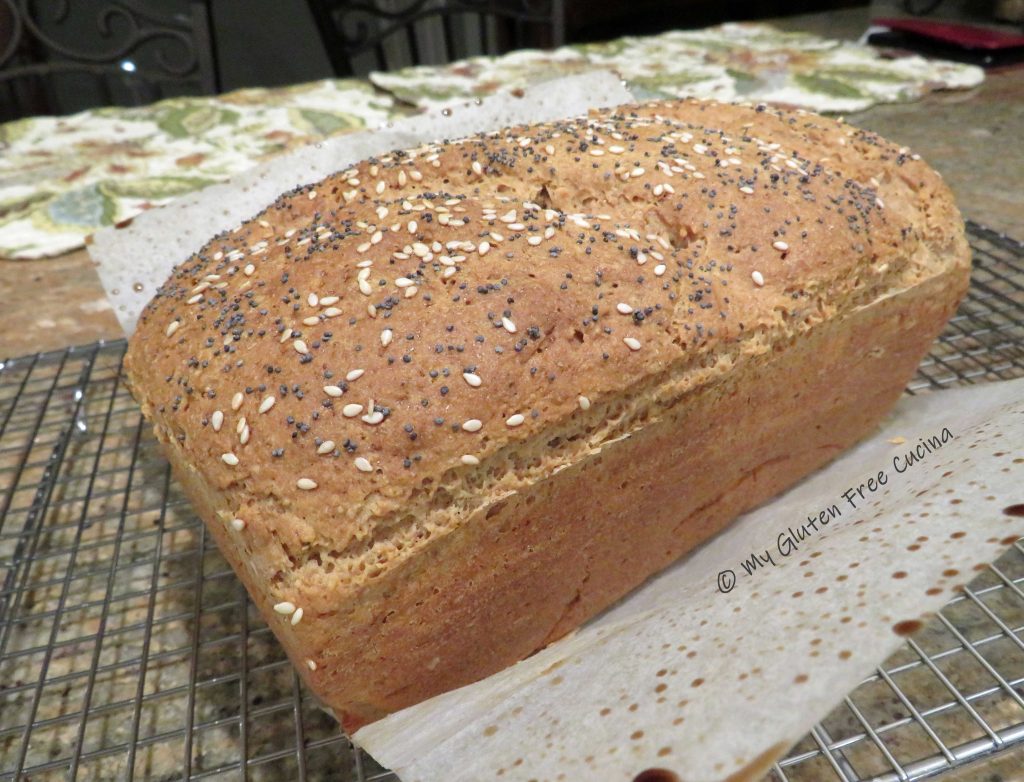
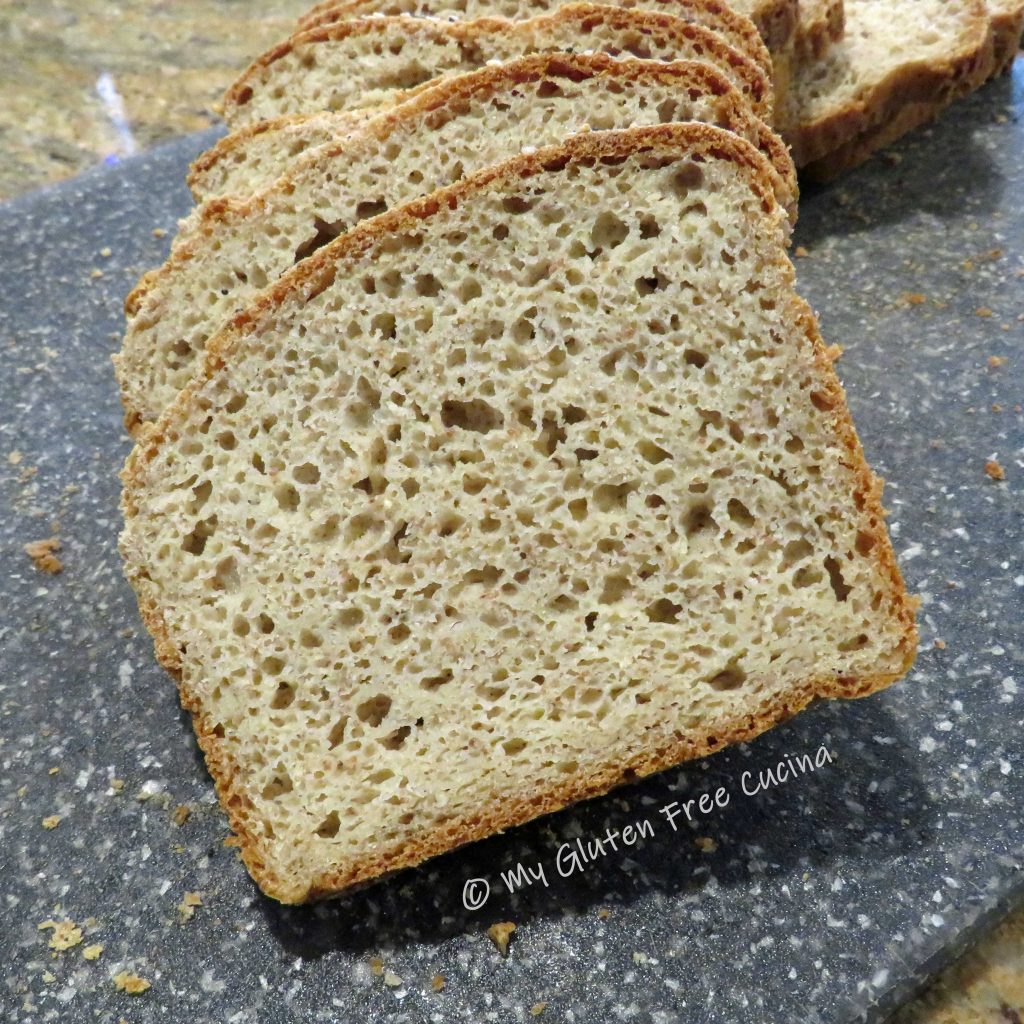
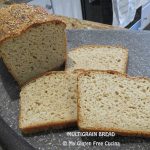
Just look at that beautiful loaf of bread! In the gluten free universe, this is what dreams are made of! Not only does it taste great, but it is also nutritious and wholesome, made with a combination of grains that delivers real bread flavor without the gluten.
If you like to mix up your own flour blends, then this recipe is for you!
I adapted this recipe from one of my own, Gluten Free Sandwich Thins. I always made them for lunch when I worked in an office, but now that I’m home most of the time, I find that I like to have sliced bread in the house. When you make a loaf, you can slice it as thin or as thick as you want for sandwiches, toast or just to go with dinner.
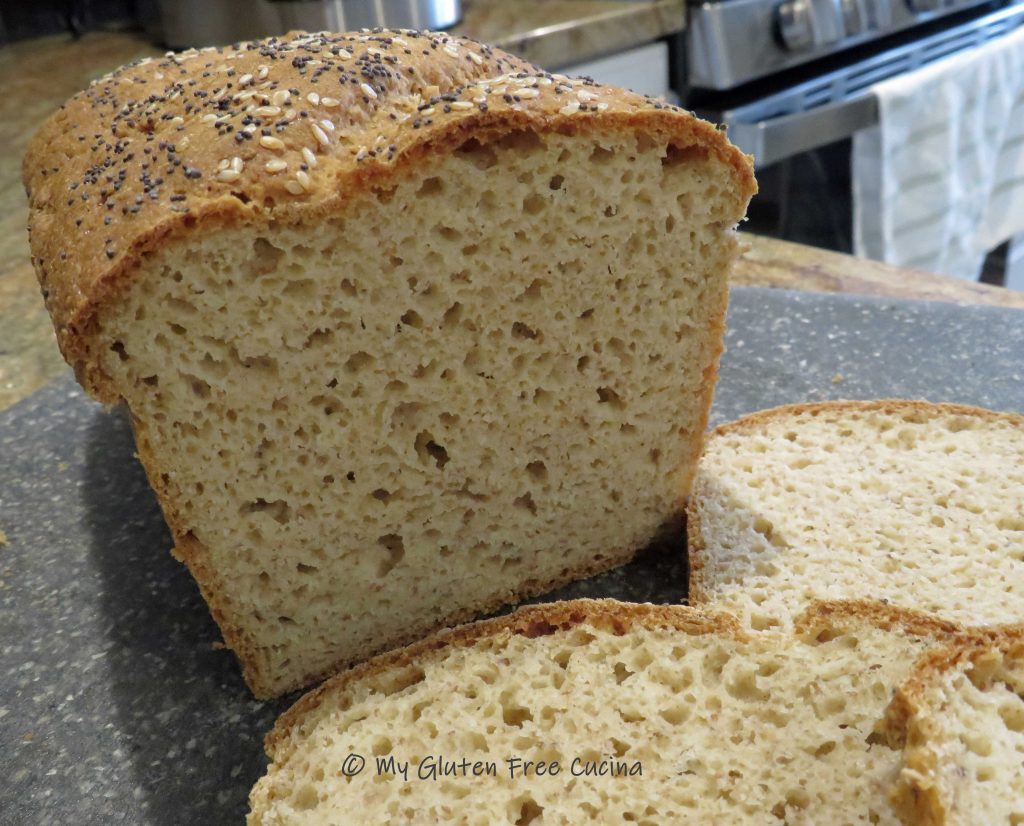
This bread is wonderful for sandwiches. It doesn’t need toasting, doesn’t fall apart in your hands and the middle is not wet or tacky at all. It’s a gluten free dream come true!
This post contains affiliate links.
Ingredients:
- 1 tbsp. yeast
- 1 tbsp. ground chia seeds
- 1 tbsp. sugar
- 1/2 cup warm water
- 127 g. whole grain sorghum flour
- 183 g. brown rice flour
- 56 g. tapioca starch
- 56 g. arrowroot starch
- 56 g. potato starch
- 21 g. teff grain, ground
- 1 tsp. gelatin
- 1.5 tsp. xanthan gum
- 1 tsp. salt
- 1 large egg
- 3 tbsp. olive oil
- 3/4 cup warm milk (I used 2%)
- 1/2 cup warm water
- 2 tbsp. milk, for brushing
- sesame seeds
- poppy seeds
Preparation:
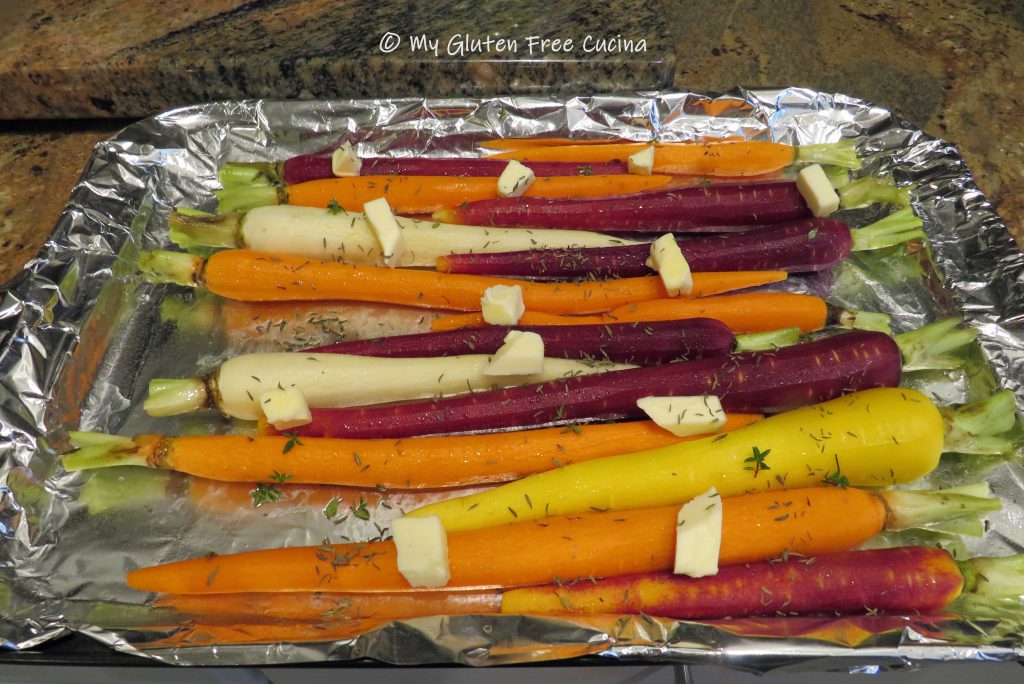
Line a 1 lb. loaf pan with parchment paper and mist with cooking spray.
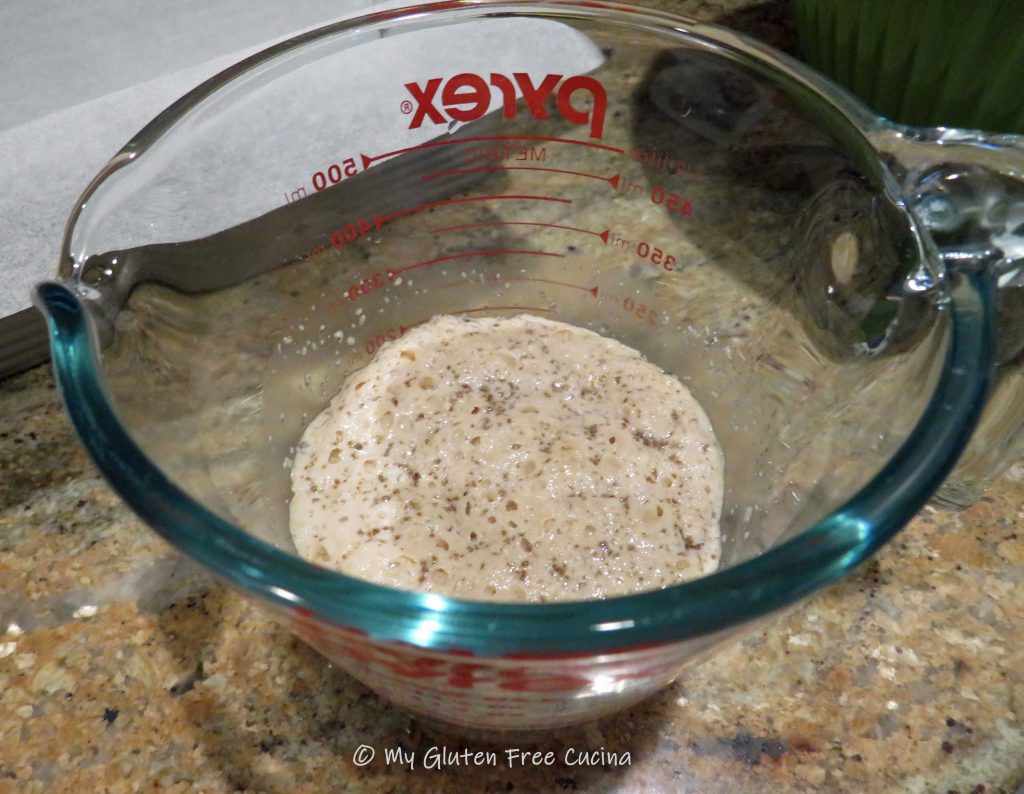
 Combine the yeast, ground chia seeds, sugar and 1/2 cup water in a small bowl or measuring cup. Let the mixture rest for 10 minutes.
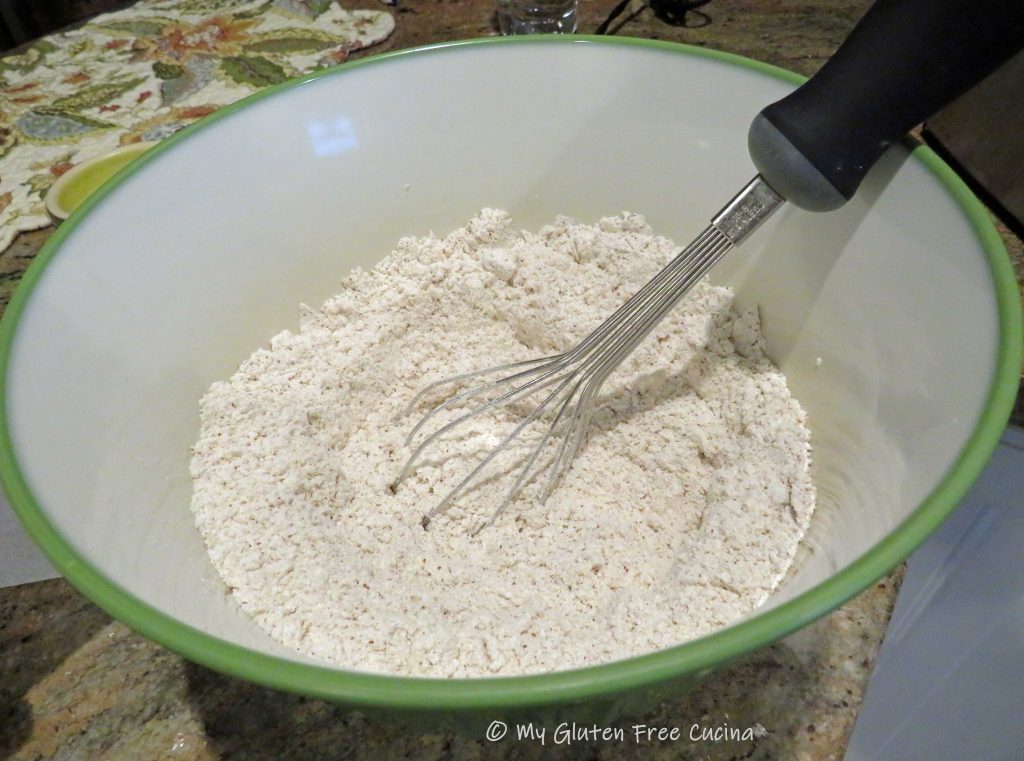
In a separate bowl, whisk together all of the dry ingredients, sorghum flour through salt.
When the yeast has bloomed, add the mixture to the bowl of a stand mixer along with the egg, olive oil, milk and water.
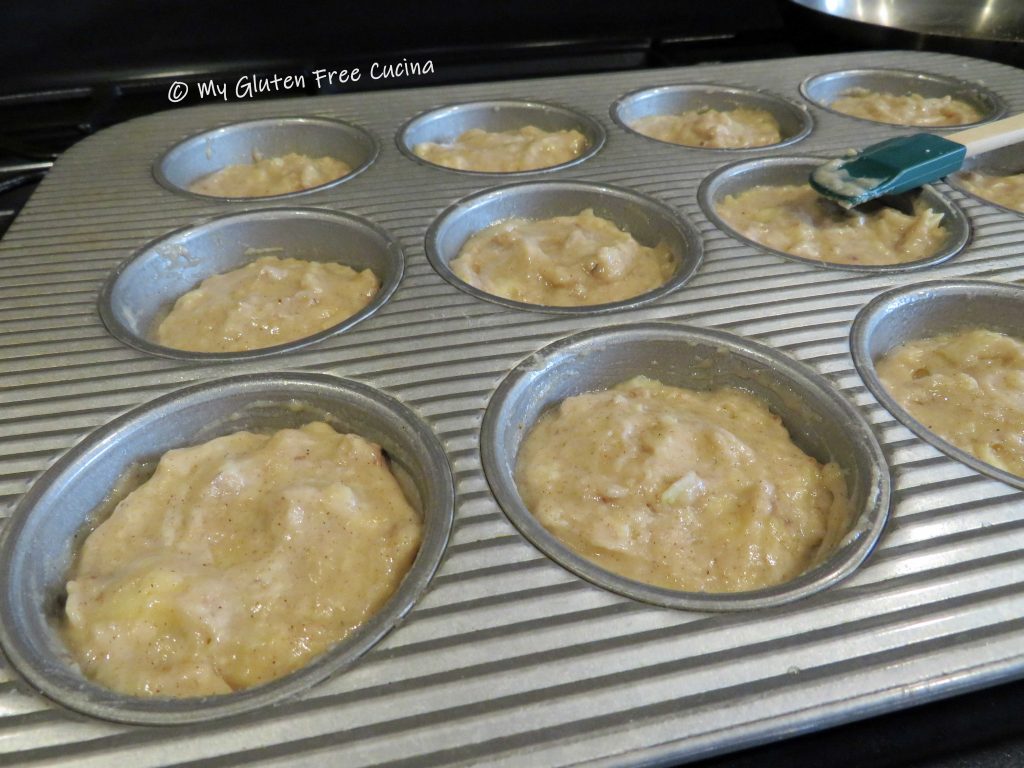
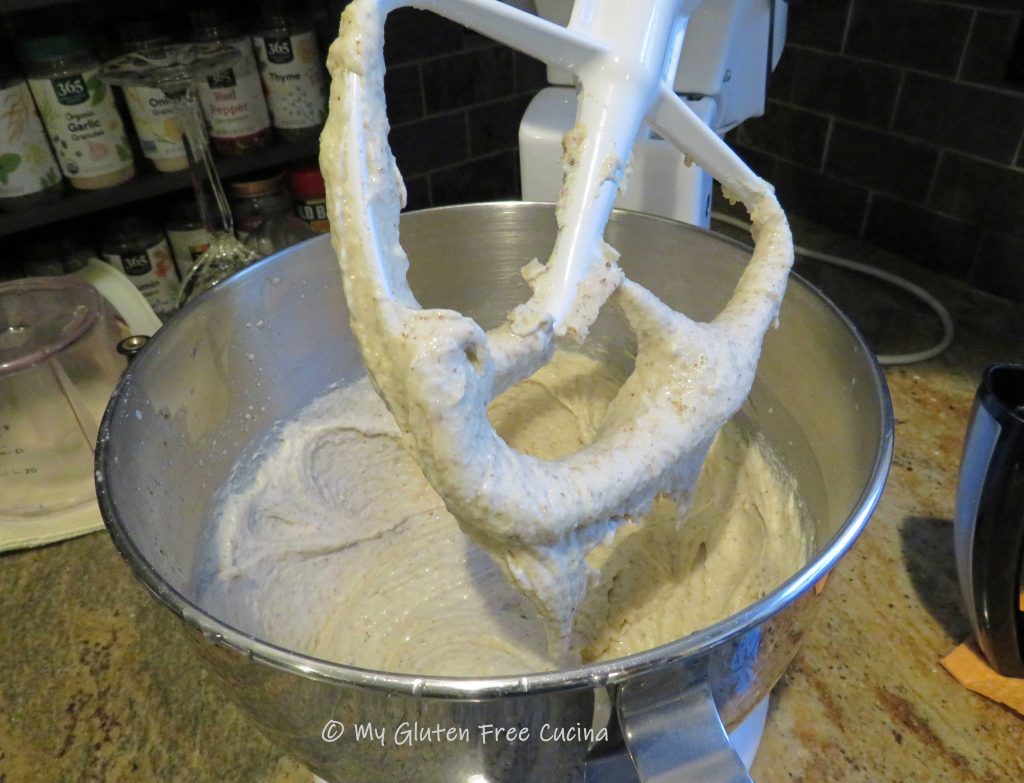
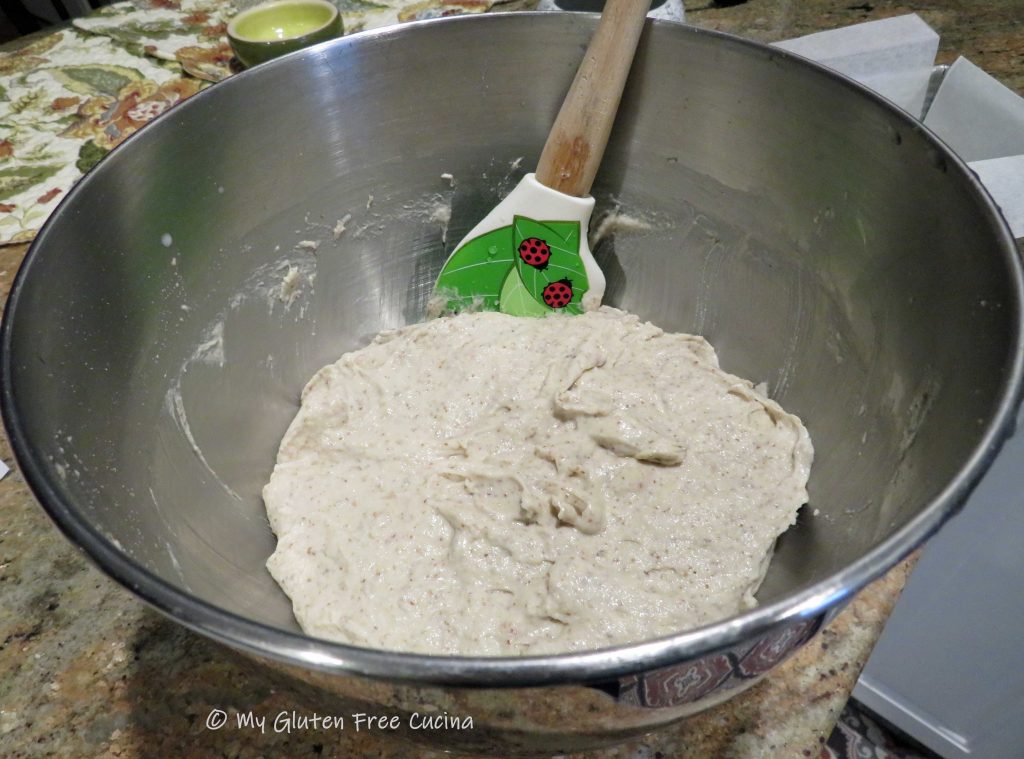
 Whisk it all together, and then add the dry ingredients into the wet. Mix for 5 minutes with the paddle attachment. The dough will be heavy and wet.
 Scrape the dough into the prepared pan, smoothing out the top with a spatula dipped in water.
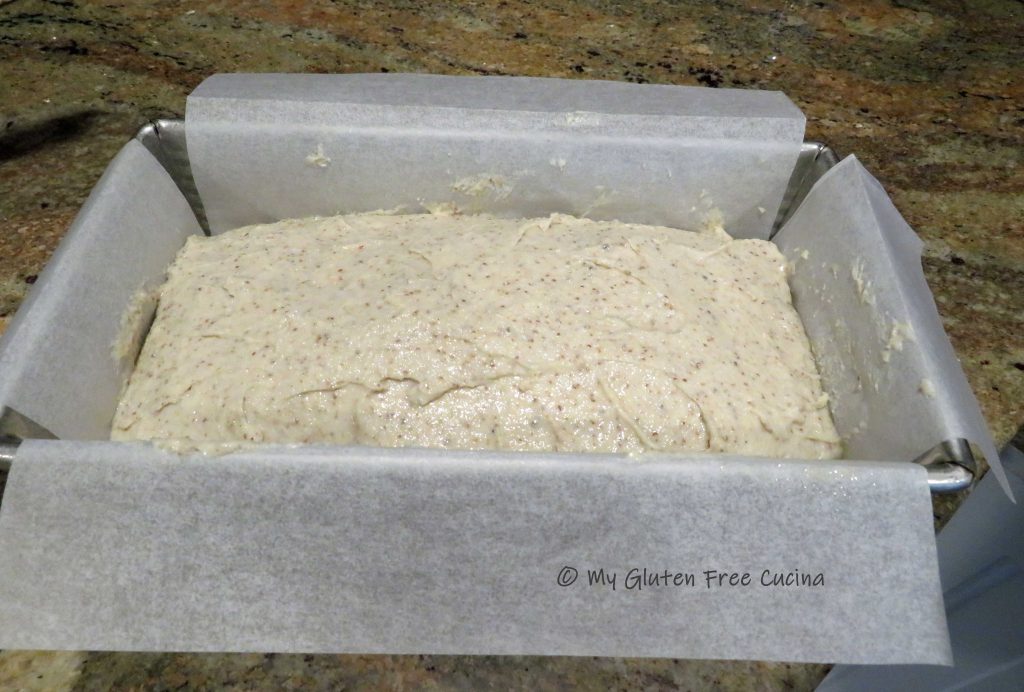
Cover with oiled plastic wrap and let it rise for 30 minutes while you preheat the oven to 400 degrees.
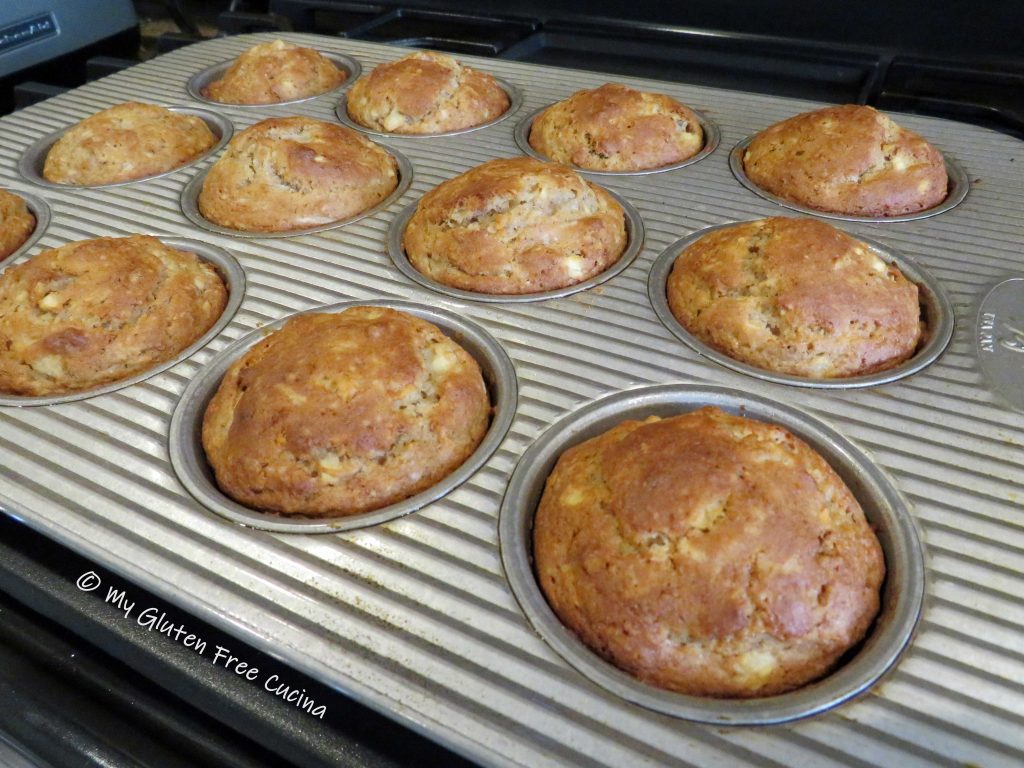
Brush the top of the loaf with milk, and sprinkle with sesame and poppy seeds.
 Quickly make 2 diagonal slashes across the top of the loaf with a sharp knife.

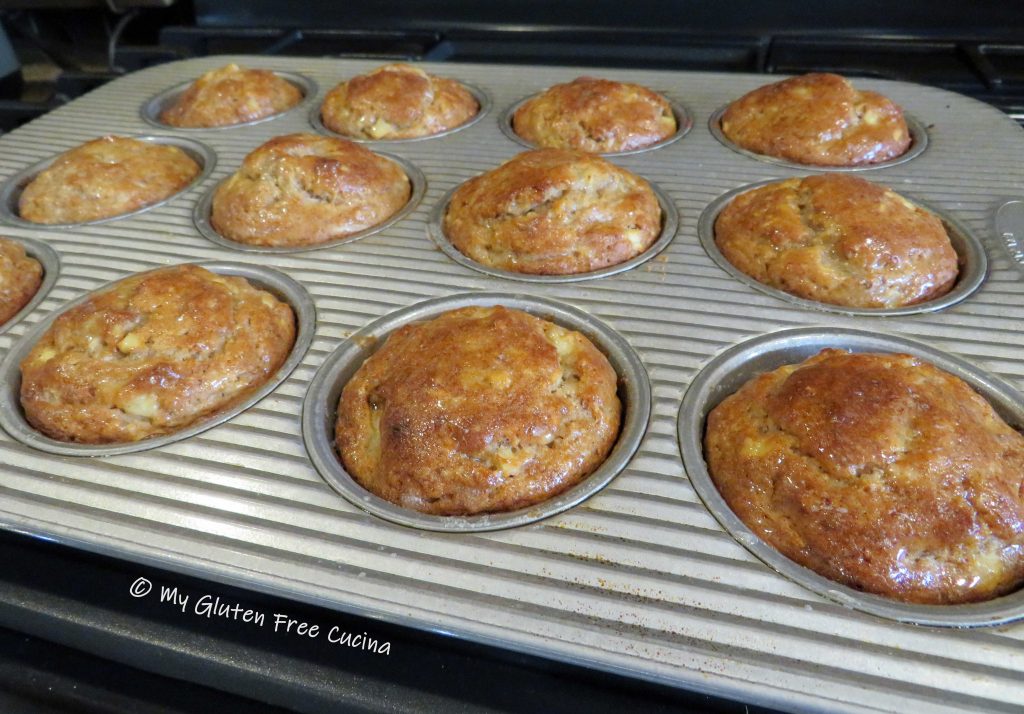
Place the loaf on the middle rack of the oven, close the door and drop the temperature to 375º. Bake 50-55 minutes, or until the internal temperature reaches 205º (use a thermometer).

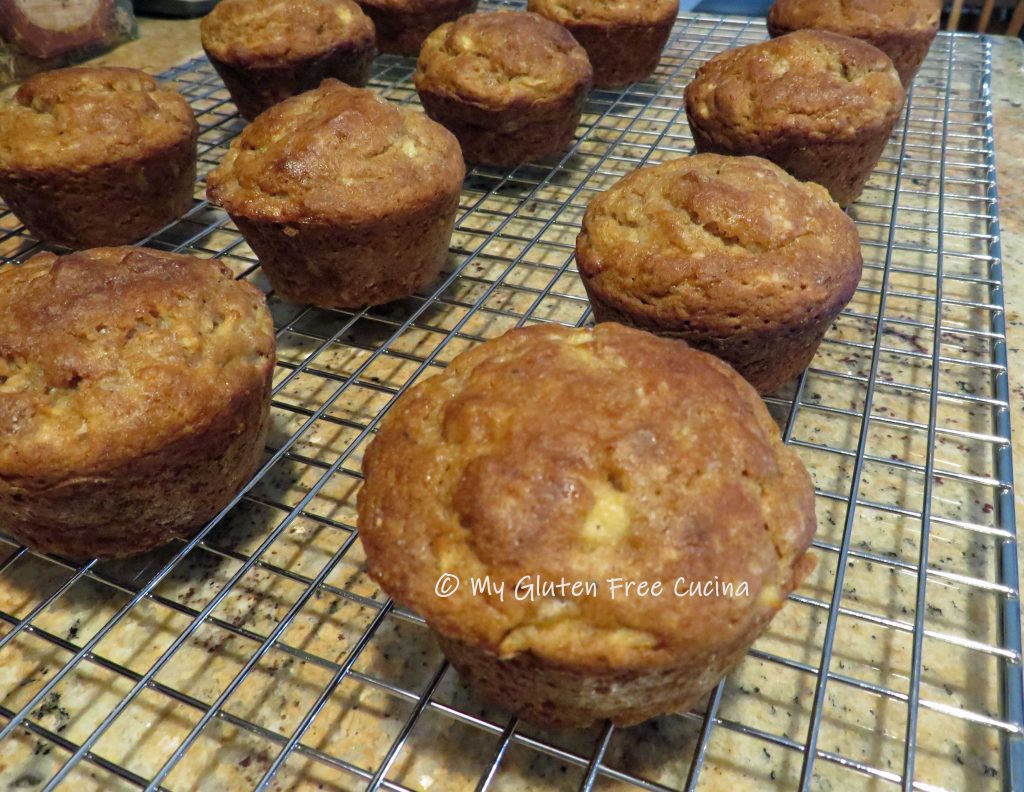
Cool in the pan 15 minutes, then transfer to a rack.
 Cool to room temperature, then bag it and let the loaf stand at room temperature overnight. Resist the urge to cut into that loaf right away, and your patience will be rewarded with this amazing crumb! It is truly worth the wait!
Notes ♪♫ It takes a bit more effort to weigh and mix the individual flours and starches in this recipe, but the results make it well worth your time.

Gluten Free Multigrain Sandwich Loaf
- Method: Baking
- Diet: Gluten-Free
Description
A nutritious and wholesome loaf, made with a combination of grains that deliver real bread flavor without the gluten.
Ingredients
- 1 tbsp. yeast
- 1 tbsp. ground chia seeds
- 1 tbsp. sugar
- 1/2 cup warm water
- 127 g. whole grain sorghum flour
- 183 g. brown rice flour
- 56 g. tapioca starch
- 56 g. arrowroot starch
- 56 g. potato starch
- 21 g. teff grain, ground
- 1 tsp. gelatin
- 1.5 tsp. xanthan gum
- 1 tsp. salt
- 1 large egg
- 3 tbsp. olive oil
- 3/4 cup warm milk (I used 2%)
- 1/2 cup warm water
- 2 tbsp. milk, for brushing
- sesame seeds
- poppy seeds
Instructions
Line a 1 lb. loaf-pan with parchment paper and mist with cooking spray.
Combine the yeast, ground chia seeds, sugar and 1/2 cup water in a small bowl or measuring cup. Let the mixture rest for 10 minutes.
In a separate bowl, whisk together all of the dry ingredients, sorghum flour through salt.
When the yeast has bloomed, add the mixture to the bowl of a stand mixer along with the egg, olive oil, milk and water.
Whisk it all together, and then add the dry ingredients into the wet. Mix for 5 minutes with the paddle attachment. The dough will be heavy and wet.
Scrape the dough into the prepared pan, smoothing out the top with a spatula dipped in water.
Cover with oiled plastic wrap and let it rise for 30 minutes while you preheat the oven to 400 degrees.
Brush the top of the loaf with milk, and sprinkle with sesame and poppy seeds.
Quickly make 2 diagonal slashes across the top of the loaf with a sharp knife.
Place the loaf on the middle rack of the oven, close the door and drop the temperature to 375º. Bake 50-55 minutes, or until the internal temperature reaches 205º (use a thermometer).
Cool in the pan 15 minutes, then transfer to a rack.
Cool to room temperature, then bag it and let the loaf stand at room temperature overnight. Resist the urge to cut into that loaf right away, and your patience will be rewarded with this amazing crumb! It is truly worth the wait!
Notes
It takes a bit more effort to weigh and mix the individual flours and starches in this recipe, but the results make it well worth your time.
 Combine the brussels sprouts, red onion, and bacon in a
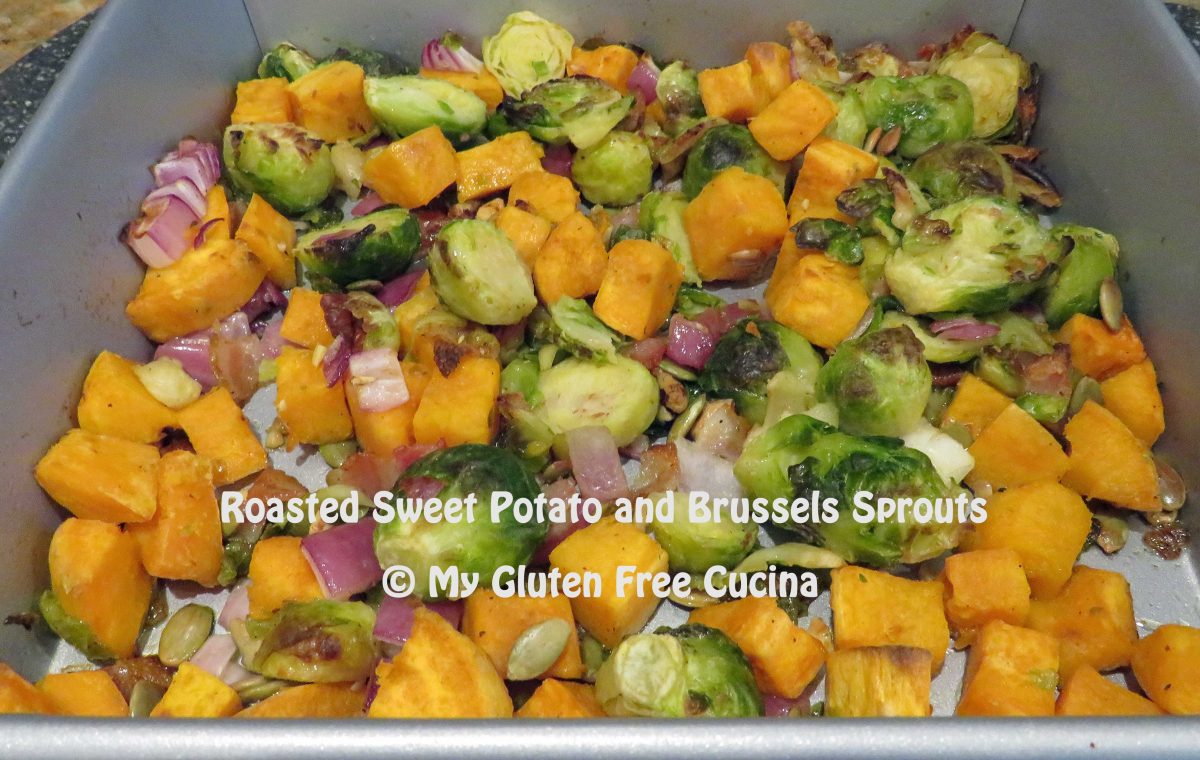
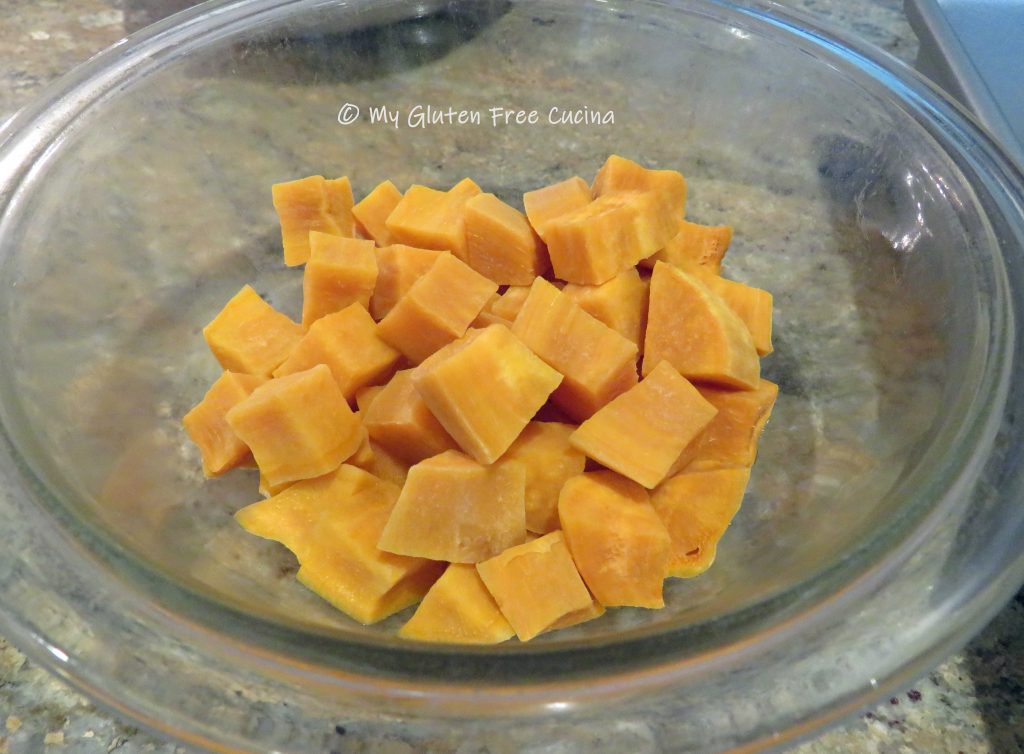
 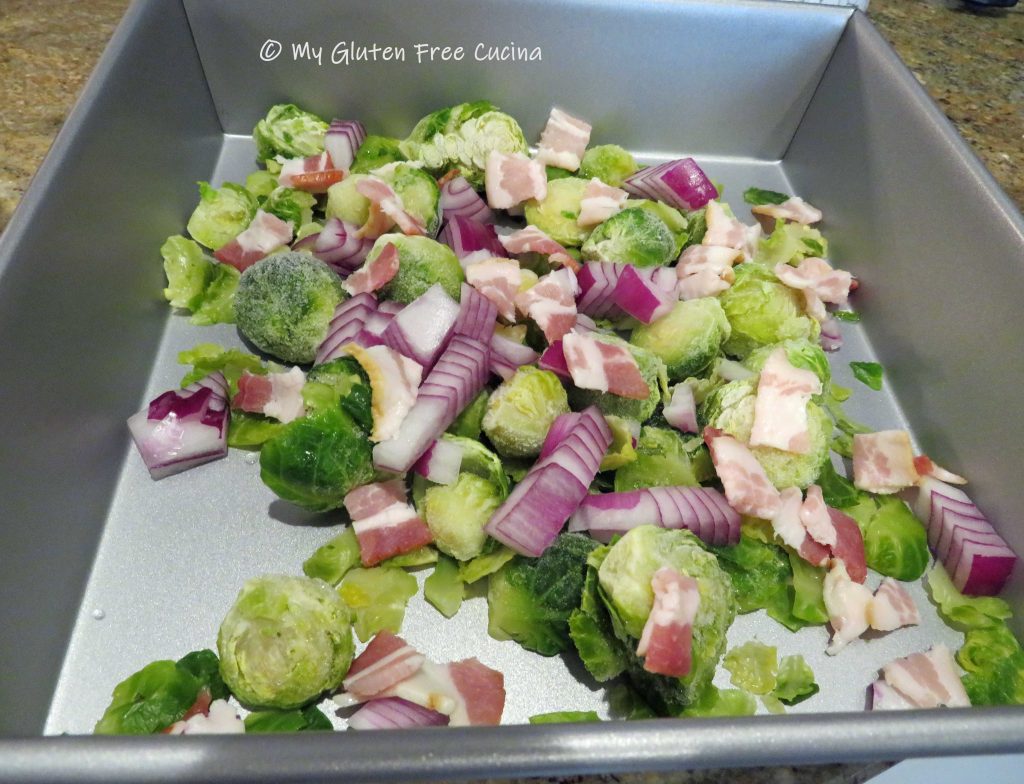 Stir in the cooled potatoes and toss with oil, salt and pepper. Top with the nuts and seeds and make sure everything is spread in an even layer.


 Sprinkle with


 Transfer to a
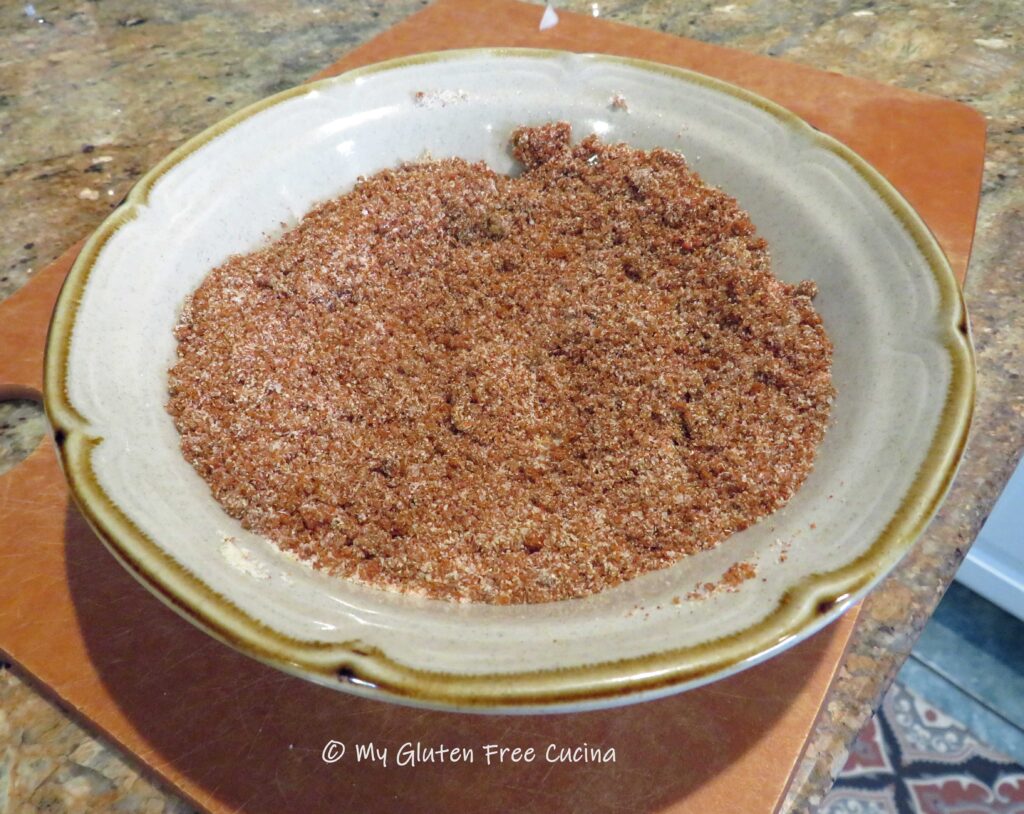 Preparation:
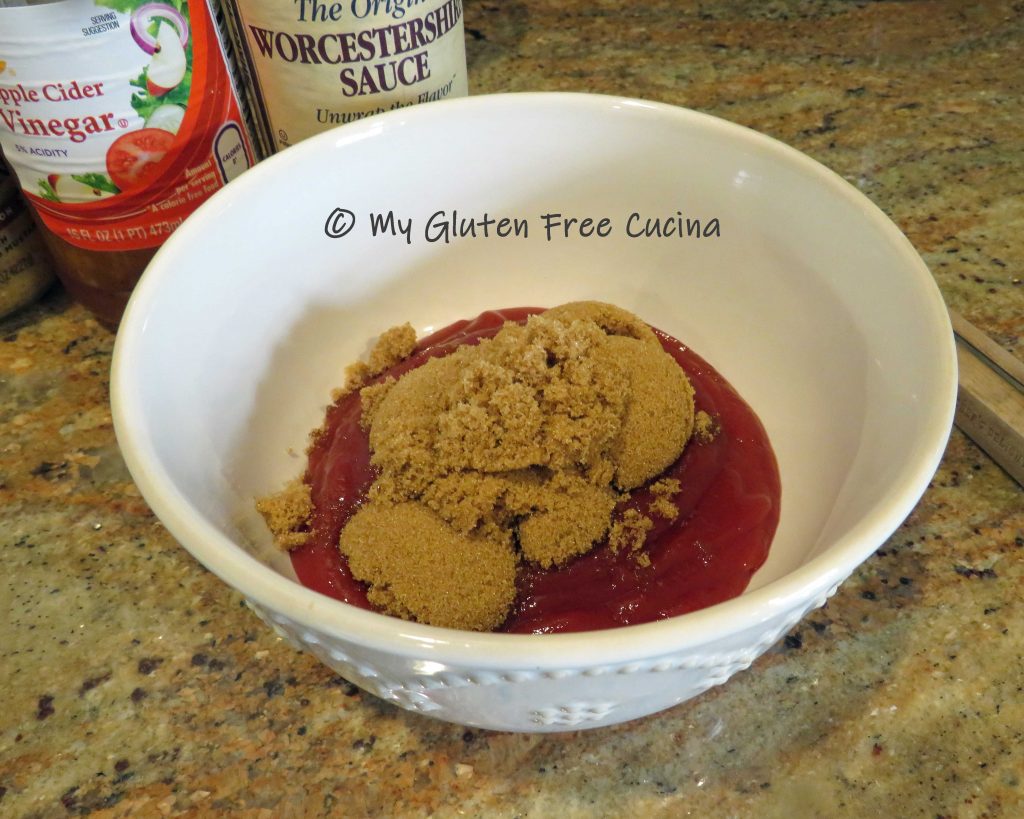
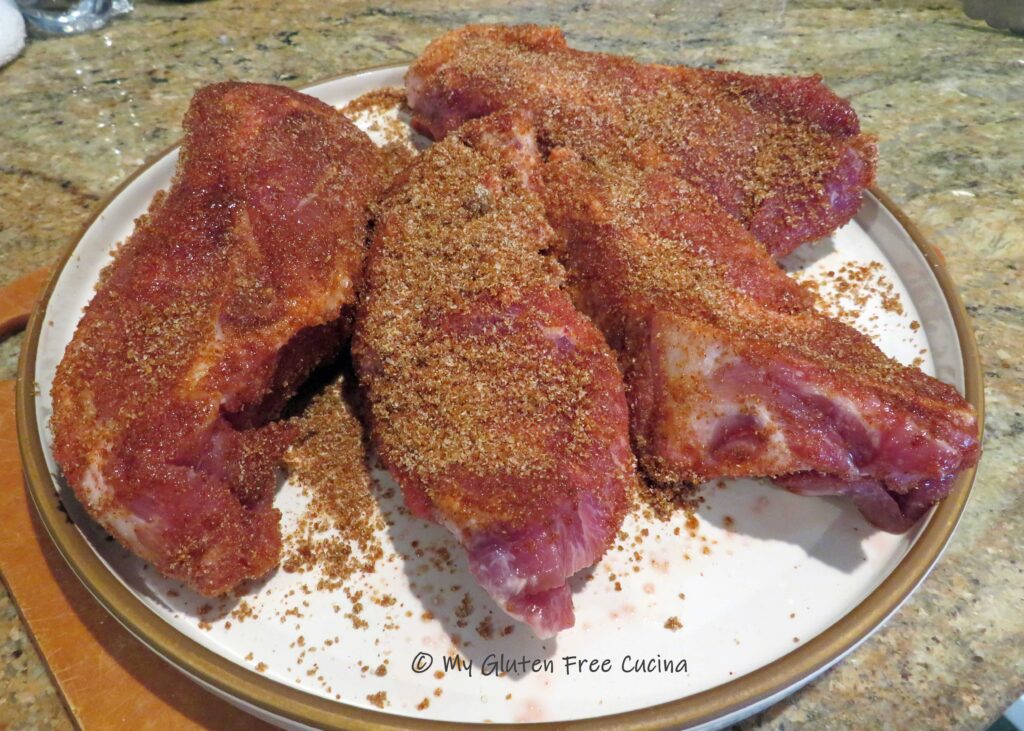 Mist a covered skillet, Dutch oven or braising pan with cooking spray. Cut the onions into large chunks and arrange in a single layer, to create a base for the ribs.
 Place the ribs on top of the onions. As the ribs cook down, they will release liquid, and you want them to be elevated for most of the cook time, not submerged.
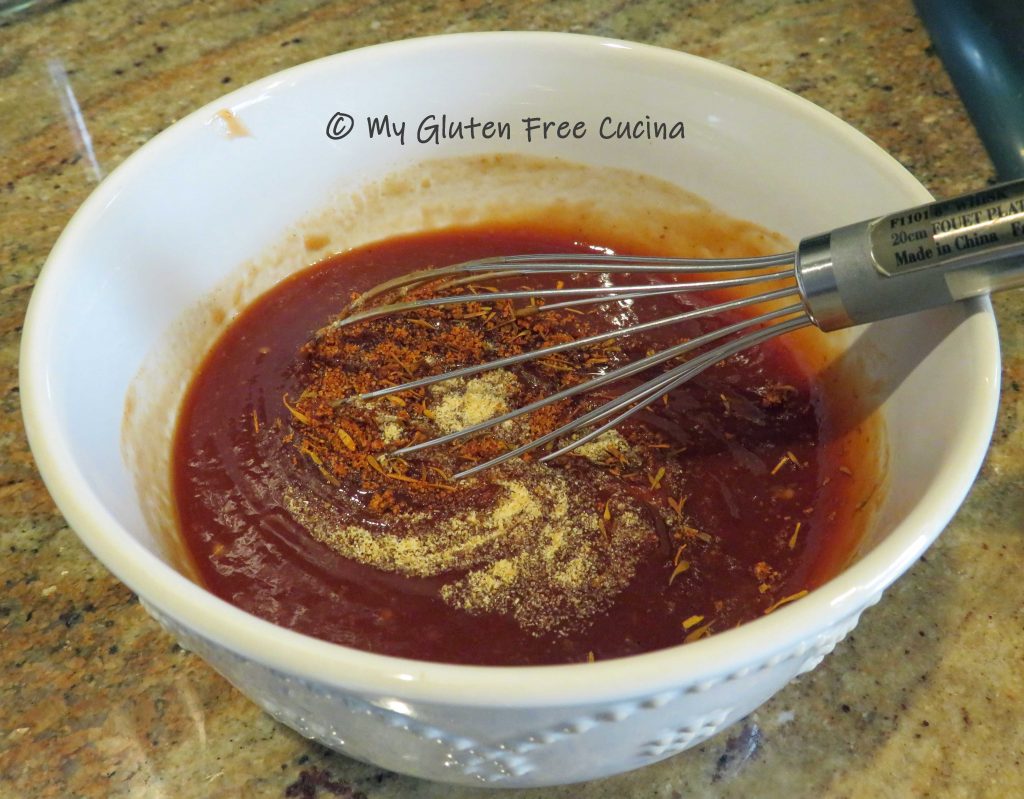
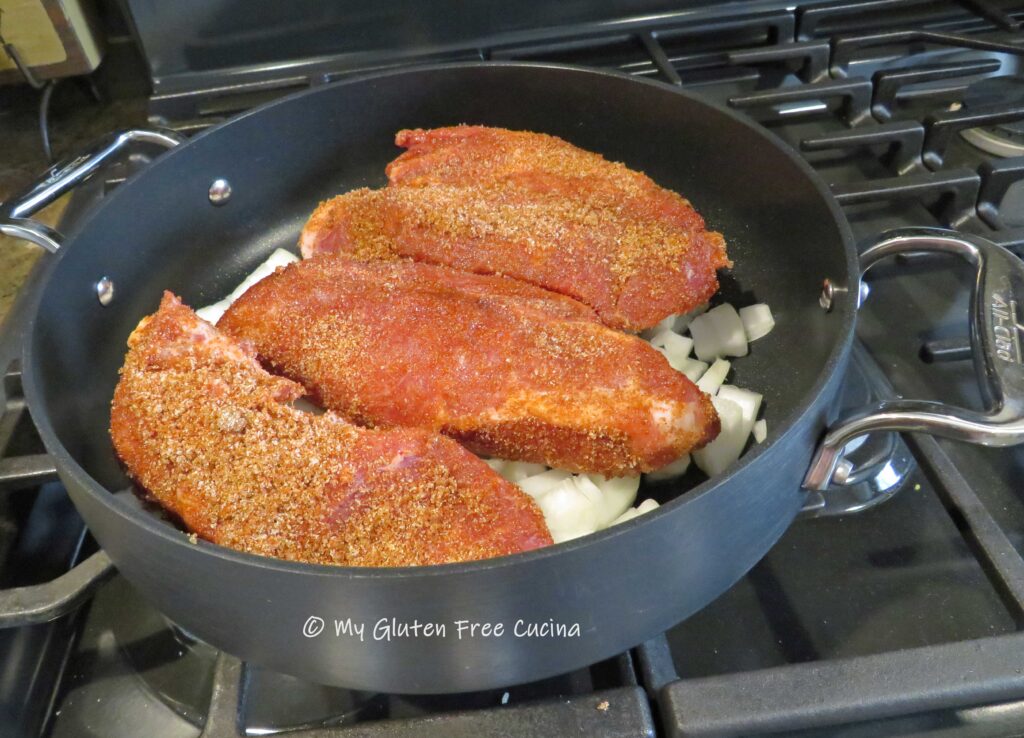 Cover and roast at 225° for 4 hours total. After 3-1/2 hours, uncover and brush liberally with BBQ sauce.
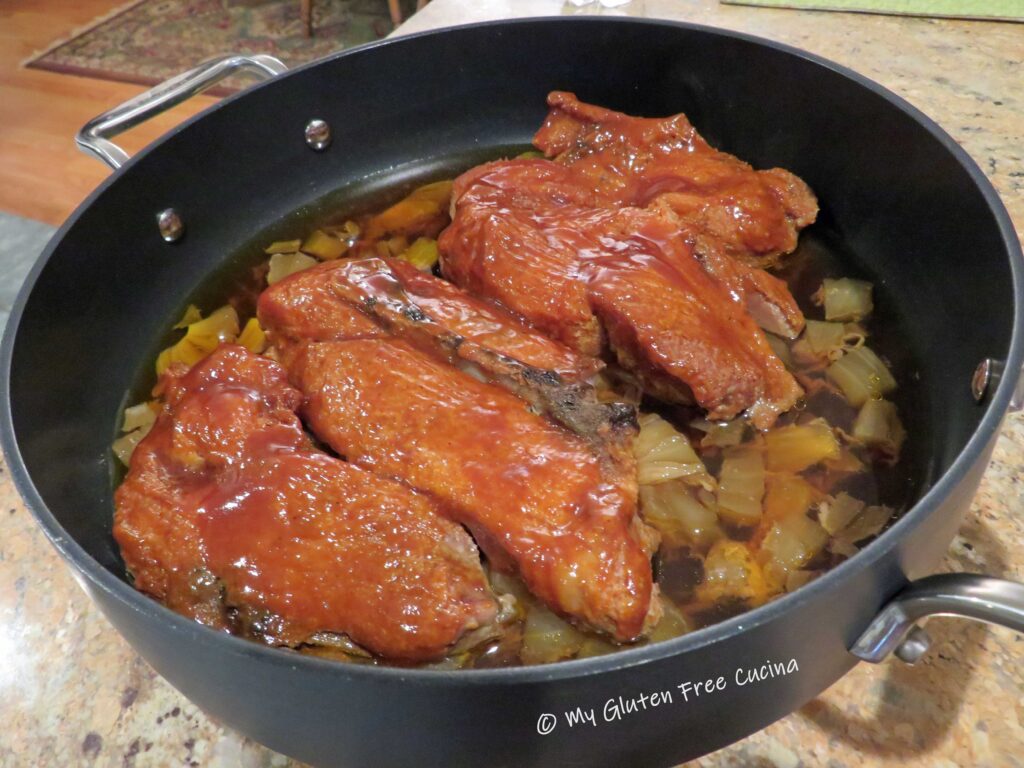 Continue cooking 1/2 hour longer. The meat will be falling off the bone tender!
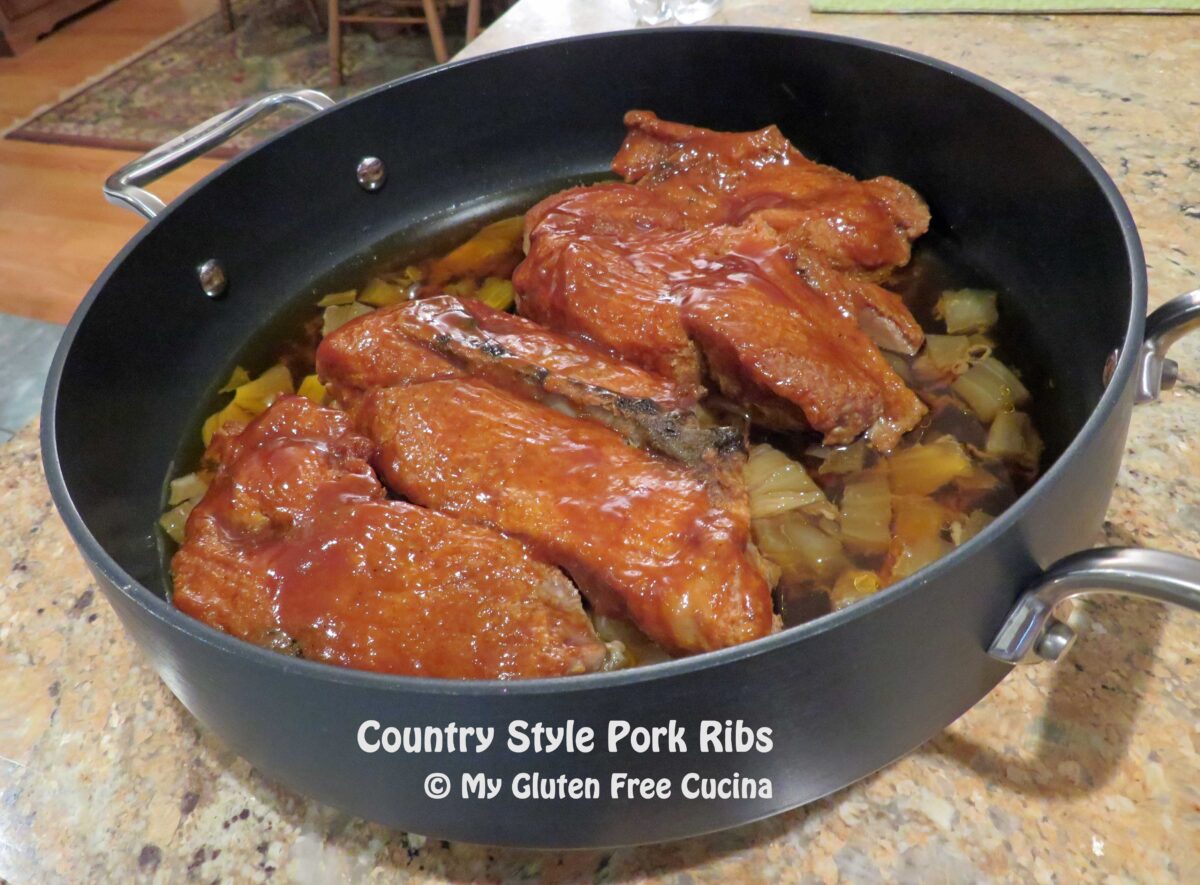
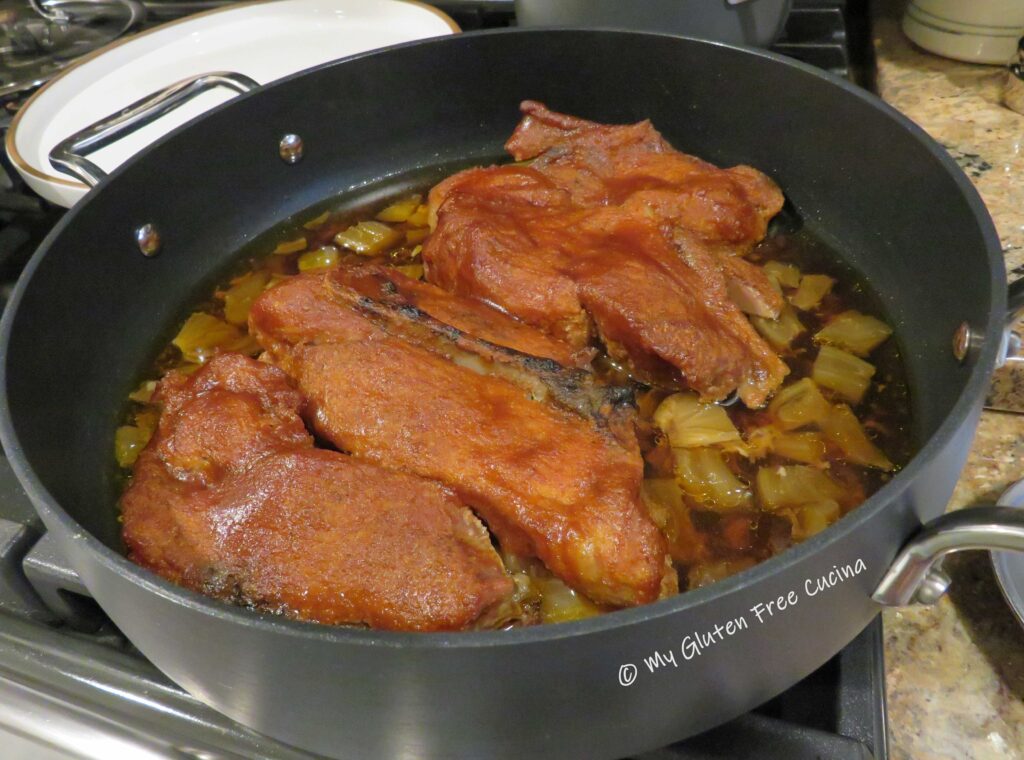 See how much liquid has accumulated in the bottom of the pan, yet the ribs are not swimming in it?
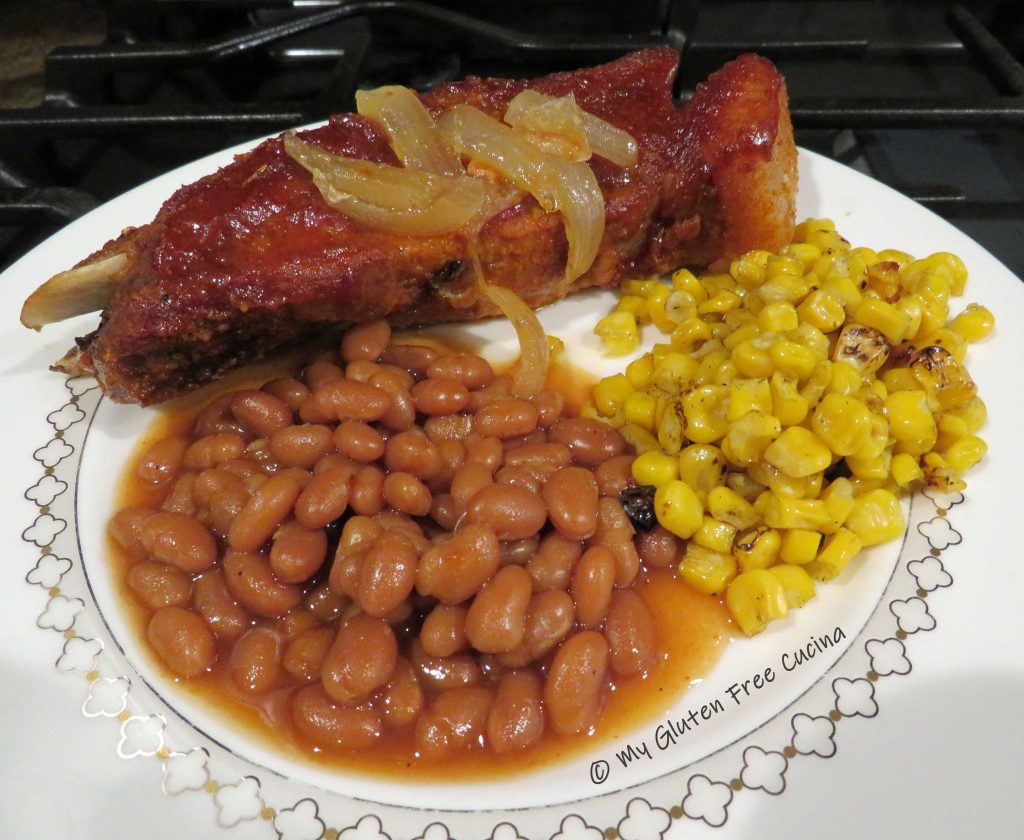
 To plate, spoon some of the onions and pan juice over the ribs. I served the ribs with a side of