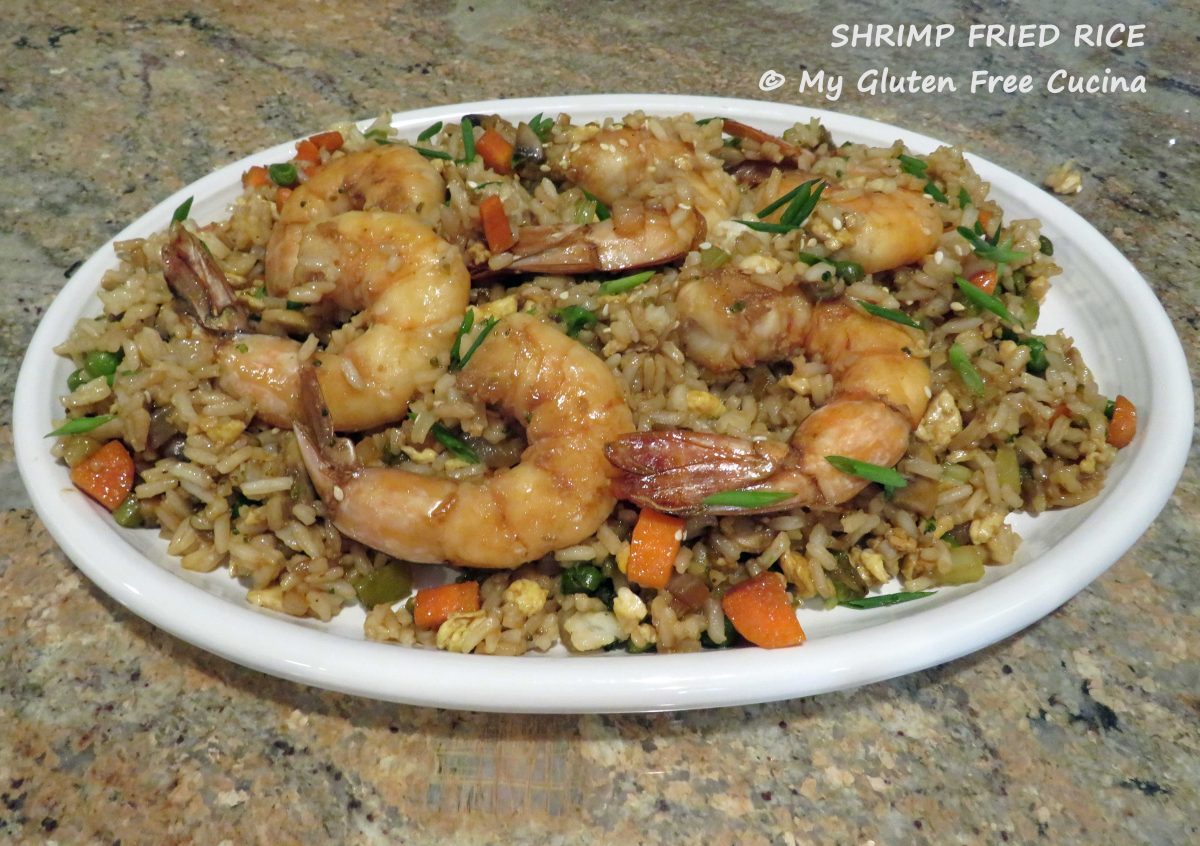
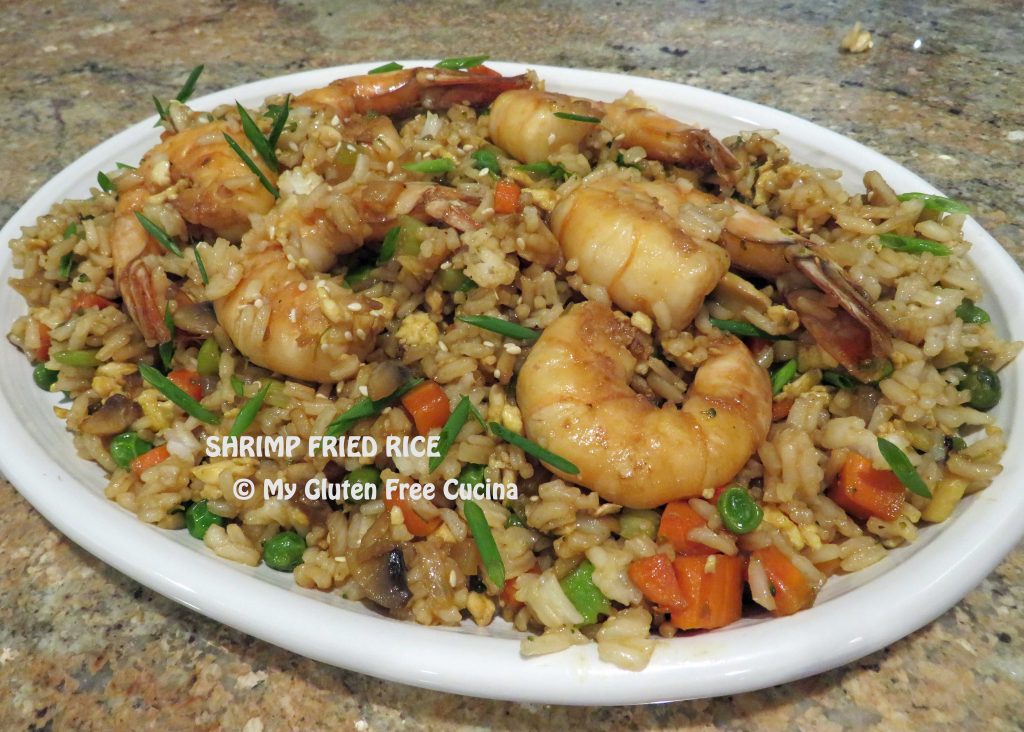
I love Asian inspired meals. This dish satisfies my craving for takeout, which is usually off limits because of the gluten in soy sauce. Easy to prepare at home, the measurements are approximate, and the recipe is very forgiving. Substitute chicken, pork or beef for the shrimp and use veggies that you have on hand. You can also save time by making the rice a day ahead, it’s actually better this way.
3-4 servings
This post contains affiliate links.
Ingredients:
- 1/2 cup uncooked long grain rice (use white rice or brown rice)
- 1 tsp. butter
- 1 cup water
- 1/8 tsp. salt
- 8 oz. raw shrimp (about 12 large or 6 colossal) peeled and deveined
- 1 large egg
- 1 tsp. water
- 1 tsp. butter
- olive oil
- toasted sesame oil
- 1/2 cup carrot, diced
- 1/4 cup each sweet onion, celery, mushrooms, broccoli, peas
- 2 tbsp. mirin
- 1/8 tsp. garlic powder
- 1/8 tsp. ginger powder
- 1/8 tsp. ground pepper
- gluten free coconut aminos
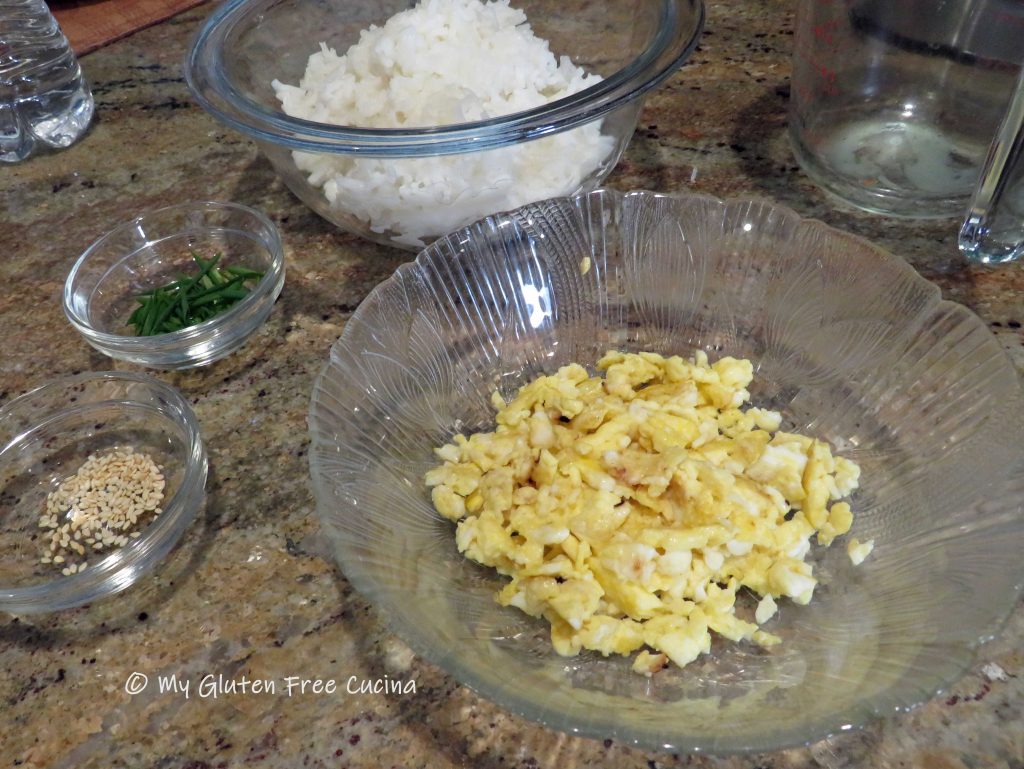
- toasted sesame seeds for garnish
- fresh chives for garnish
Preparation:
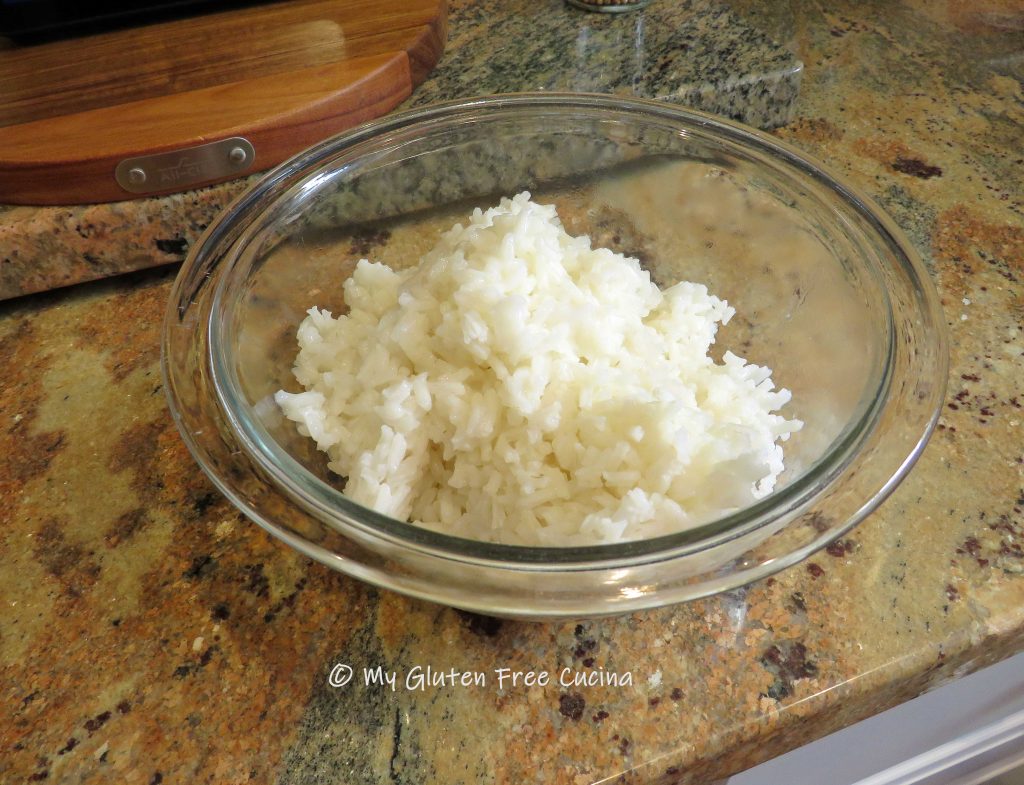
Combine the rice with 1 tsp. melted butter in a small saucepan, stirring to coat. Add the water and salt, cover and bring to a boil. Reduce heat to a simmer and cook according to package directions, about 15 minutes for white rice or 35 minutes for brown. Chill the rice while you get the rest of the dish ready.
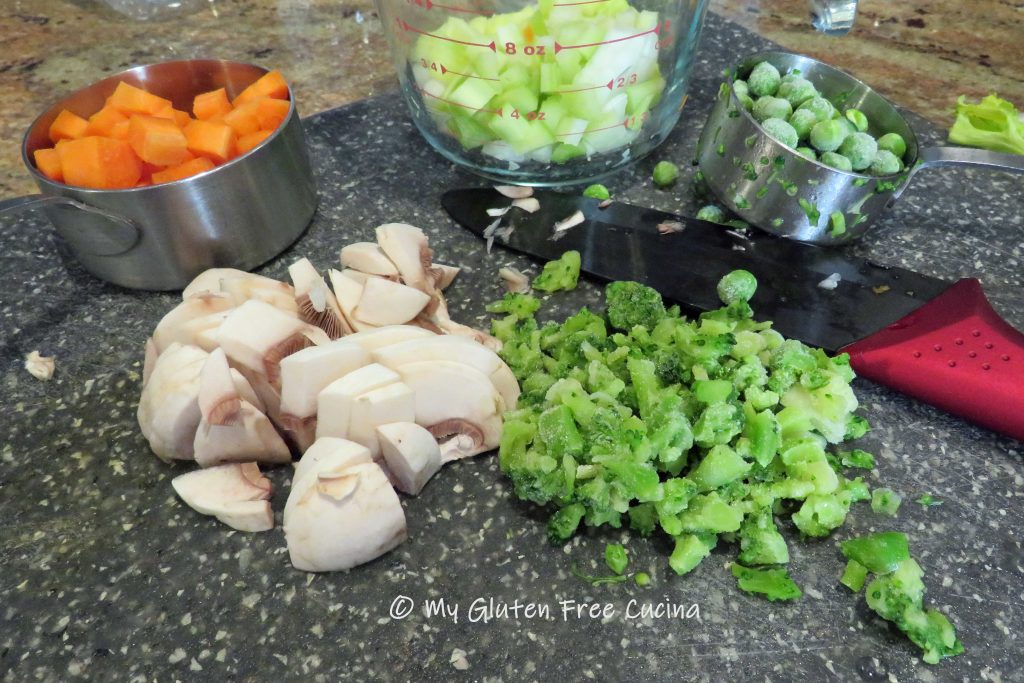
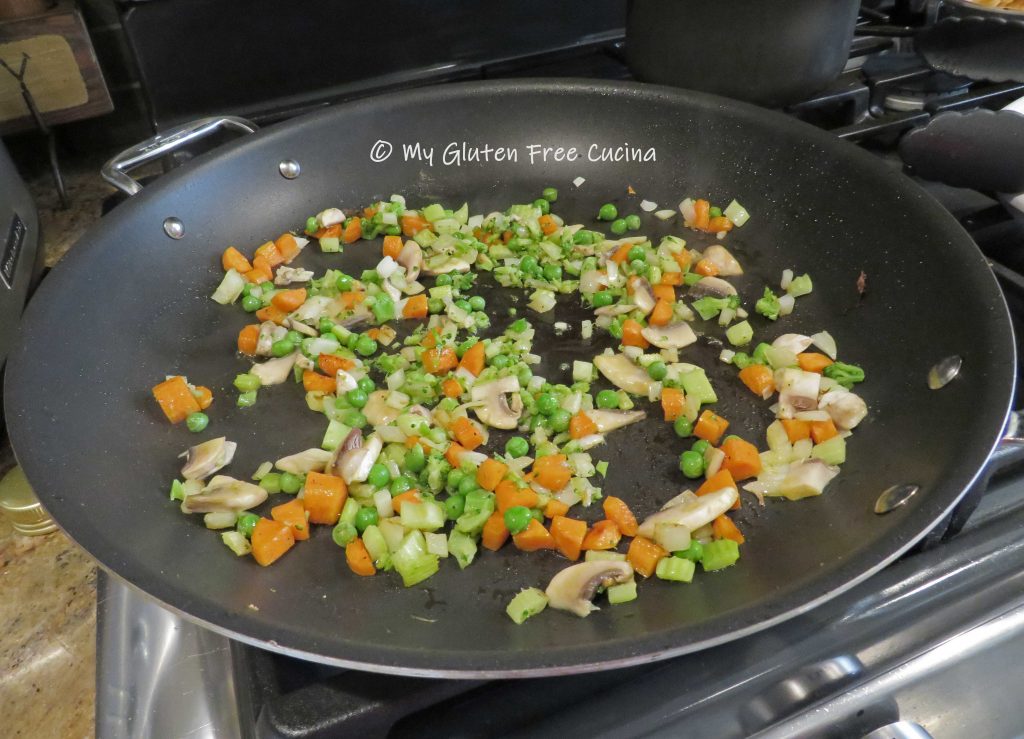
While the rice cooks, chop the veggies into small dice. Whisk together the mirin, garlic and ginger powders.
Toast the sesame seeds in a dry skillet and cut the chives on the diagonal into 1/2″ pieces.
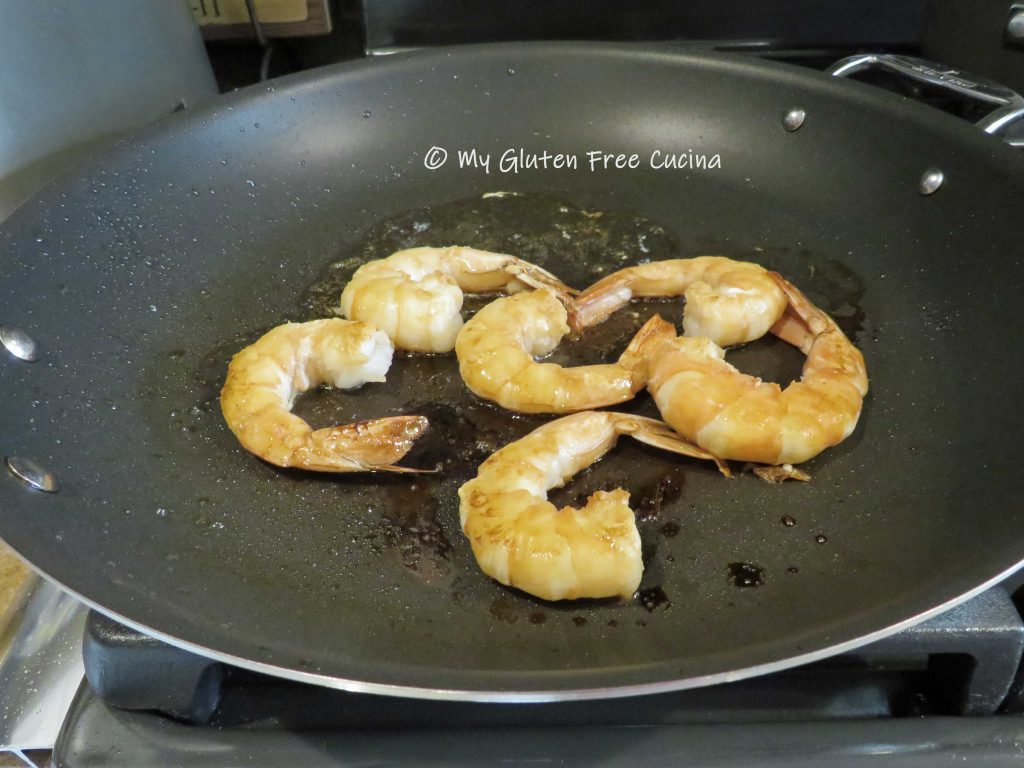
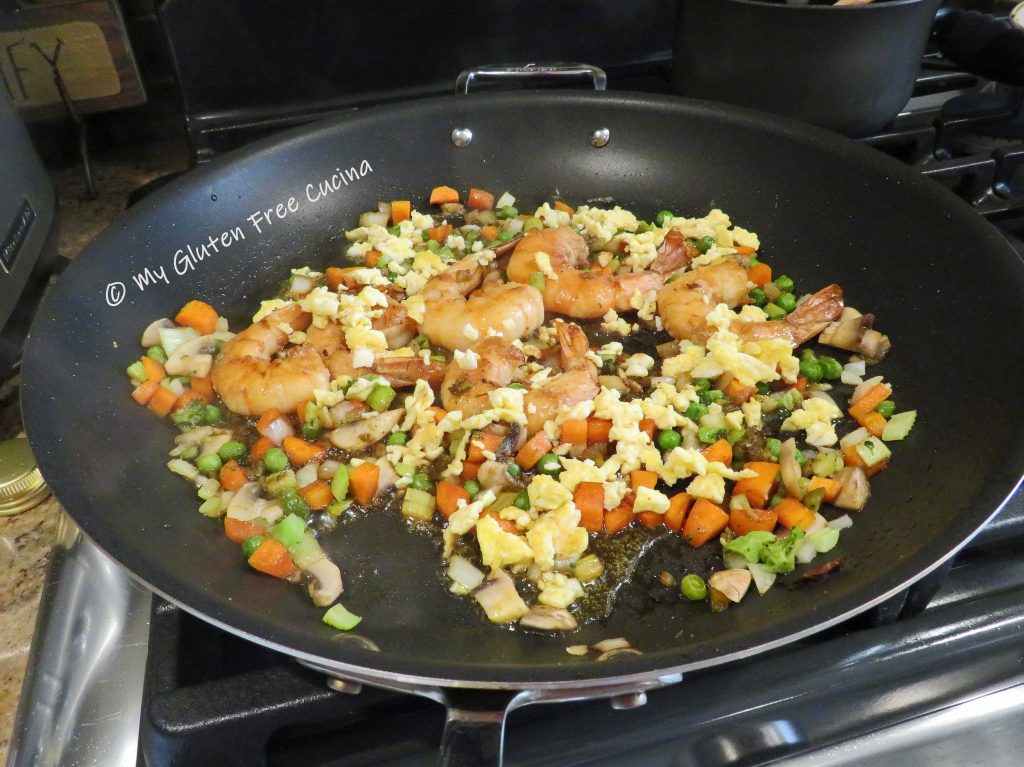
Peel and devein the shrimp, and sprinkle with coconut aminos. Heat a large nonstick skillet over medium low and add 2 tsp. sesame oil. Cook the shrimp in a single layer just until they turn pink, turning once. Remove from the skillet and set aside.
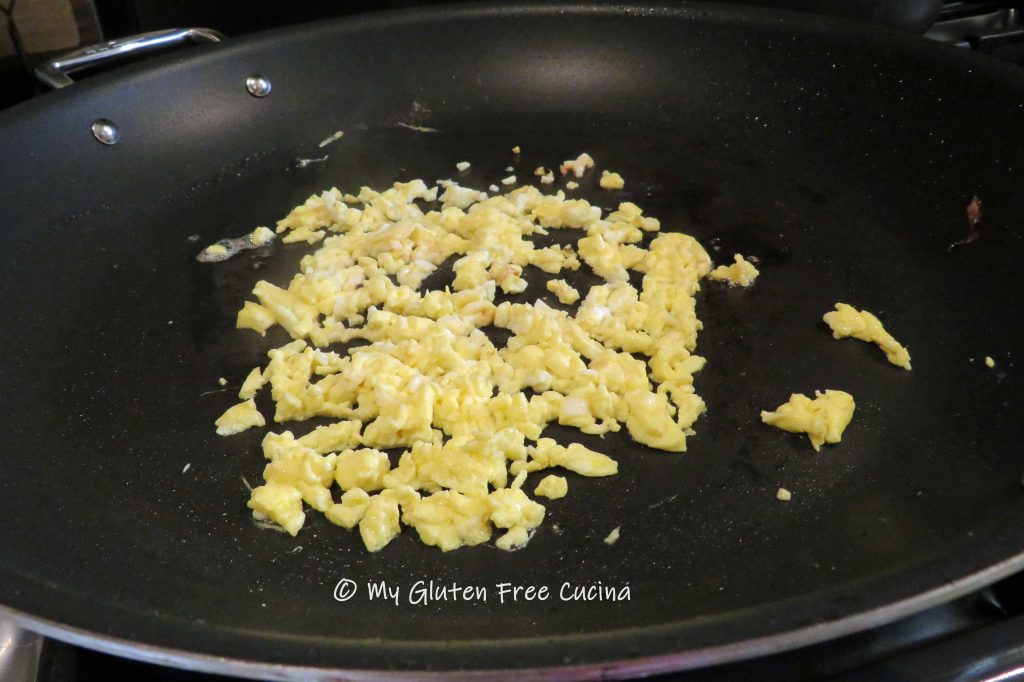
Wipe the skillet clean and add 1 tsp. of butter. Whisk the egg with 1 tsp. of water and add to the skillet, turning to cook through. Use a spatula to break the egg into small pieces, then transfer to a bowl and keep warm.
Next, add 2 tbsp. olive oil with 2 tsp. sesame oil to the skillet and cook the veggies. Give the carrots a few minutes head start, followed by the onion and celery. Soft veggies like broccoli, peas and mushrooms go in last. Season with ground pepper, and sprinkle with coconut aminos.
When the veggies are ready, it’s time to put everything together. Stir in the mirin mixture, then add back the shrimp and egg.
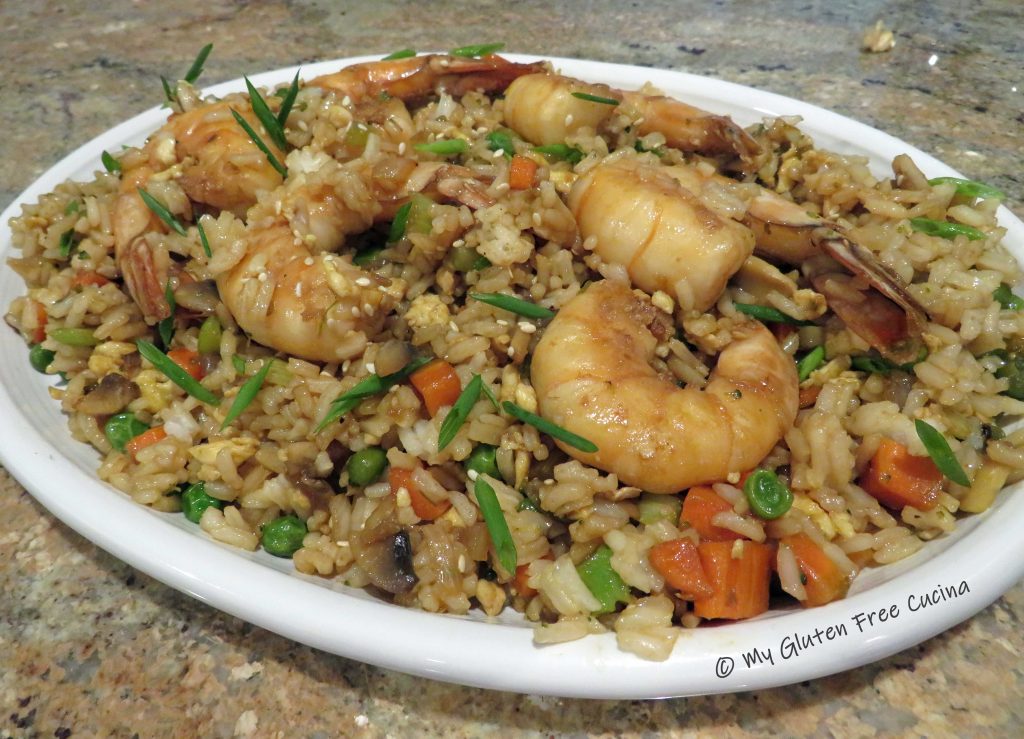
Finally, add the rice and drizzle with 2 tsp. sesame oil and a little more coconut aminos. Use 2 spatulas to stir and toss everything together until well blended and heated through.
 Transfer to a serving platter and garnish with the chives and toasted sesame seeds.
This is a delicious gluten free meal to add to your weeknight rotation. Forget takeout! With endless substitutions to keep it fresh, this will become one of your favorite go-to recipes.
Notes ♪♫ I used Coconut Aminos in this recipe instead of gluten free soy sauce. We are a low sodium household, and coconut aminos have about a 10th the sodium of regular soy sauce. If salt is not an issue, you can use gluten free soy sauce or tamari. Remember, regular soy sauce is fermented in wheat and is not safe for those with Celiac disease.
Originally posted 06/22/2018 Updated 07/10/2023


 Preparation:
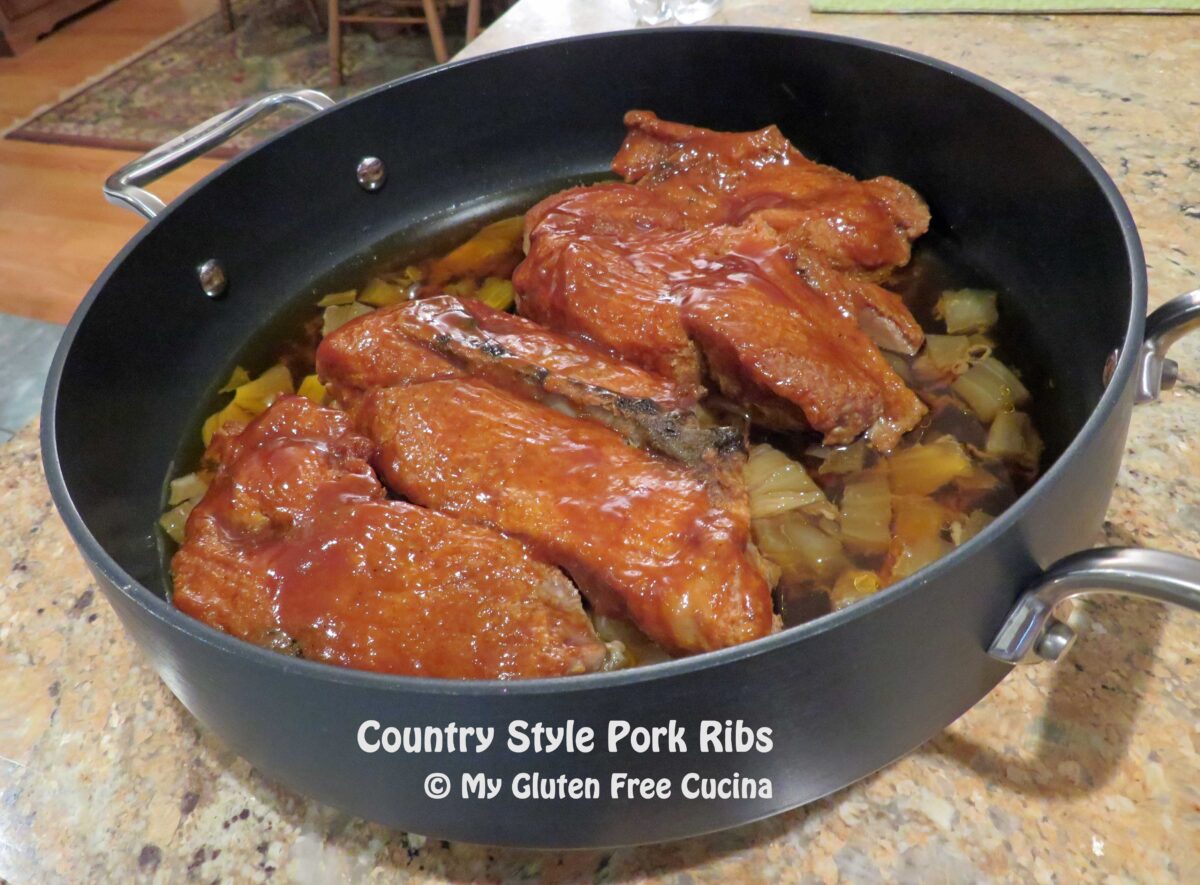
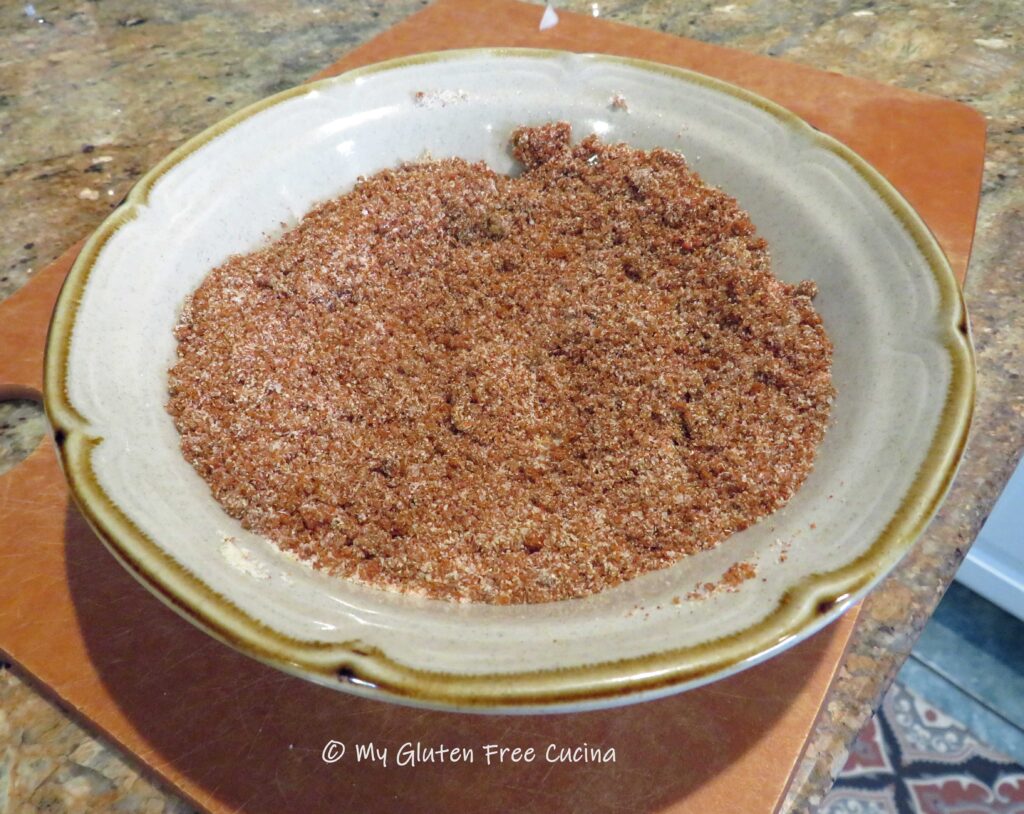
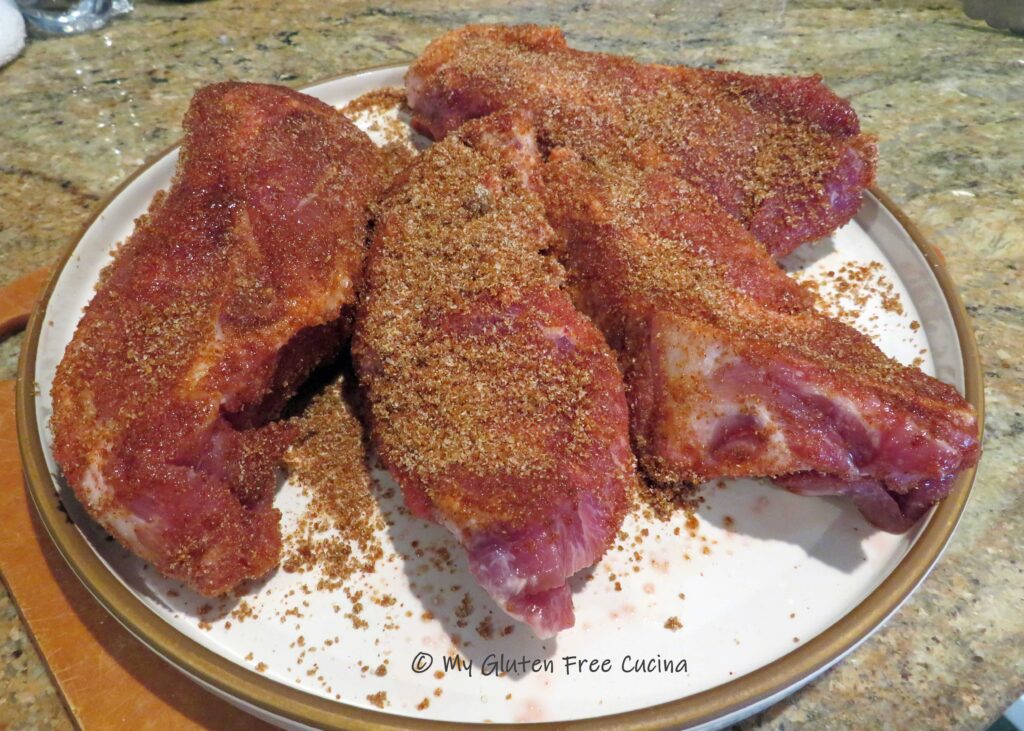 Mist a covered skillet, Dutch oven or braising pan with cooking spray. Cut the onions into large chunks and arrange in a single layer, to create a base for the ribs.
 Place the ribs on top of the onions. As the ribs cook down, they will release liquid, and you want them to be elevated for most of the cook time, not submerged.
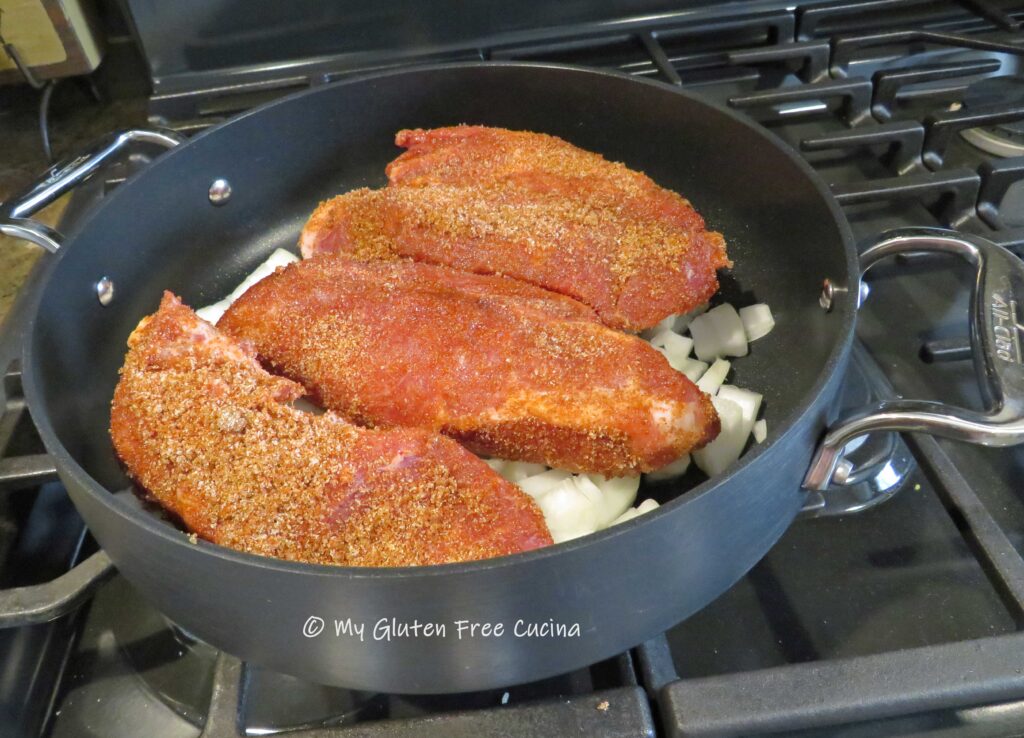 Cover and roast at 225° for 4 hours total. After 3-1/2 hours, uncover and brush liberally with BBQ sauce.
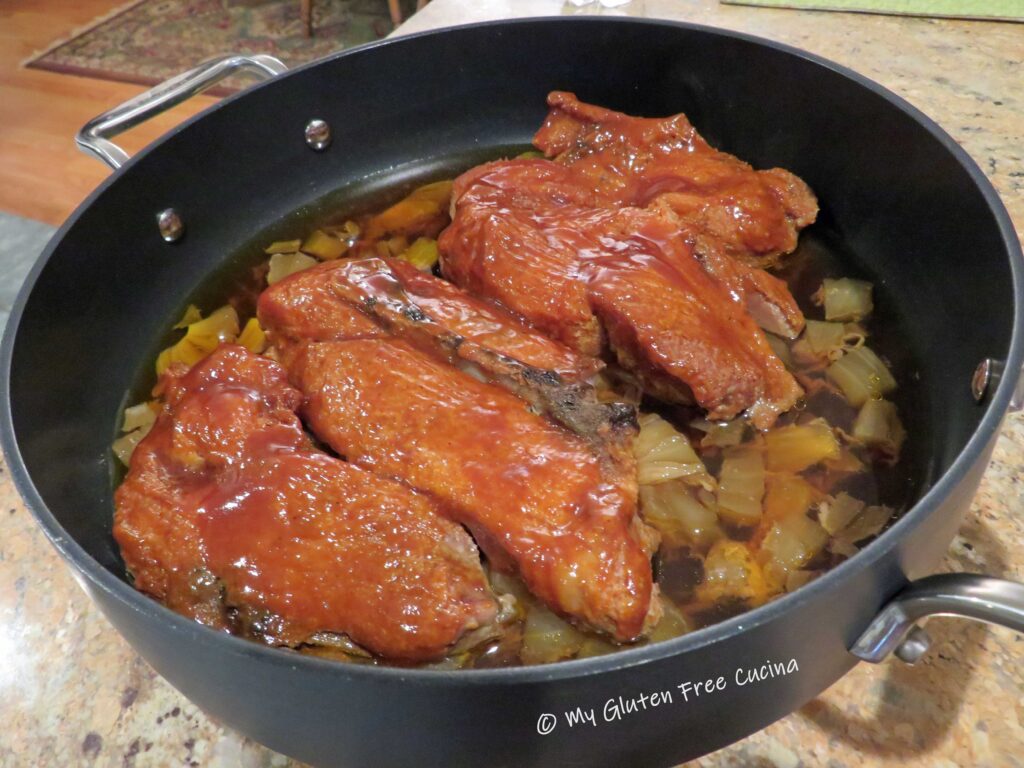 Continue cooking 1/2 hour longer. The meat will be falling off the bone tender!
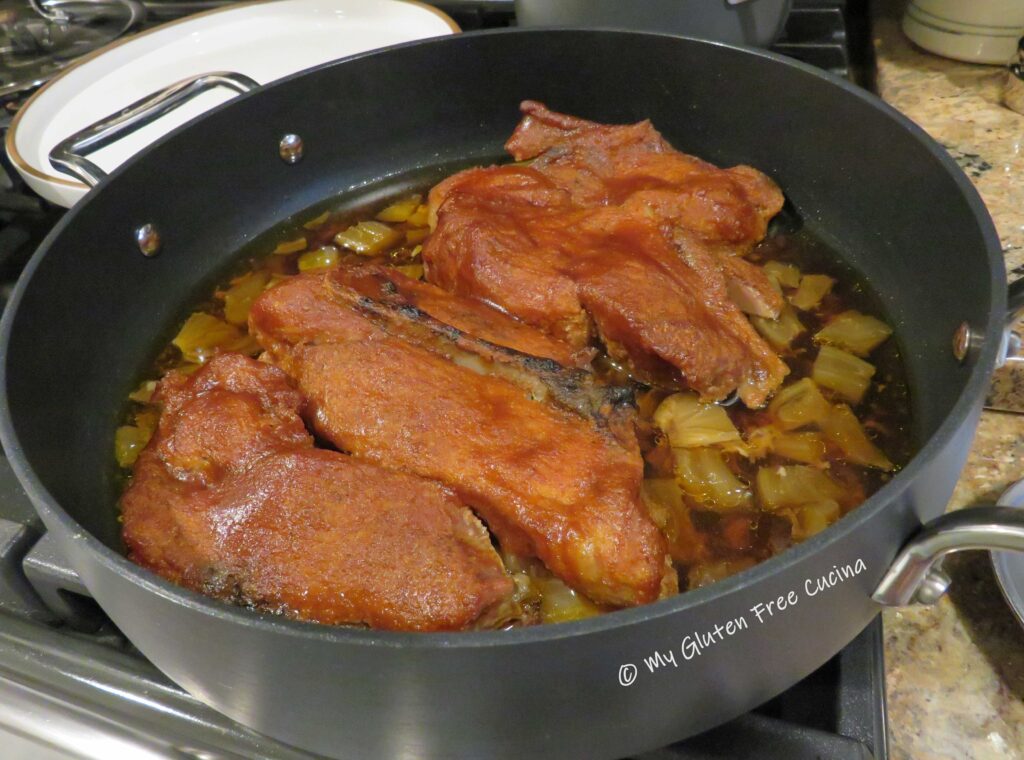 See how much liquid has accumulated in the bottom of the pan, yet the ribs are not swimming in it?
 To plate, spoon some of the onions and pan juice over the ribs. I served the ribs with a side of
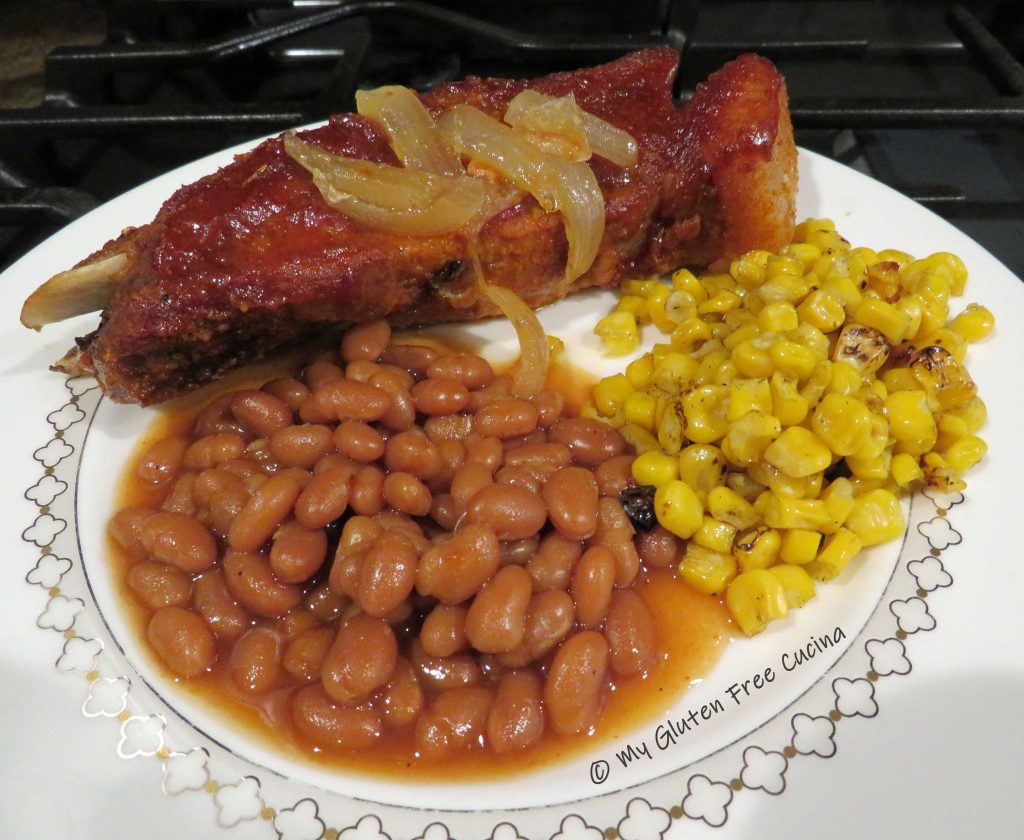


 Cover and simmer on low for 2 hours, stirring occasionally. I like to use a
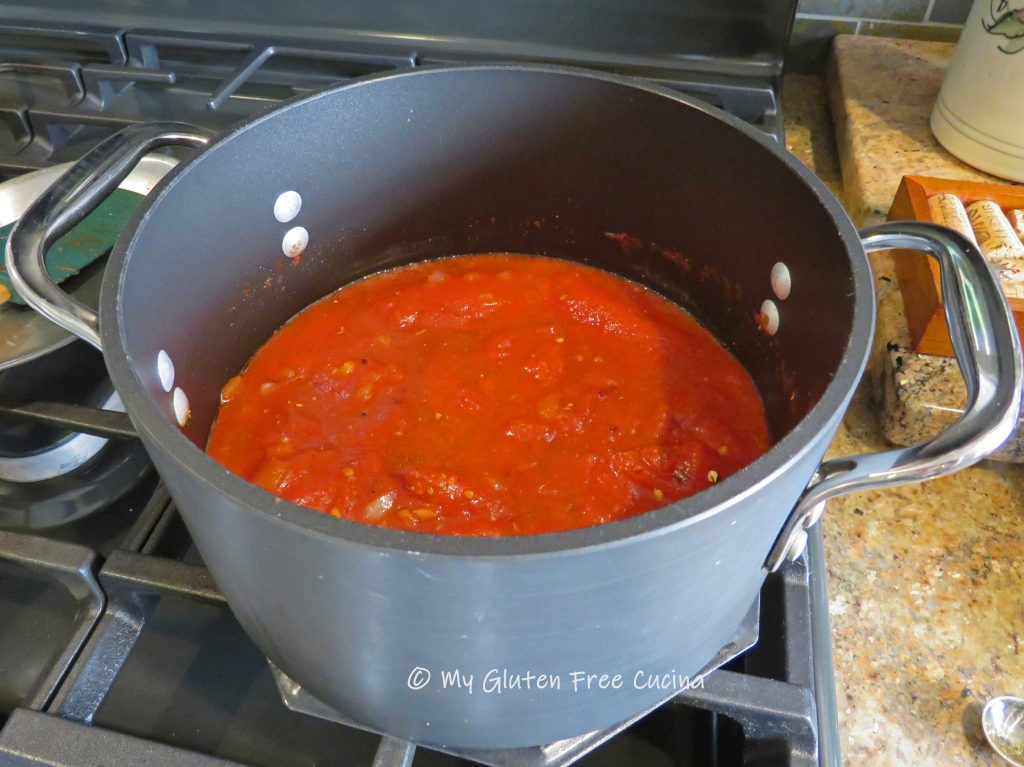
 Add the wine and continue cooking slowly, stirring frequently until most of the liquid evaporates.
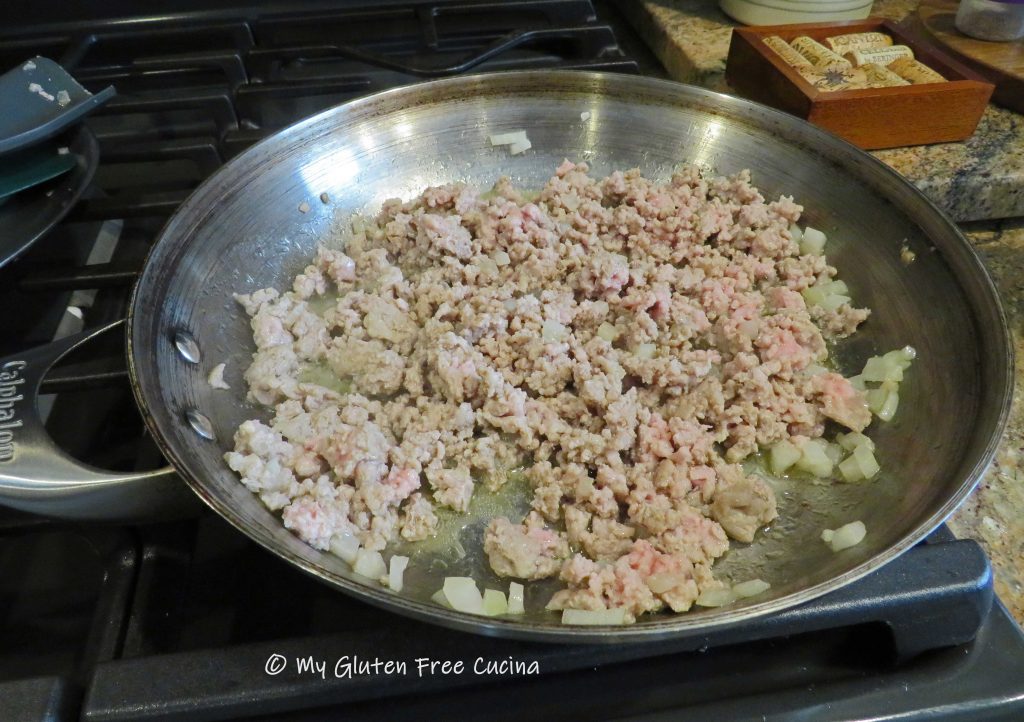
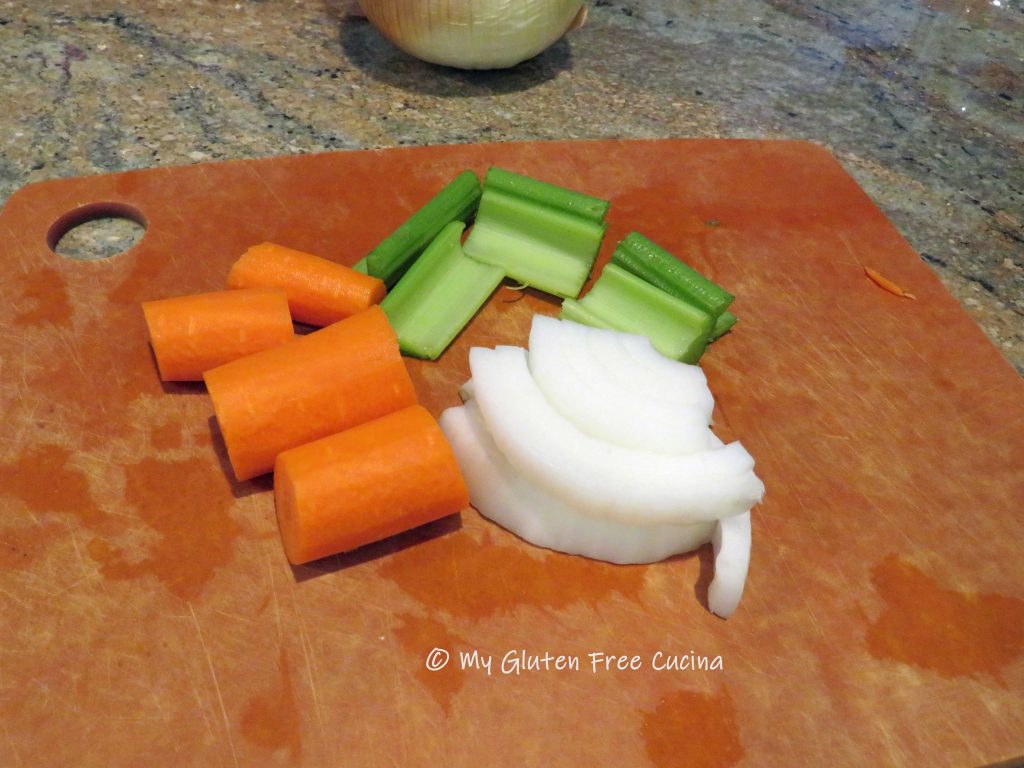
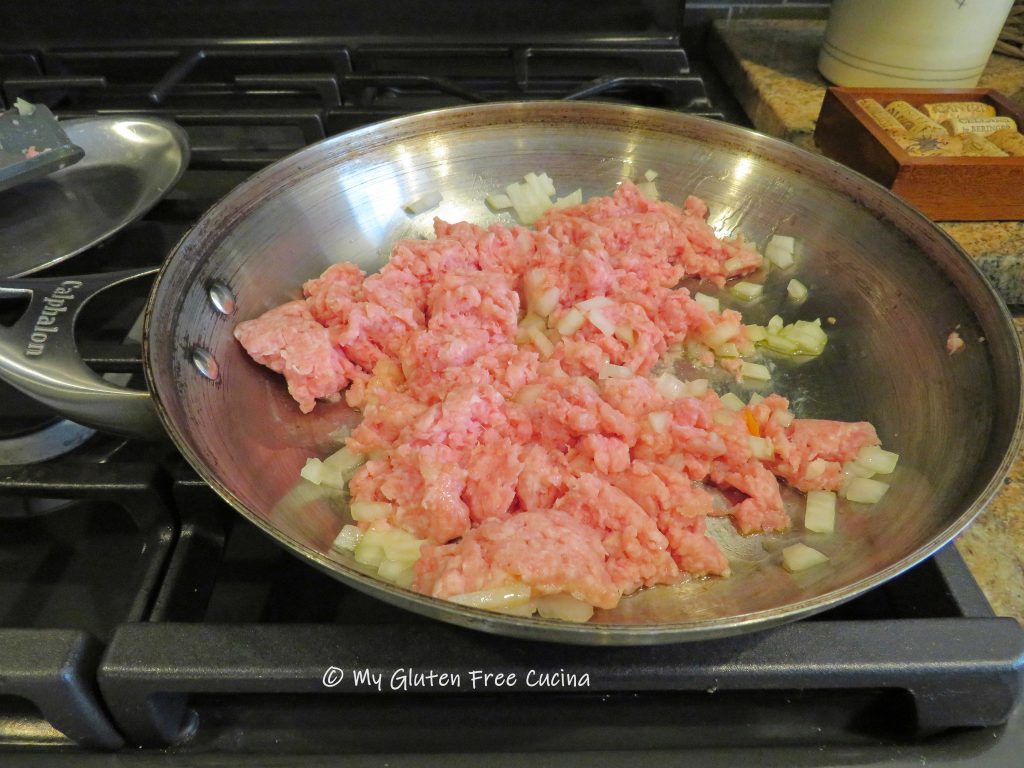
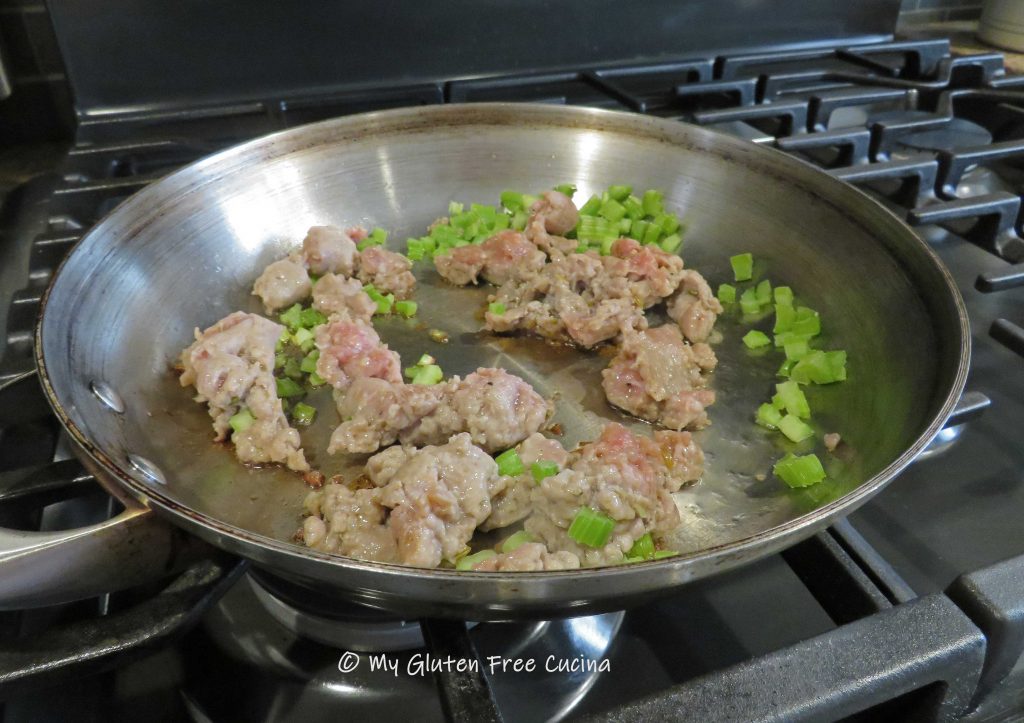
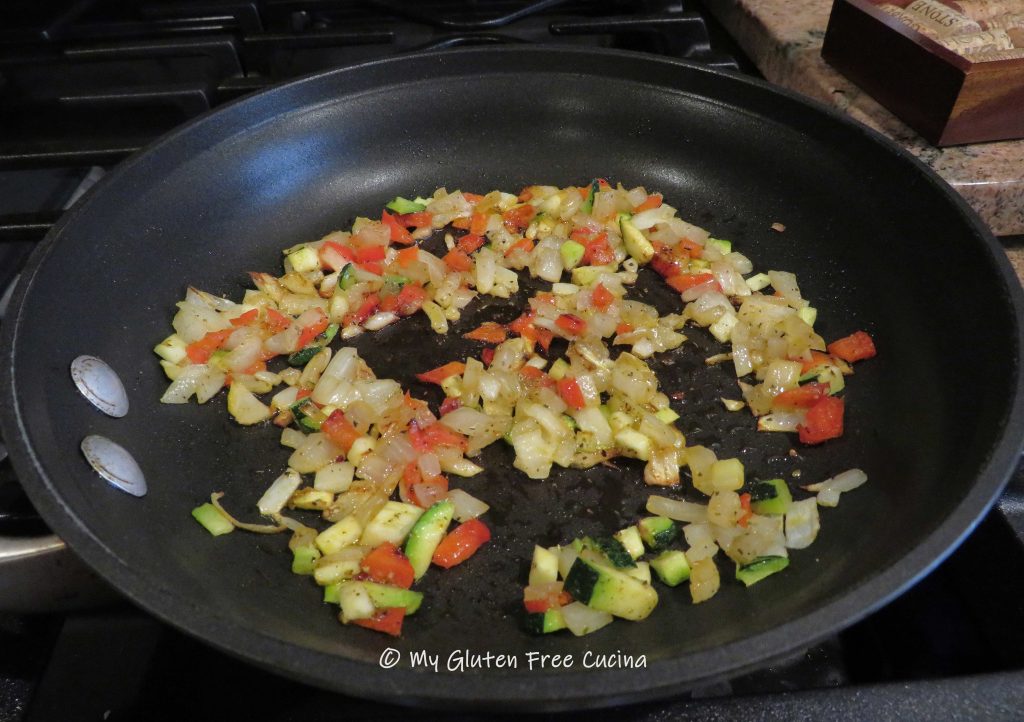
 Add the minced veggies to the pork and stir well.
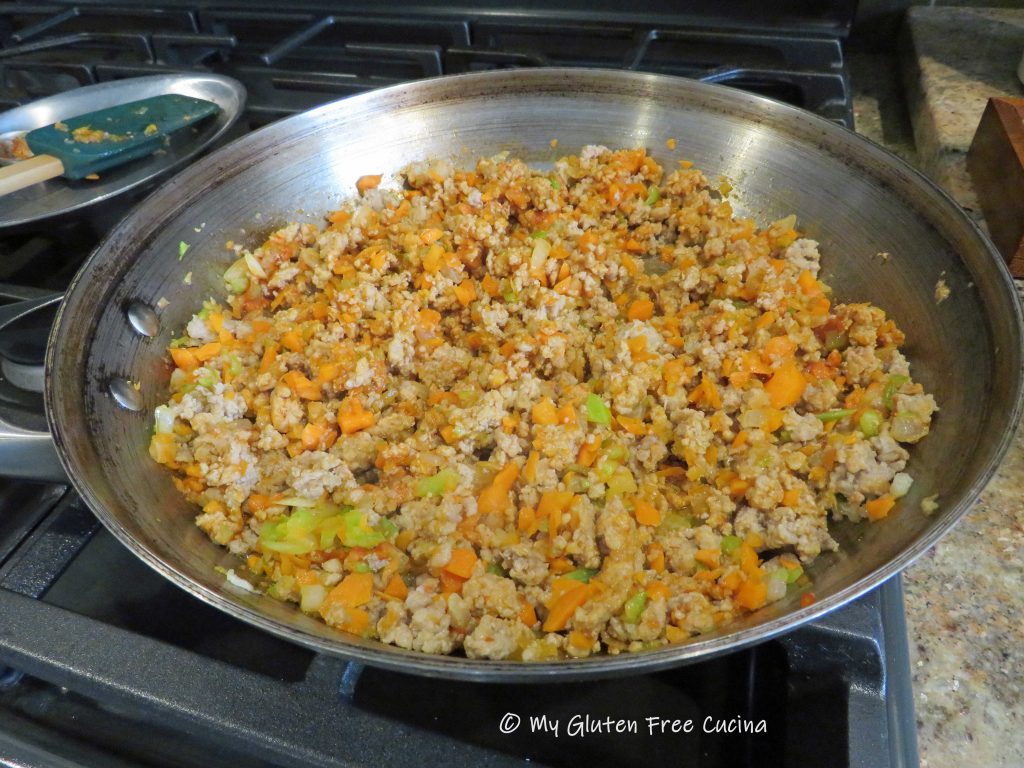
 Make a spot in the center of the pan and add the tomato paste. Let it toast for a minute before stirring it into the pork and veggies.
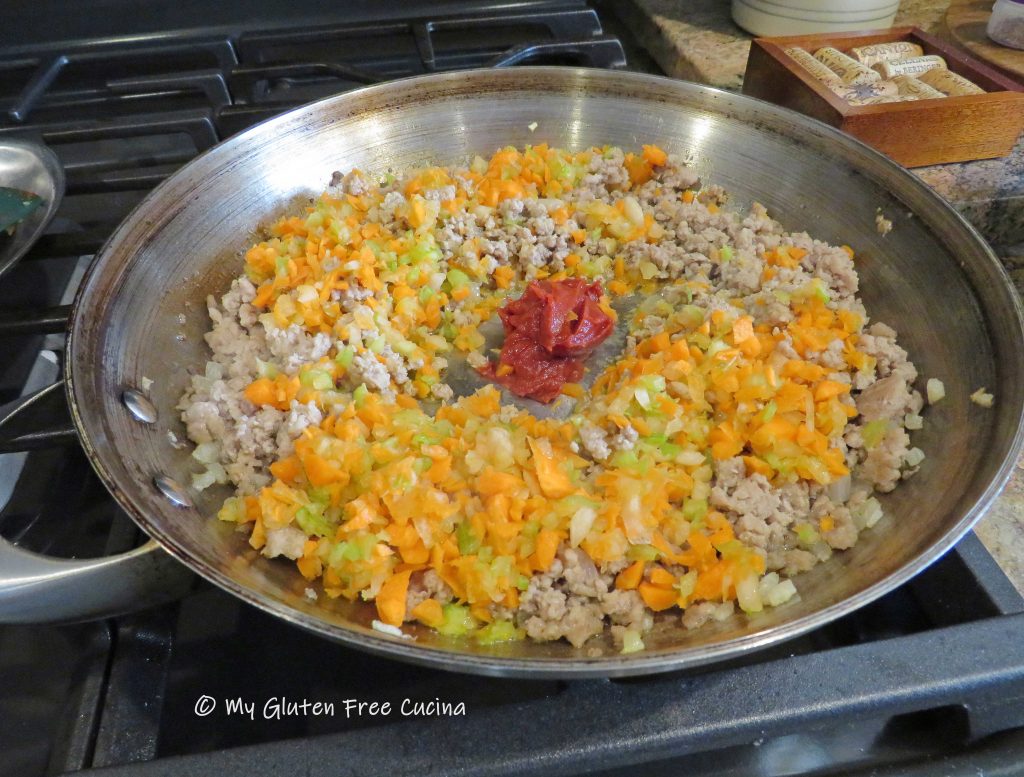
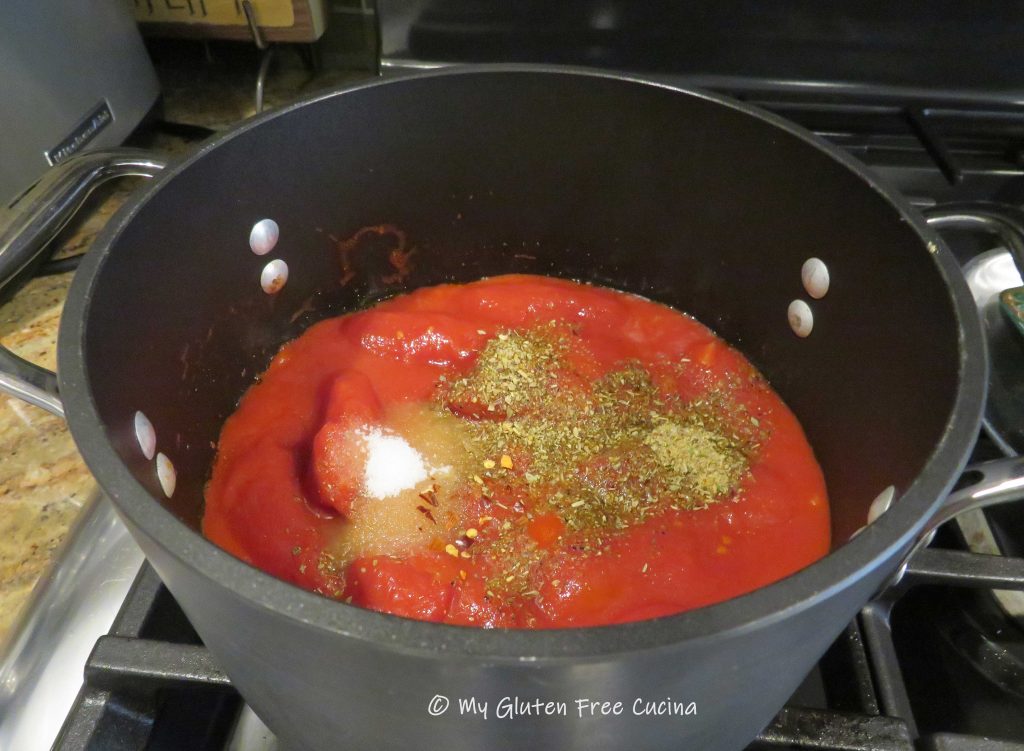
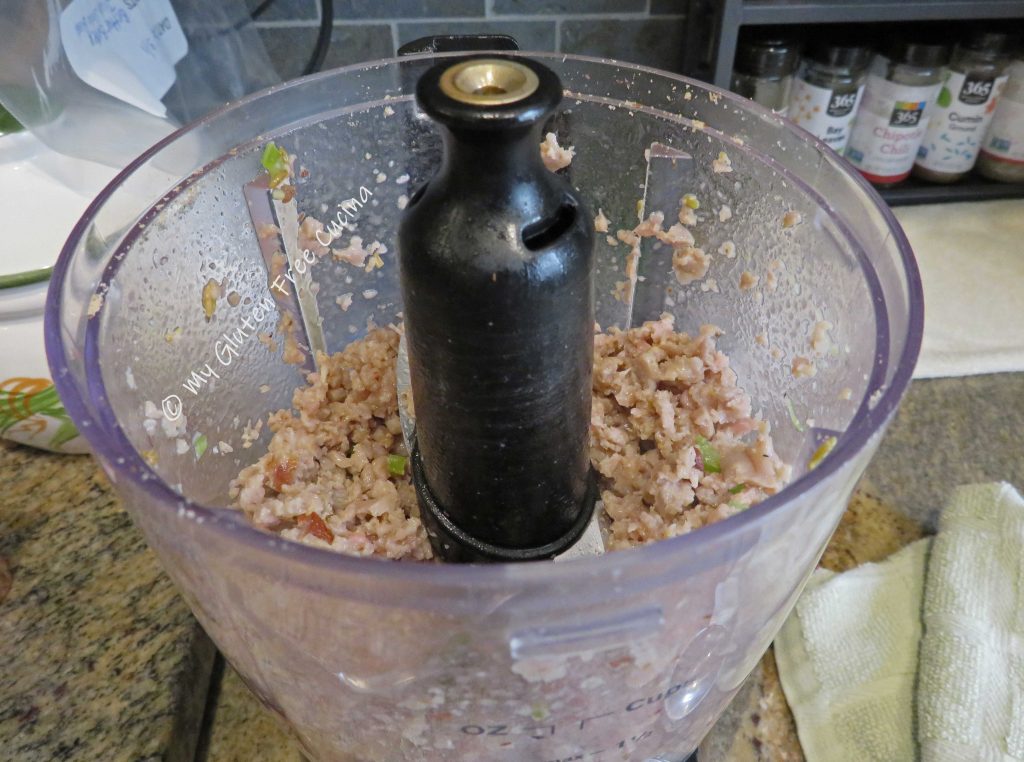
 Add the broth with salt to taste.
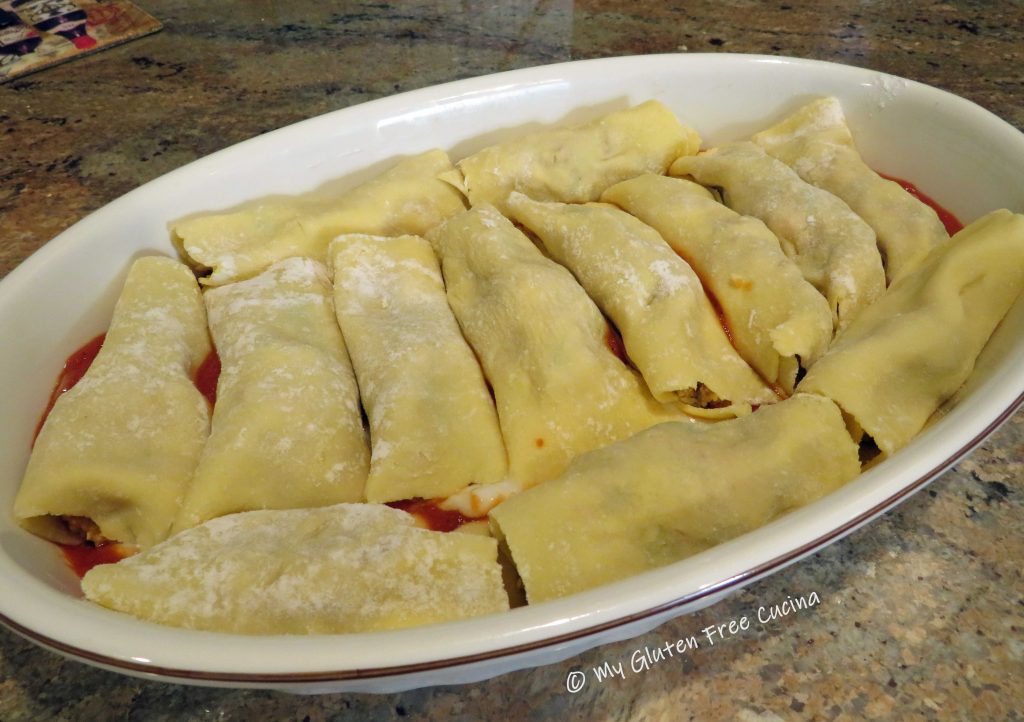
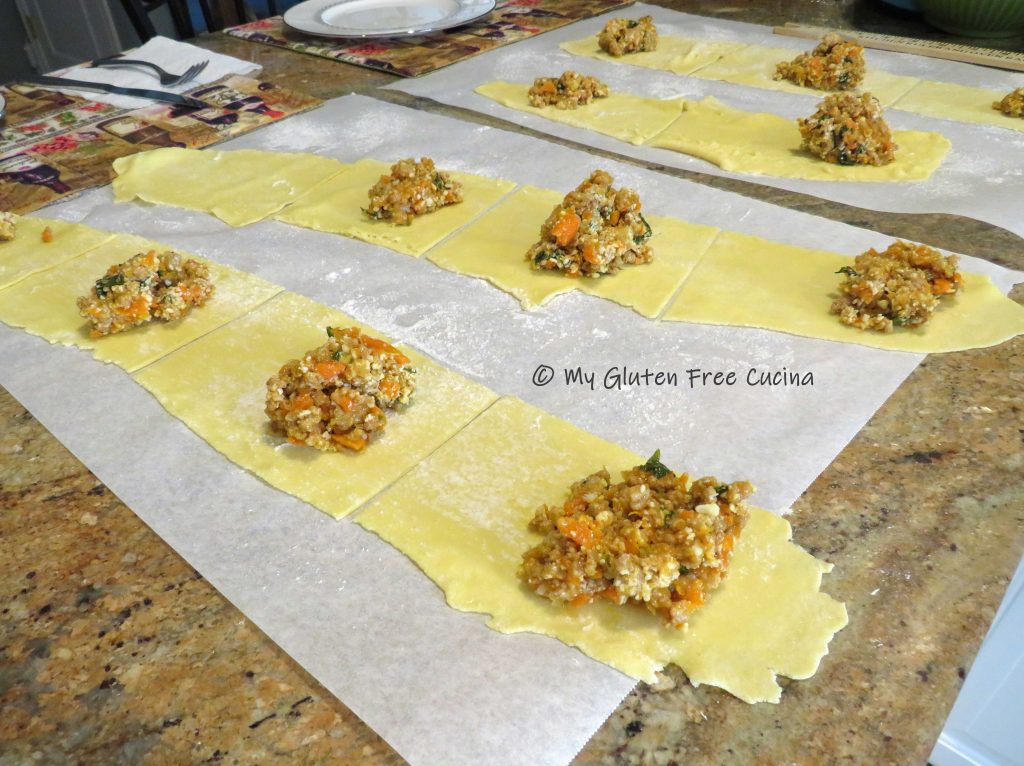
 Sprinkle the arrowroot evenly over the mixture and stir it in. Simmer on low until the filling has thickened. Stir in the baby spinach. The filling should be moist, but not watery.


 For this recipe, setting 3 on a


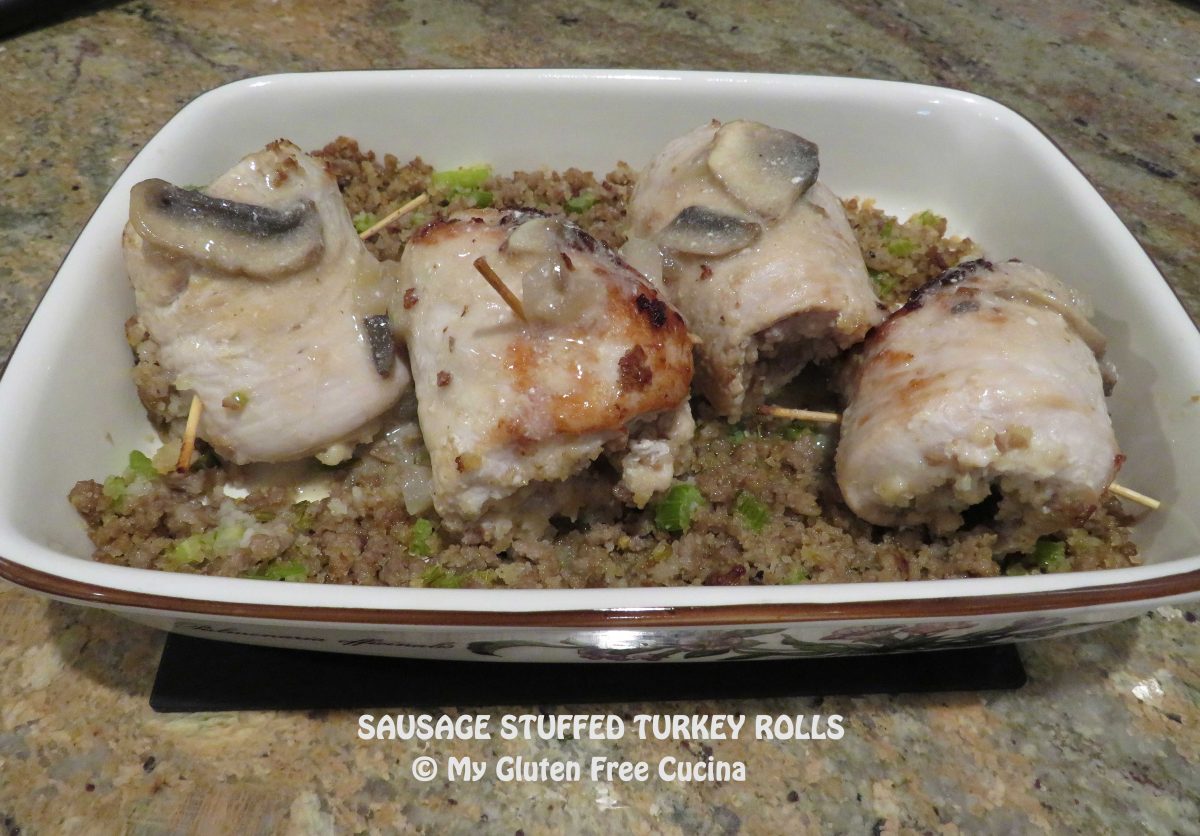


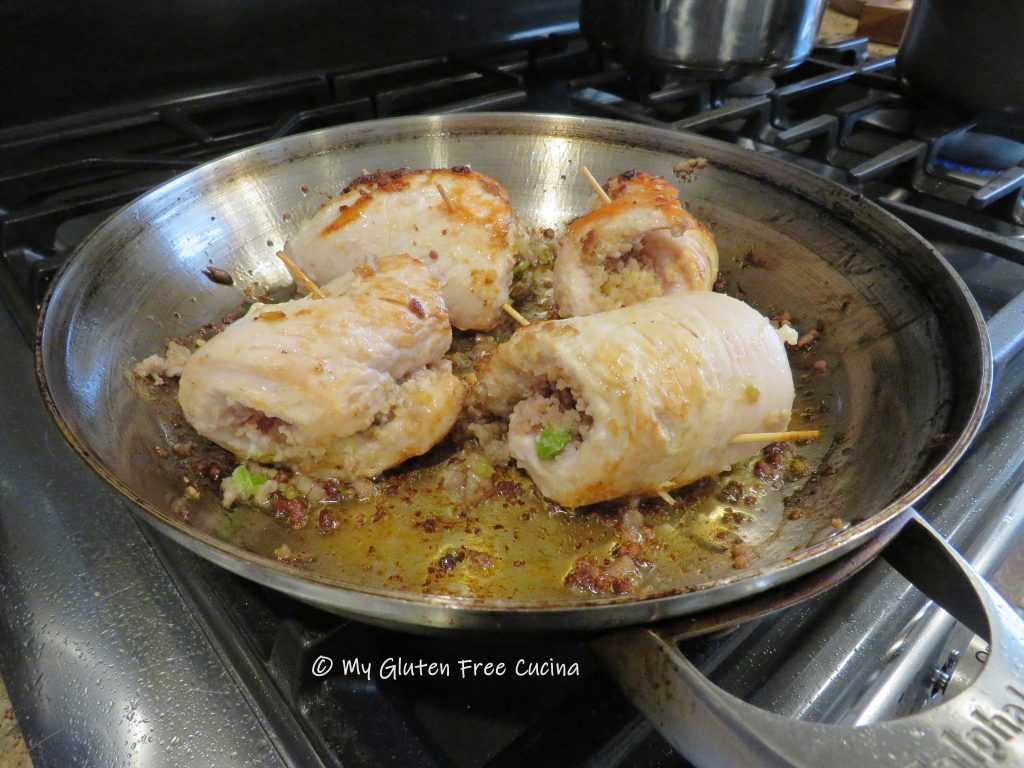


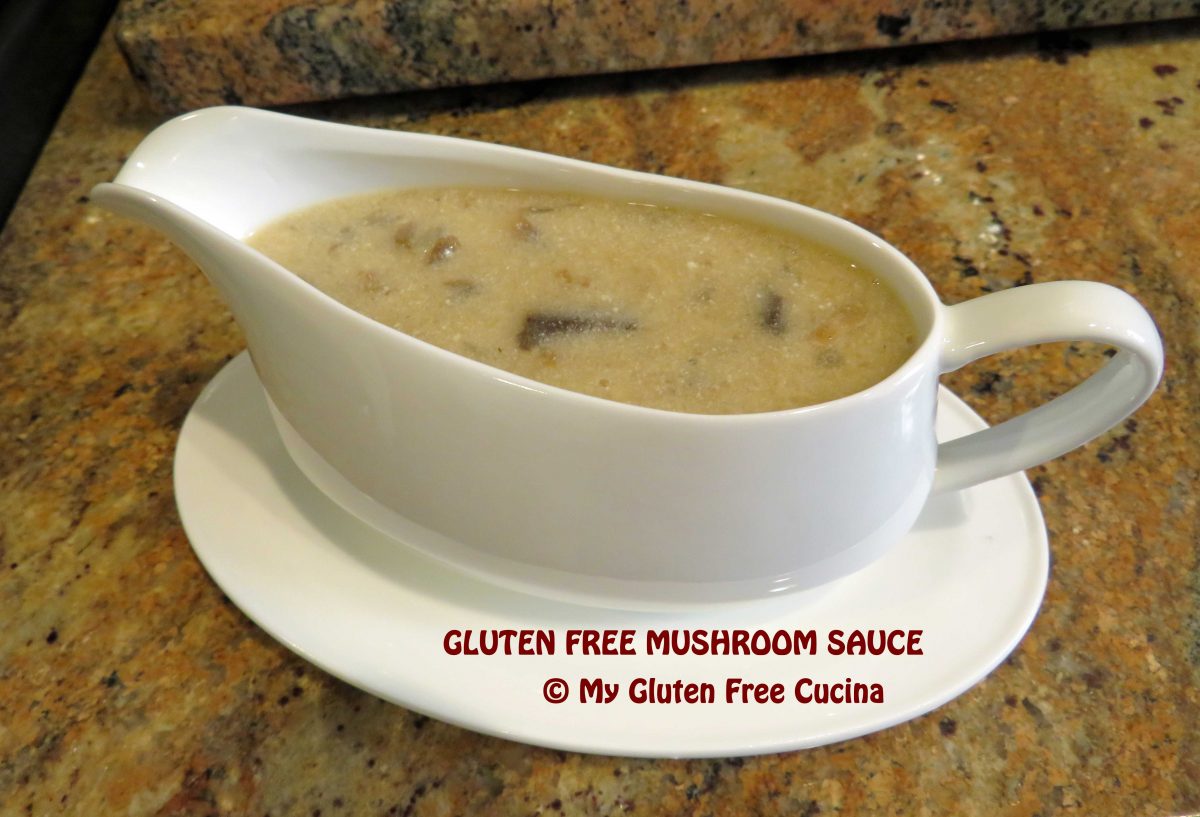


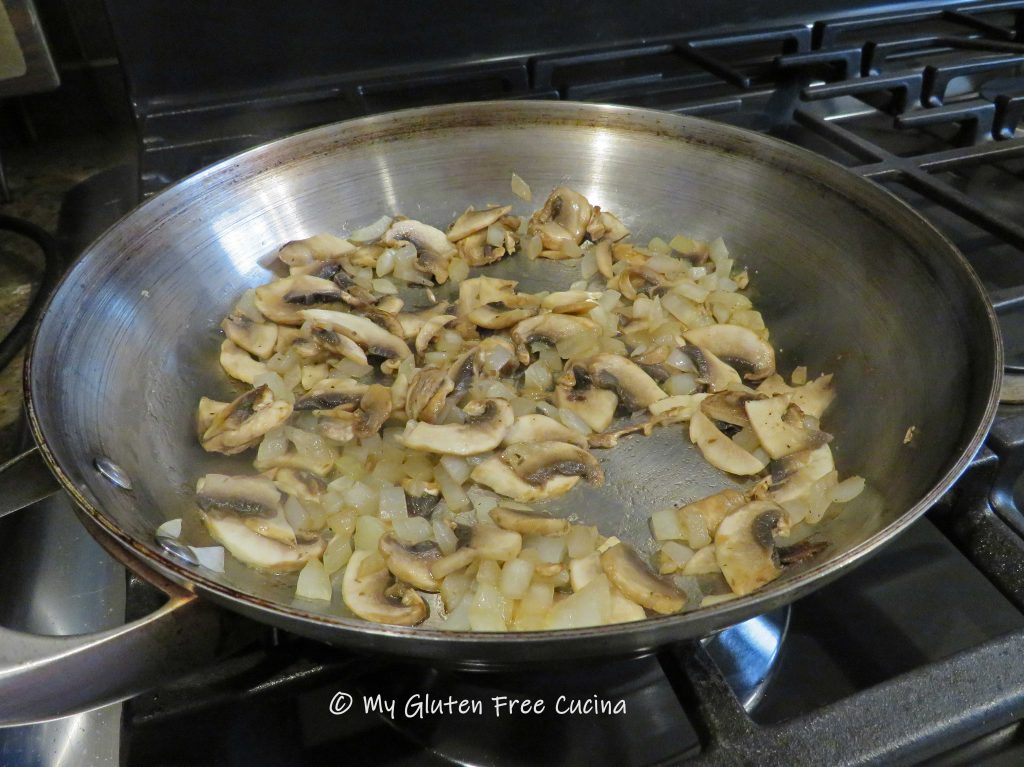

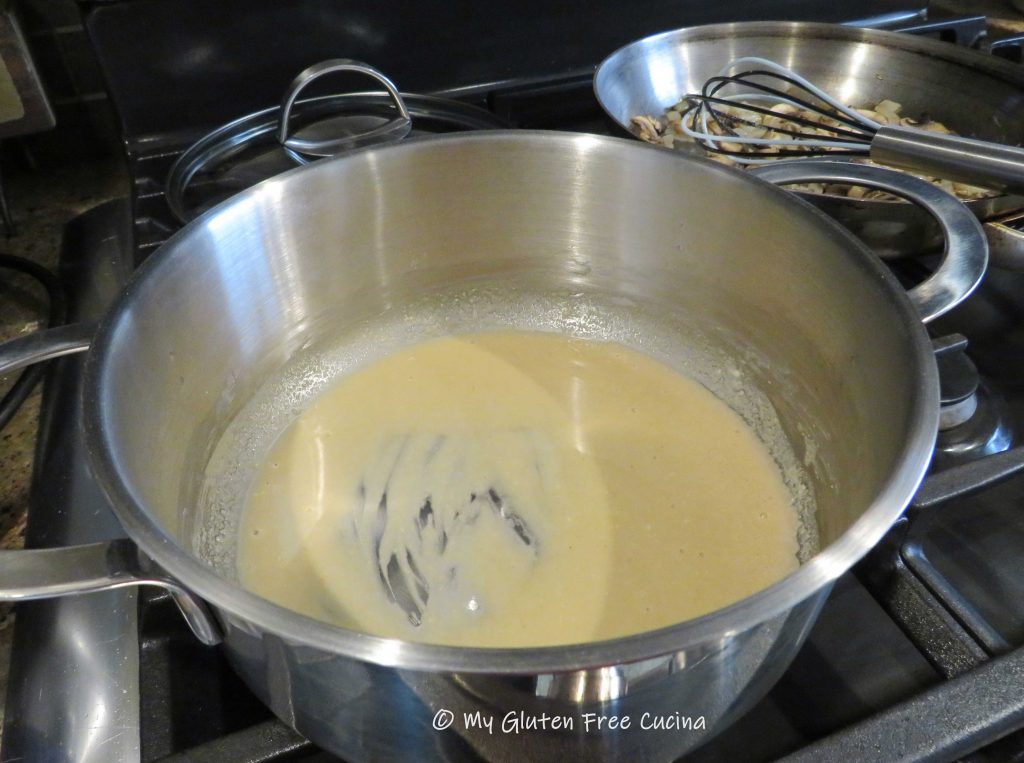


 This sauce goes well with so many things. Beef, poultry, pork… I am especially proud of this next recipe for Sausage Stuffed Turkey Rolls. Paired with the Mushroom Sauce and a side of wild rice, this was a great meal.
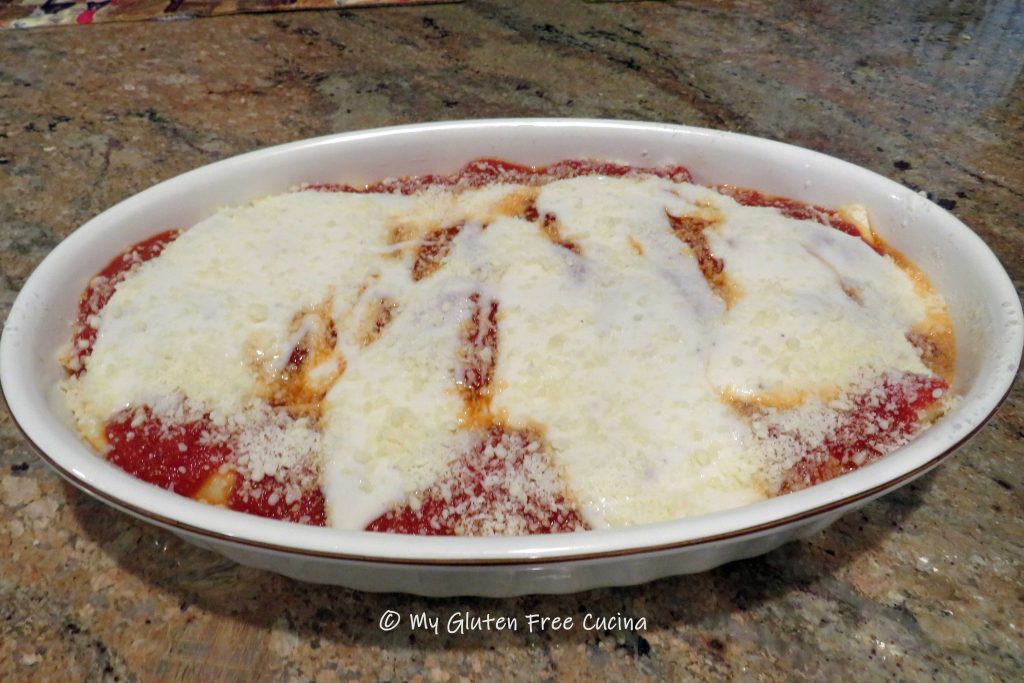
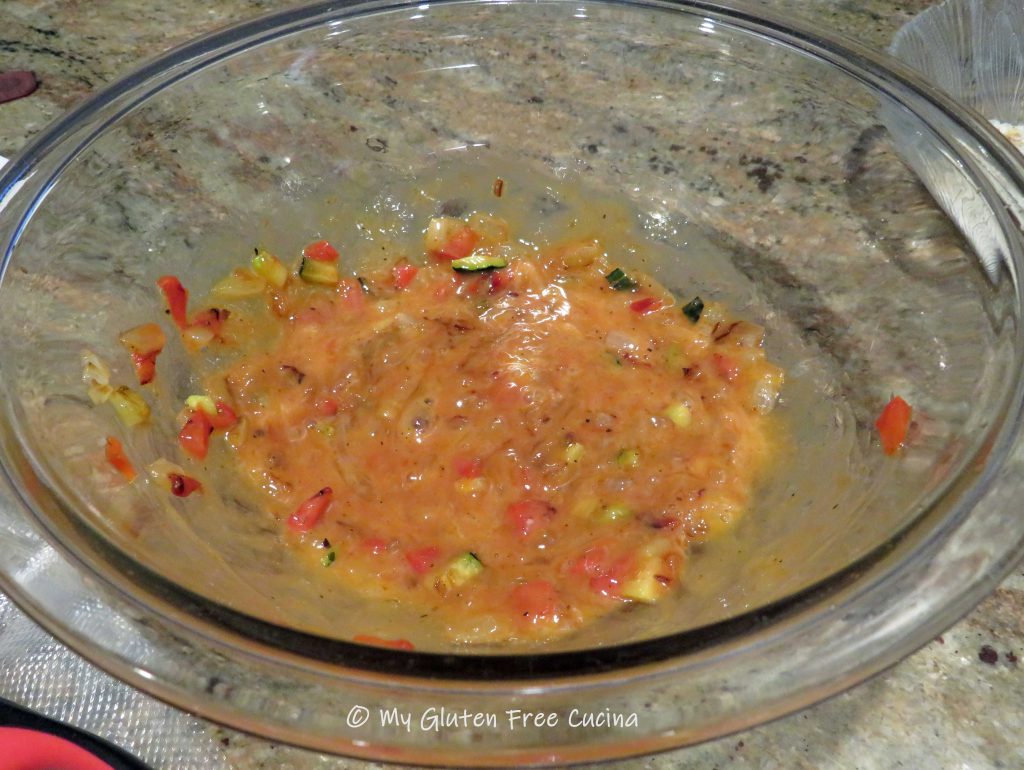
 Transfer to a
  When cooled, whisk in the ketchup followed by the egg and more seasoning.
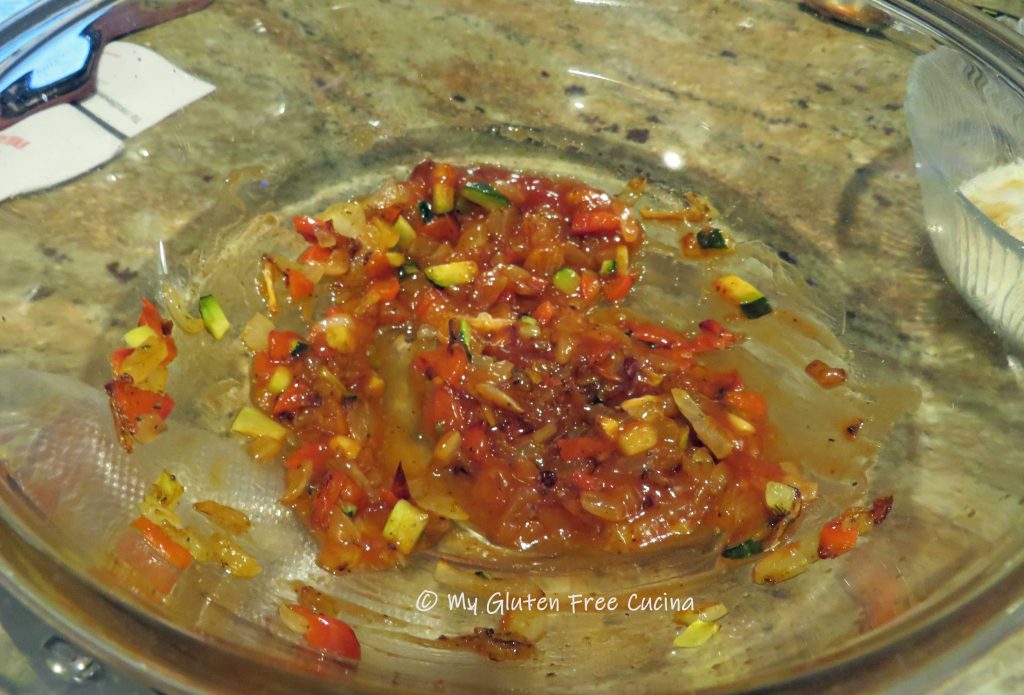
 Next add the beef, working it in with your hands. Gradually add the potato flakes and breadcrumbs and combine well.
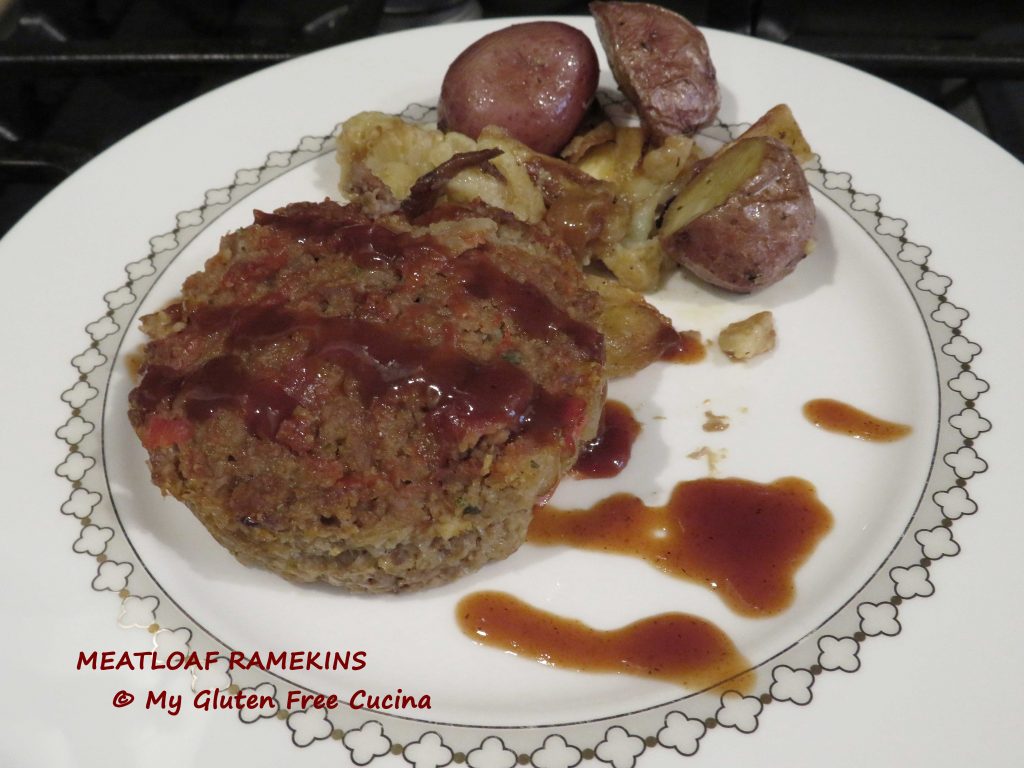
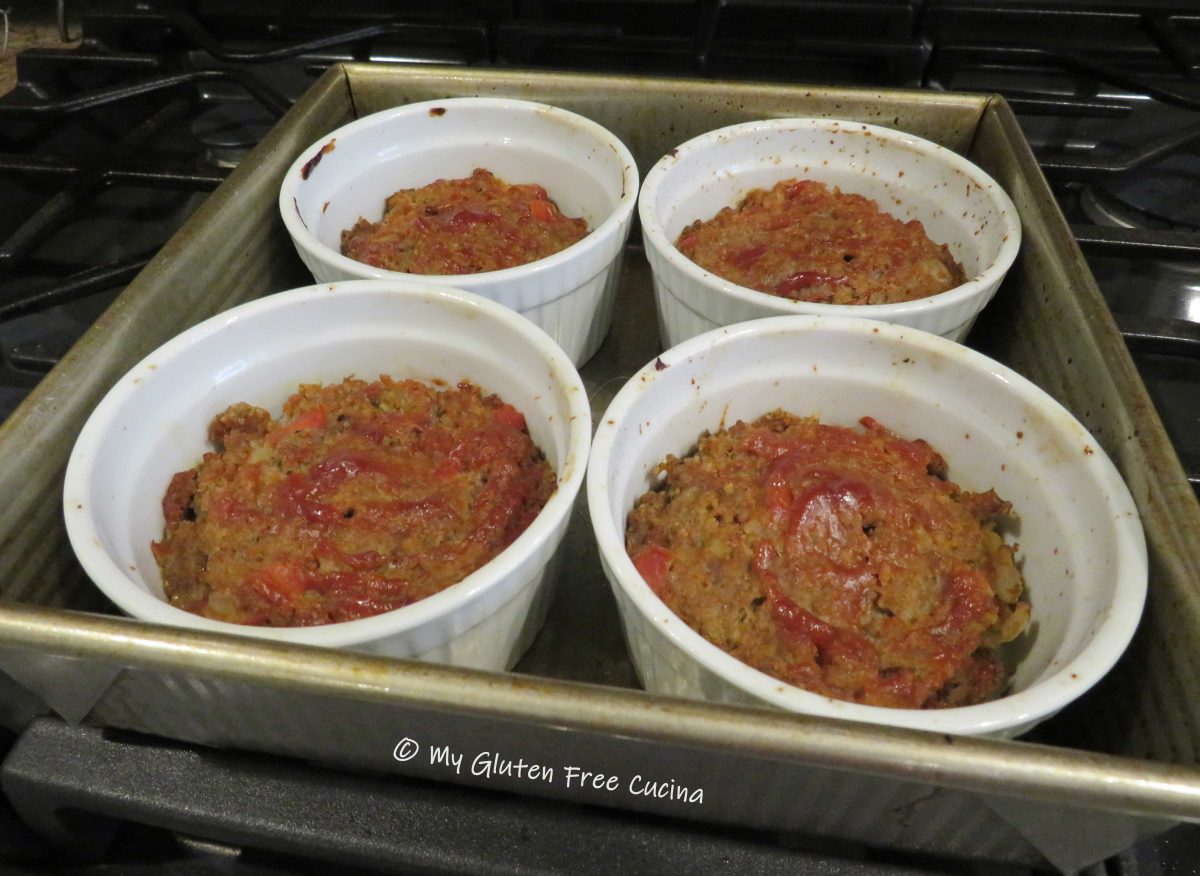
 Divide the meatloaf mixture between the 4 ramekins. Top with ketchup and smooth the tops with a fork.
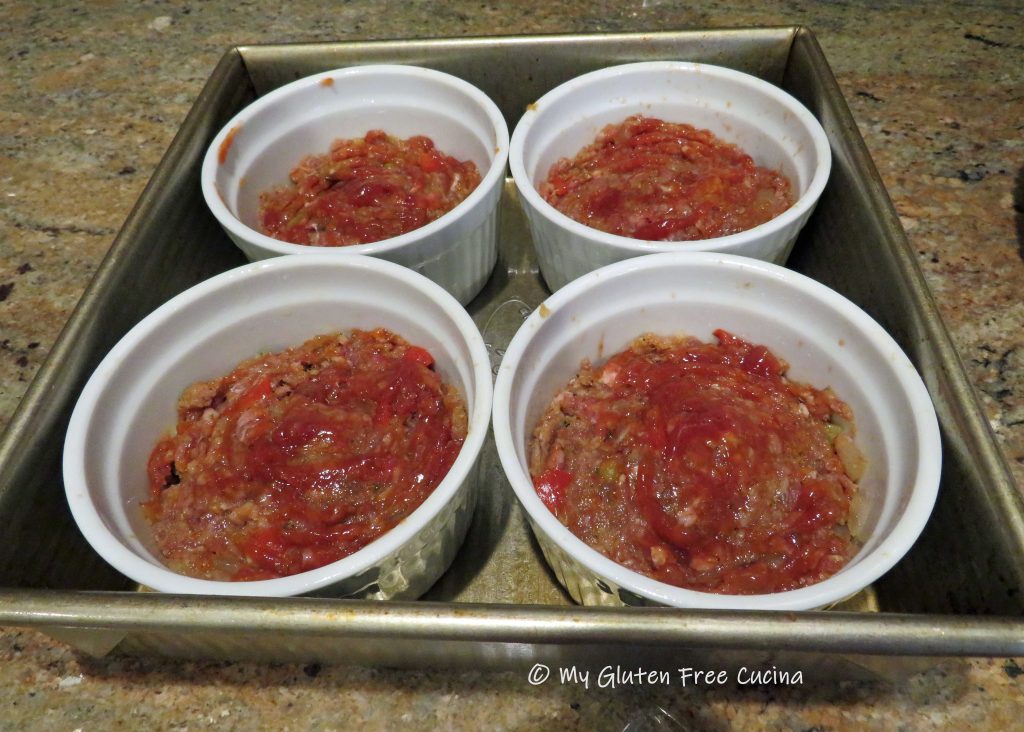 Bake at 375º for 20 minutes or until the internal temperature reaches 150º (
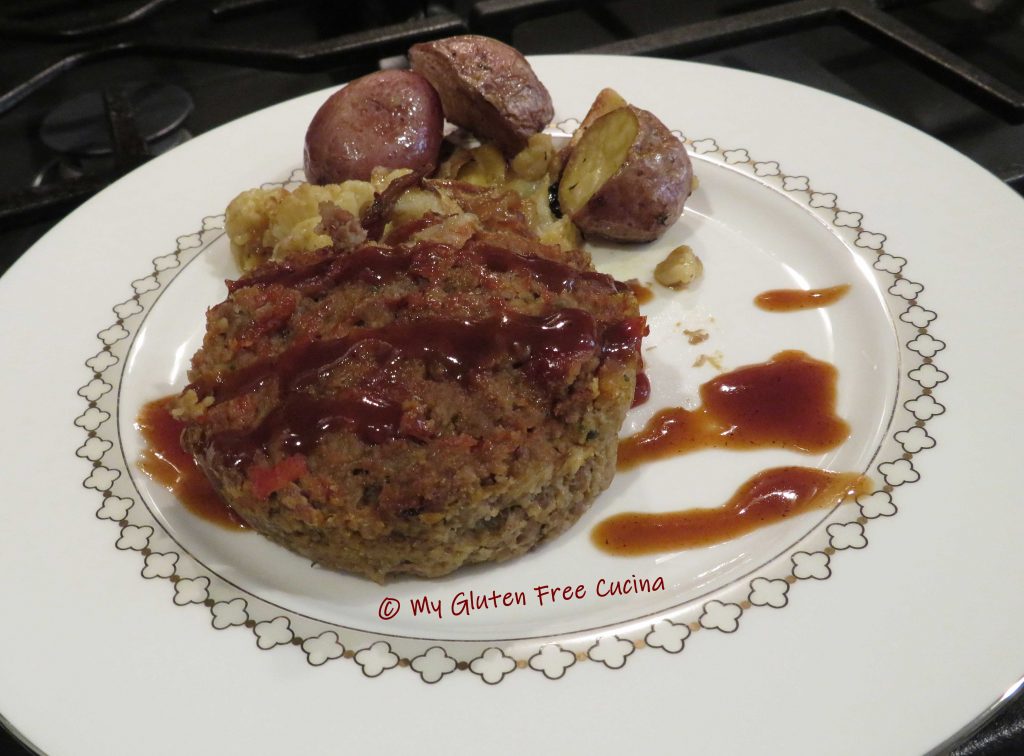
 Serve with ketchup or your favorite BBQ sauce (my favorite is