This variation on traditional rice pilaf is a nice change from the usual. The addition of rainbow quinoa gives the rice a fiber boost and a nice textural contrast. With just a hint of red, green and yellow bell pepper to liven things up, this is a side dish that you will want to add to your rotation.
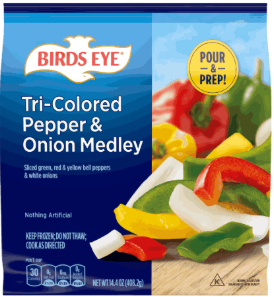
Cook the diced pepper and onion in 1 tsp. olive oil and 1 tsp. butter until liquid is mostly evaporated. (Hint: I buy frozen bell pepper strips to have on hand for recipes that only require a small amount.)
I got these at Stop & Shop
Bring chicken broth to a boil in a small saucepan with lid. Add 1 tsp. butter, the rice, quinoa and seasoning. Cover, reduce heat to low and simmer 20 minutes.
When finished, stir in the cooked peppers and onions. Garnish with fresh chives before serving.
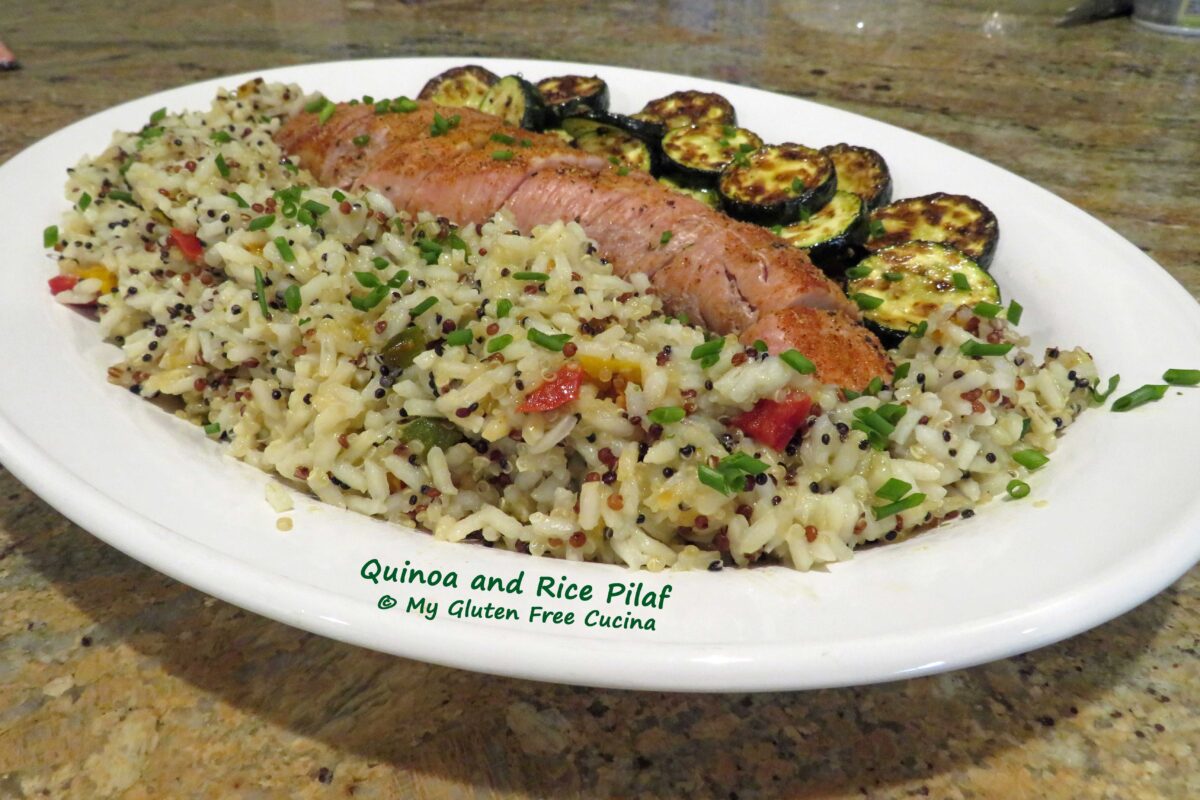
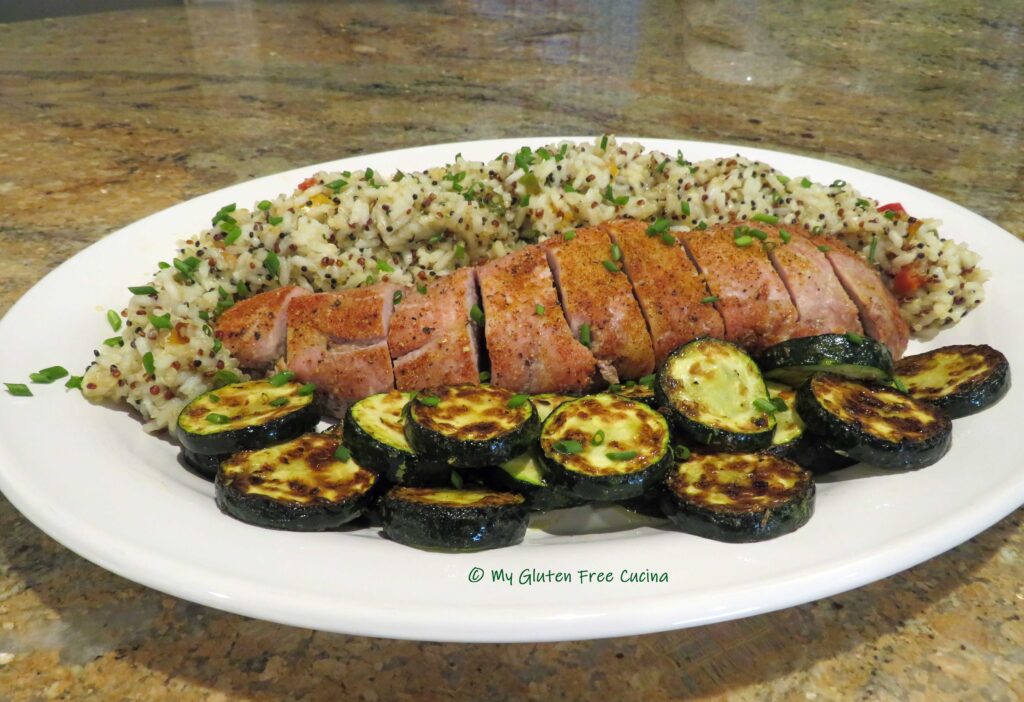
Look what a beautiful backdrop it makes for my pork tenderloin and zucchini! So delicious and easy.
Can you use brown rice?
I chose long grain white rice for this dish because it cooks in the same amount of time as the quinoa. If you prefer to use brown rice, you will need to start the rice 20 minutes ahead, then add the quinoa for another 20 minutes.
Notes ♪♫ Quinoa is one of those grains that are at higher risk of cross contact with gluten grains, both in the field and during processing and packaging. For peace of mind, I always look for the gluten free label.
Ah, the benefits of a well-stocked pantry. It’s been a week of chilly temperatures and nonstop rain here in New England. So, I decided that a pot of soup would hit the spot, but no way was I running to the store for an ingredient!
Check out the recipe and see what I pulled out of my pantry! A little this and a little of that, I even combined different types of stock. My “use it up” recipe turned out to be one of the best soups of the season. I hope are inspired!
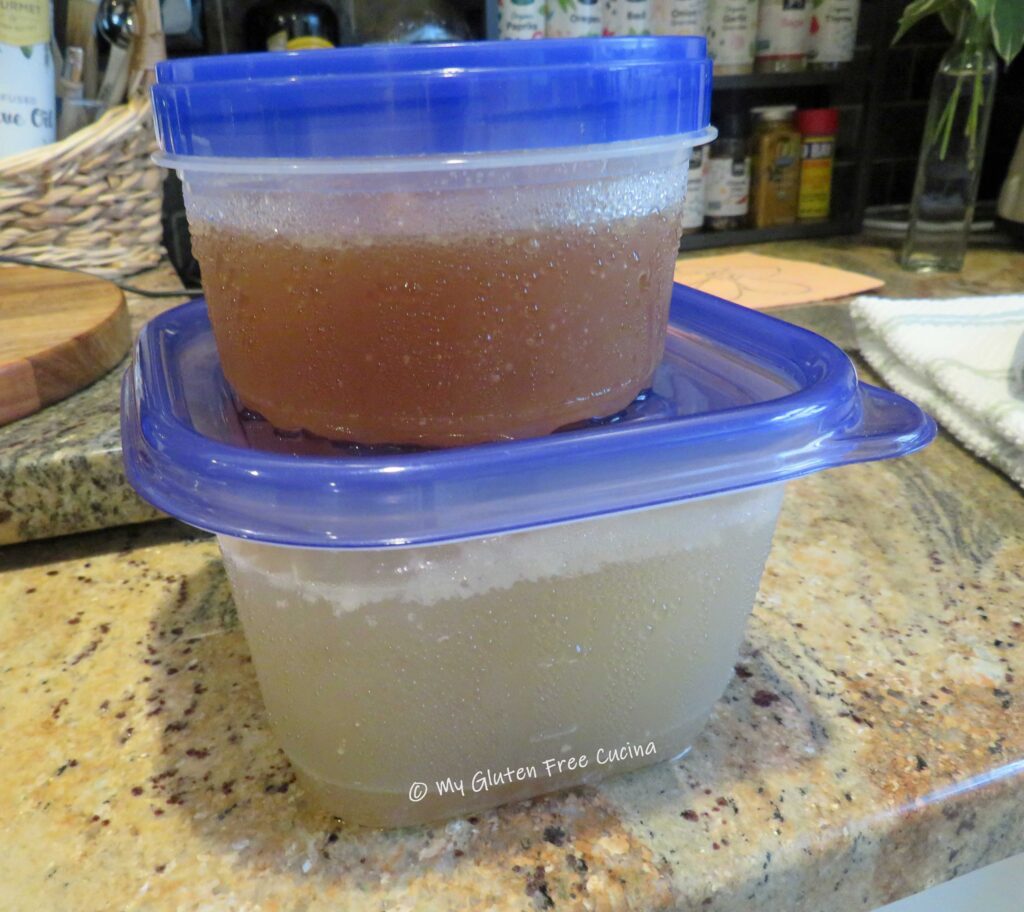
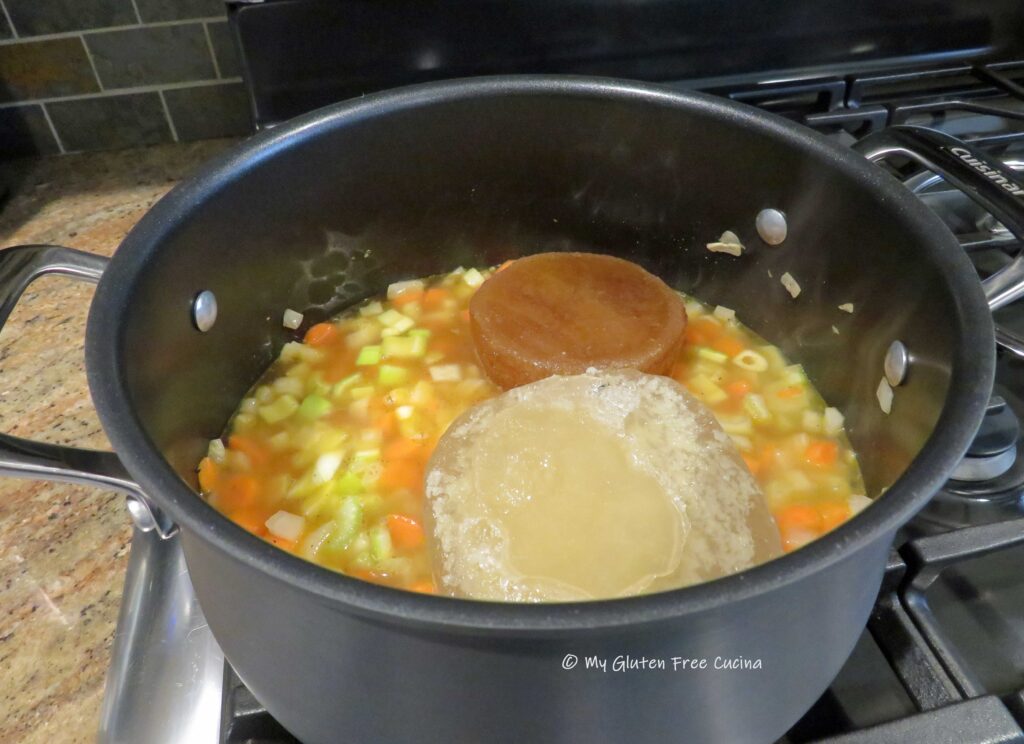
For me, going through the pantry includes the freezer. There I found the last 2 containers of homemade stock that I had made over the winter. The larger one is chicken stock, and the smaller one is turkey. Between the two I had about 32 oz. total. You can, of course buy a 32 oz. carton of stock (I won’t tell)!
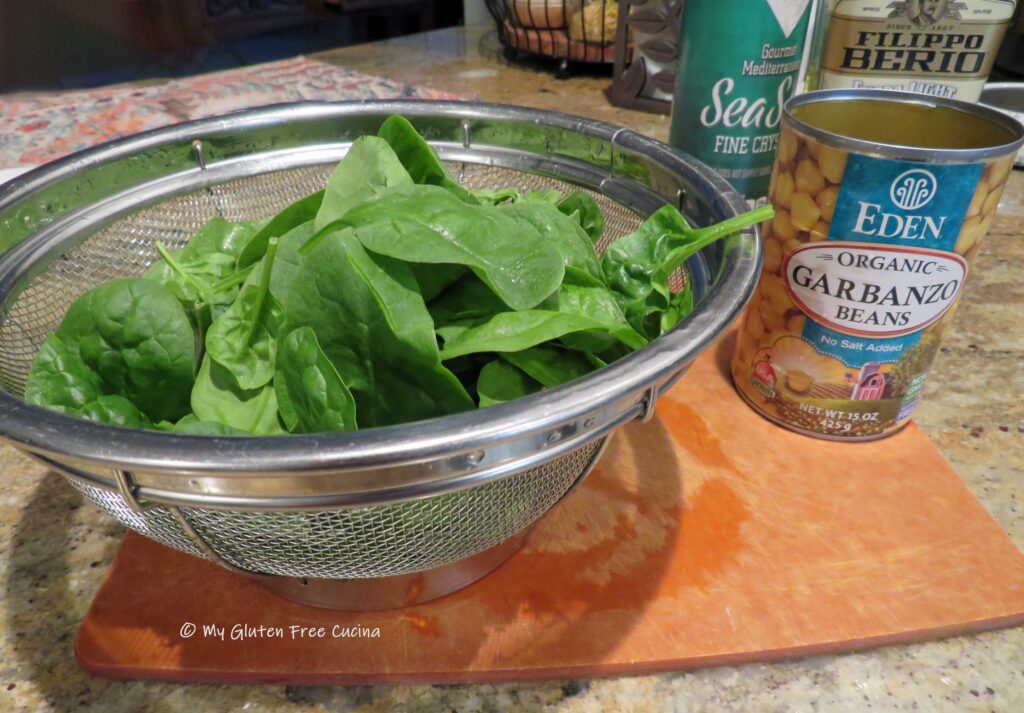
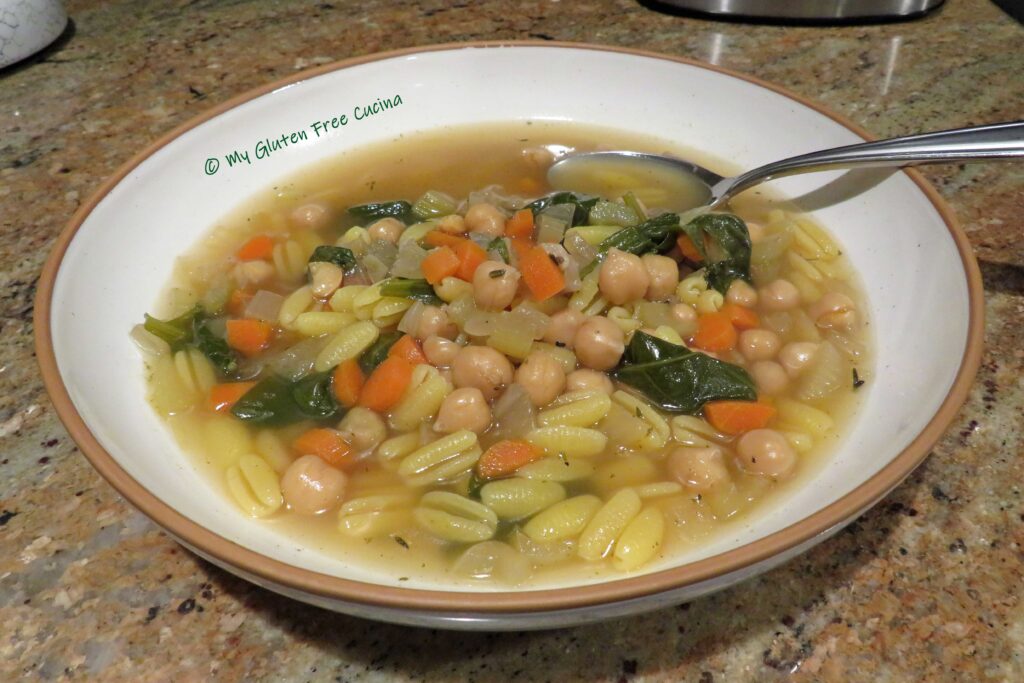
From the refrigerator, I had carrots, celery and baby spinach. From my dry pantry, I had cartons of chicken and beef broth, canned chickpeas (we call them Ceci beans), gluten free pasta and every seasoning under the sun.
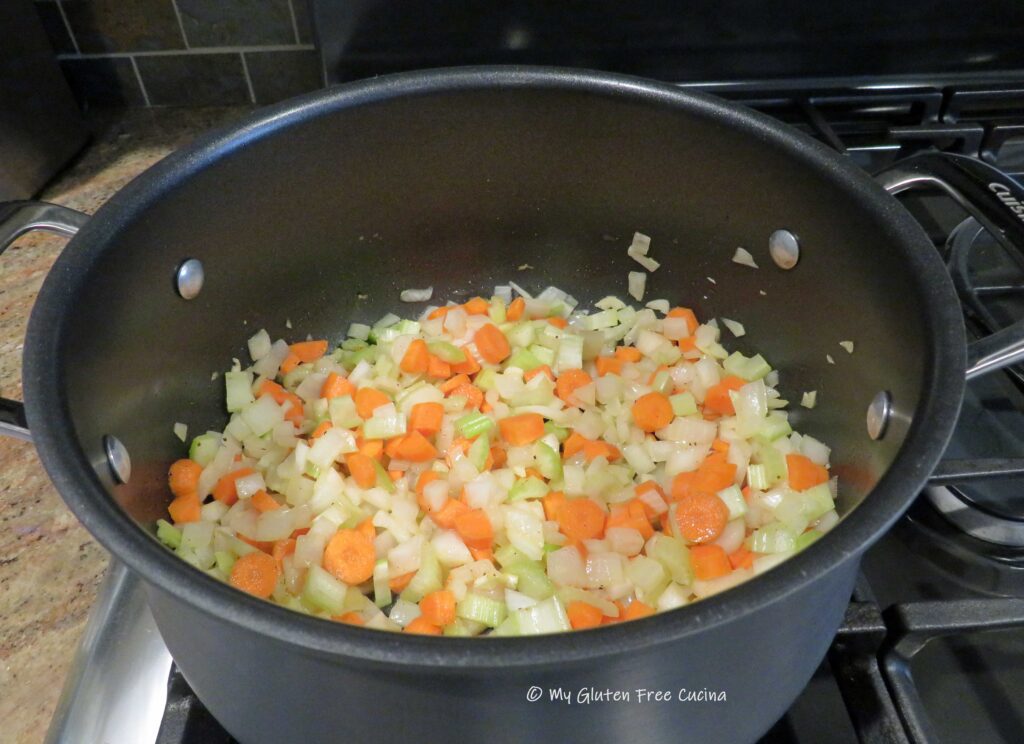
To get started, dice the onion, carrots and celery and slice the garlic cloves very thin. Heat a 5 qt. pot or Dutch oven over medium low with about a tablespoon of olive oil and add all the veggies. Season with salt and pepper, give it a good stir and cook for 5 minutes.
Add the stock (mine was still a bit frozen), broth (I used 8 oz. each chicken and beef broth) and seasonings. Cover and simmer 30 minutes.
Drain and rinse the chickpeas and add them to the pot. Continue simmering another 30 minutes. When finished, add all of the spinach.
Stir well, cover and turn off the heat. The residual heat will be enough to wilt the spinach.
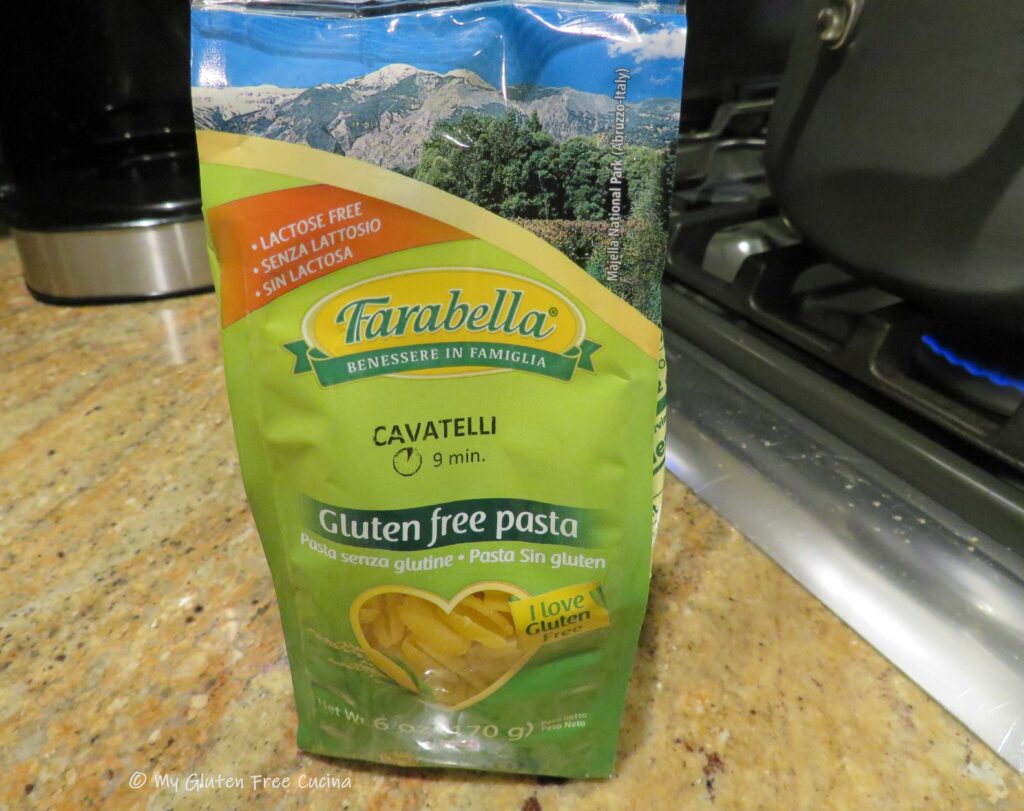
Cook the pasta separately. I had a 6 oz. bag of gluten free cavatelli from Farabella. It was just the right amount for a pot of soup.
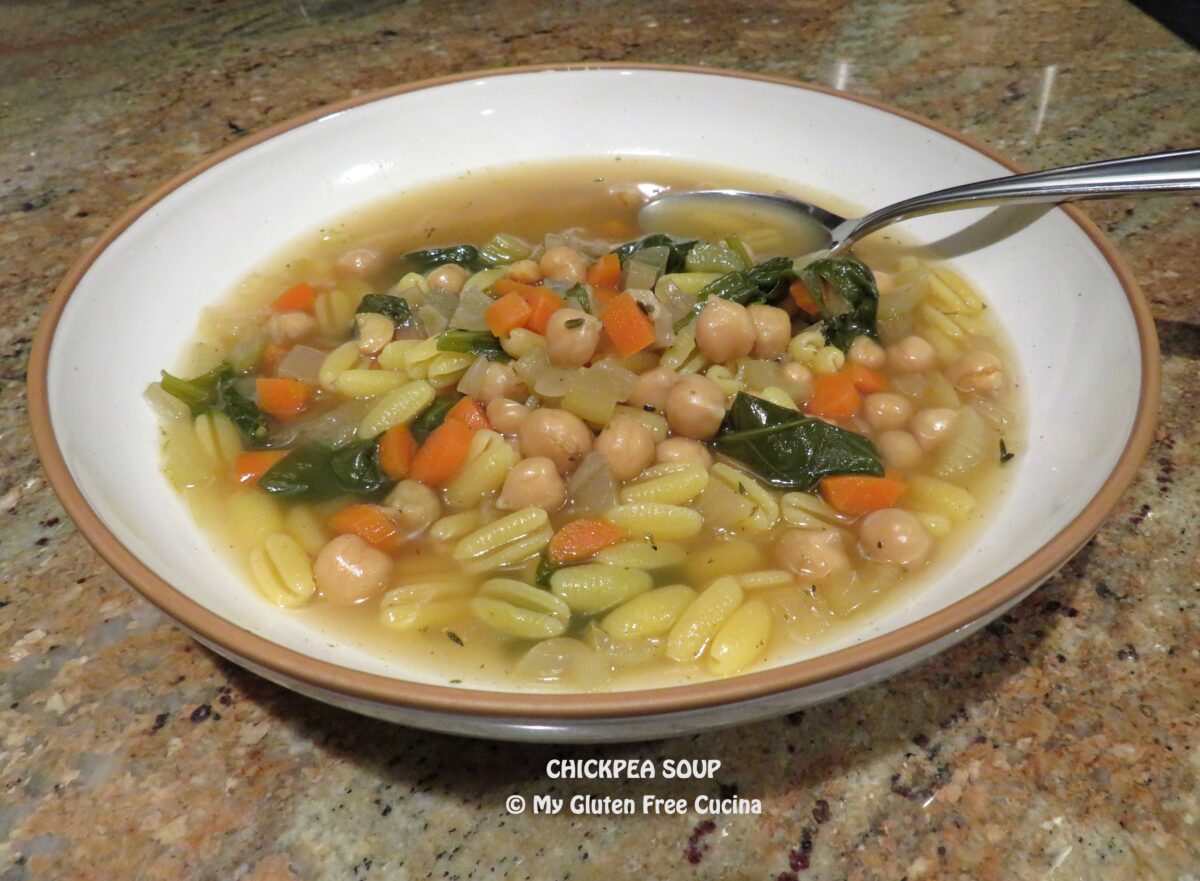
There it is- dinner ready and made completely from my pantry.
Notes ♪♫ If you like a thicker soup, you can partially puree the ingredients before adding the spinach. You can top it with grated cheese or gluten free crackers such as Schar Table Crackers.
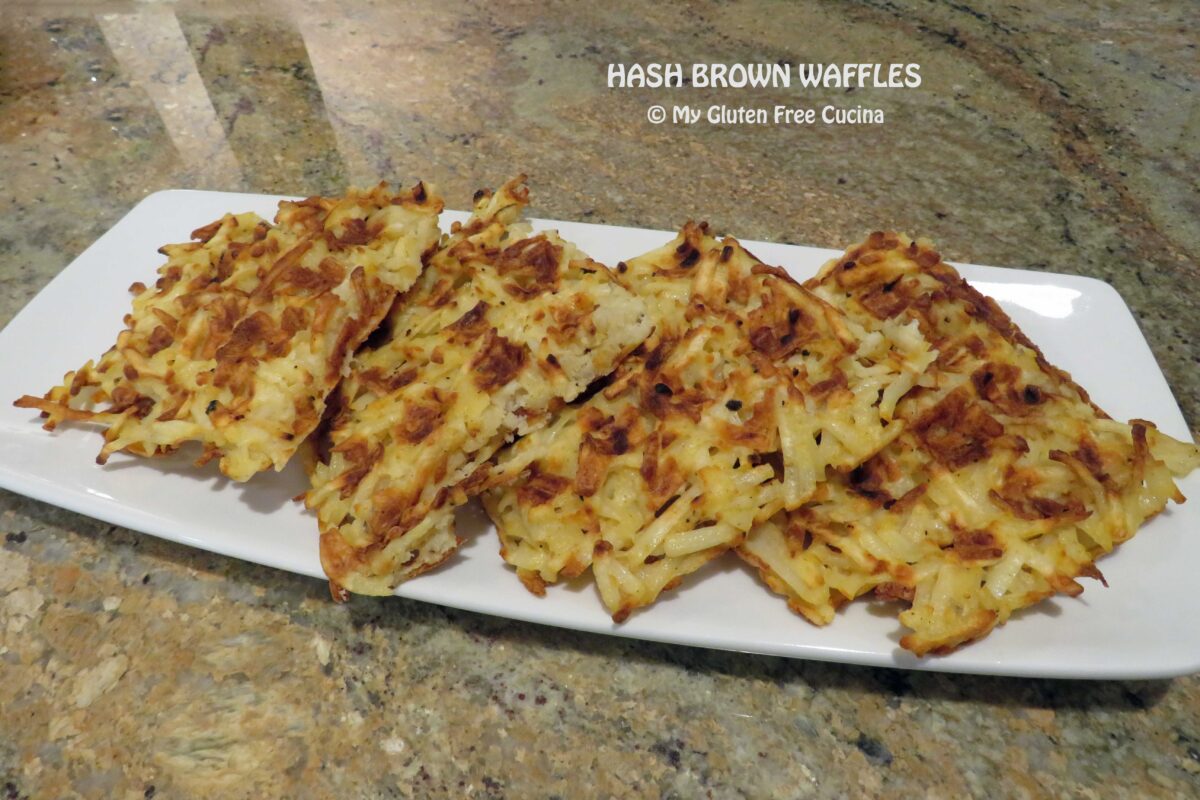
For those of us who are gluten free, potatoes tend to be on the menu quite often. After a while, it becomes a challenge to keep things interesting! Recipes like this one are fun and easy, something different that both adults and kids will love. Hash Brown Waffles are the perfect side for BBQ dinners, pork, chicken and even fish.
Wondering what makes the recipe so easy? The secret is using frozen, shredded hash brown potatoes. Not only do you avoid having to shred the potatoes yourself, but you can skip the step of wringing out all the moisture.
When shopping for shredded hash browns, look for plain, unseasoned. Not all hash browns are gluten free, so check for the gluten free label or verify that there are no gluten containing ingredients. I like the Ore-Ida brand.
Take the hash browns out to thaw about 2 hours ahead of time, they do not have to be completely defrosted.
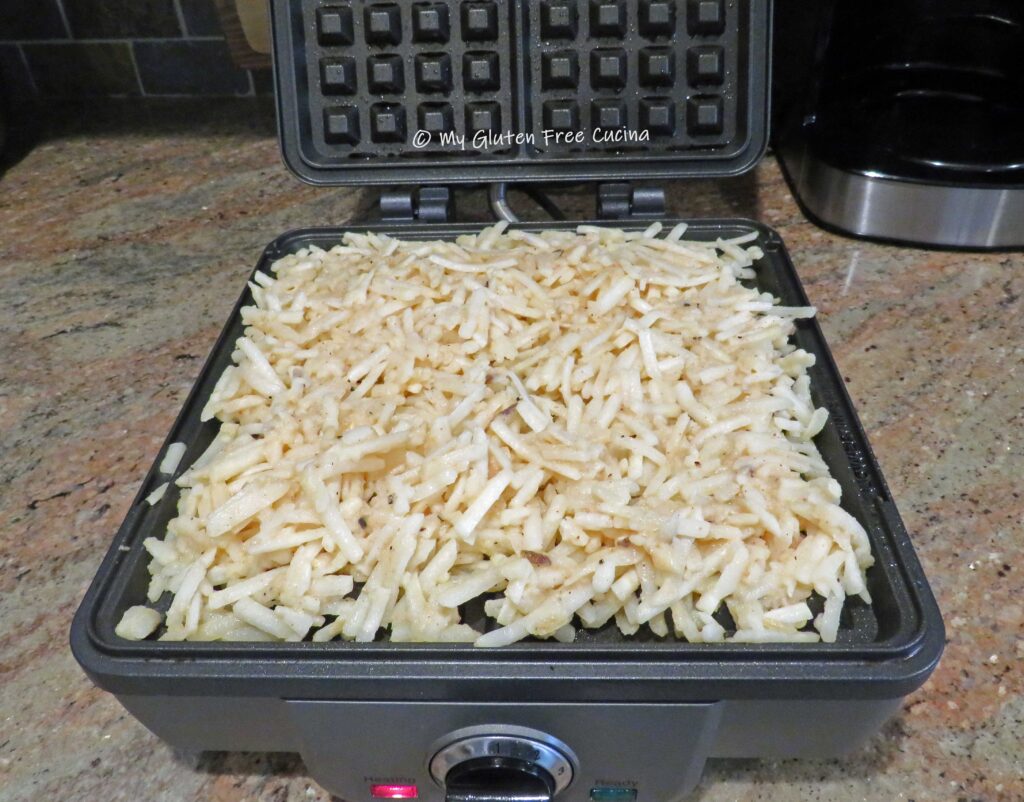
Whisk together the egg, milk, oil and seasonings. Add the hash browns and stir together with a spatula until evenly coated. Cover and let it sit at room temperature while you preheat your waffle iron to 350º.
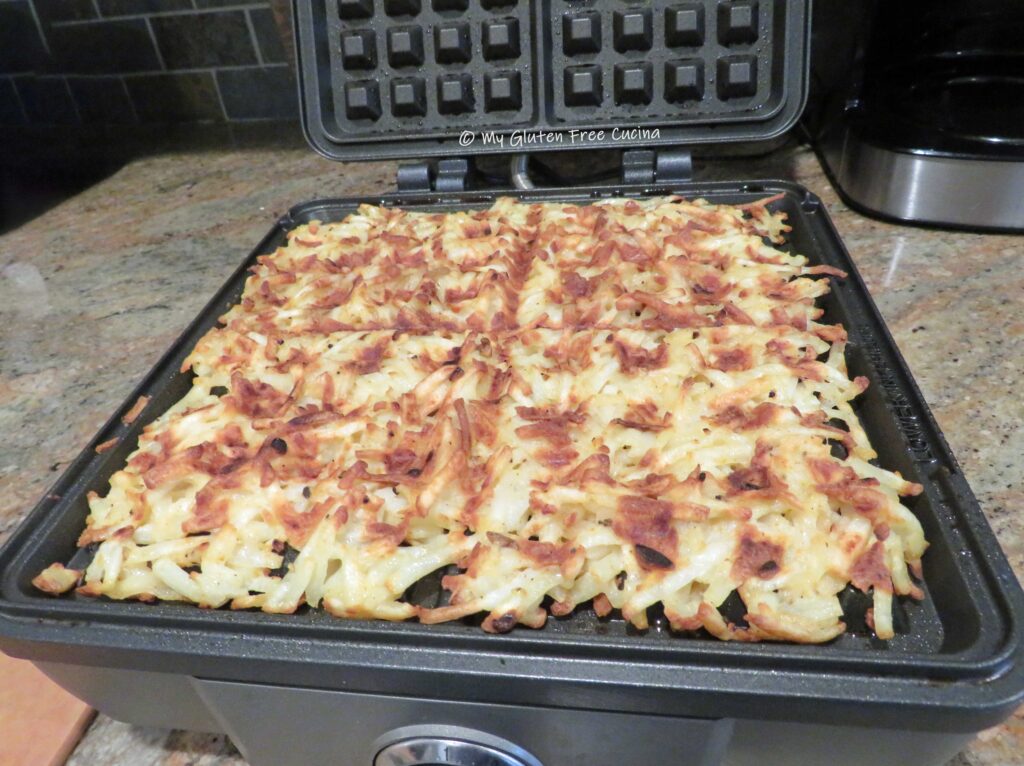
Mist the waffle iron generously with cooking spray. Scoop the hash brown mixture onto the waffle plate and spread them out in an even layer with a spatula. Use all of the hash browns, they will cook down as the potatoes release their liquid.
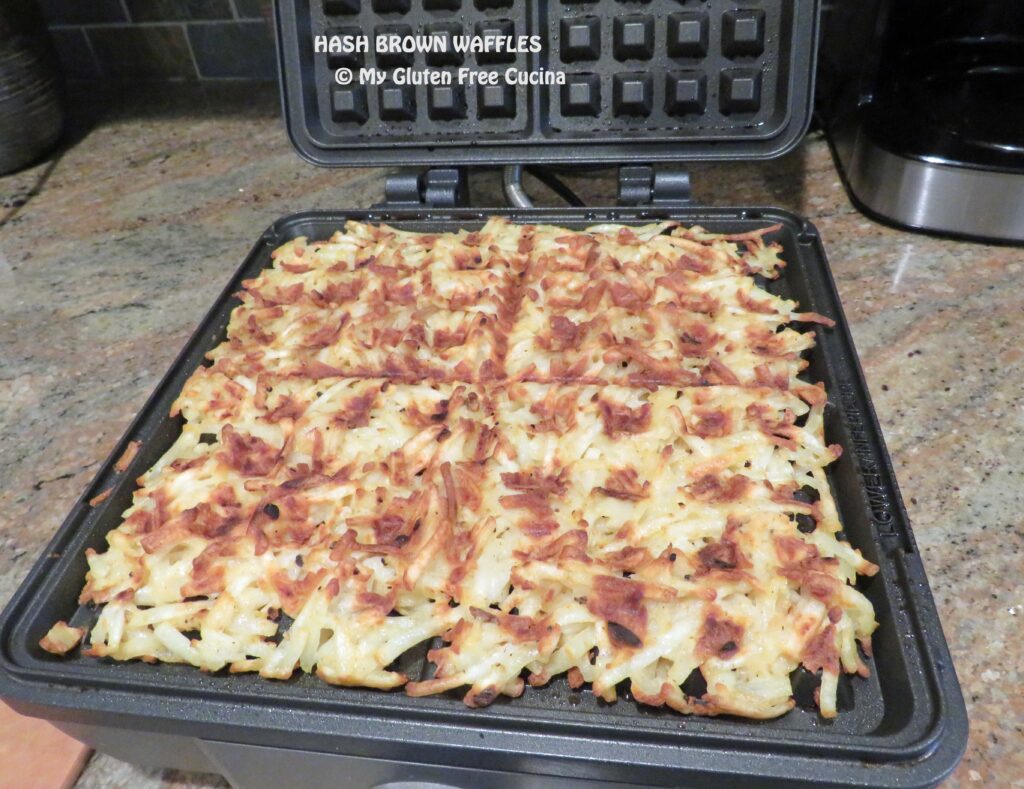
Cook for 15 minutes, then check every 5 minutes to see how they’re doing. Mine took close to 30 minutes to get nicely browned with crispy edges.
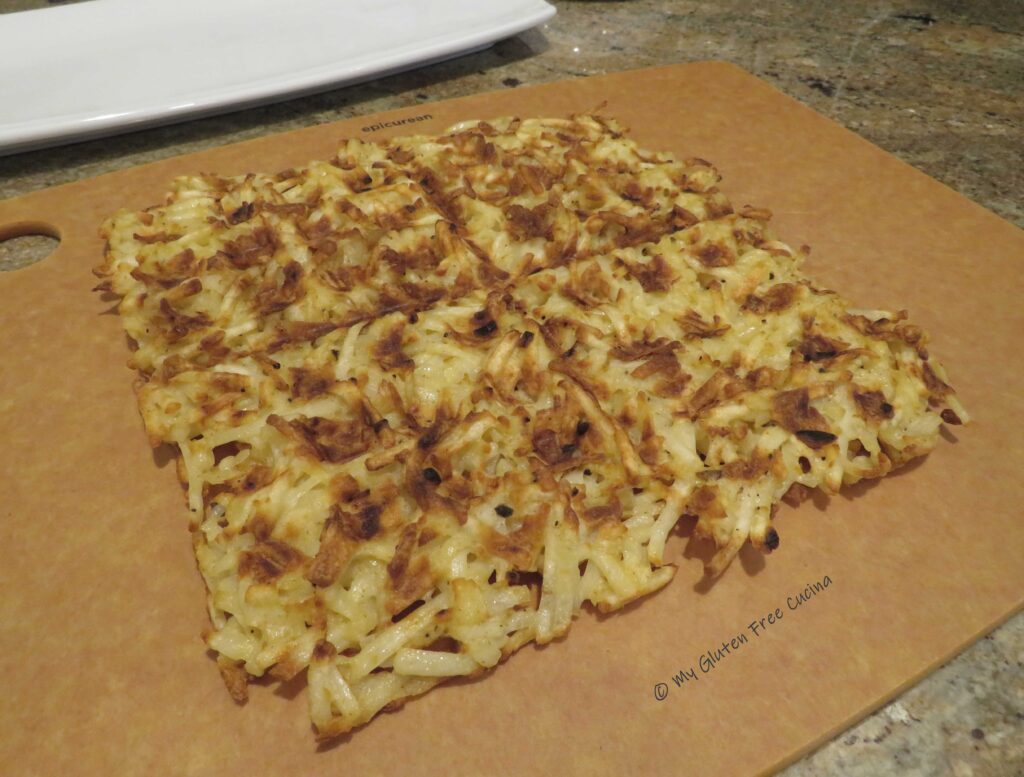
Gently lift one corner and slide a spatula underneath to transfer the waffles to a cutting board.
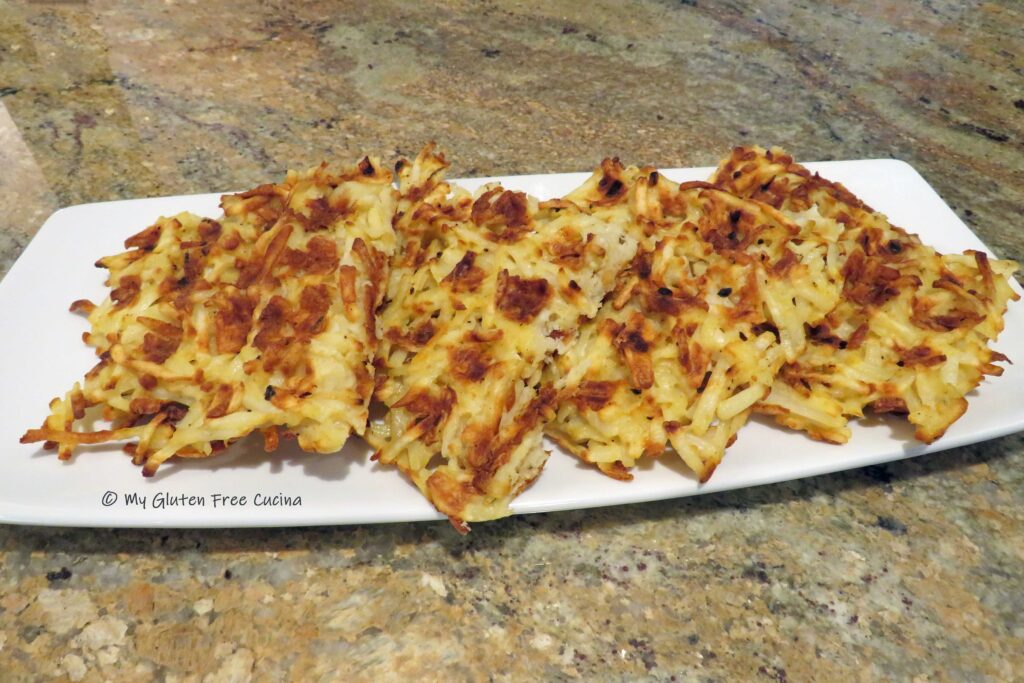
Use a knife or pizza wheel to break waffles into 4 sections.
The waffles are best eaten immediately. They will lose some of their crispness as they cool off.
If you have leftovers, they can be reheated in the oven on a pizza stone, in an air fryer, or in the toaster (toaster bags are recommended). Microwaving is always an option, but the waffles will be soft.
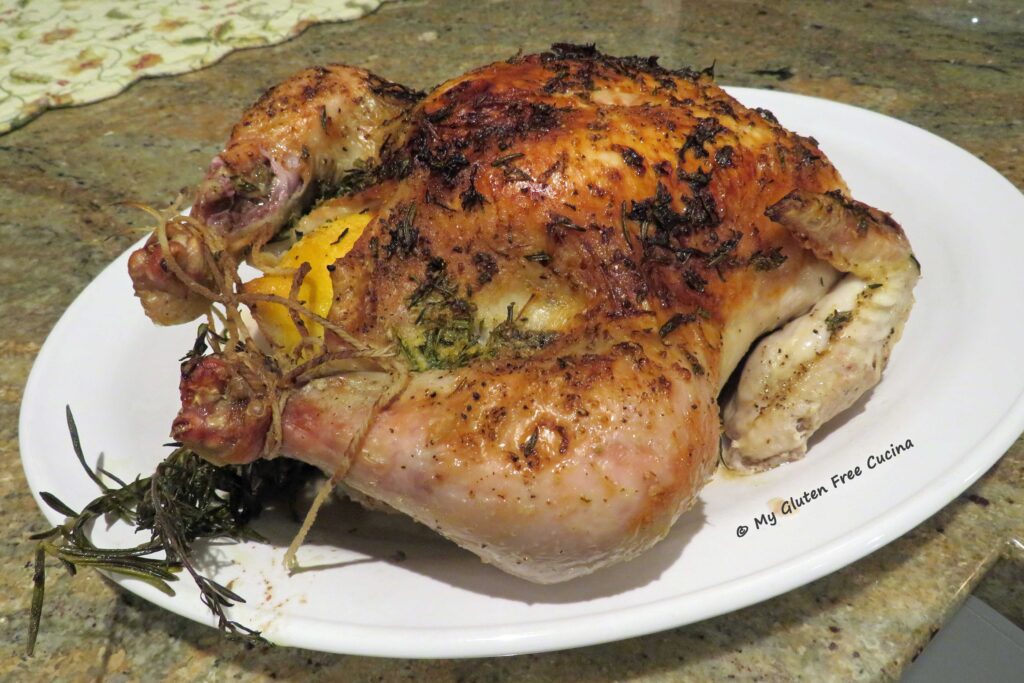
Everyone loves a traditional roast chicken dinner. It’s a great option for a casual get together, or even on a holiday when a turkey is just too large.
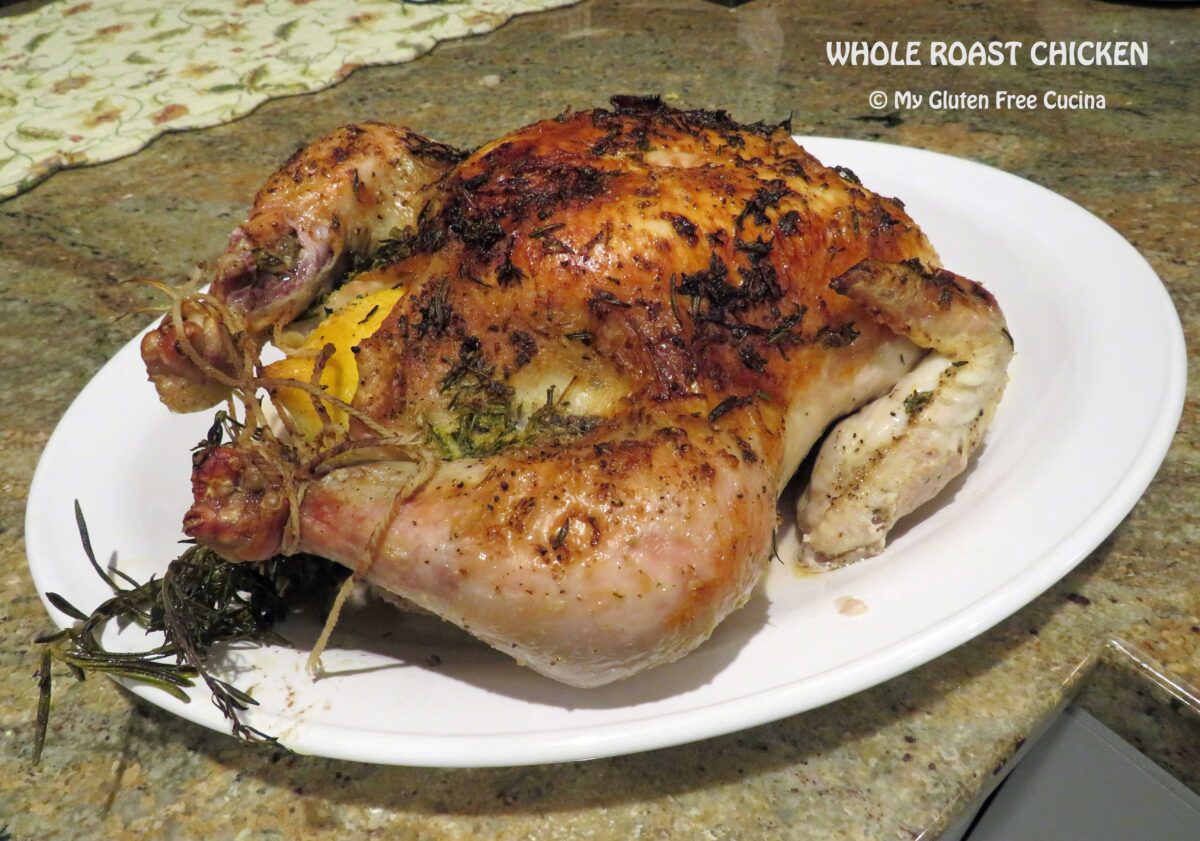
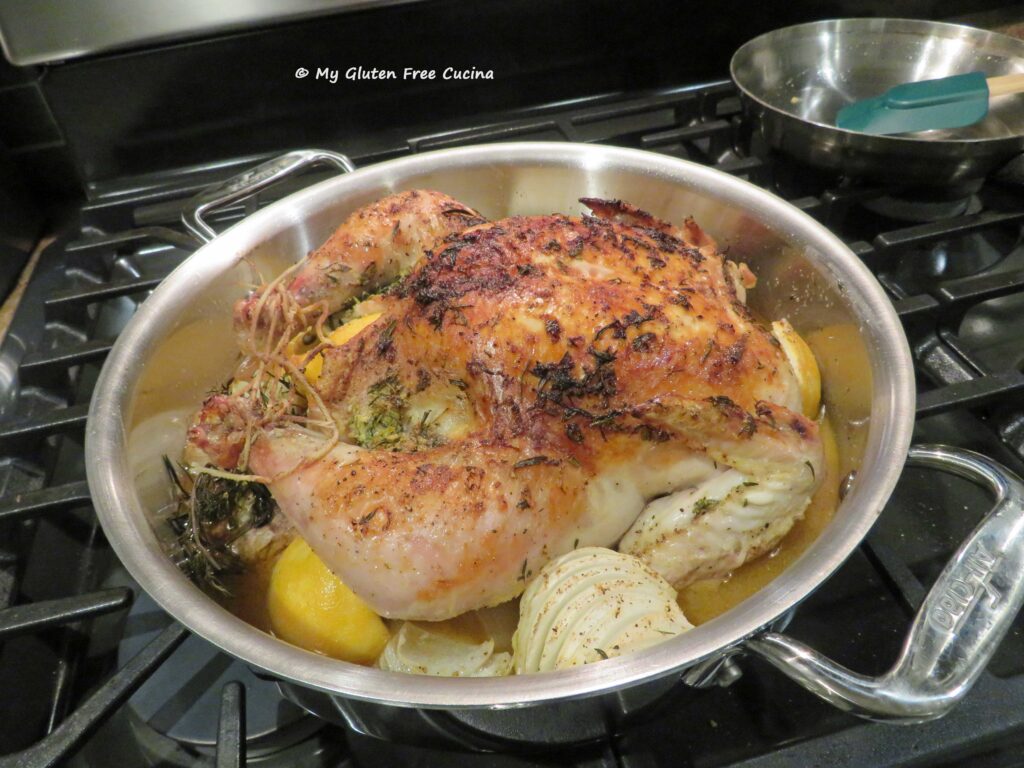
Don’t be intimidated by roasting a whole chicken, it’s easy and makes a beautiful presentation. In this post, I’ll show you how to prepare a bird that is golden brown on the outside, moist and juicy on the inside. Lemon, garlic and fresh herbs really bring out the flavor.
This post contains affiliate links.
Ingredients:
4-6 lb. roasting chicken
1 stick butter, softened
2 lemons, zested
several sprigs of fresh rosemary and thyme
1 whole head of garlic
2 tbsp. olive oil
salt and pepper to taste
1 large onion, peeled and quartered
cooking spray
Preparation:
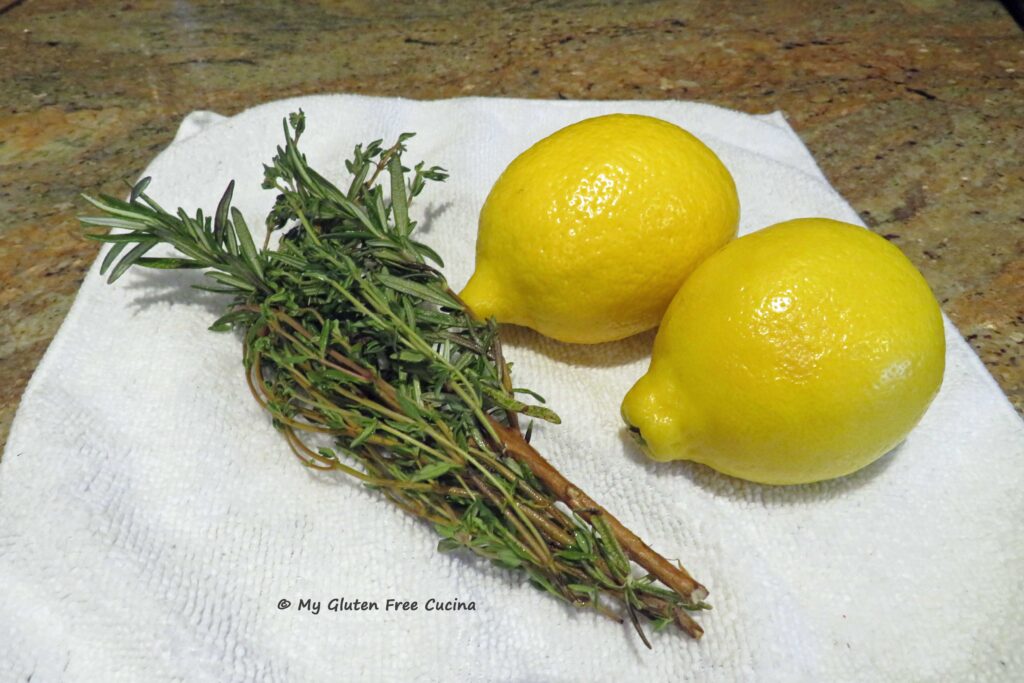
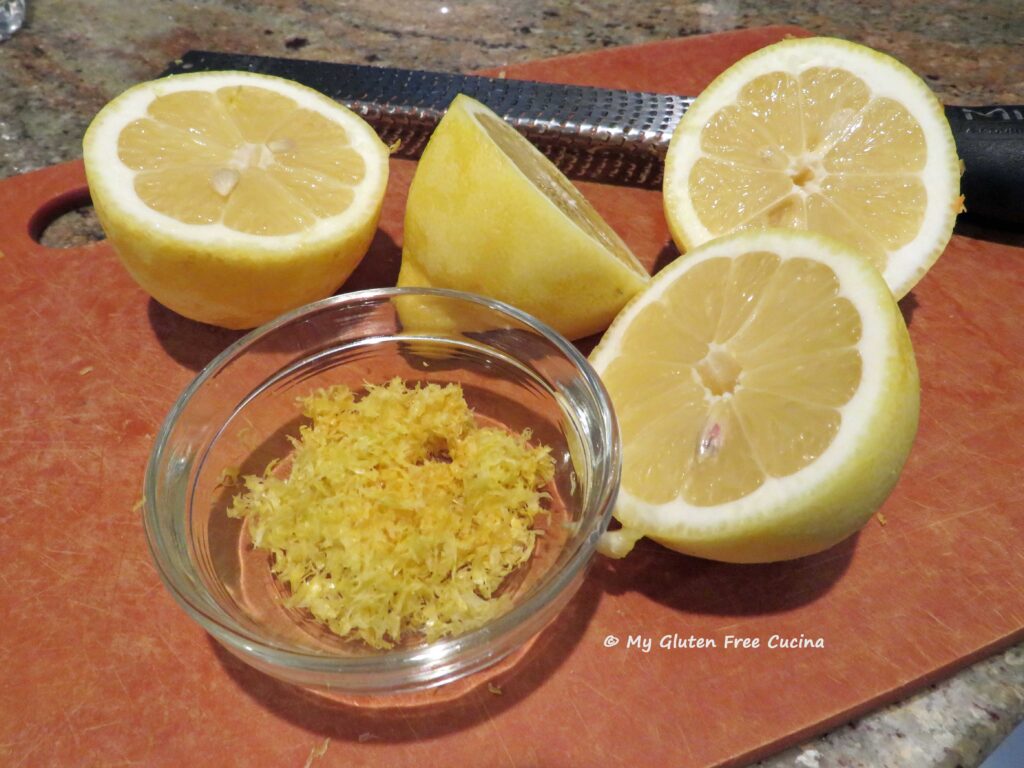
Wash and dry the lemons and herbs. Zest both lemons and cut in half (Need a zester?).
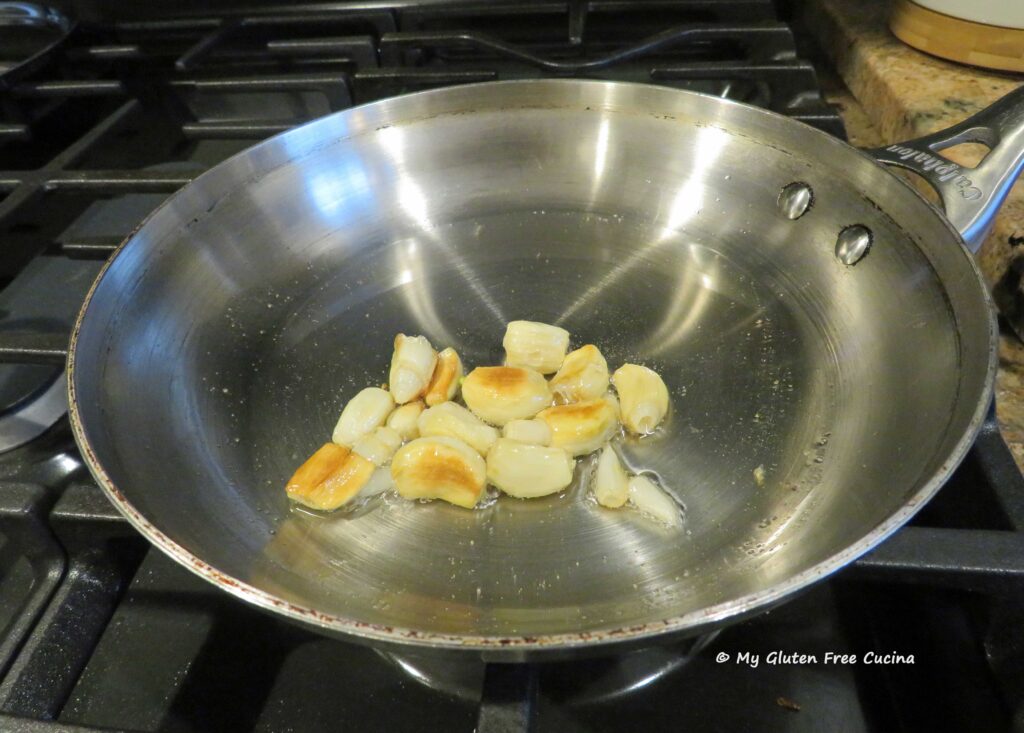
Peel the garlic cloves and slowly warm them in the olive oil over lowest possible heat. A simmer mat is great for this application. Turn the cloves every 10 minutes until softened.
Mince half of the rosemary and thyme and add to the butter along with the lemon zest. Mash it together with a fork.
-Preheat the oven to 425º. Remove the giblets packet from the chicken.
-Rinse the chicken, inside and out and pat dry. Mist a roasting pan or casserole with cooking spray and set the chicken breast side up.
-Fit as many pieces of lemon as you can into the cavity of the chicken, along with the garlic cloves and remaining rosemary and thyme sprigs.
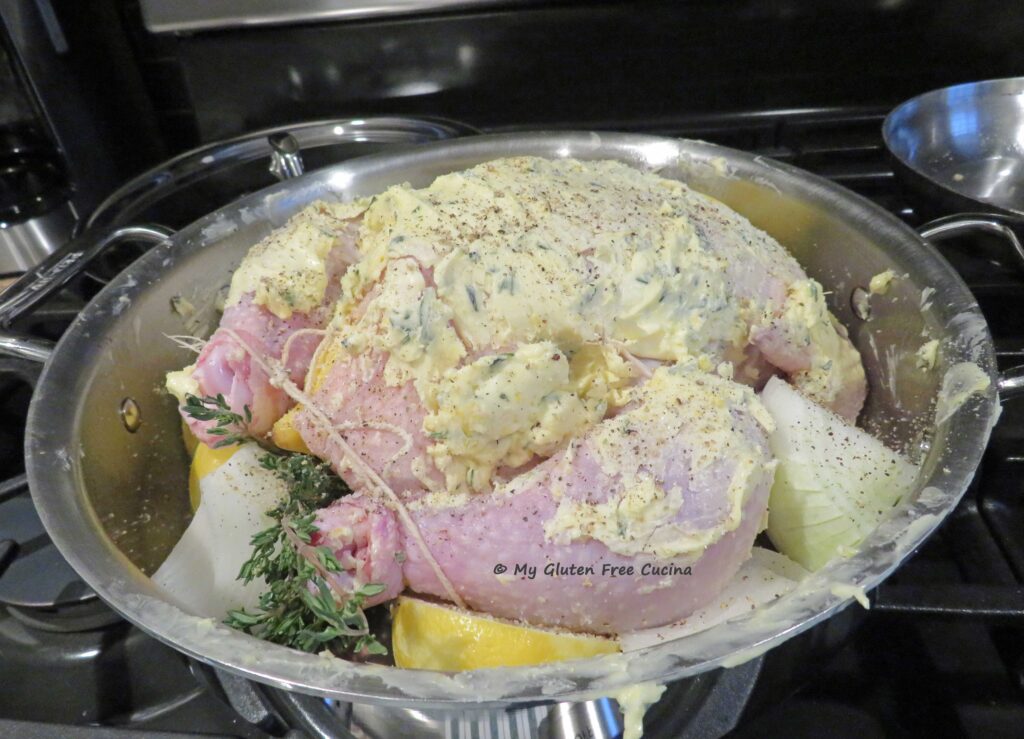
-Rub the butter mixture all over the chicken, be sure to coat the wings and legs. Season with salt and pepper.
-Tie the legs together. Quarter the onion and tuck slices under the chicken, along with any extra pieces of lemon.
Roast uncovered for 1 to 1-1/2 hours, or until a thermometer inserted into the thigh registers 165º. (A 4 lb. chicken will cook in just over an hour but allow a full hour and a half for a 6 lb. bird.)
The skin should be nicely browned. Be sure to let it rest for 10 minutes before carving.
Notes ♪♫ I got a whole chicken (4 lb.) for just $4.00! From that little chicken I had a great dinner, with leftovers. The carcass and wings went into the stock pot for a big pot of soup that I shared with a neighbor, so nothing was wasted. With today’s prices I’d say that’s quite a value!
Originally posted 02/23/2020 Rephotographed 03/11/2025
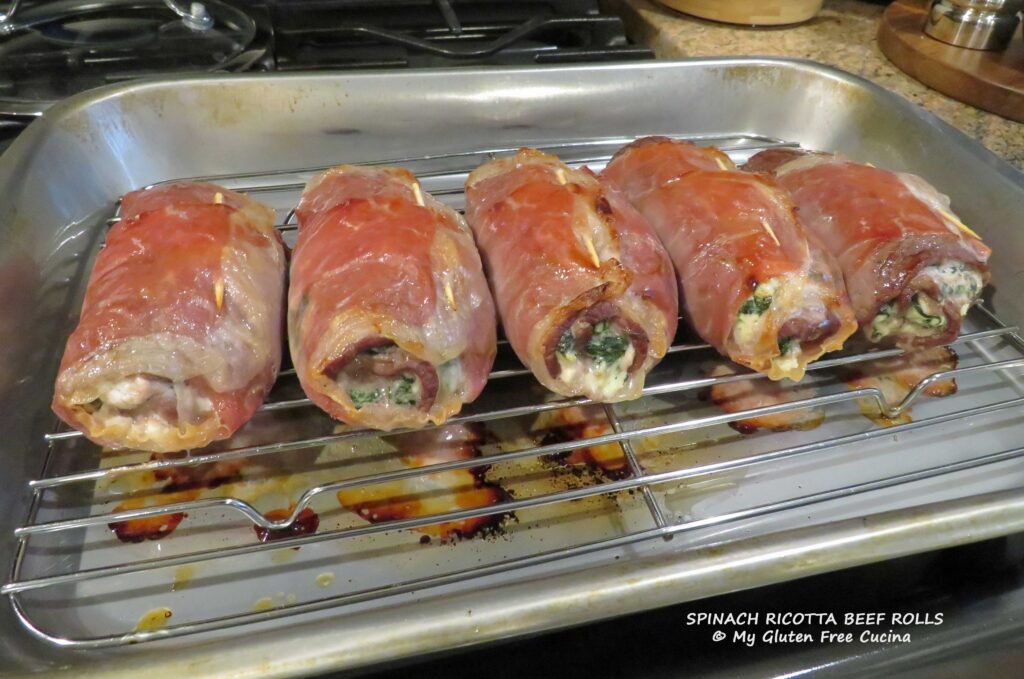
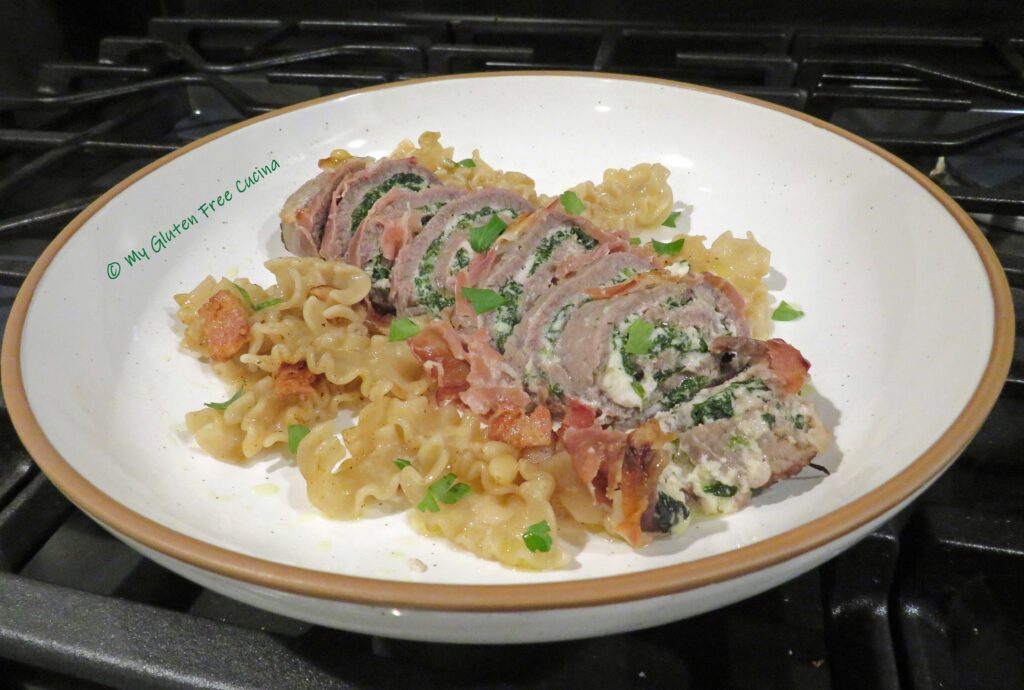
It’s no secret I’m a little obsessed with bundled meat recipes! Check out these thin slices of beef, rolled and stuffed with a spinach ricotta filling. The rolls are then wrapped in prosciutto and baked. Oh my! The meat was so tender, this dish would be a wonderful choice for date night or a small dinner party.
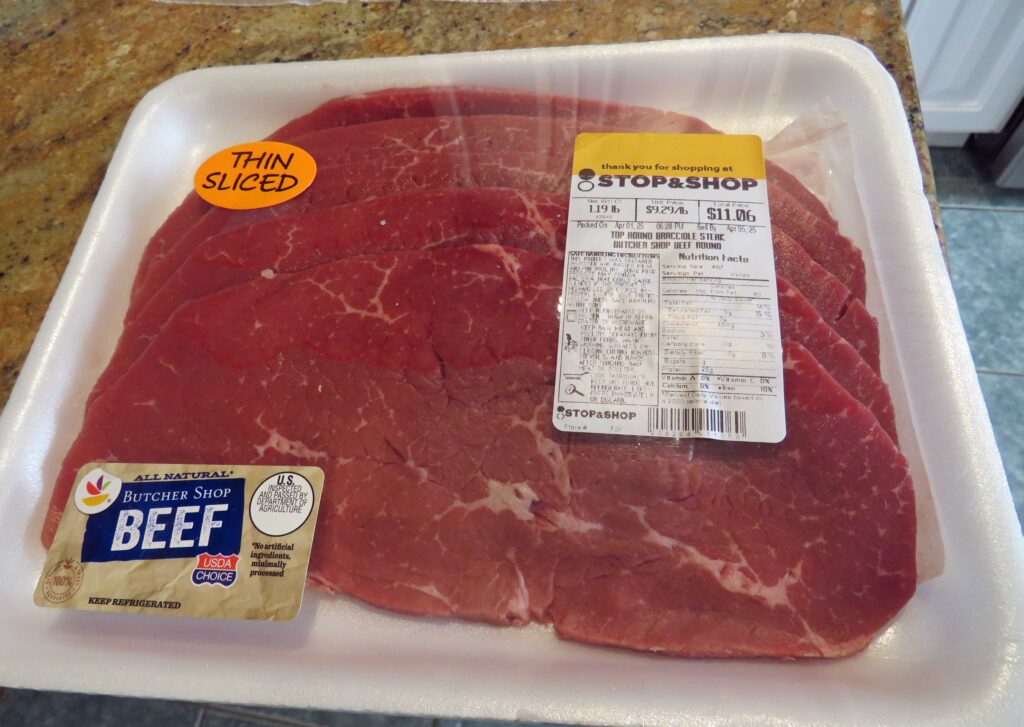
You won’t find any strange ingredients in this recipe. All are naturally gluten free and commonly available. I am fortunate to live in an Italian neighborhood, where thin sliced top round is sold for making Bracciole. If you don’t see it in the meat case, ask your butcher.
Ingredients:
6 oz. bag baby spinach
1 clove of garlic
2 tbsp. olive oil
1 cup ricotta cheese
4 oz. prosciutto, thin sliced
1¼ lb. top round cut into 1/4″ thin slices.
1 tbsp. honey
salt and fresh ground pepper to taste
This post contains affiliate links.
Preparation:
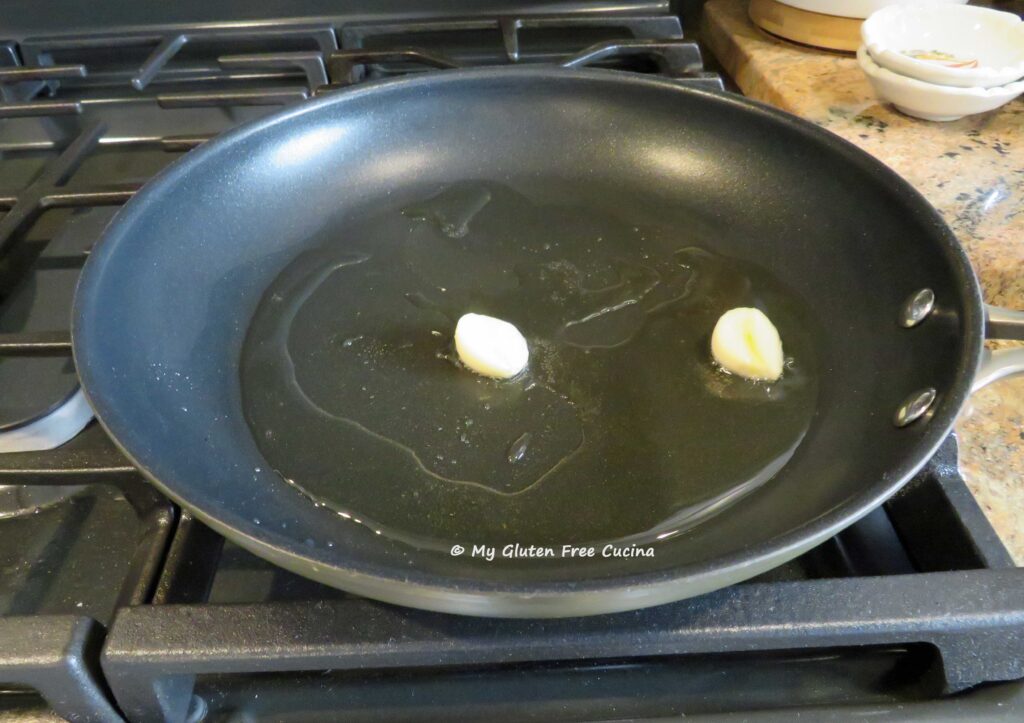
Heat olive oil in a nonstick skillet with a lid. Cut the garlic clove in half and add to the oil. Cook for 2 minutes over low heat to infuse the oil with garlic flavor.
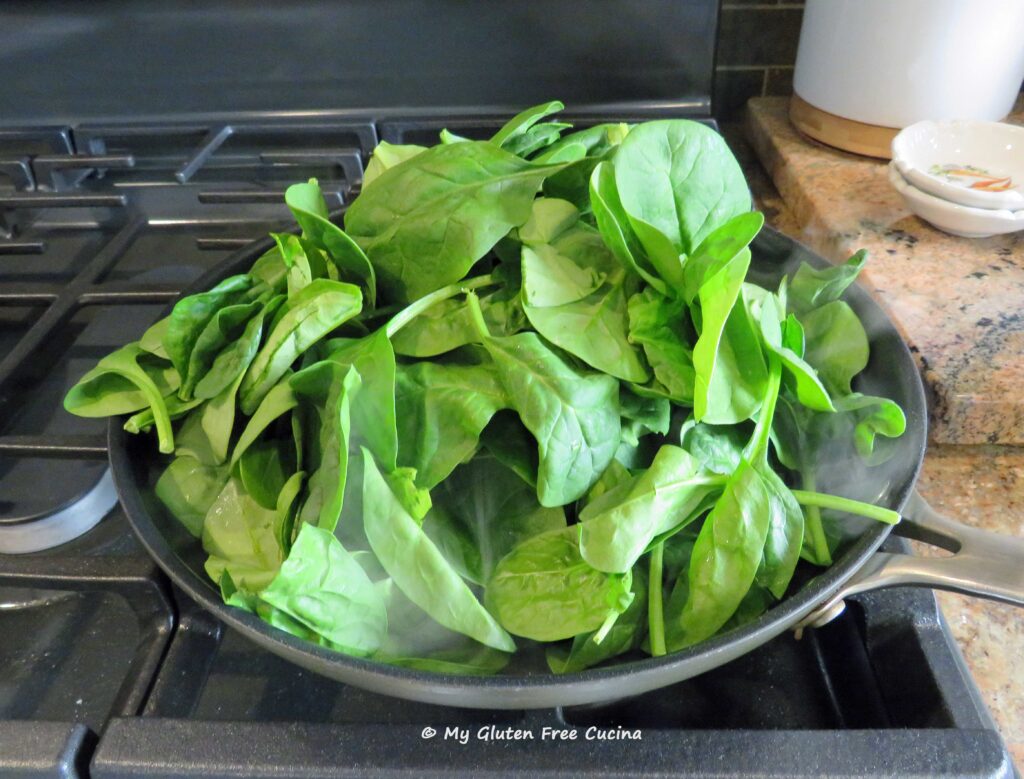
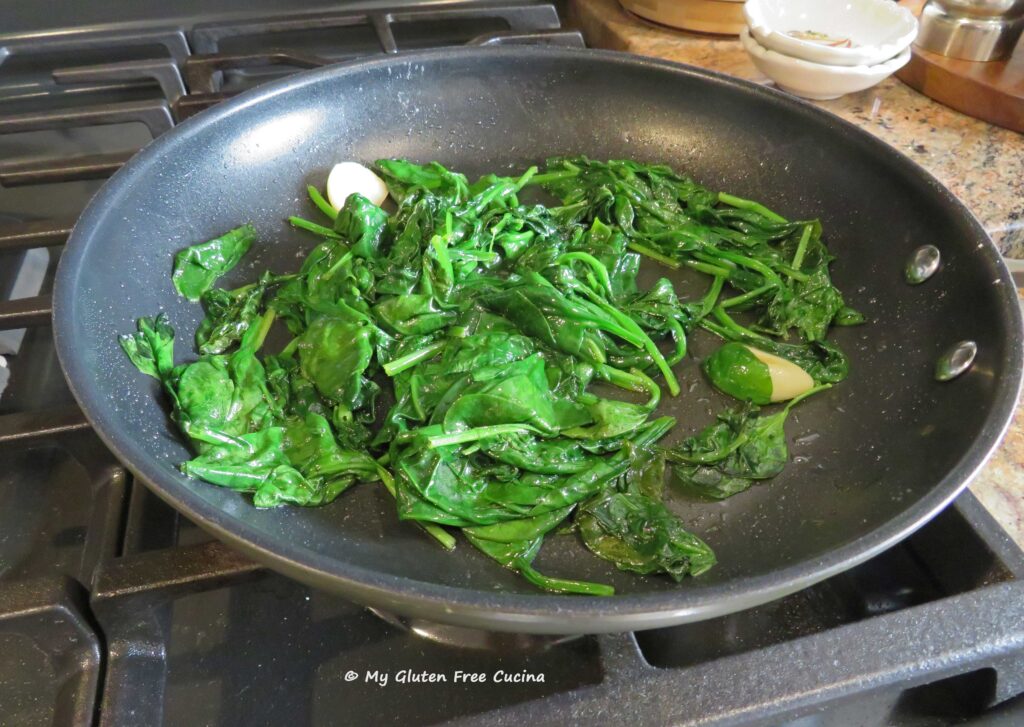
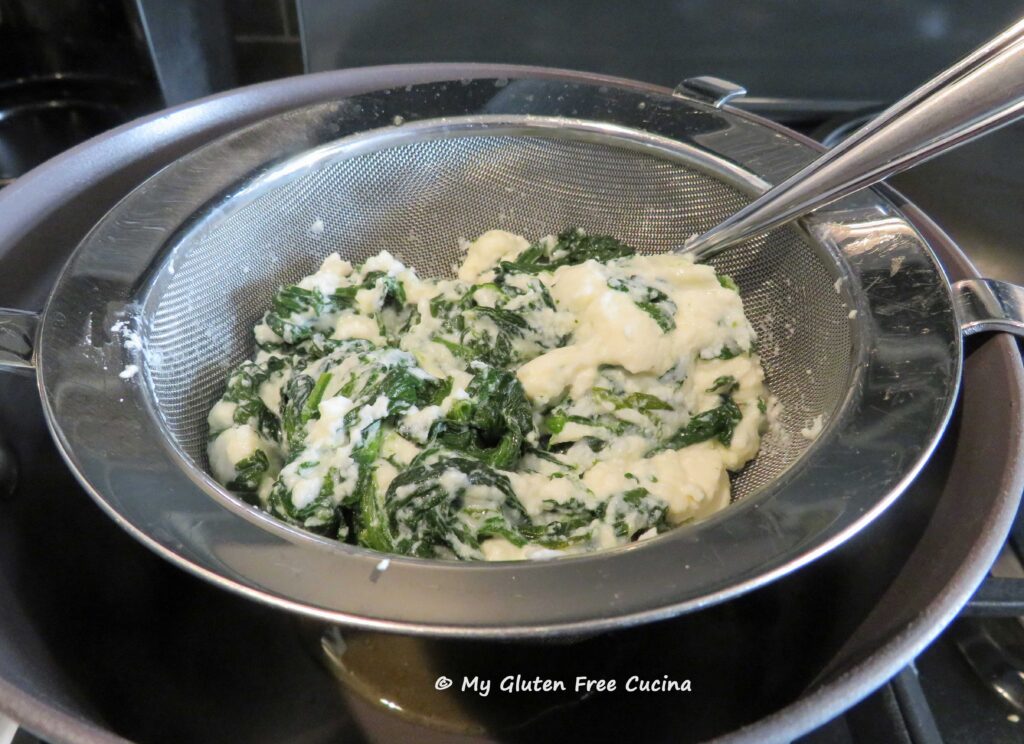
Add all of the spinach to the skillet. It looks like a lot, but it will cook down. Cover and cook for 10 minutes total, stirring after 5 minutes.
What did I tell you? 😉
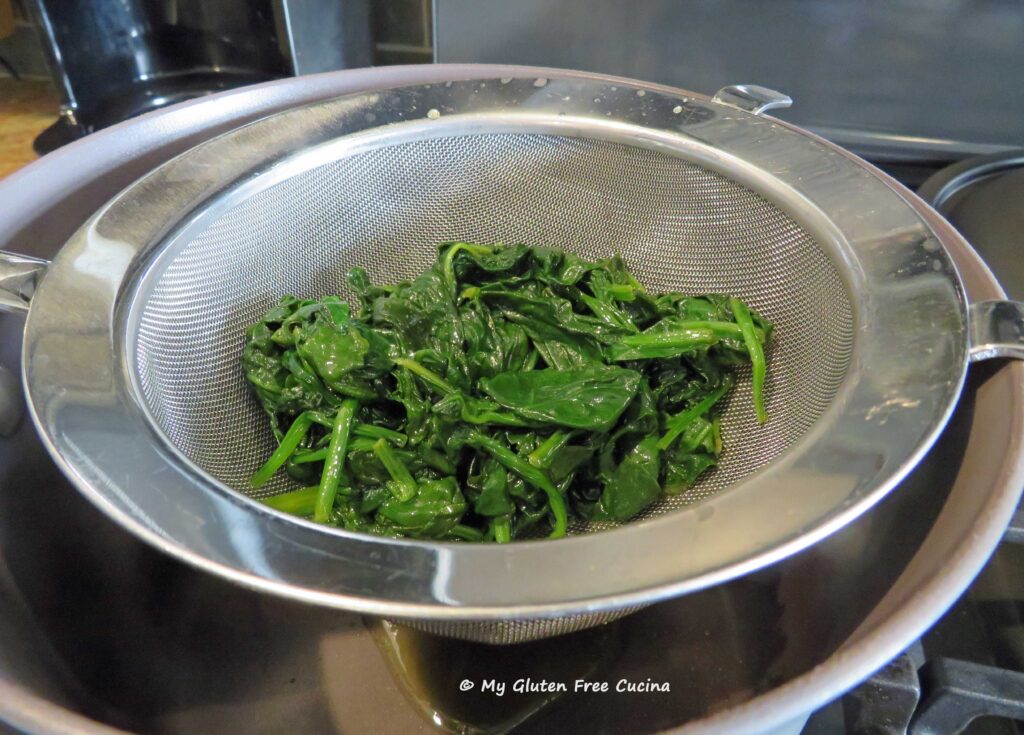
Drain the spinach, let it cool slightly then stir in the ricotta (discard the garlic). Season with a pinch of salt and fresh ground pepper.
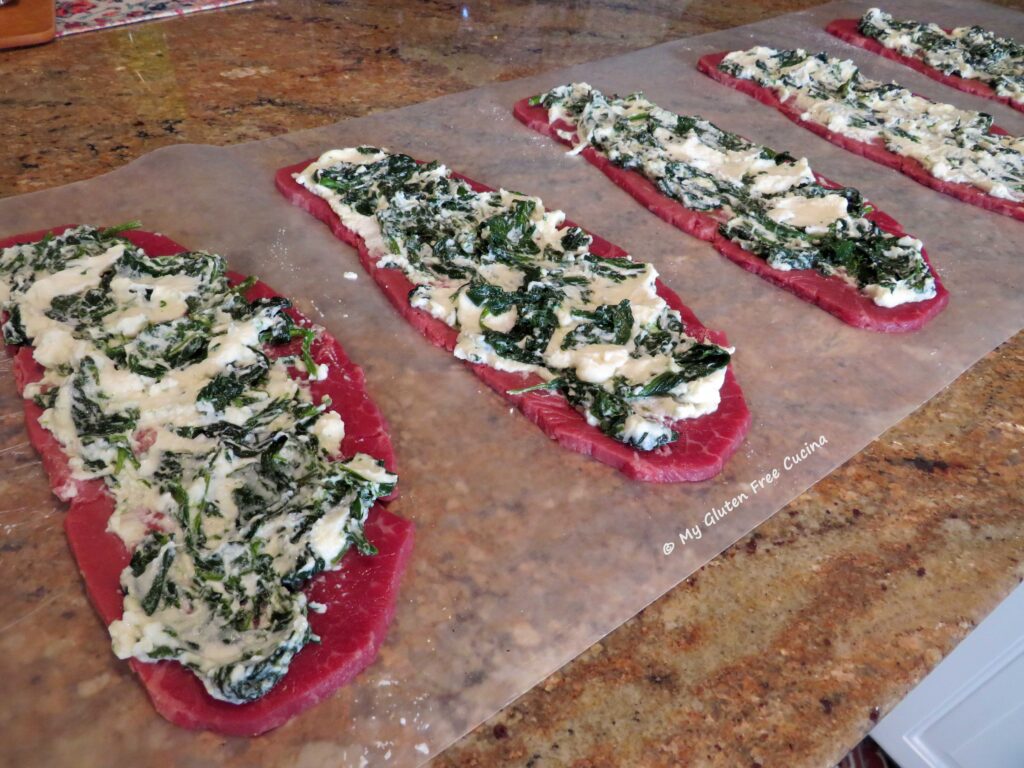
Cover your work surface with wax paper or plastic wrap. Lay out the beef slices and spread the spinach ricotta mixture over each one.
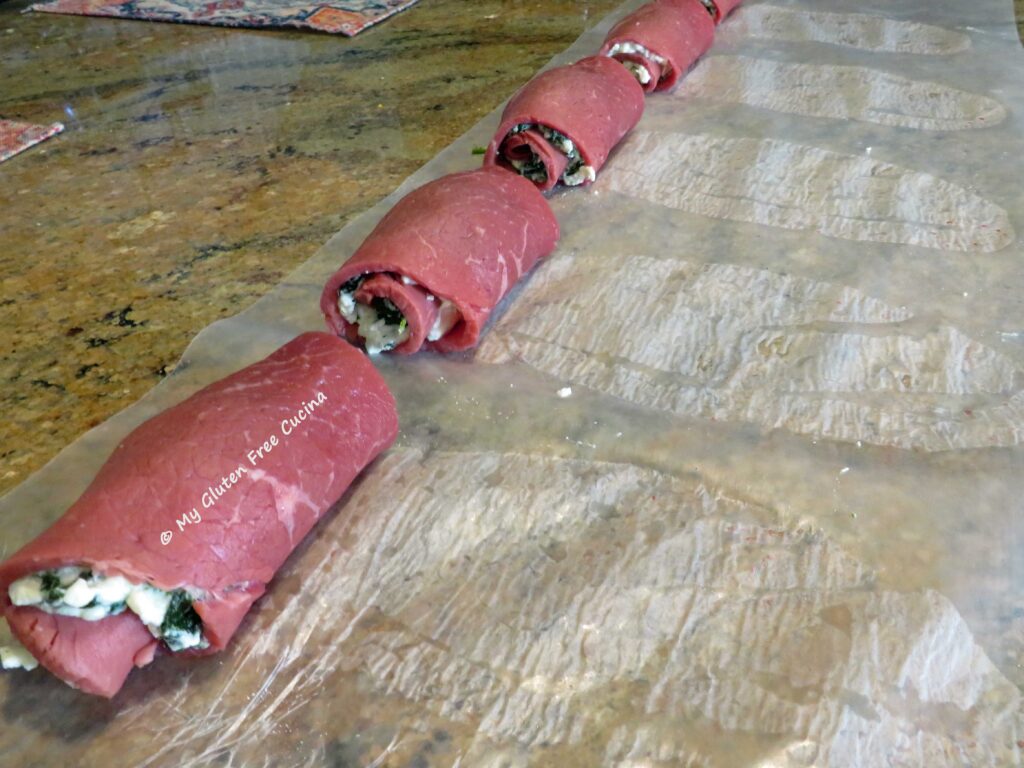
Starting at the short end, roll the slices up into a bundle.
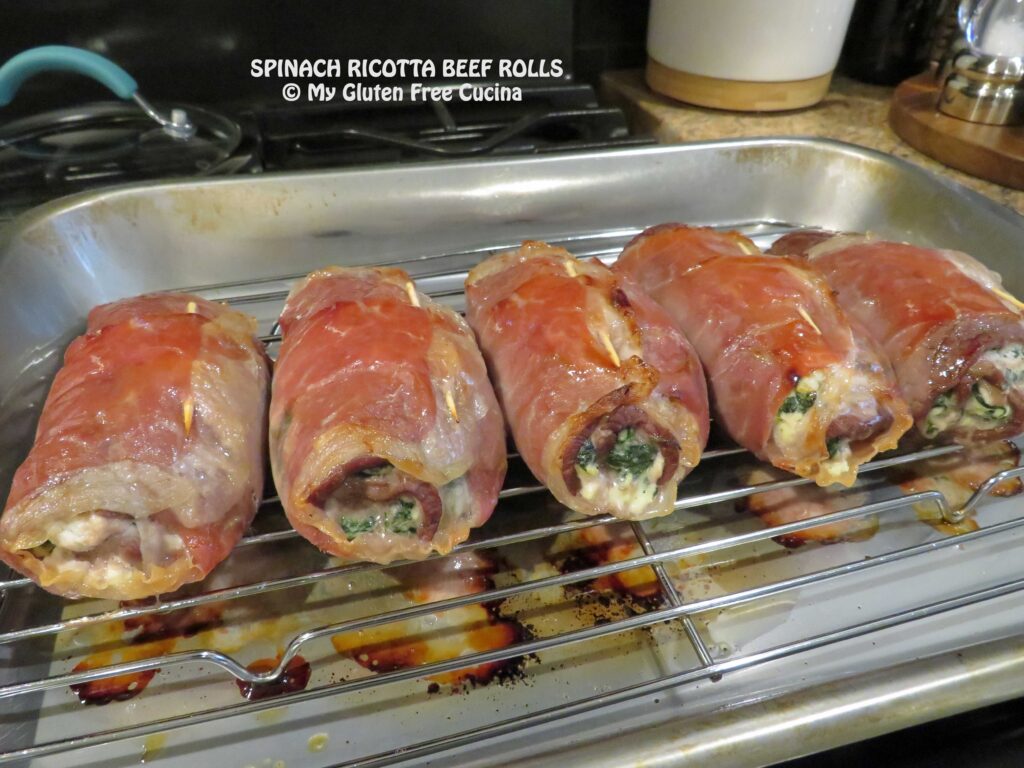
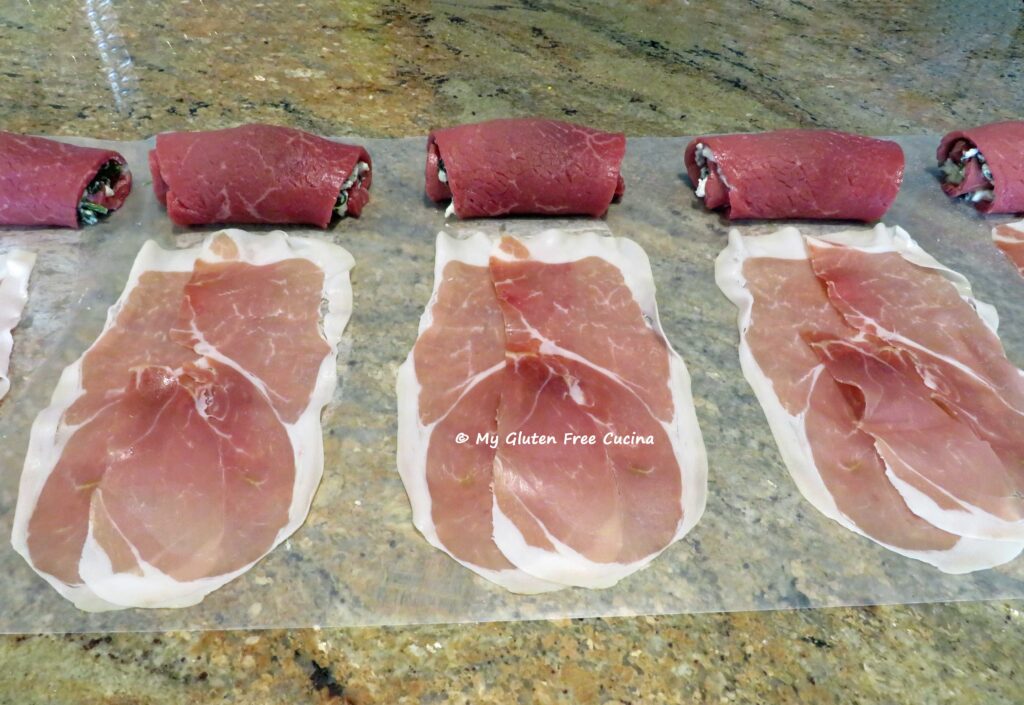
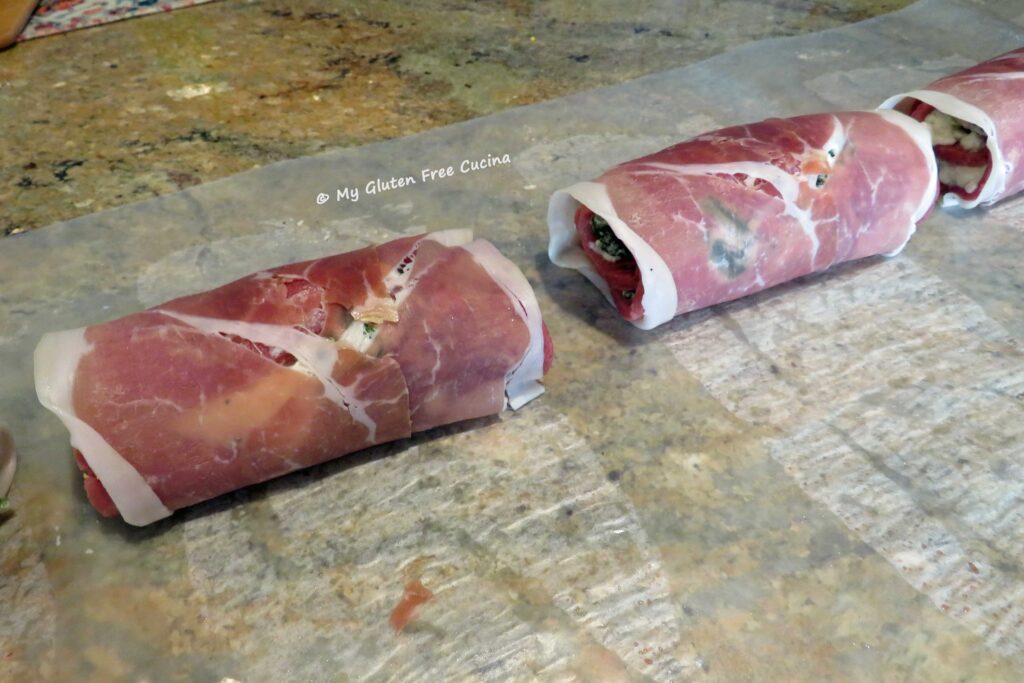
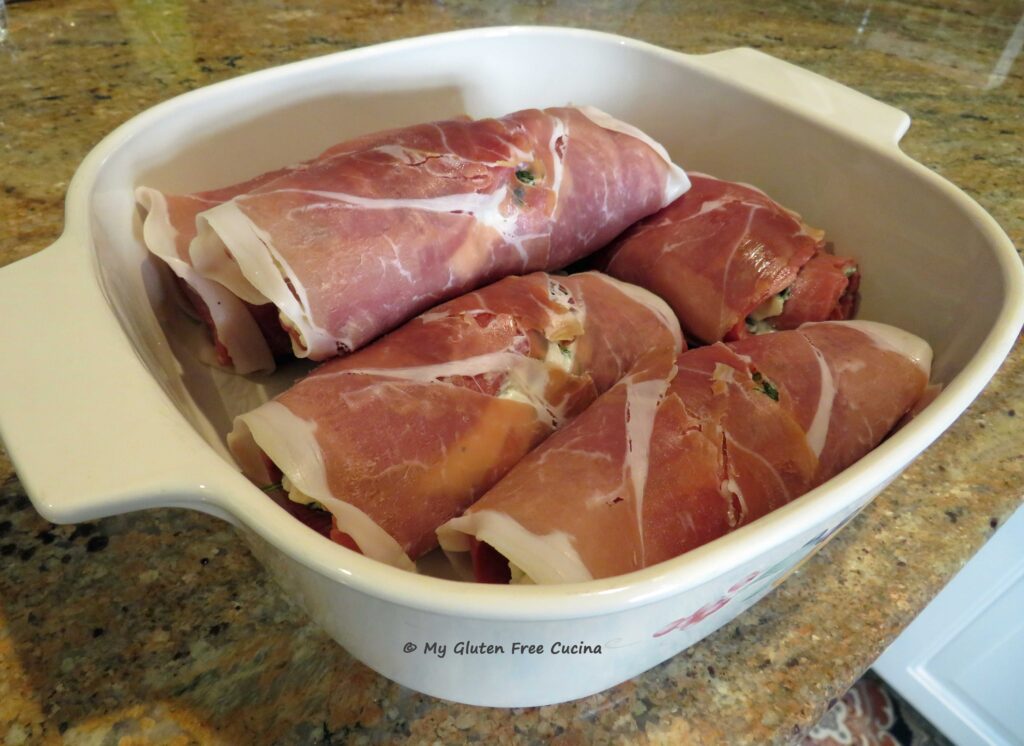
Next, wrap each meat bundle in 1-2 slices of prosciutto.
Cover and refrigerate the meat bundles for 2-3 hours.
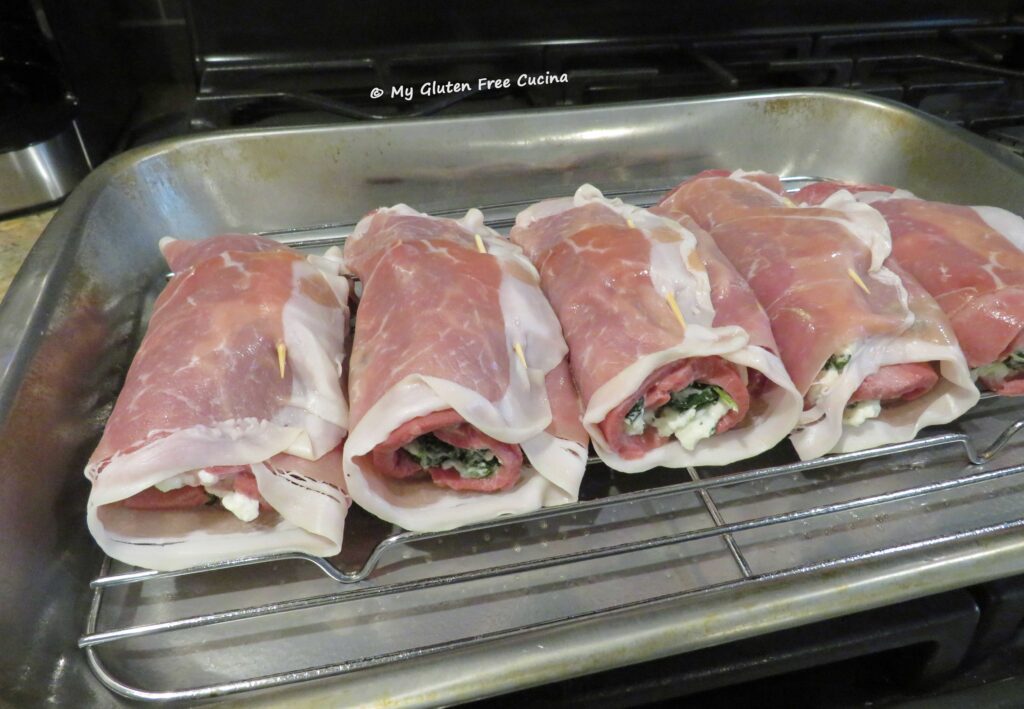
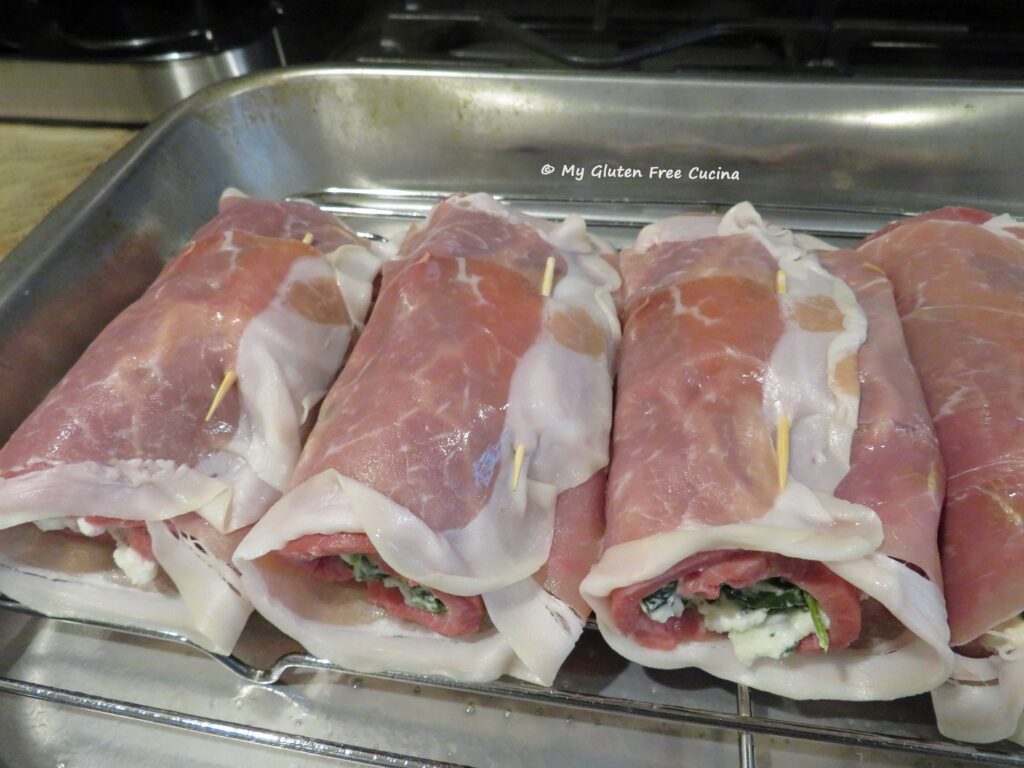
Secure each bundle with a toothpick. Place the beef rolls on the rack and bake for 30 minutes.
Brush the tops with honey during the last 5 minutes of baking.
Cover and let it rest for 10 minutes before slicing. Serve over pasta or risotto. Leftovers can be warmed in the microwave and are just as good the next day!
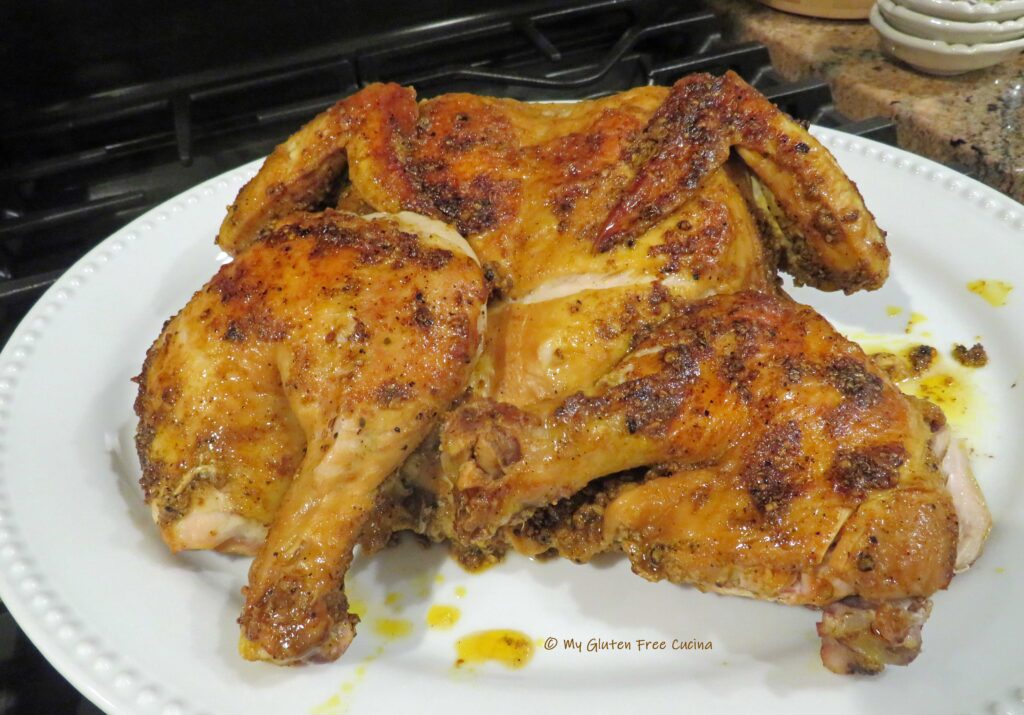
Here’s a recipe that I haven’t made in many years. Why I don’t know, because it is truly delicious! The spicy marinade, along with the cooking technique are what give this chicken its gorgeous color and juicy meat.
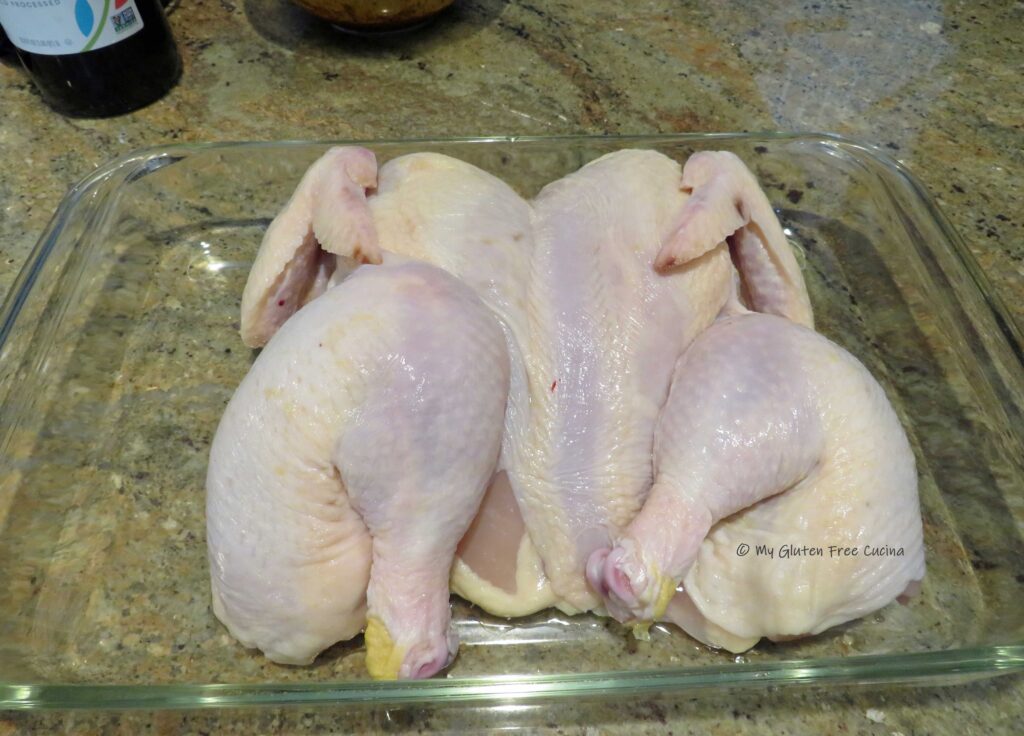
The preparation begins with splitting the chicken down the middle (but not all the way through) and opening it up flat. In culinary terms, this method is referred to as “spatchcocking” the chicken. Then, after a few hours in the fridge with a spicy marinade, the chicken is cooked skin side down in a heavy skillet, weighed down with a brick to ensure continuous contact with the surface of the pan. The finished dish is incredible!
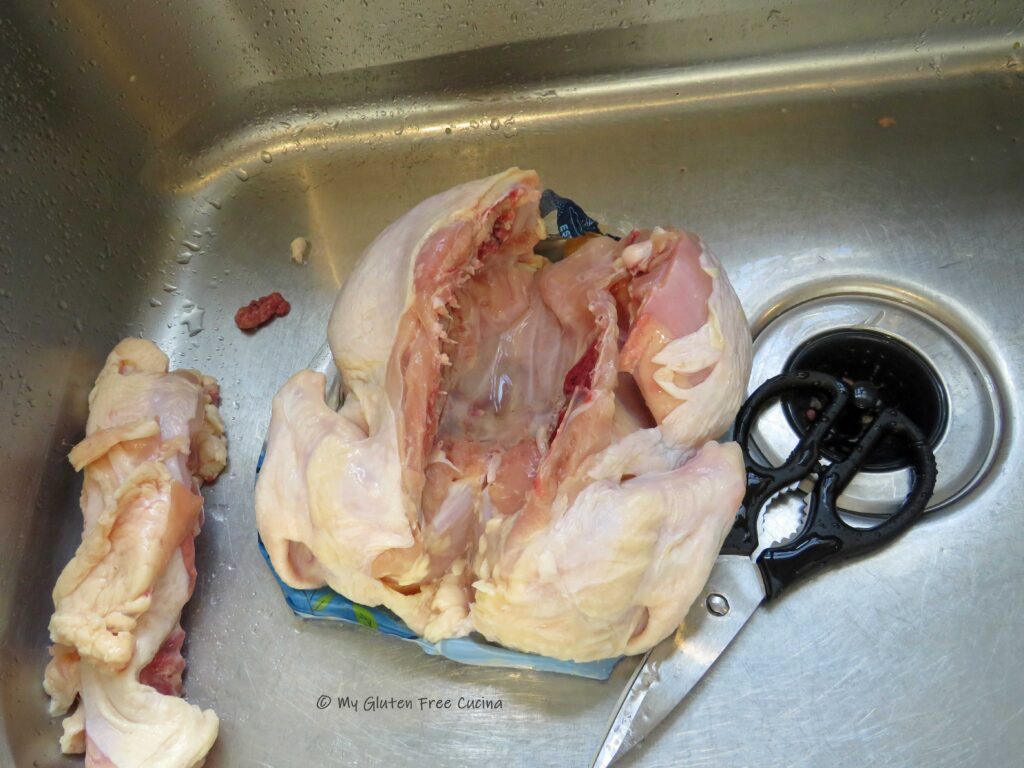
Now, if you can purchase a chicken and have it split or “spatchcocked” right at the meat counter that’s great. But if not, don’t worry! The technique is quite simple, and you can do it yourself with a good pair of kitchen shears.
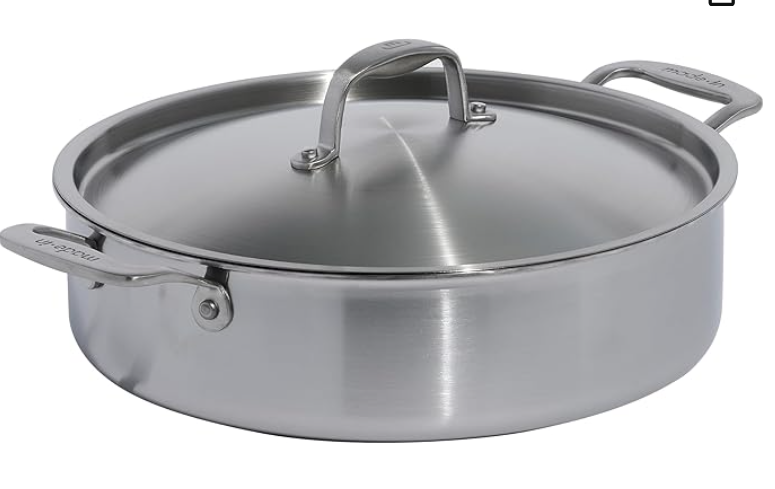
I used a stainless-steel braising pan for this recipe. A cast iron skillet or Dutch oven would be ideal, if you have one and can lift the pan in and out of the oven (add a brick to that and it’s pretty heavy!). Either way, you need a pan that can go from stovetop to oven.
If you have shied away from spatchcocking a chicken, or have always had it done by the butcher, don’t worry! It’s not hard and I did mine right in the sink. All you need to do is turn the chicken breast side down and use a good pair of kitchen shears to cut along both sides of the backbone. Remove the backbone and discard. Turn the chicken over and give it a sharp rap in the center to break the breastbone so that it lays flat. Yes, that’s it!
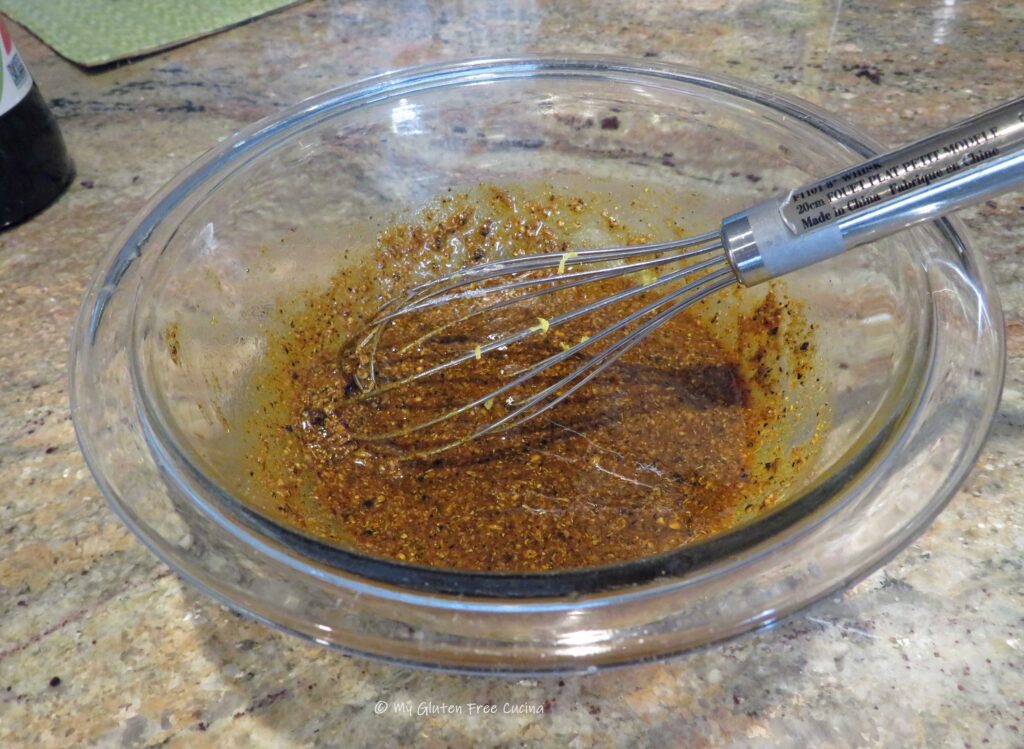
To make the marinade, toast the whole peppercorns, coriander seed and fennel seed in a hot skillet for 2 minutes, just until fragrant. Grind in a coffee grinder. Transfer to a small bowl with the paprika, cayenne, cumin, turmeric and salt. Whisk in 1/4 cup olive oil, lemon juice and zest.
Now rub the chicken all over with the spice mixture. Cover and refrigerate for 4 hours.
Wrap the brick in aluminum foil.
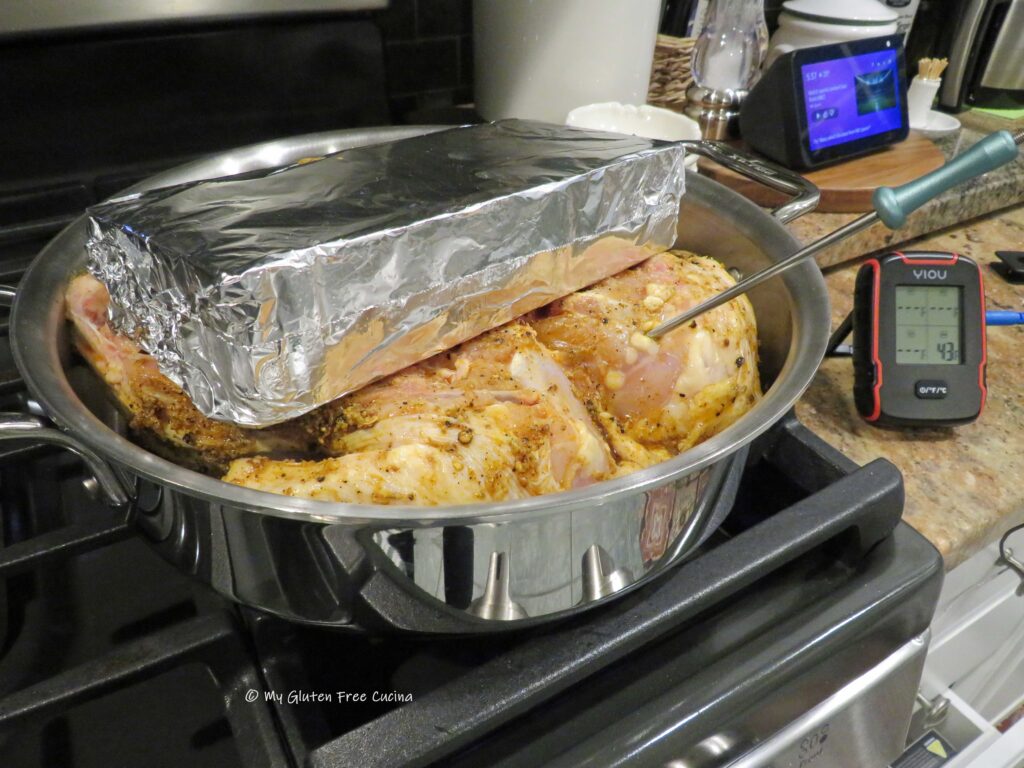
Preheat the oven to 400º. Heat your stainless-steel pan or Dutch oven on the stovetop and add the remaining 2 tbsp. olive oil and 1 tbsp. butter. Place the chicken in the pan skin side down and cover immediately with the brick. Cook over medium heat for 15 minutes to develop a crust.
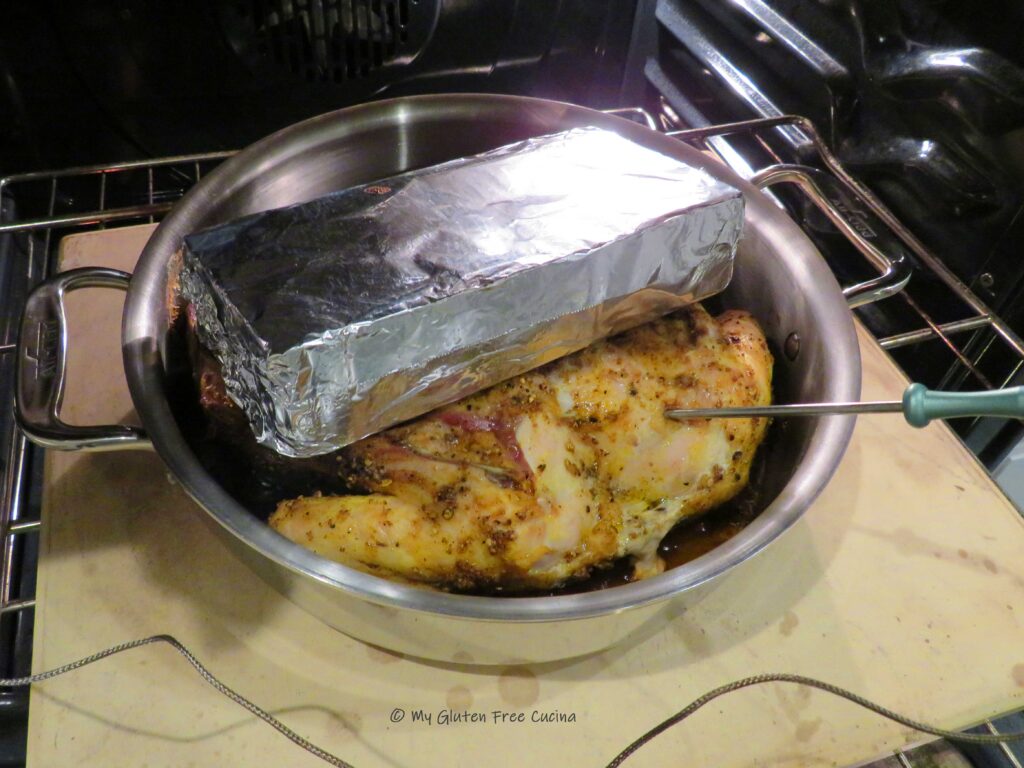
Transfer to the oven and continue cooking for 45 minutes to an hour or more, depending on the size of the chicken. Use a thermometer to check for doneness, 160-165º
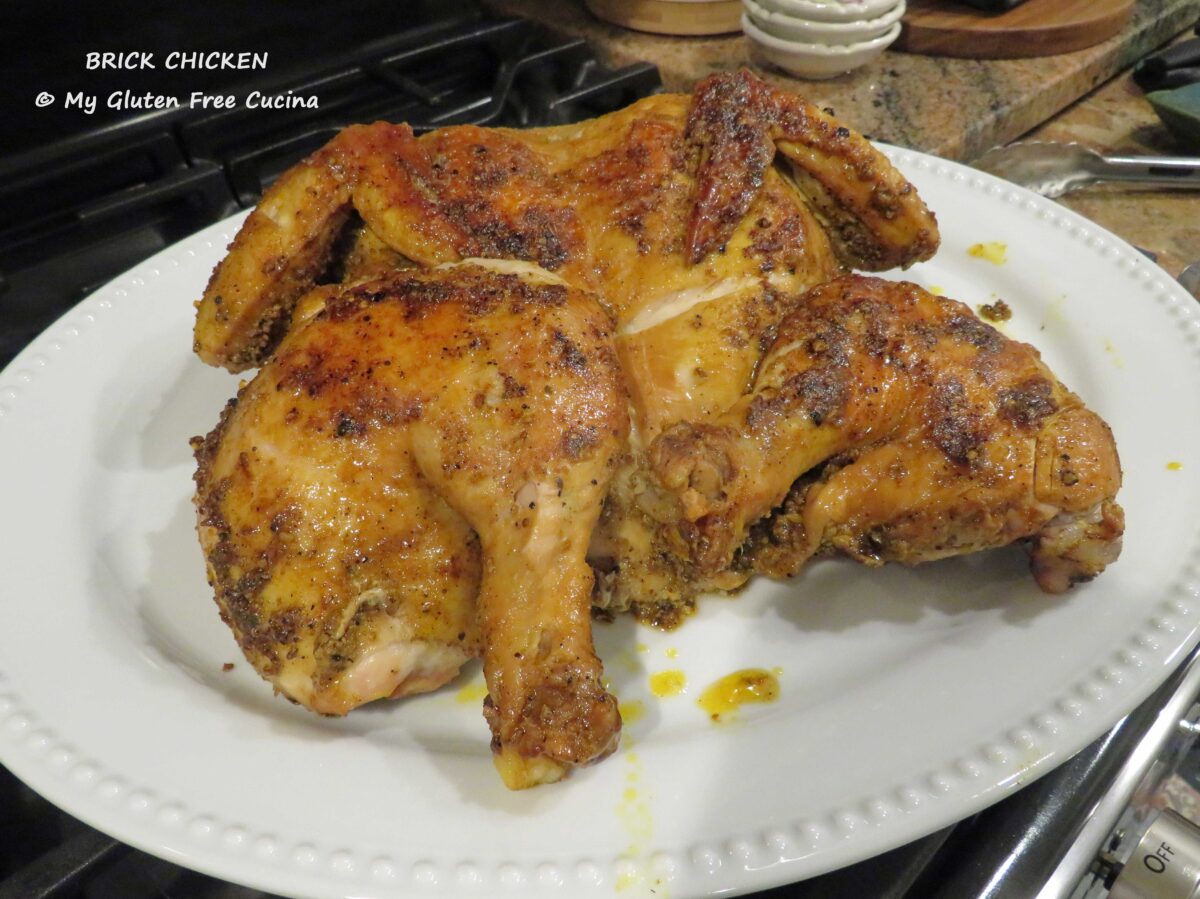
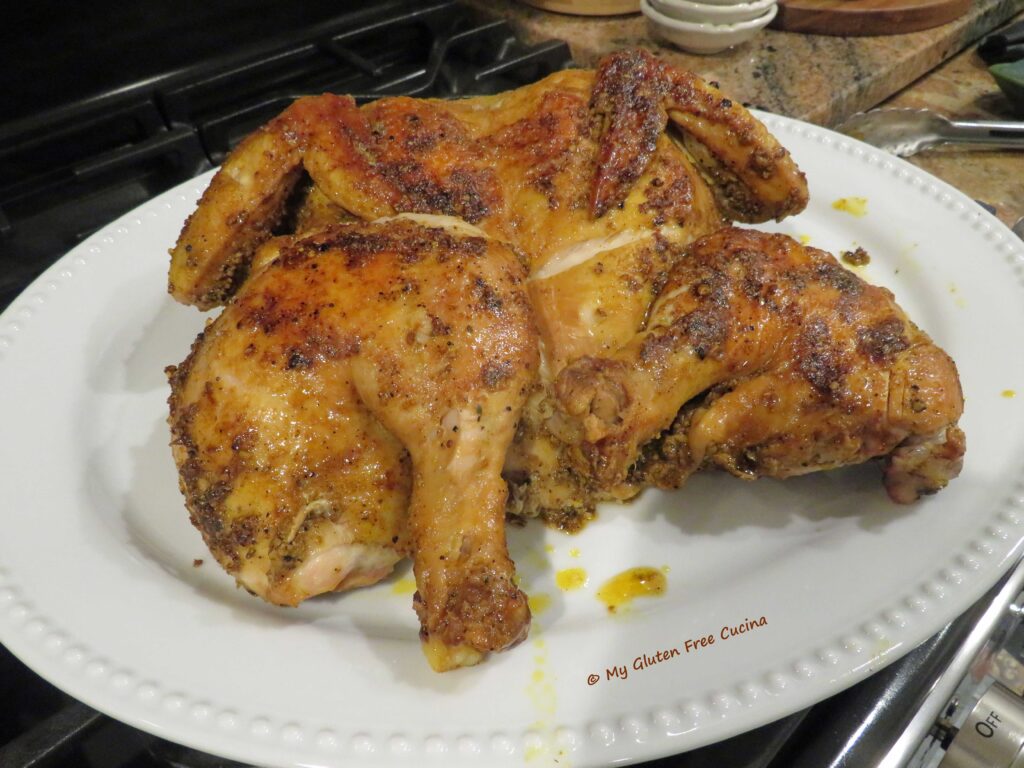
Carefully remove the brick, turn the chicken, skin side up onto a serving platter and bring it to the table for a gorgeous presentation!
Look at the color! Beautifully browned and the meat is so moist! The marinade is so aromatic, and I know you are going to love the flavor.
Notes ♪♫ Now you know why I keep a brick in my kitchen cupboard! Yes, it is an unusual accessory to have in the kitchen but now that I’ve shown you how I used it in this recipe you may want to pick one up on your next trip to the hardware store or home improvement center!
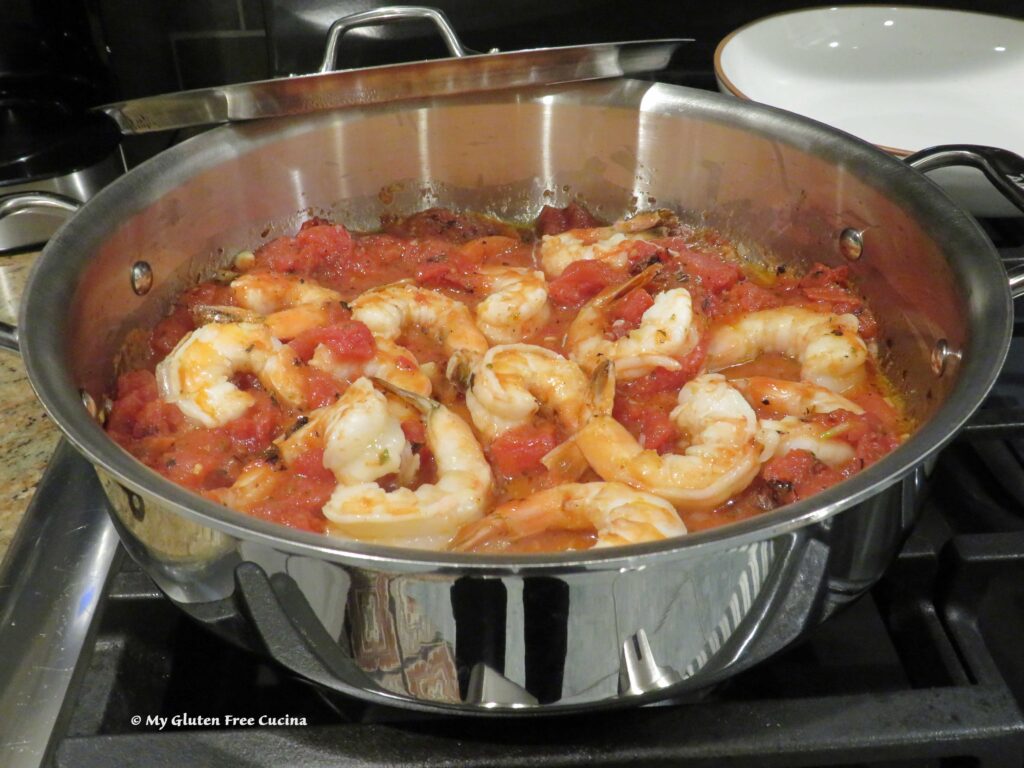
Fra Diavolo is a spicy tomato sauce traditionally paired with pasta and seafood. It’s a simple sauce made with a generous amount of crushed red pepper flakes. You can adjust the heat to your liking- I usually plan on 1/2 tsp. per serving. Do you like it spicy? 🔥🔥🔥
This post contains affiliate links.
2 Servings
Ingredients:
3 tbsp. olive oil, divided
1 lb. shrimp, peeled and deveined (I used 16-20 per pound count)
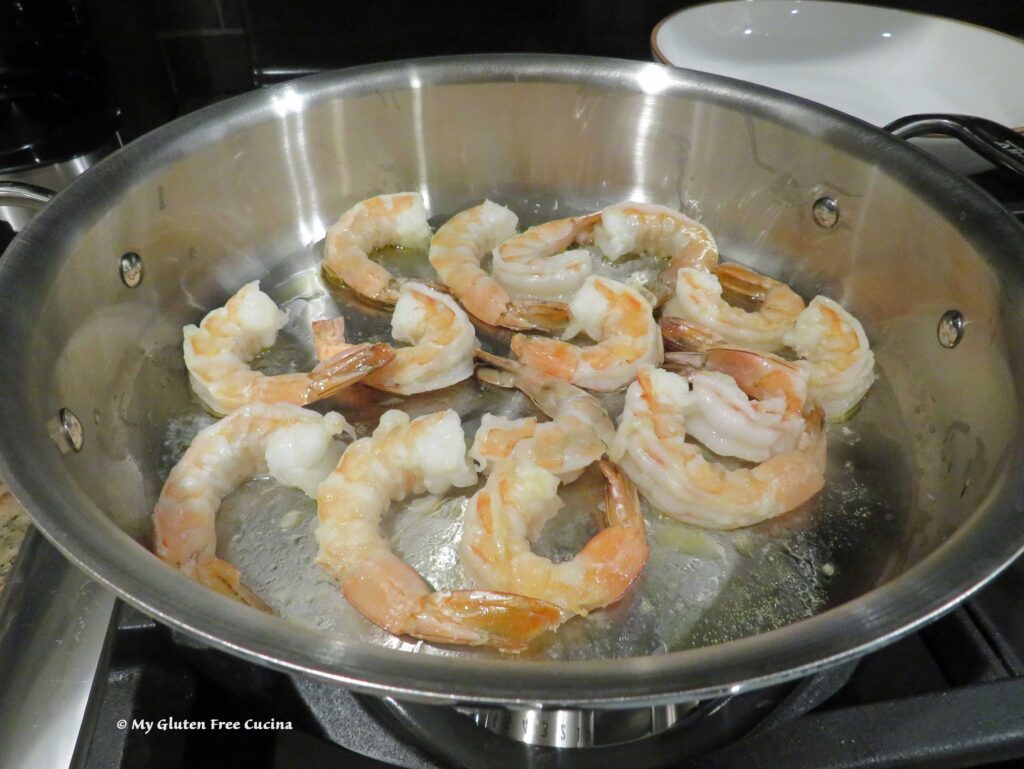
Heat a large skillet with 1 tbsp. olive oil and boil a large pot of salted water for the pasta. Partially cook the shrimp, about 1 minute per side.
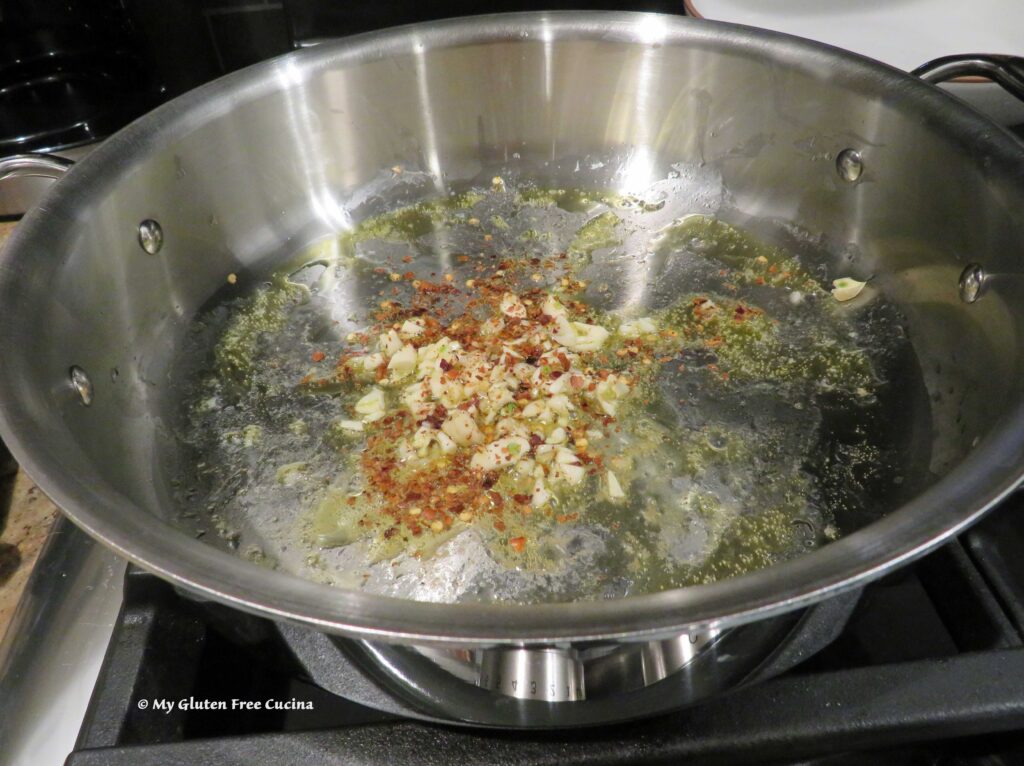
Remove the shrimp to a bowl and add another tbsp. olive oil to the skillet. Add the garlic and red pepper flakes, and cook for 30 seconds, stirring several times.
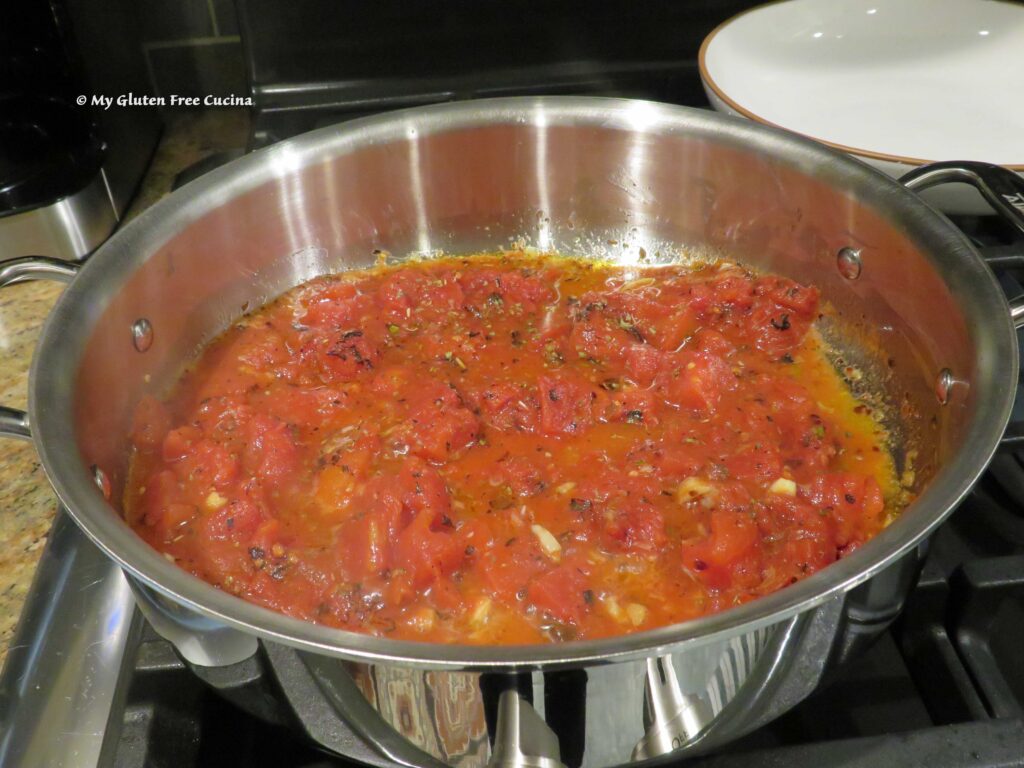
Add the fire roasted tomatoes with juice, 1/2 tsp. oregano and salt to taste.
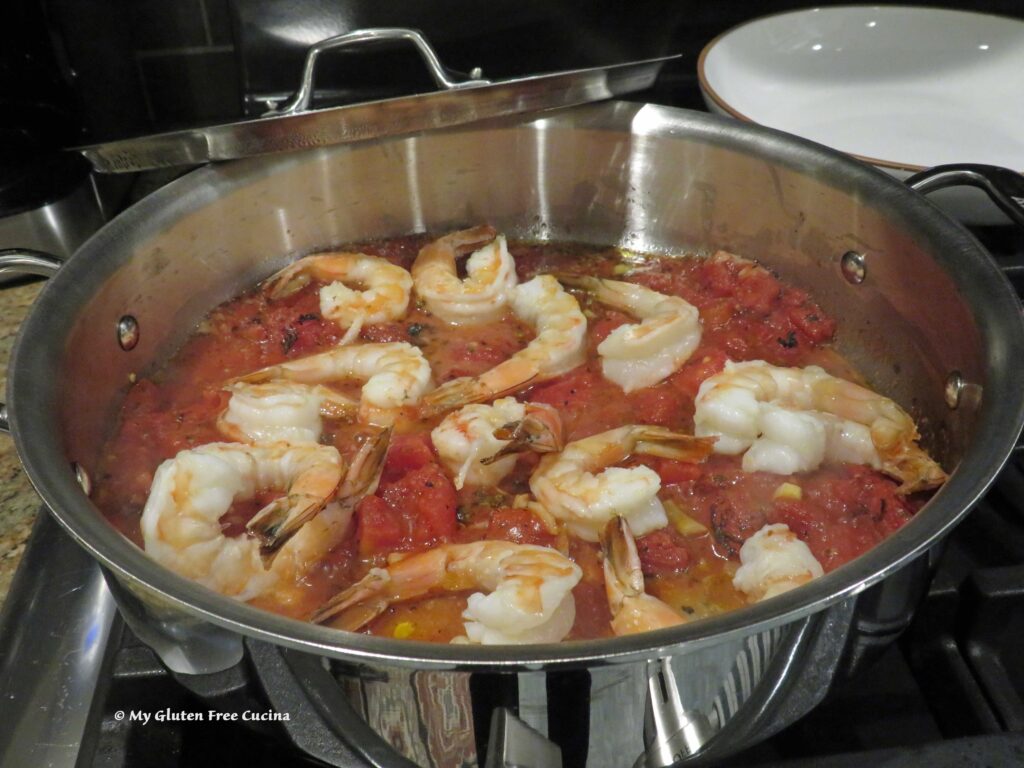
Cook the pasta to 2 minutes less than package directions. With 4 minutes to go on the pasta, add the shrimp to the sauce.
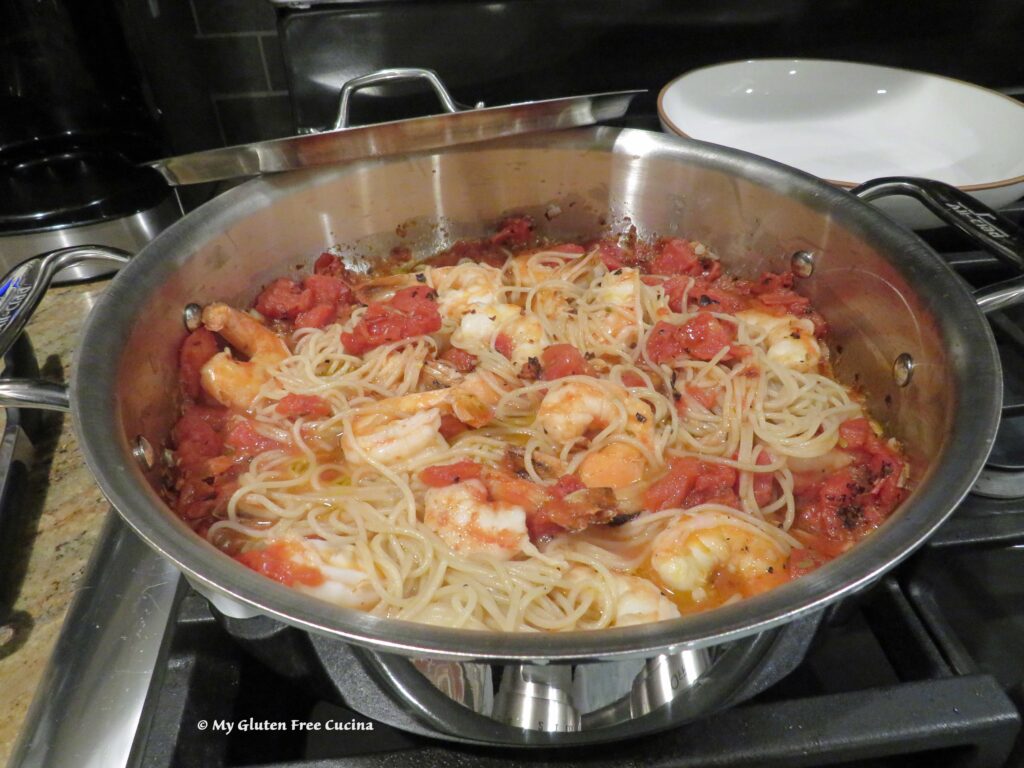
Drain the pasta, add it right into the sauce and toss with 1 more tbsp. olive oil and more red pepper flakes if you dare! ♨️
Transfer to serving bowls and garnish with fresh Italian parsley.
I absolutely love the spice in this dish! If you prefer something milder though, you can try my Shrimp Scampi recipe, the sauce is very similar but with a fraction of the heat.
Notes ♪♫ Shrimp size labels are not officially regulated and can differ from one brand to another. What one producer considers large or extra-large may be extra jumbo or colossal to another. That’s why it’s important to go by the count per pound. My shrimp was labeled 16-20, which means there should be 16 to 20 shrimp per pound. I used 16 shrimp (a generous 8 per serving) for this recipe.
Fra Diavolo is a spicy tomato sauce traditionally paired with pasta and seafood. It’s a simple sauce made with a generous amount of crushed red pepper flakes. You can adjust the heat to your liking- I usually plan on 1/2 tsp. per serving. Do you like it spicy?
Ingredients
UnitsScale
· 3 tbsp. olive oil, divided
· 1lb. shrimp, peeled and deveined (I used 16-20 per pound count)
· 4 cloves garlic, crushed and coarse chopped
· 1 tsp. red pepper flakes (or as much as you like)
· 1 can (14.5 oz.) fire roasted diced tomatoes
· salt, to taste
· 1/2 tsp. oregano
· 4oz. gluten free pasta (I used Jovial capellini)
· fresh Italian parsley, for garnish
Instructions
Heat a large skillet with 1 tbsp. olive oil and boil a large pot of salted water for the pasta. Partially cook the shrimp, about 1 minute per side.
Remove the shrimp to a bowl and add another tbsp. olive oil to the skillet. Add the garlic and red pepper flakes, and cook for 30 seconds, stirring several times.
Add the fire roasted tomatoes with juice, 1/2 tsp. oregano and salt to taste.
Cook the pasta to 2 minutes less than package directions. With 4 minutes to go on the pasta, add the shrimp to the sauce.
Drain the pasta, add it right into the sauce and toss with 1 more tbsp. olive oil and more red pepper flakes if you dare! ♨️
Transfer to serving bowls and garnish with fresh Italian parsley.
Notes
Notes ♪♫ Shrimp size labels are not officially regulated and can differ from one brand to another. What one producer considers large or extra-large may be extra jumbo or colossal to another. That’s why it’s important to go by the count per pound. My shrimp was labeled 16-20, which means there should be 16 to 20 shrimp per pound. I used 16 shrimp (a generous 8 per serving) for this recipe.
Unauthorized use and/or duplication of this material without express and written permission from this blog’s author and/or owner is strictly prohibited.
Have you seen this bread before? Pane Bianco first appeared in the King Arthur catalog around 2018. At the time, I had recently been diagnosed with Celiac Disease, and the thought of making breads like this seemed impossible!
I saved the recipe though, and as I was going through old folders recently, there it was. That was the moment I decided to make a gluten free version of this gorgeous bread!
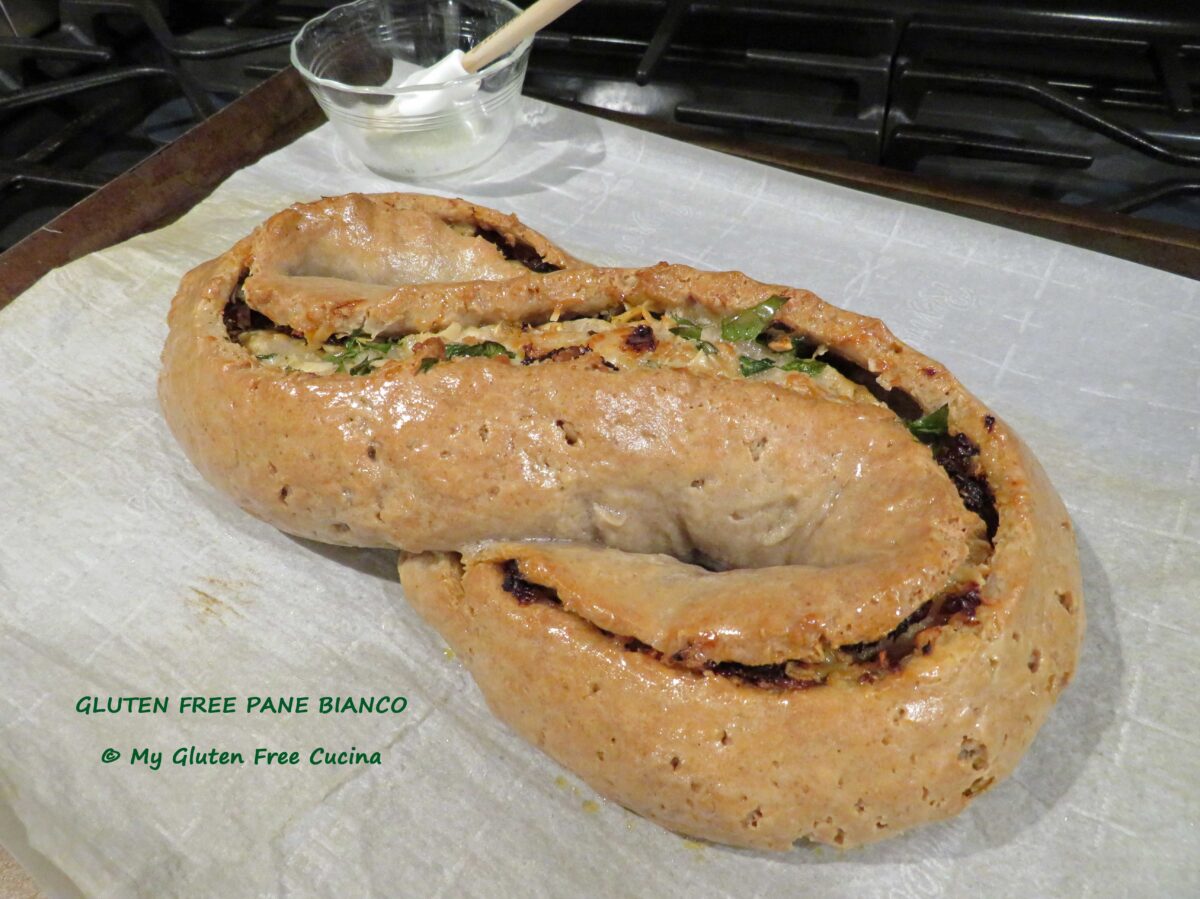
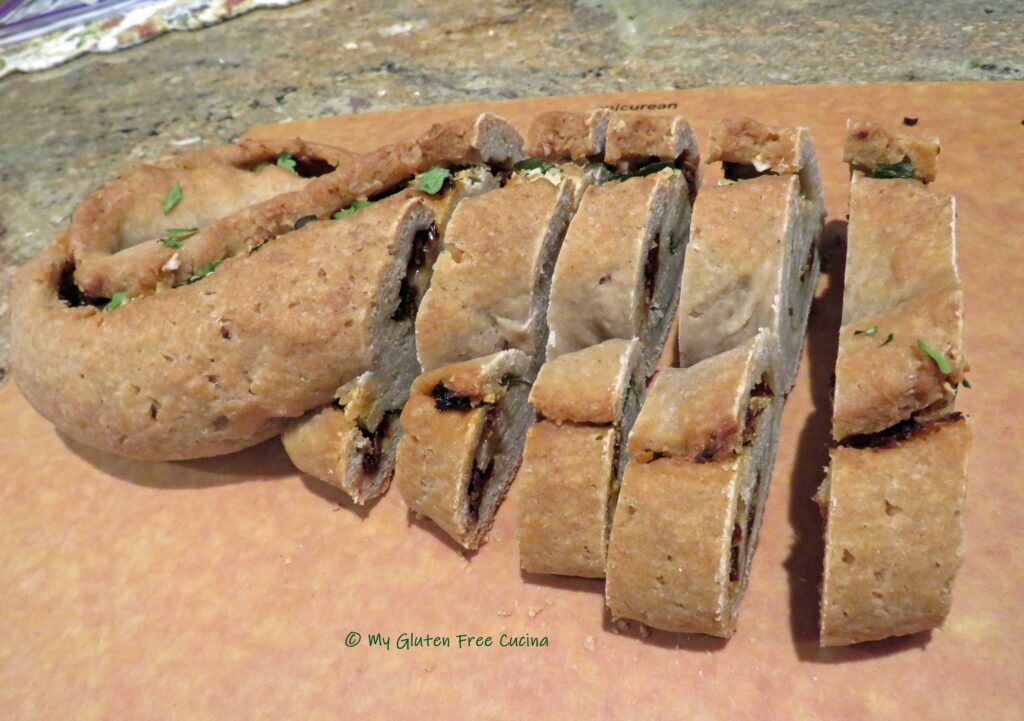
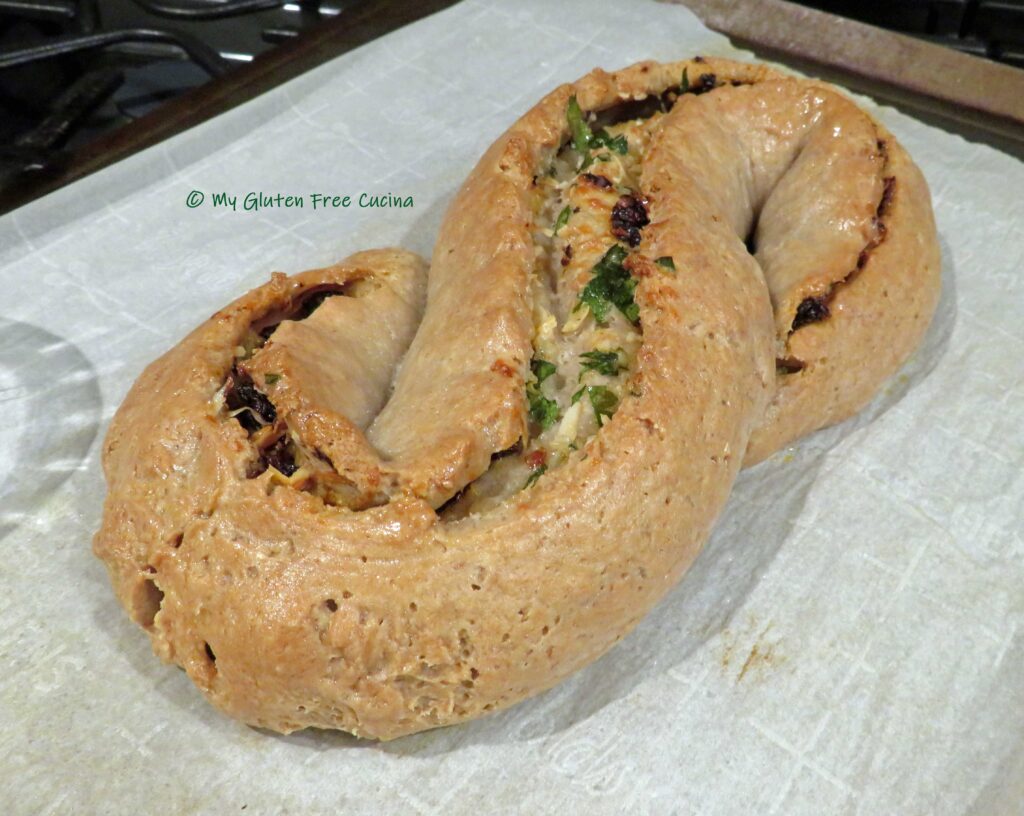
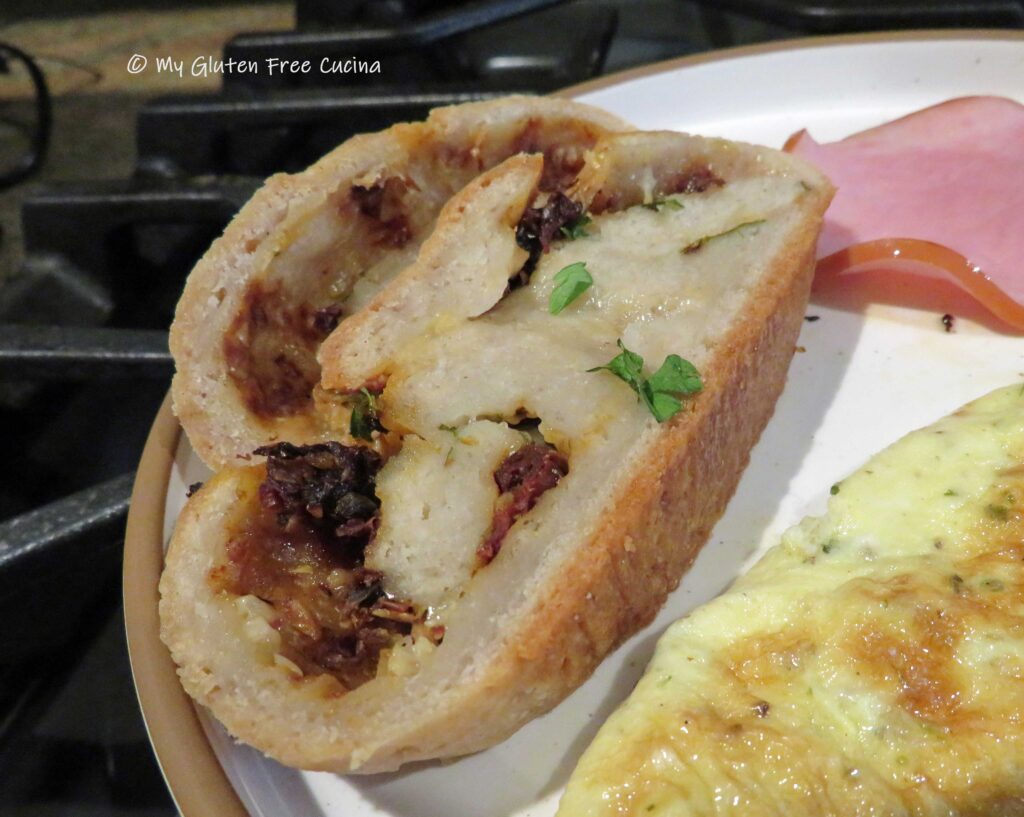
Pane Bianco literally translates to “White Bread”. That sounds oh so dull and ordinary, when this eyecatcher of a loaf is anything but. The S-shape looks so fancy, with the scored dough revealing a filling of sundried tomatoes, garlic, cheese and basil. It’s a stunner as it opens up during baking, and don’t get me started on the aroma!
This post contains affiliate links.
For this bake I used a 50/50 combination of Better Batter Artisan Flour blend and Better Batter Bread flour. I’ve done some experimenting with this mix, and I just love the resulting flavor and texture. You can use 360 g. of either flour, or a blend of the two like I did.
If you want to try this recipe the way I made it, you can order a bag of each flour blend at 30% off and bake along with me!
1/3 cup fresh basil leaves (or Italian parsley), chopped
1 tbsp. melted butter, for finishing
Preparation:
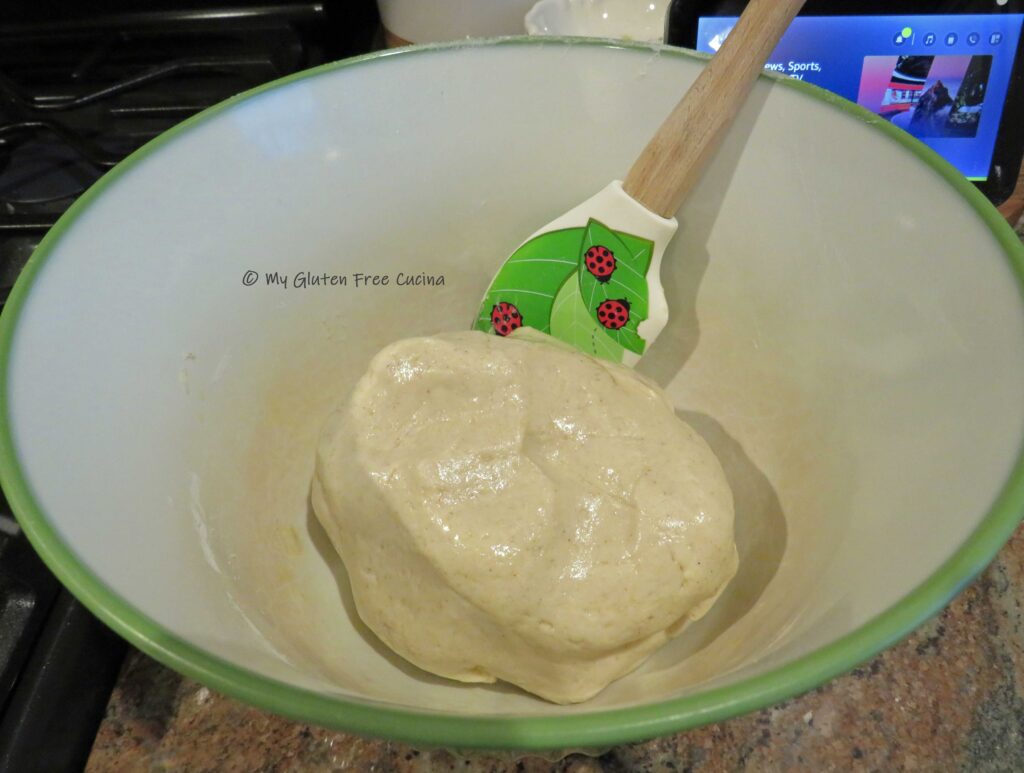
Whisk together the flours, yeast and salt. In the bowl of a stand mixer, combine the egg, milk, water and olive oil. Add the flour mixture to the wet ingredients and mix for 5 minutes with the paddle attachment to form the dough. Place the dough in an oiled bowl and let it rise for 45 minutes. It may not double and that’s ok.
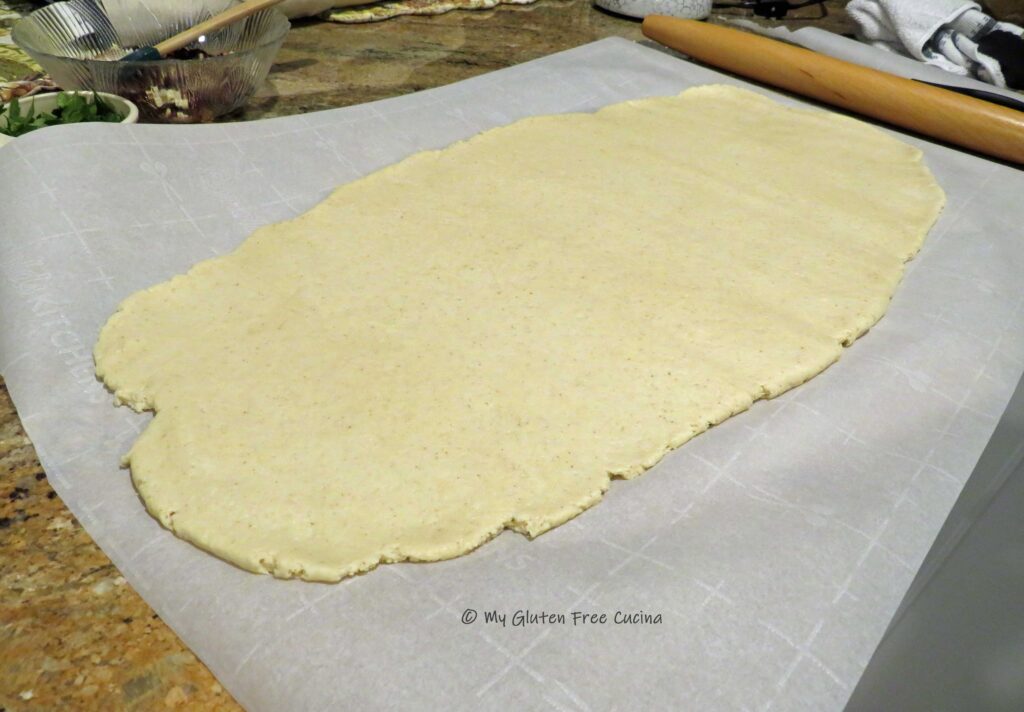
Measure a 2 ft. sheet of parchment paper. Roll the dough out into a rectangle shape, approximately 22″ x 8″.
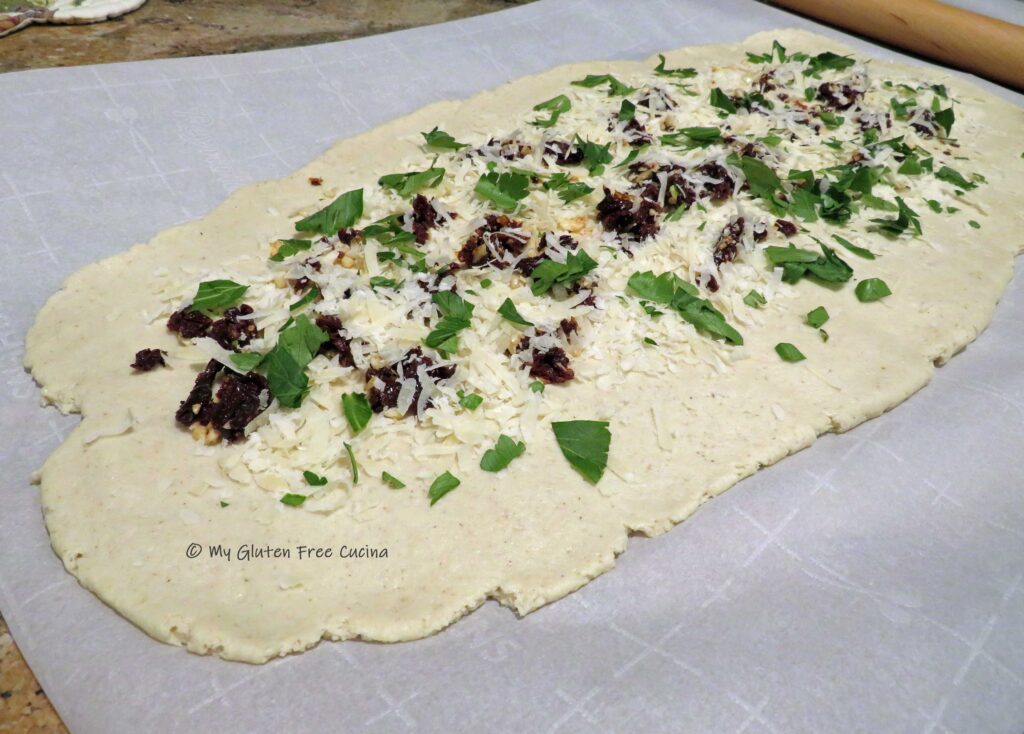
Spread with the sundried tomatoes, garlic, cheese and basil (I could not get fresh basil this time of year, so I used Italian parsley). Go easy on the filling, don’t add too much or the bread will be wet.
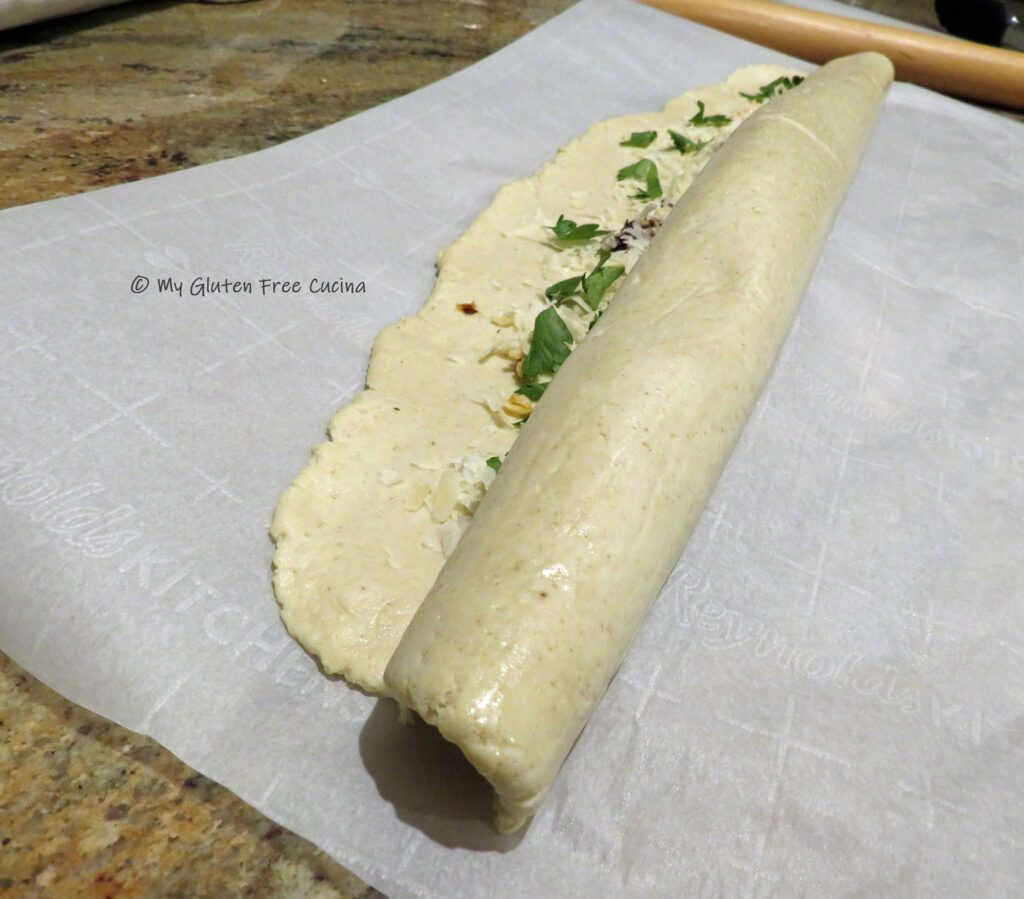
Using the parchment to assist you, roll the dough into a log.
Pinch the edges together and if they don’t seal use a fork to smooth out the seam.
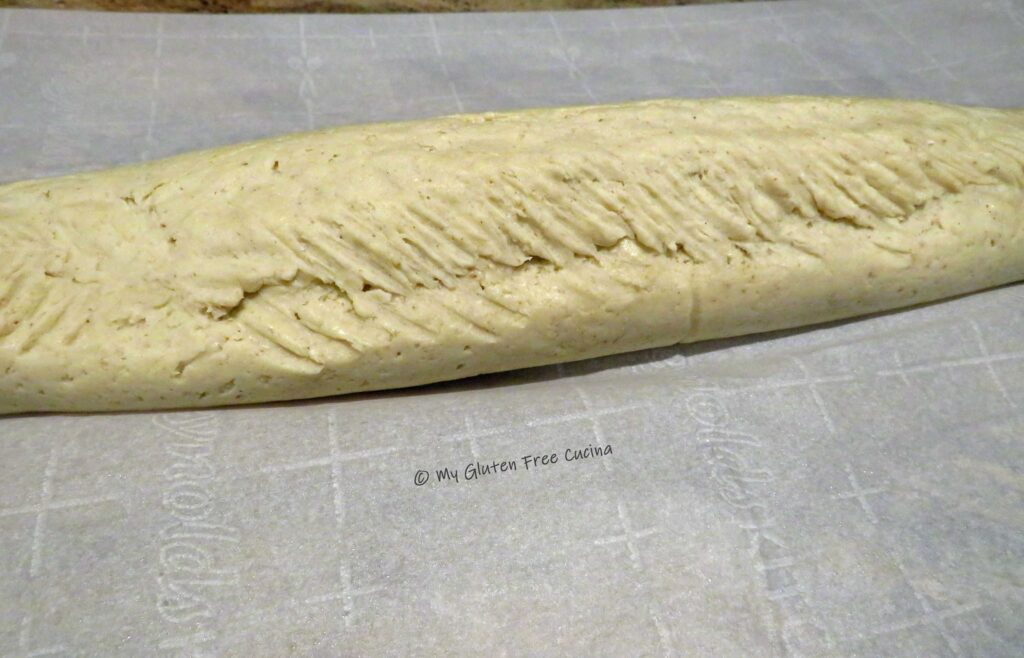
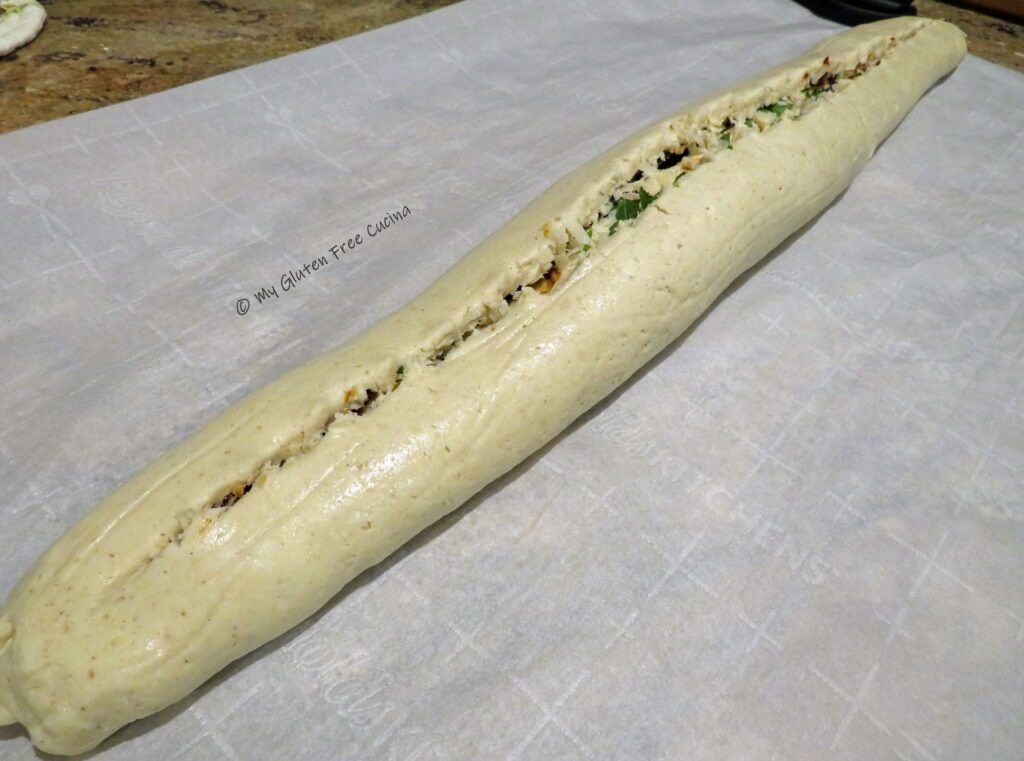
Place the roll seam side down on the parchment. Use kitchen shears to cut down the center from one end to another, leaving 1/2″ on each end.
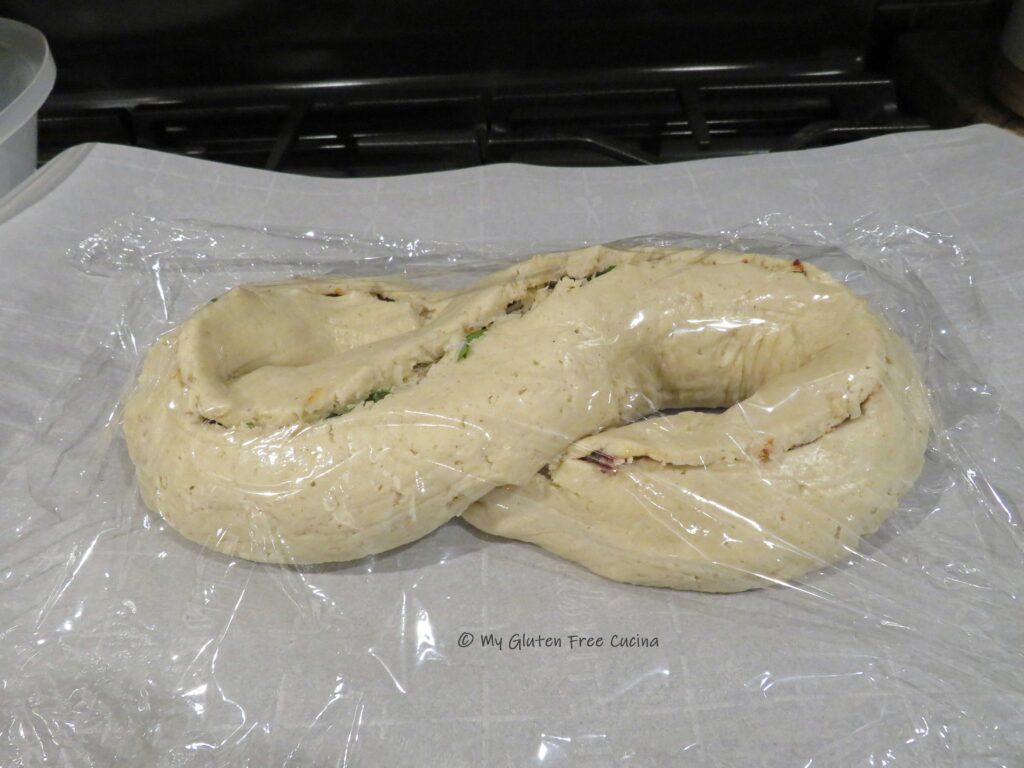
Carefully twist the dough into an S shape and tuck the ends underneath like this. Go slowly, so the dough doesn’t break (just pinch together if it does). Slide the loaf onto a baking sheet, cover with plastic wrap and let it rise for 45 minutes. Preheat the oven to 350º.
Bake for 45 minutes or until the internal temperature reaches 200º (check with a thermometer). Remove from the oven and brush with melted butter.
Cool slightly then slice and serve warm. This is one of those breads you do not want to wait on. That cheesy filling! Leftovers can be reheated in the microwave or toaster (try these toaster bags!).
You can store the loaf at room temperature for up to a day, then freeze the leftovers.
Notes ♪♫ The original recipe for Pane Bianco appeared here on the King Arthur website. Better Batter recommends that when adapting gluten bread recipes with their flour, you should increase the liquid ingredients by 50%. My gluten free adaptation includes this adjustment.
Pane Bianco literally translates to “White Bread”. That sounds oh so dull and ordinary, when this eyecatcher of a loaf is anything but. The S-shape looks so fancy, with the scored dough revealing a filling of sundried tomatoes, garlic, cheese and basil. It’s a stunner as it opens up during baking, and don’t get me started on the aroma!
Ingredients
UnitsScale
· 180gBetter Batter Artisan Flour Blend
· 180gBetter Batter Bread Flour
· 7g (1 pkg.) instant yeast
· 8gtable salt
· 45gegg (1 large)
· 170gmilk (I used 2%)
· 111g warm water
· 52golive oil
· 3/4cup shredded cheese (I used parmesan)
· 1/2cupsundried tomatoes in oil, drained and chopped
· 4 garlic cloves, minced
· 1/3cup fresh basil leaves (or Italian parsley), chopped
· 1 tbsp. melted butter, for finishing
Instructions
Whisk together the flours, yeast and salt. In the bowl of a stand mixer, combine the egg, milk, water and olive oil. Add the flour mixture to the wet ingredients and mix for 5 minutes with the paddle attachment to form the dough. Place the dough in an oiled bowl and let it rise for 45 minutes. It may not double and that’s ok.
Measure a 2 ft. sheet of parchment paper. Roll the dough out into a rectangle shape, approximately 22″ x 8″.
Spread with the sundried tomatoes, garlic, cheese and basil (I could not get fresh basil this time of year, so I used Italian parsley). Go easy on the filling, don’t add too much or the bread will be wet.
Using the parchment to assist you, roll the dough into a log.
Pinch the edges together and if they don’t seal use a fork to smooth out the seam.
Place the roll seam side down on the parchment. Use kitchen shears to cut down the center from one end to another, leaving 1/2″ on each end.
Carefully twist the dough into an S shape and tuck the ends underneath like this. Go slowly, so the dough doesn’t break (just pinch together if it does). Slide the loaf onto a baking sheet, cover with plastic wrap and let it rise for 45 minutes. Preheat the oven to 350º.
Bake for 45 minutes or until the internal temperature reaches 200º (check with a thermometer). Remove from the oven and brush with melted butter.
Cool slightly then slice and serve warm. This is one of those breads you do not want to wait on. That cheesy filling! Leftovers can be reheated in the microwave or toaster (try these toaster bags!).
You can store the loaf at room temperature for up to a day, then freeze the leftovers.
Notes
The original recipe for Pane Bianco appeared here on the King Arthur website. Better Batter recommends that when adapting gluten bread recipes with their flour, you should increase the liquid ingredients by 50%. My gluten free adaptation includes this adjustment.
Unauthorized use and/or duplication of this material without express and written permission from this blog’s author and/or owner is strictly prohibited.
Better Batter Collaborator
When you shop Better Batter | Gluten Free Flour, use my Promo Code MGFC30 for 30% off your non-sale purchase!
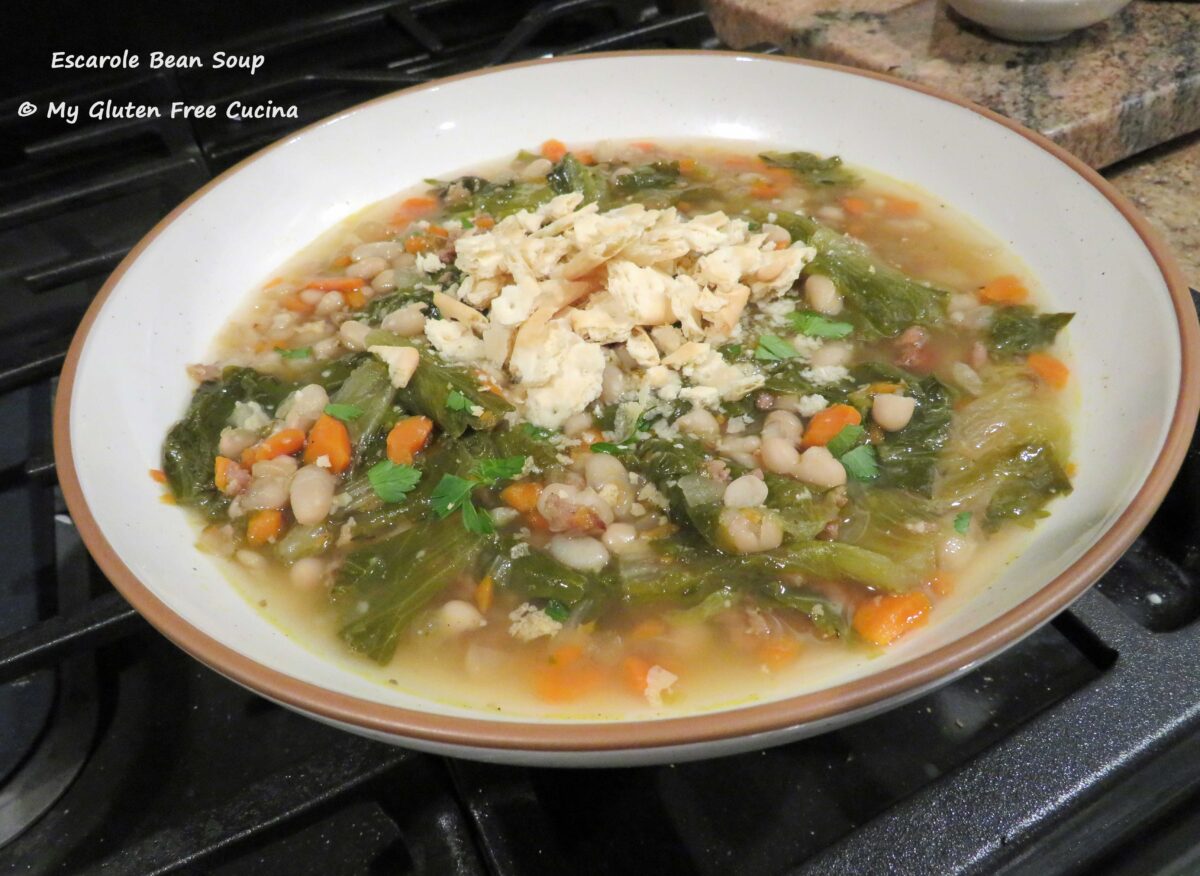
Escarole and Beans are a classic Italian combo, and this easy to prepare soup is just bursting with flavor thanks to the addition of Italian sausage.
I was nursing a sore shoulder while I made this, so instead of my usual hand dice I used an electric chopper. It turned out to be quite the time saver, and the coarse mince gave the soup a lot of body. To speed things up even more, I took a shortcut and used canned beans.
This was one delicious soup! I made a big pot and shared with a neighbor, and it got rave reviews! Rumor has it that this soup will cure the common cold but far be it from me to make medical claims! 😉
I used a 5-quart Dutch oven, large enough for a generous pot of soup. Begin by prepping the veggies. Mince the garlic, then give the carrots, celery and onion a few pulses in an electric chopper.
Cut the sausage links into 4 pieces and brown them in the pot.
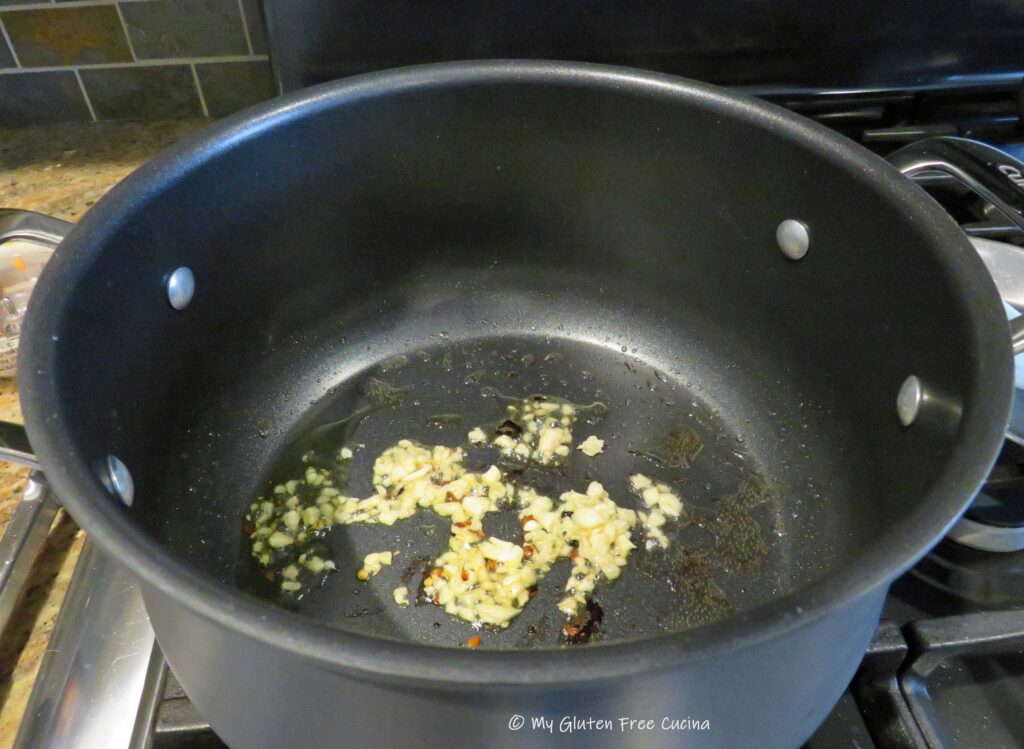
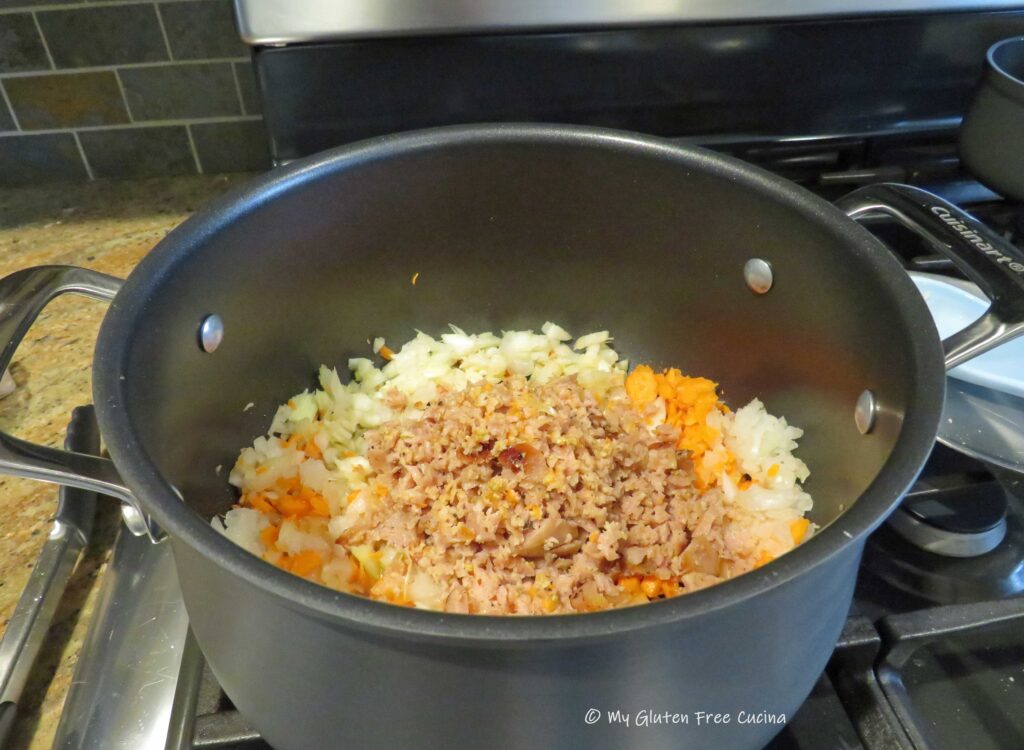
Remove the sausage, transfer to the electric chopper and pulse a few times to break it up. Leave any oil from the sausage in the pan and add 1 tbsp. olive oil. Add the red pepper flakes and garlic, stir and cook for 30 seconds. Don’t walk away, the garlic can burn very quickly!
Next add all of the veggies to the pan. Stir and cook for 1-2 minutes longer then add back the sausage.
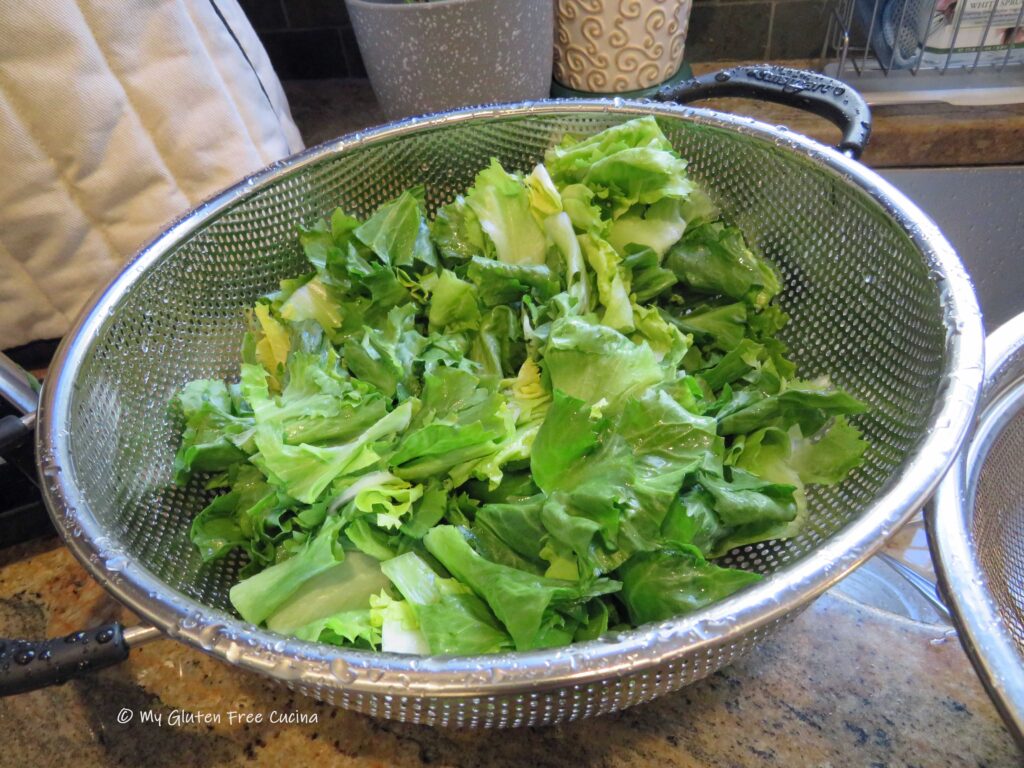
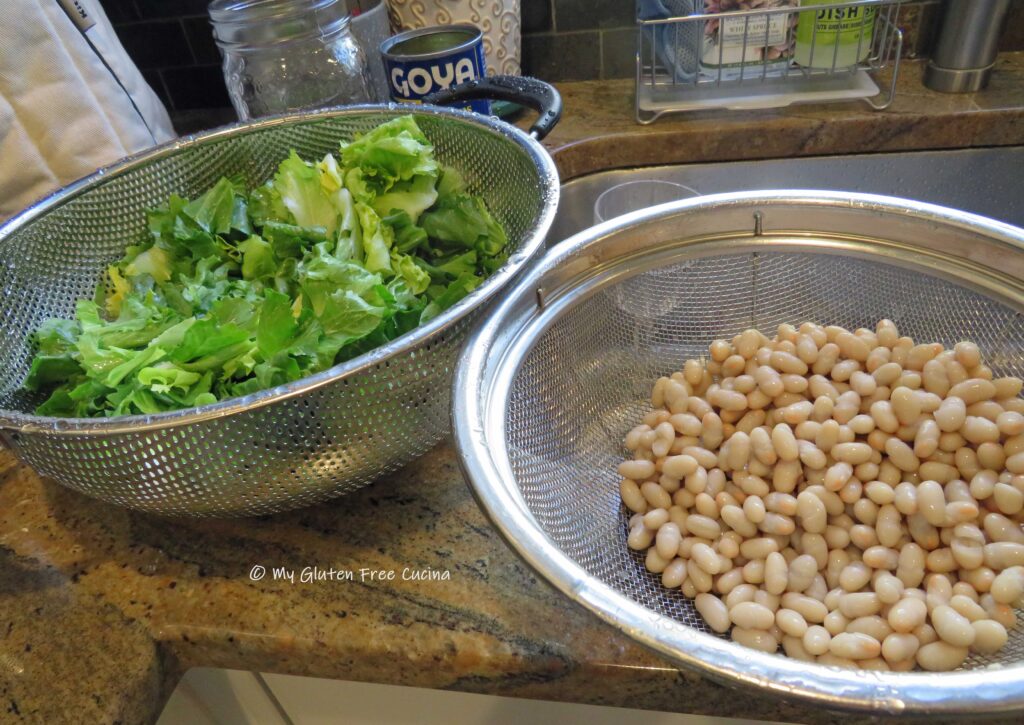
Stir in the beef broth, chicken broth, sage and thyme. Cover and simmer 30 minutes. Drain and rinse 2 cans of navy beans. Rinse the escarole leaves thoroughly and tear them into 2-3″ pieces.
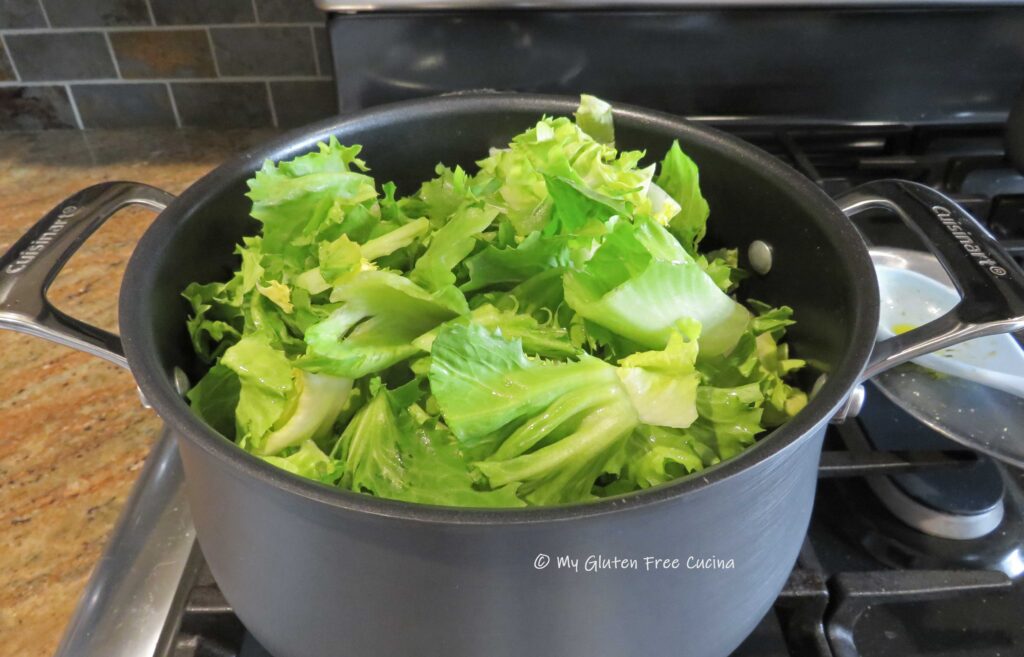
Stir the beans and escarole into the soup. Don’t worry, it will cook down!
Cover and simmer on low for another 20 minutes. Taste for seasoning and add salt if needed. Garnish with fresh parsley and serve with gluten free crackers and/or grated cheese.
Notes ♪♫ Watch ingredient labels on beans and broth. I used Goya navy beans, and Swanson beef and chicken broth. All were labeled gluten free. If you are limiting sodium, choose unsalted beans and broth, the sausage will have enough salt to flavor the soup.
One of the things I miss most since my Celiac diagnosis is Chinese takeout. Oh, how I loved those noodles, veggies and fried rice!
At first glance you might think that many of these dishes are gluten free, but did you know that soy sauce contains gluten? It’s true, traditional soy sauce is fermented with wheat, so it is off limits on the gluten free diet.
Fortunately, there are gluten free alternatives. For my Asian inspired dishes, I often use San-J Tamari in place of regular soy sauce. It’s brewed with soybeans and no wheat.
For those who need to be mindful of salt intake, Coconut Aminos can be a lower sodium alternative to gluten free soy sauce or tamari. It has that umami flavor profile, but with less salt.
Another favorite condiment, Hoisin Sauce can also be found in the Asian aisle in most markets. It’s sweeter and much thicker than soy sauce and can be used for glazing and dipping. In this recipe, I use all of these condiments to create a sweet and savory flavor profile.
Cook the rice according to package directions and set aside to cool. This step can be done ahead, in fact the rice works better in this recipe if it has been cooked in advance and refrigerated.
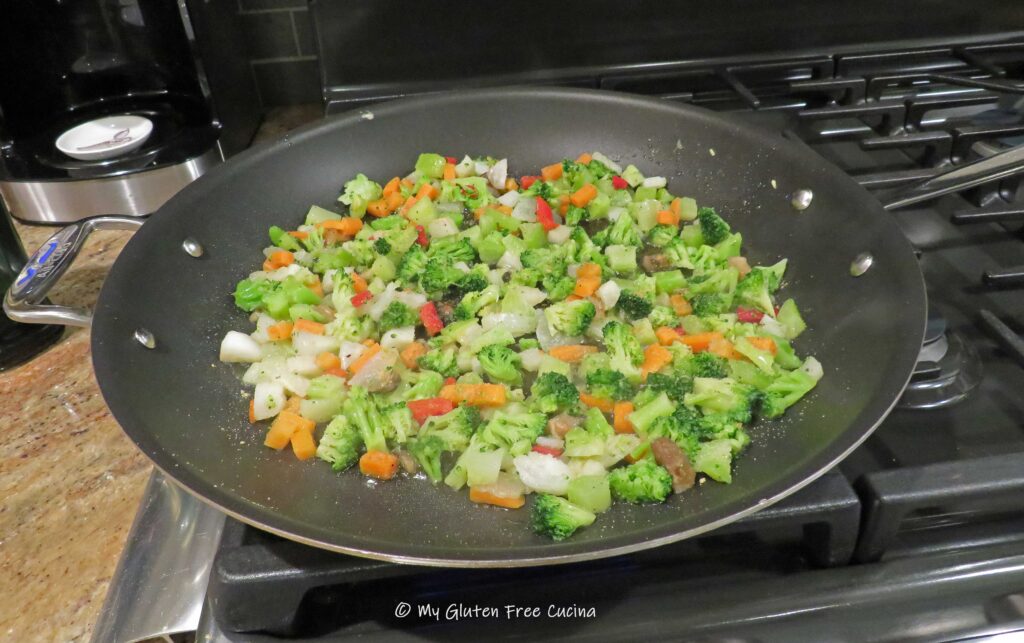
While the rice cooks, prep all the vegetables. Using a frozen stir fry blend like this one is a real time saver.
I did think the veggies were a bit large for fried rice, so I cut them into smaller pieces. Season the veggies with salt and pepper to taste. Sprinkle with garlic and ginger powder and leave them out to defrost.
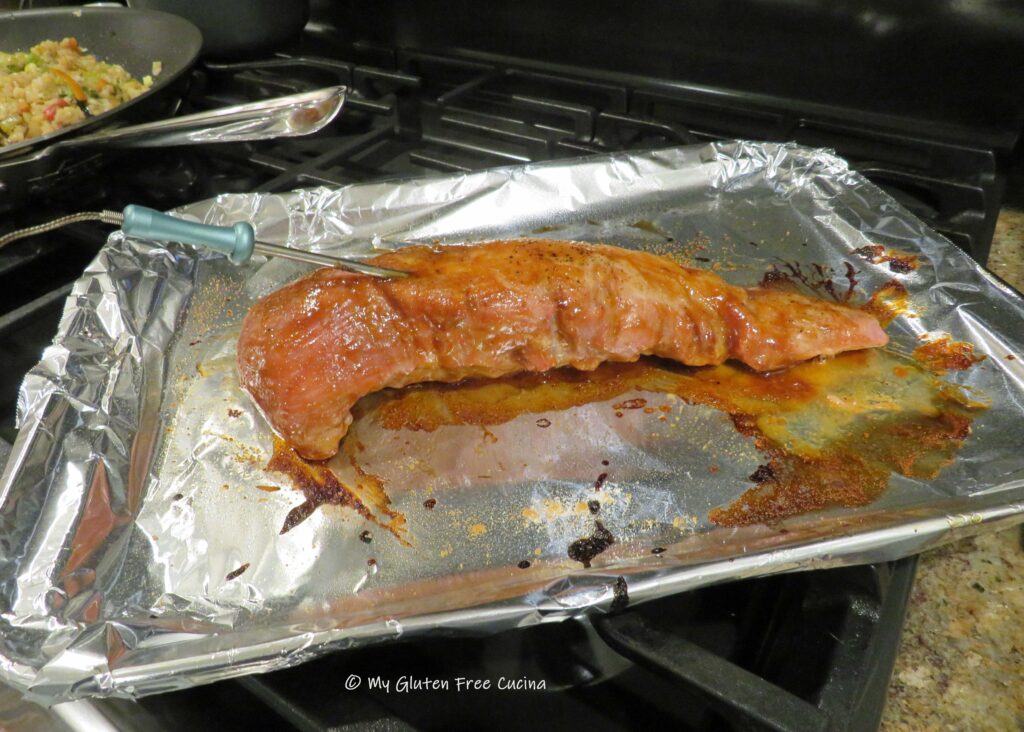
Preheat the oven to 375º. Arrange the tenderloin on a foil lined baking sheet. Sprinkle both sides with salt, pepper, garlic powder and ginger.
Insert an oven safe thermometer in the thickest part of the tenderloin and roast until it reaches 120º. Brush the roast with hoisin sauce and return to the oven until the internal temperature reaches 140º. When the meat is done, let it rest for 10 minutes.
For the rice, heat a large nonstick skillet over medium low and mist with cooking spray (I like Bertolli because it doesn’t damage my nonstick pans). Whisk the egg with 1 tbsp. water and scramble. Crumble the egg and set aside.
Next, add a little olive oil to the skillet with the veggies. Drizzle with just a little sesame oil, and sprinkle salt, pepper, garlic and ginger. When cooked through, add a few shakes of Tamari or Coconut Aminos.
Add the cooked rice and egg back to the skillet, with more sesame oil, Tamari and/or coconut aminos. The amount you add is up to you, just taste as you go.
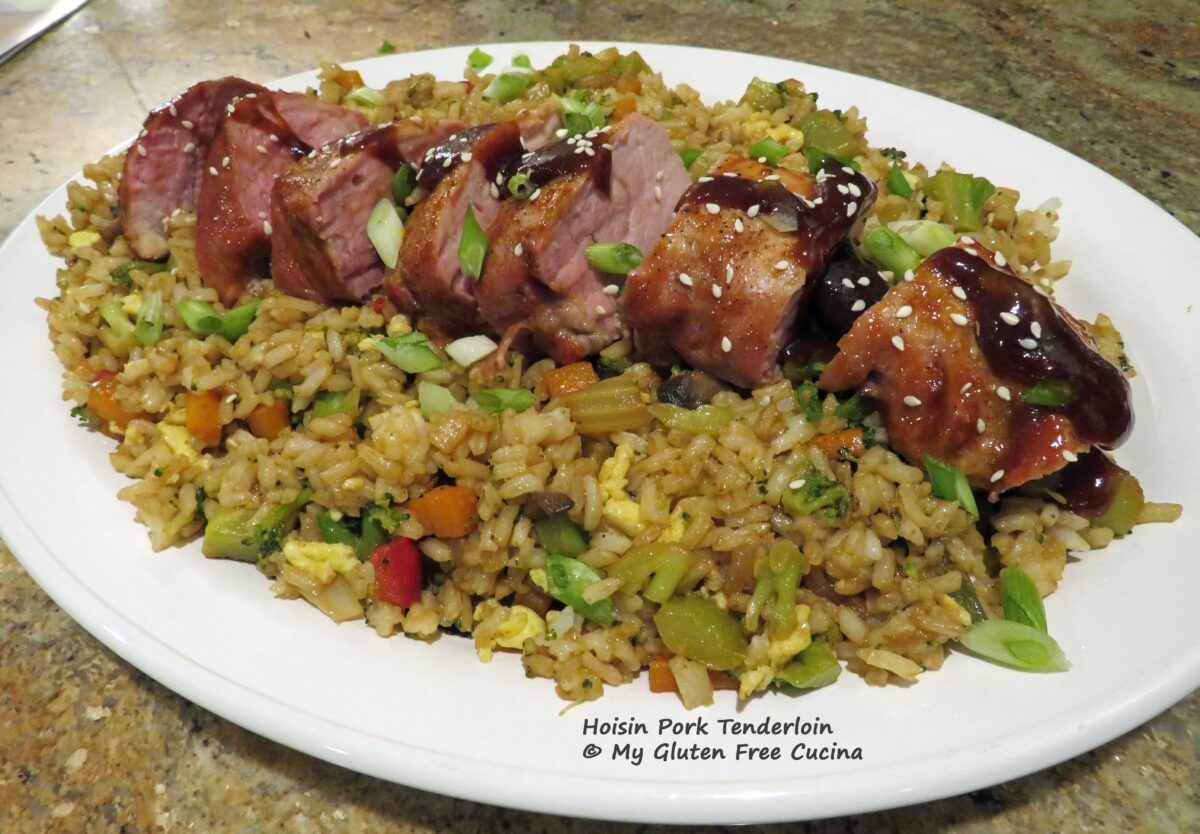
To plate, transfer the fried rice to a serving dish. Slice the tenderloin and arrange it over the rice. Drizzle hoisin sauce over the pork, and garnish with scallions and sesame seeds.
This Asian inspired dish is better than any restaurant! It has all the flavors that you have been missing, minus the gluten! Everyone in your family will love it!
Notes ♪♫ Gluten free Asian condiments can be found in most markets and online. Some of my favorite brands are San J, Sun Luck, and Coconut Secret. Always look for the gluten free label, as some brands will have both a regular and gluten free version of the same product.
Originally posted 10/21/2019 * Updated and rephotographed 11/20/2024
This Asian inspired dish is better than any restaurant! It has all the flavors that you have been missing, minus the gluten! Everyone in your family will love it!
Ingredients
UnitsScale
· 1cup uncooked long grain white rice
· 2cupswater
· 1/2 tsp. salt
· 14.4 oz. bag frozen stir fry vegetables (or fresh veggie combo of your choice)
· 1lb. pork tenderloin
· salt and pepper
· garlic powder
· ginger powder
· 1 egg
· 1 tbsp. water
· olive oil
· sesame oil
· cooking spray
· gluten free Hoisin sauce
· gluten free Tamari, or Coconut Aminos
· fresh scallions for garnish
· sesame seeds for garnish
Instructions
Cook the rice according to package directions and set aside to cool. This step can be done ahead. In fact, the rice works better in this recipe if it has been cooked in advance and refrigerated.
While the rice cooks, prep all the vegetables. Using a frozen stir fry blend is a real time saver.
Season the veggies with salt and pepper to taste. Sprinkle with garlic and ginger powder and leave them out to defrost.
Preheat the oven to 375º. Arrange the tenderloin on a foil lined baking sheet. Sprinkle both sides with salt, pepper, garlic powder and ginger.
Insert an oven safe thermometer in the thickest part of the tenderloin and roast until it reaches 120º. Brush the roast with hoisin sauce and return to the oven until the internal temperature reaches 140º. When the meat is done, let it rest for 10 minutes.
For the rice, heat a large nonstick skillet over medium low and mist with cooking spray). Whisk the egg with 1 tbsp. water and scramble. Crumble the egg and set aside.
Next, add a little olive oil to the skillet with the veggies. Drizzle with just a little sesame oil, and sprinkle salt, pepper, garlic and ginger. When cooked through, add a few shakes of Tamari or Coconut Aminos.
Add the cooked rice and egg back to the skillet, with more sesame oil, Tamari and/or coconut aminos. The amount you add is up to you, just taste as you go.
To plate, transfer the fried rice to a serving dish. Slice the tenderloin and arrange it over the rice. Drizzle hoisin sauce over the pork, and garnish with scallions and sesame seeds.
Notes
Gluten free Asian condiments can be found in most markets and online. Some of my favorite brands are San J, Sun Luck, and Coconut Secret. Always look for the gluten free label, as some brands will have both a regular and gluten free version of the same product.
Unauthorized use and/or duplication of this material without express and written permission from this blog’s author and/or owner is strictly prohibited.









 Peel the garlic cloves and slowly warm them in the olive oil over lowest possible heat. A
  Mince half of the rosemary and thyme and add to the butter along with the lemon zest. Mash it together with a fork.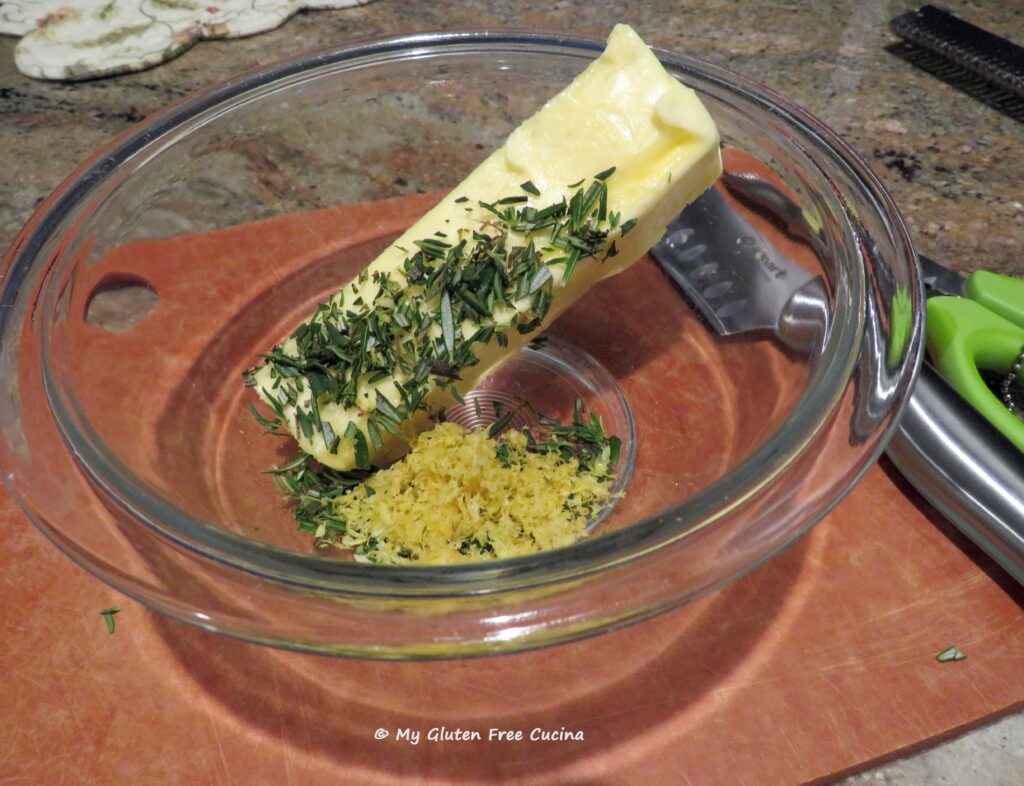
 -Preheat the oven to 425º. Remove the giblets packet from the chicken.
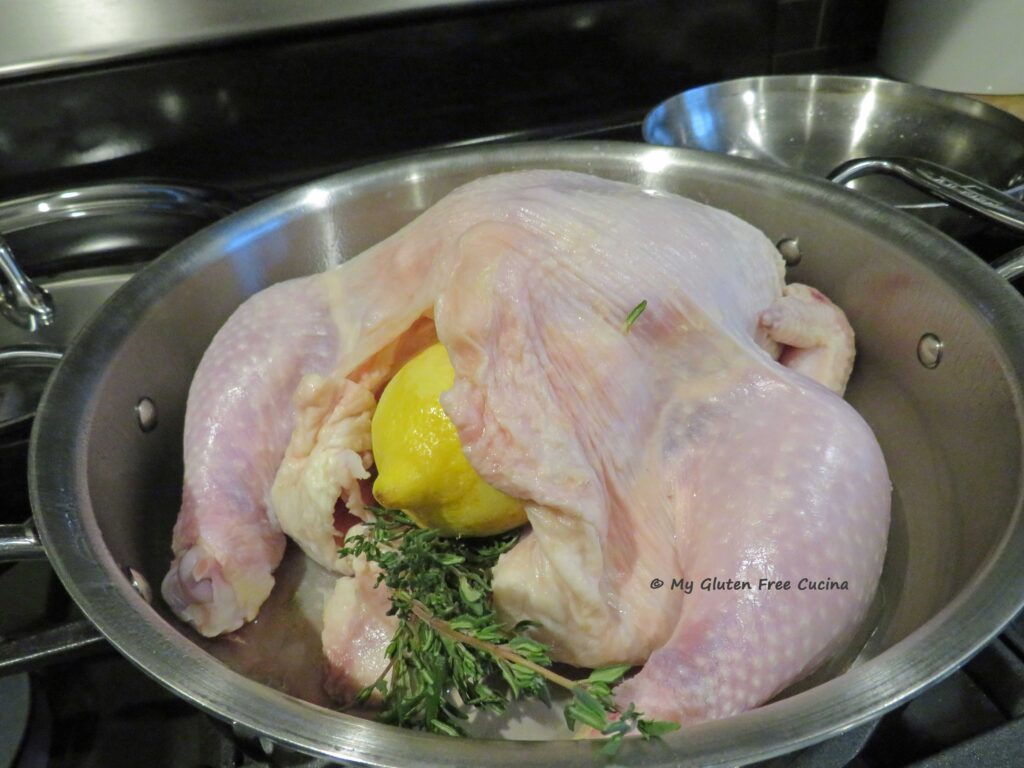 -Rub the butter mixture all over the chicken, be sure to coat the wings and legs. Season with salt and pepper.
 Roast uncovered for 1 to 1-1/2 hours, or until a
 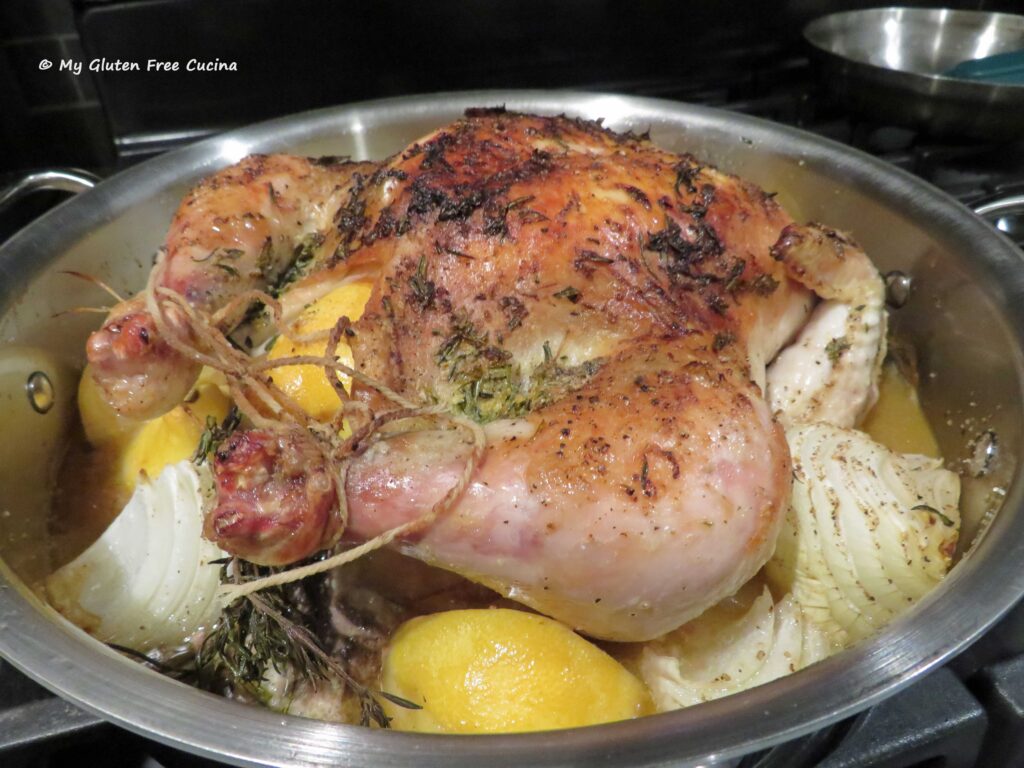 The skin should be nicely browned. Be sure to let it rest for 10 minutes before carving.
 Notes ♪♫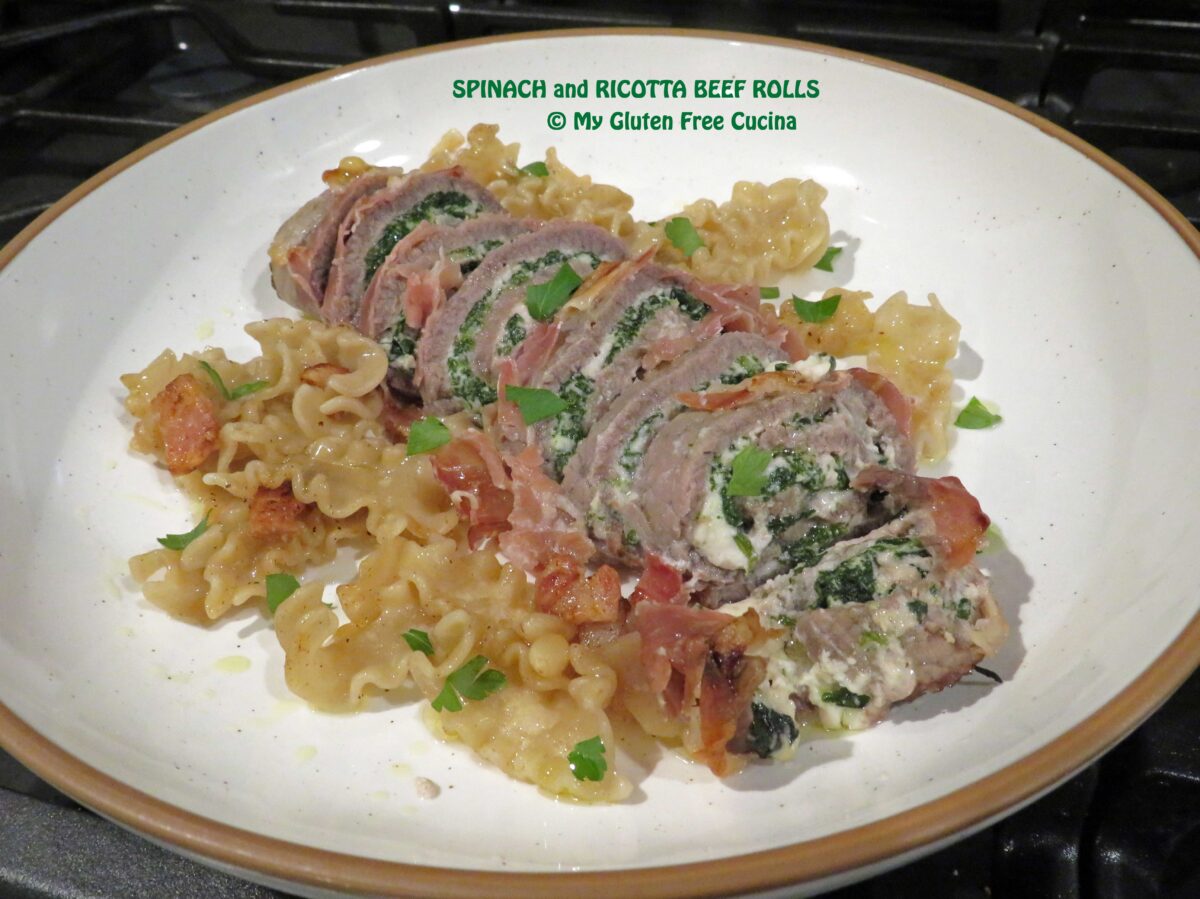
 Rinse the chicken thoroughly and pat dry. Place it in a
  To make the marinade, toast the whole peppercorns, coriander seed and fennel seed in a hot skillet for 2 minutes, just until fragrant. Grind in a
  Now rub the chicken all over with the spice mixture. Cover and refrigerate for 4 hours.
 Wrap the brick in aluminum foil.
 Transfer to the oven and continue cooking for 45 minutes to an hour or more, depending on the size of the chicken. Use a
  Carefully remove the brick, turn the chicken, skin side up onto a serving platter and bring it to the table for a gorgeous presentation!
 Look at the color! Beautifully browned and the meat is so moist! The marinade is so aromatic, and I know you are going to love the flavor.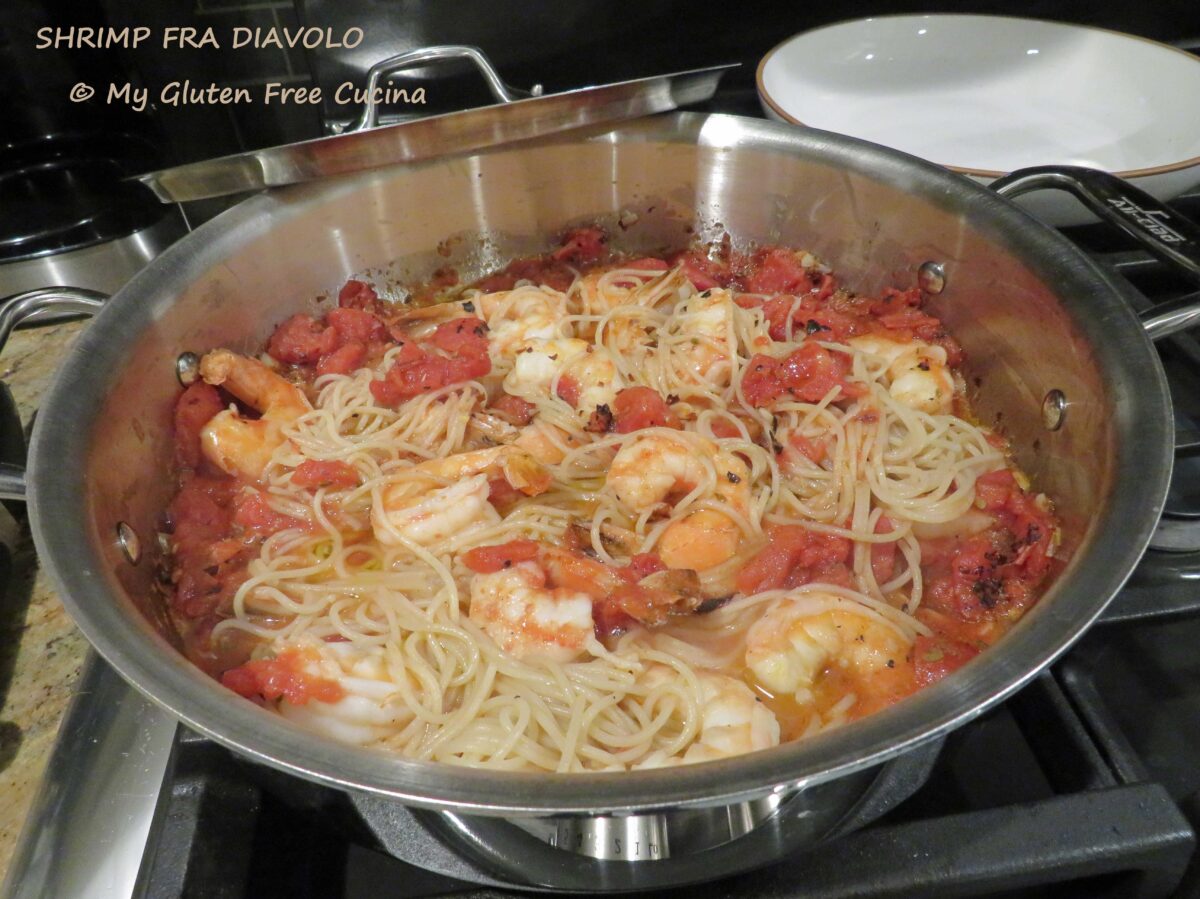
 Ingredients: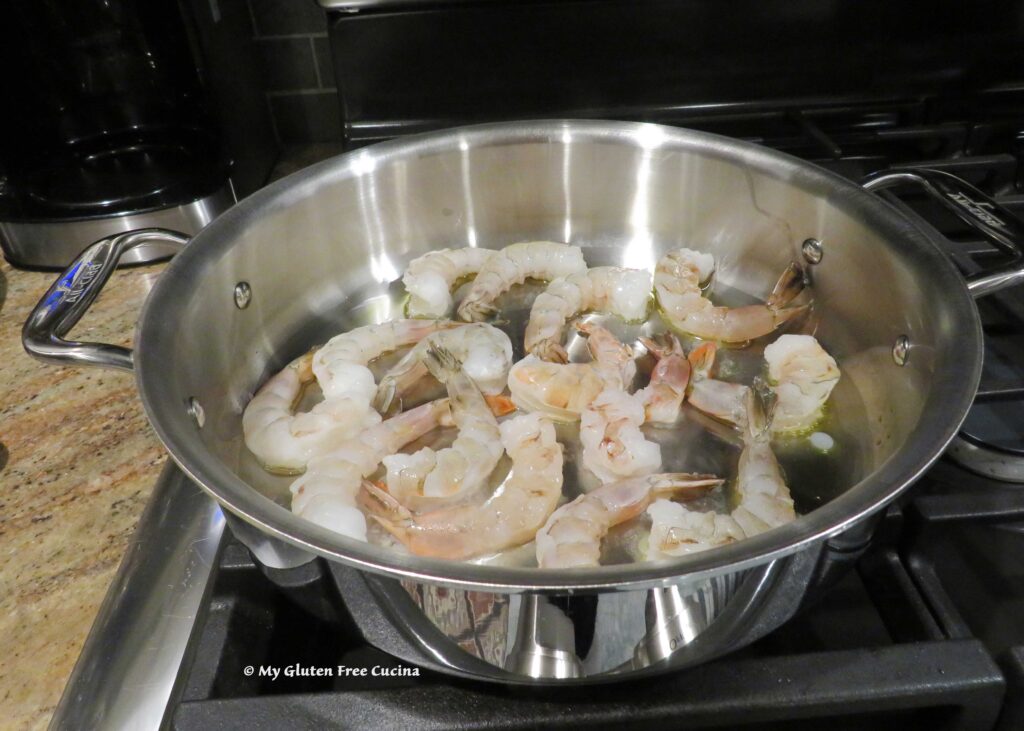
 Remove the shrimp to a bowl and add another tbsp. olive oil to the skillet. Add the garlic and red pepper flakes, and cook for 30 seconds, stirring several times.
 Add the fire roasted tomatoes with juice, 1/2 tsp. oregano and salt to taste.
 Cook the pasta to 2 minutes less than package directions. With 4 minutes to go on the pasta, add the shrimp to the sauce.
 Drain the pasta, add it right into the sauce and toss with 1 more tbsp. olive oil and more red pepper flakes if you dare! ♨️
 Transfer to serving bowls and garnish with fresh Italian parsley.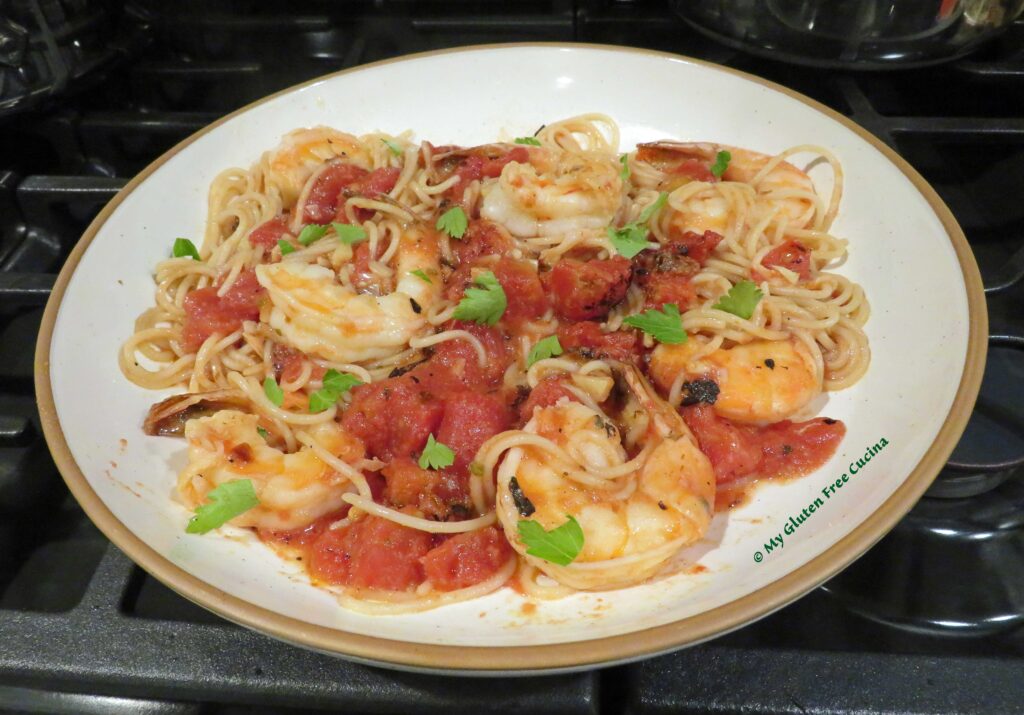




 Pinch the edges together and if they don’t seal use a fork to smooth out the seam.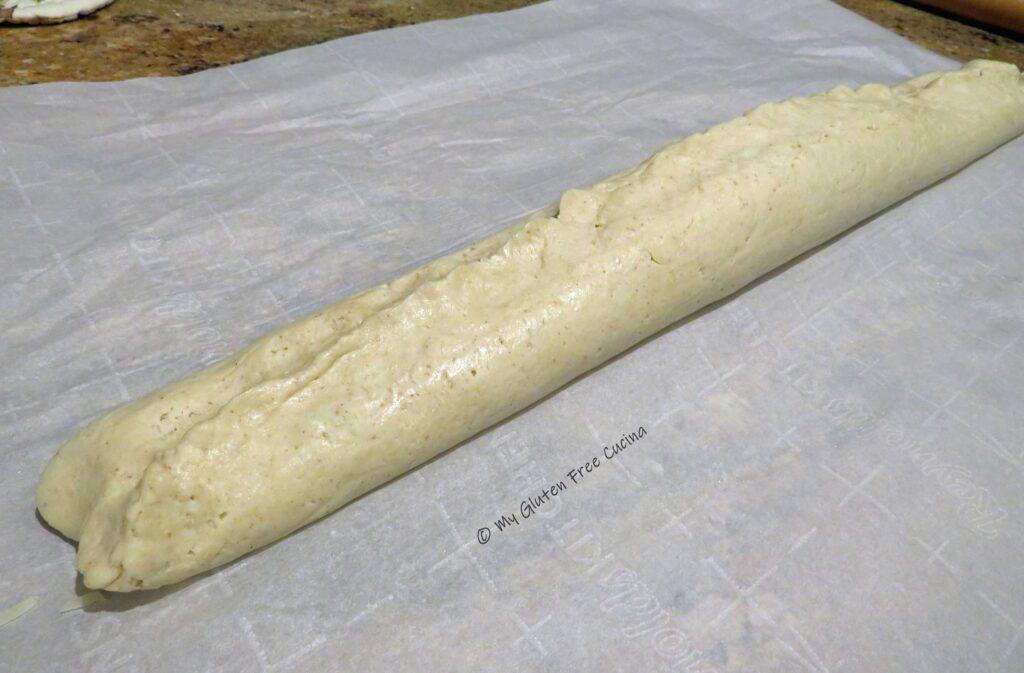
 You can store the loaf at room temperature for up to a day, then freeze the leftovers.
 Preparation: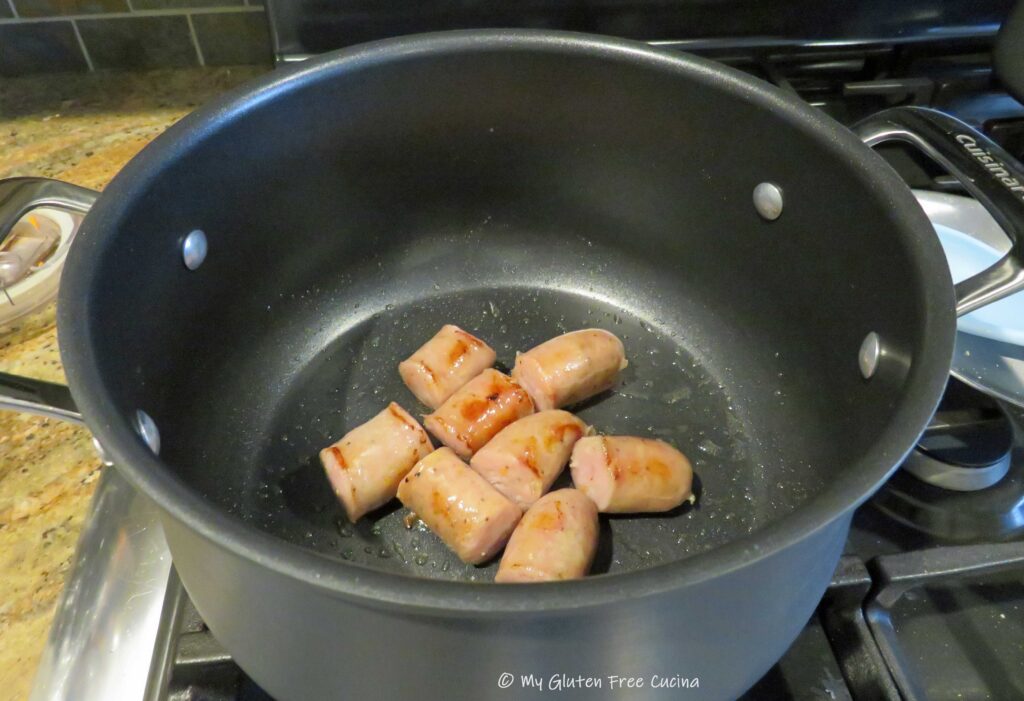
 Cover and simmer on low for another 20 minutes. Taste for seasoning and add salt if needed. Garnish with fresh parsley and serve with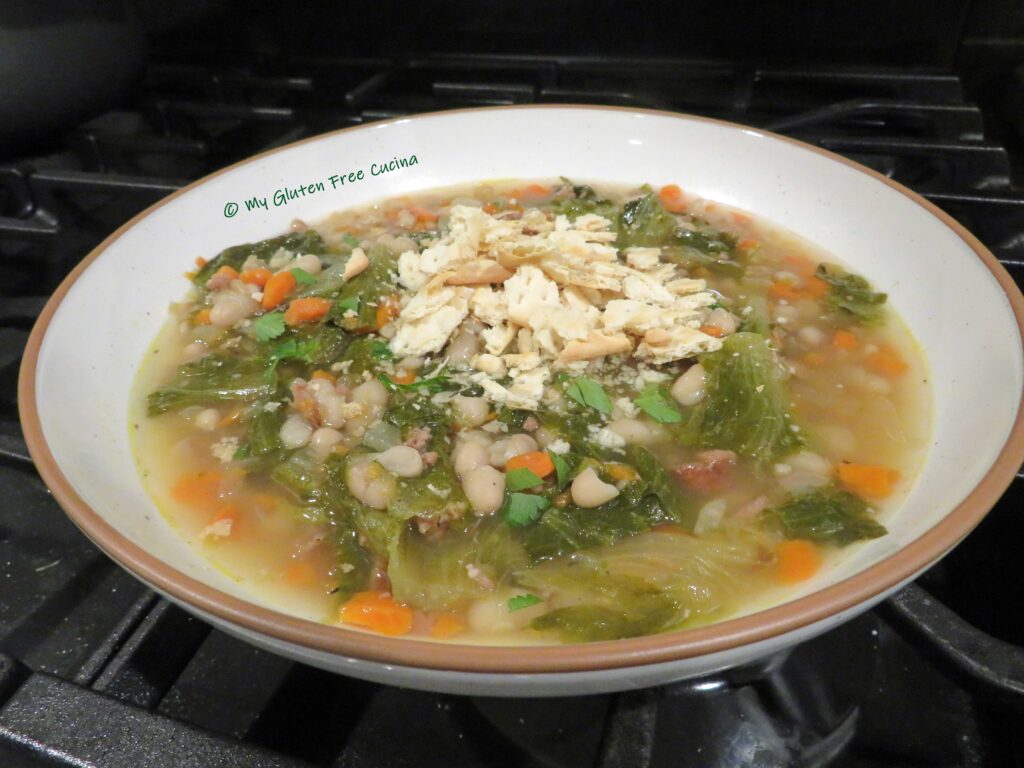

 Preparation:
 I did think the veggies were a bit large for fried rice, so I cut them into smaller pieces. Season the veggies with salt and pepper to taste. Sprinkle with garlic and ginger powder and leave them out to defrost.