
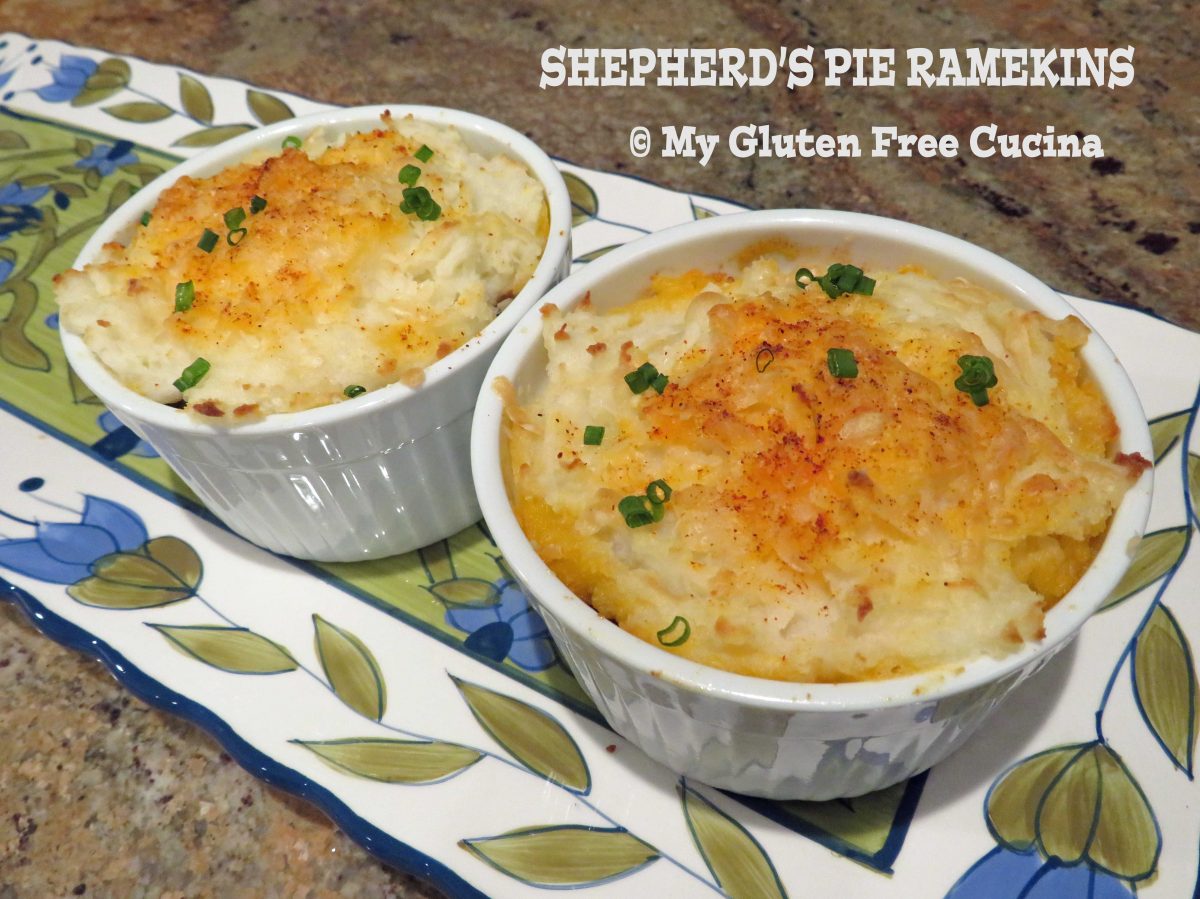
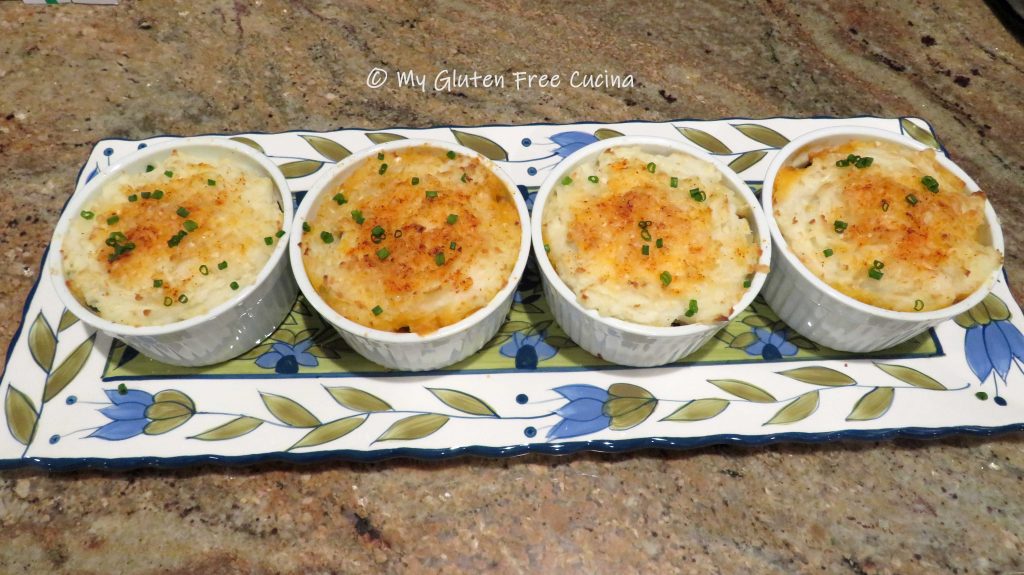
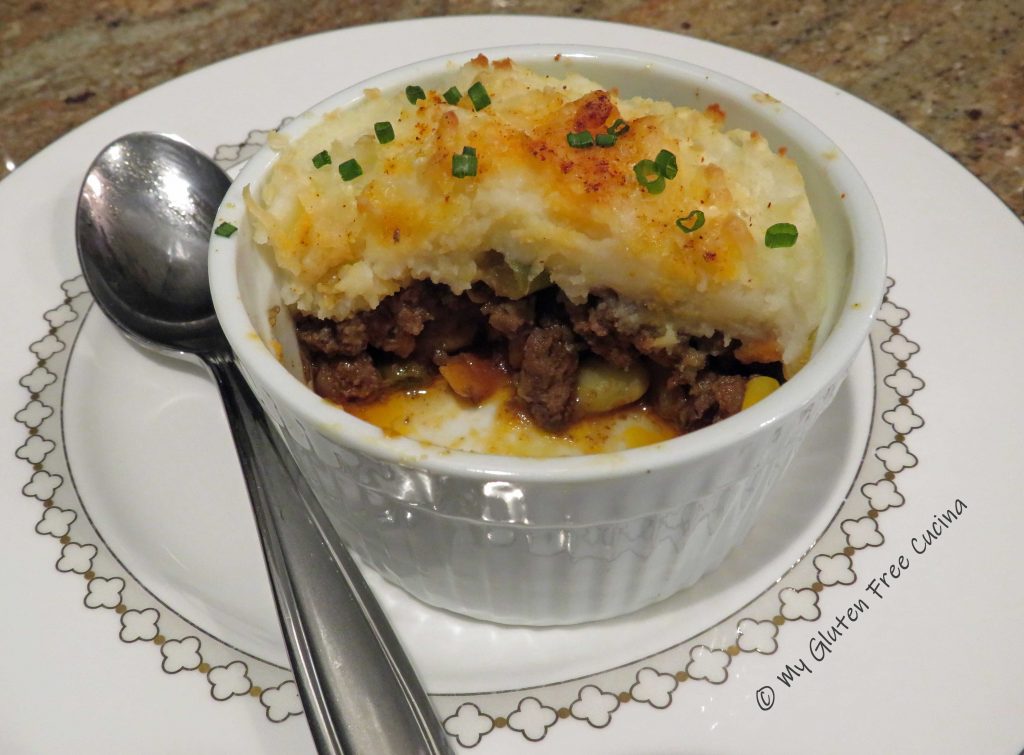
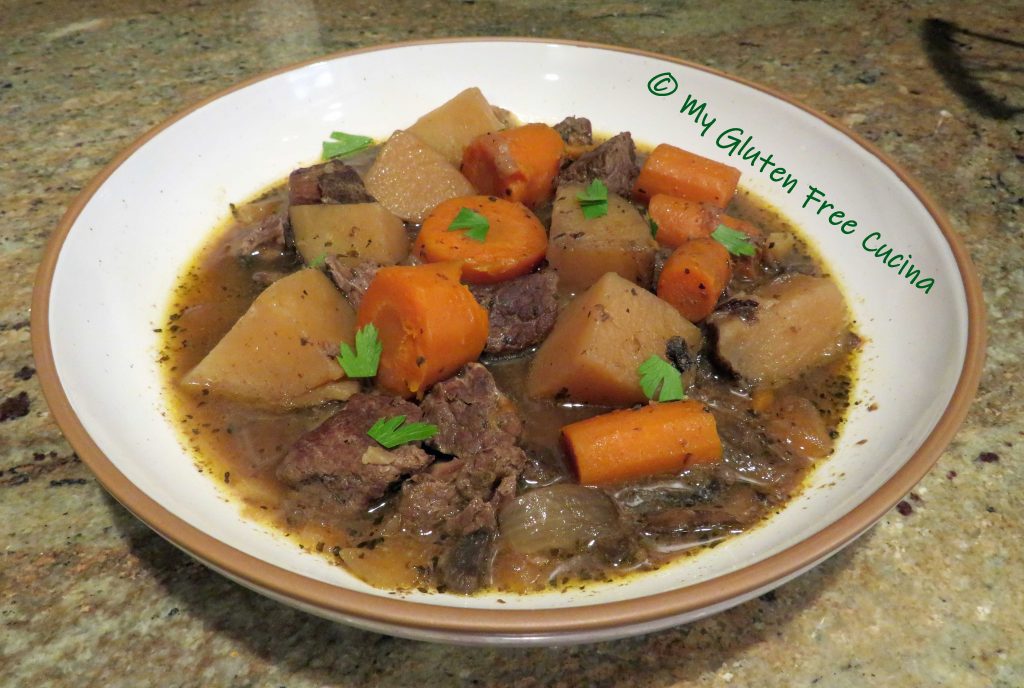
Gluten Free Shepherd’s Pie Ramekins
Individual serving ramekins take this ordinary comfort food to dinner party status! The presentation will wow your guests, while still keeping it fun and casual! I love using the ramekins for portion control, and one serving was plenty filling!
Most of the ingredients are straight from the pantry, like ground beef, frozen mixed veggies, and instant mashed potatoes! Yes, I cheated and used instant mashed potatoes from Idahoan, I always keep them on hand. (Check out how I use them in my meatballs and meatloaf!)
4 Servings
This post contains affiliate links.
Ingredients:
- 12 oz. lean ground beef
- 1-2 tbsp. olive oil
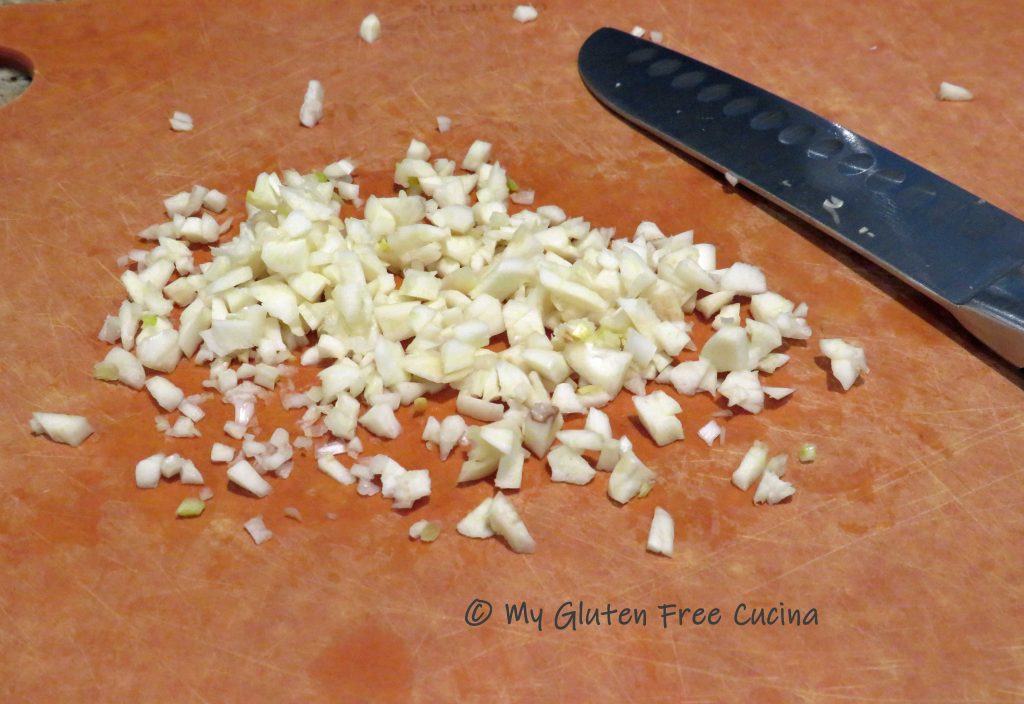
- 2 cloves garlic, minced
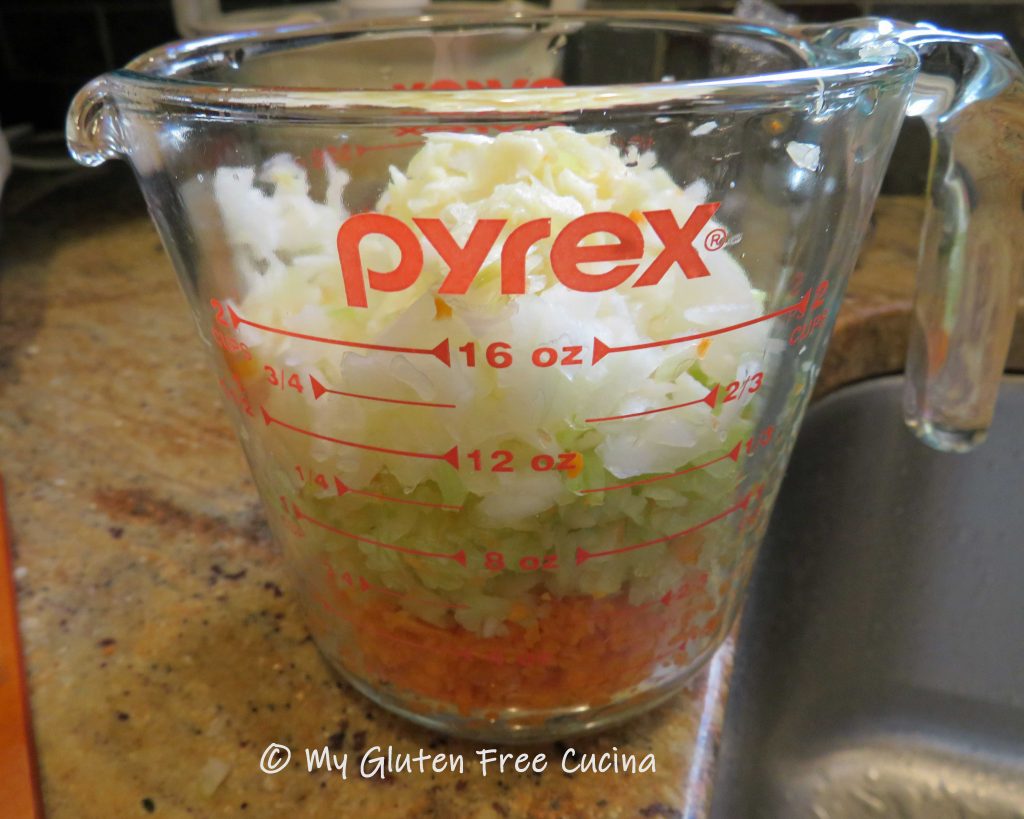
- 1/2 cup diced sweet onion
- 1-1/2 cups frozen mixed vegetables
- 1/2 tsp. thyme
- fresh ground pepper
- seasoned salt
- 2 tbsp. tomato paste
- 1 tbsp. gluten free Worcestershire sauce
- 1 cup beef or vegetable broth
- 1 cup gluten free instant mashed potato flakes
- cooking spray
- 1/4 cup grated cheese
- paprika
- fresh chives for garnish
Preparation:
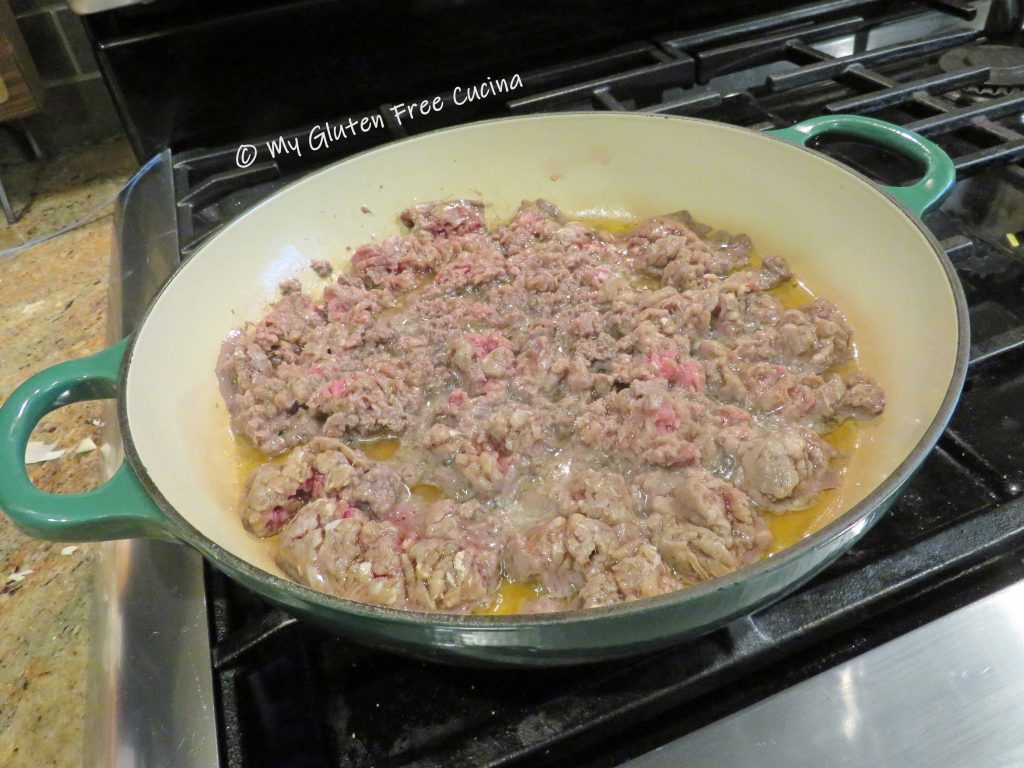
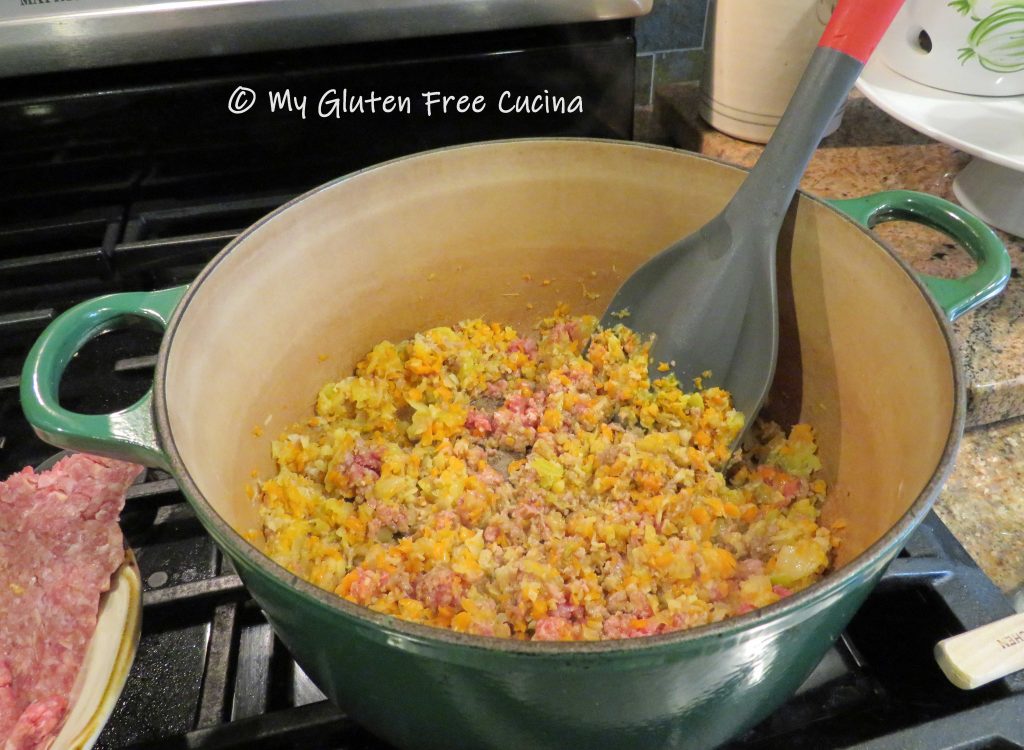
Heat a braising pan or deep skillet with olive oil. Brown the beef, breaking it up with a spatula. Season with fresh ground pepper and seasoned salt.
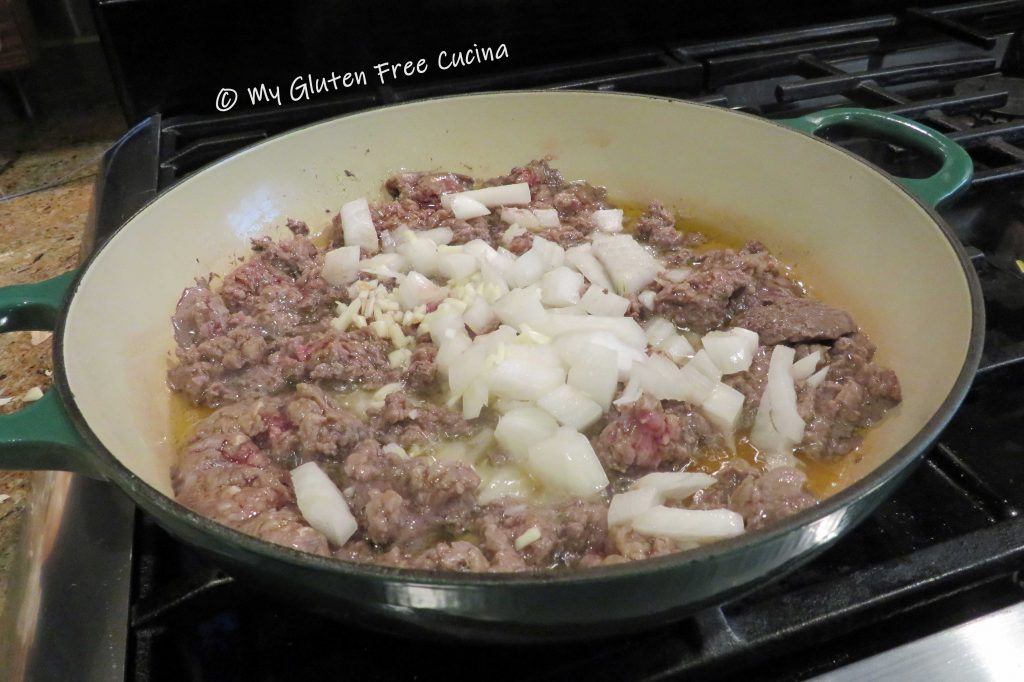
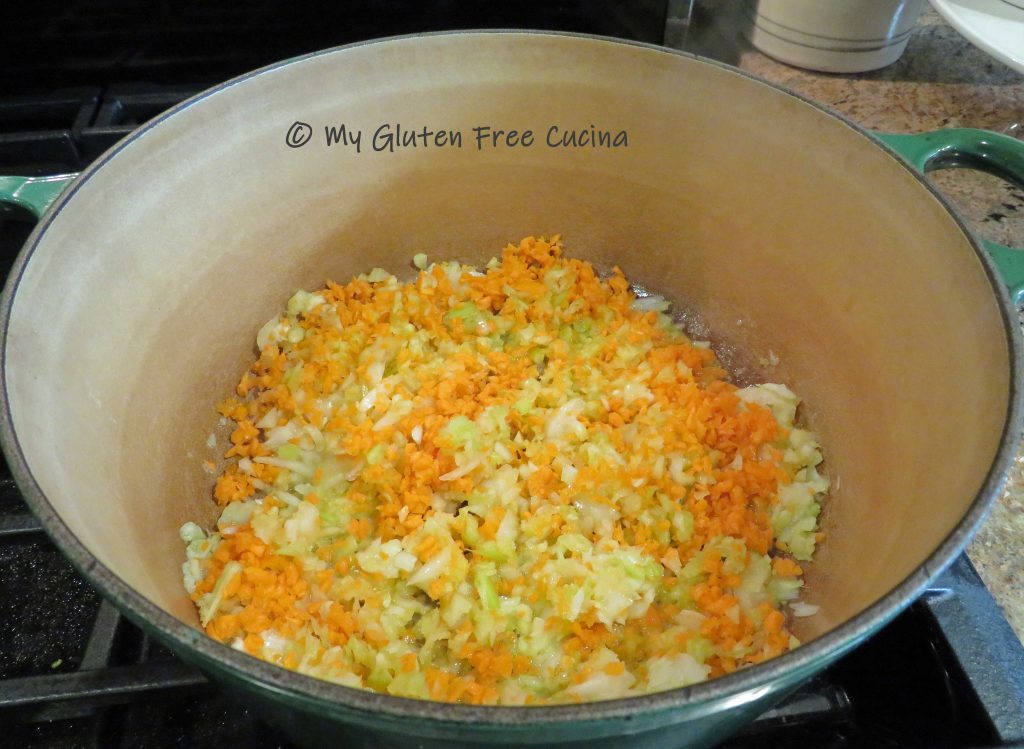
Add the garlic and onion. Continue cooking several minutes then add the mixed vegetables, and thyme.
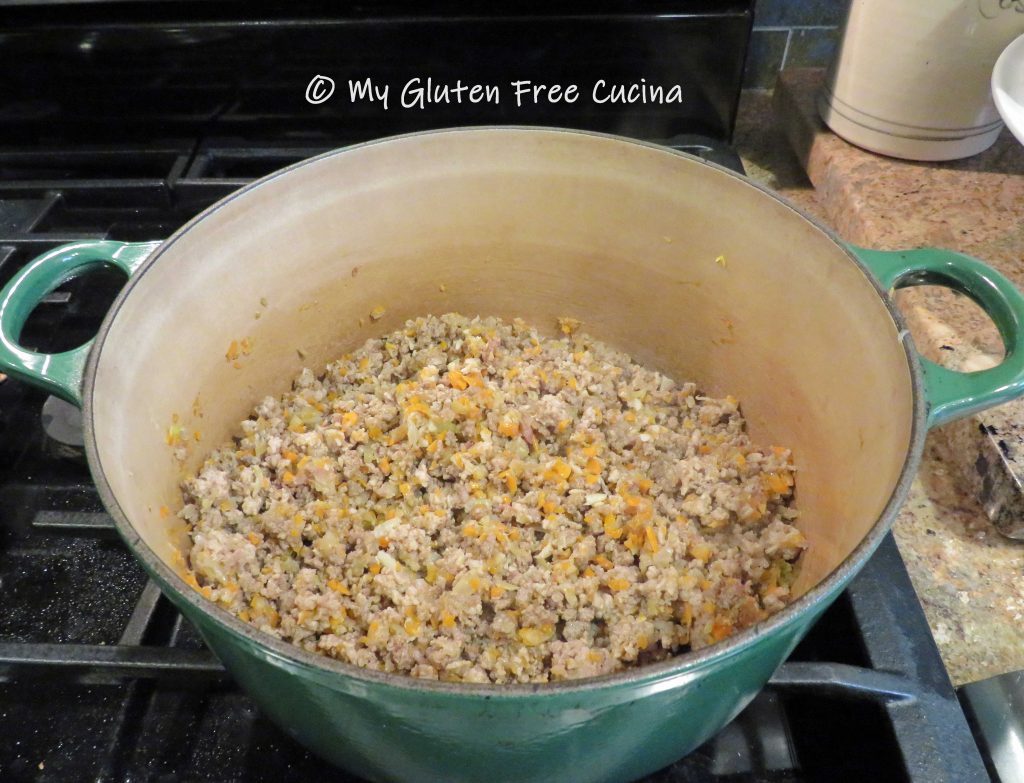
Clear a spot in the center of the pan and add the tomato paste. Let it toast for a minute then stir into the meat and veggies. Stir in the broth and Worcestershire sauce, then bring to a boil.
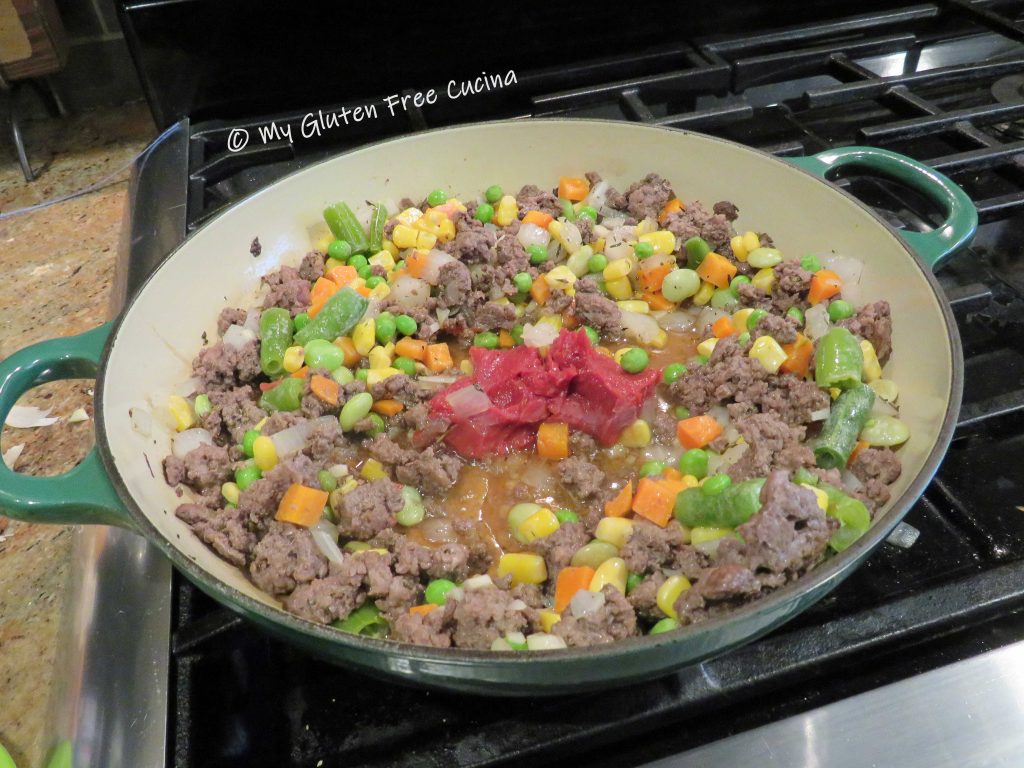
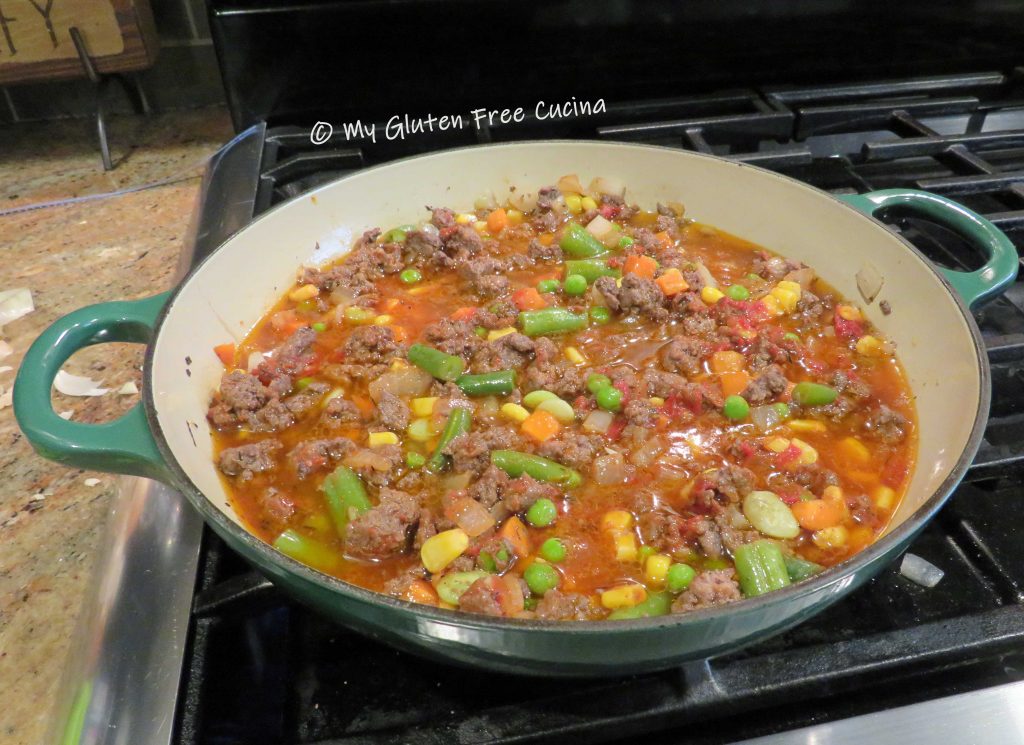
Turn the heat down to a low simmer and cook for 30 minutes or until most of the liquid has evaporated. Stir every 5 minutes.

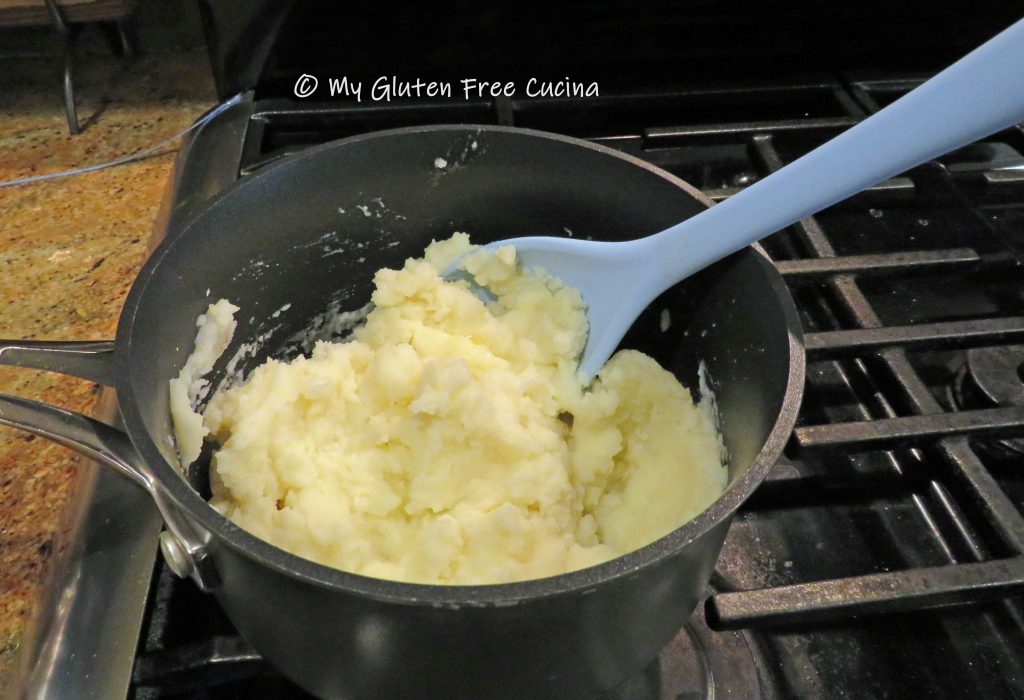
Preheat the oven to 375º. In a small sauce pot, prepare the instant mashed potatoes according to package directions.
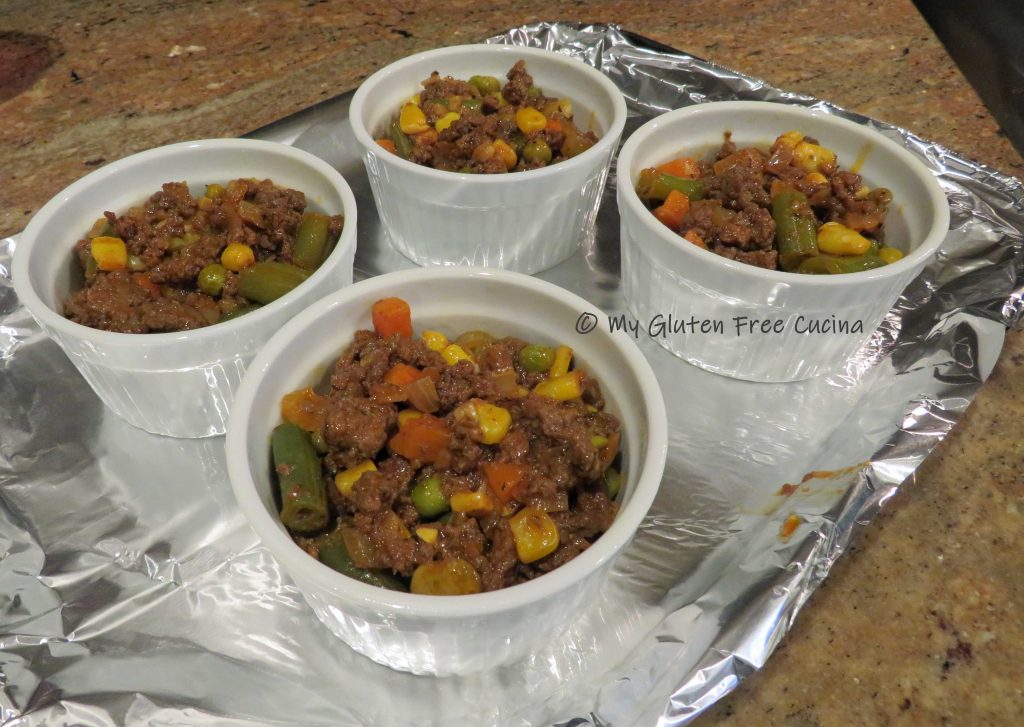
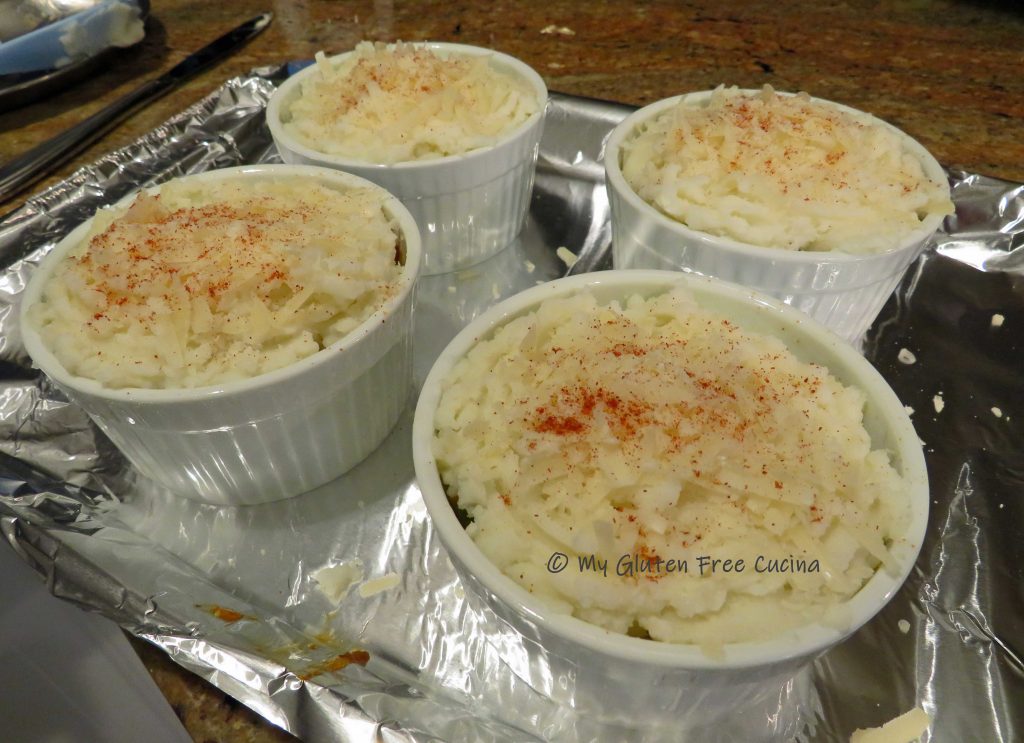
Spray the ramekins with cooking spray and arrange them on a baking sheet (this will make it easy to transfer in and out of the oven). Spoon the filling into the ramekins, leaving room for the mashed potatoes.
Spread mashed potatoes over the top and use a fork to smooth it out. Top with grated cheese and sprinkle with paprika. Bake for 15 minutes, then finish under the broiler on low for 2 more minutes.
Garnish with fresh chives and serve.

I hope you were inspired to try these Shepherd’s Pie Ramekins! For another twist on this traditional comfort food, check out my Shepherd’s Pie with Rutabaga, it’s a long-time family favorite!
Notes ♪♫ Most of the ingredients in this recipe are naturally gluten free. Always check labels on condiments, broth and seasoning. Lea and Perrins Worcestershire sauce is gluten free in the US but not in Canada (make sure yours is made with distilled white vinegar, not malt vinegar).


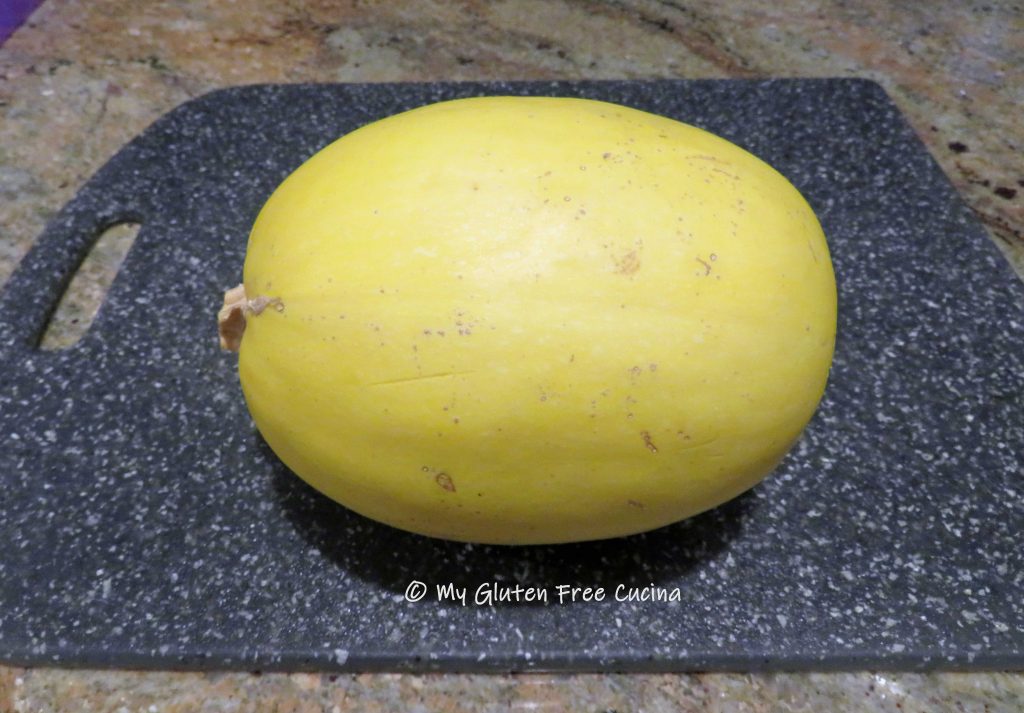


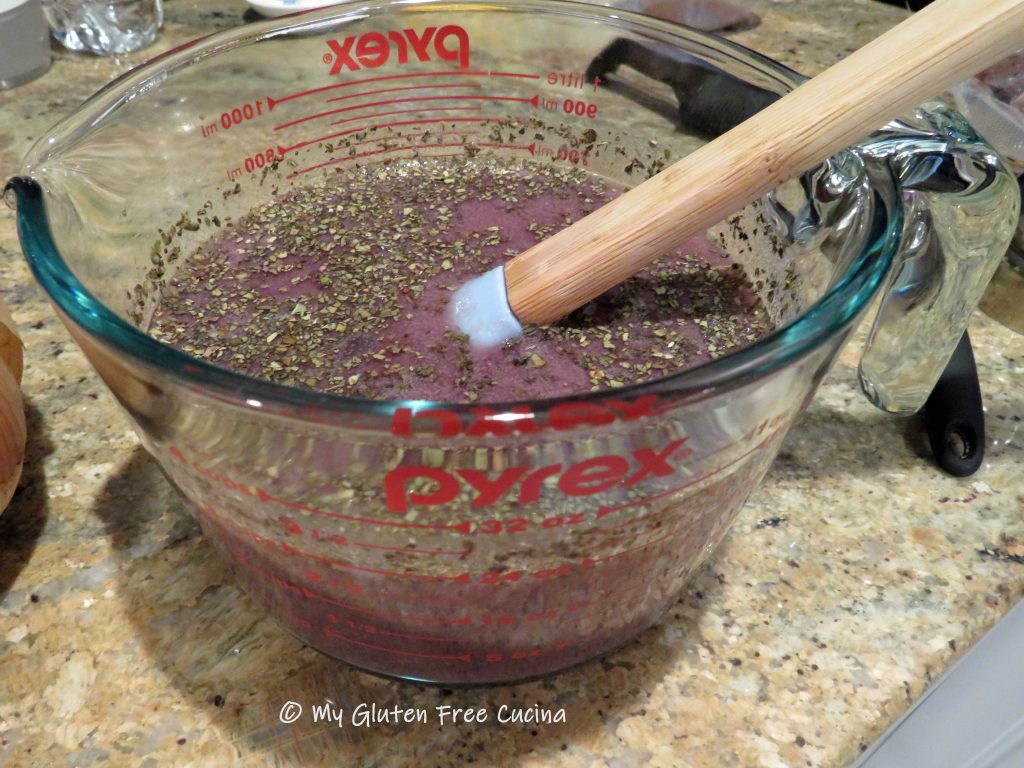
 Scrape out the seeds with a large spoon. Brush each half with about 1 tbsp. of olive oil, and sprinkle generously with Italian seasoning.
 Place the two halves cut side down on a parchment lined
 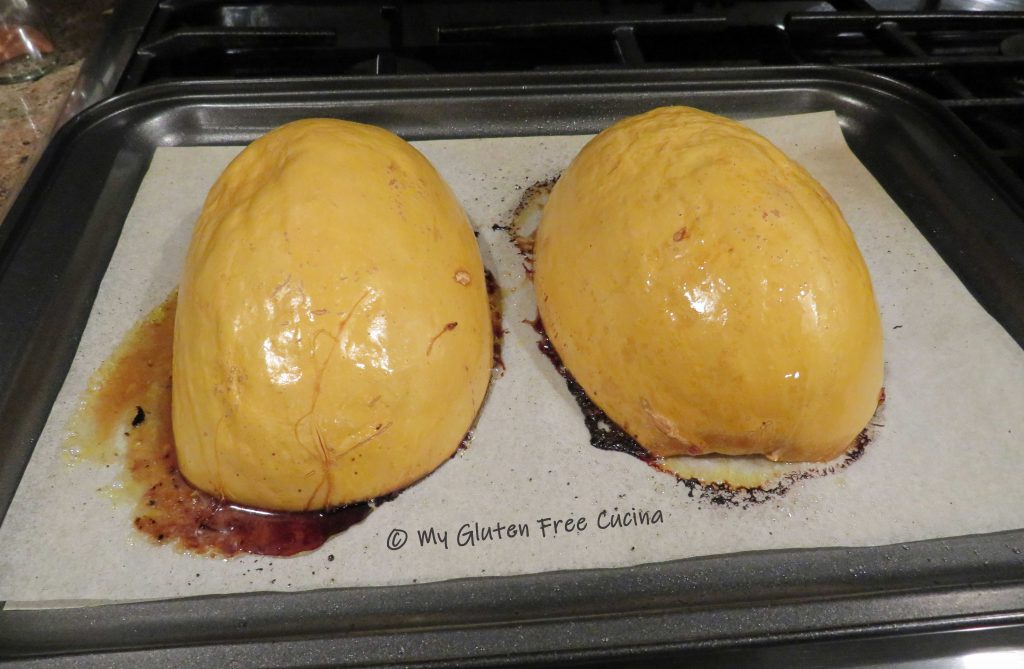 While the squash is baking make the meat sauce.
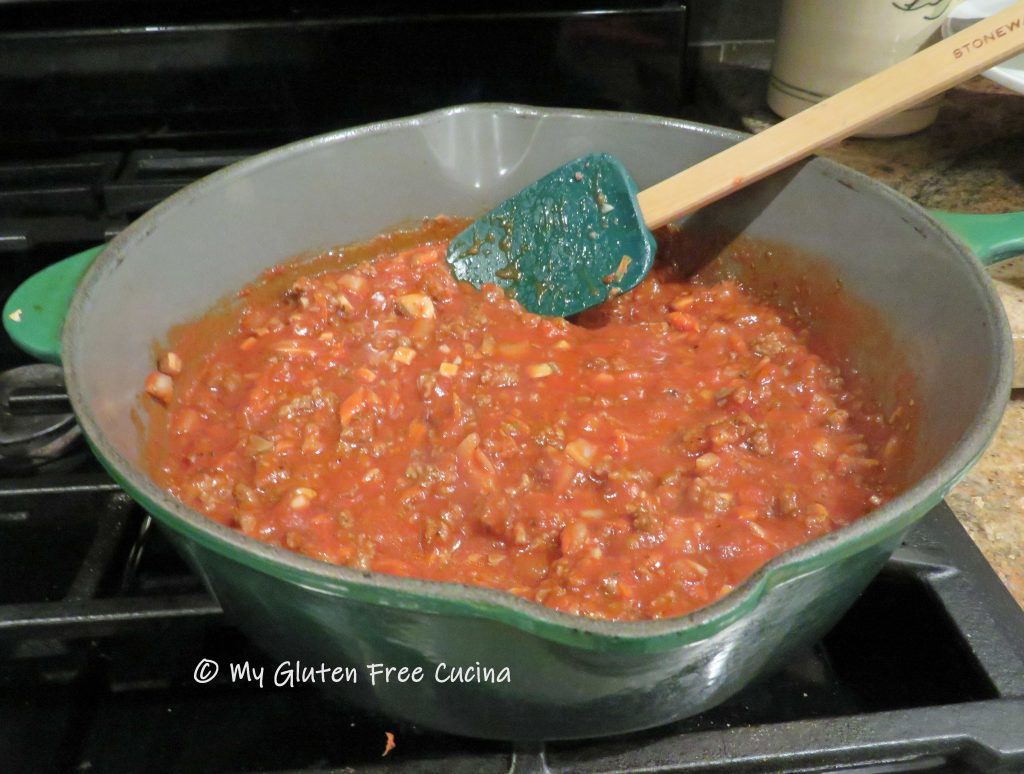
 Heat a
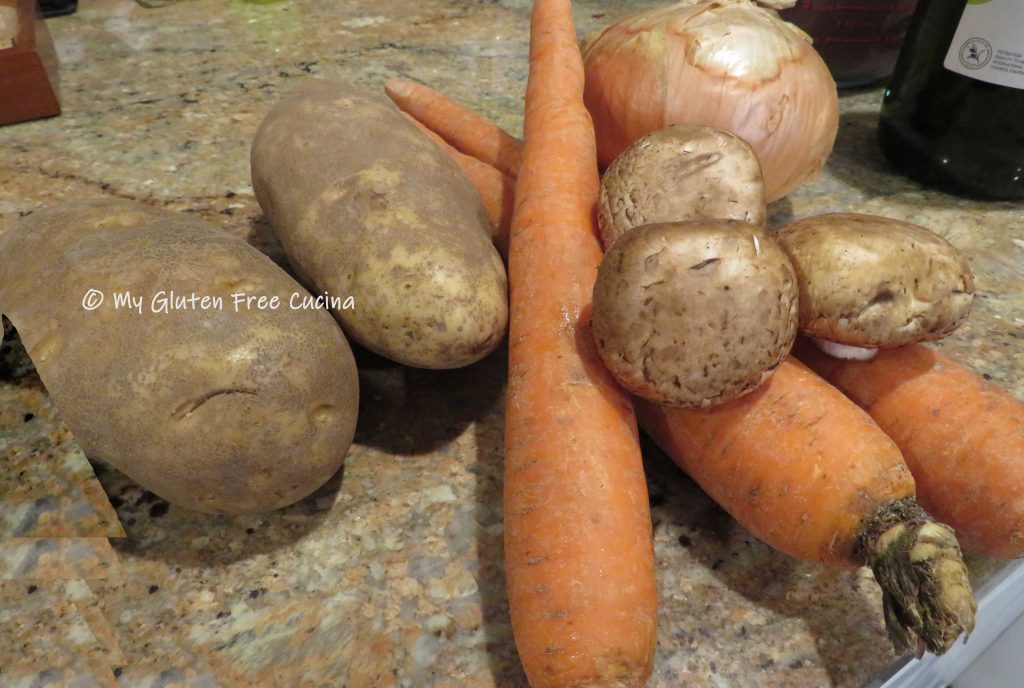
  When the beef has browned, stir in the onions, followed by the garlic, carrots and mushrooms. Sprinkle with Italian seasoning and fresh ground black pepper. Continue cooking 3-4 minutes, stirring frequently to help the liquid evaporate.


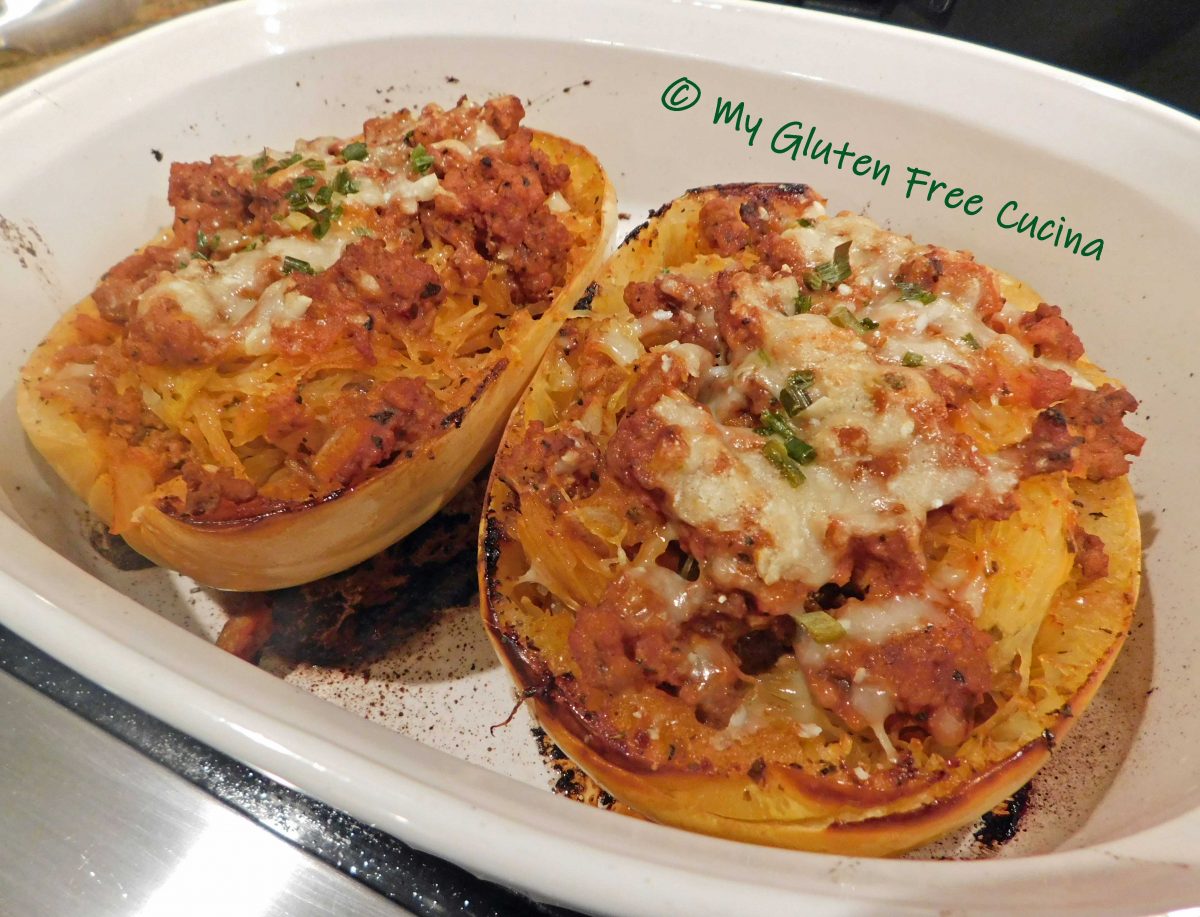
 Toss with half of the meat sauce and spoon the mixture back into the squash shells.
 Top with more sauce, grated cheese and herbs. Return to the oven for another 20-30 minutes.
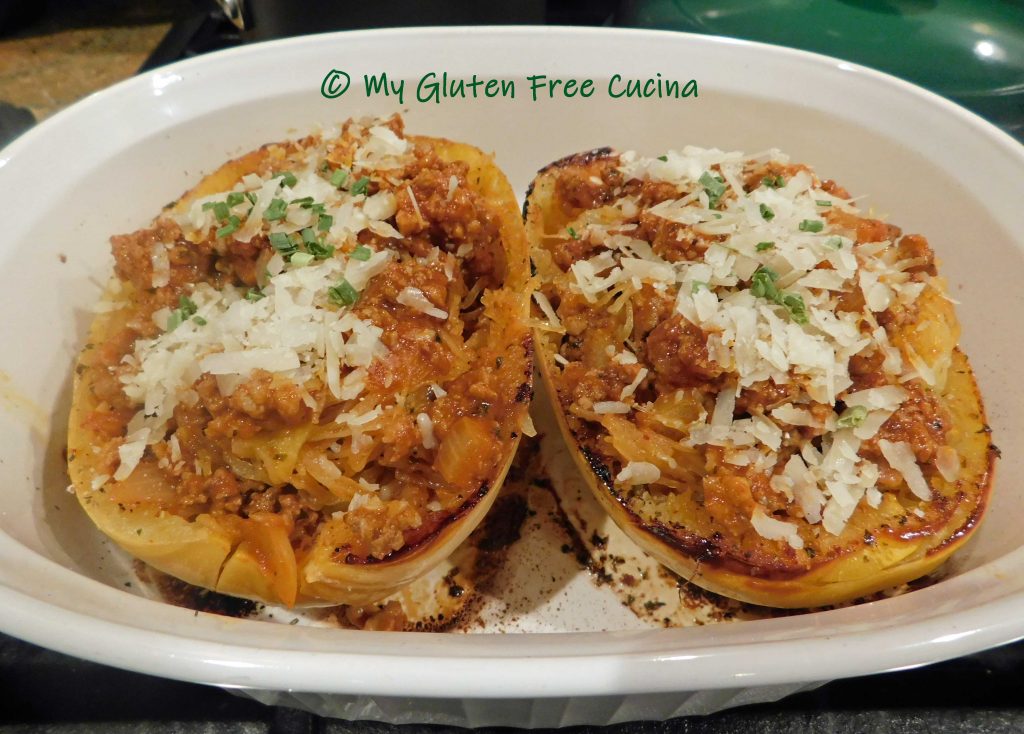 You can finish them off under the broiler for 2-3 minutes to crisp up the edges.
 Serve in the shell with extra sauce on the side.
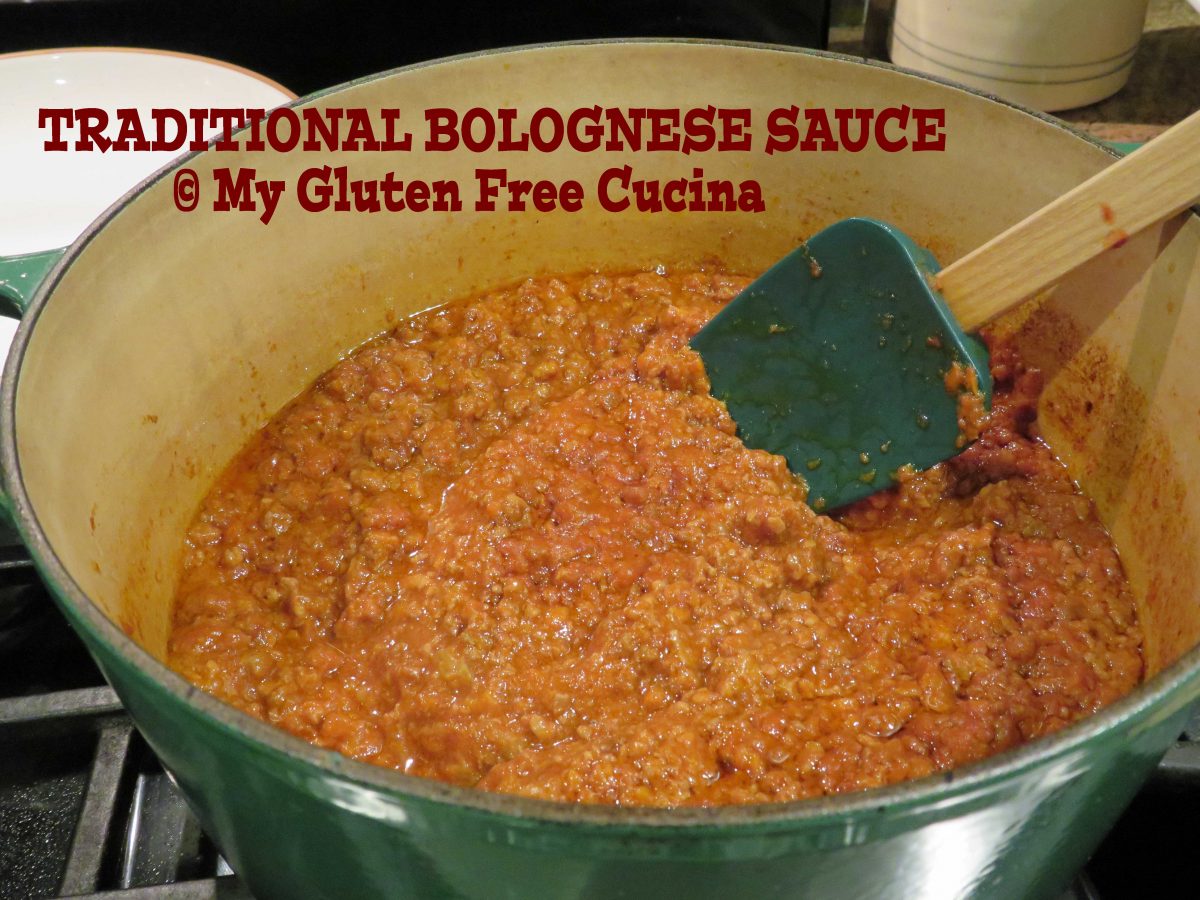
 Chop the pancetta into fine dice or pulse a few times in the processor.
 Add it to the pot and continue cooking slowly for 10 more minutes.
 Allow some of the liquid to evaporate before adding more meat, you want it to brown, not steam. Add more salt and pepper to taste.
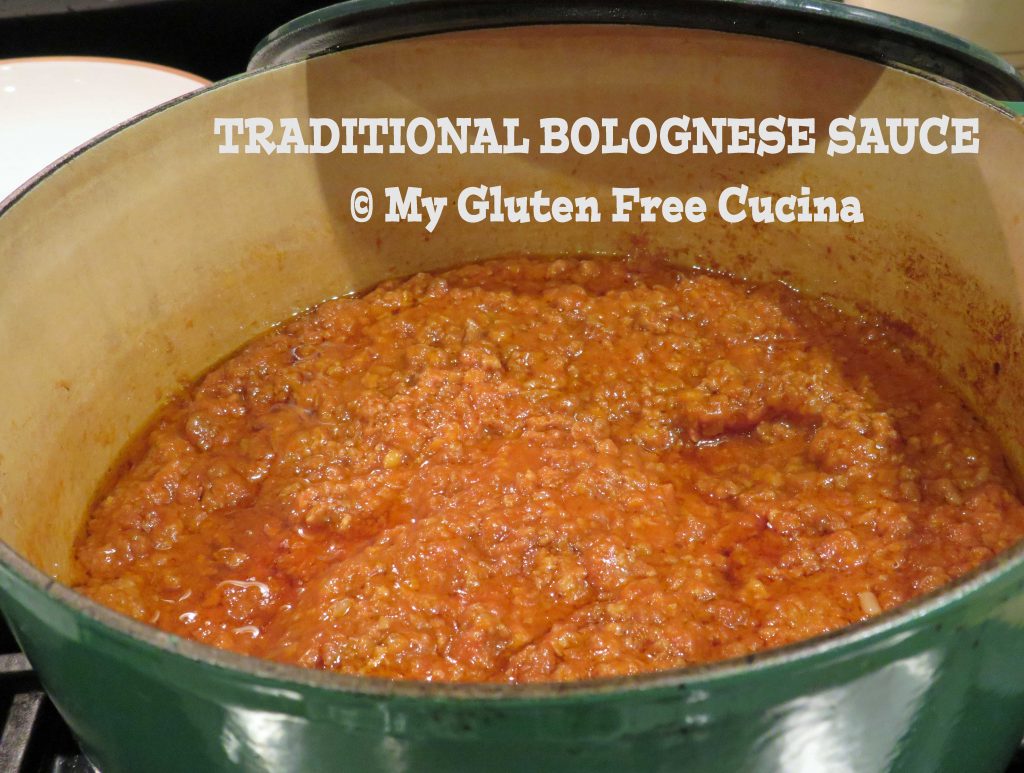
 After about 20 minutes the meat should be well browned and starting to caramelize on the bottom of the pan. Clear a spot in the middle of the pan and add the tomato paste. Cook for 2 minutes, then stir the tomato paste into the meat.
 Add the red wine, and use a spatula to loosen up any browned bits on the bottom of the pan and stir them into the sauce.
 Simmer 3 minutes to allow some of the wine to cook off, then add the milk (or cream), tomatoes and stock.
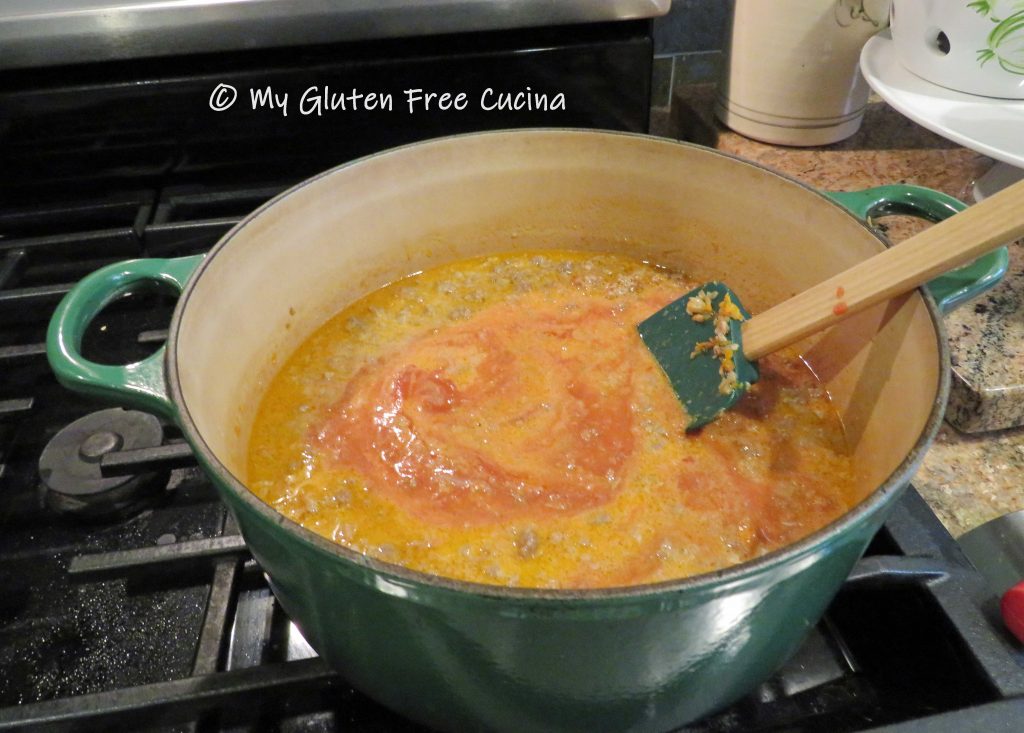


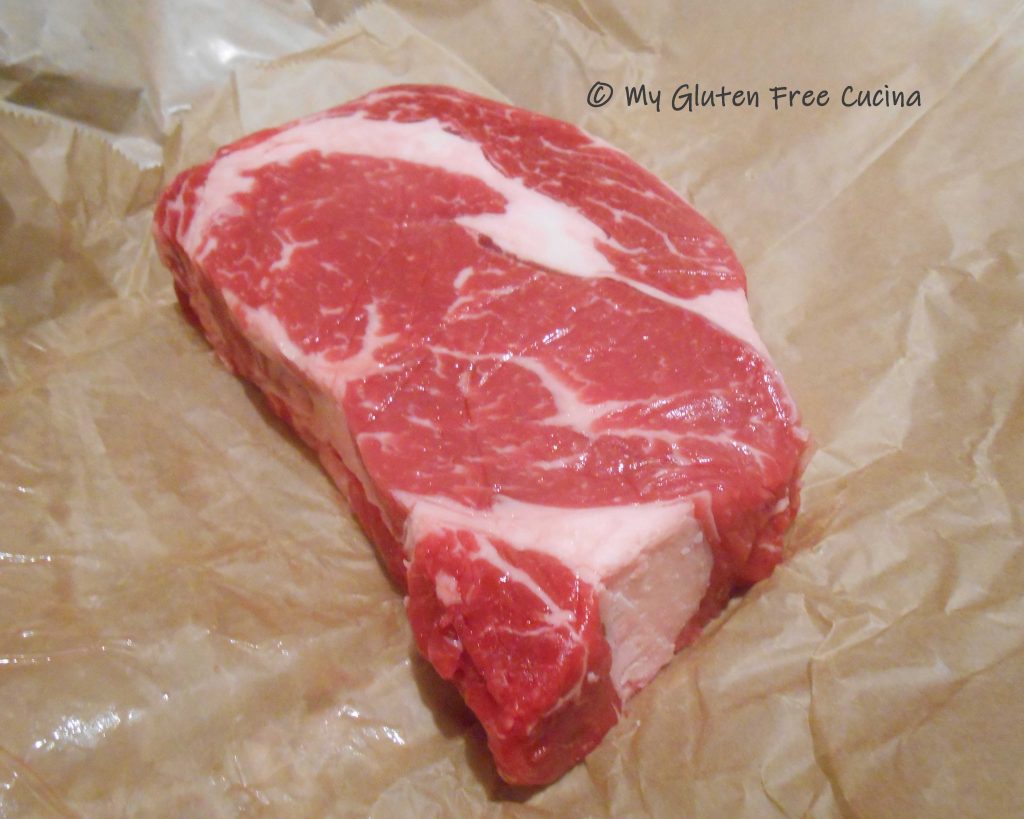
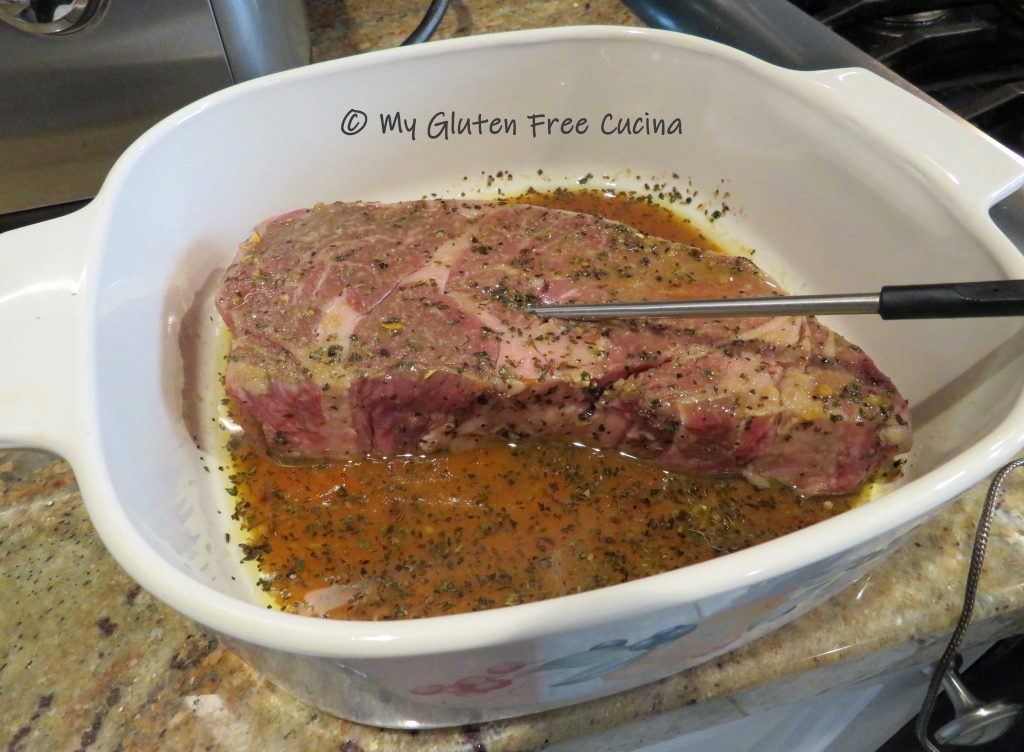
 Lay the steak out on a
 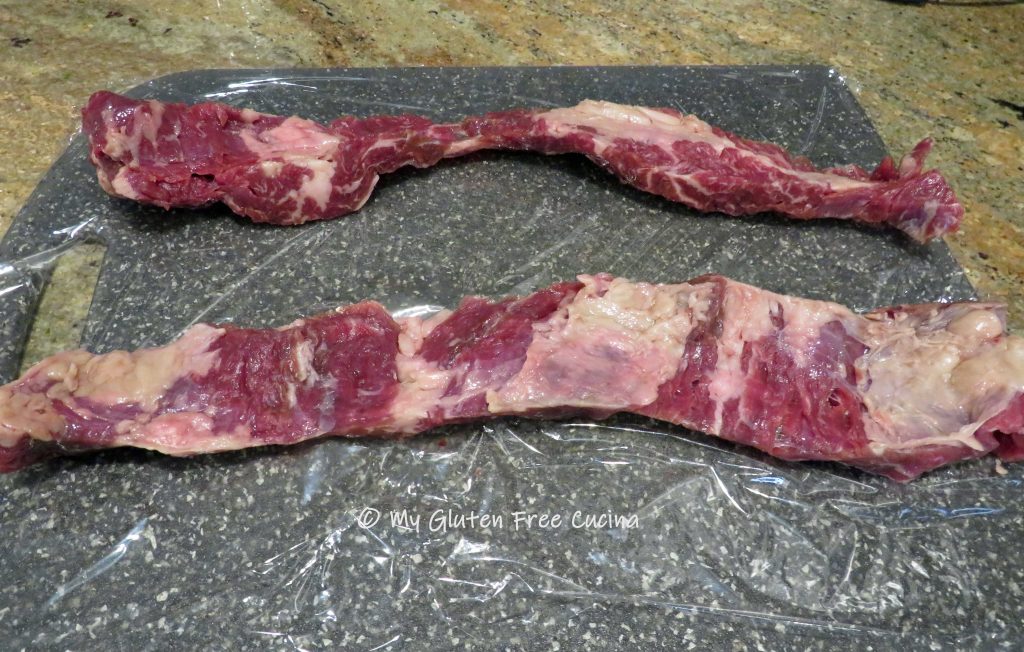 Cover the meat with another sheet of plastic wrap and
 Spread the garlic mixture evenly over the steak.


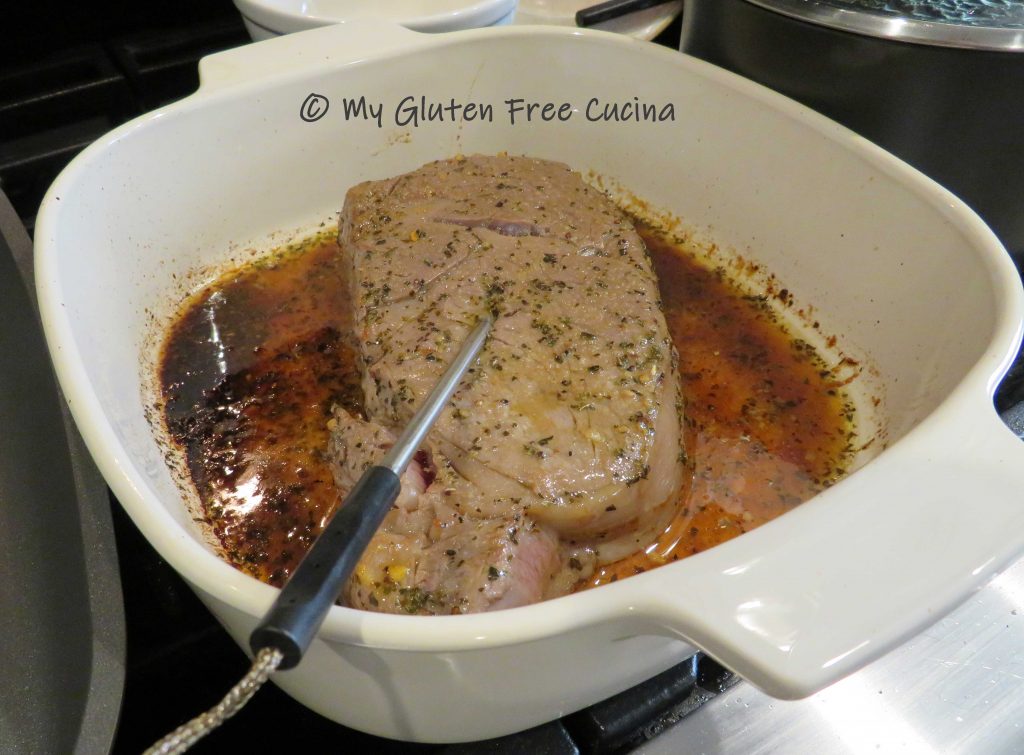
 Remove them when the internal temperature reaches 135º for medium (
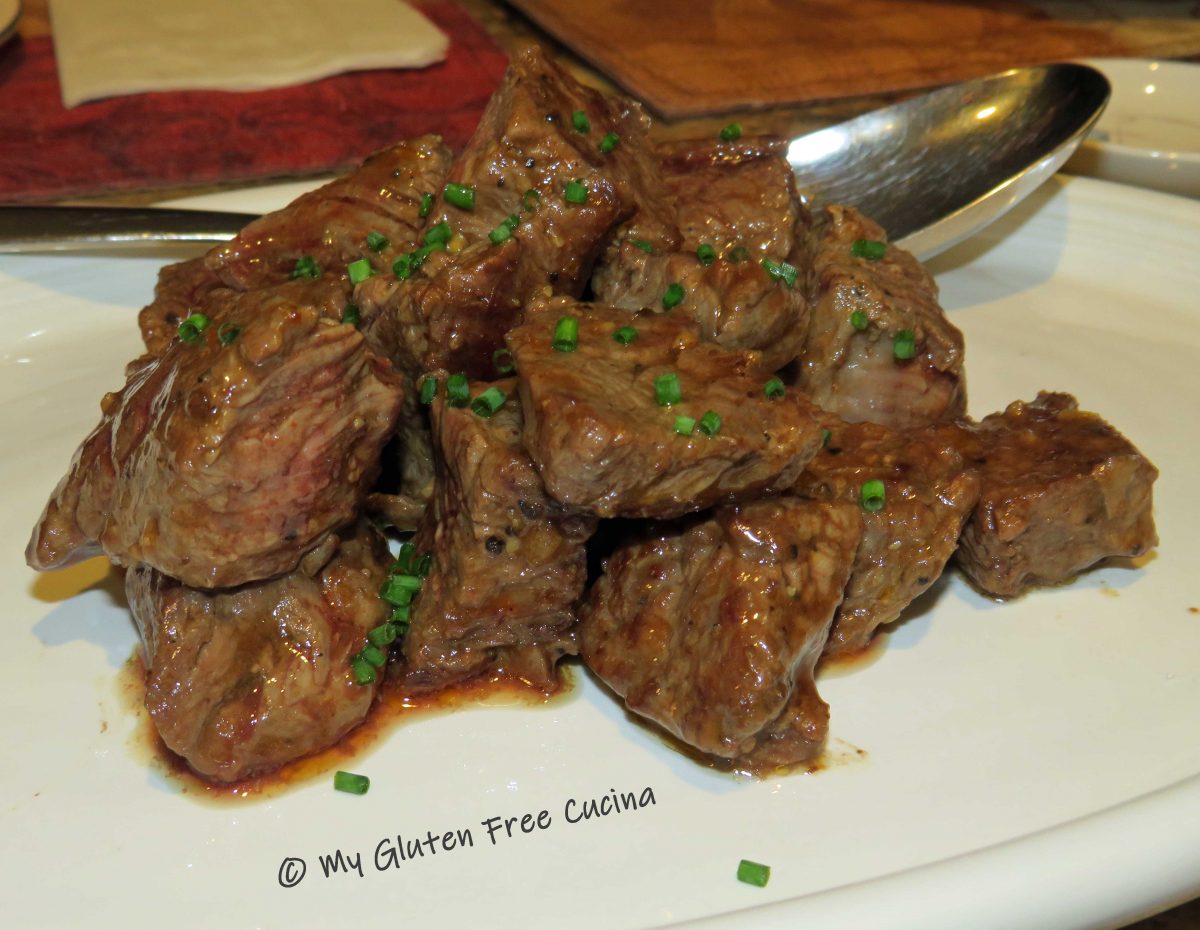


 To finish, add 2 tbsp. gluten free BBQ sauce and toss to coat.


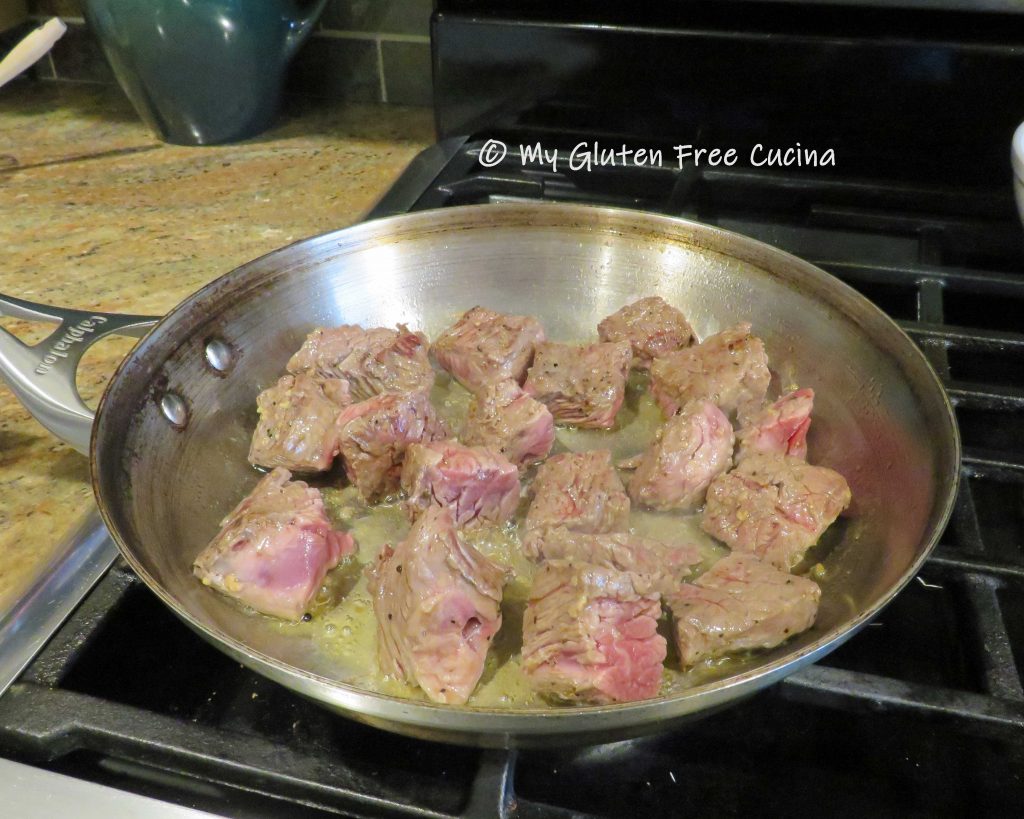
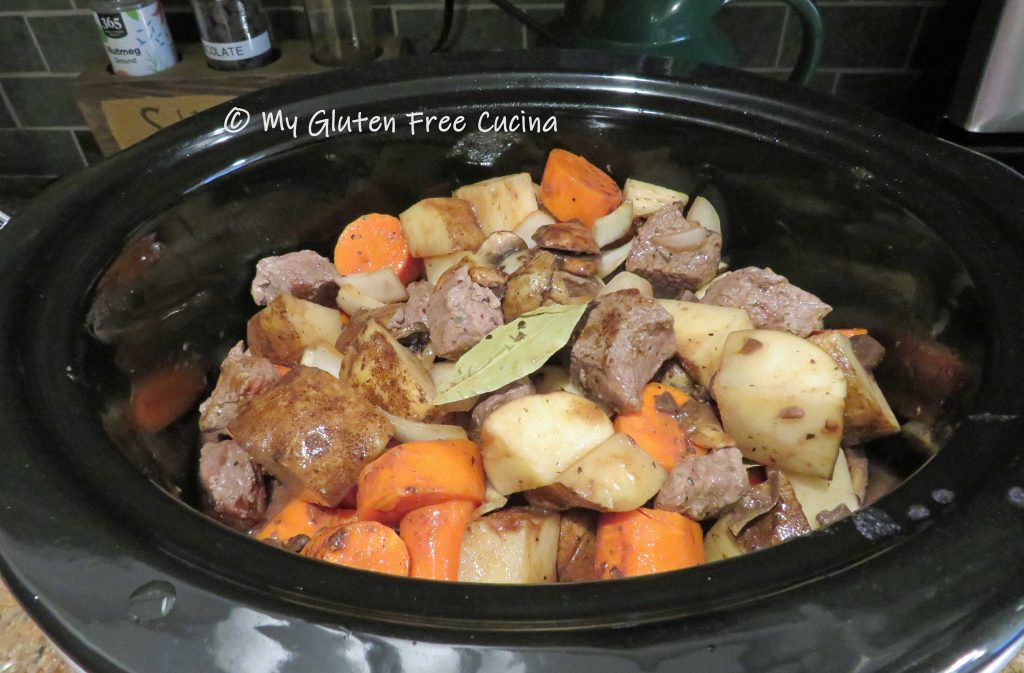
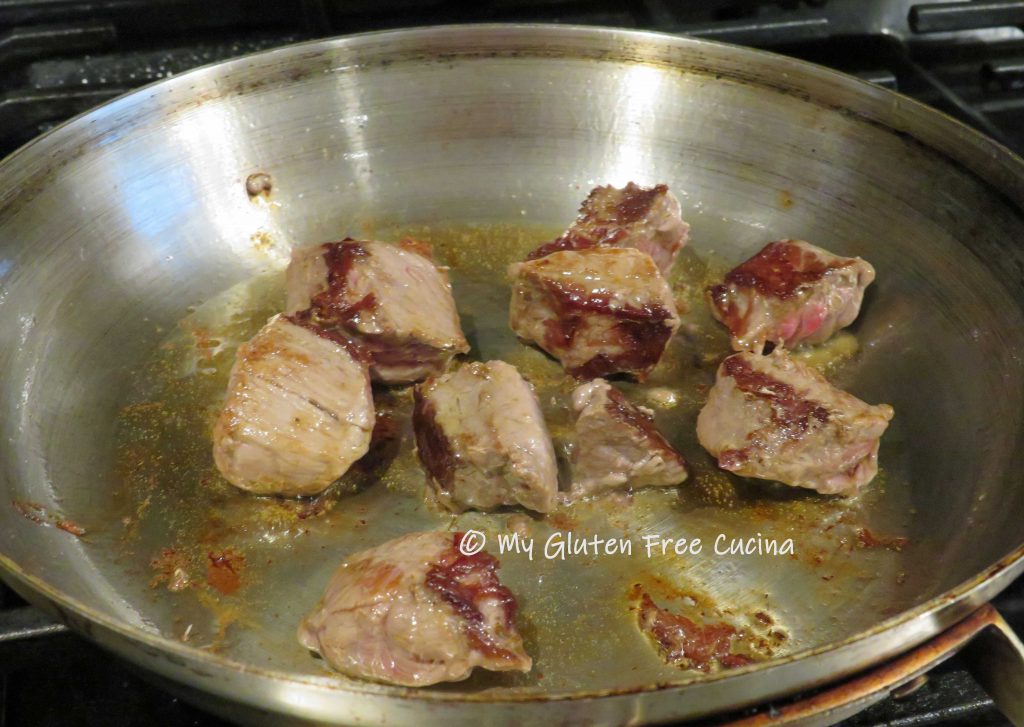 Don’t crowd the pan, you want to get some good color on the outside (if the pieces are too close together the meat will steam in its own liquid). I did my beef in 2 batches.
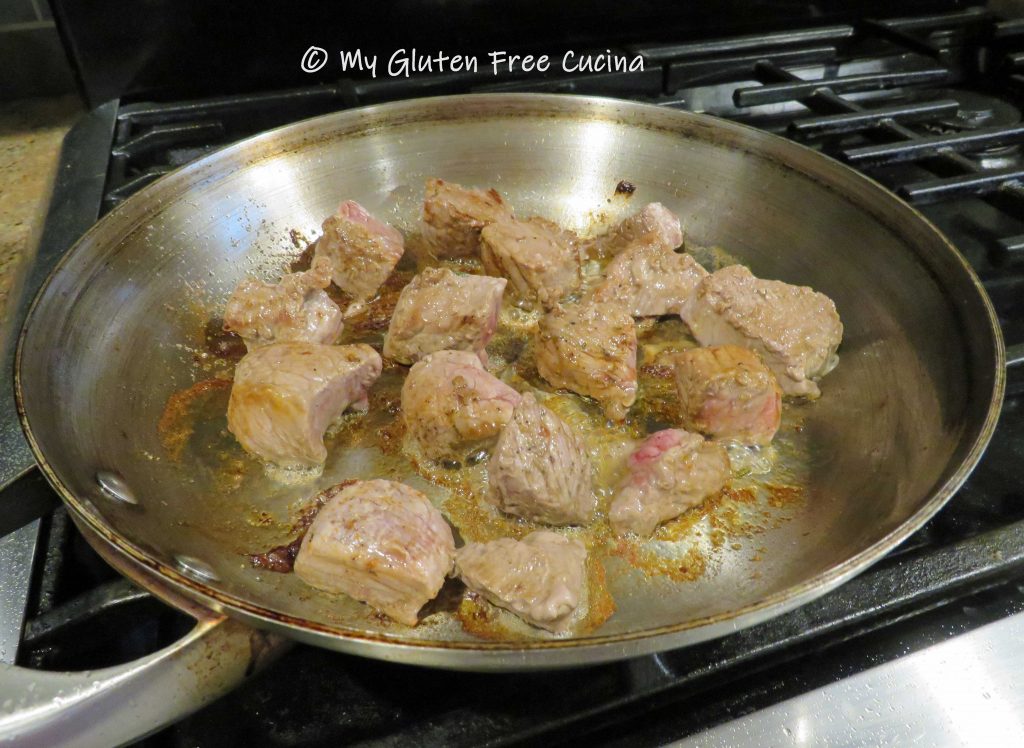 Once the beef goes into the crock-pot, you will see some nice browned bits on the bottom of your skillet.
 Pour 1/3 cup of the wine mixture into the hot pan to deglaze, using a spatula to scrape up all of the browned bits, they are full of flavor!
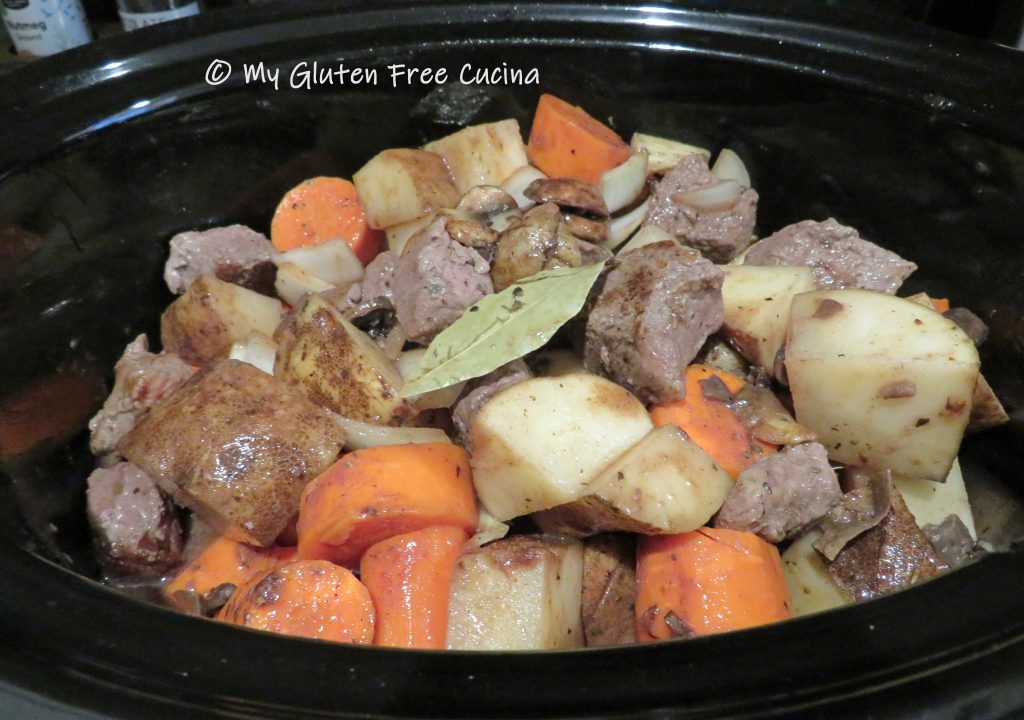
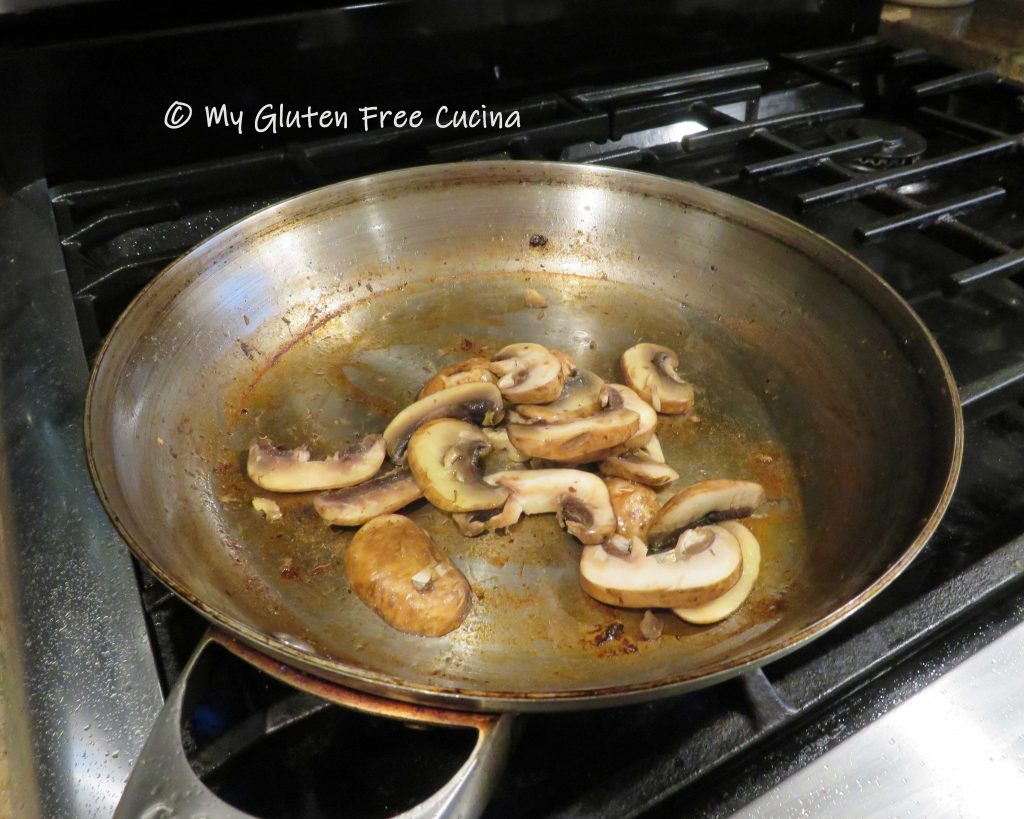
 Pour the liquid into the crock-pot and add more olive oil to the skillet. Begin browning the veggies, a few minutes each starting with the onions.
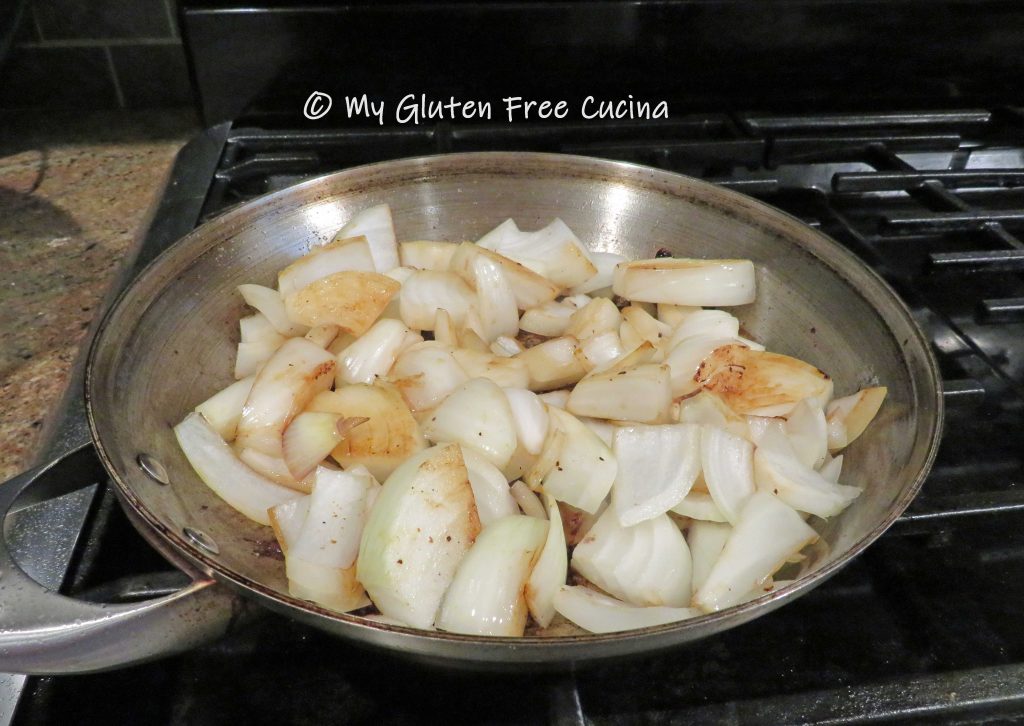


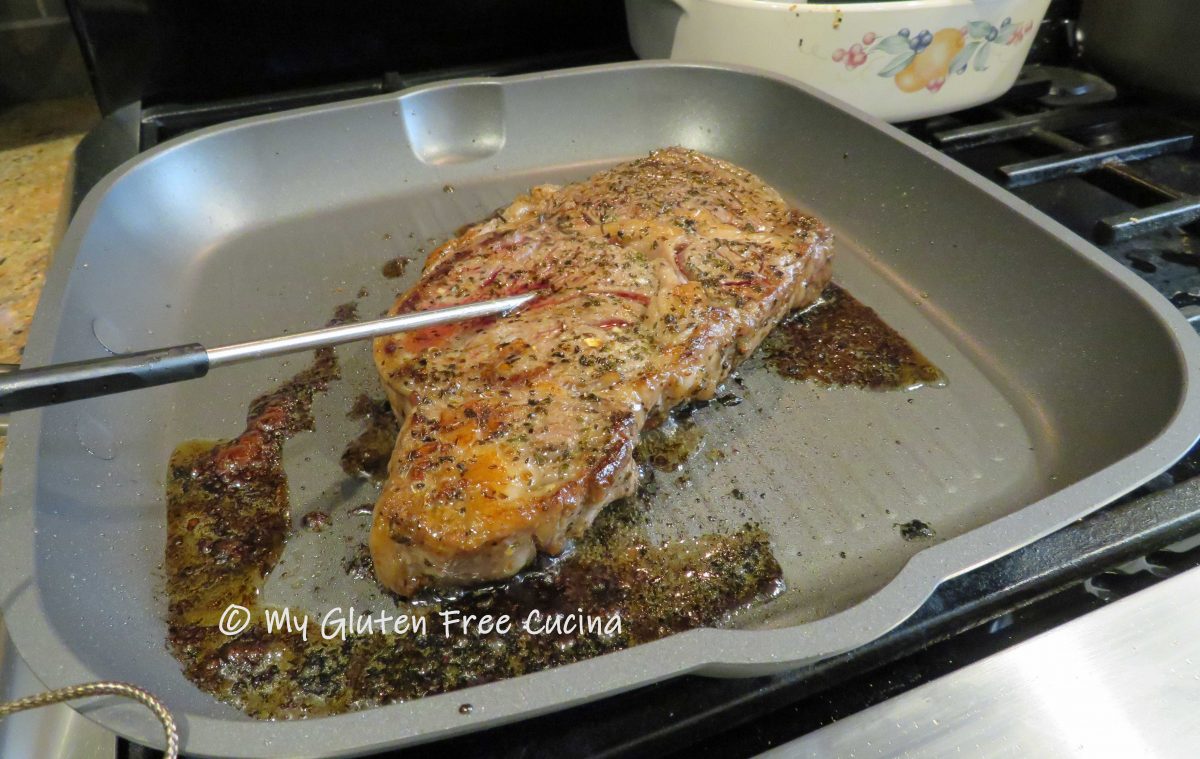


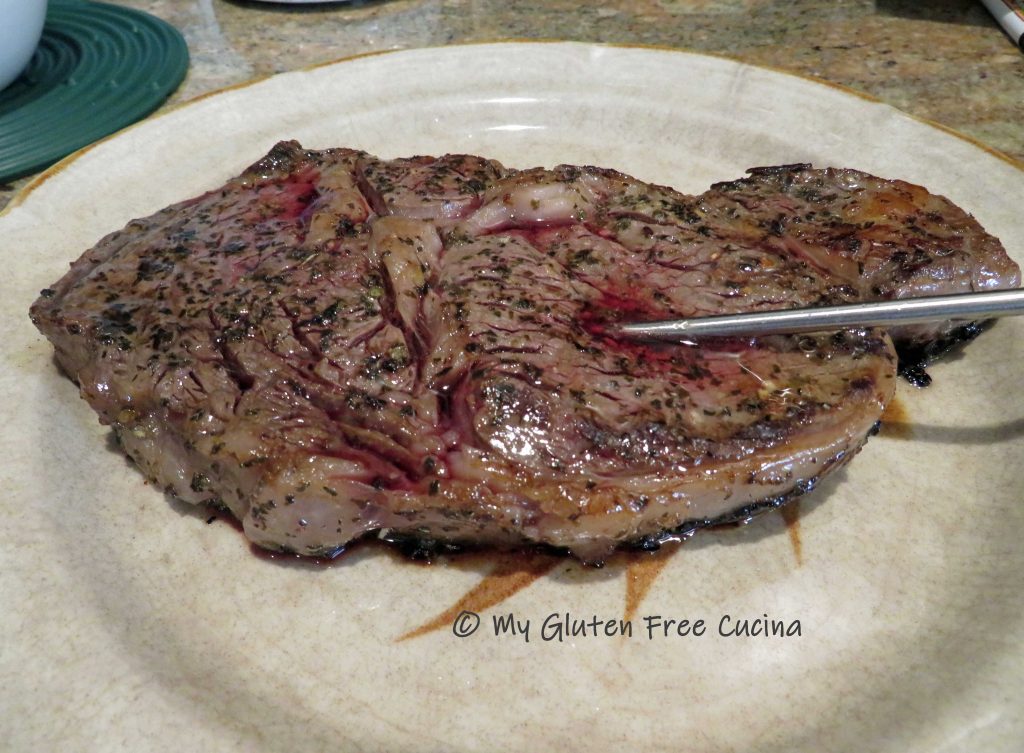
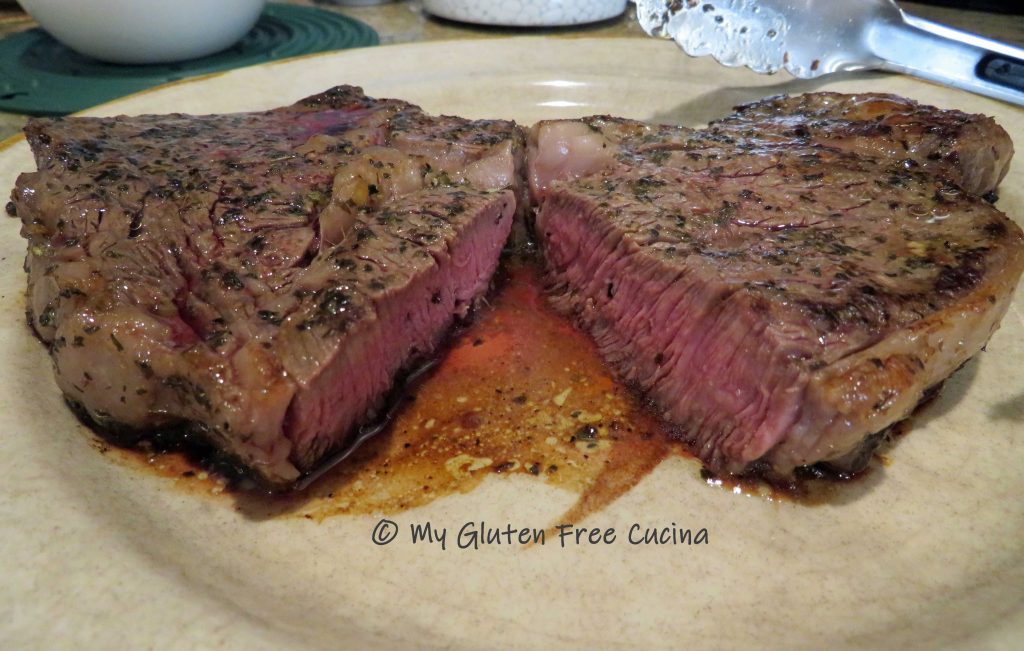
 Keeping the thermometer in place, cook the steak for 2 minutes more per side, or until the internal temperature reaches 140º for medium.
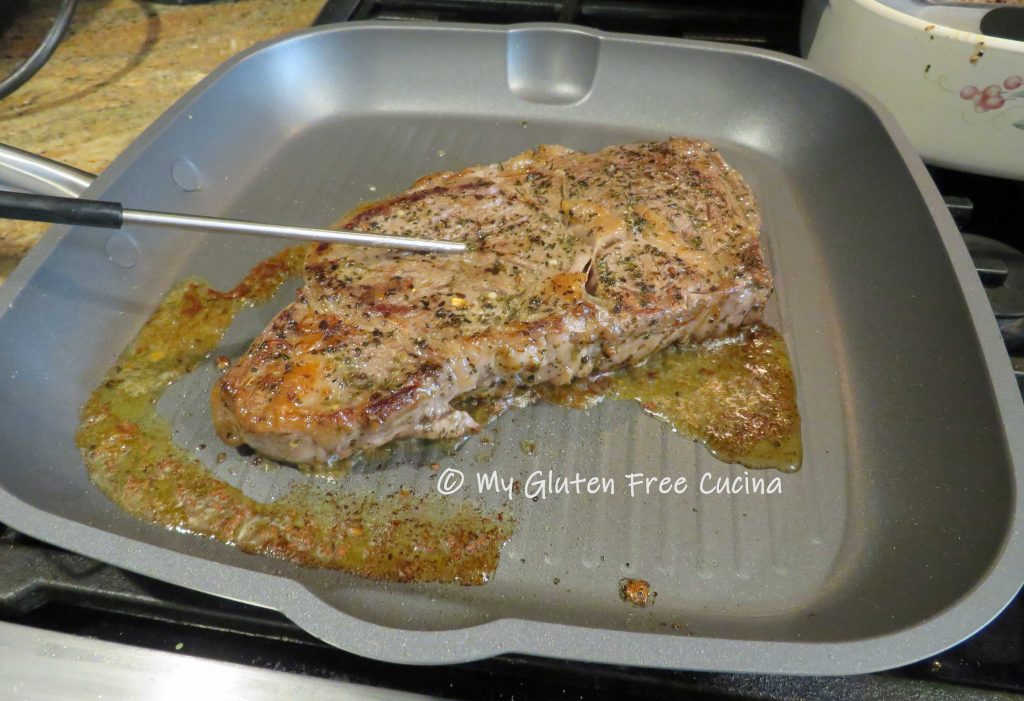


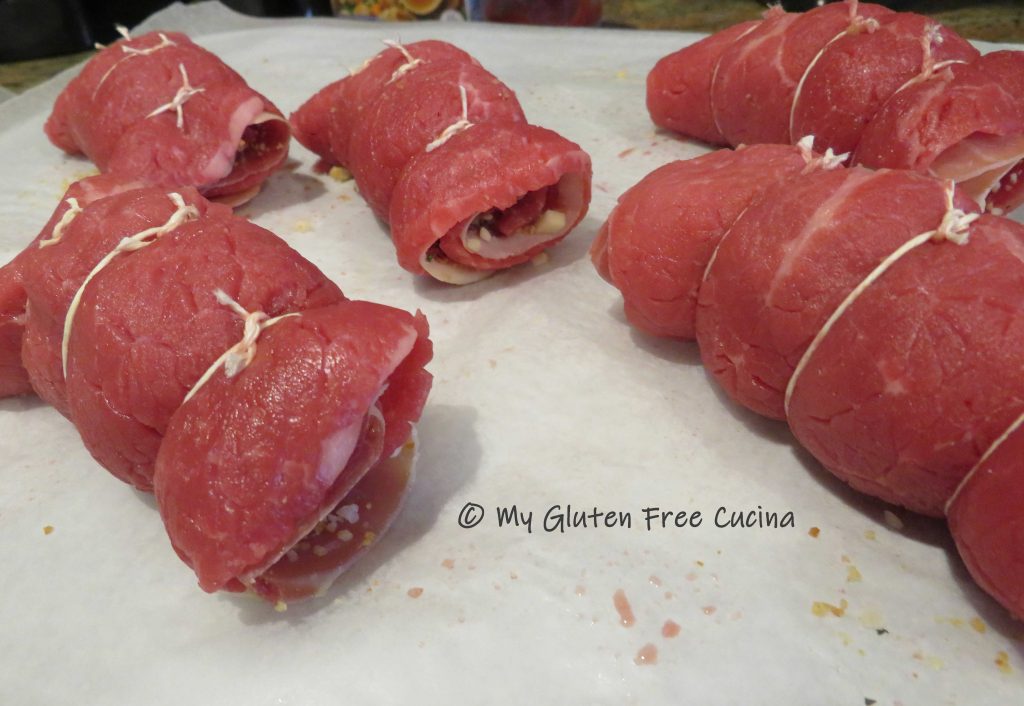
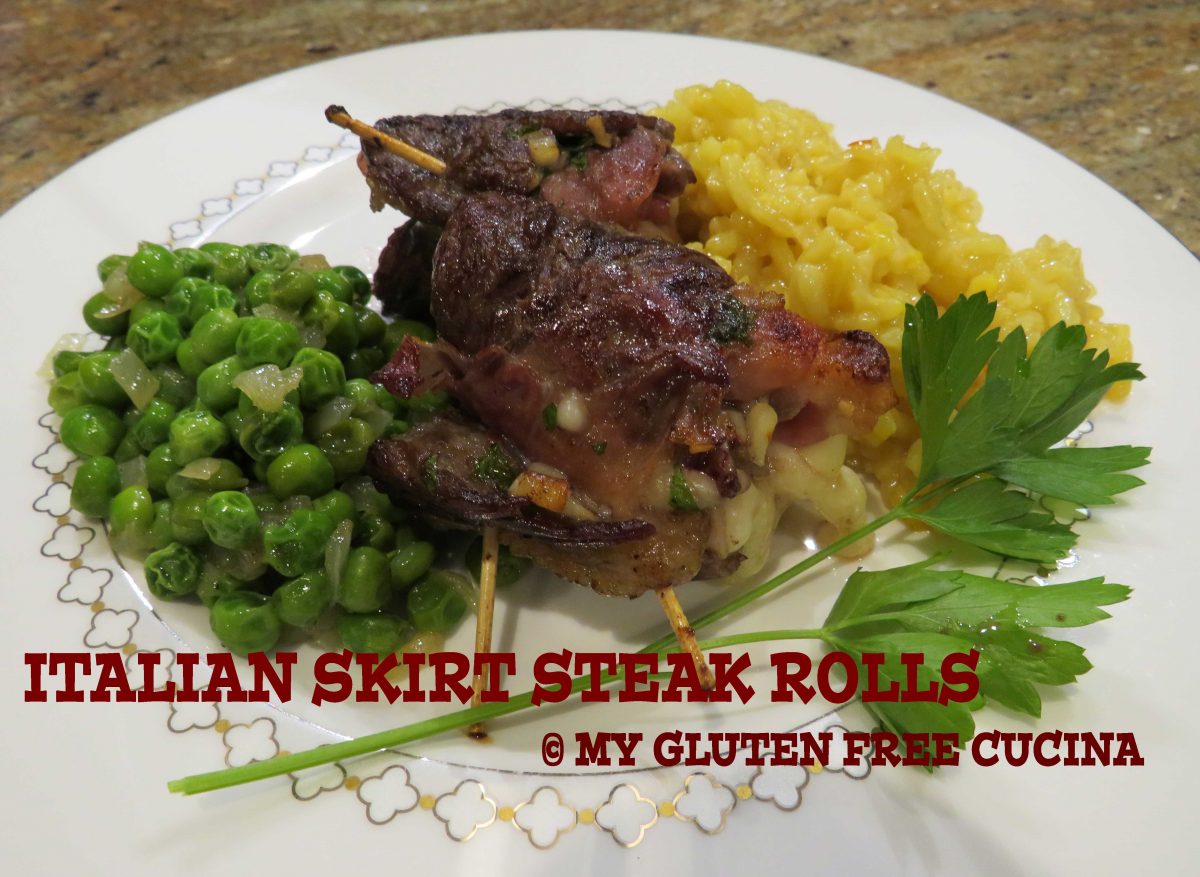
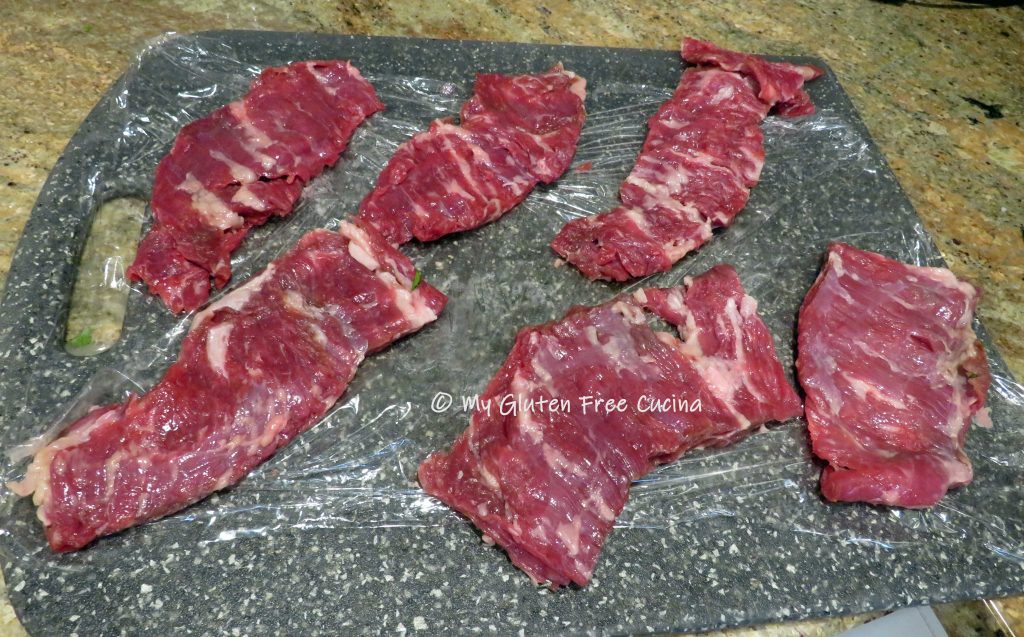
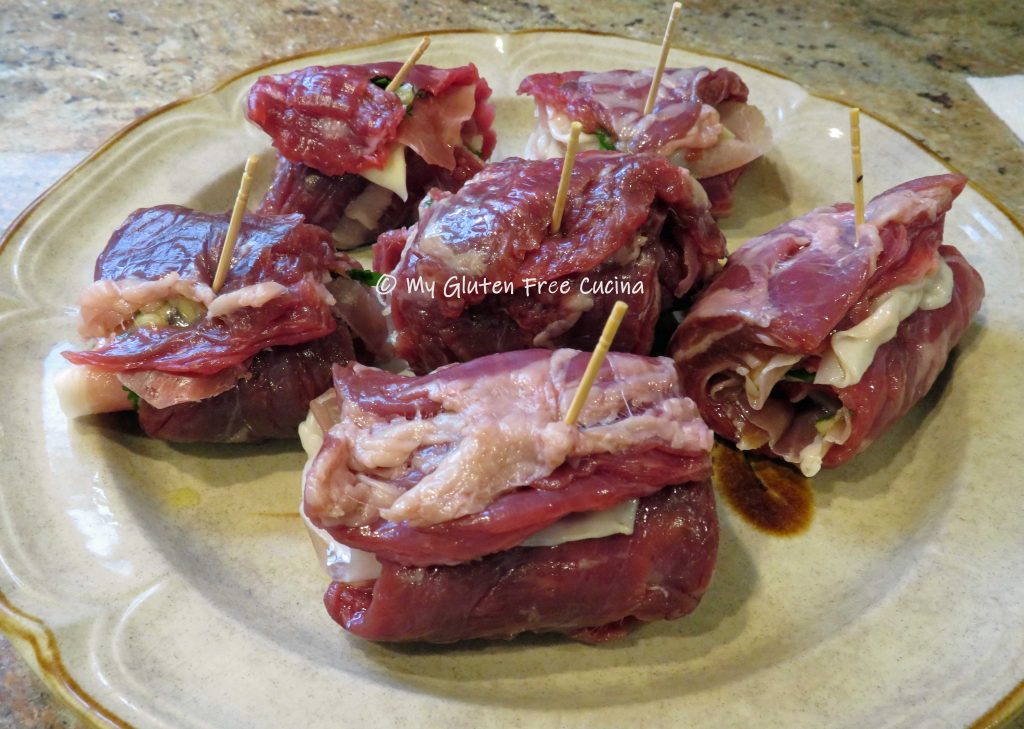
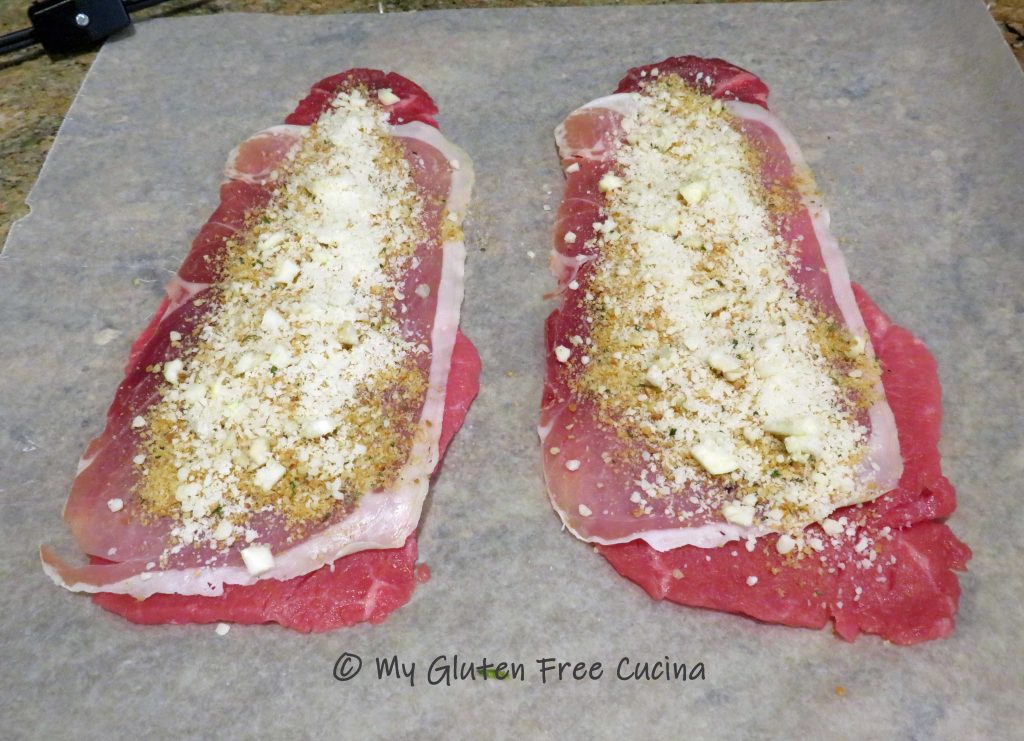
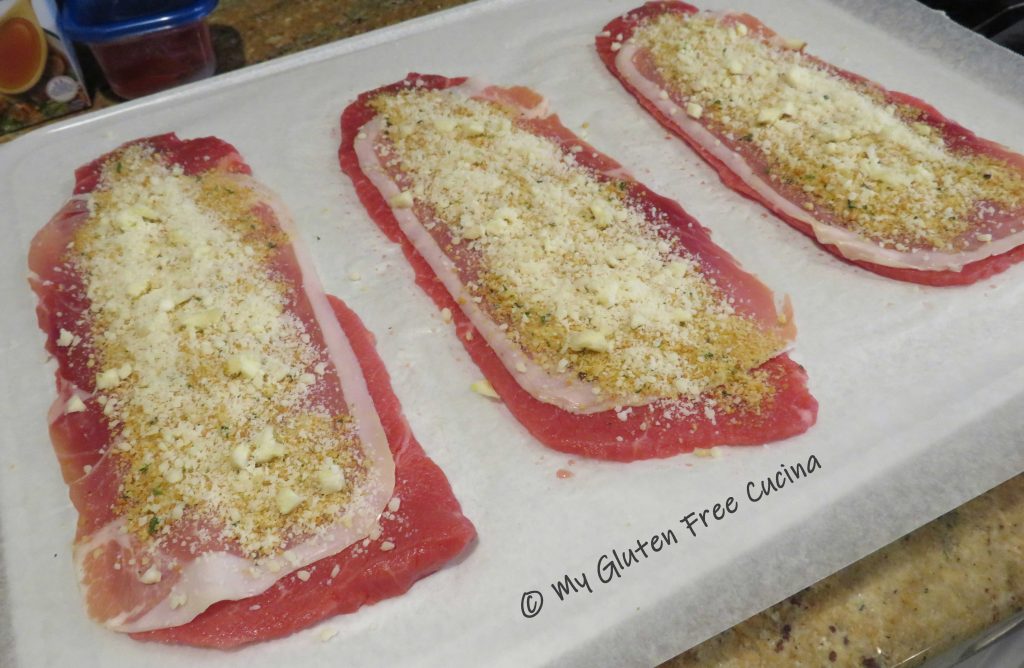
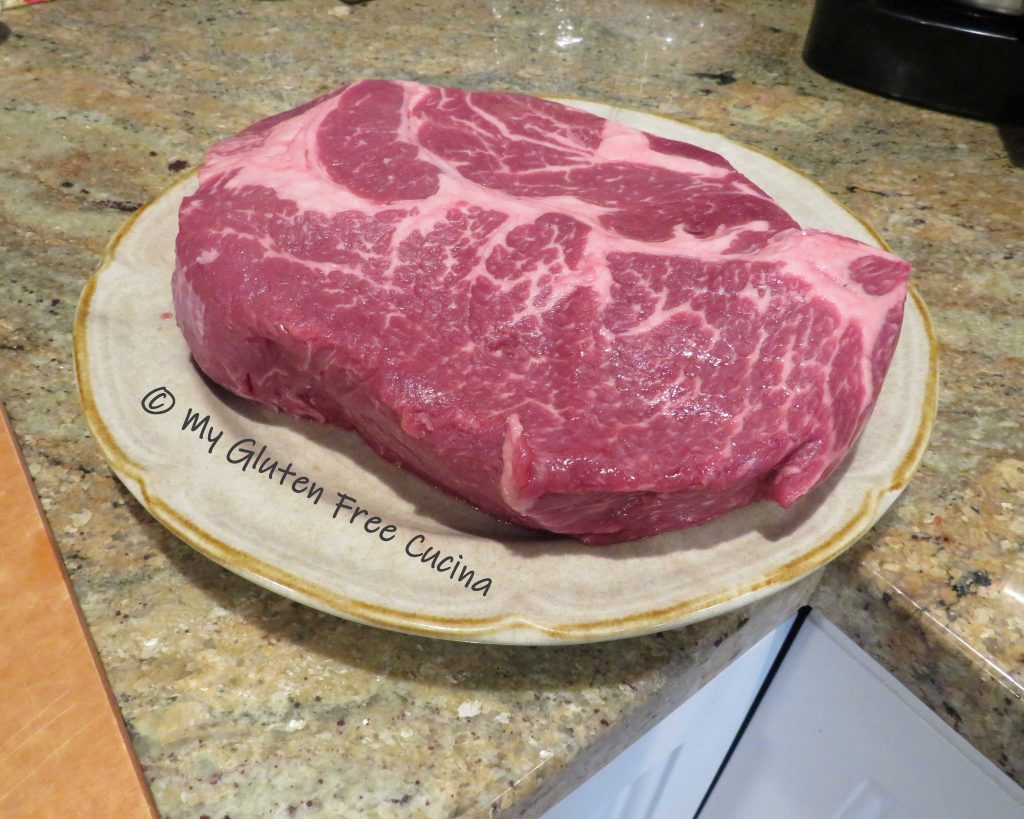
 Season the beef with salt and pepper, then layer with a slice of prosciutto. Sprinkle each with about 1 tbsp. gluten free Italian breadcrumbs, 1 tbsp. grated cheese and 1/2 tsp. of the minced garlic.
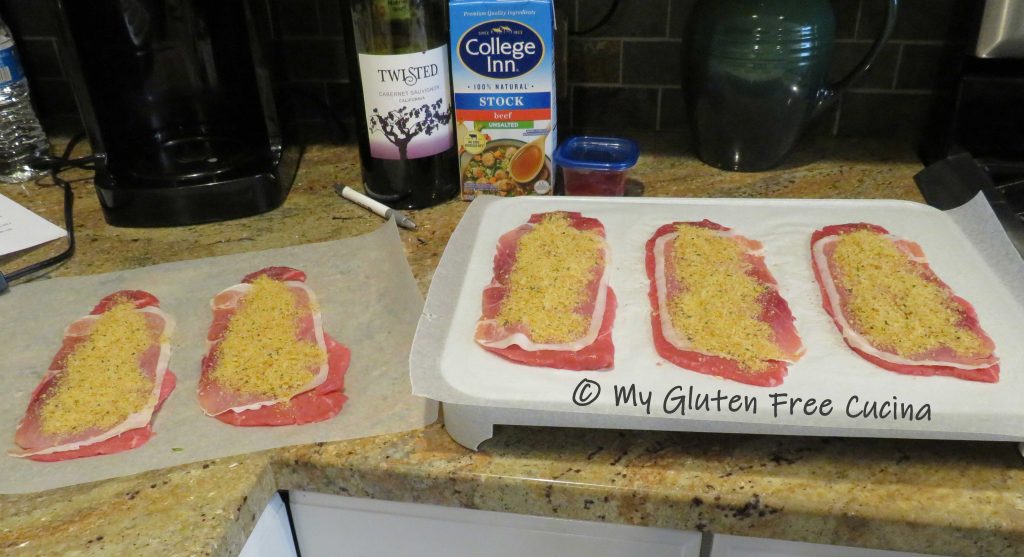
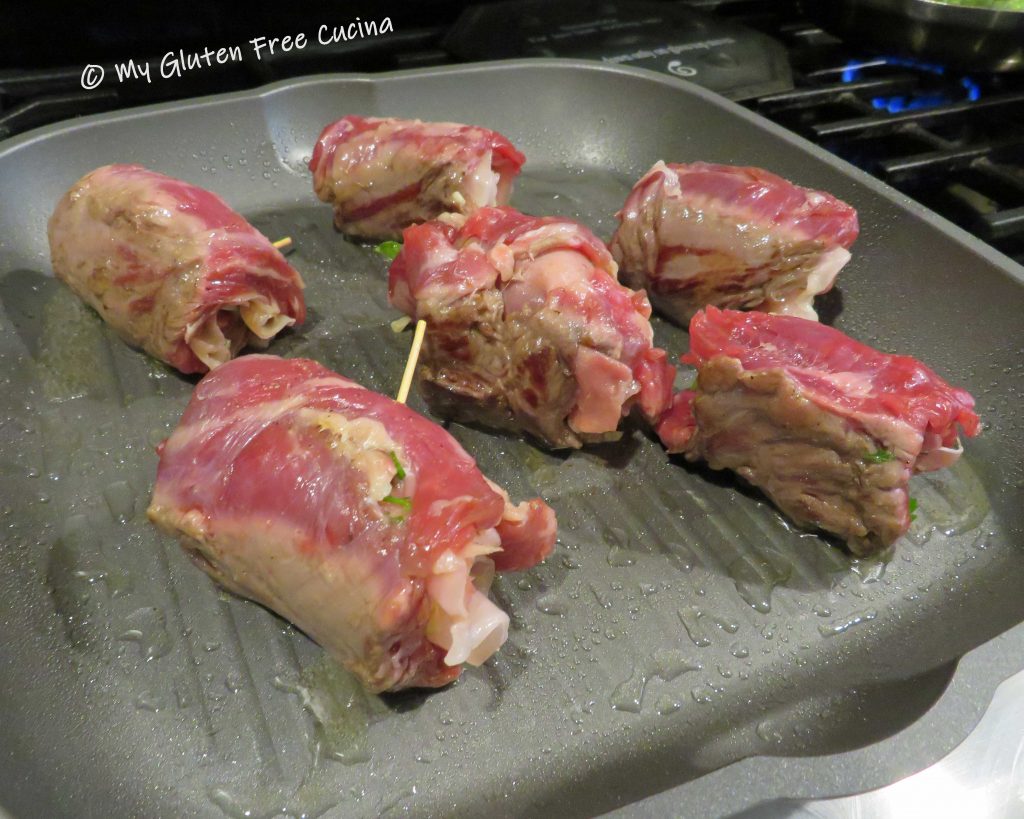
 Starting at the narrow end, roll up the meat into bundles.
 Secure each bundle with cooking twine or toothpicks (twine is more secure but toothpicks are easier to remove).
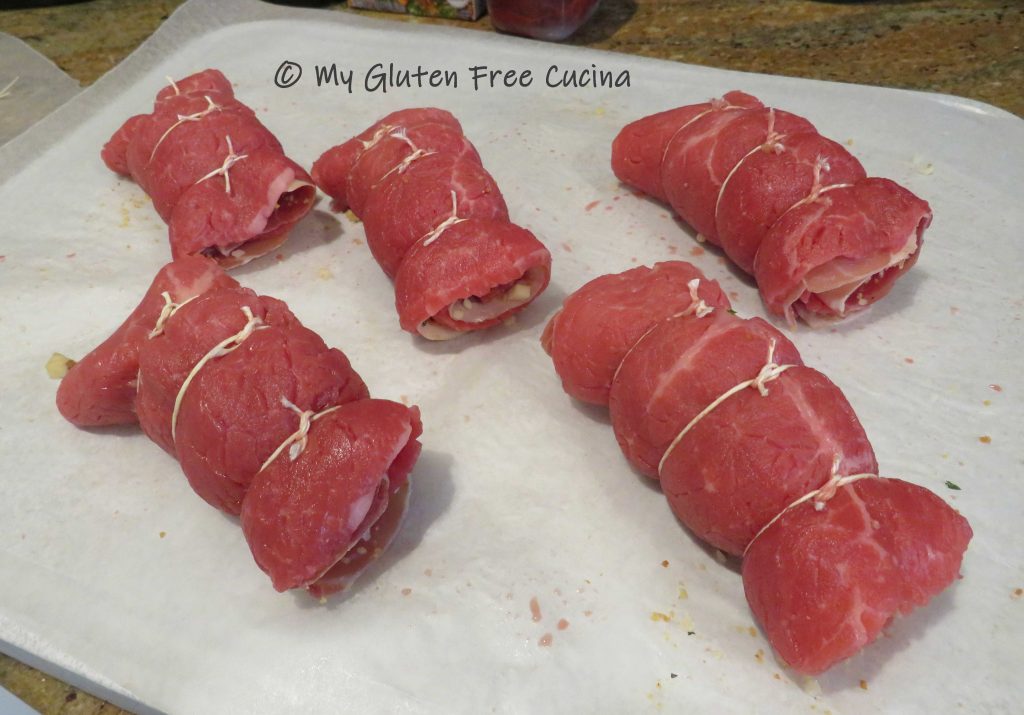

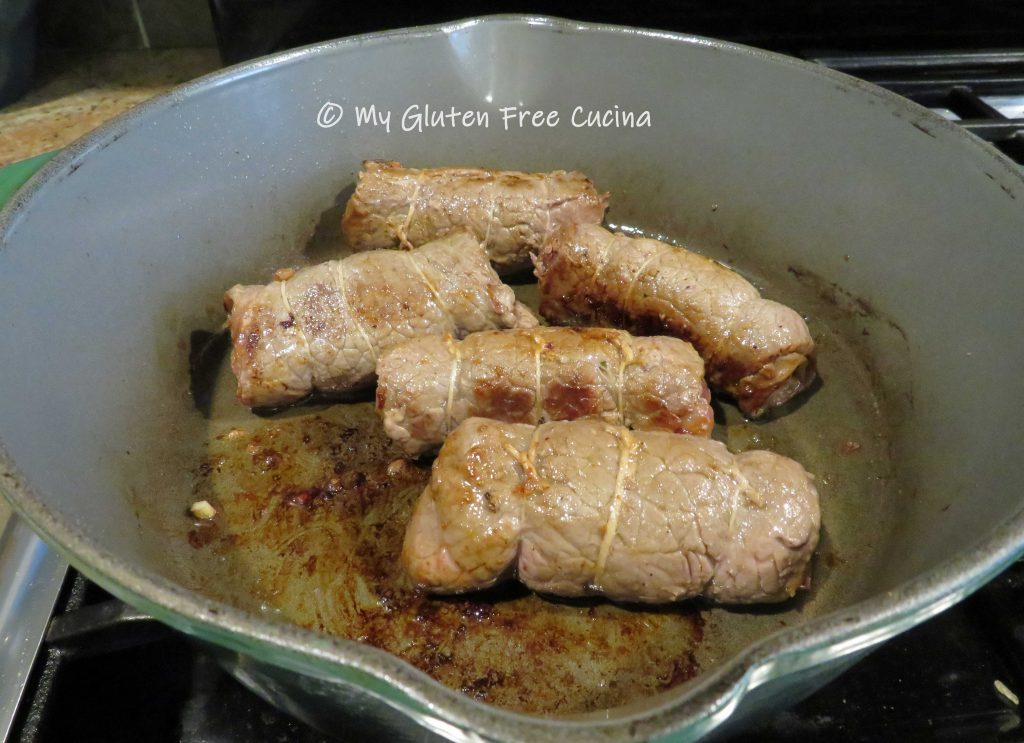
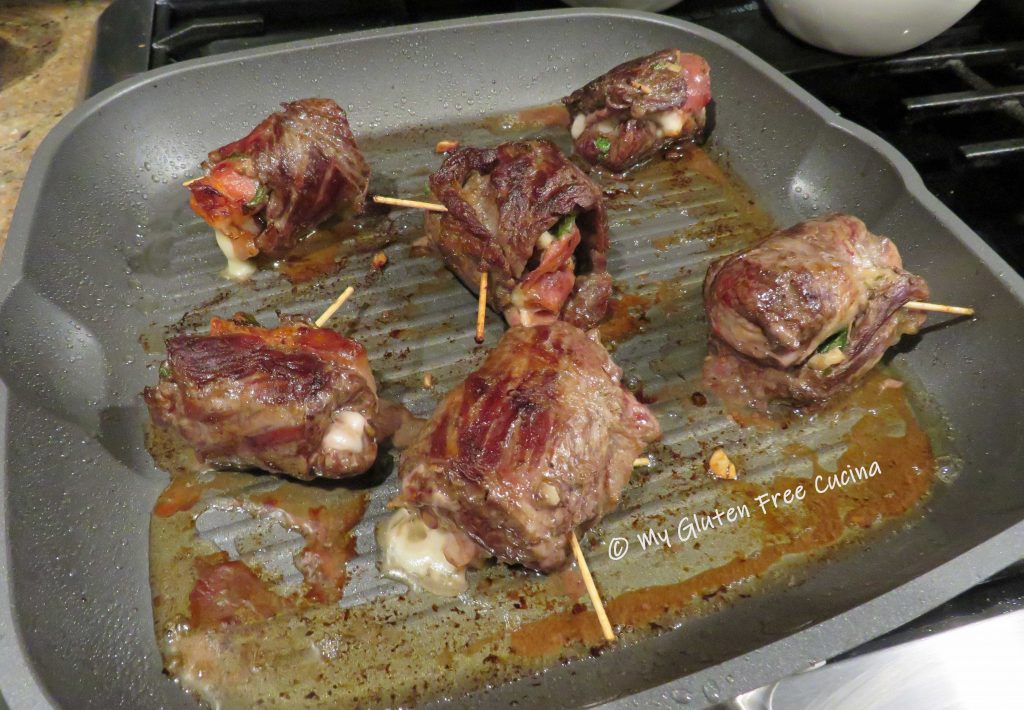
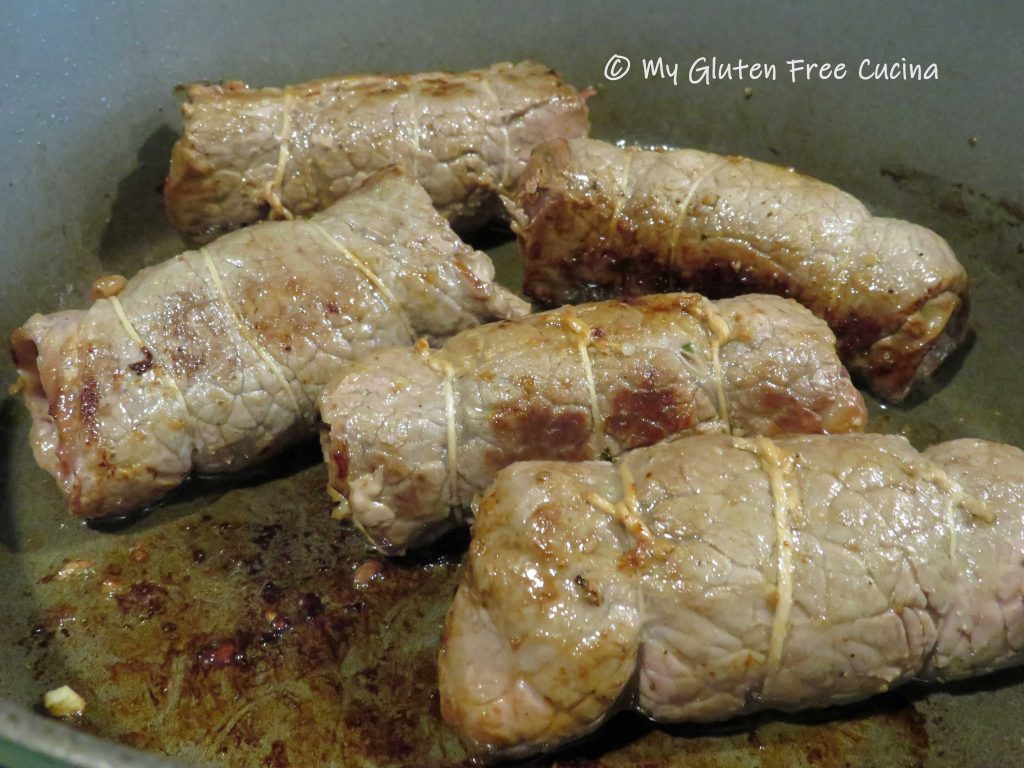 Remove the meat, keeping the pan on low heat.
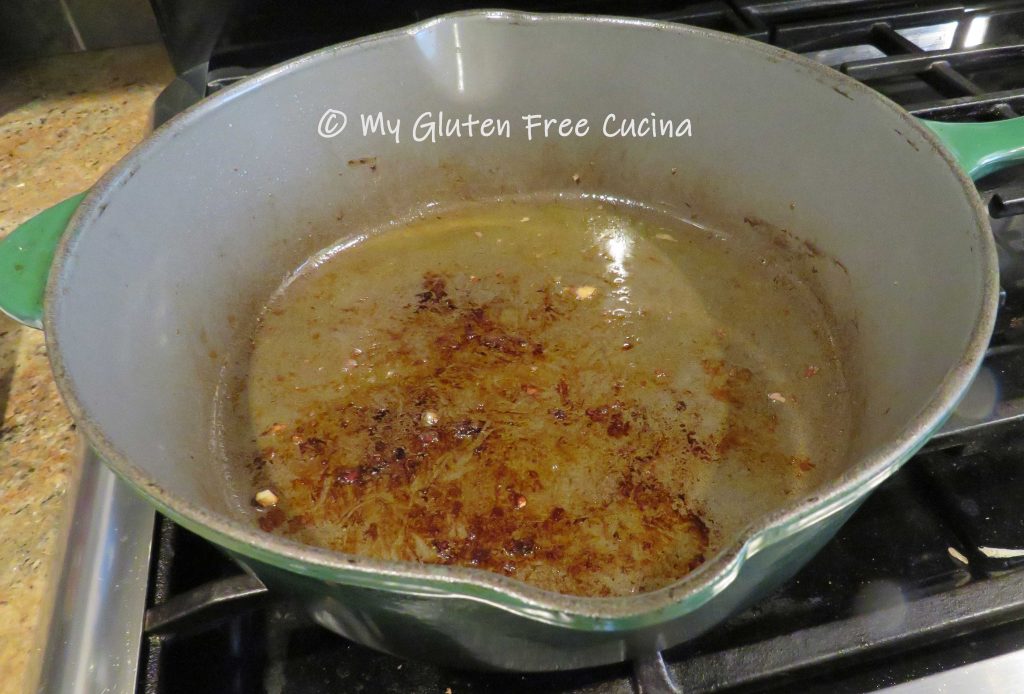
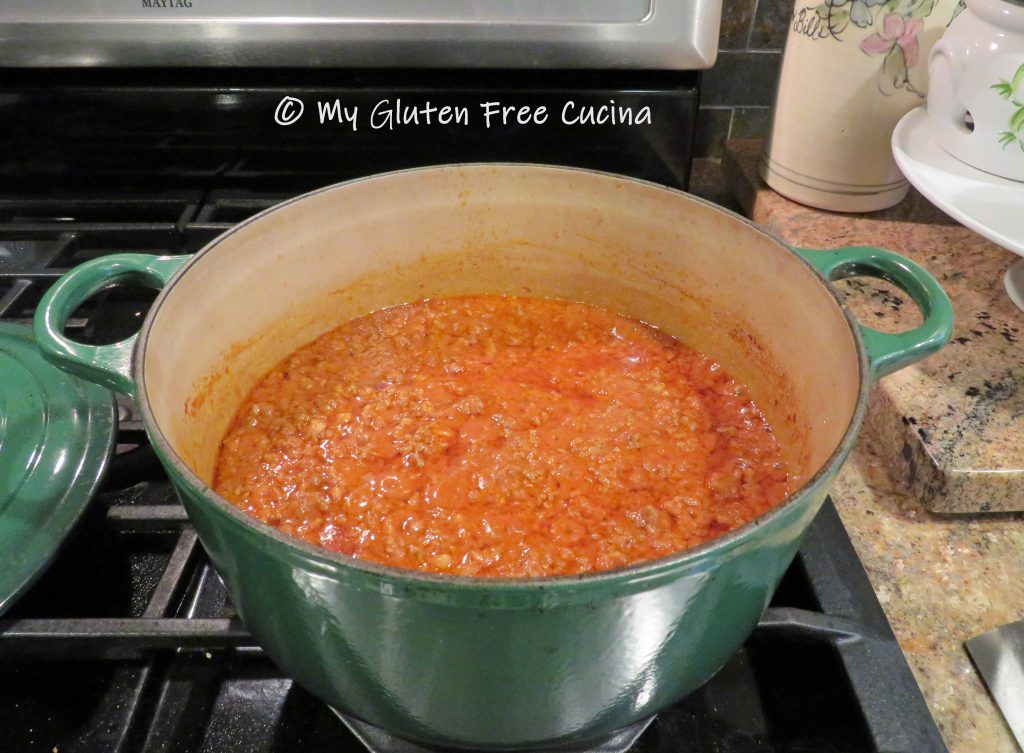
 Add the tomato paste, beef broth, remaining garlic and herbs.
 Stir it all together and continue cooking over low heat to make a reduction. Doesn’t that look good?
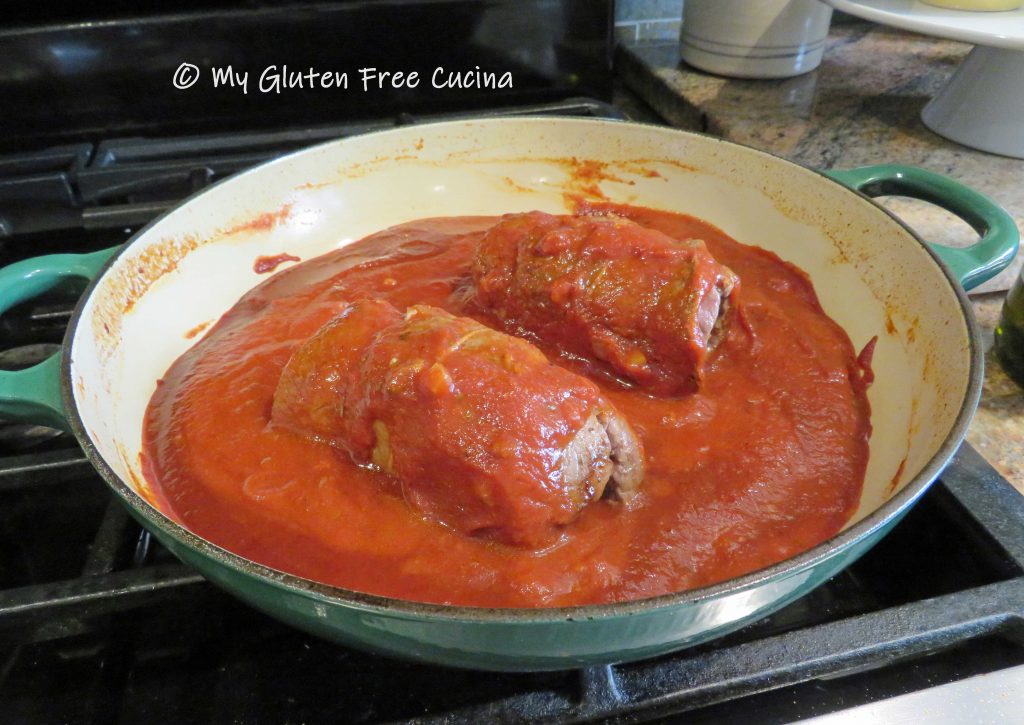
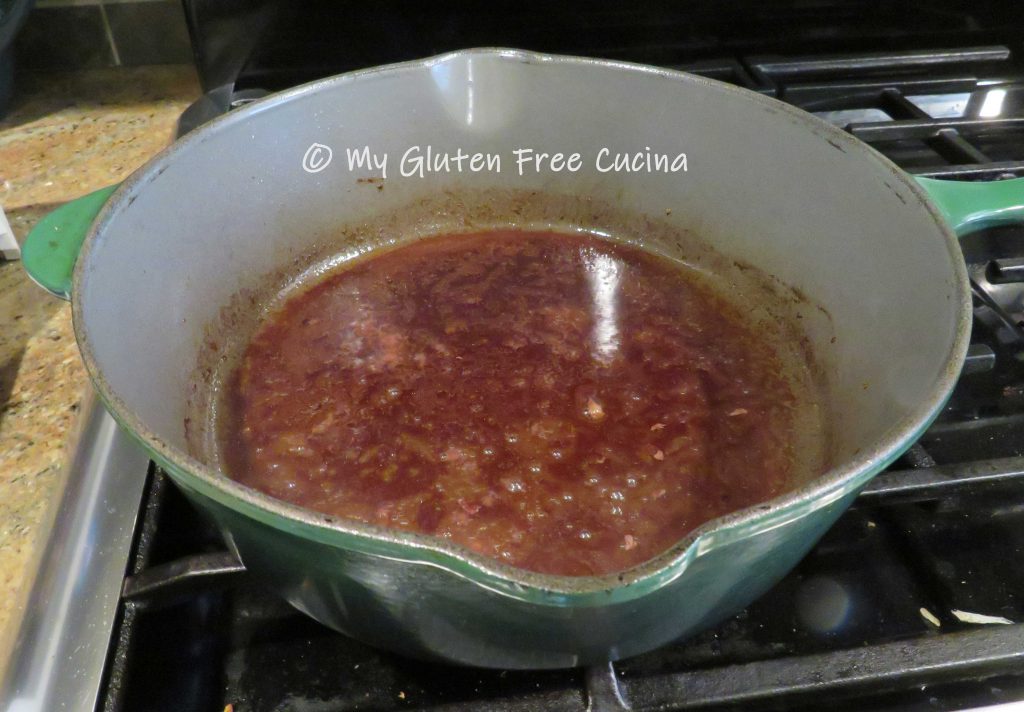
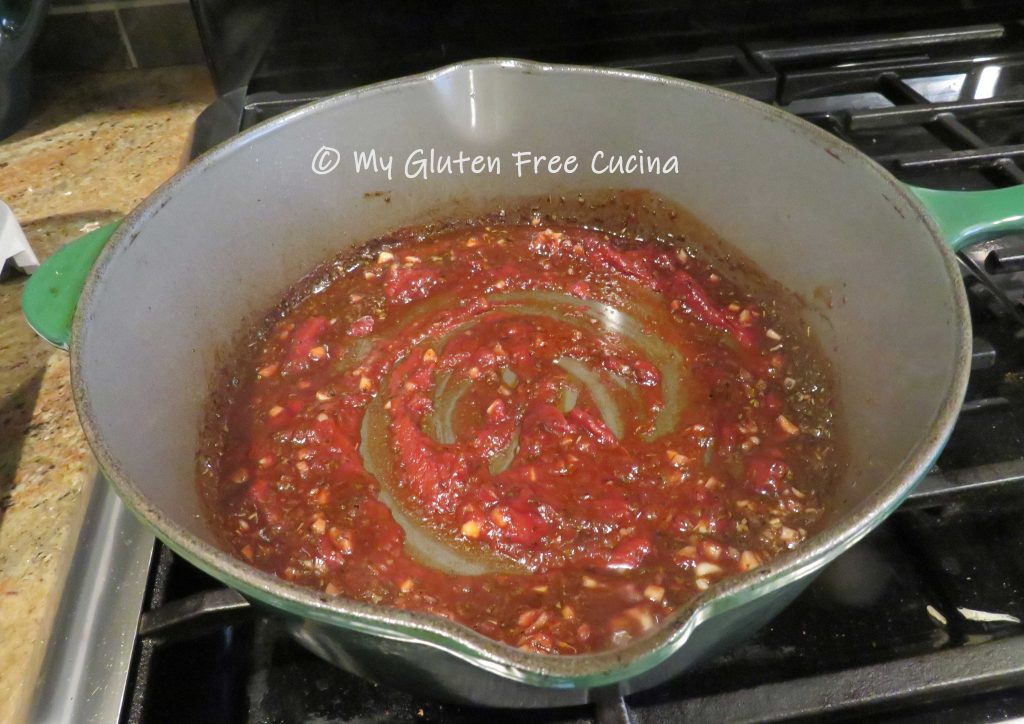 When most of the liquid has evaporated, add the tomato sauce, along with the meat bundles.
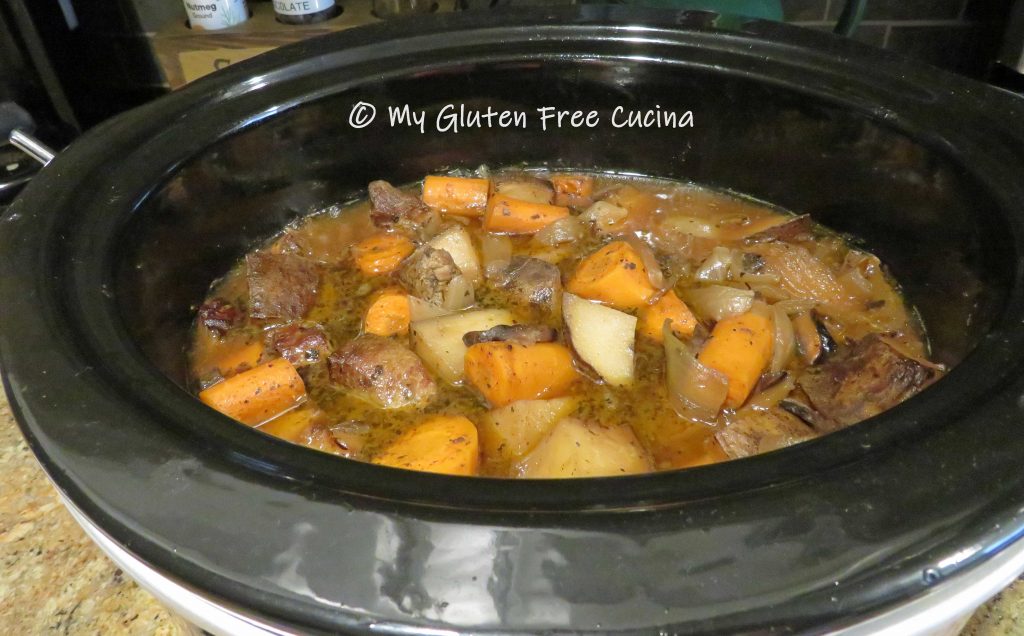
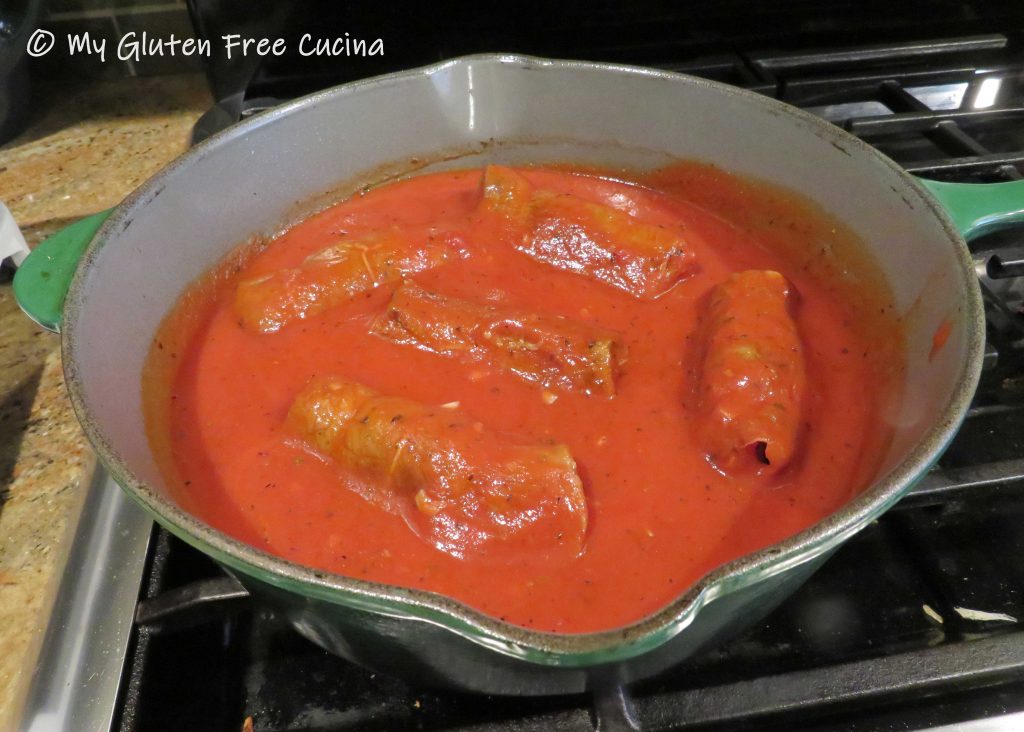 Cover and cook on lowest heat for 3 hours. Use a
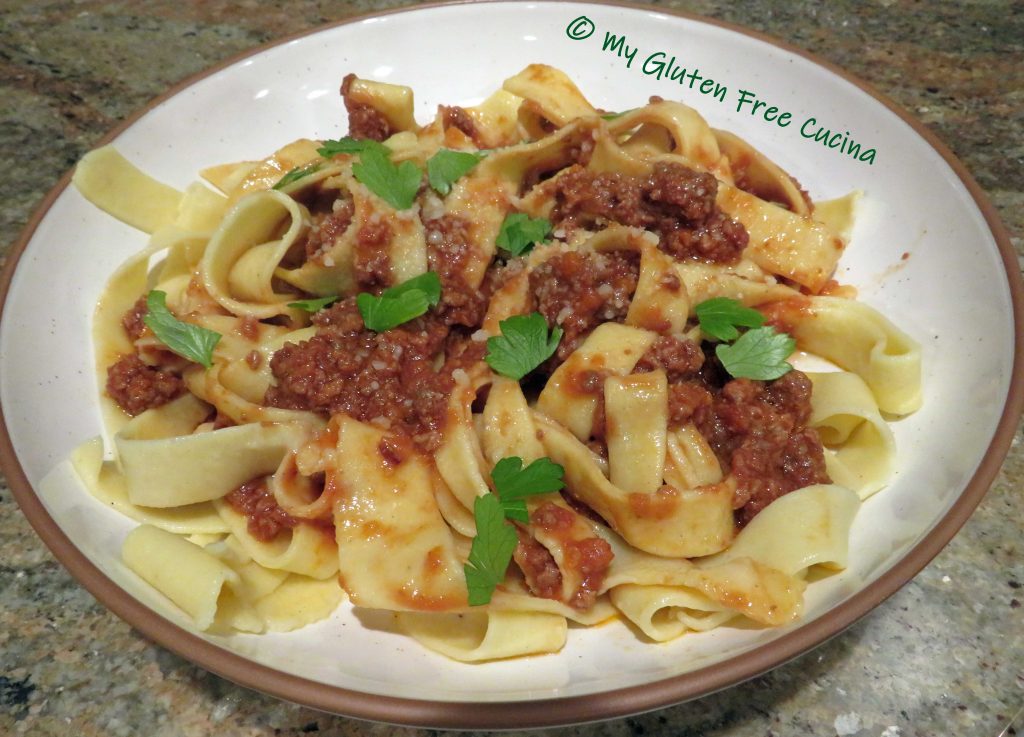
  Serve alongside your favorite gluten free pasta, with extra sauce and grated cheese. Garnish with fresh parsley or chives. Don’t forget to remove the twine and toothpicks!


 Pat the roast dry. Make 1/2″ slits all over and insert the garlic slivers. Sprinkle both sides with seasoning.


