Italian Skirt Steak Rolls

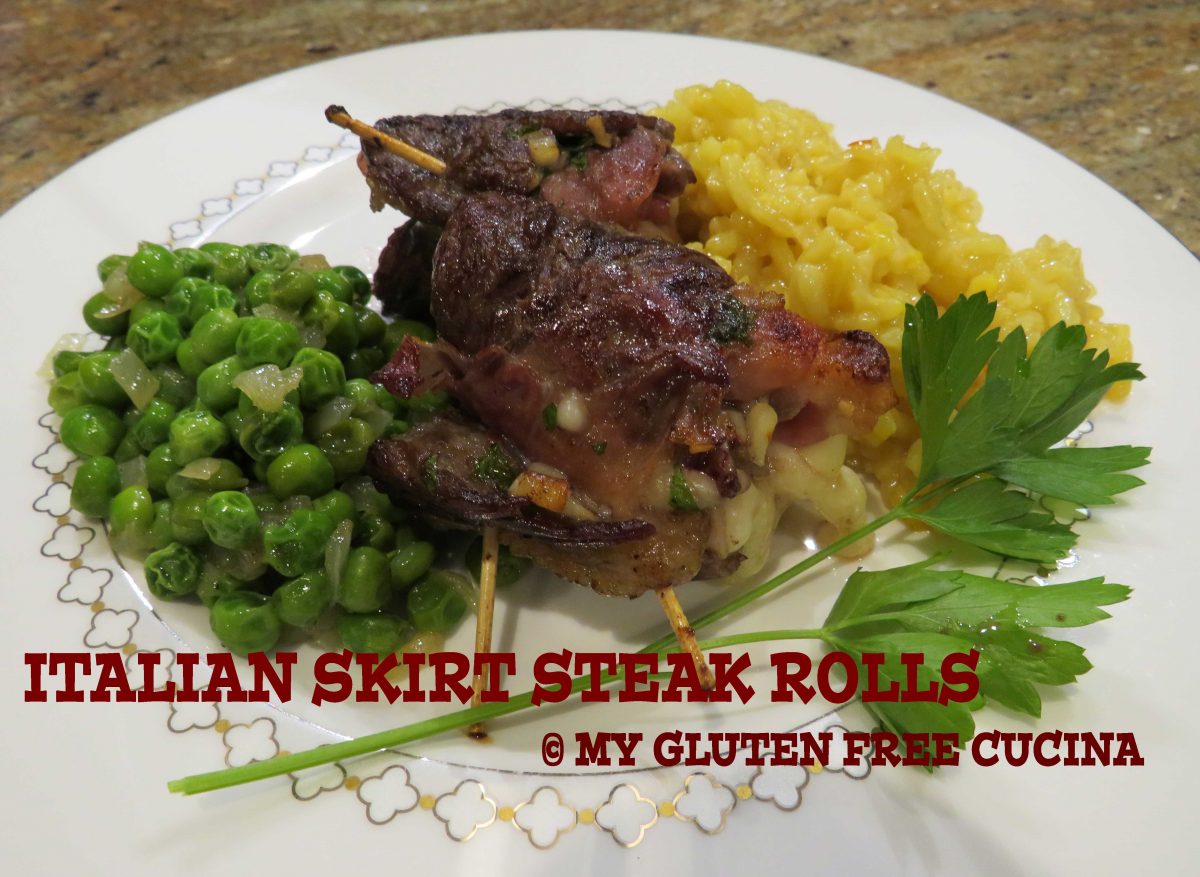
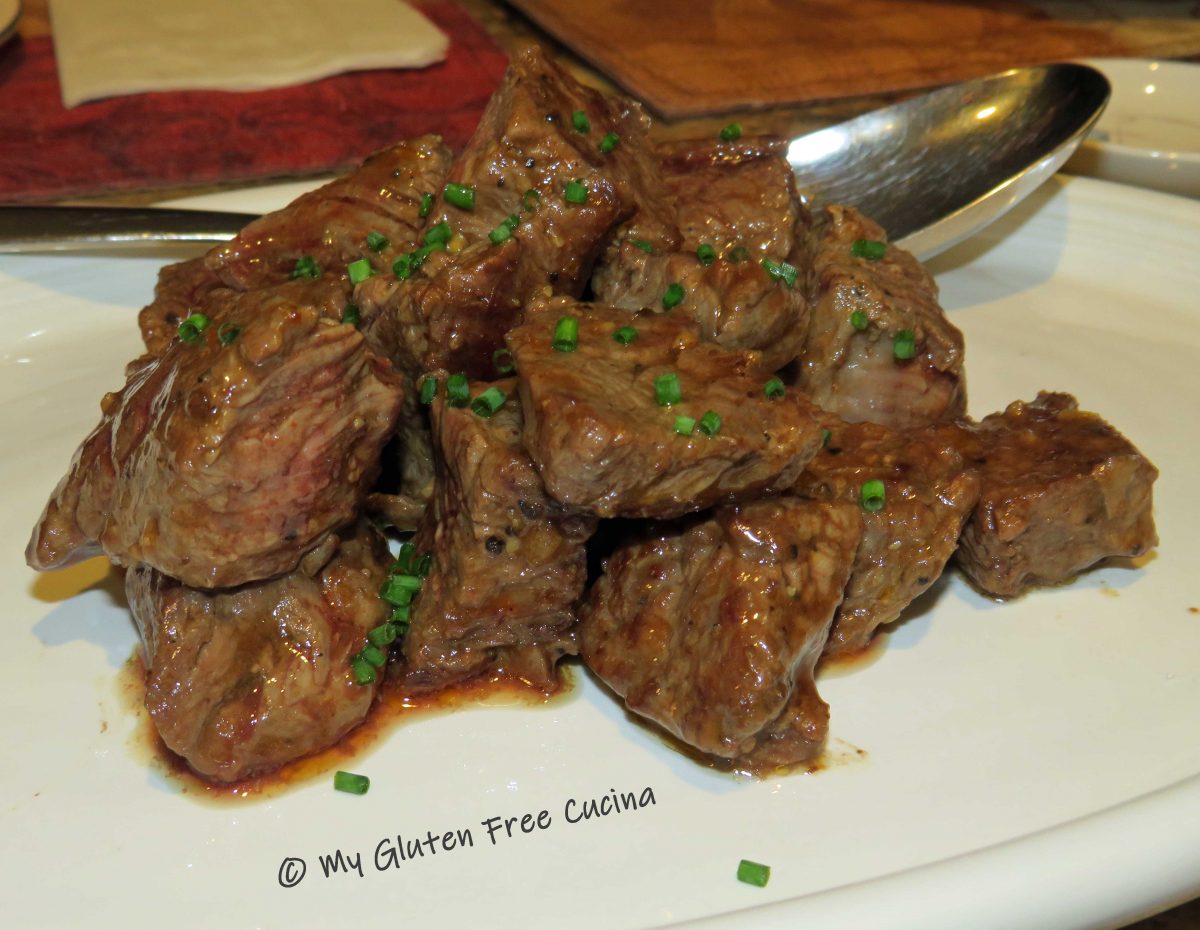
This is another bucket list recipe that I have had on the back burner.  It’s one of those dishes that is so easy to prepare but looks like you fussed for hours.  The little bundles of steak, prosciutto and cheese are amazing!

Skirt Steak Rolls may remind you of another bundled meat dish, Bracciole.  But while Bracciole is simmered in tomato sauce for hours on low heat, these Skirt Steak Rolls are cooked very quickly over high heat.

Was it difficult to make this recipe gluten free?  NO, because the ingredients have always been gluten free! 

When starting the gluten free diet, you may be tempted to throw away all your old cookbooks- don’t!  There are so many recipes that you have eaten all your life that were always gluten free or just need a change of one or two ingredients.  In time you will realize there are so many meals you can enjoy that are gluten free with no crazy ingredients to purchase!

This post contains affiliate links.

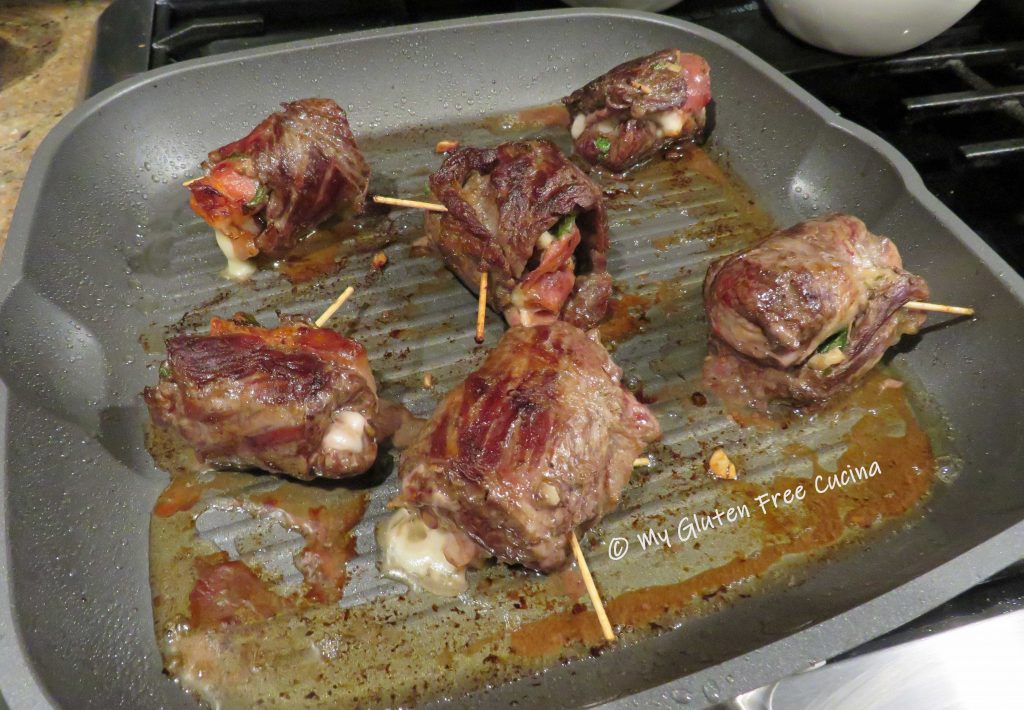
For this recipe I used an oven safe grill pan, to sear the steak rolls on the stove top and finish them in the oven.  One pan for easy cleanup!

Ingredients:

  • 1 lb. skirt steak
  • 3 garlic cloves, minced
  • 2 tbsp. fresh parsley, minced
  • 2 tbsp. olive oil
  • 3 oz. prosciutto
  • 2 oz. sliced provolone cheese cut into strips
  • ground pepper to taste

Preparation:

First gather your ingredients.  Mince the garlic and parsley and combine with 2 tbsp. olive oil.  Leave a few sprigs of parsley for garnish.

Lay the steak out on a cutting board covered with plastic wrap and trim away any white membrane or visible fat.

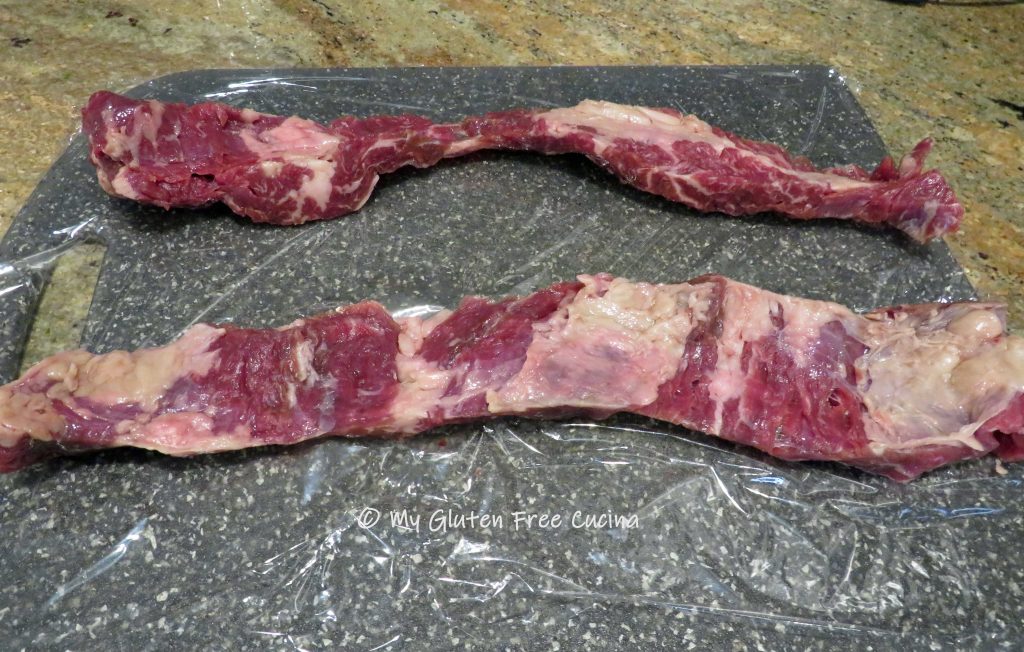
Cover the meat with another sheet of plastic wrap and pound to an even 1/4″ thickness.

Cut the steak into strips, 6-8″ long.

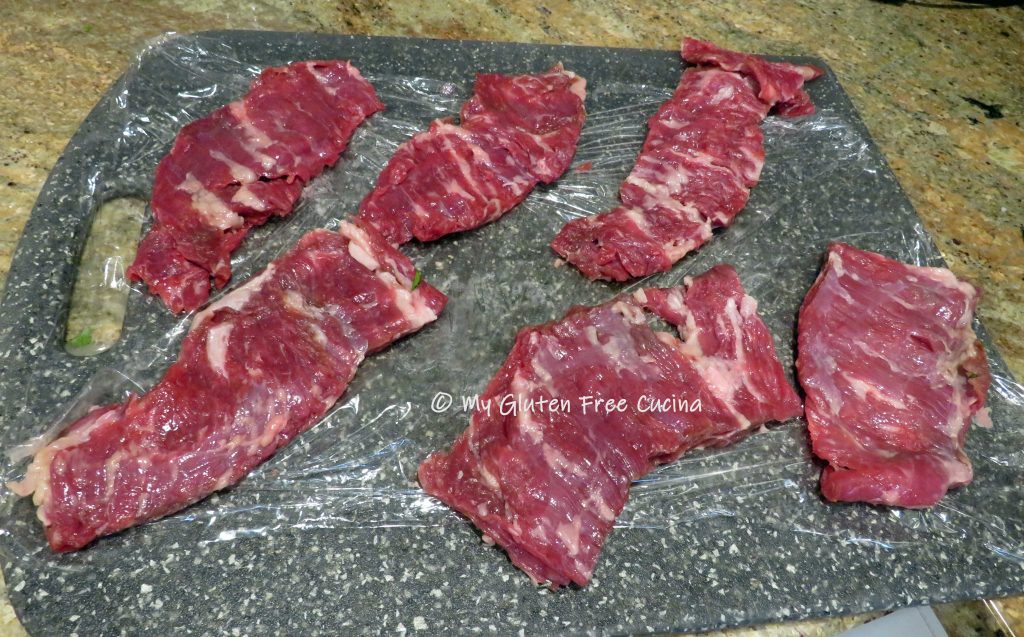
Spread the garlic mixture evenly over the steak.

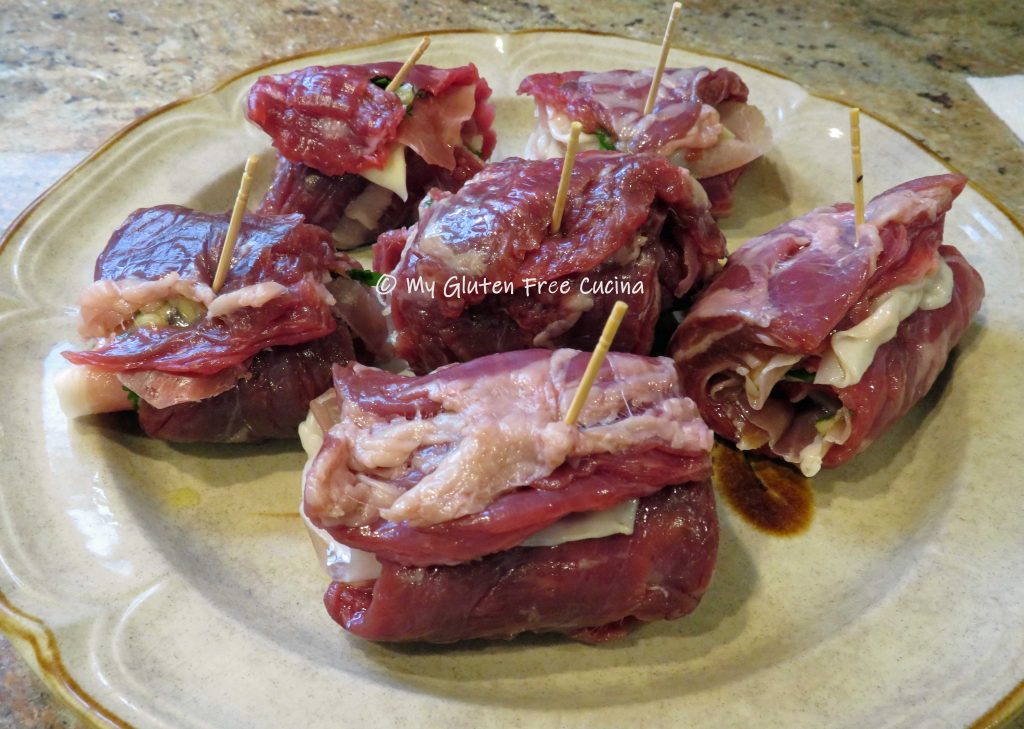
Layer the steak with prosciutto slices and top with cheese.

Now roll each piece into a bundle and secure with toothpicks.  Refrigerate for 1 hour.

Preheat the oven to 350º and season the meat bundles with fresh ground pepper.  I don’t add salt, because the cheese and prosciutto have plenty of sodium.

Coat an oven safe grill pan with olive oil spray and heat to medium (you can also do this step on an outdoor grill).  Begin cooking the steak rolls in the hot pan, about 1 minute per side.

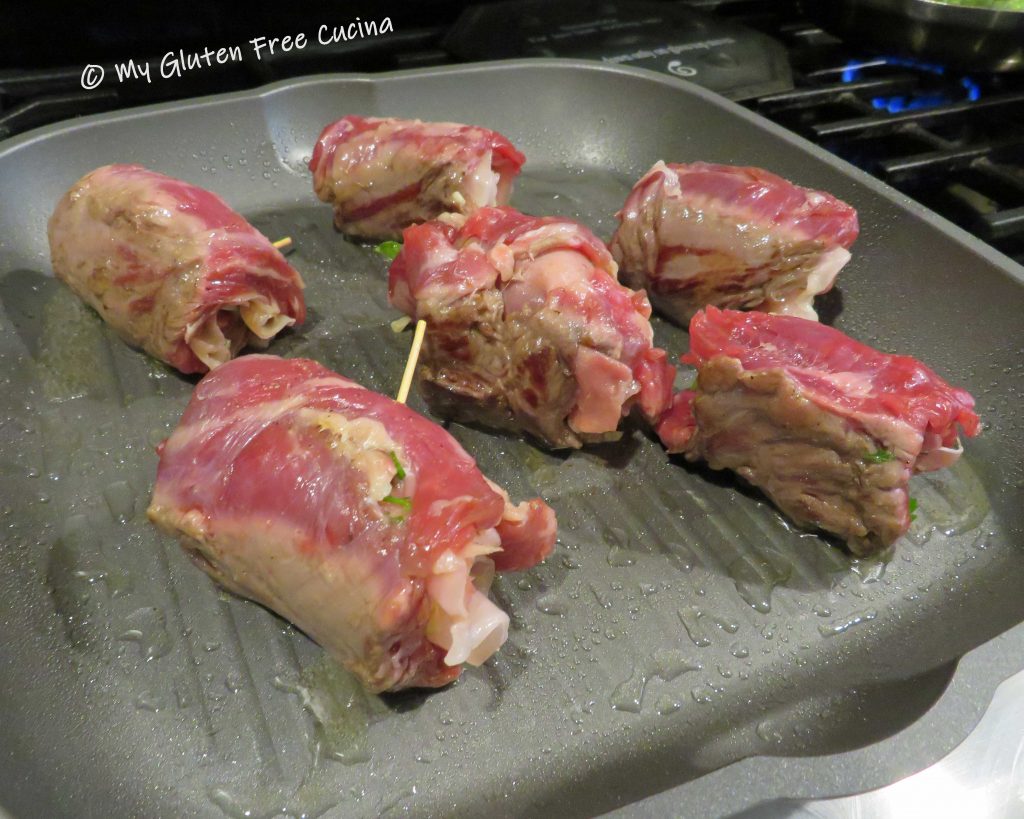
When you have some good color on the outside, transfer the pan into the oven to finish cooking.

Remove them when the internal temperature reaches 135º for medium (use a thermometer).  Tent with foil and rest 5 minutes before serving (temperature should reach 140º after resting 5 minutes).  The key to this recipe is not to overcook the meat.  A quick sear in a hot pan then finish it off in the oven, done.

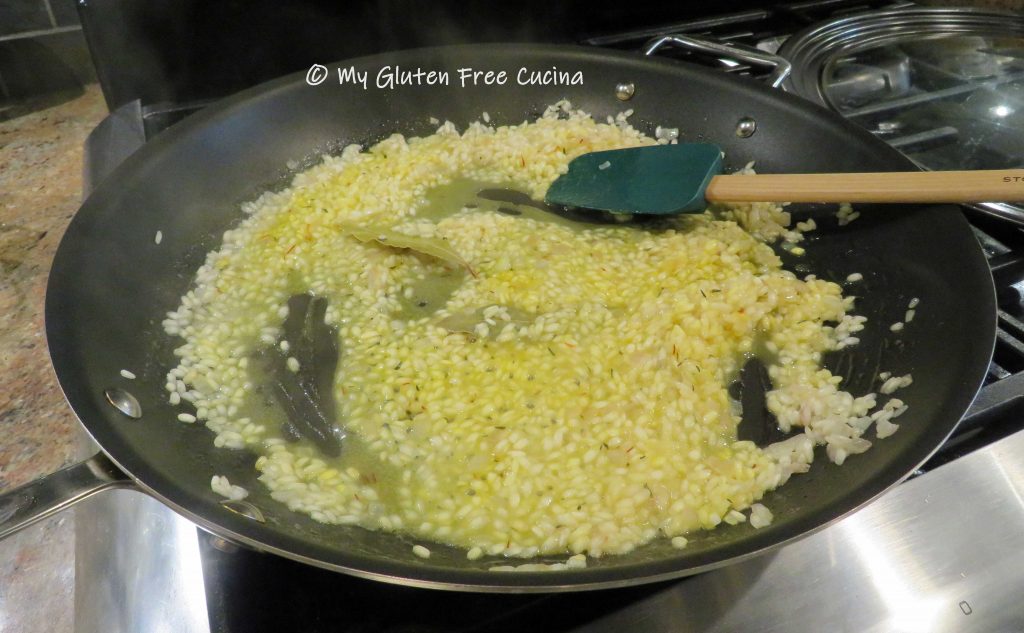
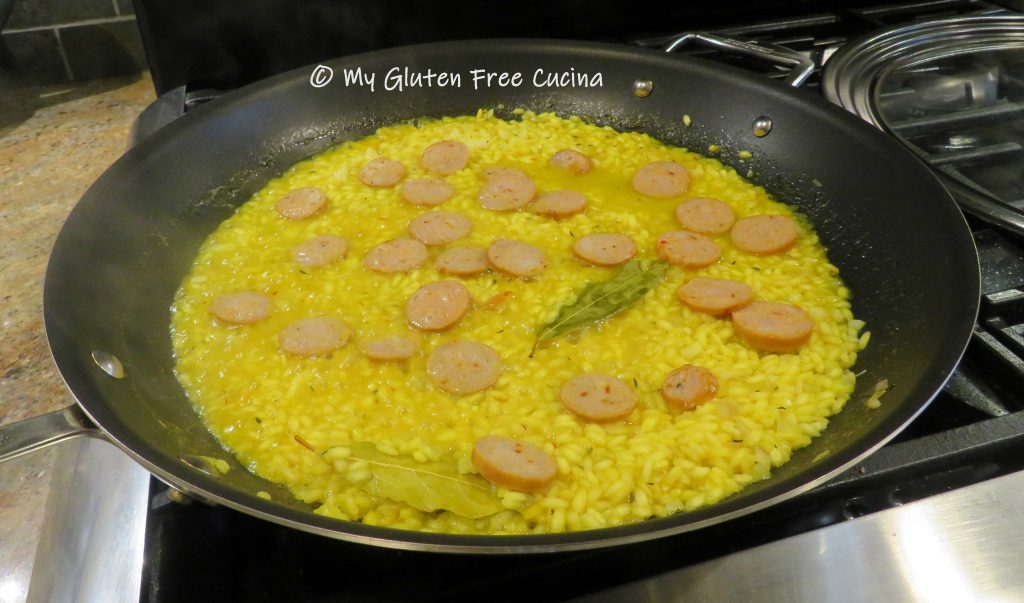
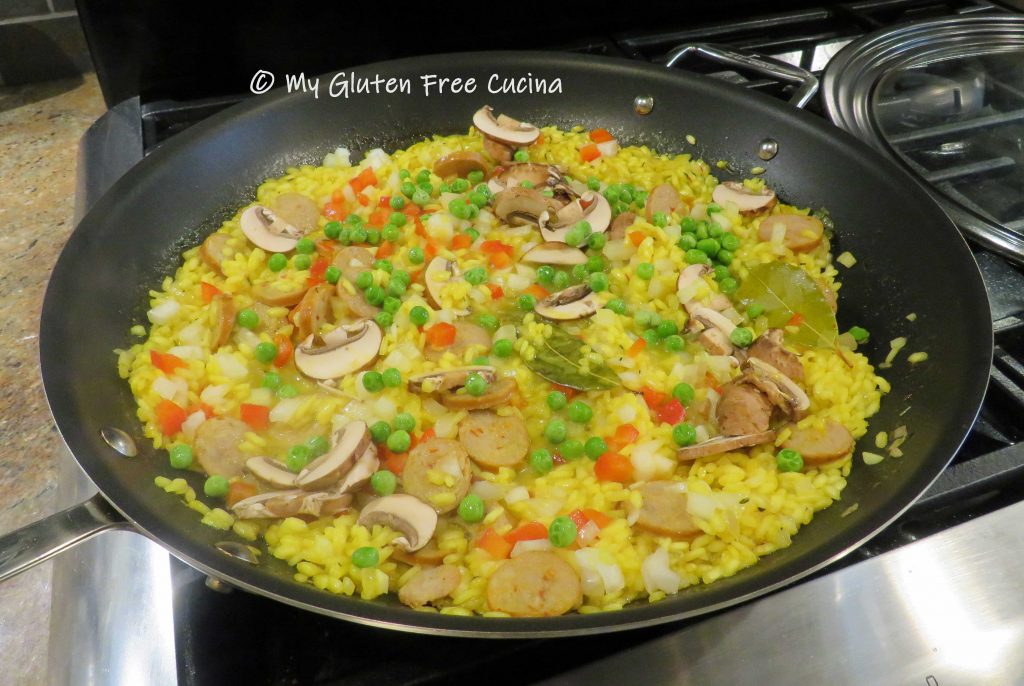
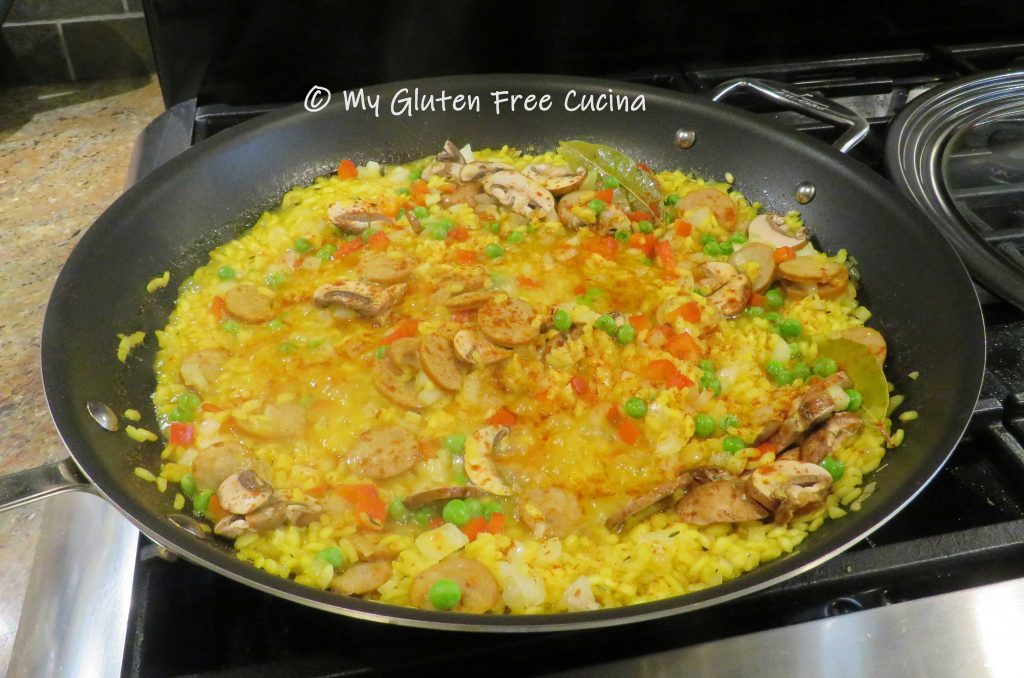
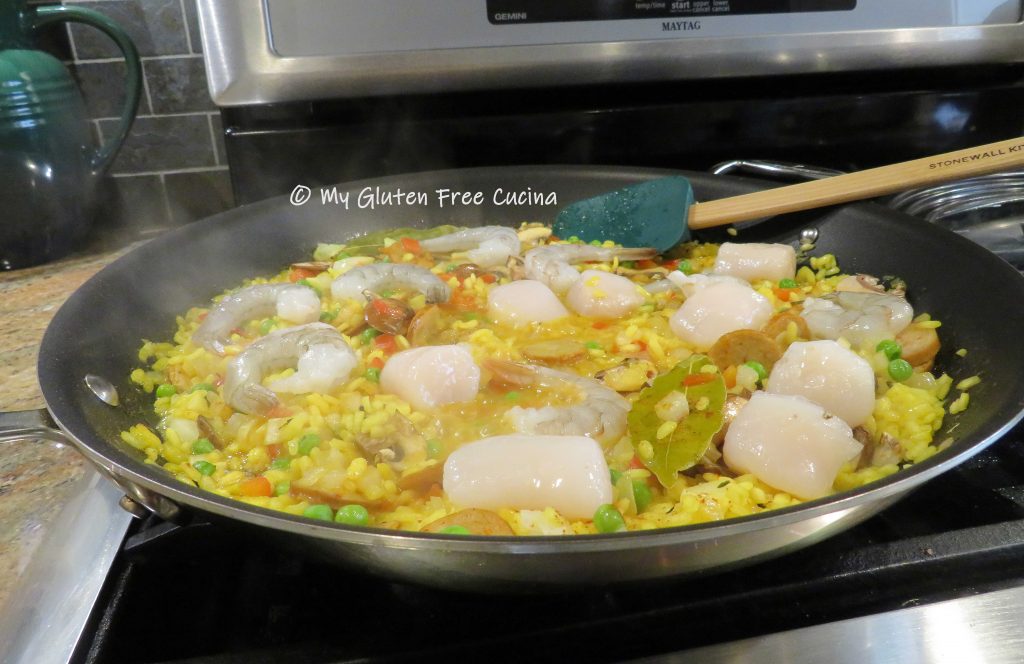
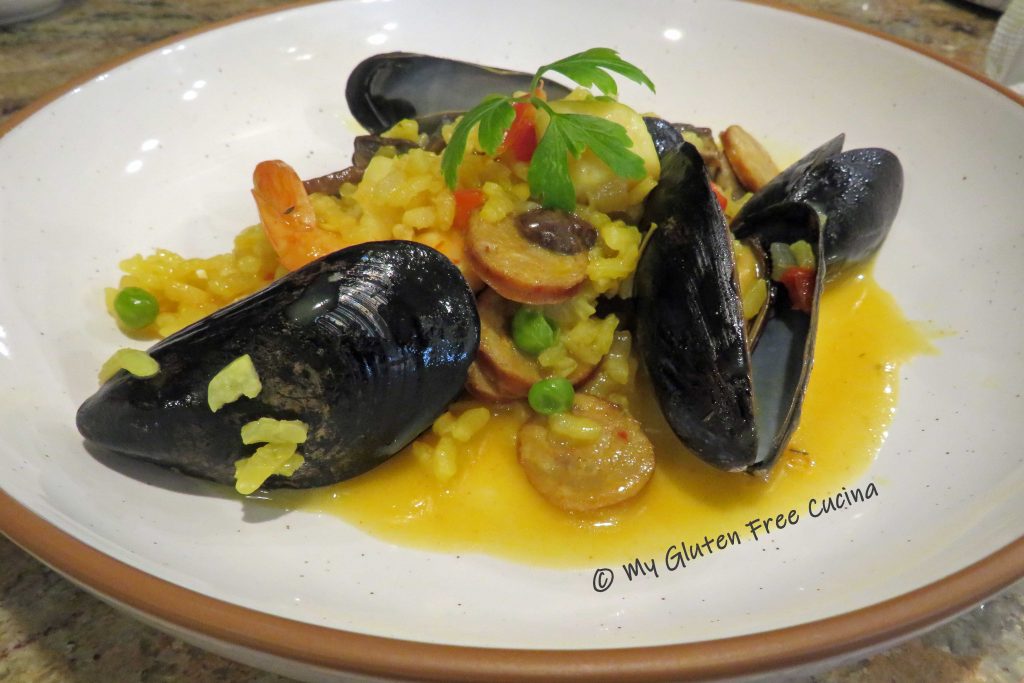
Garnish with fresh parsley, and dinner is served.  I made a side of peas and a simple risotto.

Notes ♪♫  When choosing cold cuts, I look for gluten free brands like Boar’s Head or Primo Taglio.  When just a small amount of prosciutto is called for in a recipe like this one, it can be convenient (and safer) to purchase in a sealed 3 oz. package rather than having it sliced at the deli.

Print This Post Print This Post

Butternut Squash and Pear Soup

How many soup recipes can you prepare in under an hour?  Well here’s one that you will want to pin for the holidays!  It’s elegant enough for your Thanksgiving table and quick enough to prepare after work.  The butternut squash and pear combo is complemented by just the right amount of onion and garlic, the perfect balance of sweet and savory.  Celebrate the season with a comforting bowl of soup that is good for you!

This post contains affiliate links.

About 6 Servings 

Ingredients:

  • 32 oz. carton (4 cups) gluten free chicken broth
  • 1 tsp. olive oil
  • 1 tsp. butter
  • 1 cup onion, diced
  • 1/4 tsp. turmeric
  • 1 tbsp. grated fresh ginger (or 1/2 tsp. powdered)
  • 1 clove garlic
  • 1 tsp. sea salt
  • fresh ground pepper to taste (about 1/2 tsp.)
  • 1 medium butternut squash, peeled and cubed (about 4 cups)
  • 2 pears (I used Bosc), peeled and cubed
  • 1/2 tbsp. gluten free Worcestershire sauce
  • 1 tsp. sugar
  • 1/2 cup half & half (optional)

Preparation:

In a Dutch oven or 4-quart stock pot, sauté the onions and garlic in olive oil and butter.  Add the remaining ingredients through sugar, and simmer until the squash is soft.

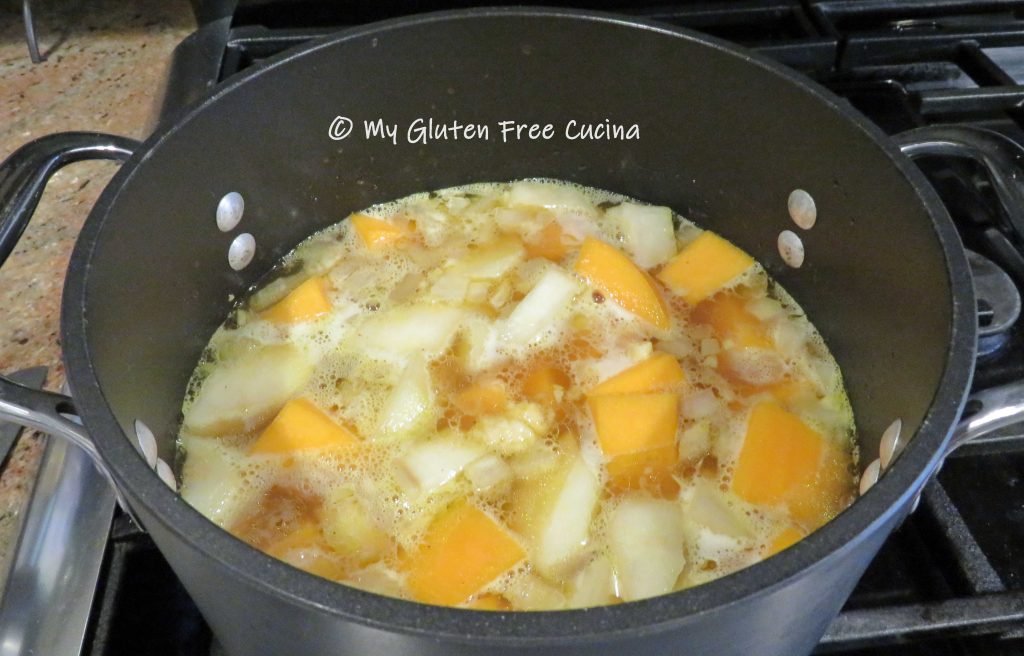
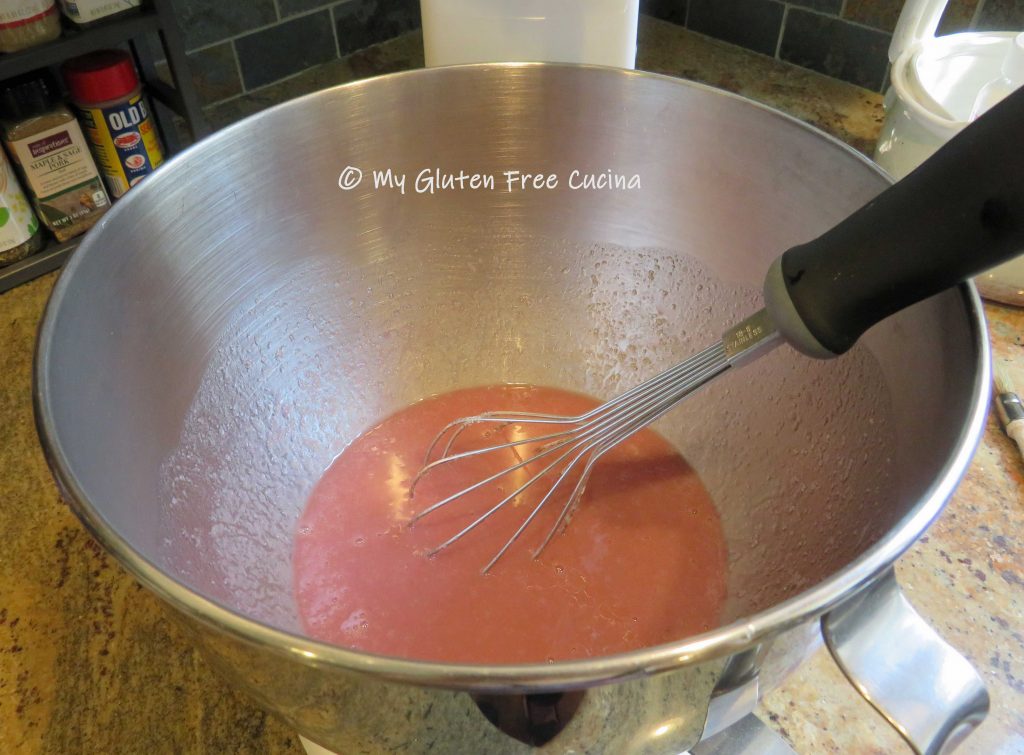
Remove from heat and puree with a stick blender.  If you like, stir in a drizzle of half & half for a smooth, creamy finish.

That’s it!  Serve with a simple garnish of fresh herbs.  So pretty and festive.

Special thanks to my cousin Donna for this recipe that has become a holiday tradition

Notes ♪♫ Most of the ingredients in this recipe are naturally gluten free.  I used Swanson brand chicken broth, and Lea and Perrins Worcestershire sauce.

Print This Post Print This Post


Air Fryer Turkey Cutlets with Sweet Potato Fries

Another win for the air fryer, I made these gluten free breaded turkey cutlets (schnitzel) for dinner, and they were so good!  I loved how crispy the breading came out in the air fryer.  Since deep fried food does not agree with me, the air fryer has been a great way to enjoy “fried” food without the tummy aches!

Thin sliced turkey breast cutlets make this recipe fast and easy to prepare.   They are commonly available where we live, but if you can’t find them chicken cutlets would work just as well.  I made sweet potato fries to go with the cutlets for an easy dinner that cooks in 30 minutes!

This post contains affiliate links.

4 Servings

Ingredients:

  • 1 sweet potato, large
  • 2 tsp. canola oil
  • 1/2 tsp. maple seasoning
  • cooking spray

……………………………………………………………..

  • 1 lb. turkey breast cutlet sliced thin (4 cutlets, 1/4 lb. each)
  • 1/4 cup white rice flour
  • 1 egg, beaten with 1 tbsp. water
  • 1/2 cup gluten free breadcrumbs
  • seasoned salt, to taste
  • cooking spray

Preparation:

Peel the sweet potato and cut into uniform size pieces, about 4″ x 1/2″.  Toss with canola or other neutral oil and season to taste.

Spray 2 trays with cooking spray and divide the potatoes between them.  Start them in a 400º air fryer on the top 2 racks.  They will need to cook 25-30 minutes, and the turkey cutlets will be added during the last 15 minutes of cook time.

While the potatoes cook, prep the turkey.  Set up 3 breading trays with the rice flour, beaten egg and gluten free breadcrumbs.  Season each tray.

Work with one cutlet at a time.  Dredge in the flour then dip in the egg, shaking off the excess.

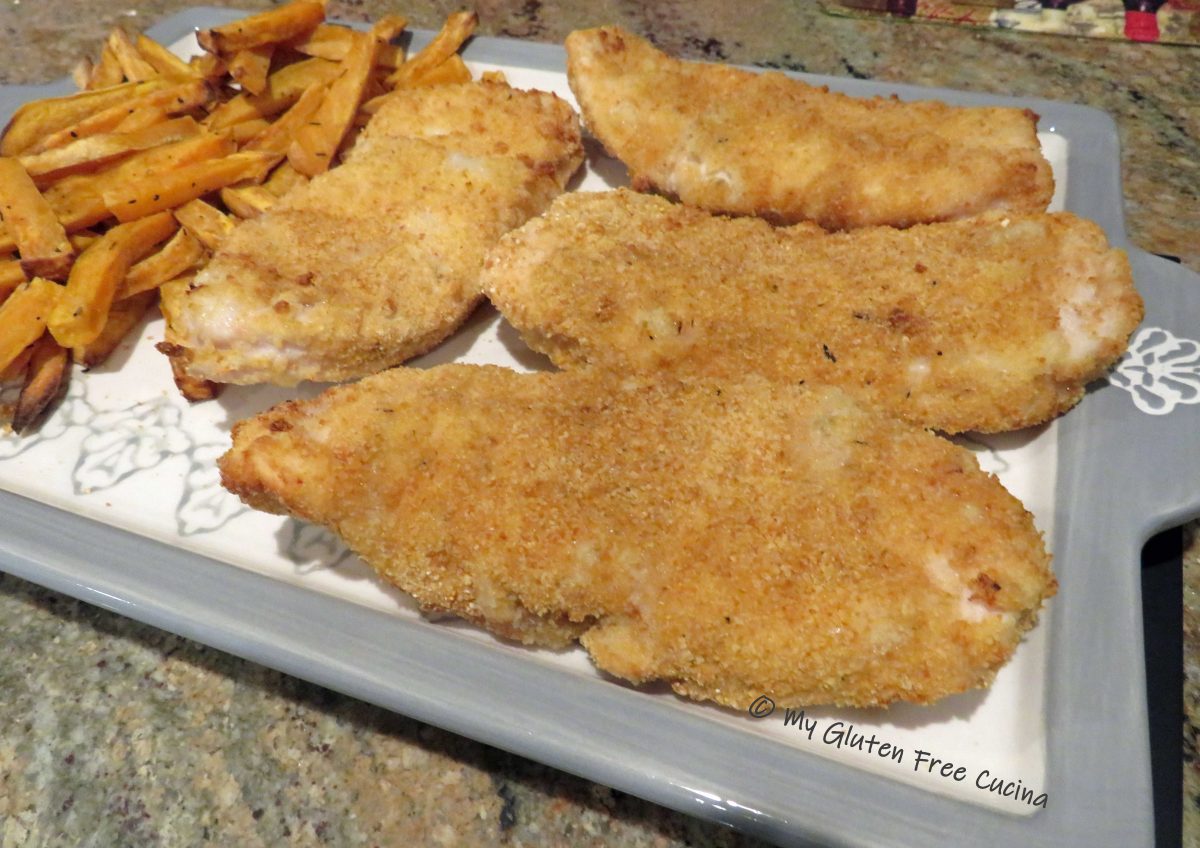
Finally coat with breadcrumbs.  Spray a rack with cooking spray and arrange the breaded cutlets in a single layer.

When the potatoes have 15 minutes left to cook, spray the cutlets with cooking spray and place them on the top shelf of the air fryer.  Move the potatoes to the bottom 2 shelves, use tongs to give them a toss.

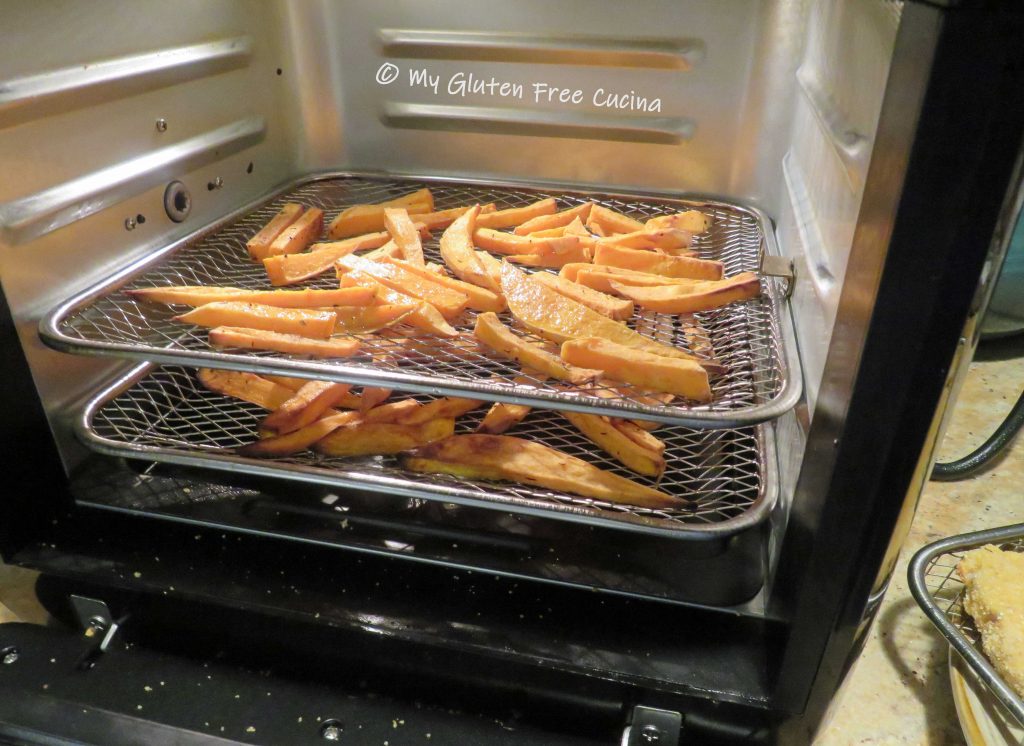
After 8 minutes turn the cutlets over and spray the tops with cooking spray.

Finish cooking 7 minutes longer, and everything should be done at the same time.

Dinner was delicious!  The sweet potato fries took a little longer than russet potato, but they were perfectly done at 400º for 30 minutes.

The cutlets are best eaten crispy hot out of the air fryer.  Leftovers can be reheated in the air fryer or enjoyed cold.  They make great sandwiches!

Notes ♪♫ I have a shelf style air fryer and was able to fit both the turkey and the fries onto 3 shelves.  If you have a basket style fryer you may have to cook them separately.

Print This Post Print This Post

Gluten Free Italian Wine Biscuits

This recipe is about a memory.  Of my long-ago childhood home, when my younger self would arrive home from school to find that my mother had been baking.  Of the aroma that filled the kitchen, the table covered with racks holding dozens and dozens of these fragrant Italian treats just out of the oven.  We would devour them still warm, when they had the consistency of a soft cookie.  Later, when fully cooled they would firm up to a crisp exterior perfect for dunking in coffee!

Why do I remember this particular recipe so fondly?  Like most women of her generation my mother embraced convenience foods, and her cookies and cakes were usually made from a boxed mix.  Not these Wine Biscuits though, they were always made from scratch!

It’s a popular recipe and an easy one too!  Every Italian has their own little variation, but the basic ingredients include a cup of sugar, a cup of oil and a cup of wine.  My mother used eggs in hers.  I know that others do not, but I think the egg definitely helped with the consistency in this gluten free makeover.

It was a challenge to recreate the exact texture of these biscuits with a gluten free flour.  Although we call them biscuits, they are actually a shaped cookie.  The dough had to be workable enough to roll into thin ropes, to form the traditional twist and knot shapes.  A tall order for gluten free!

This post contains affiliate links.

The Flour

In keeping with the simplicity of my mother’s recipe, I did not want to make a 20-ingredient flour blend.  So, I used Better Batter Original All Purpose Flour and was very pleased with the taste and texture of the wine biscuits.  They got a big thumbs up from family and friends who sampled them!  Please note that other gluten free flour blends may work, but since every brand is different, you may not achieve the same results with another flour.

When you shop Better Batter and use my Promo Code MGFC30 at checkout, you will receive 30% off any non-sale item! 

CLICK HERE to take advantage of this incredible opportunity to try the flour that I call my little miracle in a bag!

Yield: 2 dozen

My mother’s original recipe made 4 dozen wine biscuits and believe me, in those days they disappeared before having a chance to cool down!  I decided to cut the recipe in half, and it was just the right amount for a small get together.  You can double it for a larger group or holiday baking.

Ingredients:

Plus . . . . . . . . . . . .

  • additional flour for dusting and rolling
  • 1 beaten egg, for egg wash

Preparation:

In the bowl of a stand mixer, whisk together the egg, sugar, oil and wine.

In a separate bowl, whisk together the flour, baking powder and salt.  Gradually add the dry ingredients to wet and beat until a soft dough forms.

Lightly flour a cutting board, and scoop out one rounded tablespoon of dough at a time.  Roll each piece into a rope, about 1/2″ thick and 10″ long.  Keep the board and your fingers lightly floured while handling the dough.

You can shape the ropes into a knot or a twist.  My mother would simply form a round and pinch the ends together, that works too!  You should have enough for about 2 dozen.

Line 2 baking sheets with parchment and arrange the formed wine biscuits, leaving a few inches of space in between.  Refrigerate for 1 hour before baking.  Keeping them cold helps the biscuits retain their shape.

Preheat the oven to 325º.  Whisk together 1 egg with 1 tbsp. water and lightly brush the wine biscuits with the egg wash.

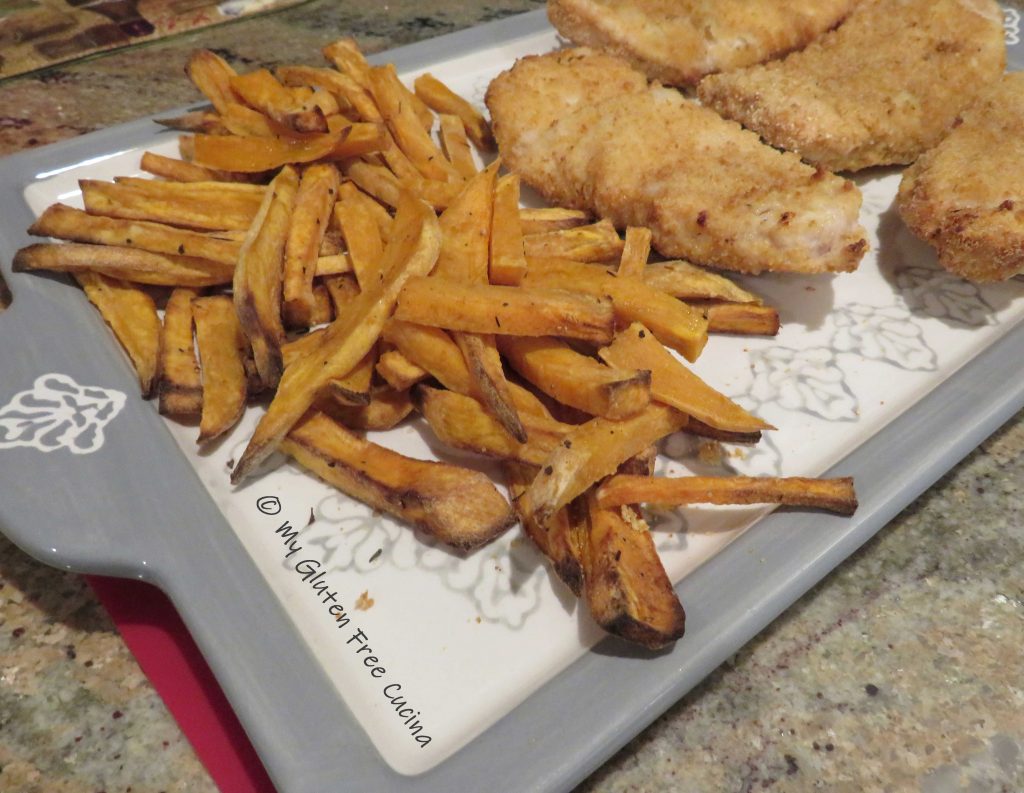
Bake for 22-25 minutes.  Cool in the pan 10 minutes then transfer to a rack.  Enjoy them warm or at room temperature.

Store airtight at room temperature 2-3 days.  I imagine they would freeze well but this batch did not last long enough to find out!

Notes ♪♫ My mother made these biscuits with my grandfather’s homemade red wine. 🍷 There was always a bottle in the refrigerator.  Even when the wine was past its prime, it was good for cooking, and this was how it usually got used up!  You can use any red wine that you enjoy drinking (i.e., not cooking wine!).

Print This Post Print This Post

Gluten Free Seafood Paella

Today I’m making Paella, the amazing Valencian rice dish infused with aromatic saffron.  There are several variations of Paella, that may include chicken, pork, or seafood.  It can also be made vegetarian, or a blend of the above.

This paella is all about the seafood.  I used shrimp and scallops from my freezer pantry and fresh mussels that I purchased the same day.  I did add a link of Andouille sausage, because I love the heat it brings to this recipe.

You don’t need a paella pan to make this dish.  A large, nonstick skillet with a cover works just as well.  You can find reasonably priced pans on Amazon (like THIS ONE) that will get the job done.  If you don’t have a pan with a lid, you can purchase a universal lid.

This post contains affiliate links.

Ingredients:

  • 1 tbsp. butter
  • 1 tbsp. olive oil
  • 1/4 cup minced shallots
  • 1 cup Arborio rice
  • 1/2 cup white wine
  • 2-1/2 cups gluten free chicken stock, room temperature
  • big pinch of saffron
  • 2 bay leaves
  • 1/4 tsp. thyme
  • 1/4 tsp. turmeric
  • ——————————————–
  • 2 garlic cloves, minced
  • 1/4 cup red bell pepper, sliced
  • 1/2 cup sweet onion, diced
  • 1/4 cup mushrooms, sliced
  • 1/4 cup frozen peas, defrosted
  • 1 link gluten free Andouille sausage, cut into thin coins
  • sprinkle of paprika
  • ——————————————–
  • 8 large raw shrimp, defrosted
  • 8 large sea scallops, defrosted
  • 1 lb. mussels, scrubbed and rinsed
  • fresh Italian parsley for garnish

Preparation:

Rinse the mussels thoroughly under cool water.  Discard any that are cracked or remain open after rinsing.  Defrost the shrimp and scallops.  Peel and devein the shrimp.

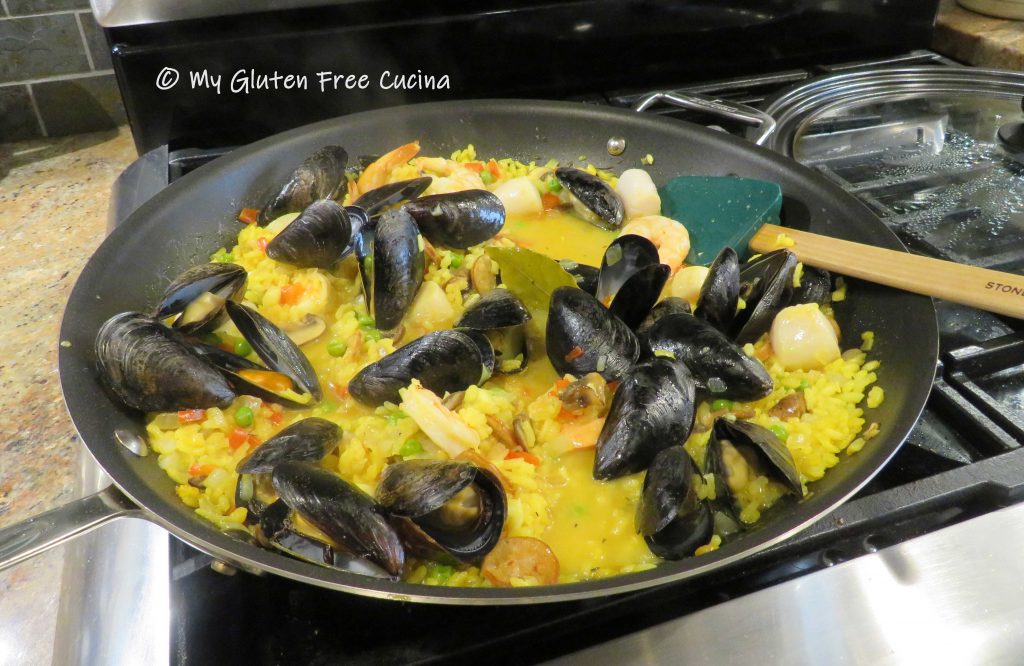
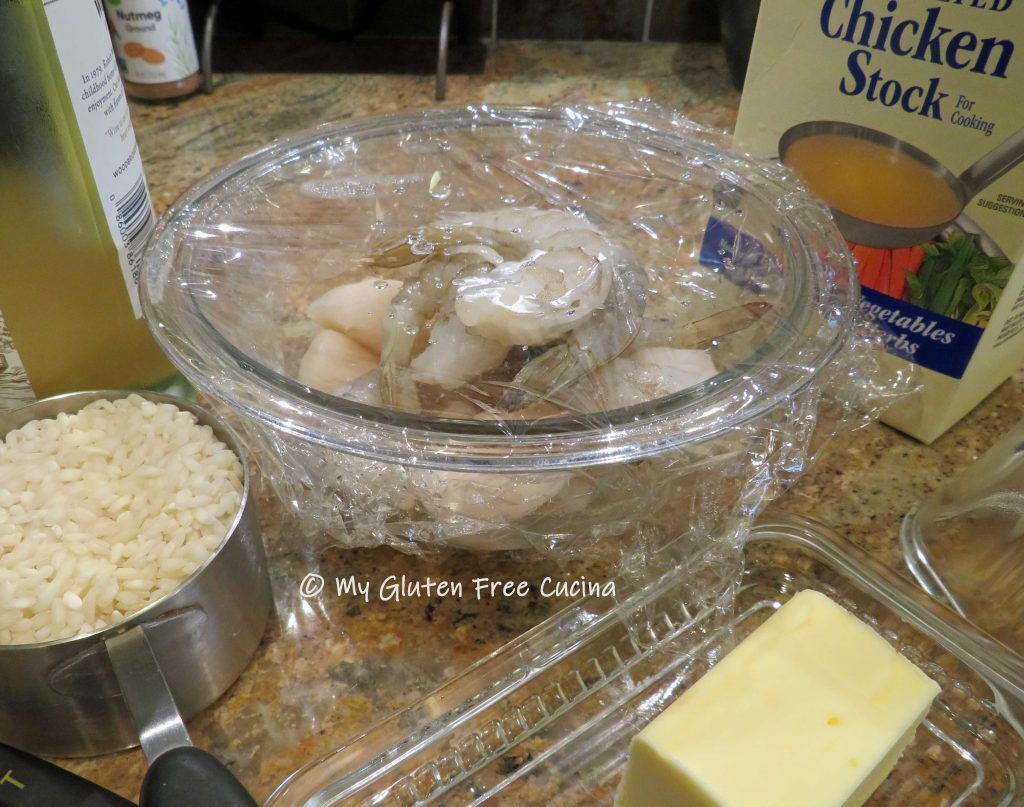
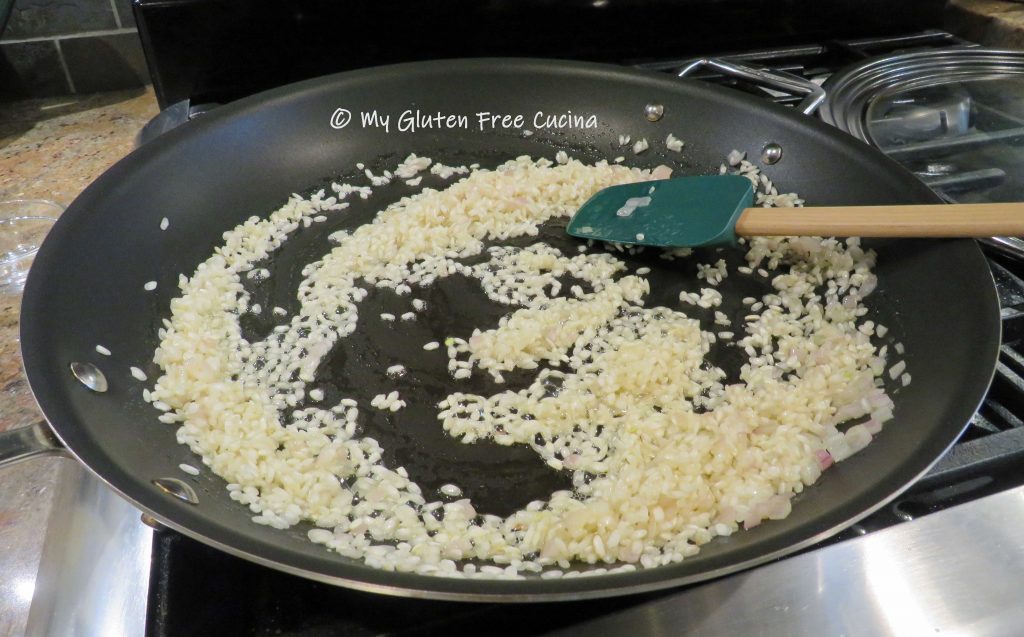
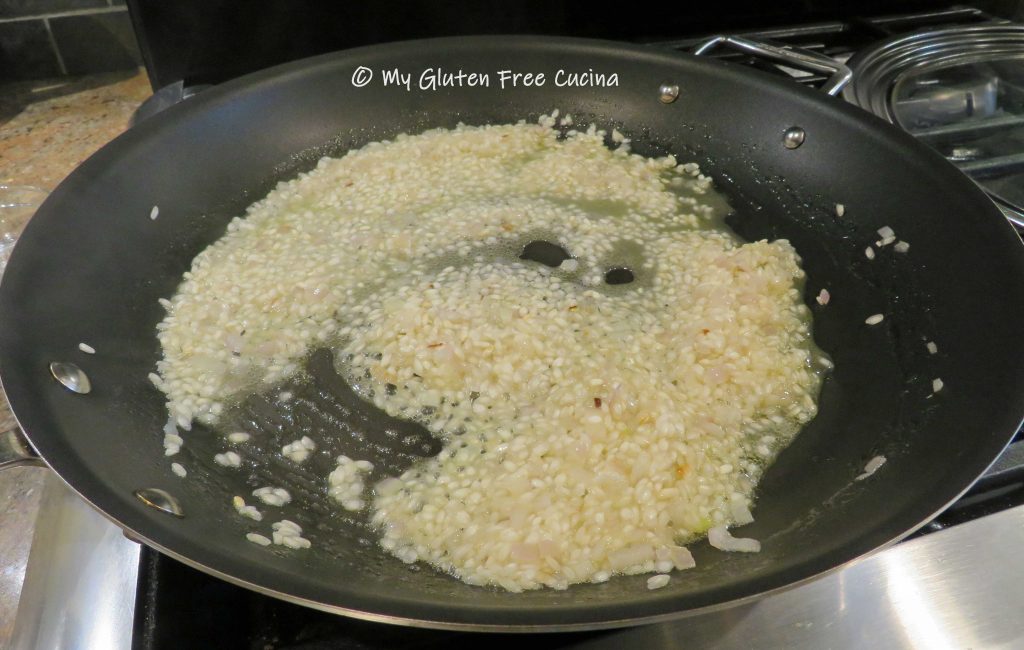
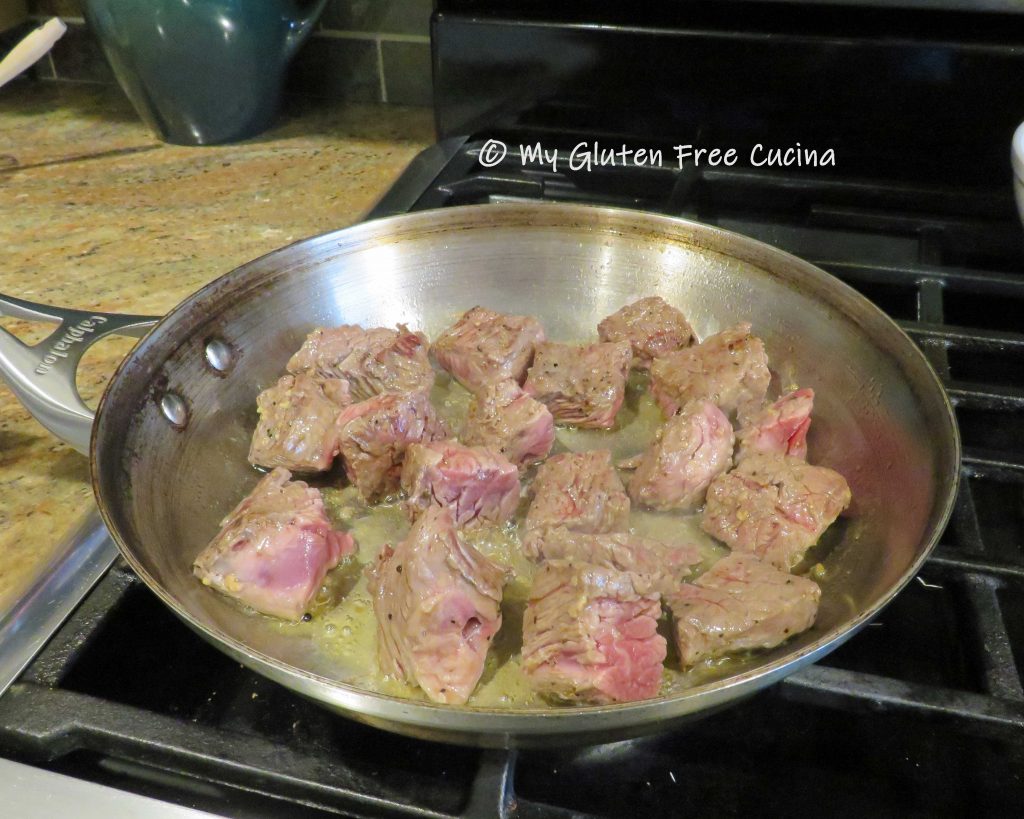
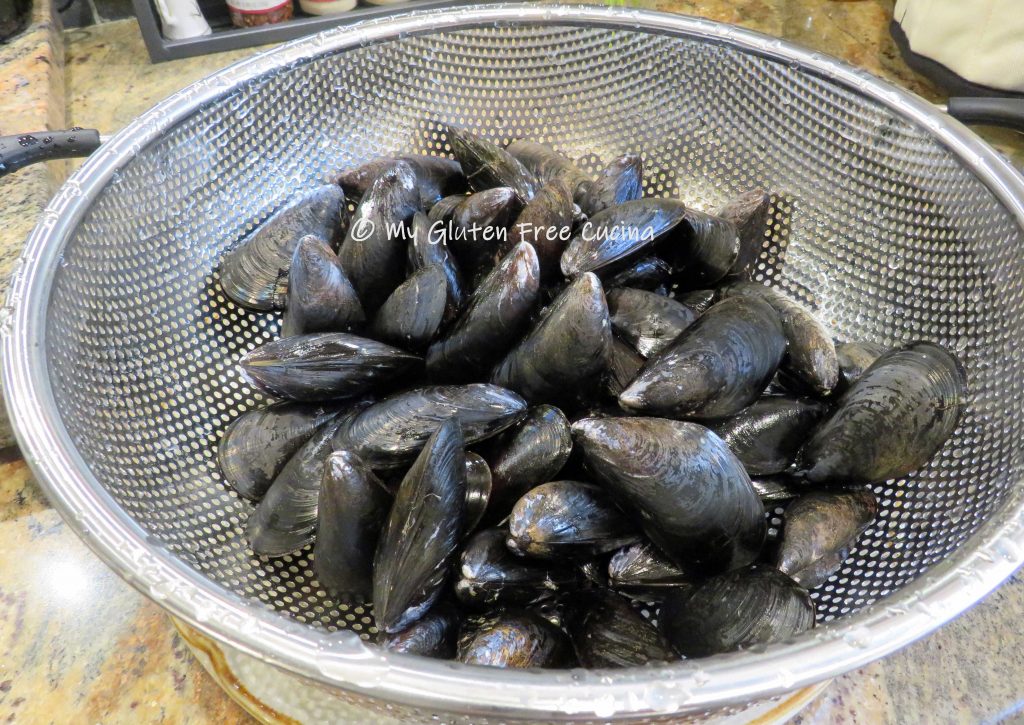
Heat the butter and olive oil in a large, nonstick skillet.  Stir in the shallots and cook gently for 1 minute.

Add the rice, stirring to coat with the oil and butter.  After 30 seconds add 1/2 cup of white wine.

Stir constantly, allowing the wine to evaporate.  When most of the liquid has been absorbed, begin adding the chicken broth 1/2 cup at a time.  With the first addition of broth, add the saffron, bay leaves, thyme and turmeric.

Continue adding the chicken broth 1/2 cup at a time.  Stir frequently, and when most of the liquid has been absorbed add the next 1/2 cup.

After 20 minutes the rice should be nearly done.  Add the garlic, Andouille sausage, and all of the veggies.  Sprinkle with paprika and cook for 5-10 minutes.

Don’t add broth after this point, as the veggies and seafood will release their own liquid.

Add the shrimp and scallops at the very end of the cook time, when the rice is done, and veggies are tender.

Stir together and cook for one minute, then add all of the mussels.  Cover and cook for 6 minutes or until the mussels open.

(Important: If any mussels do not open, discard them).

To serve, ladle the paella into wide bowls and garnish with parsley.

Notes ♪♫ Saffron is considered the most important spice in a traditional paella.  It gives the rice a beautiful golden color and distinctive flavor.  Although expensive, I always keep some on hand and use it sparingly in recipes like this one.  If you are looking for a more budget friendly alternative, try using turmeric instead of, or in addition to the saffron.

Print This Post Print This Post

Gluten Free BBQ Beef Tips

Beef Tips are a year round favorite that can be served in so many ways.  I got 2 big family packs on sale earlier this summer and broke them down into 6 portions for the freezer.  Since then I have made Grilled Beef Kabobs, Asian Beef and Broccoli, and today I made the easiest BBQ Beef Tips.  This simple dish can be prepared stovetop or on the grill.

This post contains affiliate links.

Ingredients:

Preparation:

Combine the sirloin tips with 1 tbsp. olive oil and 1/2 tsp. Montreal steak seasoning.  Cover and marinate 45 minutes at room temperature.

Heat a stainless-steel skillet on medium, brush the pan with butter and the remaining tbsp. of olive oil.  Add the sirloin tips and cook for 6 minutes, turning once.

Don’t crowd the pan, cook in batches if needed.

To finish, add 2 tbsp. gluten free BBQ sauce and toss to coat.

Cook for 1-2 more minutes.

Transfer to a serving dish and garnish with chives.  Serve with more BBQ sauce for dipping.  BBQ Beef Tips can be served over rice or try my yummy Corn Cakes or BBQ Baked Beans!

Notes ♪♫ When I began my gluten free journey, I experimented with making my own BBQ sauce.  It is delicious, but very high in sugar.  So, if you are looking for a gluten free BBQ sauce with less carbs, try Stubbs, they have many flavors to choose from.  There’s even a reduced sugar option!  Check it out!

Print This Post Print This Post