Did you ever spend the better part of a day working on a recipe, and think you may never make it again? Because it’s too much work? That’s how I was feeling as I worked on this dish – until I took that first bite. Oh, my goodness, this was absolutely divine!
Cannelloni con Besciamella – Cannelloni with Béchamel is a labor-intensive dish that is well worth the time and effort, it is swoon worthy! Recipes like this one are a wonderful way to pass a Sunday afternoon. For those who can’t spend all that time, I have broken down the recipe into four steps, some of which can be made ahead. So, whether you go for the entire recipe or spread it over 2 days, I’ve got you covered. Also, see notes at the end for shortcuts!
8 Servings
This post contains affiliate links.
The pasta dough was made with Better Batter Original Blend, and I used my KitchenAid pasta roller attachment to roll out the sheets of fresh pasta.
Shop Better Batter and use my code MGFC30 at checkout to receive 30% off any non-sale item!
– – – – – – – – – – – – – – – – – – – – – – – – – – – – – – – – –
THE STEPS
1. the Marinara 2. the Filling 3. the Pasta 4. the Béchamel
– – – – – – – – – – – – – – – – – – – – – – – – – – – – – – – – –
Step 1 – Make the marinara sauce (can be made ahead)
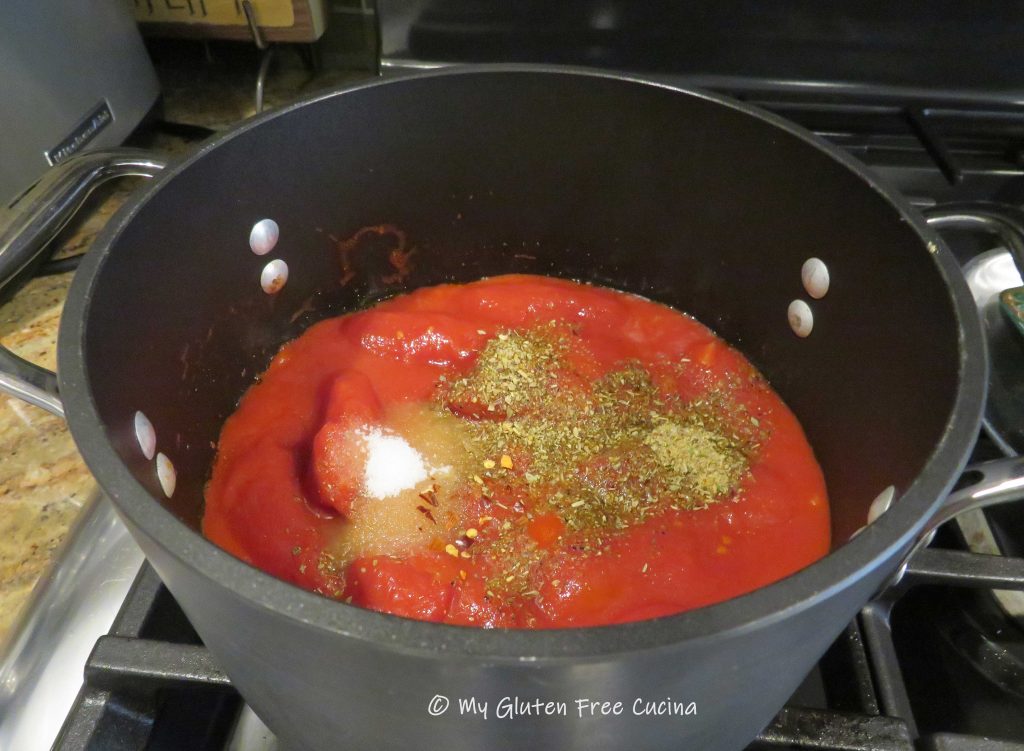
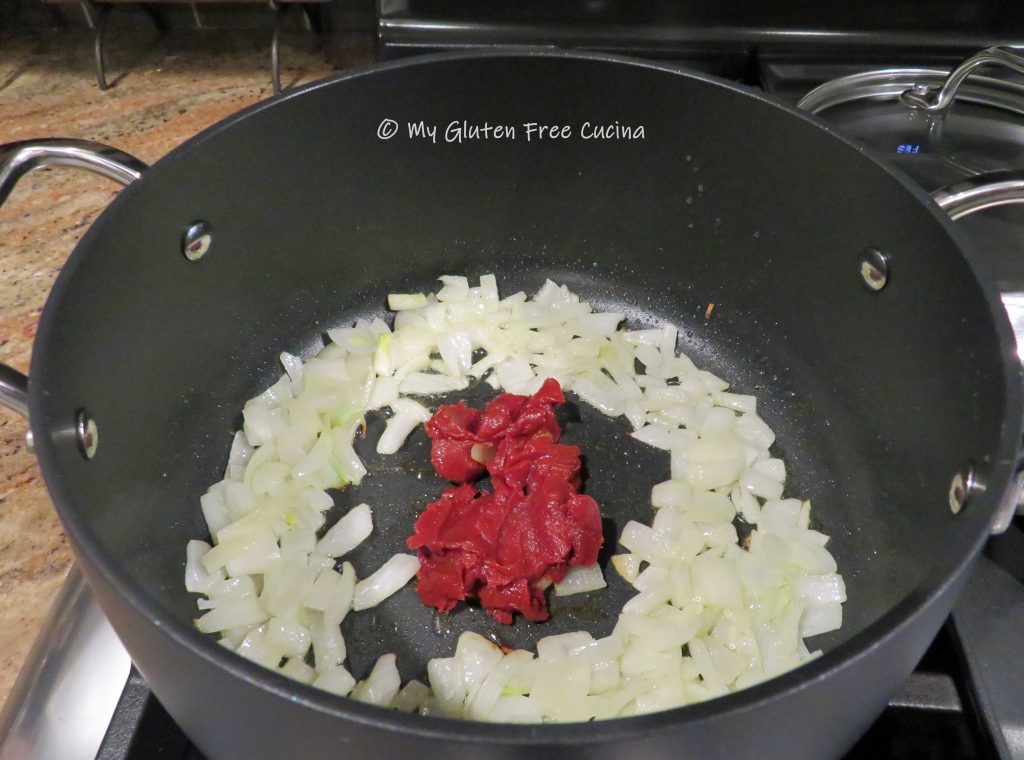
Heat the olive oil in a medium saucepan. Add the onion and garlic and cook 2 minutes on low heat. Add the tomato paste in the center of the pan. Let it toast for a minute then stir it all together.
Add the tomatoes, seasoning, sugar and red pepper flakes.
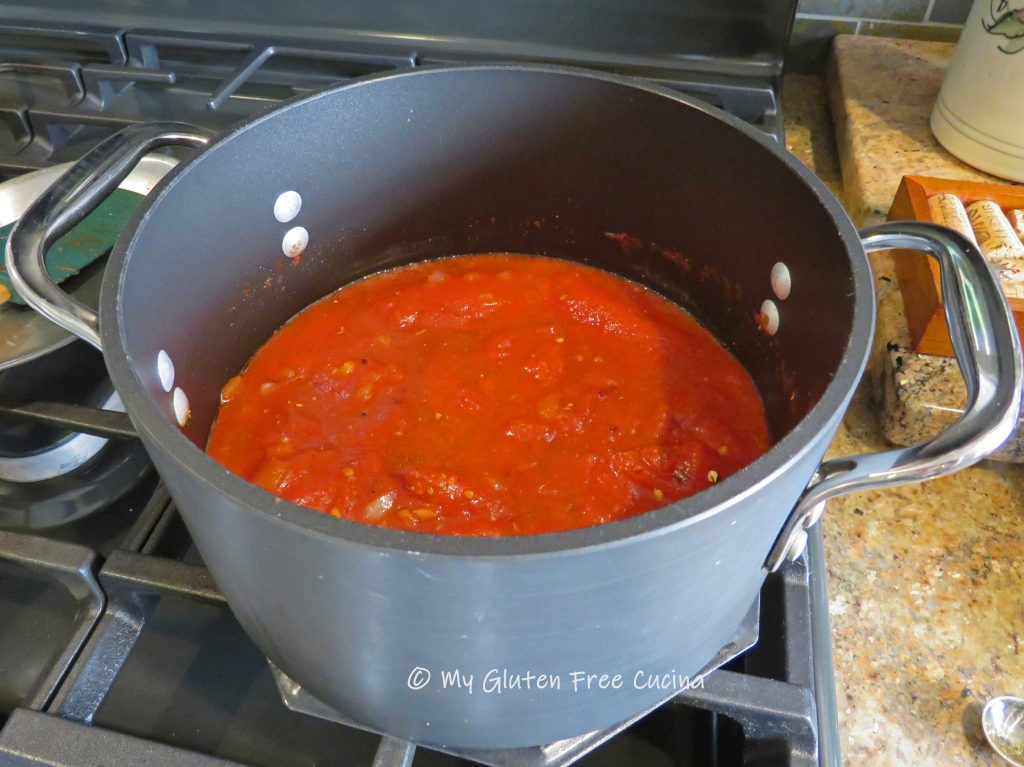
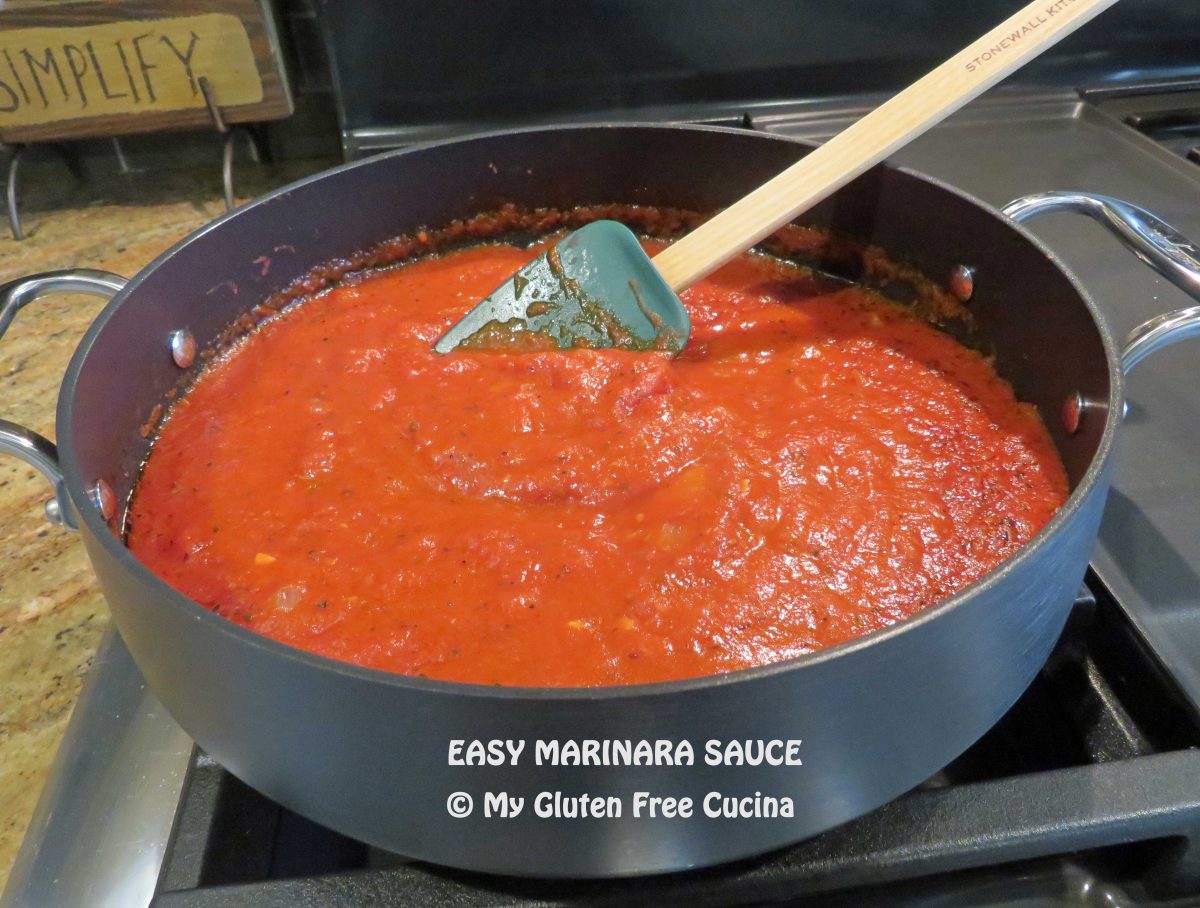
 Cover and simmer on low for 2 hours, stirring occasionally. I like to use a simmer mat, so the bottom doesn’t burn. Toward the end of cooking, use a stick blender to process into a sauce.
Step 2 – Make the filling (can be made ahead)
- 1 tbsp. olive oil
- 1/2 lb. ground pork
- 1/2 sweet onion, divided use
- 1/3 cup white wine
- 1 small carrot
- 1 small celery stalk
- salt, to taste
- 2 tsp. tomato paste
- 1 cup chicken stock
- 1/3 cup beef stock
- 1 tsp. arrowroot flour
- 1 cup baby spinach, chopped
- 2/3 cup grated parmesan
- 1 tsp. fresh grated orange zest
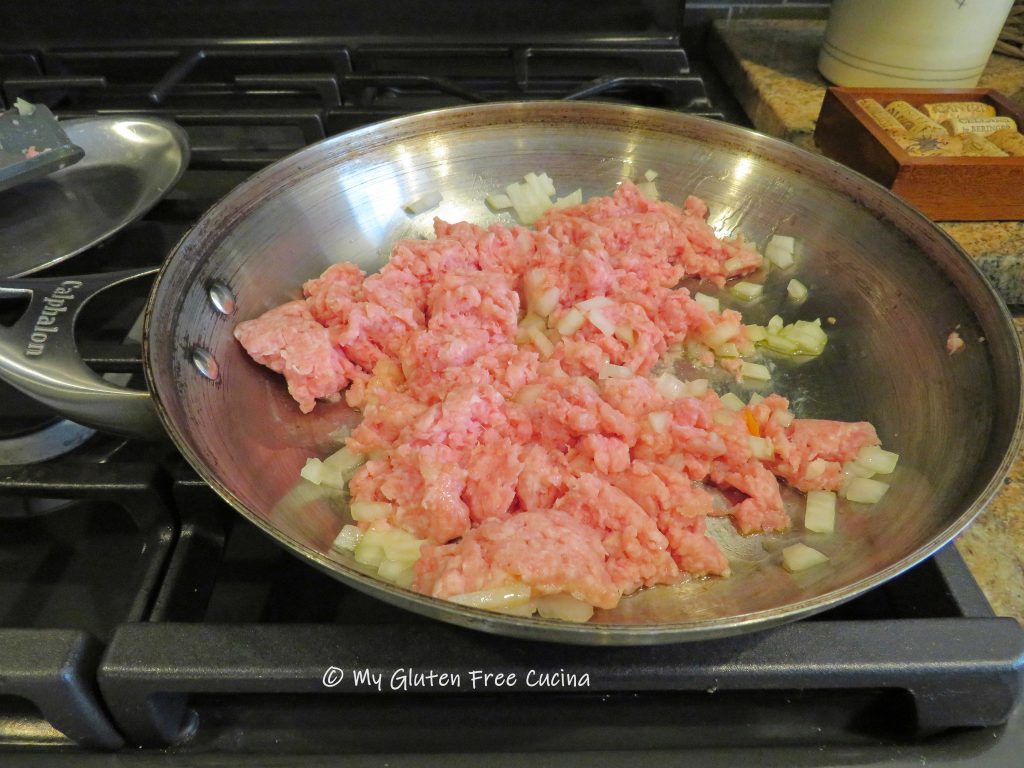
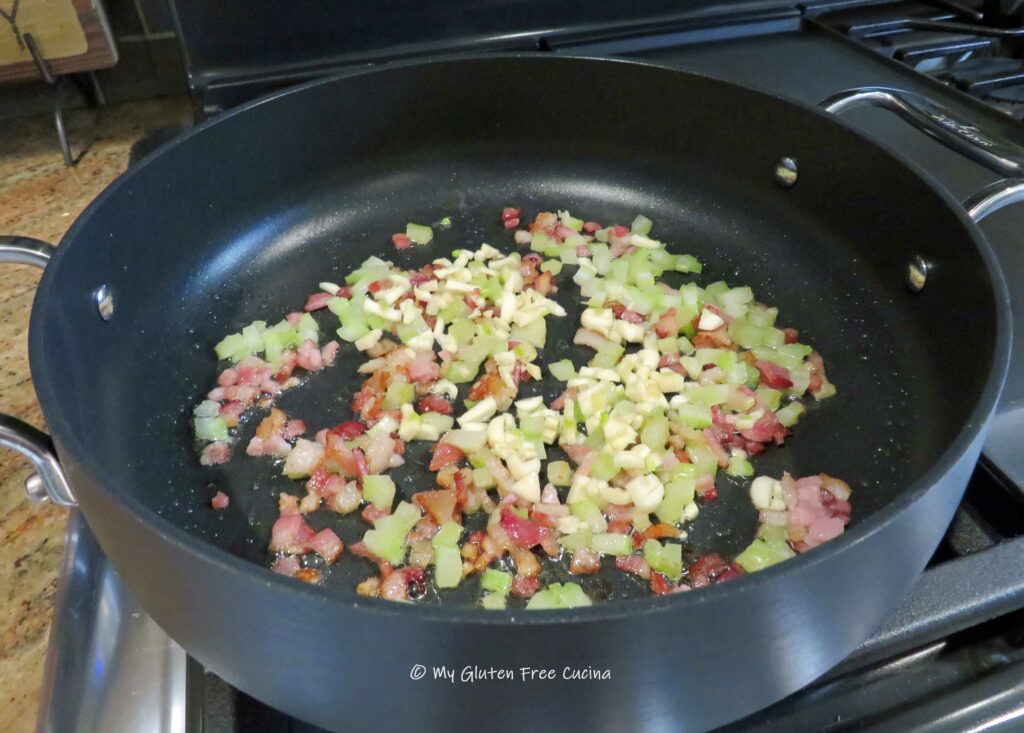
Cut half of the sweet onion into small dice (about 1/3 cup). Add the olive oil to a stainless-steel skillet on medium low heat. Cook the diced onion and ground pork, breaking up the meat with a spatula.
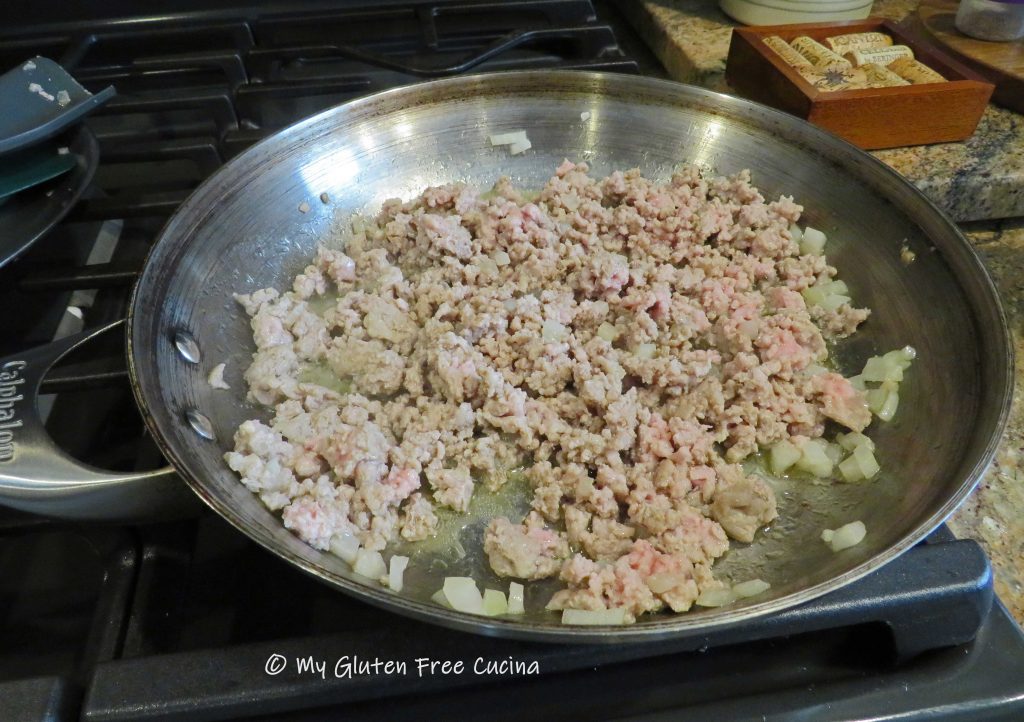
 Add the wine and continue cooking slowly, stirring frequently until most of the liquid evaporates.
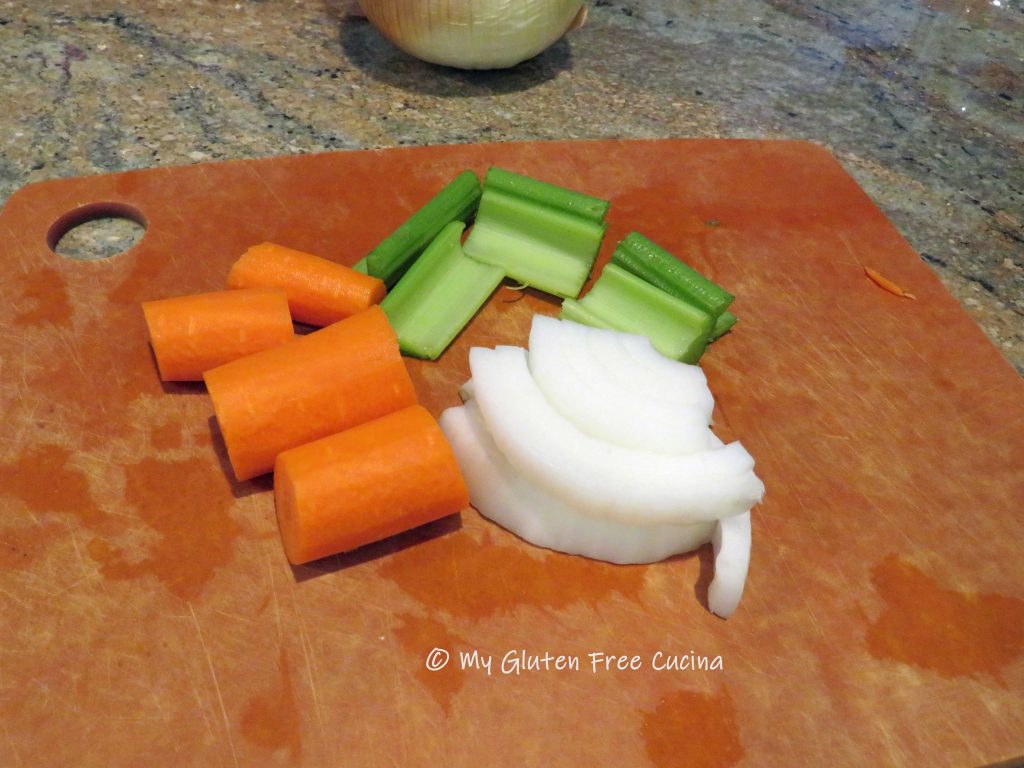
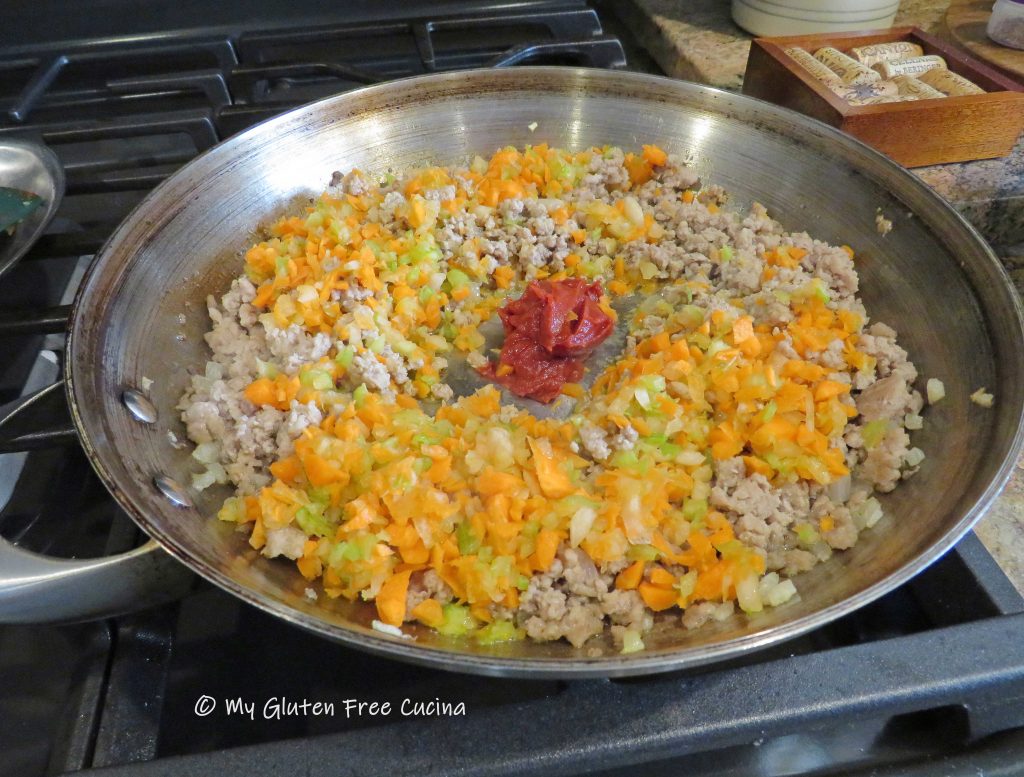
Mince the carrot, celery and remaining onion in an electric chopper.
 Add the minced veggies to the pork and stir well.
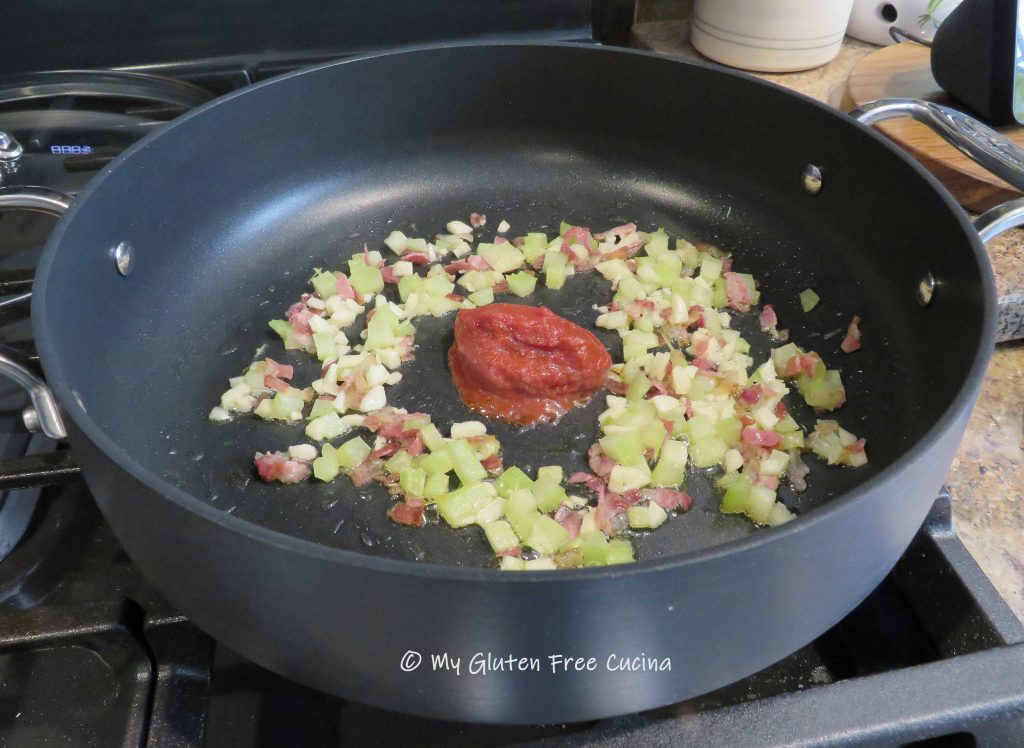
 Make a spot in the center of the pan and add the tomato paste. Let it toast for a minute before stirring it into the pork and veggies.
 Add the broth with salt to taste.
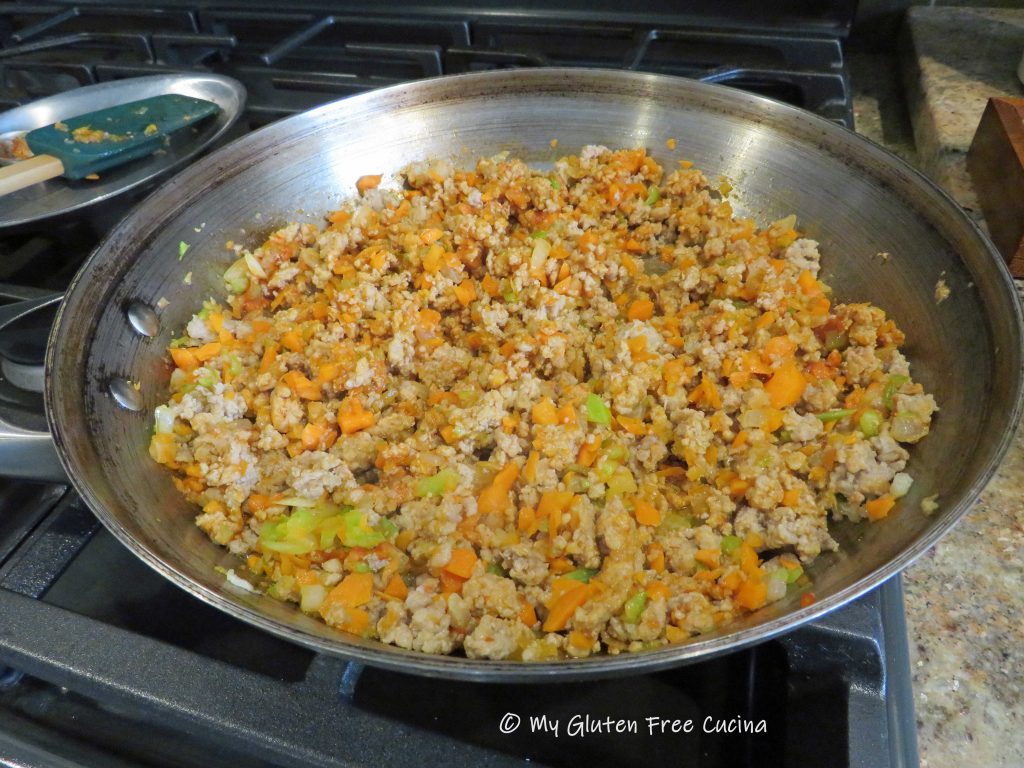
 Sprinkle the arrowroot evenly over the mixture and stir it in. Simmer on low until the filling has thickened. Stir in the baby spinach. The filling should be moist, but not watery.

Transfer to a bowl and stir in the orange zest and parmesan. Set it aside while you make the pasta and béchamel.
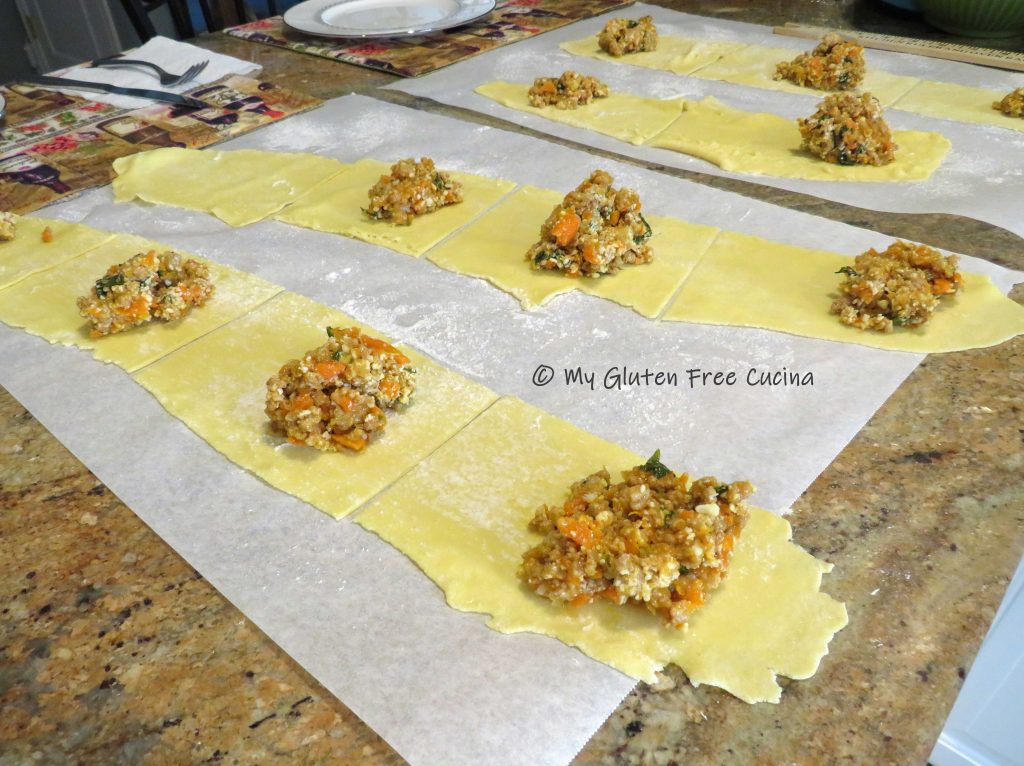
Step 3 – Make the pasta
Combine 140 g. flour and salt. In the bowl of a stand mixer, whisk the eggs and olive oil together. Add the flour mixture and beat with the paddle attachment for 5 minutes to form a soft dough.

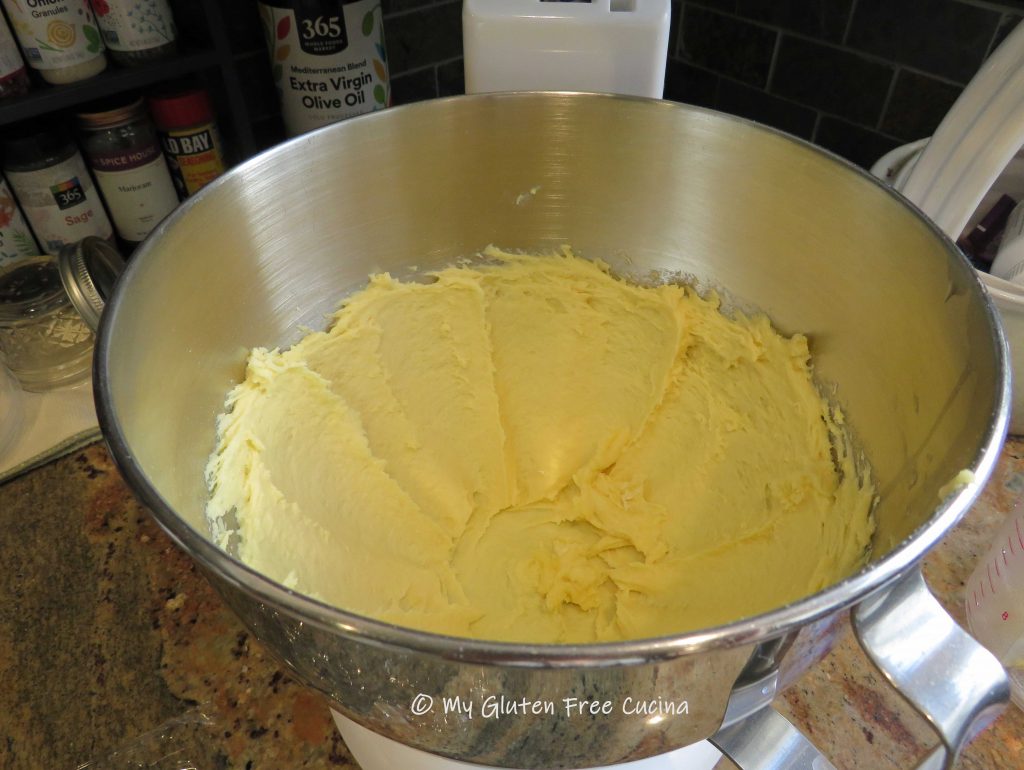
Bring the dough together and sprinkle with more flour, then wrap in plastic wrap. Let the dough rest for 15 minutes.

Divide the dough into 4 sections and work with one piece at a time. Begin feeding it through the pasta roller, starting with the thickest setting. Pass it through several times, adding more flour as needed, then begin increasing the roller setting each time until you have a sheet that is thin without tearing the dough.
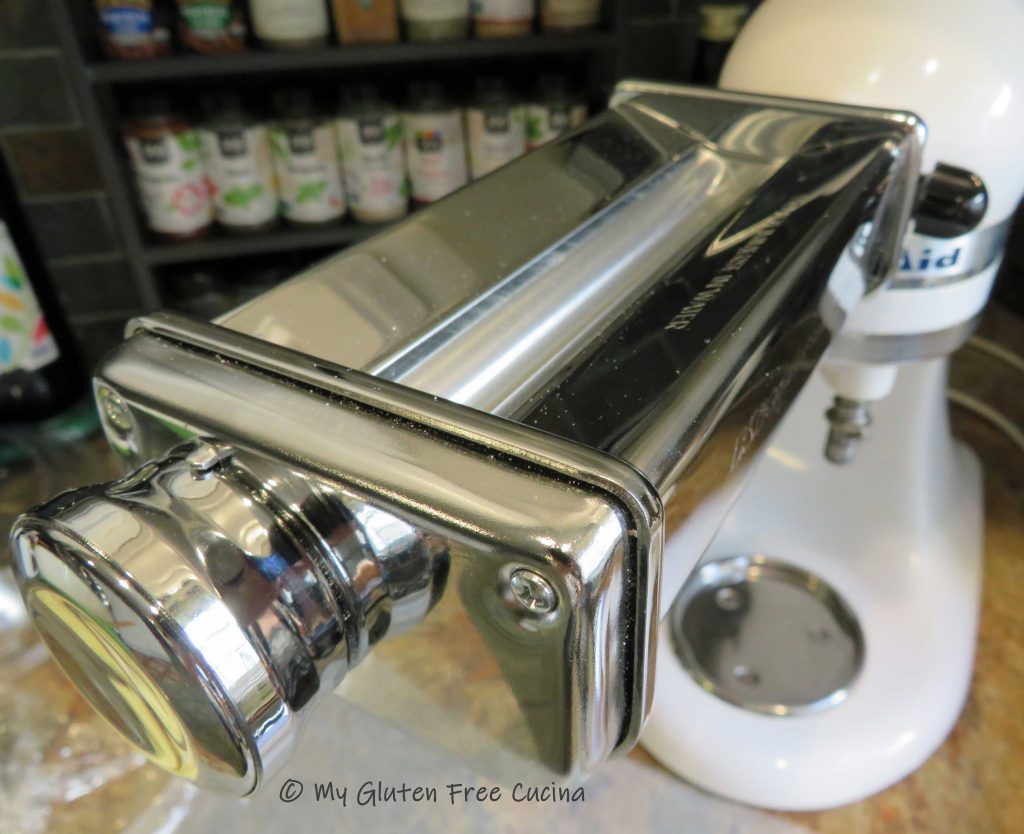 For this recipe, setting 3 on a KitchenAid pasta roller attachment is the perfect thickness. Repeat with each section and lay the sheets on floured parchment or wax paper.

Cut each section into 5-6″ pieces.
Step 4 – Make the Béchamel
- 1-1/2 tbsp. butter
- 1-1/2 tbsp. arrowroot flour
- 1/4 cup heavy cream or half and half
- 1/2 cup 2% milk
- 1/4 cup stock (chicken, beef or vegetable)
- salt and pepper to taste
Melt the butter in a small nonstick saucepan. Whisk in the arrowroot flour and cook 2-3 minutes over low heat, whisking constantly.
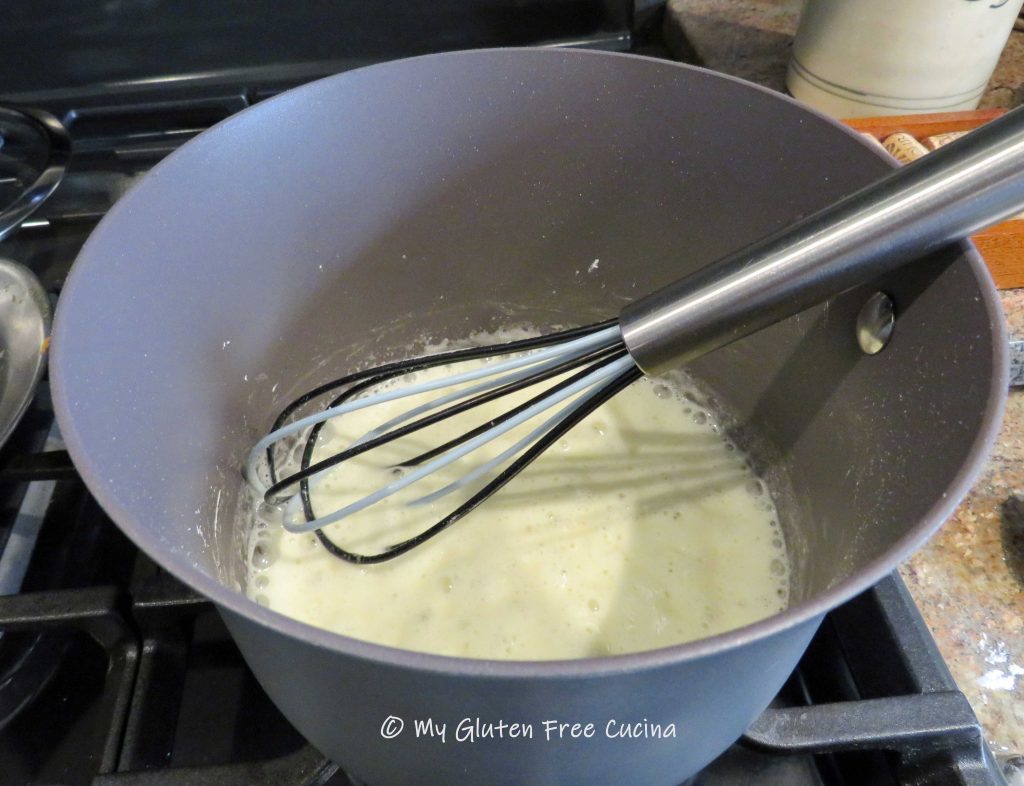
Drizzle in the milk, cream and broth and whisk continuously until thickened. Season with salt and pepper. Keep warm.

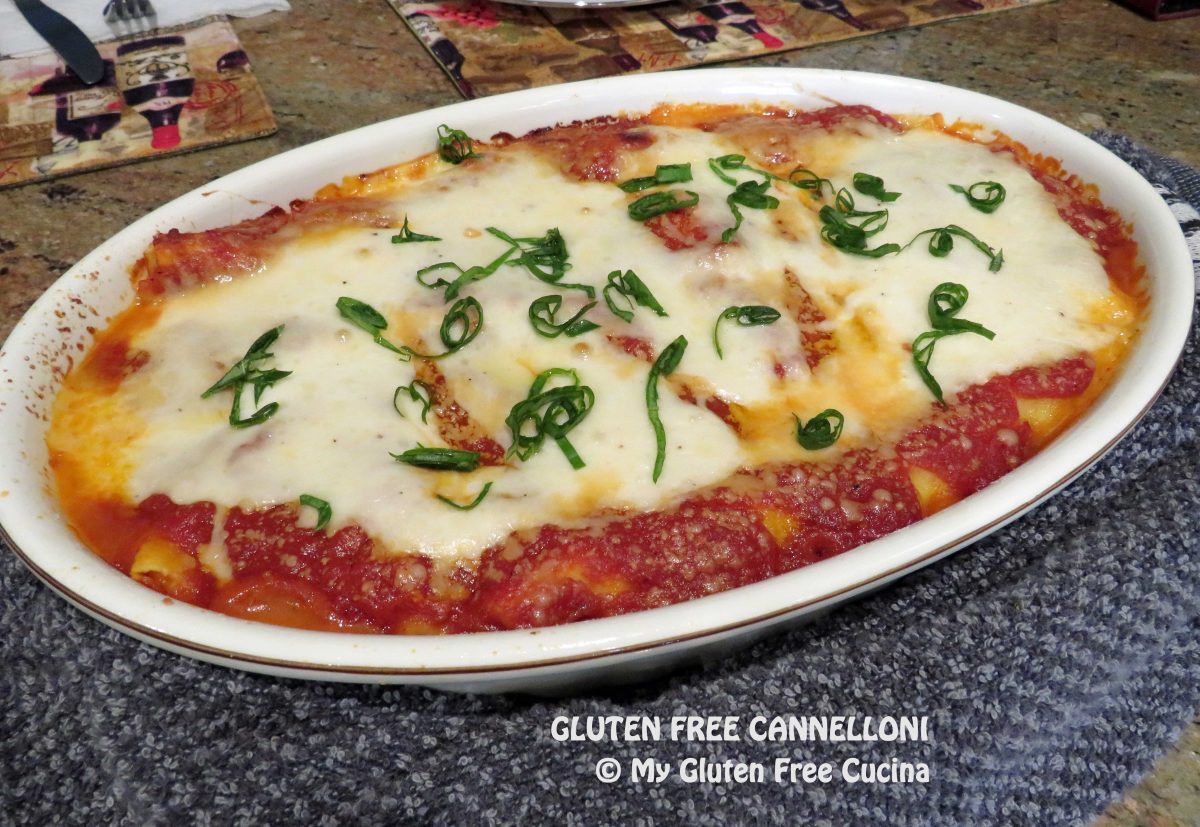
Assemble!
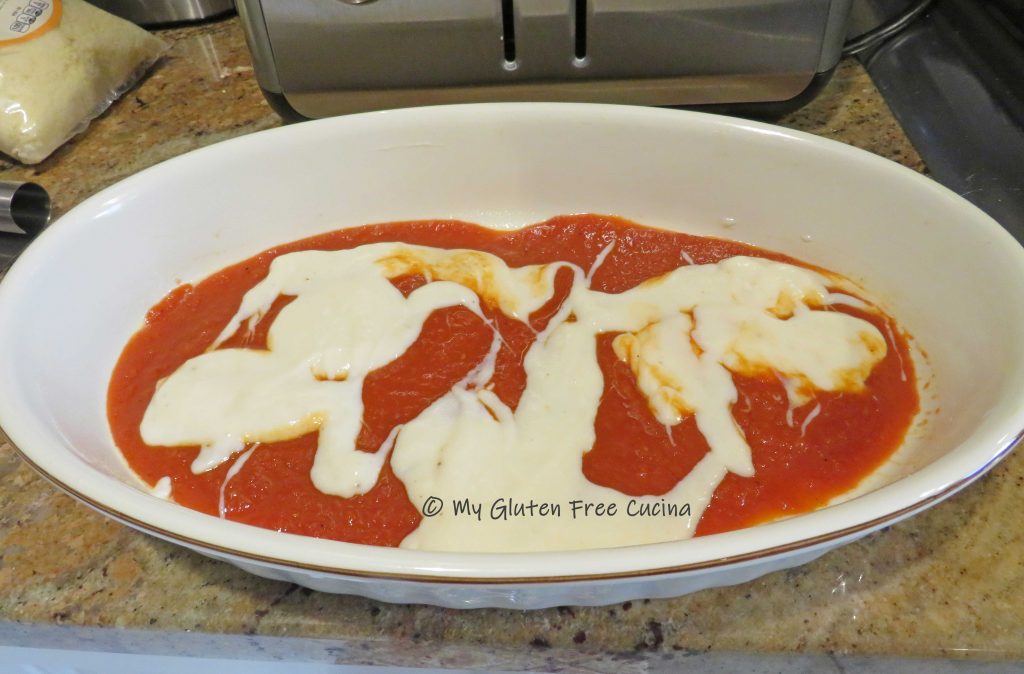
Finally! The hard work is done, and it’s time to assemble. Preheat the oven to 400º.
Coat a casserole dish with cooking spray. Ladle enough marinara to cover the bottom of the pan, and top with a few ladles of Béchamel.
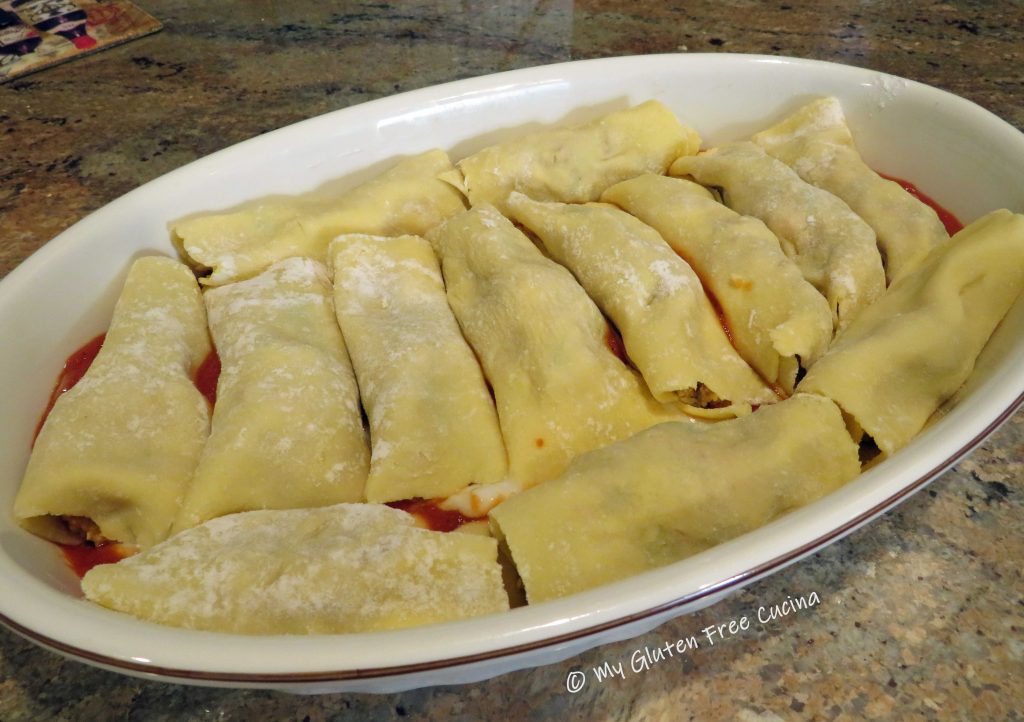
Spoon the filling evenly onto each section of pasta.
Roll each section into a cylinder and arrange the bundles in a single layer, seam side down in the casserole dish.

Spread the remaining sauce over the cannelloni, then top with more Béchamel. Be sure that all of the pasta is generously covered with the sauce, including the edges. Sprinkle the top with grated parmesan cheese and cover the dish with foil.

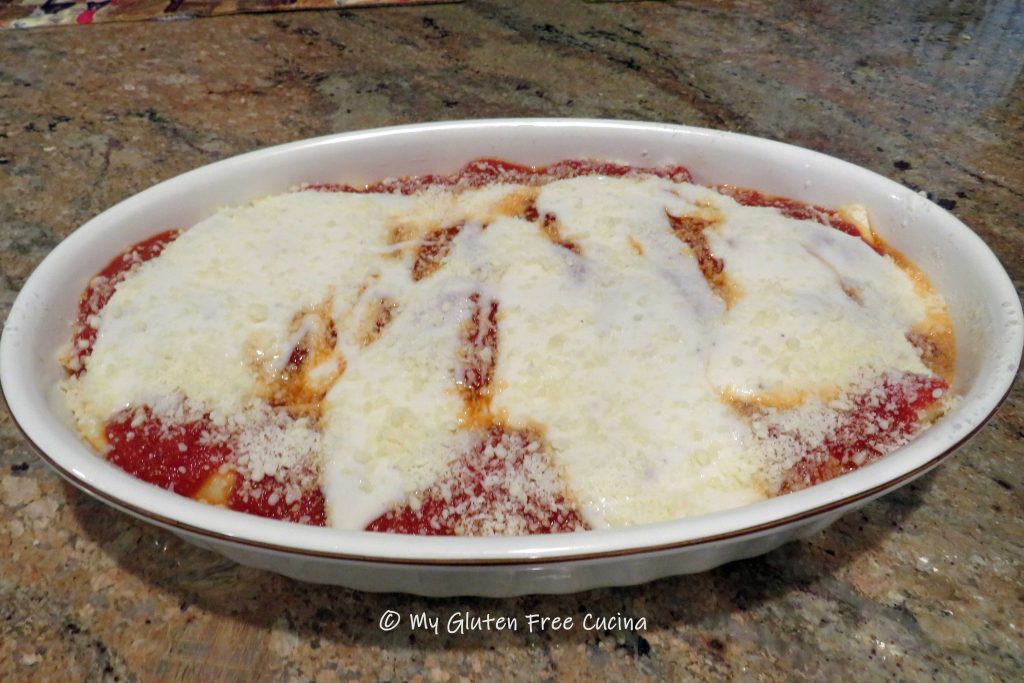
Bake for 15 minutes, then carefully remove the foil and bake for another 15 minutes.
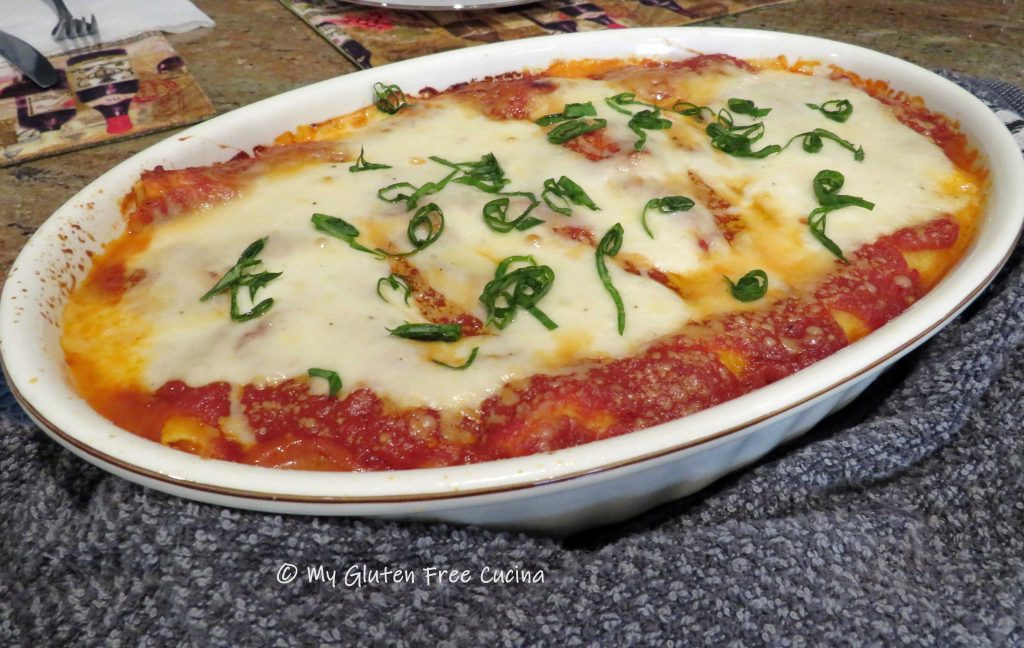
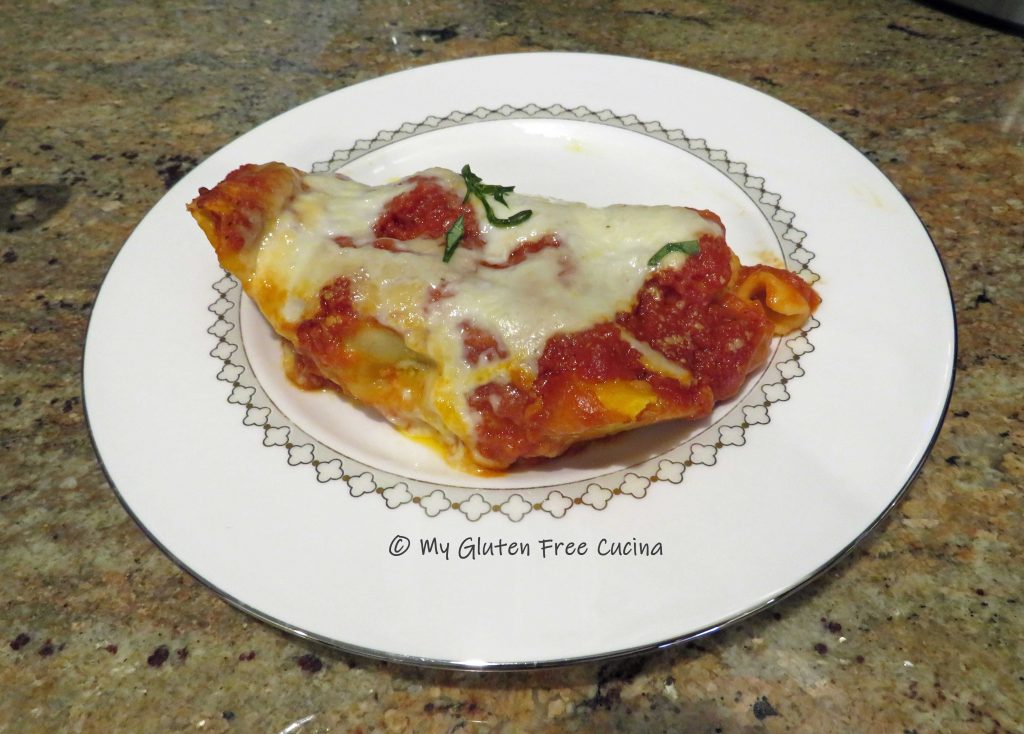
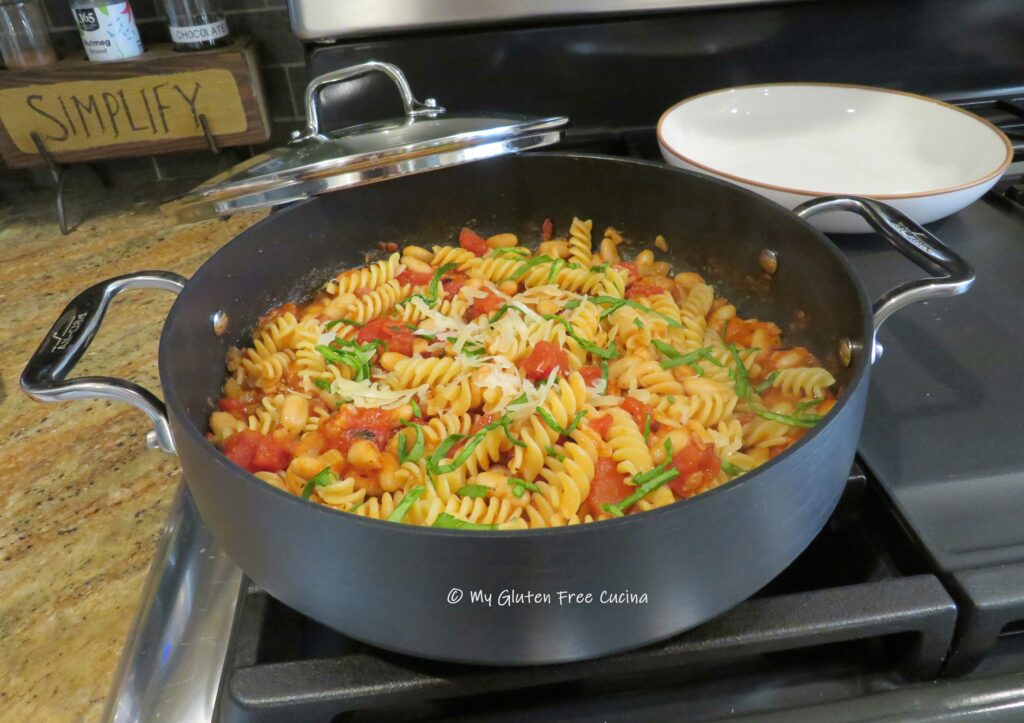
As the pasta bakes it will absorb liquid and thicken the sauce. The filling is delicious and moist. Garnish with fresh basil and dig in!

Notes:
♪ I won’t tell if you use a gluten free jar sauce (wink!).
♫ Use a wine that you can/would drink. Do NOT use cooking wine!
♪♫ Don’t skip the fresh orange zest. It adds a subtle burst of amazing flavor to the finished dish!
♫♫ Homemade pasta is fabulous, but if you’re not up to the task, try to find fresh gluten free lasagna sheets such as Taste Republic. You will need about 8 lasagna sheets for this recipe. Lay them out on floured parchment and cut each sheet in half. I do not recommend using dry pasta in this recipe, as it needs to be cooked in advance in order to roll properly and will not absorb enough liquid, resulting in a soggy finished dish.

 Print This Post

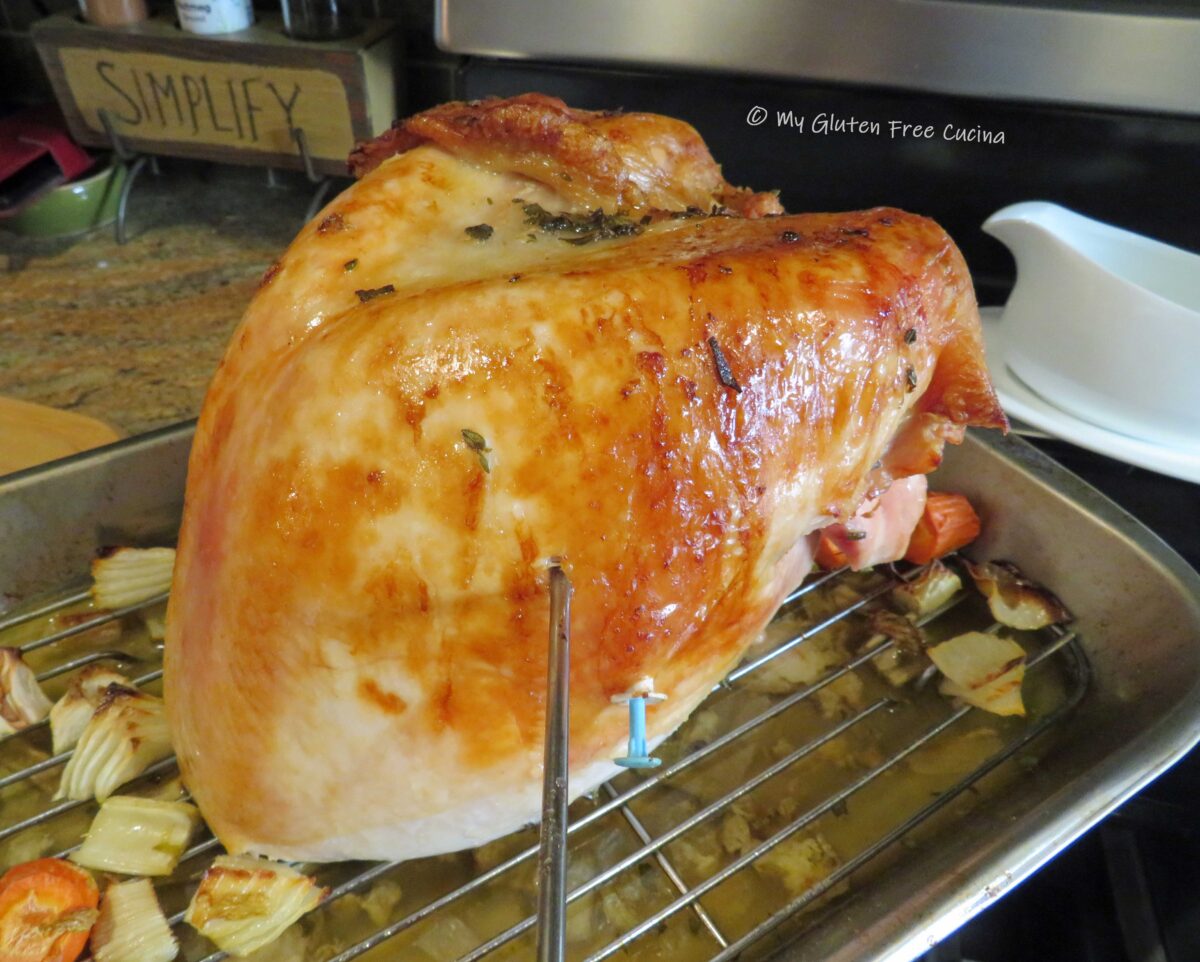
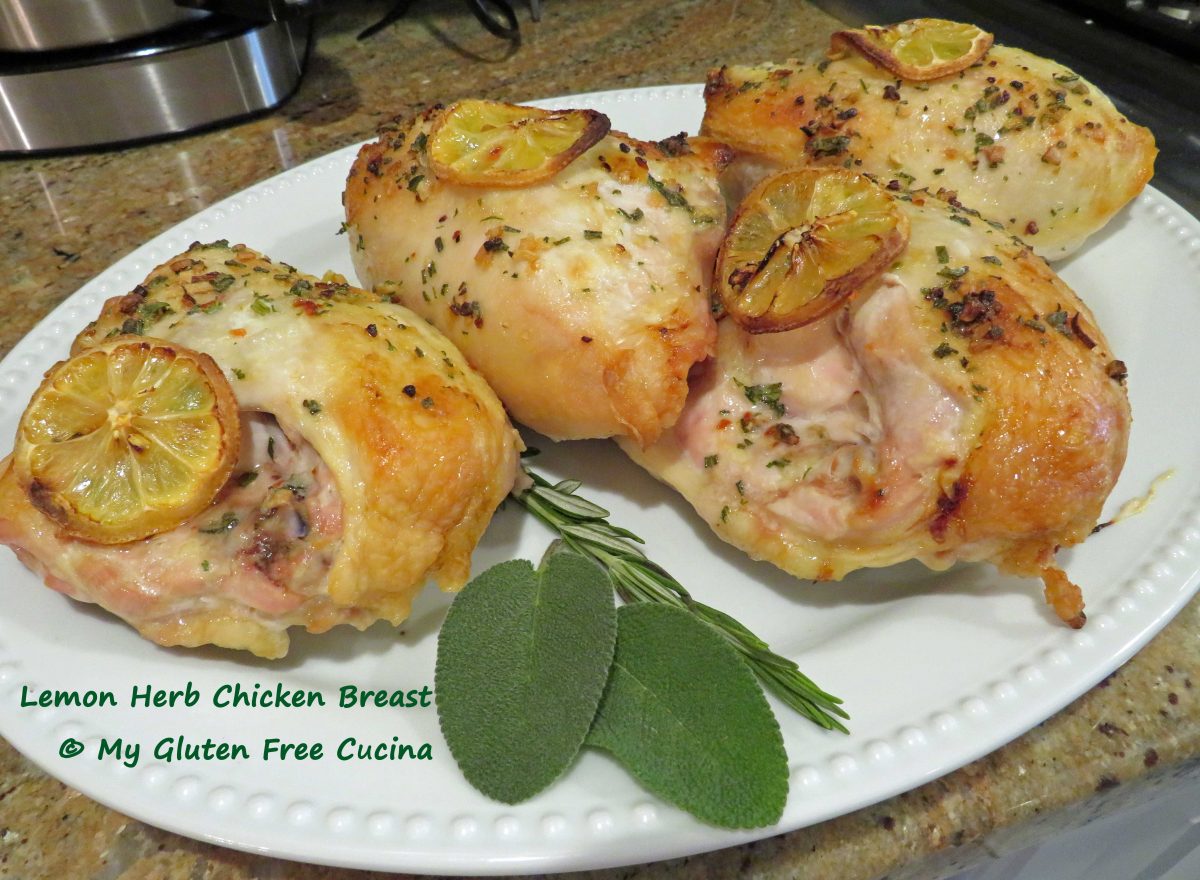
 Roast for 25 minutes per pound, or until a thermometer inserted into the thickest section registers 165º. The pop-up thermometer was spot on, but I was still glad that I used my own.
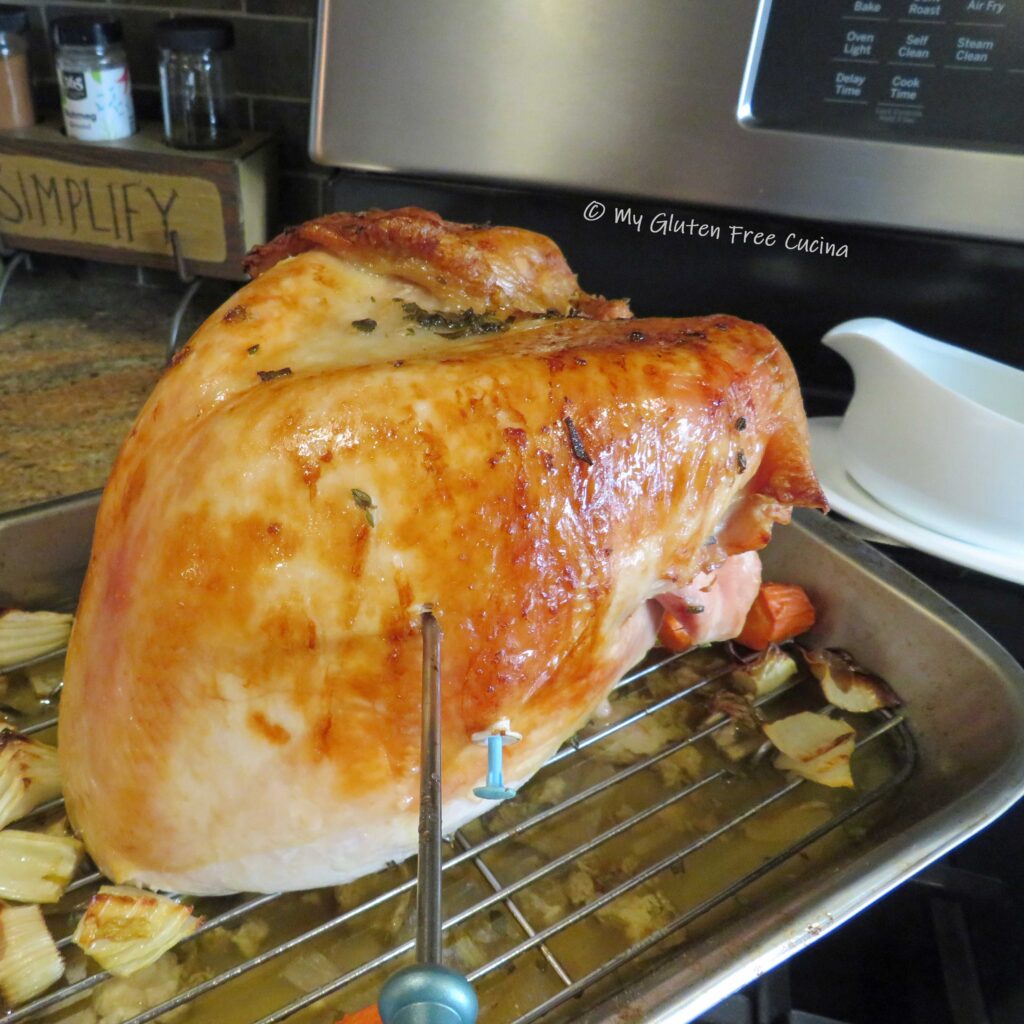
 Enjoy with Gluten Free Roast Turkey Gravy and be sure and check out my Gluten Free Ramekin Stuffing Cups!
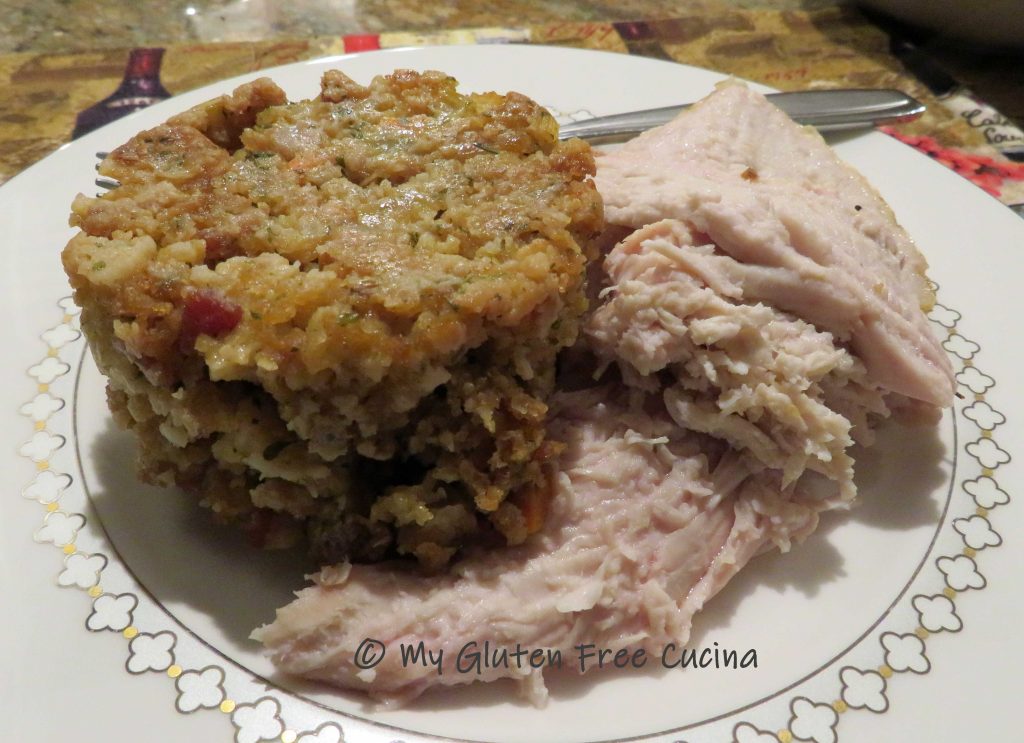
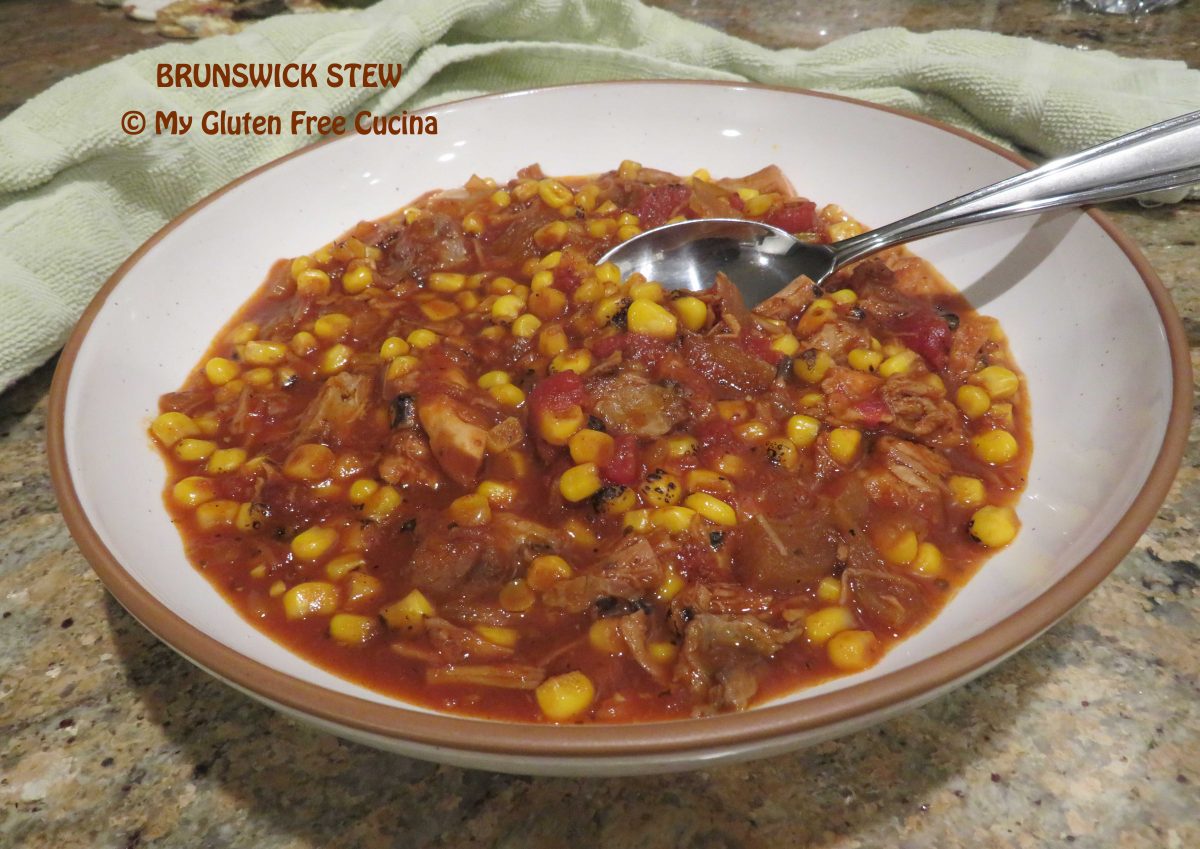

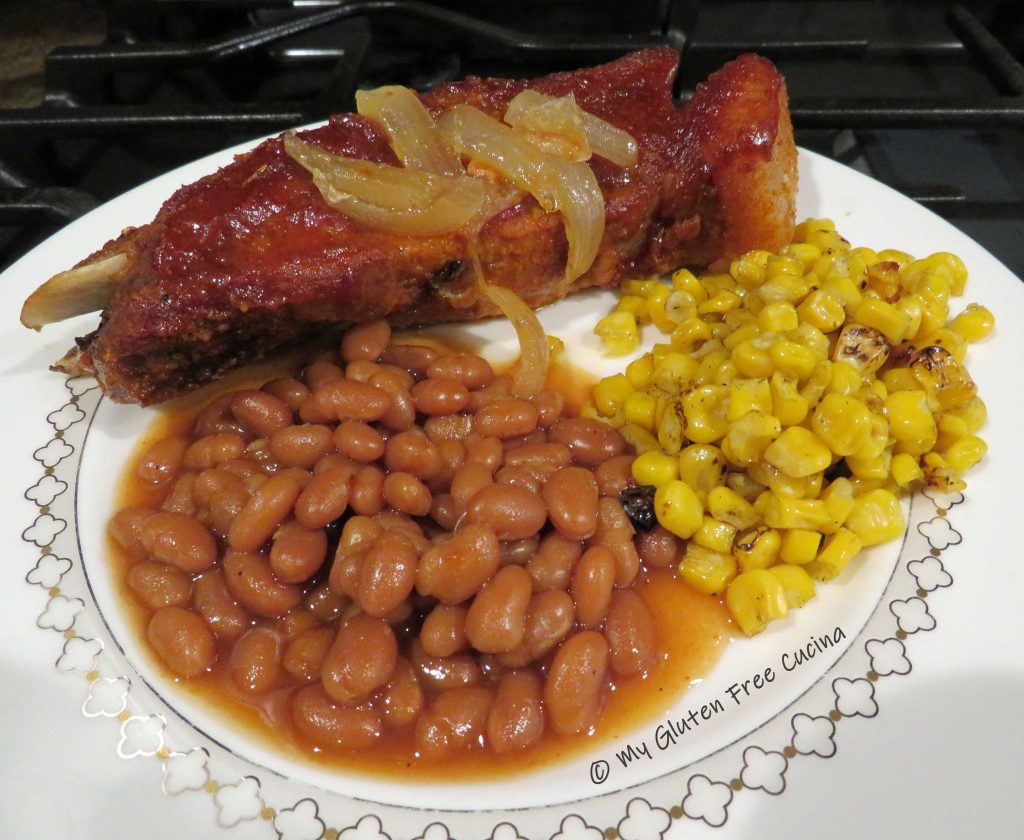
 Let it toast for a minute then add the stock, tomatoes, BBQ Sauce, brown sugar, Worcestershire sauce and seasonings.
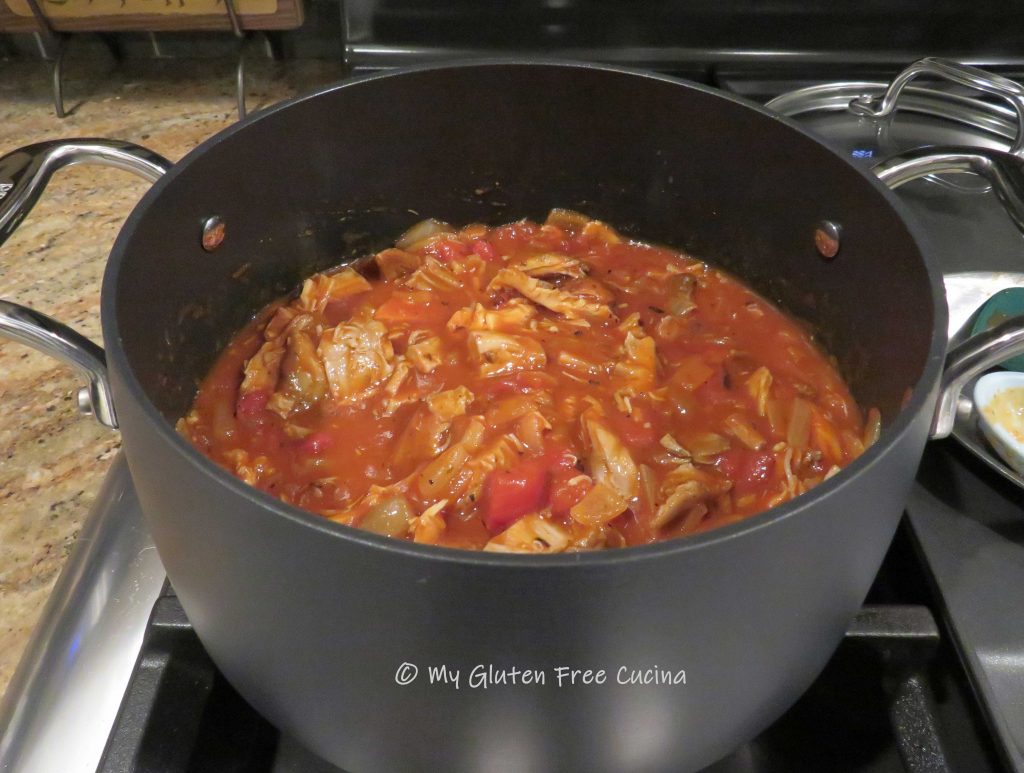 Finally add the fire roasted corn and stir everything together.


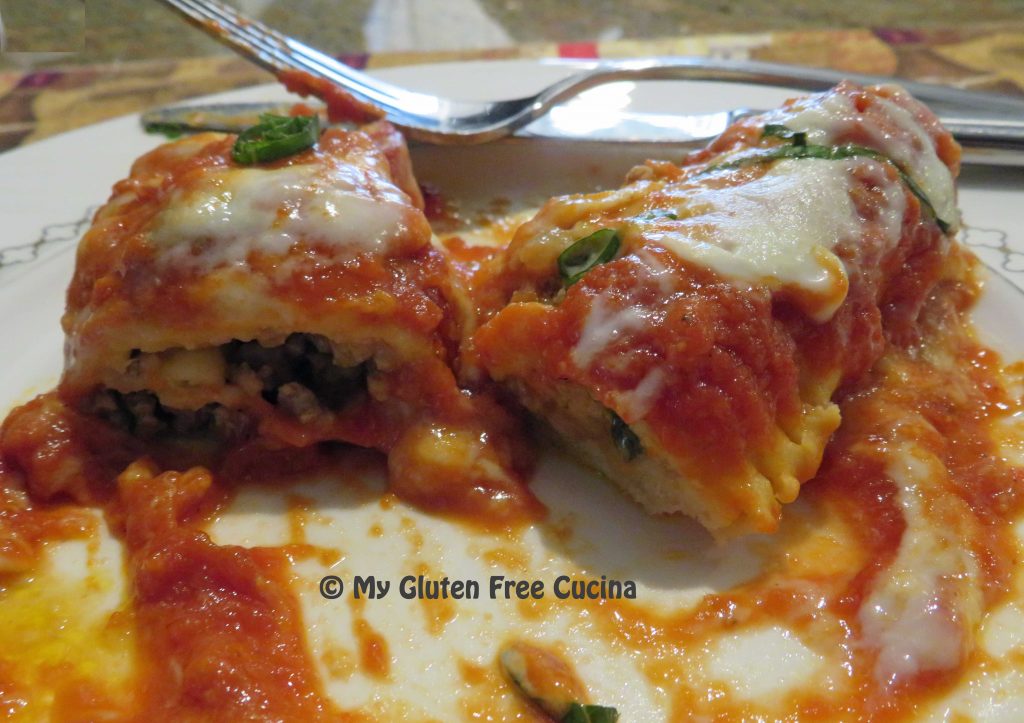
 Ladle marinara over each slice and top with grated cheese, as much as you like.
 Place in the oven for 15-20 minutes, just enough to melt the cheese.


 Now that you know how to make a good marinara sauce, what restaurant favorite will you have for dinner tonight? How about


 Sprinkle with
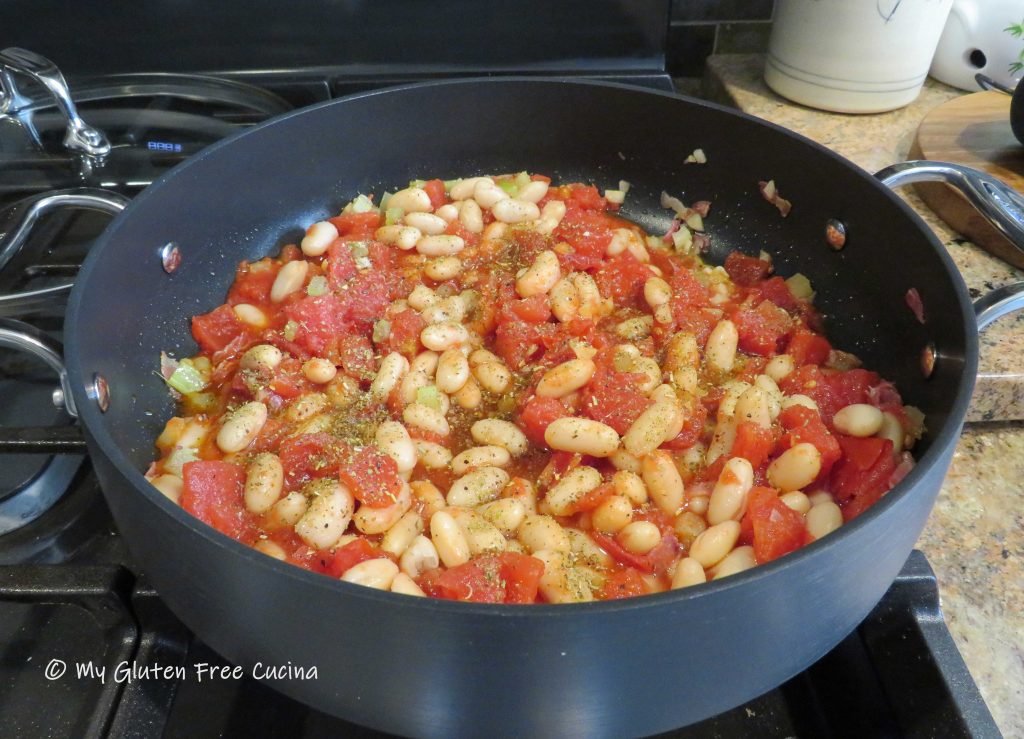

 Transfer to a

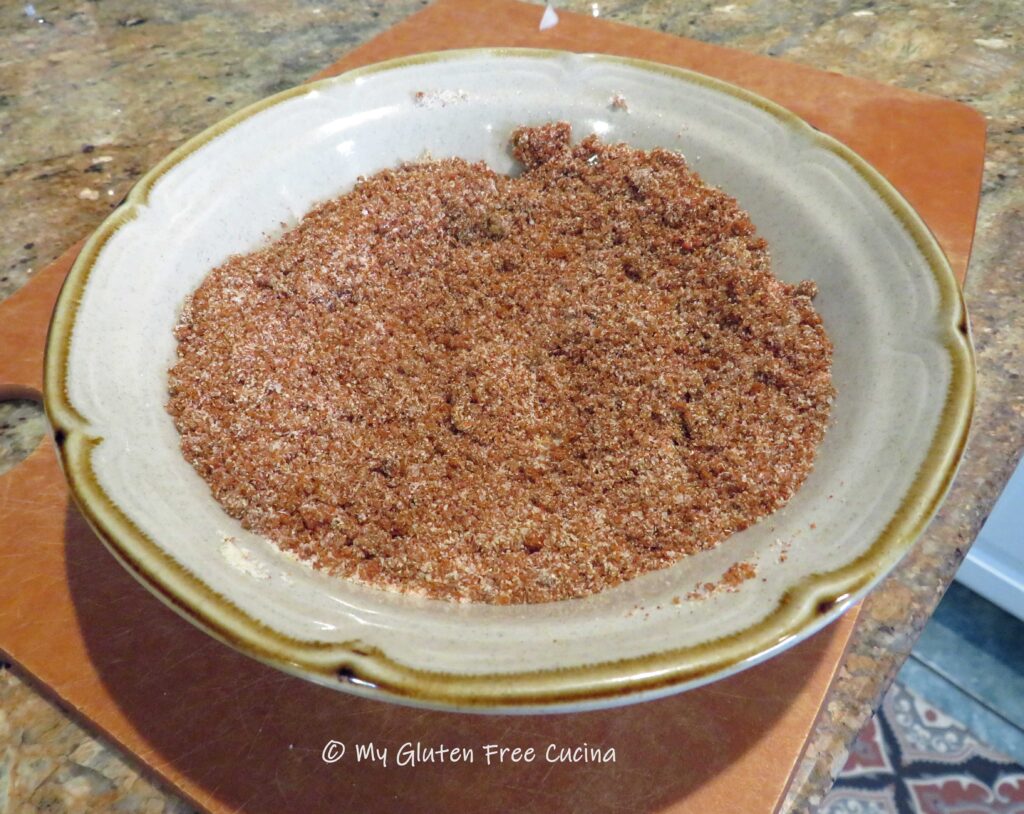 Preparation:
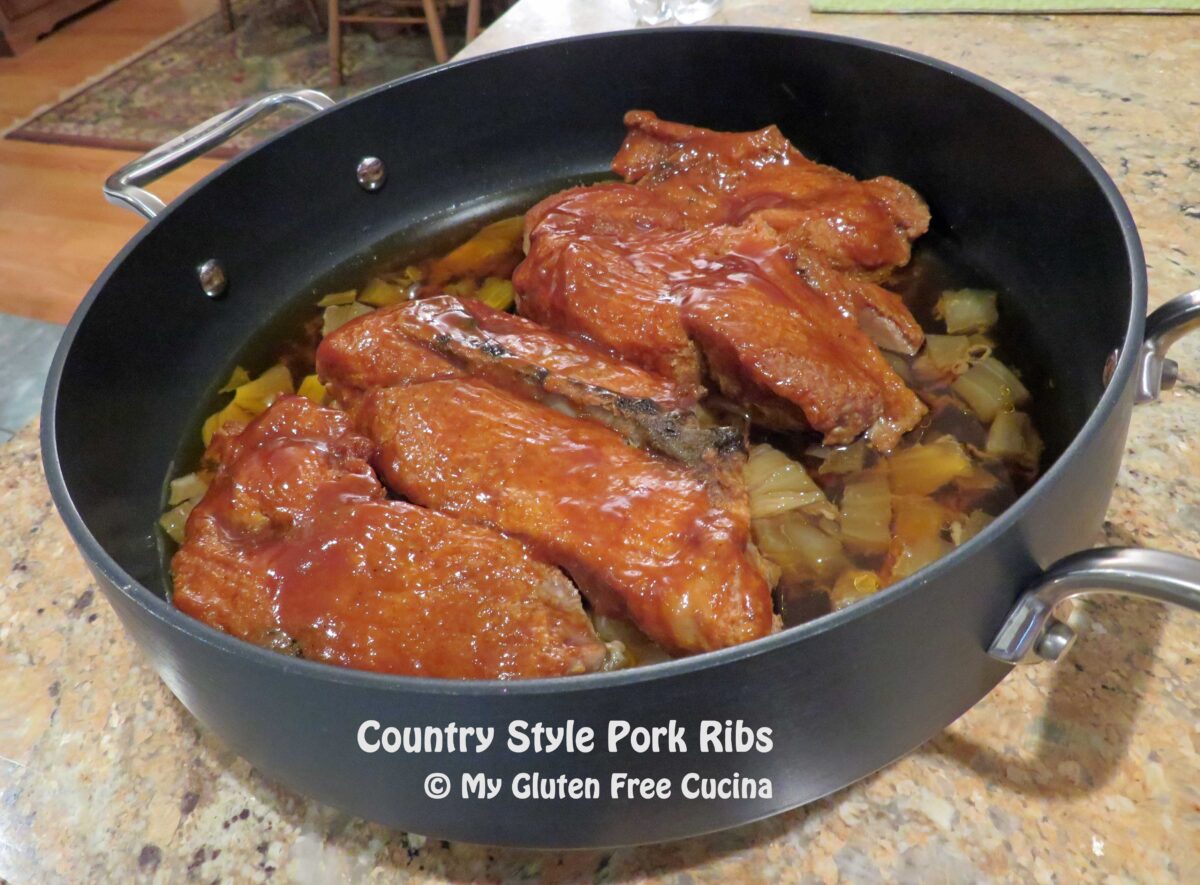
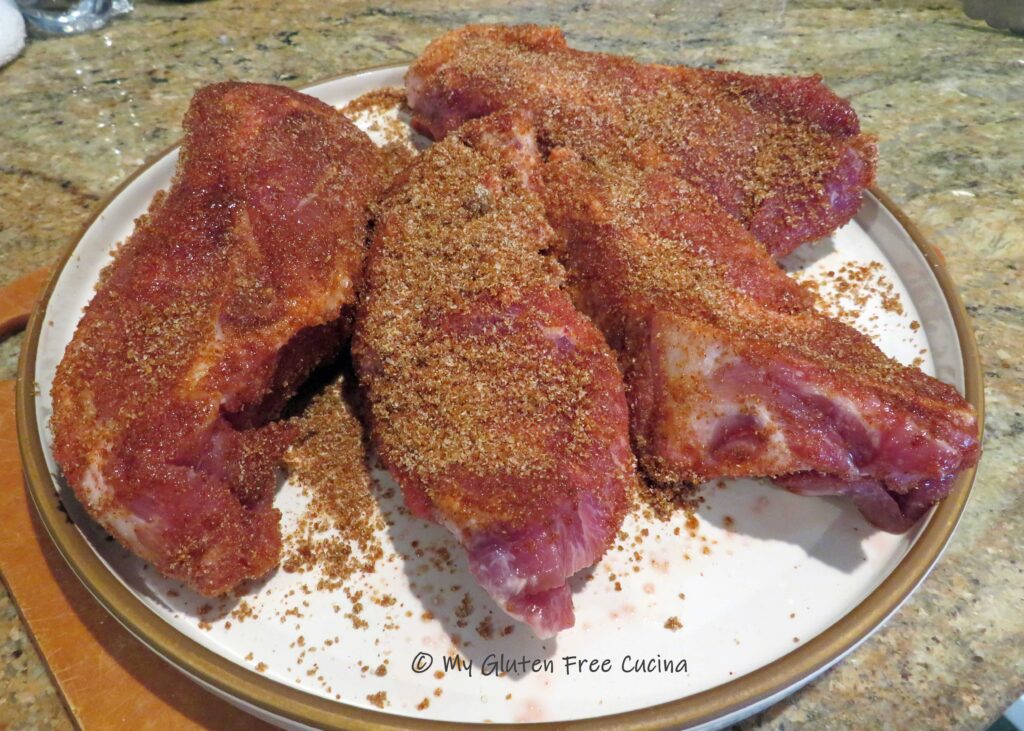 Mist a covered skillet, Dutch oven or braising pan with cooking spray. Cut the onions into large chunks and arrange in a single layer, to create a base for the ribs.
 Place the ribs on top of the onions. As the ribs cook down, they will release liquid, and you want them to be elevated for most of the cook time, not submerged.
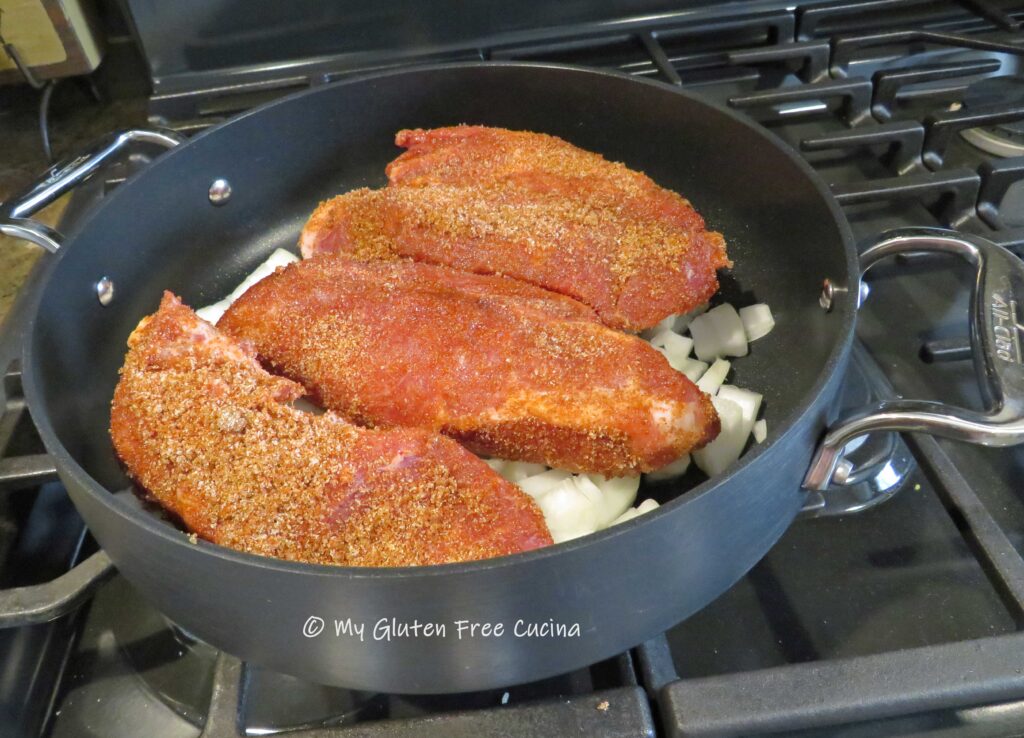 Cover and roast at 225° for 4 hours total. After 3-1/2 hours, uncover and brush liberally with BBQ sauce.
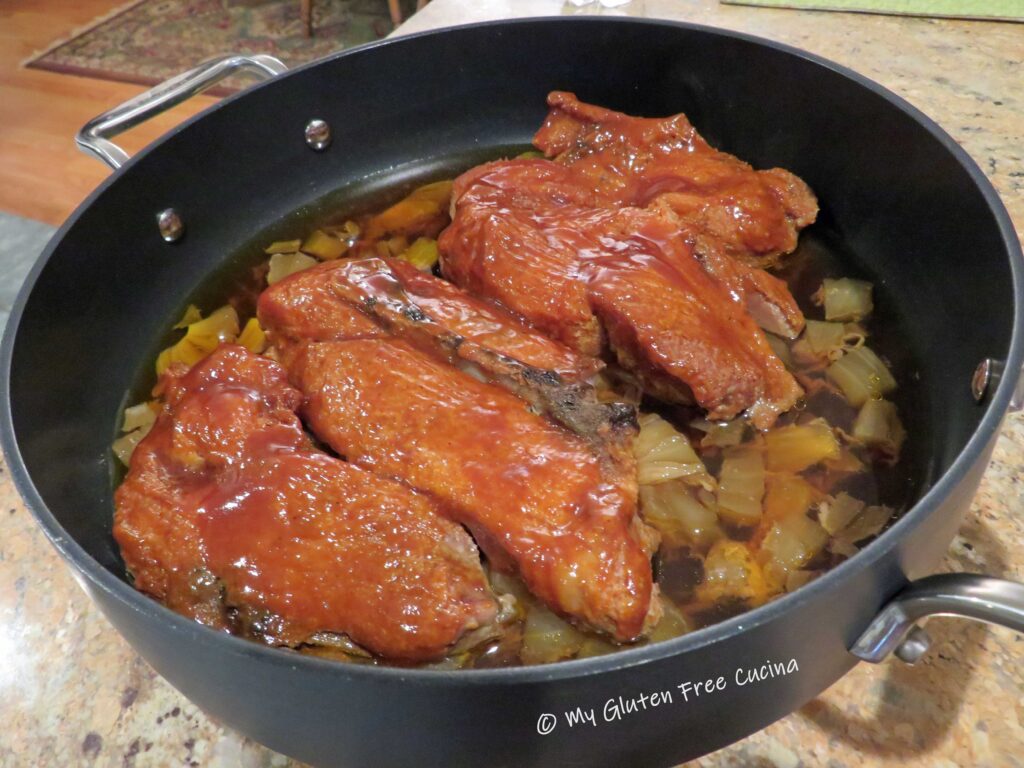 Continue cooking 1/2 hour longer. The meat will be falling off the bone tender!
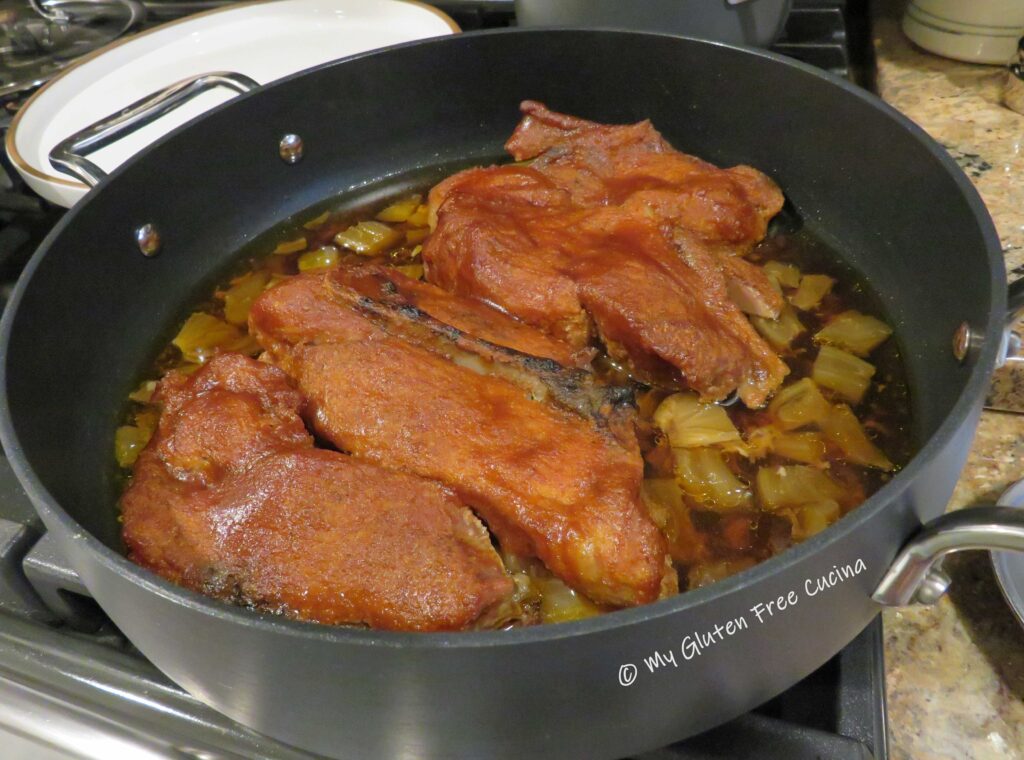 See how much liquid has accumulated in the bottom of the pan, yet the ribs are not swimming in it?
 To plate, spoon some of the onions and pan juice over the ribs. I served the ribs with a side of