Description
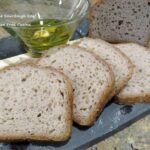
This post is for all of you who have wanted to try making gluten free sourdough bread or are just looking for a solid recipe. It’s a basic loaf, with no fancy shaping or scoring. The bread is perfect for sandwiches and does not require toasting (but it’s delicious toasted as well).
Ingredients
- 400 g. Better Batter Artisan Flour Blend
- 470 g. water (about 2-1/4 cups)
- 140 g. gluten free starter (about 1/2 cup)
- 8 g. salt (about 2 tsp.)
- 16 g. olive oil (about 2 tbsp.)
- 20 g. honey (about 2 tbsp.)
Instructions
For bread to rise properly without commercial yeast, your sourdough starter needs to be fully activated before mixing your dough (otherwise you will end up with a brick). I find that my gluten free starter doesn’t jump out of the jar like a wheat sourdough, but when fully active it does increase in size and has hundreds of tiny bubbles, especially when I give it a stir.
When I am planning to bake, I take my starter out of the refrigerator 2 days before, feed twice daily and keep it in a proofing box at 78º.
(Read more about how I made my Gluten Free Sourdough Starter here.)
The day before baking, combine all of the dough ingredients in a stand mixer with the paddle attachment. Increase the speed and mix for 5 minutes.
Transfer the dough to an oiled bowl, cover and place it in a proofing box (or warm, draft free area) for 4 hours. I try to time this step for late afternoon, so that it’s ready to go into the refrigerator overnight by around 8pm.
By the next morning, the dough should be puffed up and full of air bubbles. Take the dough out of the refrigerator and let it sit on the counter to warm up a bit before you shape it.
Rub a cutting board with a bit of olive oil and turn the dough out.
Gently pat the dough into a rectangle, don’t press hard and do not use a rolling pin – you want to keep the air bubbles intact as much as possible.
Next use a bench knife to do a letter fold.
Finally, use oiled hands to gently roll and shape the dough into a loaf. Place it in the loaf pan seam side down, cover with plastic wrap and let it sit at room temperature for 30 minutes. Preheat the oven to 450º.
Just before baking, brush the top of the loaf with 1 tbsp. olive oil and sprinkle with coarse salt. Use a lame or sharp knife to score 3 diagonal slashes across the top about 1/2″ deep.
Place the loaf in the oven and immediately throw a few ice cubes onto the bottom of the oven to create steam.
Bake for 55 minutes, or until the internal temperature reaches 210º (use a thermometer!).
Remove the loaf from the pan and let it cool for 8 hours on a rack before slicing. The longer you wait, the better the texture will be. After 8 hours you can place the loaf in a bread bag and store it at room temperature to slice in the morning.
Notes
Troubleshooting gluten free bread can be tricky and sourdough even more so. So here are a few hints. If the loaf didn’t rise, it could be that your starter wasn’t fully active. Try feeding more frequently for several days before making the dough. If the bottom or center of the loaf looks gummy, it wasn’t baked long enough (did you check with a thermometer?) or your measurements weren’t accurate (did you weigh your ingredients?). Also, be sure to wait for your bread to cool down and set completely before slicing, it takes at least 8 hours! Feel free to reach out with any questions and I’ll try my best to help!